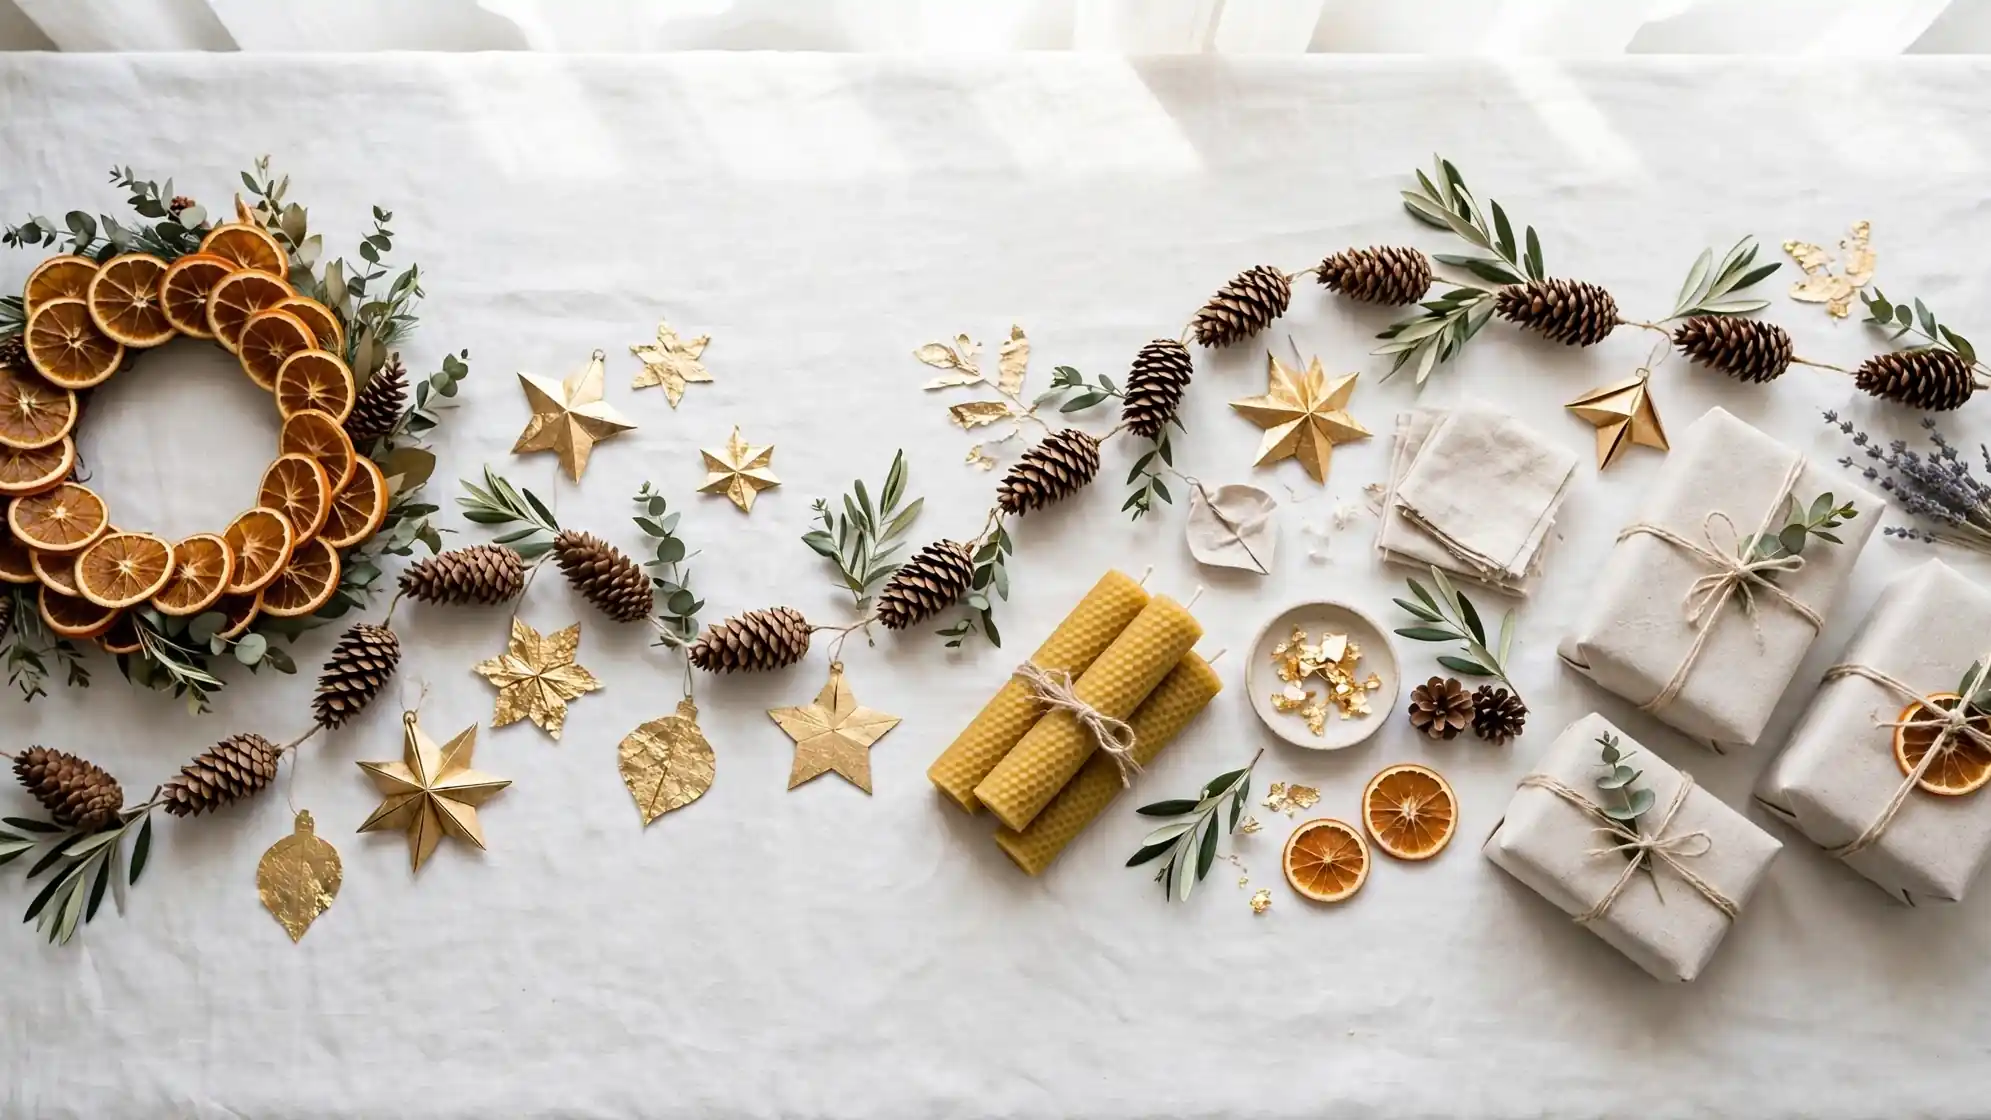
24 Christmas Craft Ideas for Adults to Make Magical Decor
These christmas craft ideas for adults turn quiet December evenings into the most creative part of the season. Handmade decor carries a warmth that store-bought pieces never quite match, and each project below fits a real adult schedule with simple supplies. From gilded ornaments to hand-rolled candles, you will find crafts that look refined on the mantel and gift beautifully to people you love.
You do not need advanced skills, only an afternoon and a few good materials. Crafters who love the holidays often start early with autumn projects like these brunette halloween costume ideas before the Christmas season arrives. Every idea below includes clear steps, honest time estimates, and styling tips so your finished pieces look intentional and gift-worthy.
Gold Leaf Ornaments
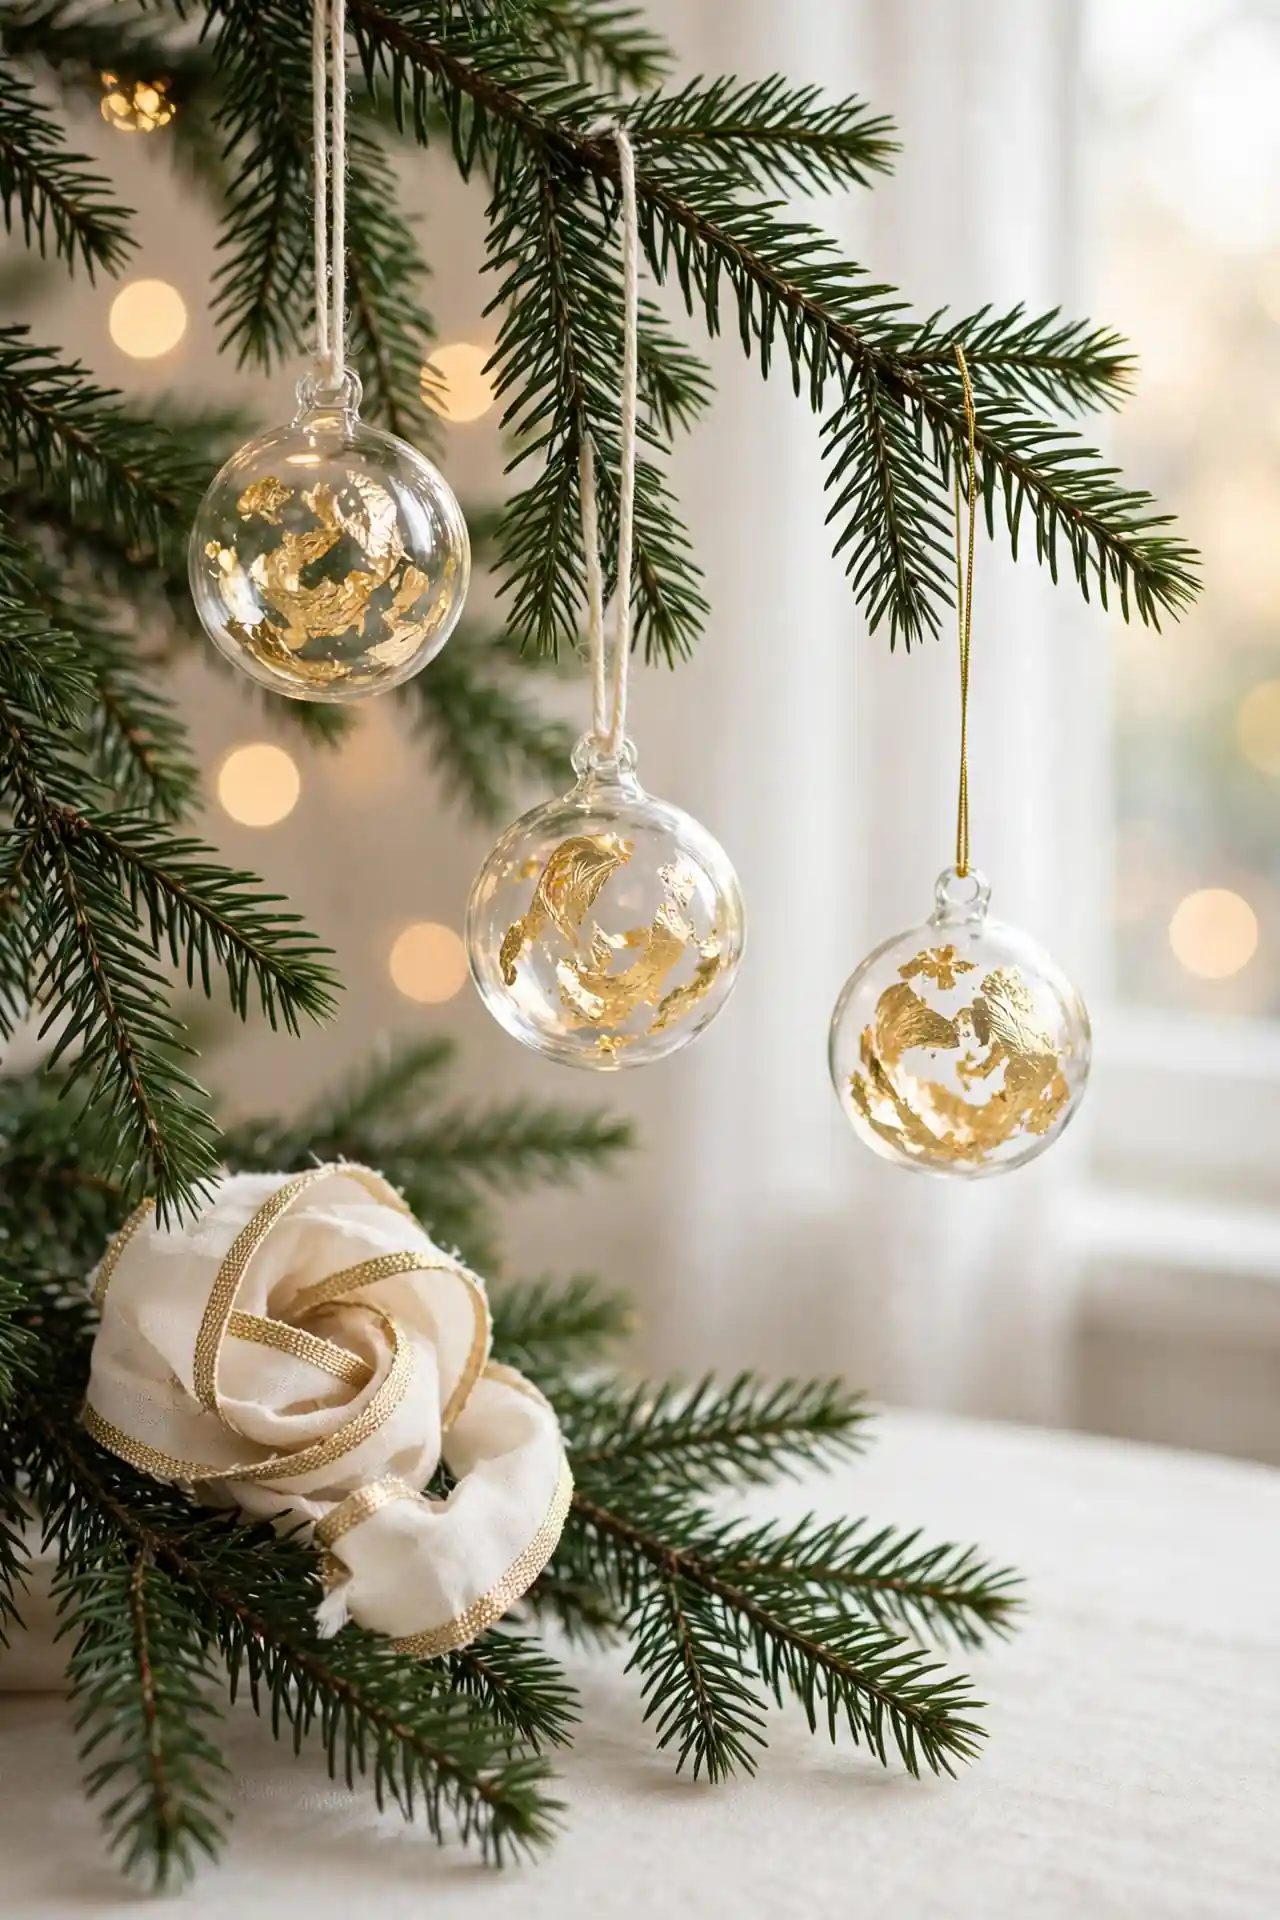
Gold leaf turns plain baubles into heirlooms in minutes. Brush a thin layer of adhesive size onto clean glass ornaments and press torn leaf squares over the tacky surface with a soft brush. Seal with a clear topcoat so the gold stays bright for years. Each ornament catches the tree lights differently, which makes the whole tree glow.
Work over a tray because the leaf drifts everywhere if you breathe near it. Cheap synthetic brushes work better than good ones since adhesive ruins bristles. Mix full gold with crackled pieces for a vintage look, or edge the ornament caps with leaf for a lighter touch. In my experience, handmade ornaments always earn the front branches.
Pine Cone Garland
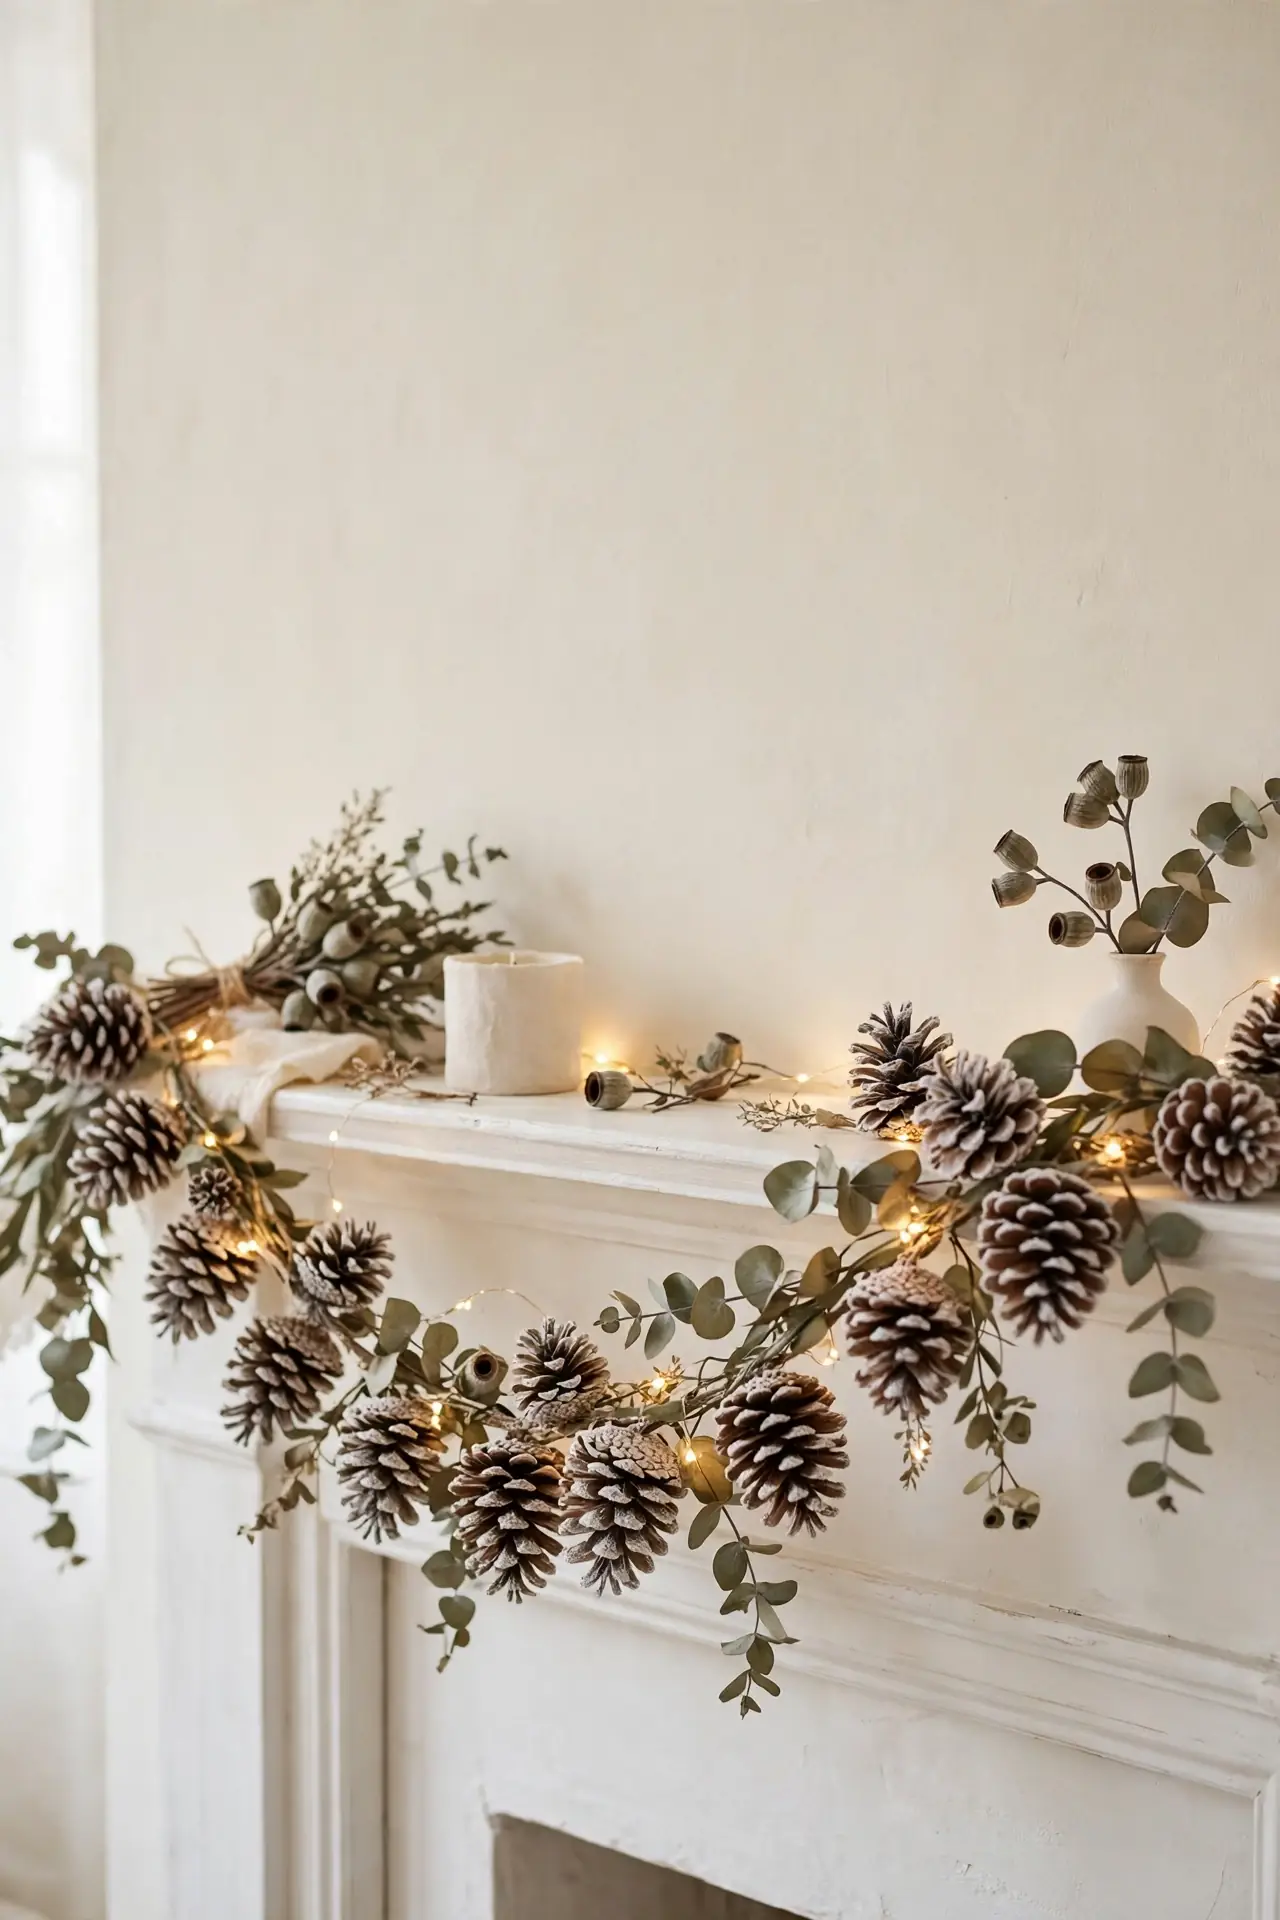
- Collect pine cones in early winter, then bake them at 200 degrees for an hour to open the scales and kill insects.
- Brush the tips with white acrylic paint or rub on a little wax for a frosted look.
- Thread jute twine through the top scales with a large needle, spacing cones about six inches apart.
- Add sprigs of dried eucalyptus or cedar between cones for color and scent.
- Tuck a sprig of rosemary behind the cones for extra color and scent.
Hang the finished garland along a mantel or stair rail with small clear hooks. Layer two strands for fullness, and tuck in a few fairy lights for evening sparkle. Pine cones store well, so you can reuse the same garland next year with no extra work.
Dried Orange Wreaths
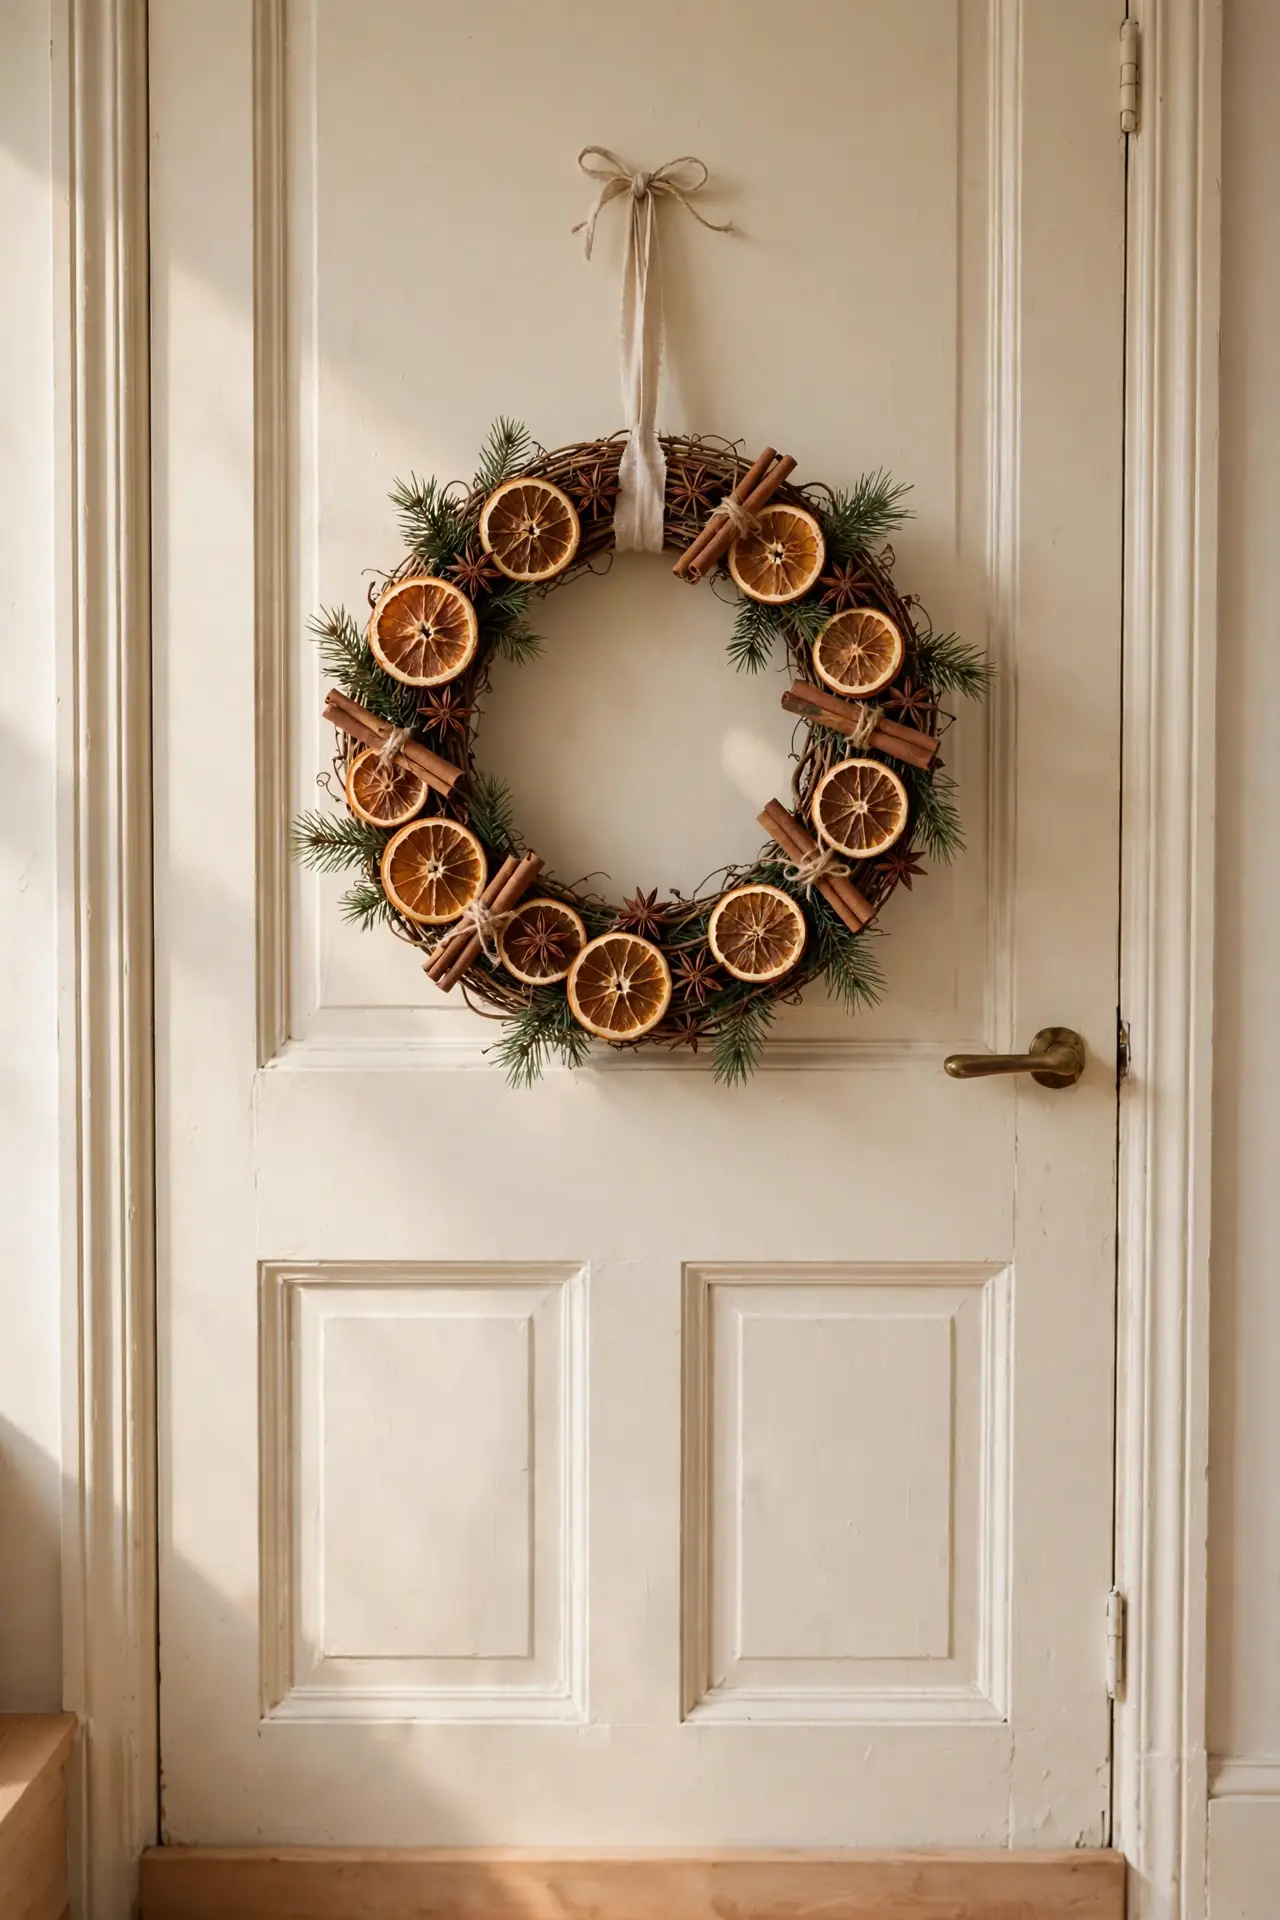
Quick Tip: Slice oranges a quarter inch thick and dry them at 200 degrees for three hours, flipping once. Pat the slices dry first so they crisp evenly and do not brown. Blot any sticky spots with a paper towel before wiring them onto the wreath form.
Start with a plain grapevine wreath and wire the orange slices in overlapping rows around the front. Fill the gaps with cinnamon sticks, star anise, and small pine sprigs for a wreath that looks and smells like the season. Hang it on an interior door to keep the slices safe from weather damage all winter.
Felt Tree Village
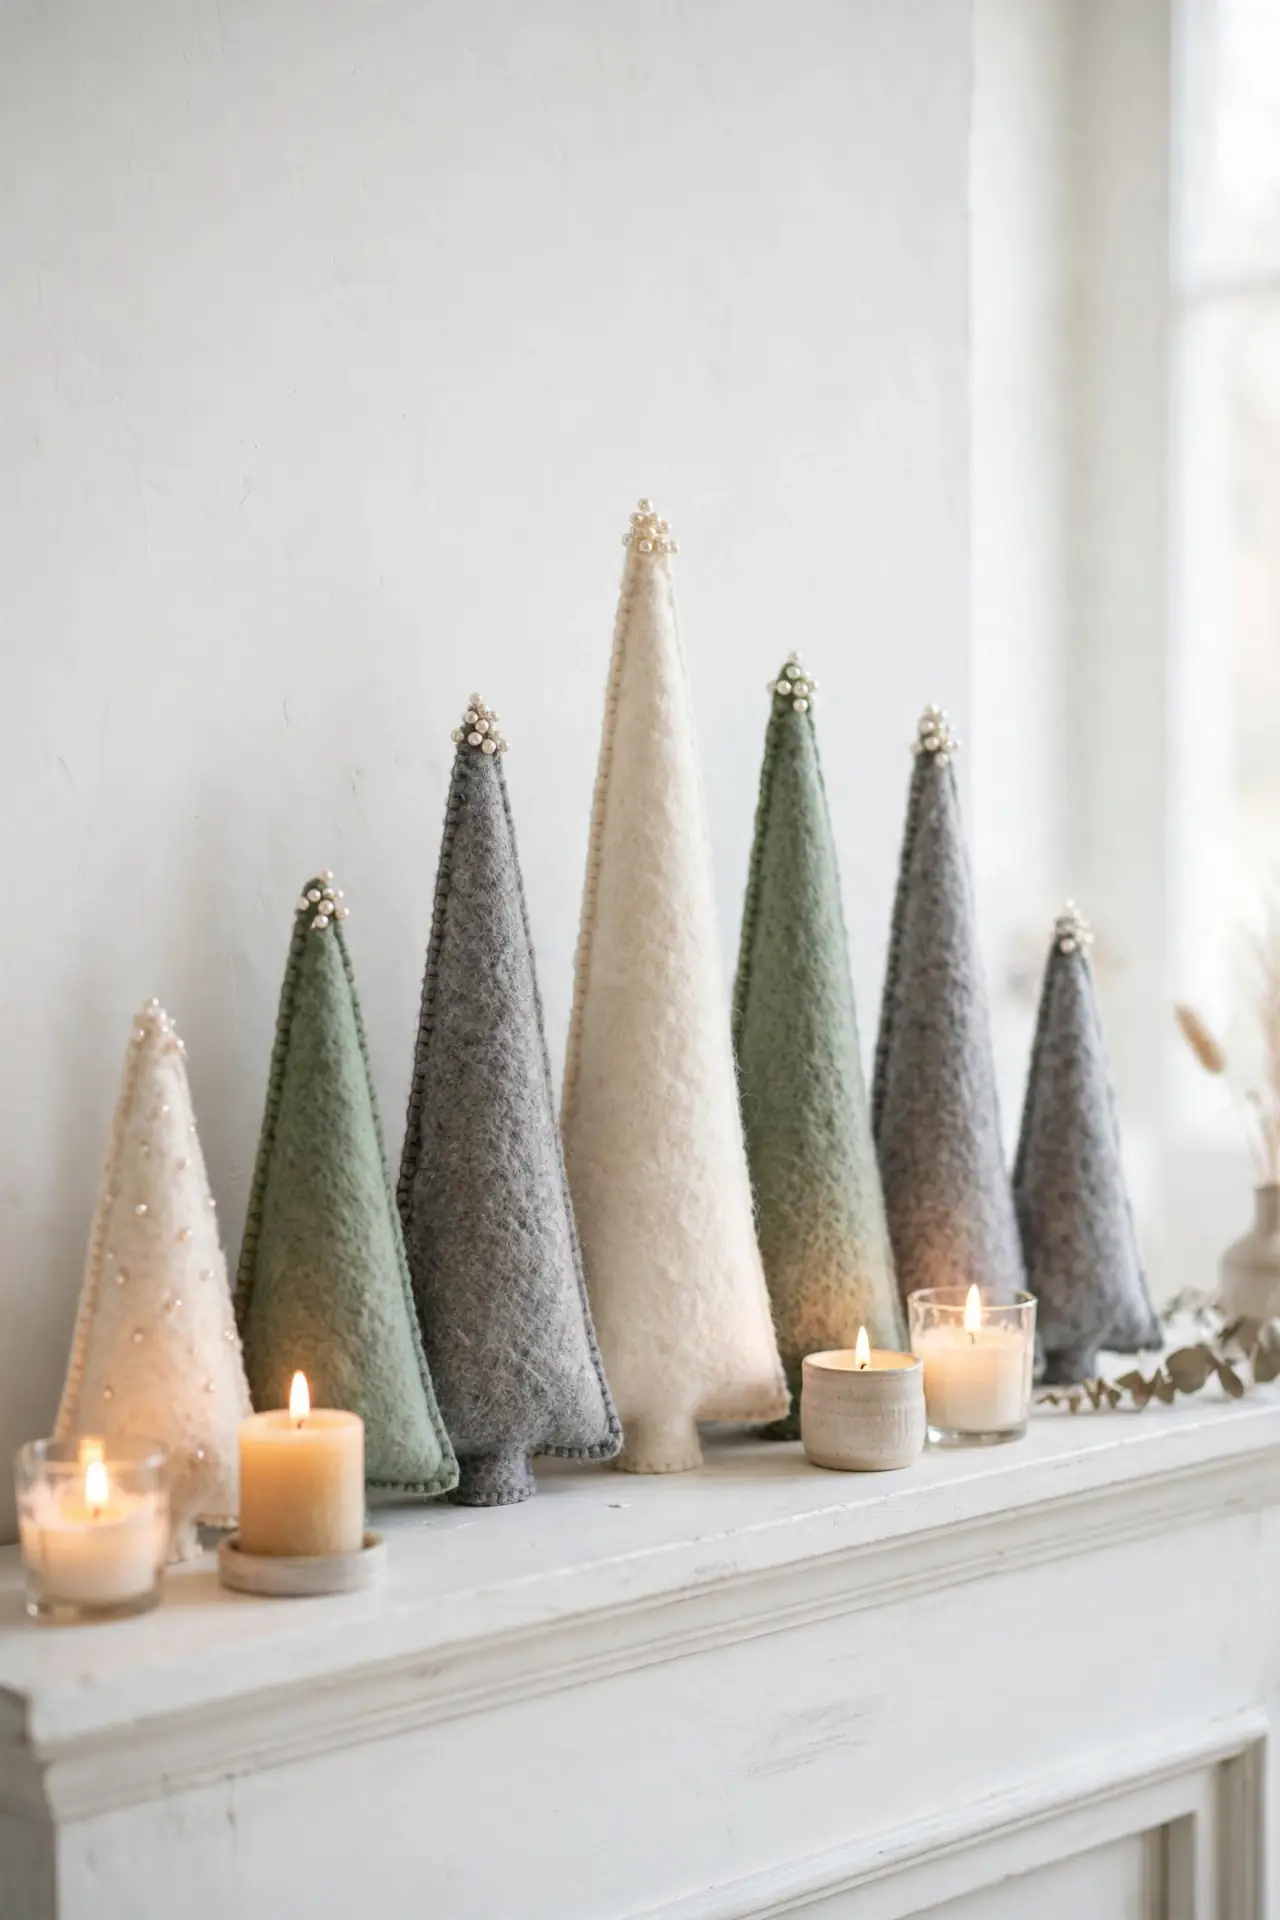
BEFORE: Store-bought mantel decor costs a fortune and never quite matches your colors. The village sets sold in shops repeat the same shapes every year, and most end up back in the box by January.
AFTER: A row of hand-cut felt trees in creams, greens, and grays costs almost nothing and fits your palette exactly. Vary the heights from four to twelve inches so the mantel has a skyline instead of a straight line.
Cut tree silhouettes from stiff felt sheets and glue them to wooden bases or fill them with rice for weight. Add tiny felt stars or pearl beads at the top of each tree. Cluster them with candles and let the tallest one sit slightly off center.
Candle Jar Centerpieces
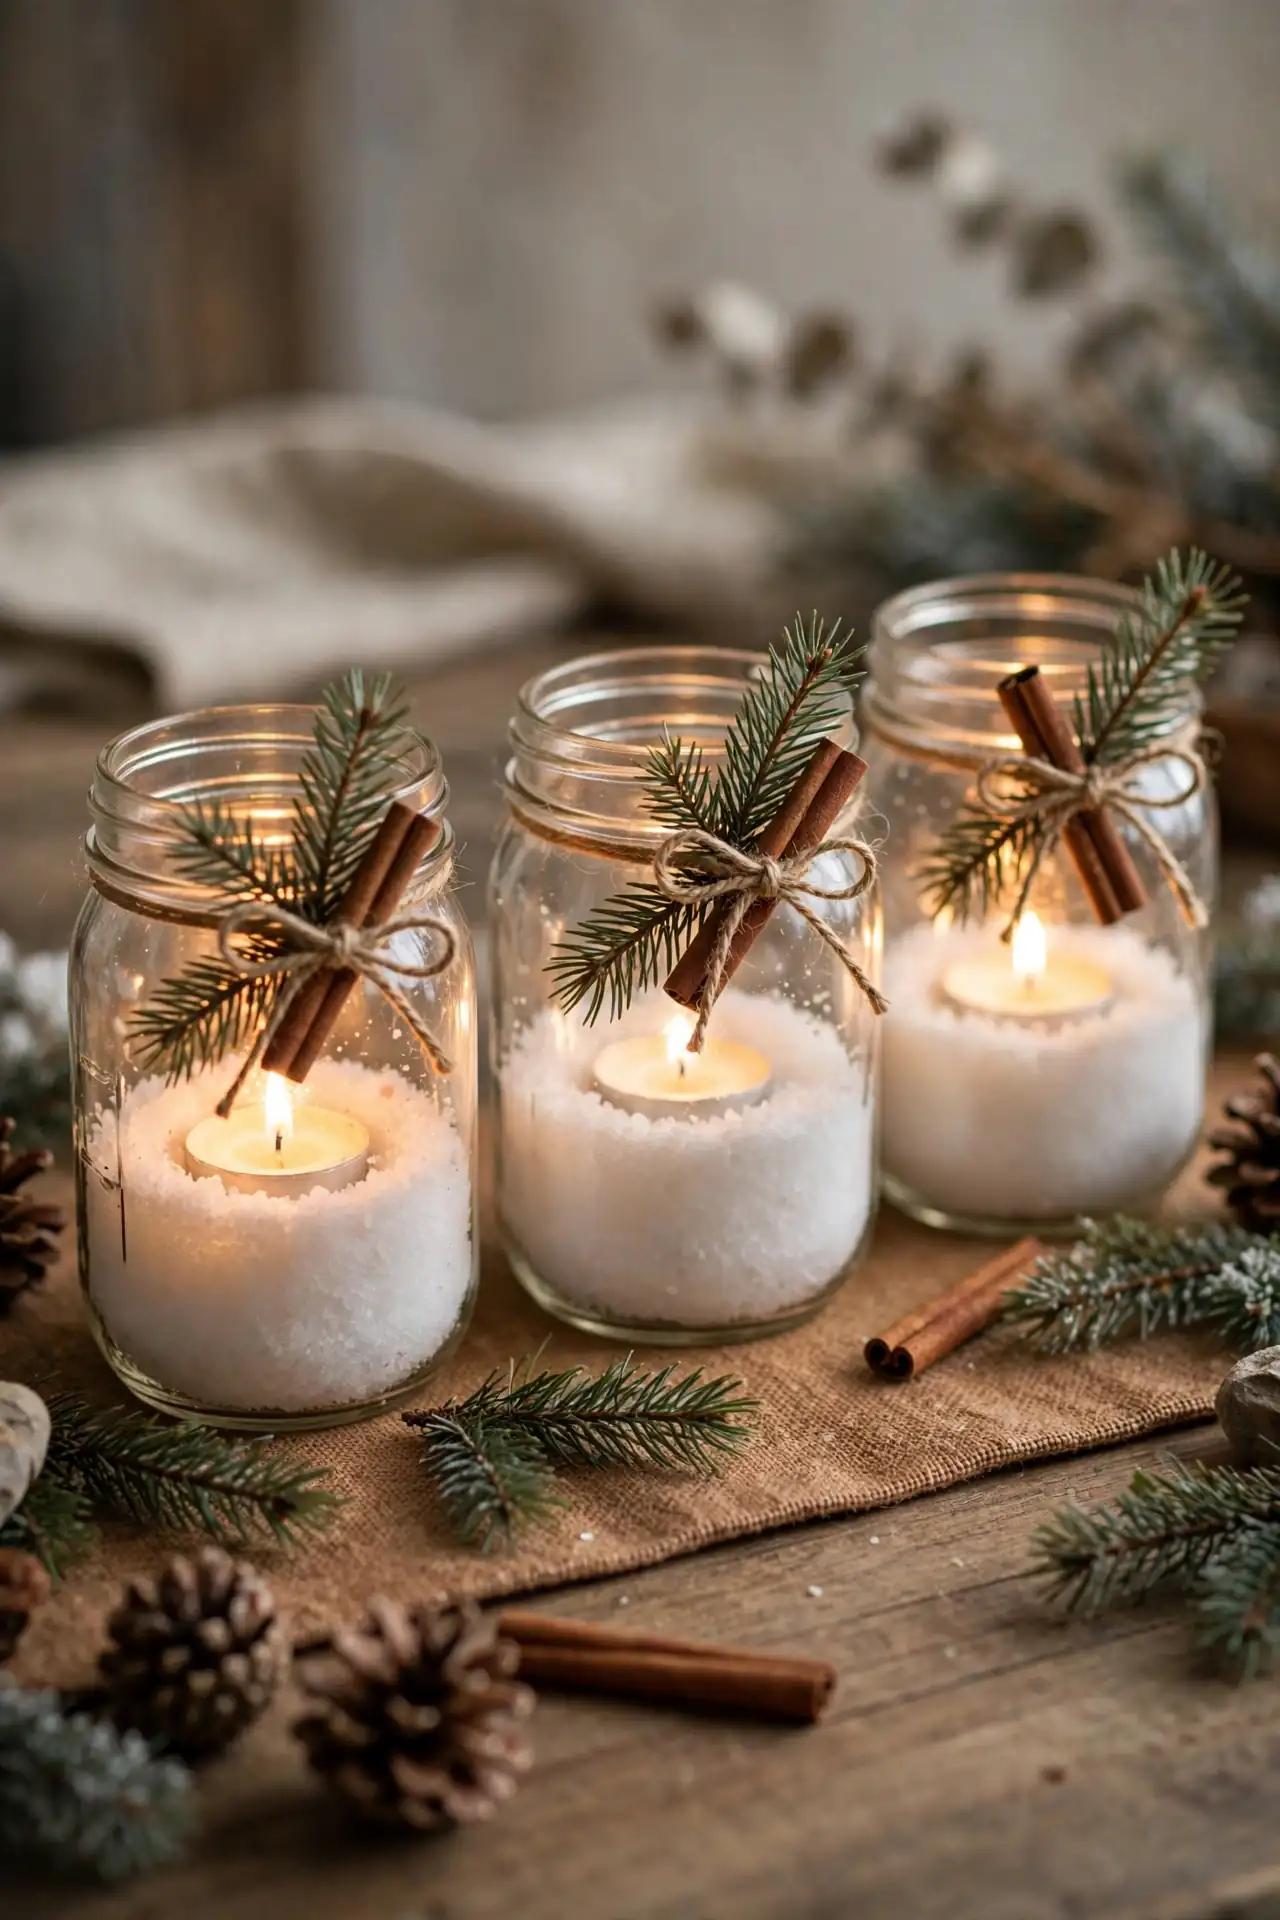
- Fill wide-mouth mason jars one third full with Epsom salt to mimic fresh snow.
- Set a tea light or short pillar candle in the center and press it into the salt.
- Wrap twine around the jar neck and tuck in a pine sprig and a cinnamon stick.
- Line three jars down the table runner, varying the heights for visual rhythm.
The salt catches the candlelight and scatters it like real snowfall at dusk. Make a dozen jars in under an hour and scatter them across the mantel and side tables too. I have seen this work well in many cases where guests assume the centerpiece was expensive.
Paper Star Lanterns
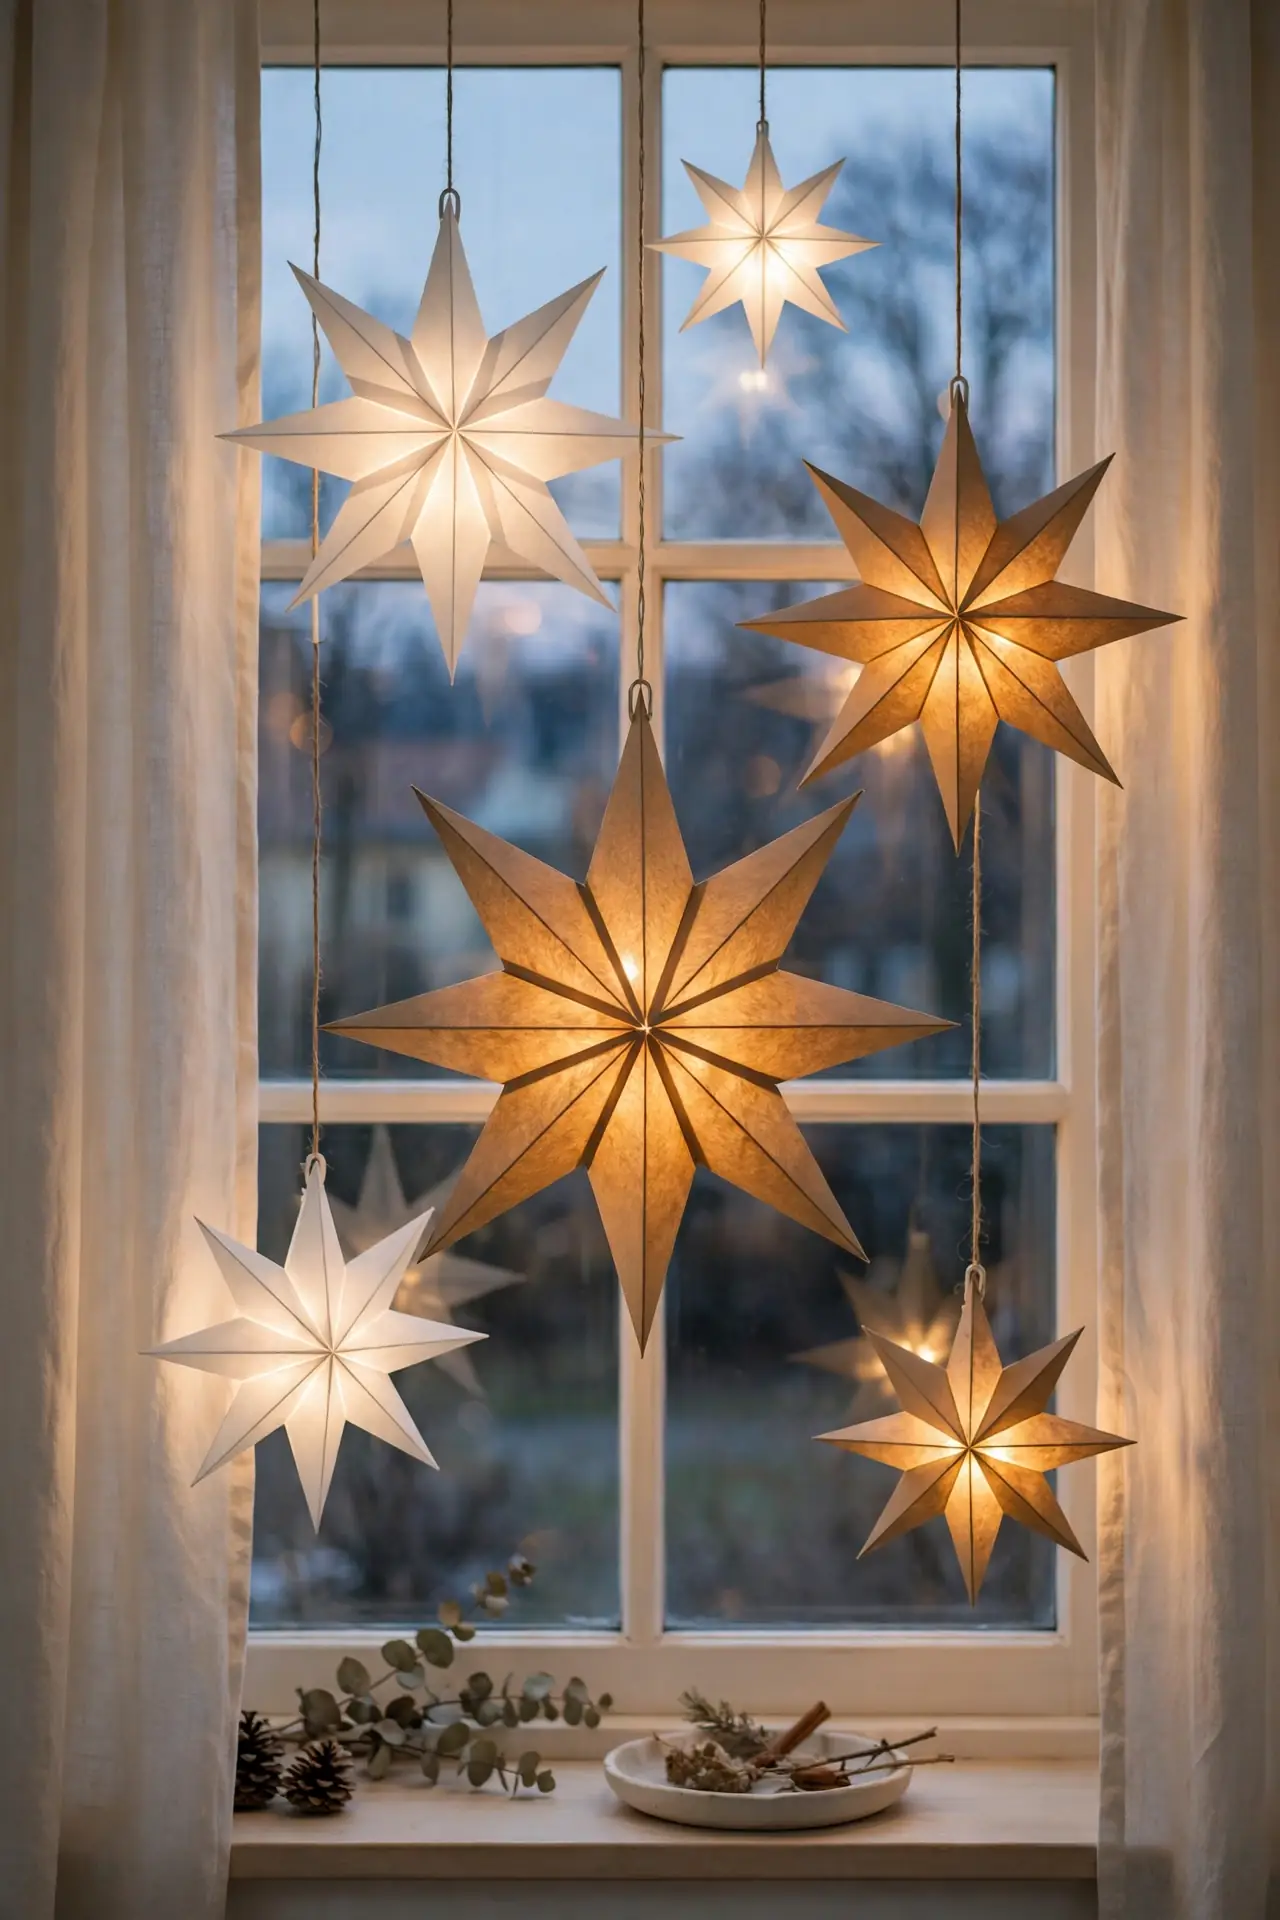
| Option | Classic Five-Point | Scandinavian Star |
|---|---|---|
| Paper type | kraft paper bags | white vellum sheets |
| Fold difficulty | beginner friendly | needs practice |
| Size | 10 to 14 inches | 18 to 24 inches |
| Light source | LED tea light | LED string light |
| Display spot | window or mantel | entryway ceiling |
Fold the paper strips into stars using a bone folder for crisp edges, then secure the points with a dot of hot glue. Pop an LED light inside each star and hang them in windows or from a branch chandelier. They look delicate but survive the whole season indoors with no fading. Kids can help with the simple folds while adults handle the gluing and lights.
Wool Stocking Bunting
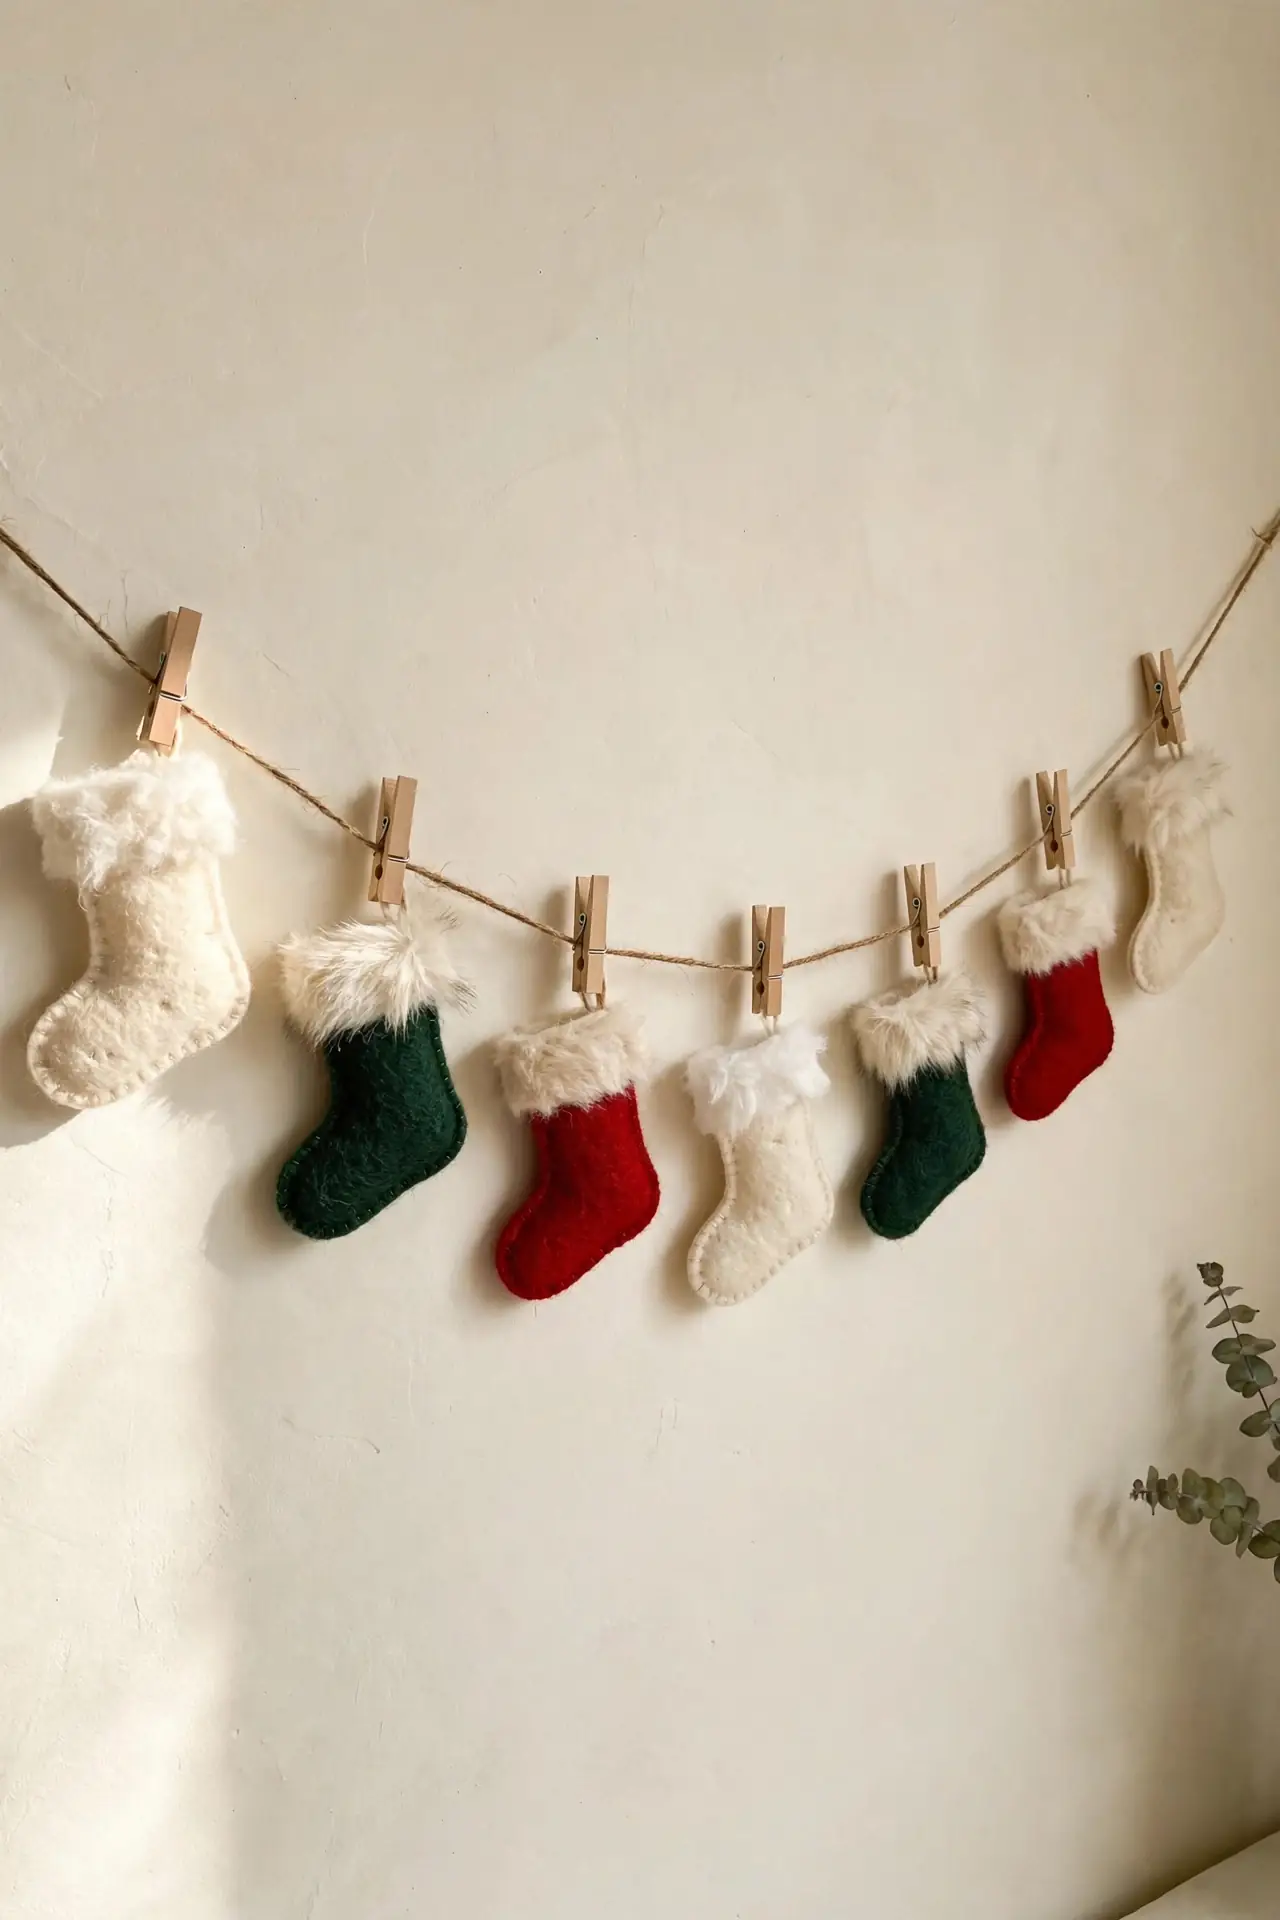
DO
- Cut mini stockings from wool felt in creams, reds, and forest greens.
- Sew or glue a small cuff of faux fur to each stocking top.
- String them on jute twine with tiny wooden clothespins for charm.
DON’T
- Do not make the stockings larger than six inches or they overwhelm the string.
- Do not use craft felt; it pills, so choose wool-blend felt instead.
- Do not hang the bunting where stockings will brush hot candles.
Drape the bunting across a doorway, the tree, or an empty wall that needs cheer. Slip a candy cane or a handwritten note into each stocking on Christmas Eve. The whole project costs little and fills a big blank space with personality. Kids love discovering the notes on Christmas morning.
Yarn Wrapped Trees
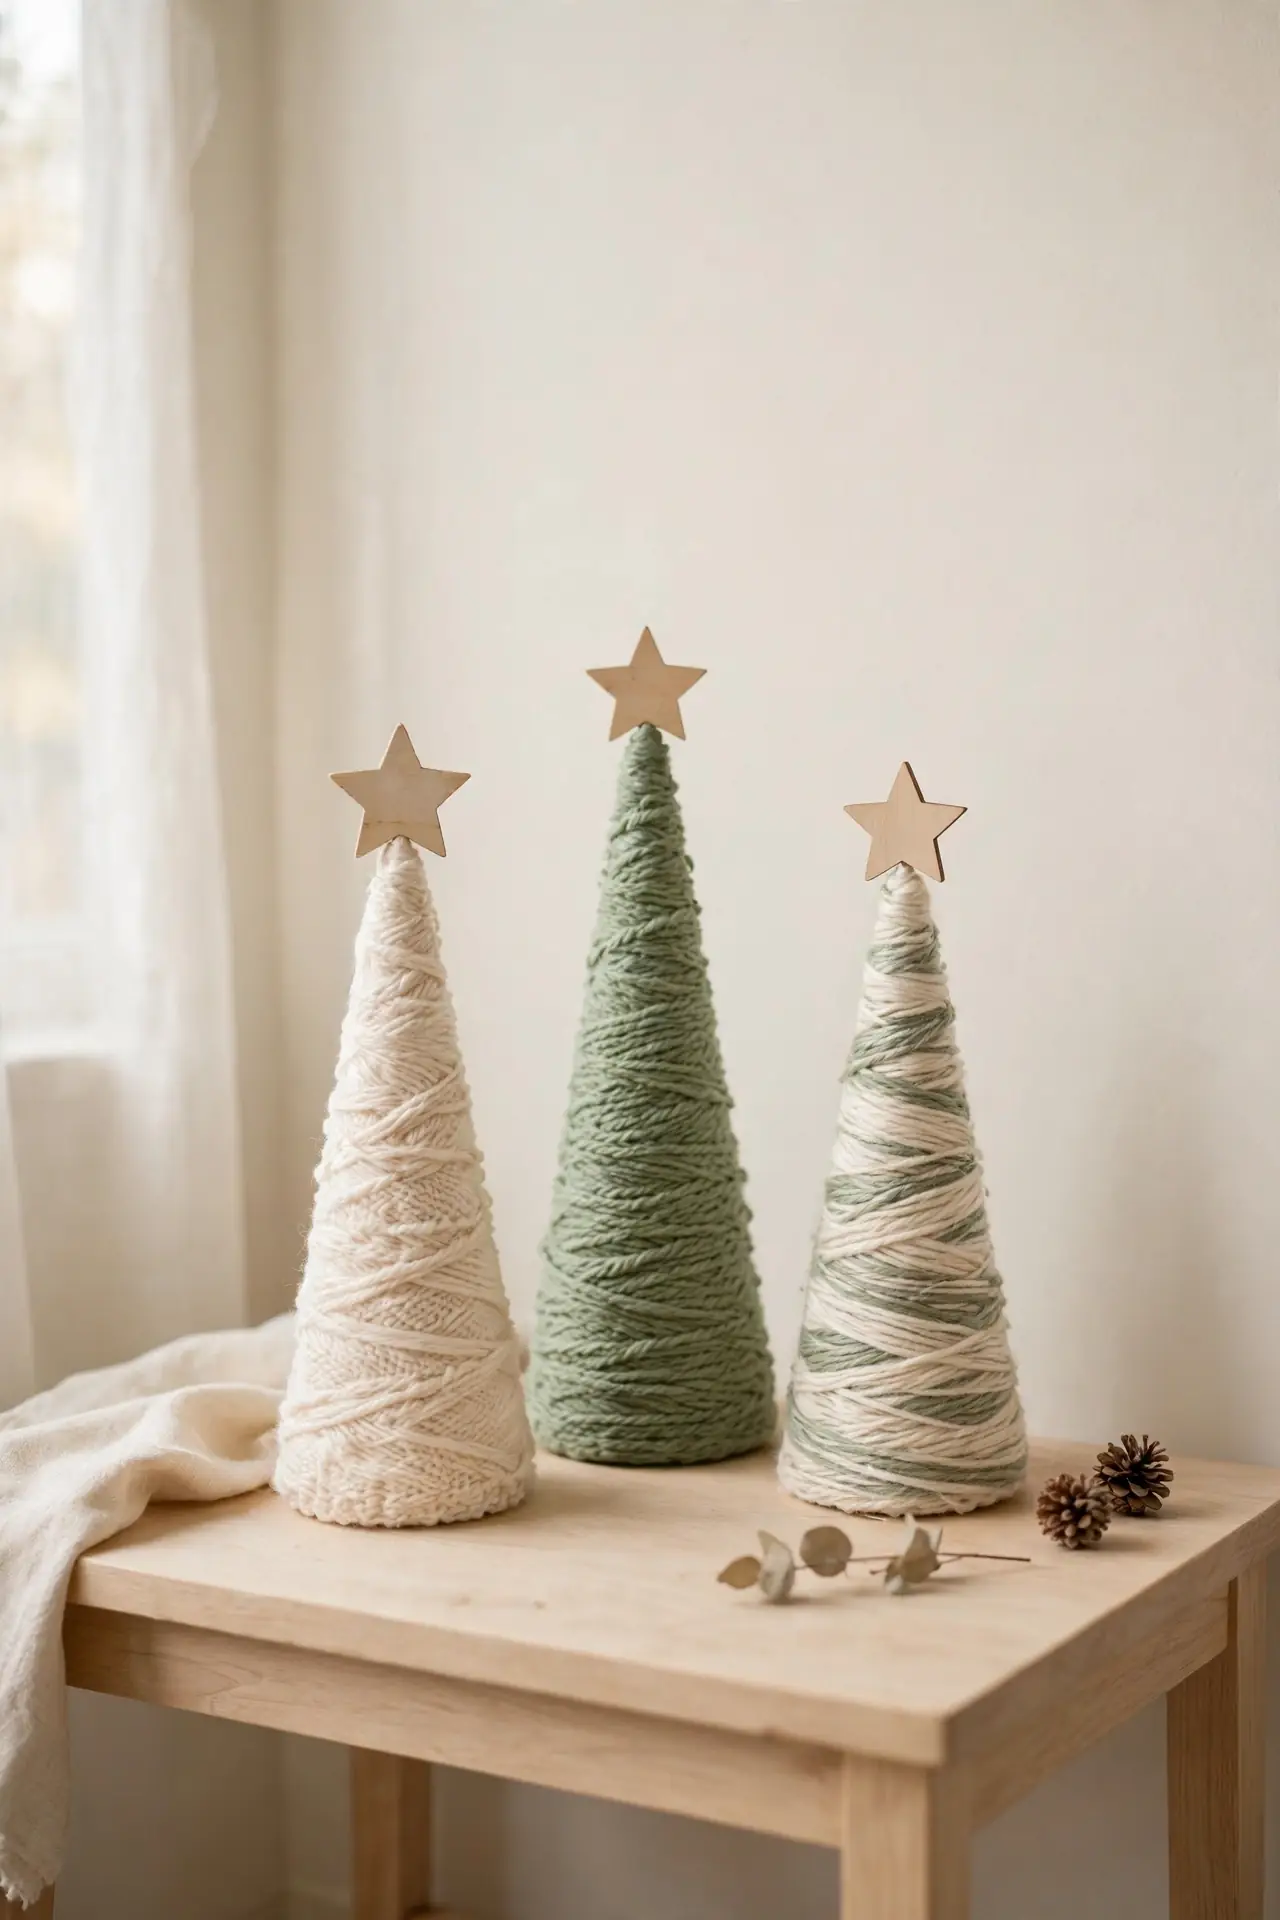
Cost: Under $15 using yarn and cones you already own.
Time: About one evening to wrap three trees.
Skill Level: Beginner friendly; wrapping is forgiving.
Best For: Mantels, shelves, and side tables that need height.
Result: Soft textured trees with a cozy handmade feel.
Wrap foam or cardboard cones in thick yarn from base to tip, securing each round with a dot of hot glue. Layer two yarn colors for stripes, or keep one creamy shade for a calm Scandinavian look. Top each tree with a small wooden star or a brass bell. Group three different heights together and let the smallest one sit slightly forward. They weigh almost nothing, so they perch safely on high shelves.
Beeswax Candle Tapers
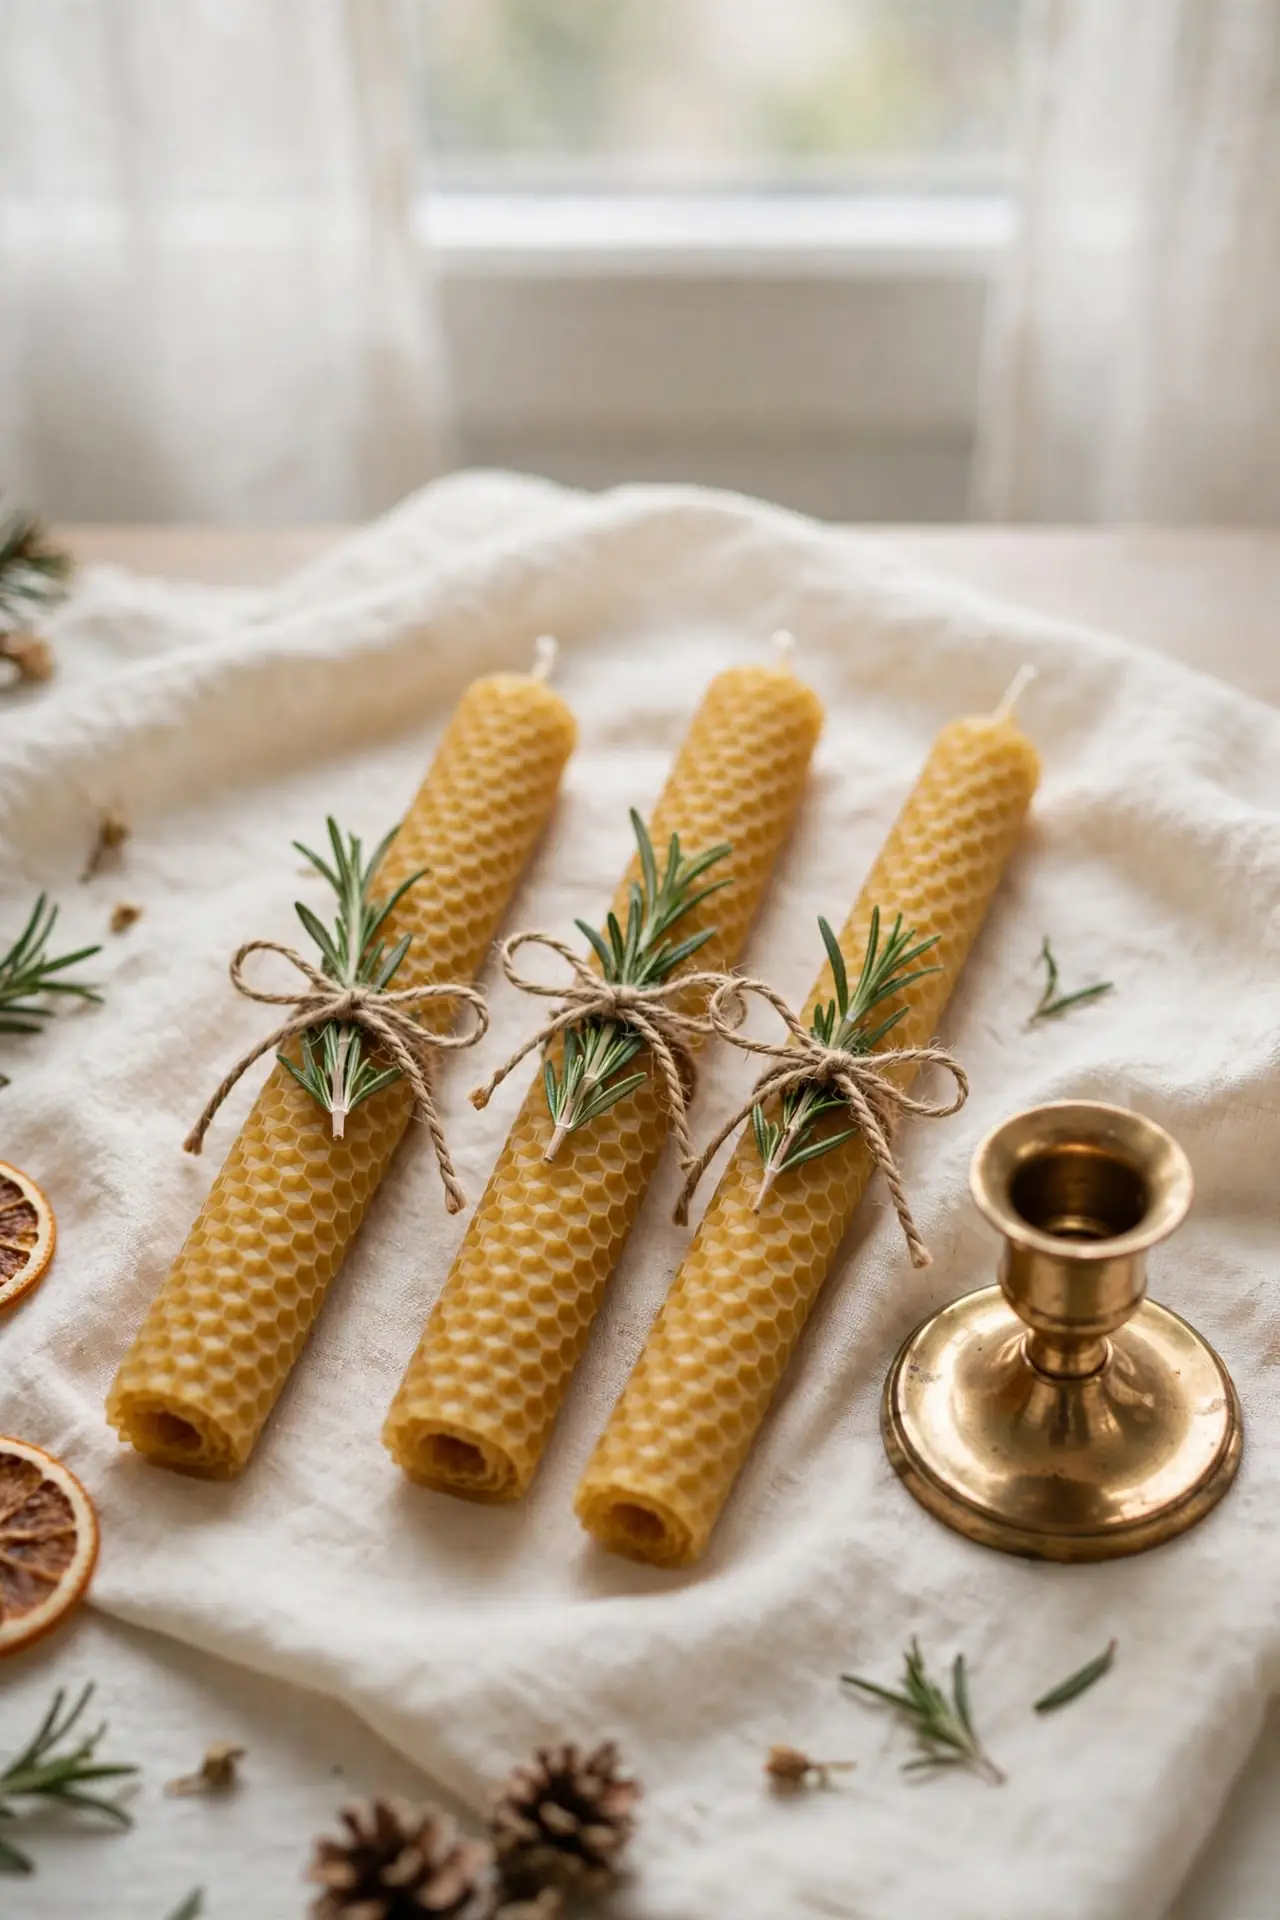
Rolled beeswax tapers smell like honey and burn with a warm golden flame. Lay a sheet of beeswax flat, set a cotton wick along one edge, and roll it tight with steady pressure. Trim the wick to a quarter inch and let the candle cure overnight before lighting. The honey scent needs no added fragrance at all.
Dipping works too, but rolling is faster and nearly impossible to mess up. Cut the sheets into festive widths: thin for dinner tapers, wide for chunky pillars. Tie finished pairs with twine and a sprig of rosemary for a hostess gift. In my experience, handmade candles always get noticed first.
Pressed Leaf Placecards
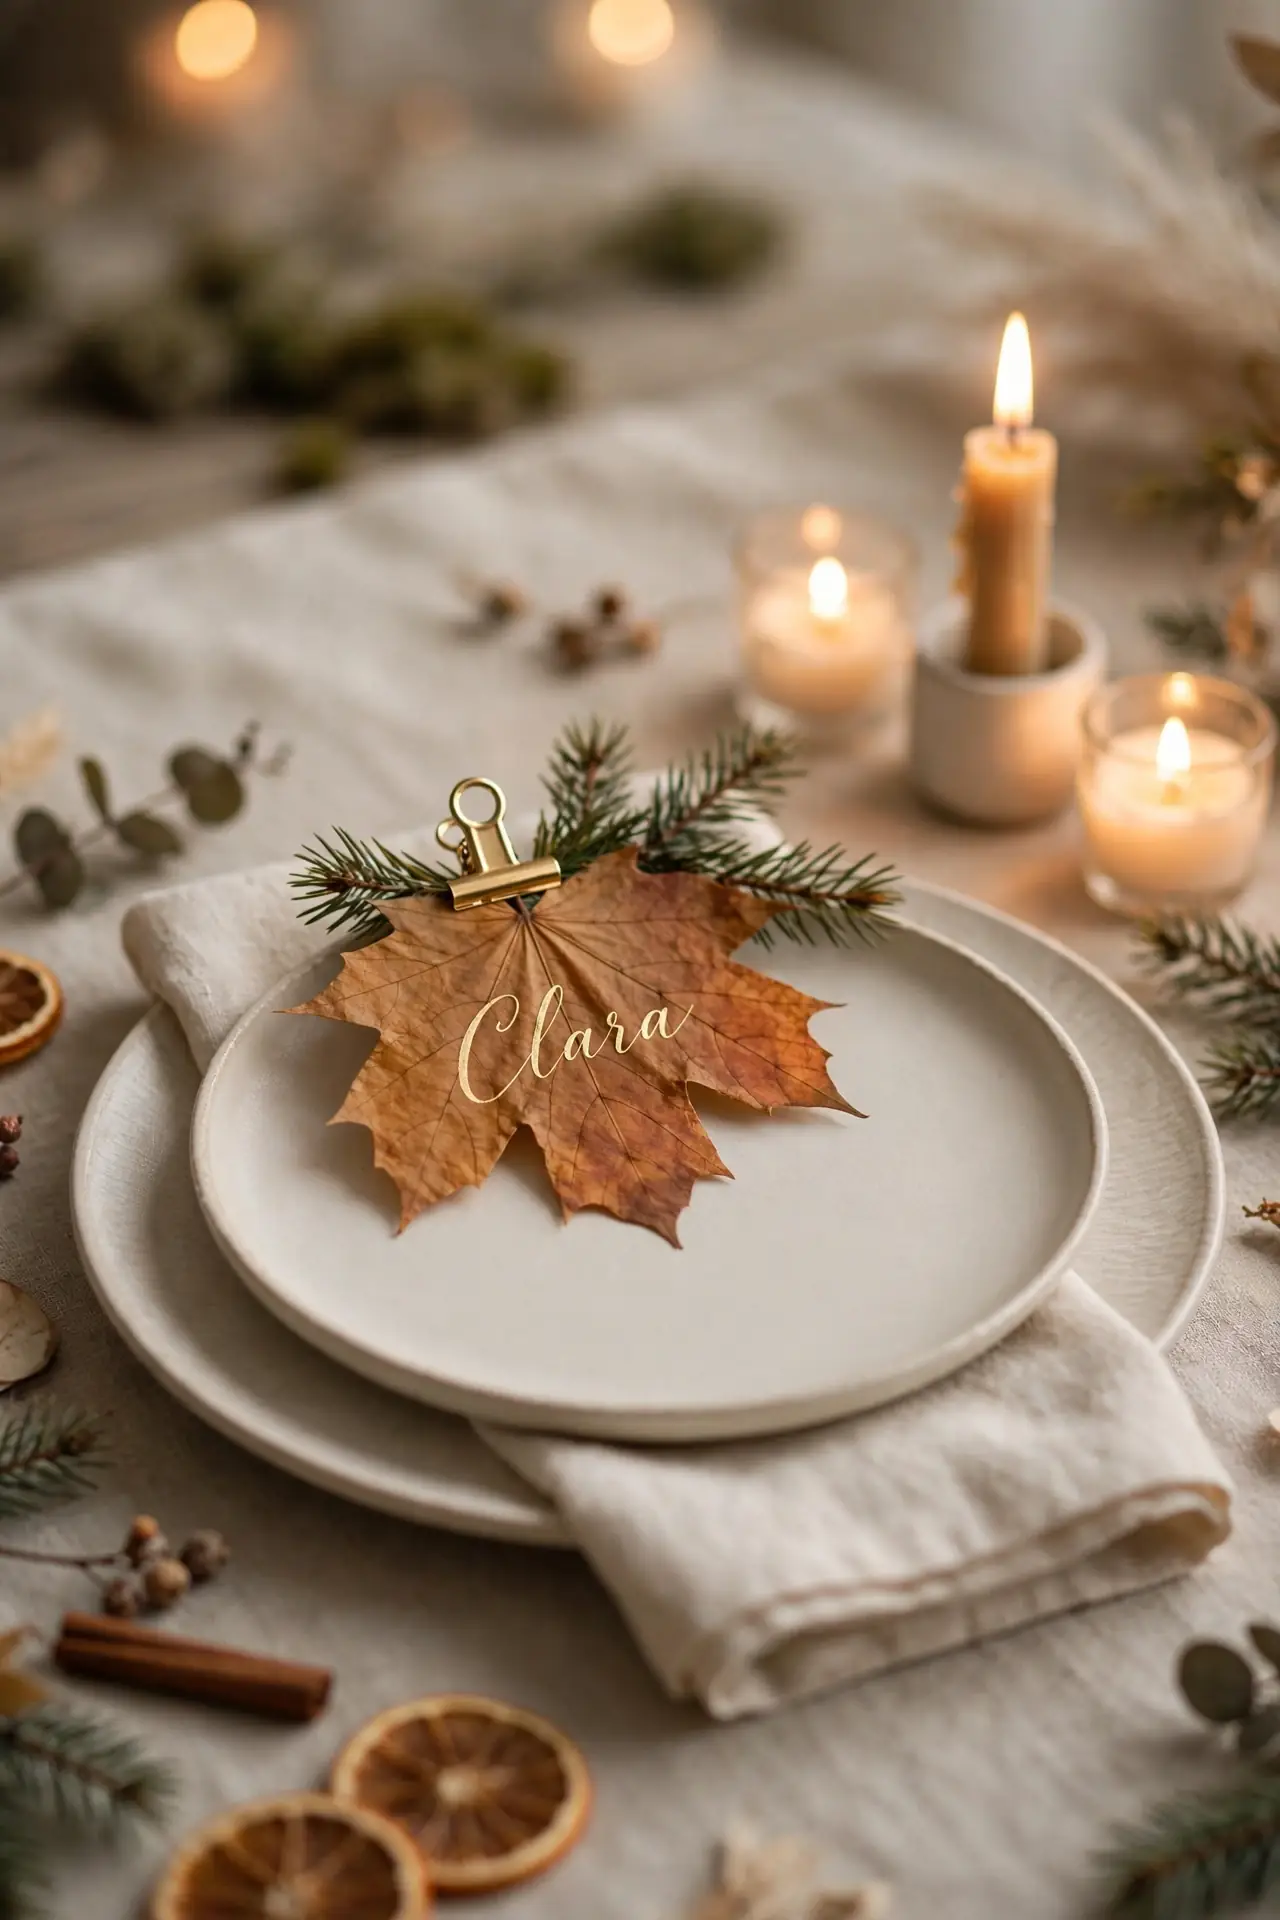
- Press autumn leaves between book pages for two weeks until fully flat and dry.
- Write each guest name with a gold paint pen across the leaf surface.
- Seal the leaf with a light coat of matte spray so the ink lasts.
- Clip the finished leaf to a pine sprig at each place setting.
- Tuck a sprig of rosemary behind the leaf for extra color and scent.
Guests notice handmade placecards before they notice the food. Use leaves with strong veins like maple or oak so the gold pen shows up clearly. If a leaf tears, layer two together with a dot of glue. These double as tree ornaments after dinner ends.
Evergreen Table Runner
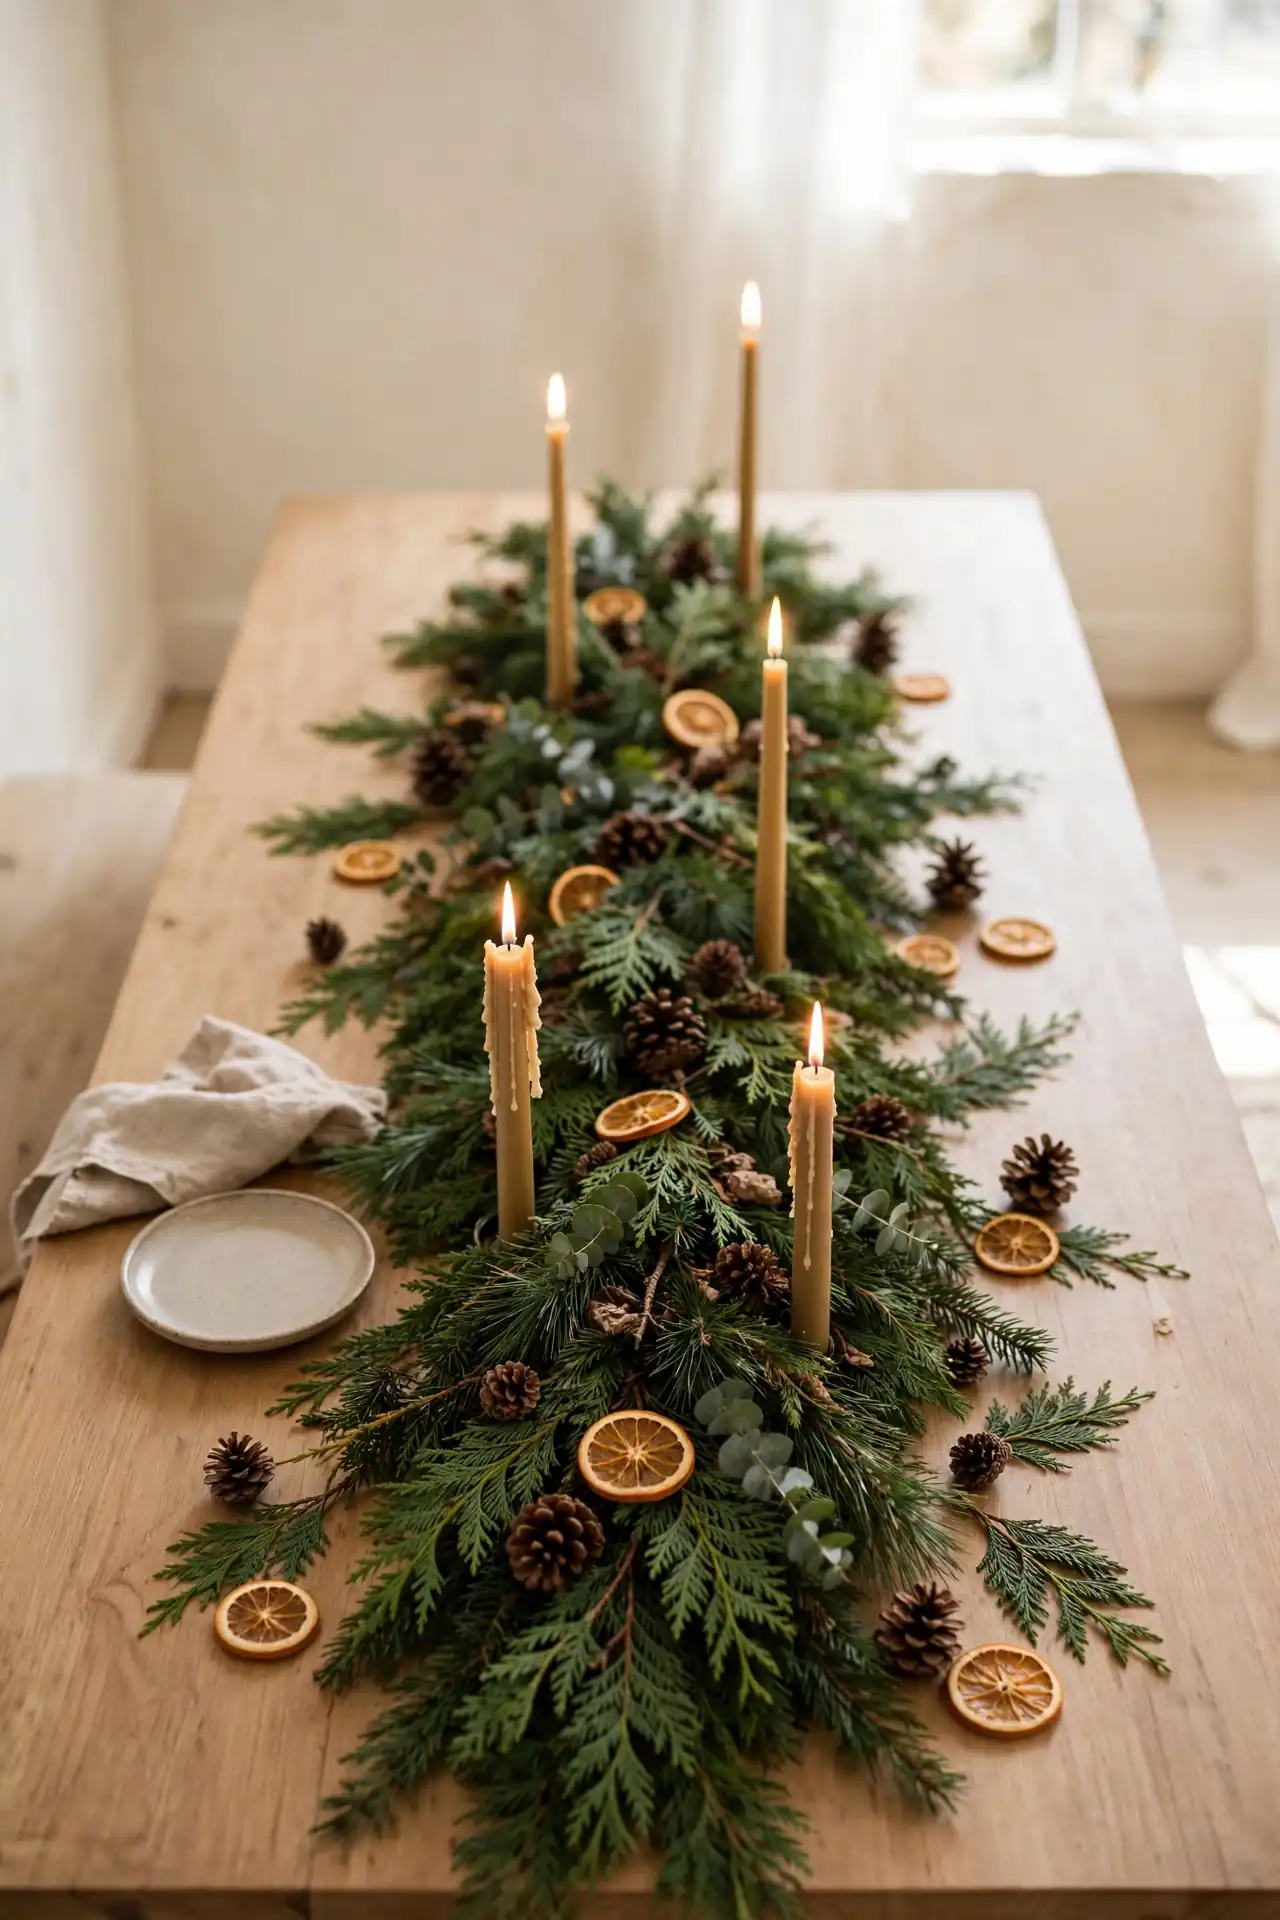
Quick Tip: Lay a strip of chicken wire or floral foam down the table center as your base. Push cedar, pine, and fir sprigs into the base at angles so no mechanics show. Mist the greens with water daily and they will stay fresh for two weeks.
Weave in pine cones, dried orange slices, and taper candles at intervals along the runner. Keep one side slightly fuller than the other so the arrangement feels natural and relaxed, not stiff. When the party ends, compost the greens and save the wire base. The whole table smells like a walk through fresh winter woods.
Brass Bell Swags
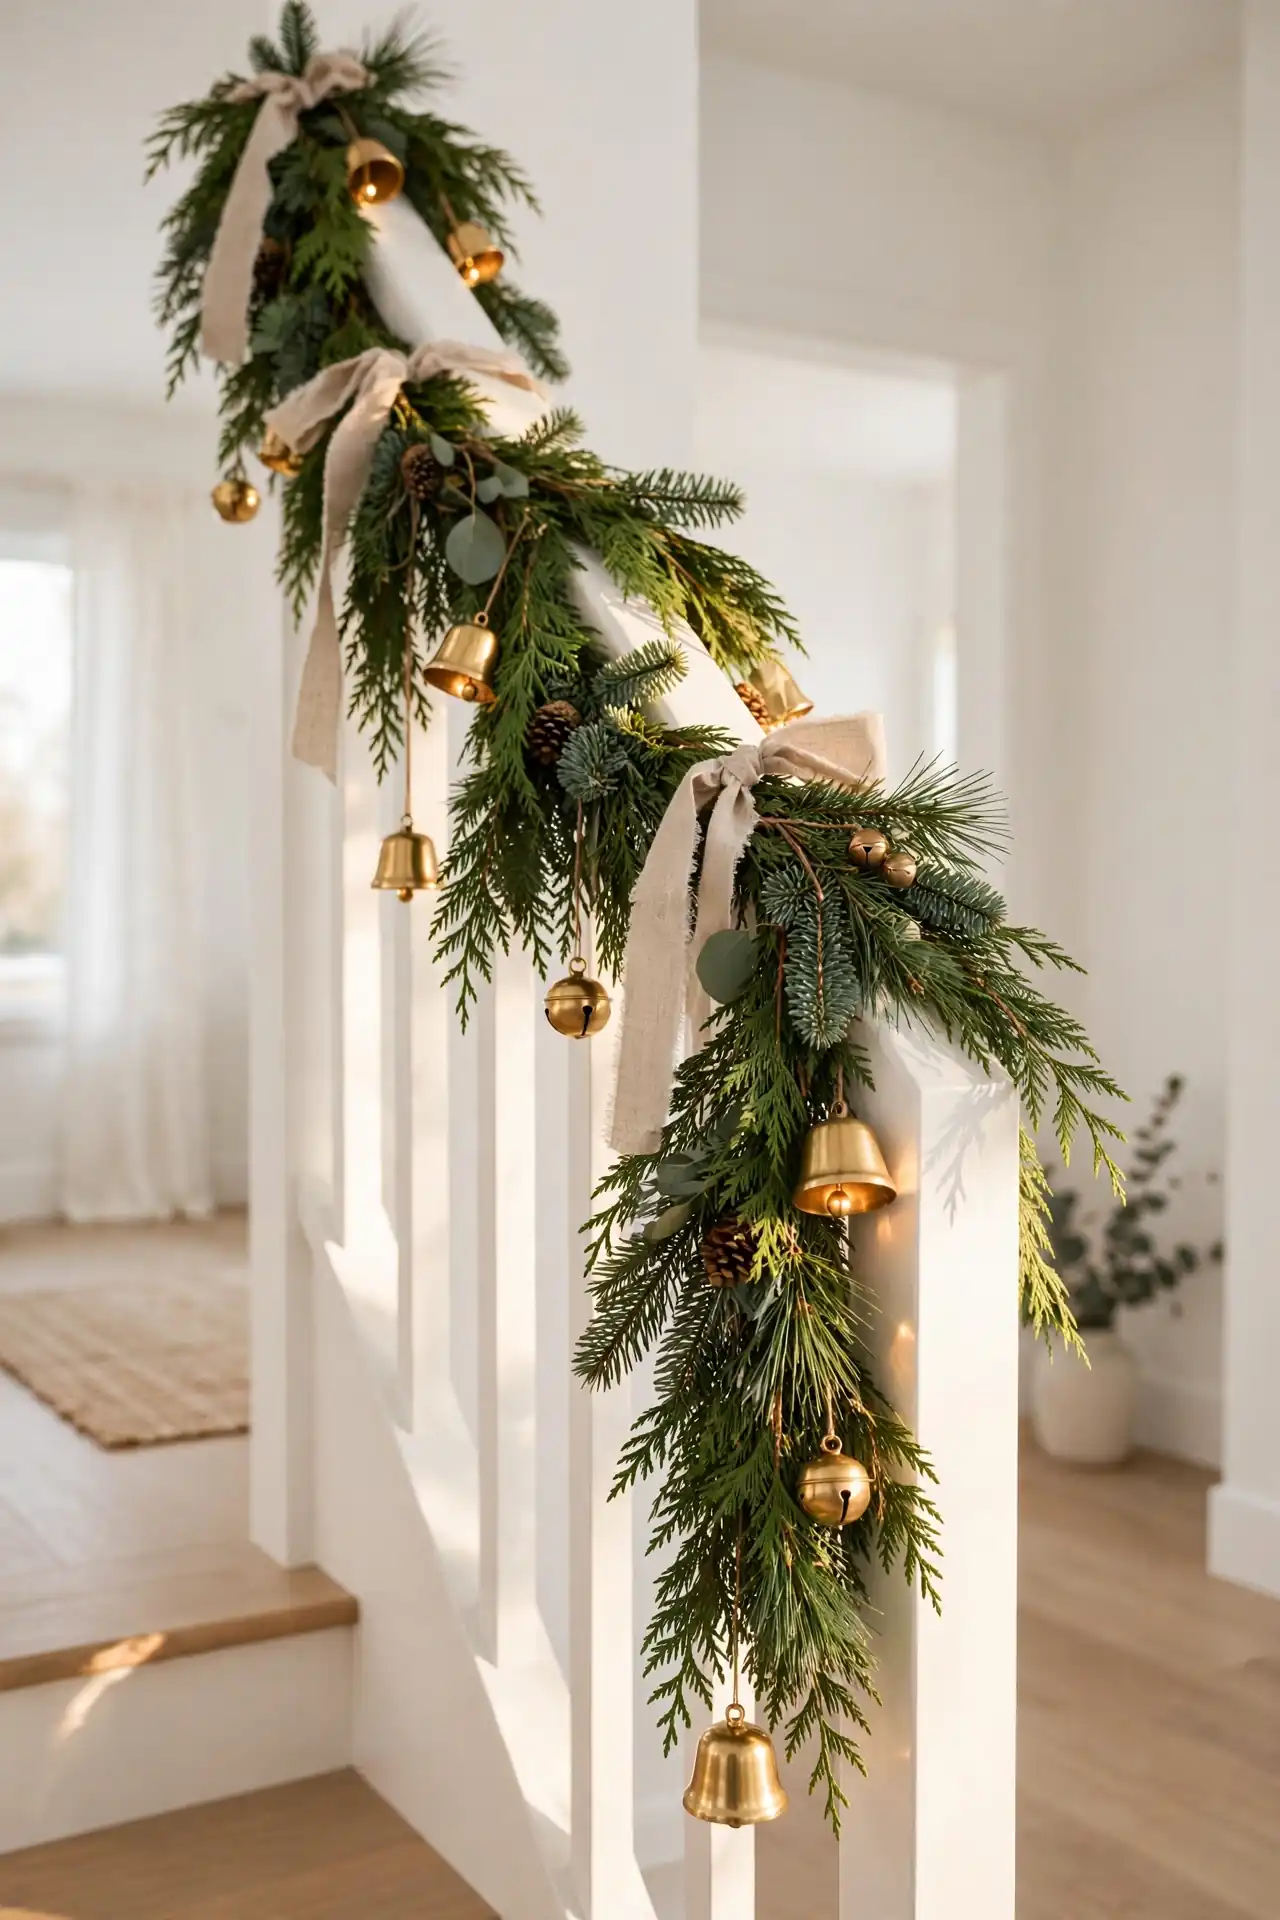
BEFORE: Plain garland on the stair rail looks flat and forgettable by mid-December. Store-bought swags use the same plastic berries every year and collect dust in the branches.
AFTER: Strands of brass bells woven through fresh cedar garland jingle softly every time someone climbs the stairs. The metal catches candlelight and looks expensive against the dark green boughs.
Buy small brass bells in bulk and wire them onto a cedar or pine garland every eight inches. Drape the garland with a loose swoop between stair newels so the bells hang free. Test the jingle volume before the party; fewer bells mean a gentler sound.
Hand Painted Baubles
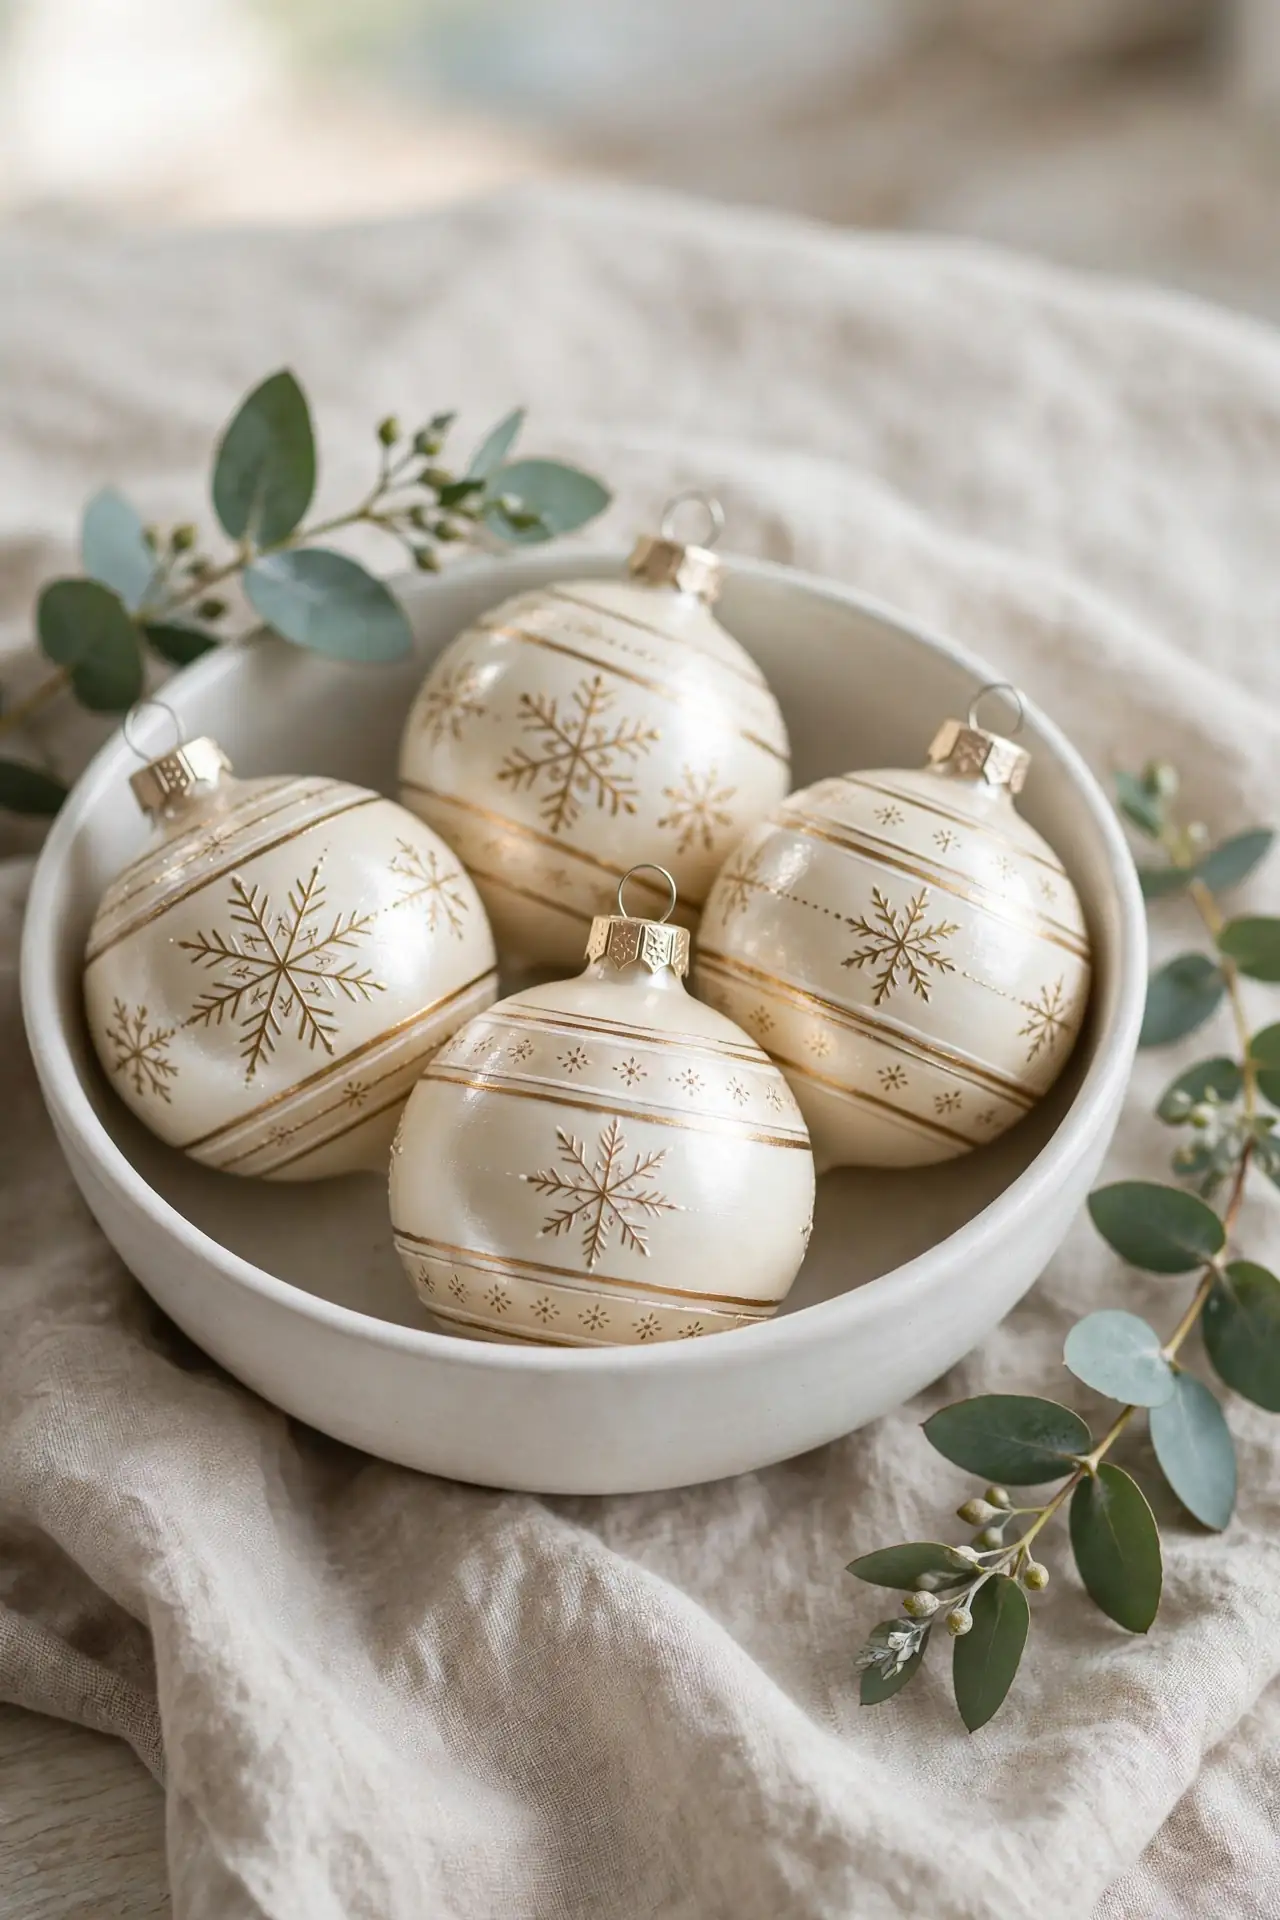
- Wipe clear glass baubles with rubbing alcohol so paint grips the surface.
- Paint simple motifs like stripes, dots, or snowflakes with acrylic craft paint.
- Let each layer dry fully before adding the next color or detail.
- Finish with a clear gloss sealer so the paint survives storage.
- Add a ribbon loop through the cap for hanging.
Simple designs beat complicated ones every time; a single gold stripe on cream glass looks far more elegant than a busy scene. Paint a matched set of six for a pulled-together tree, or make each one different for a collected feel. Sign and date the cap so future you remembers the year.
Linen Gift Wraps
| Option | Natural Linen | Printed Cotton |
|---|---|---|
| Fabric cost | $8 to $12 per yard | $4 to $7 per yard |
| Reuse count | dozens of holidays | three to five uses |
| Best ribbon | velvet or jute twine | grosgrain or satin |
| Wrapping style | simple knot wrap | classic folded corners |
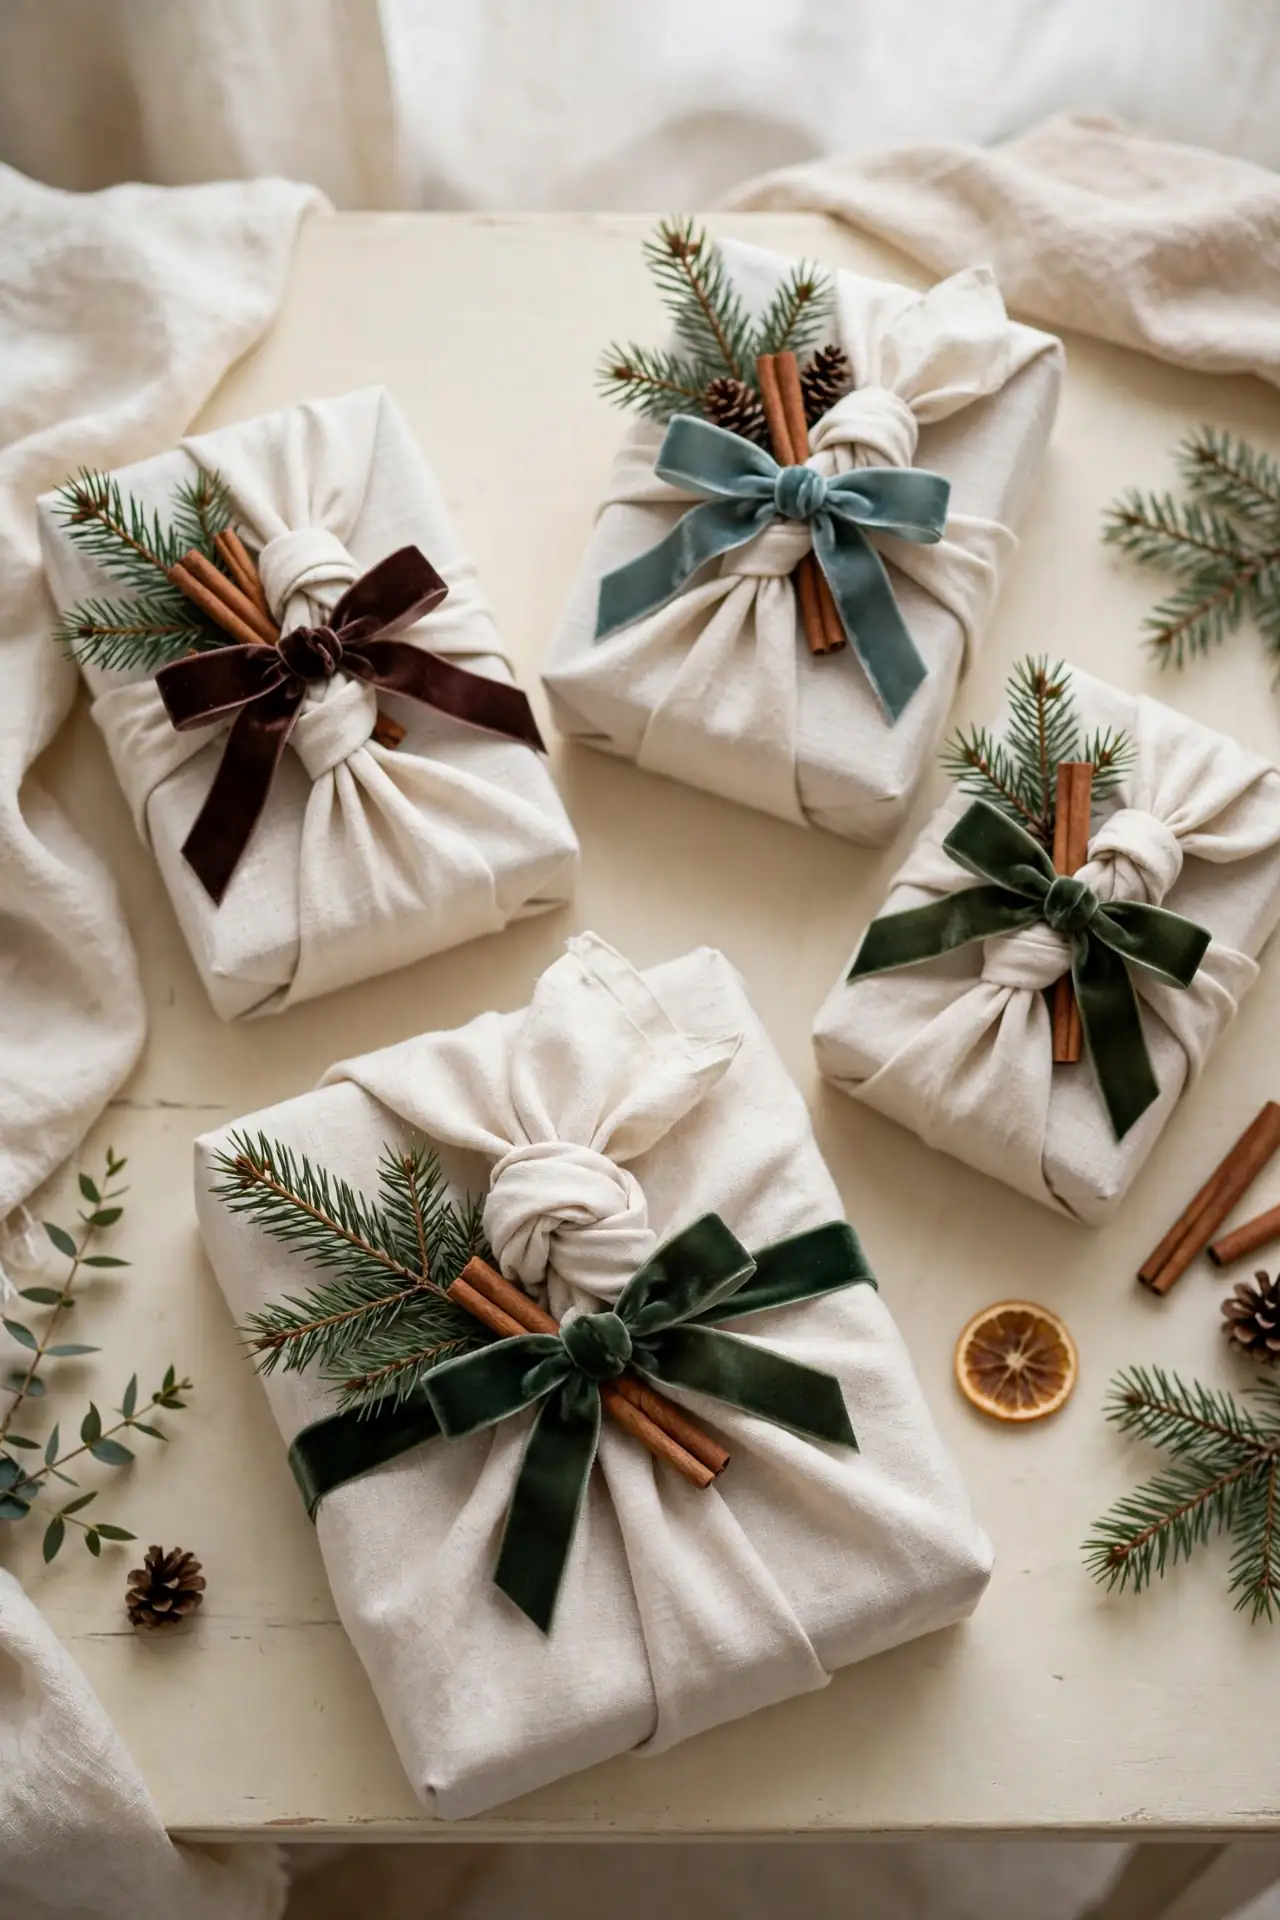
Cut fabric squares large enough to wrap each gift with a simple furoshiki knot on top. Tuck a pine sprig and a cinnamon stick under the knot for a finish that smells wonderful. Recipients keep the fabric and reuse it next year, which makes the gift keep giving. No tape, no paper waste, and the packages look straight out of a boutique.
Clay Star Toppers

DO
- Roll air-dry clay to a quarter inch thick before cutting star shapes.
- Poke a small hole near one point so the star hangs straight.
- Paint the dry stars gold and sand the edges lightly for depth.
DON’T
- Do not roll the clay too thin or the points snap off.
- Do not hang the star before it cures for a full 48 hours.
- Do not skip the sealant; unsealed clay absorbs moisture and warps.
A handmade topper gives the tree a personal finish that store-bought stars cannot match. Make a few extra stars to hang as ornaments deeper in the branches. Each one weighs almost nothing, so even slim trees hold them. Kids can press the shapes while adults handle painting and sealing.
Herb Bundle Charms
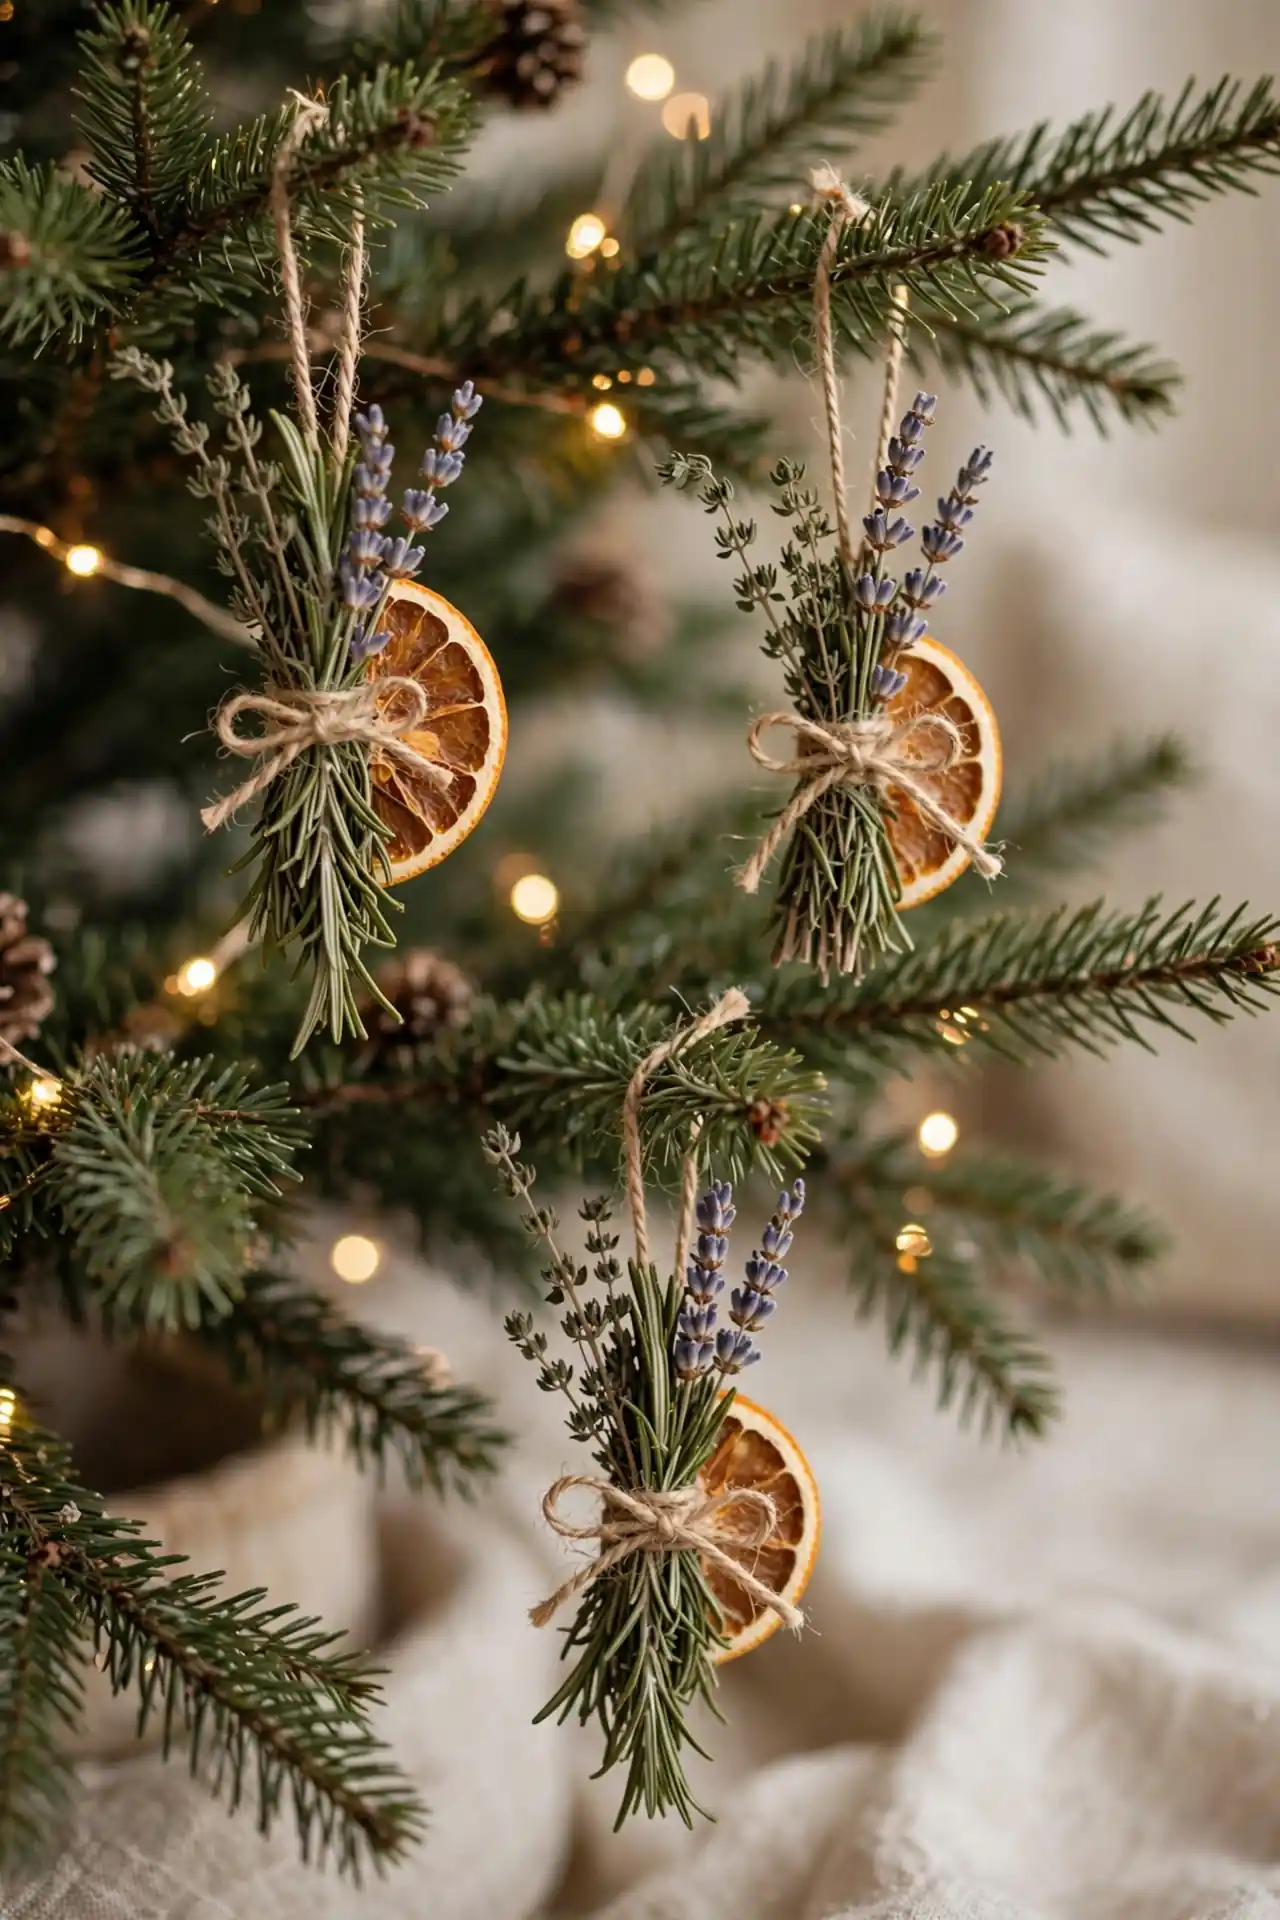
Cost: About $10 for twine, herbs, and ribbon.
Time: One hour to bundle a dozen charms.
Skill Level: Beginner; tying knots is the hardest part.
Best For: Tree ornaments, napkin rings, and gift toppers.
Result: Fragrant, rustic charms guests will ask about.
Gather small bundles of rosemary, thyme, and dried lavender, then tie each with natural twine and a loop for hanging. Add a dried orange slice or a cinnamon stick to half the bundles for variety. Hang them on the tree where the warmth releases their scent, or tie one around each napkin at dinner. They look rustic and smell like a holiday kitchen.
Ribbon Advent Calendar
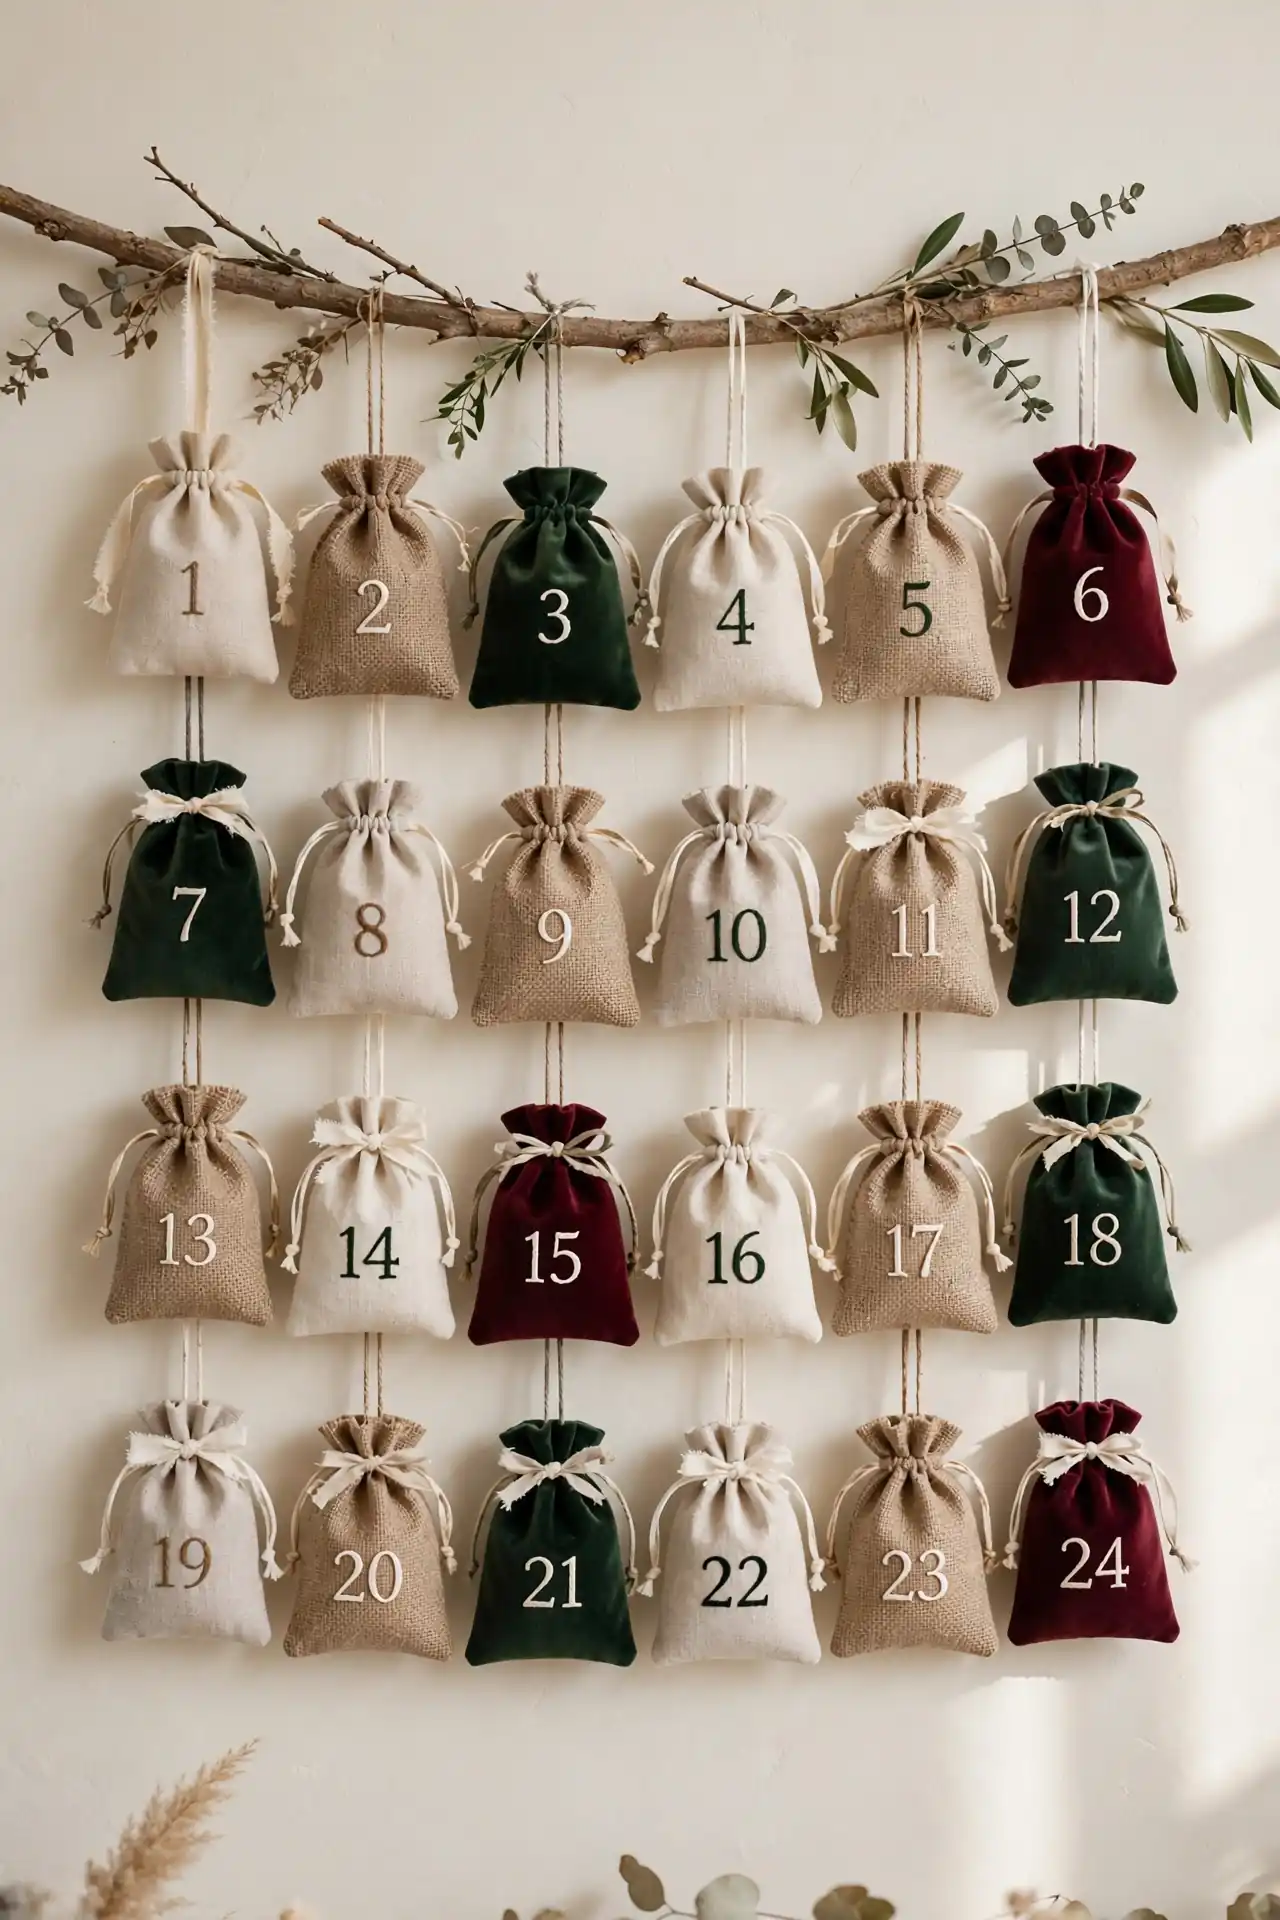
An advent calendar made of ribbon and small pouches beats cardboard chocolates every December. Sew or glue 24 numbered fabric pouches onto wide ribbon strips and hang them from a branch or rod. Fill each pouch with notes, tea bags, or tiny treats. The calendar becomes a decoration long before December first.
Number the pouches with stencils or iron-on numerals so they look crisp and even. Vary pouch fabrics between linen, burlap, and velvet for texture that photographs well. Refill the same calendar every year and it turns into a family tradition. That is the kind of craft that outlives trends.
Twig Reindeer Figures
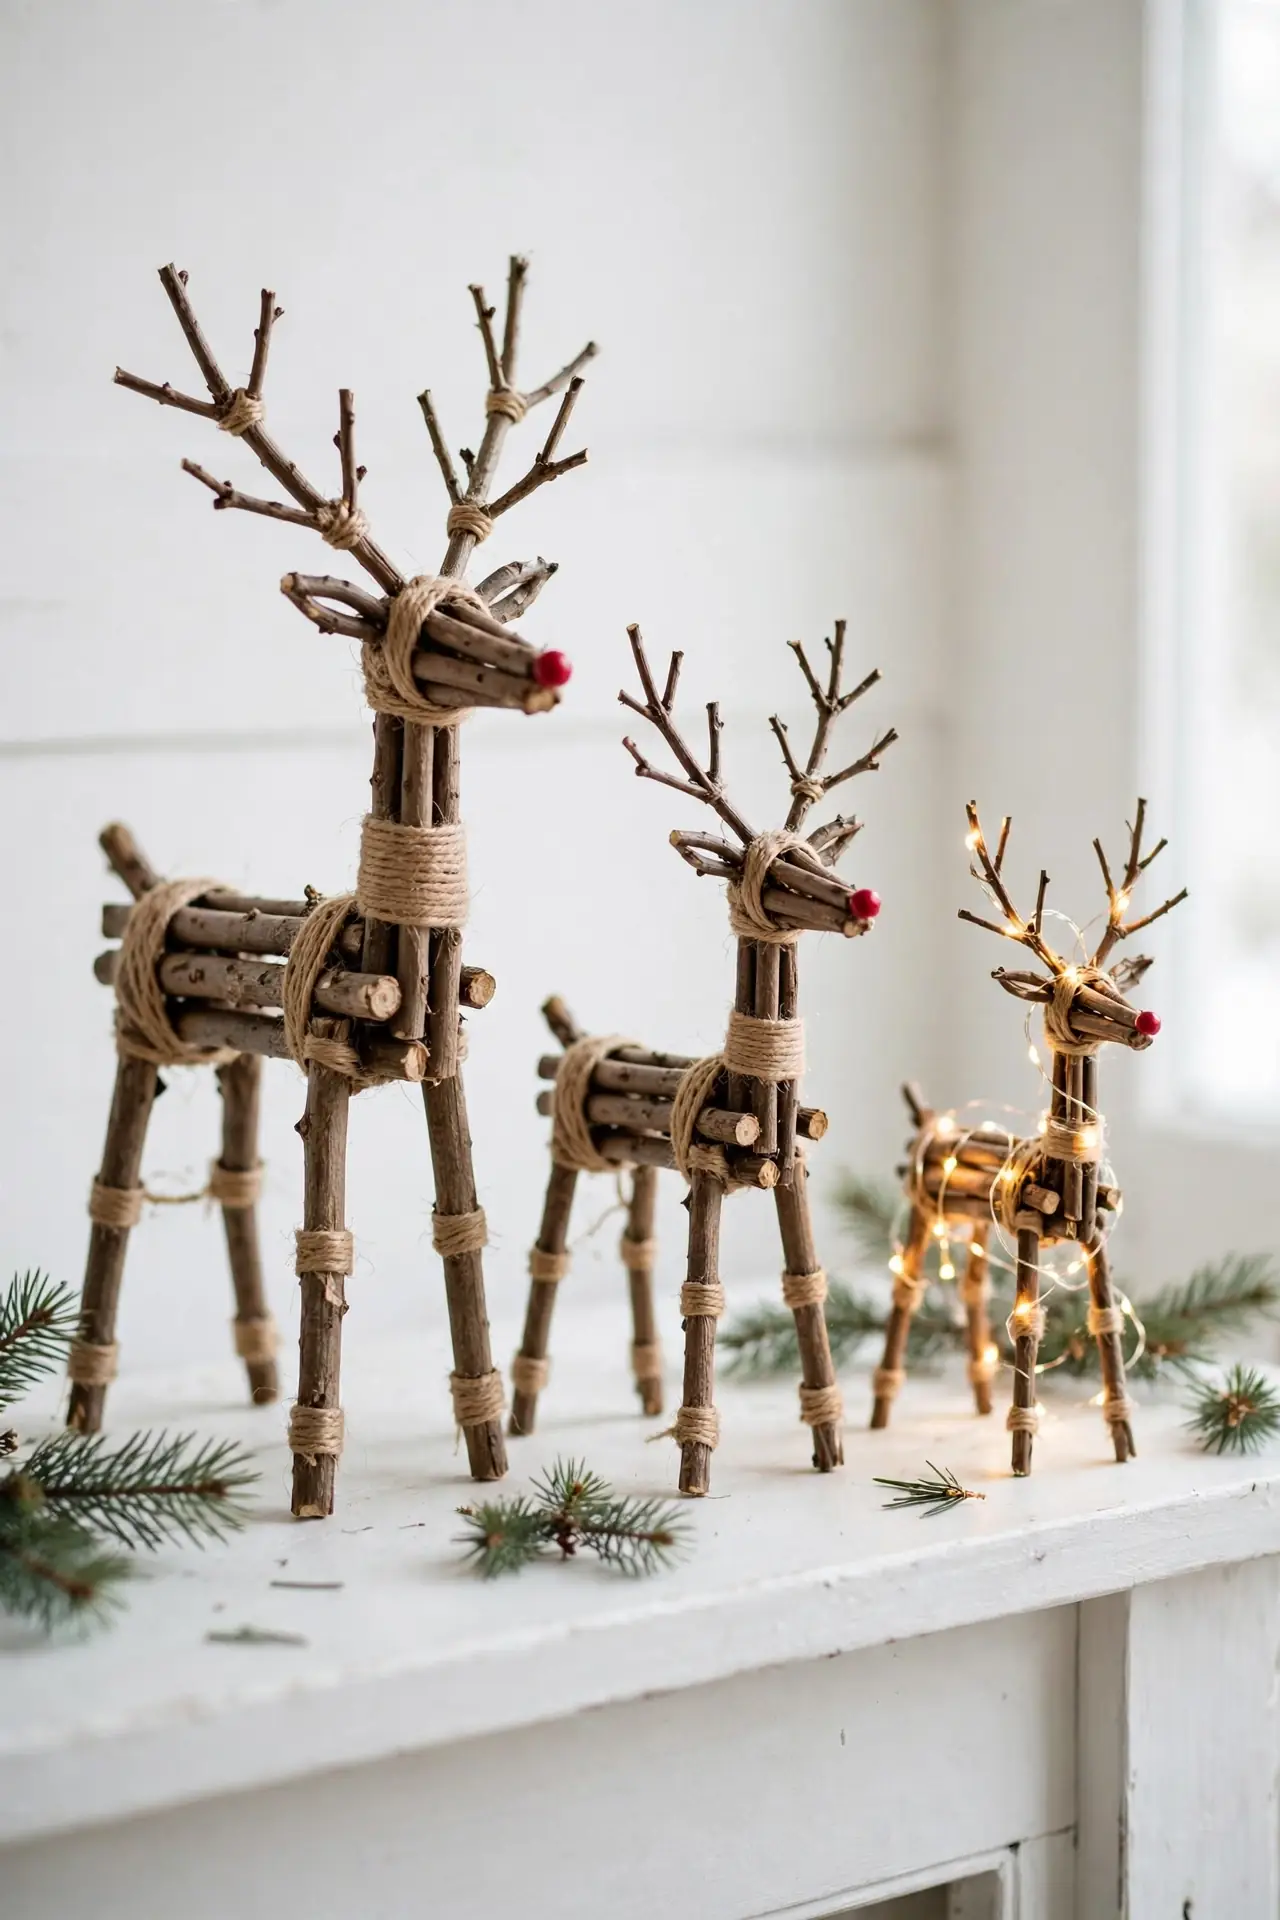
- Collect straight sticks about half an inch thick and cut them into body, leg, and antler lengths.
- Lash the pieces together with jute twine, wrapping each joint at least three times.
- Add a red wooden bead nose and two dark bead eyes with hot glue.
- Stand the reindeer in a pot of plaster or a heavy wooden base.
A family of three reindeer in different sizes makes a charming mantel scene. Wrap one with fairy lights for an evening glow, and leave the others plain for contrast. Seal outdoor versions with clear spray so rain does not loosen the twine. They cost nothing but a walk in the woods.
Macrame Tree Ornaments
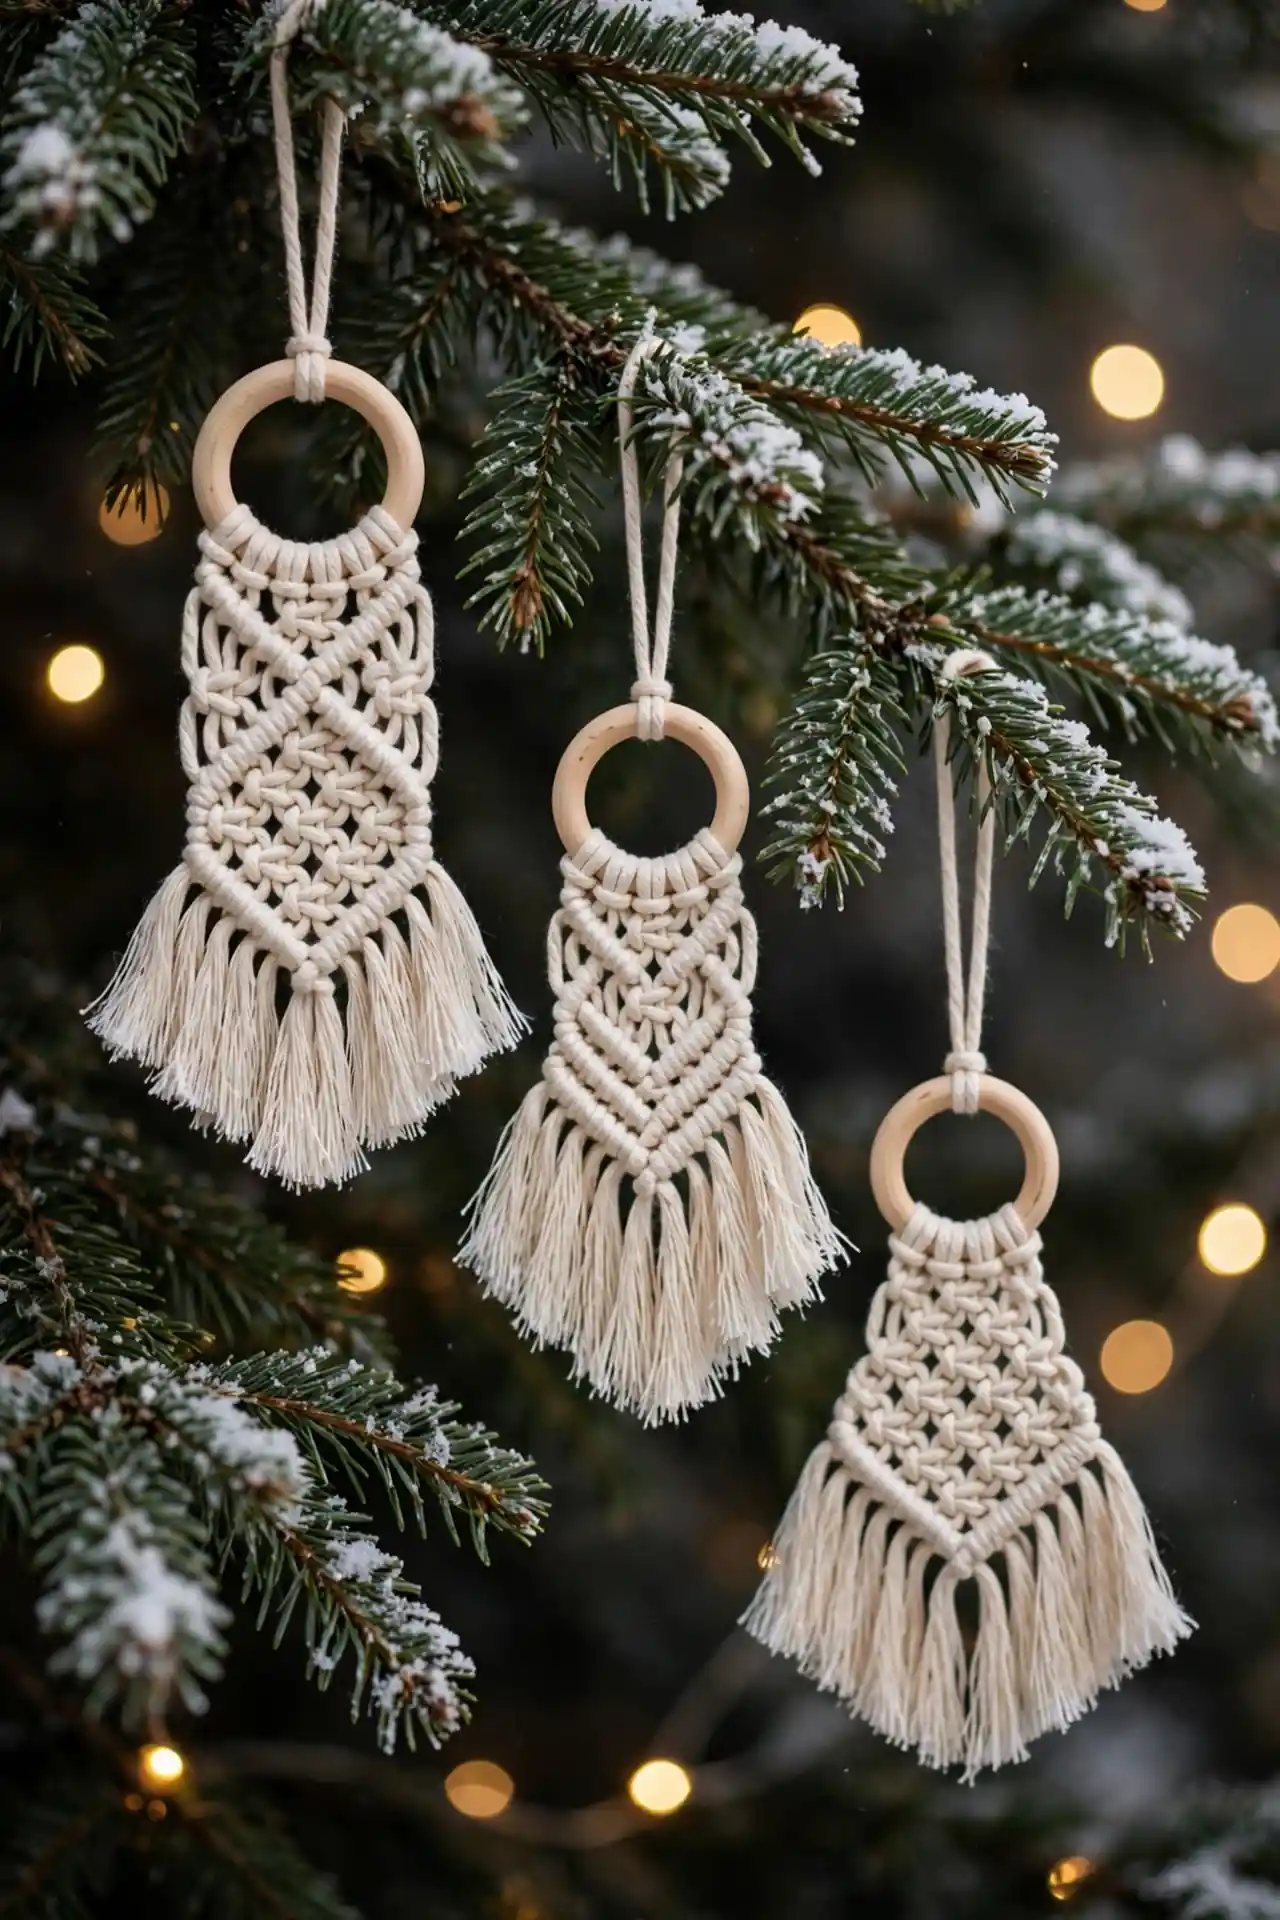
Quick Tip: Cut cotton cord into twelve-inch lengths and knot them onto a wooden ring with lark’s head knots. Work simple square knots downward to form the tree triangle, then trim the bottom into a soft fringe. Keep the tension even or the tree leans sideways.
Dip the fringe tips in diluted white paint for a snowy finish, or leave the cord natural for a boho look. Make a set of six in the same knot pattern for a cohesive tree. These ornaments weigh almost nothing and pack flat for storage. Once you learn the square knot, each ornament takes about twenty minutes.
Seed Paper Gift Tags
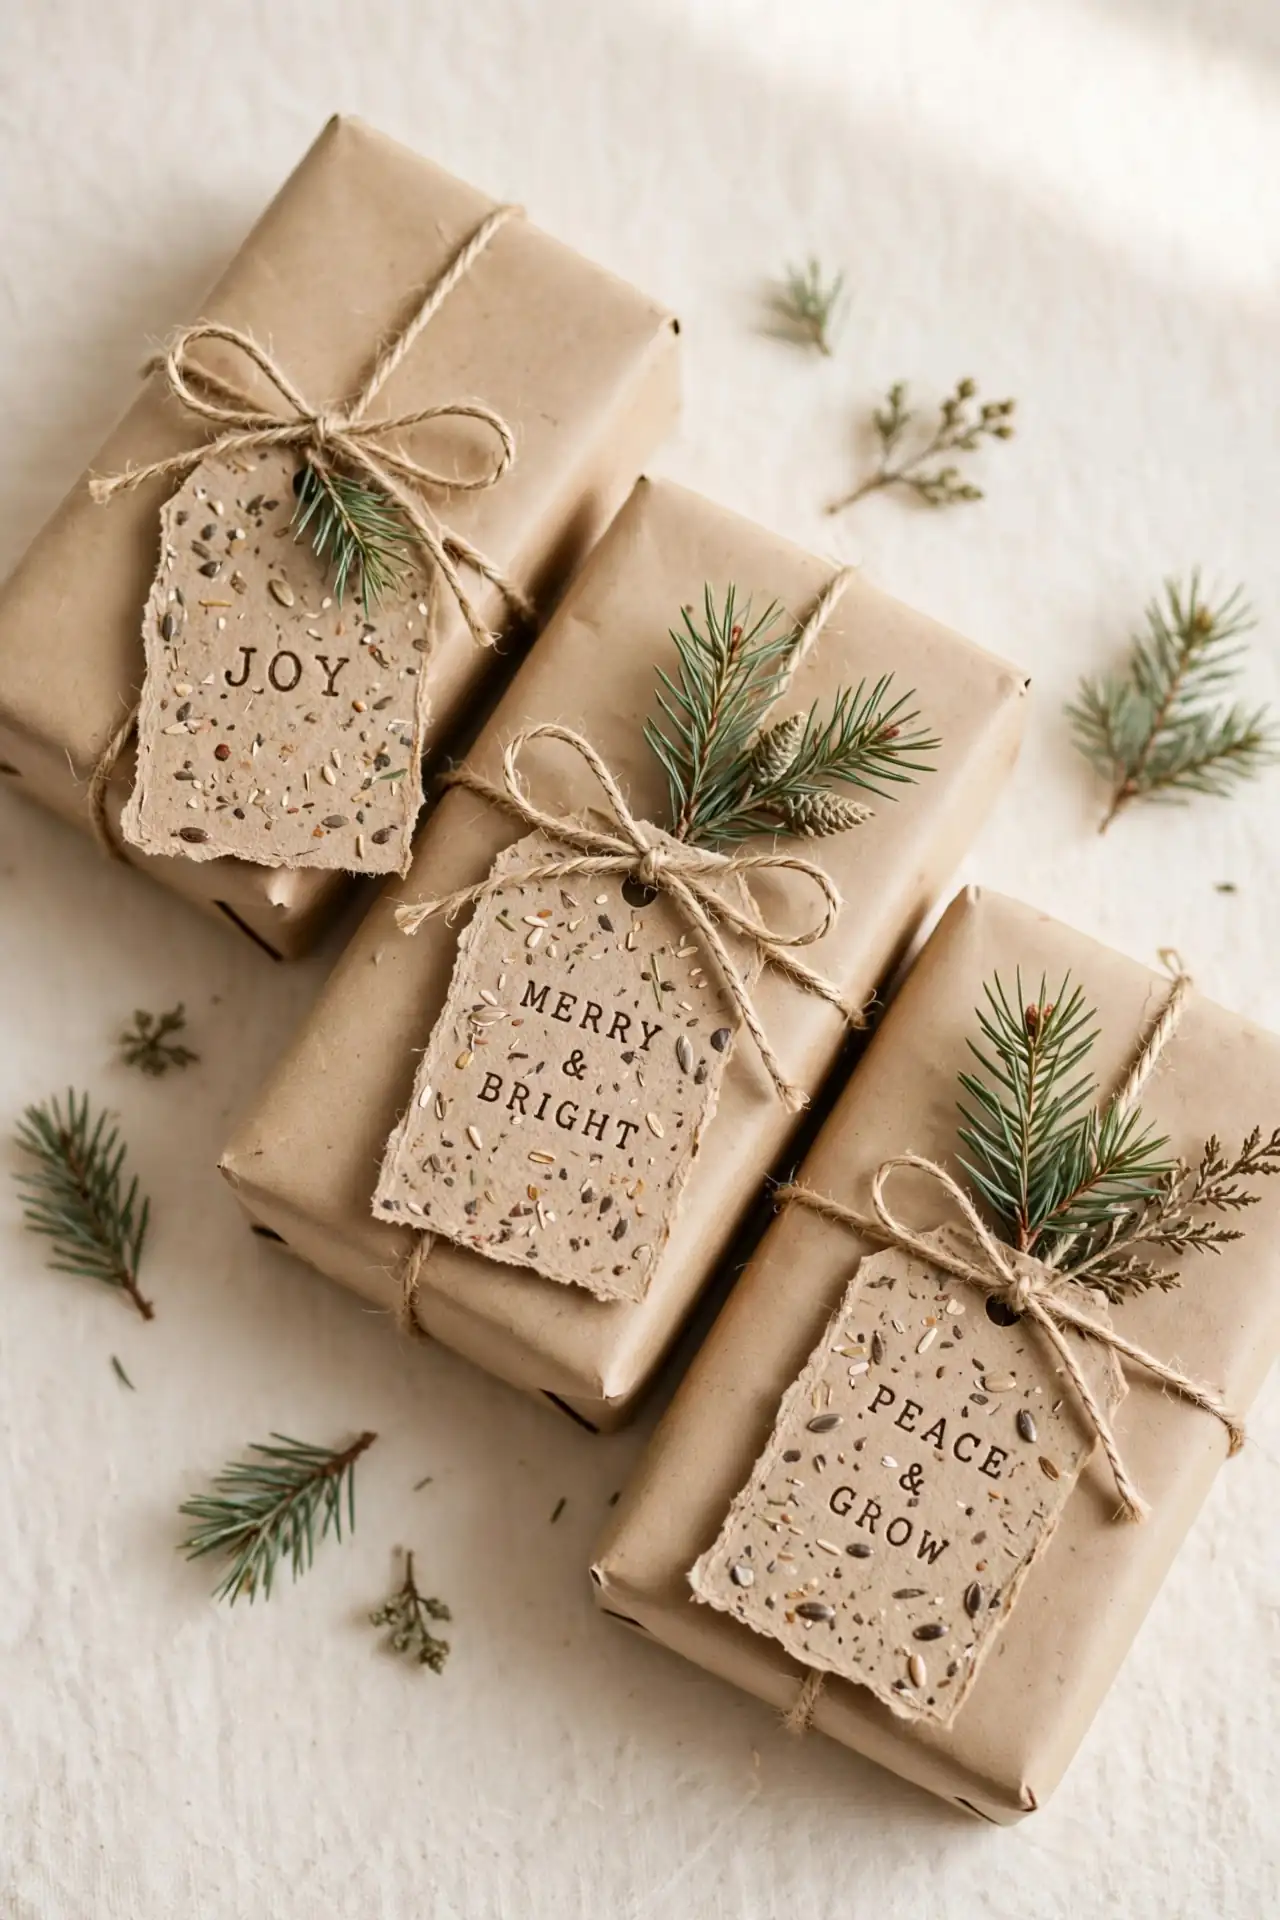
BEFORE: Gift tags from the store look identical on every package and head straight for the trash. The shiny coated ones cannot even be recycled, which feels wasteful every single year.
AFTER: Plantable seed paper tags grow wildflowers after the holidays end. Guests plant the whole tag in spring and think of your gift when the first blooms appear.
Cut seed paper into tag shapes, stamp each with a simple greeting, and thread with twine. The paper feels handmade and gives the gift a second life in the garden. For more seasonal projects, browse these fall crafts for adults and adapt the techniques with holiday colors. Every tag plants something beautiful.
Velvet Ribbon Wreaths
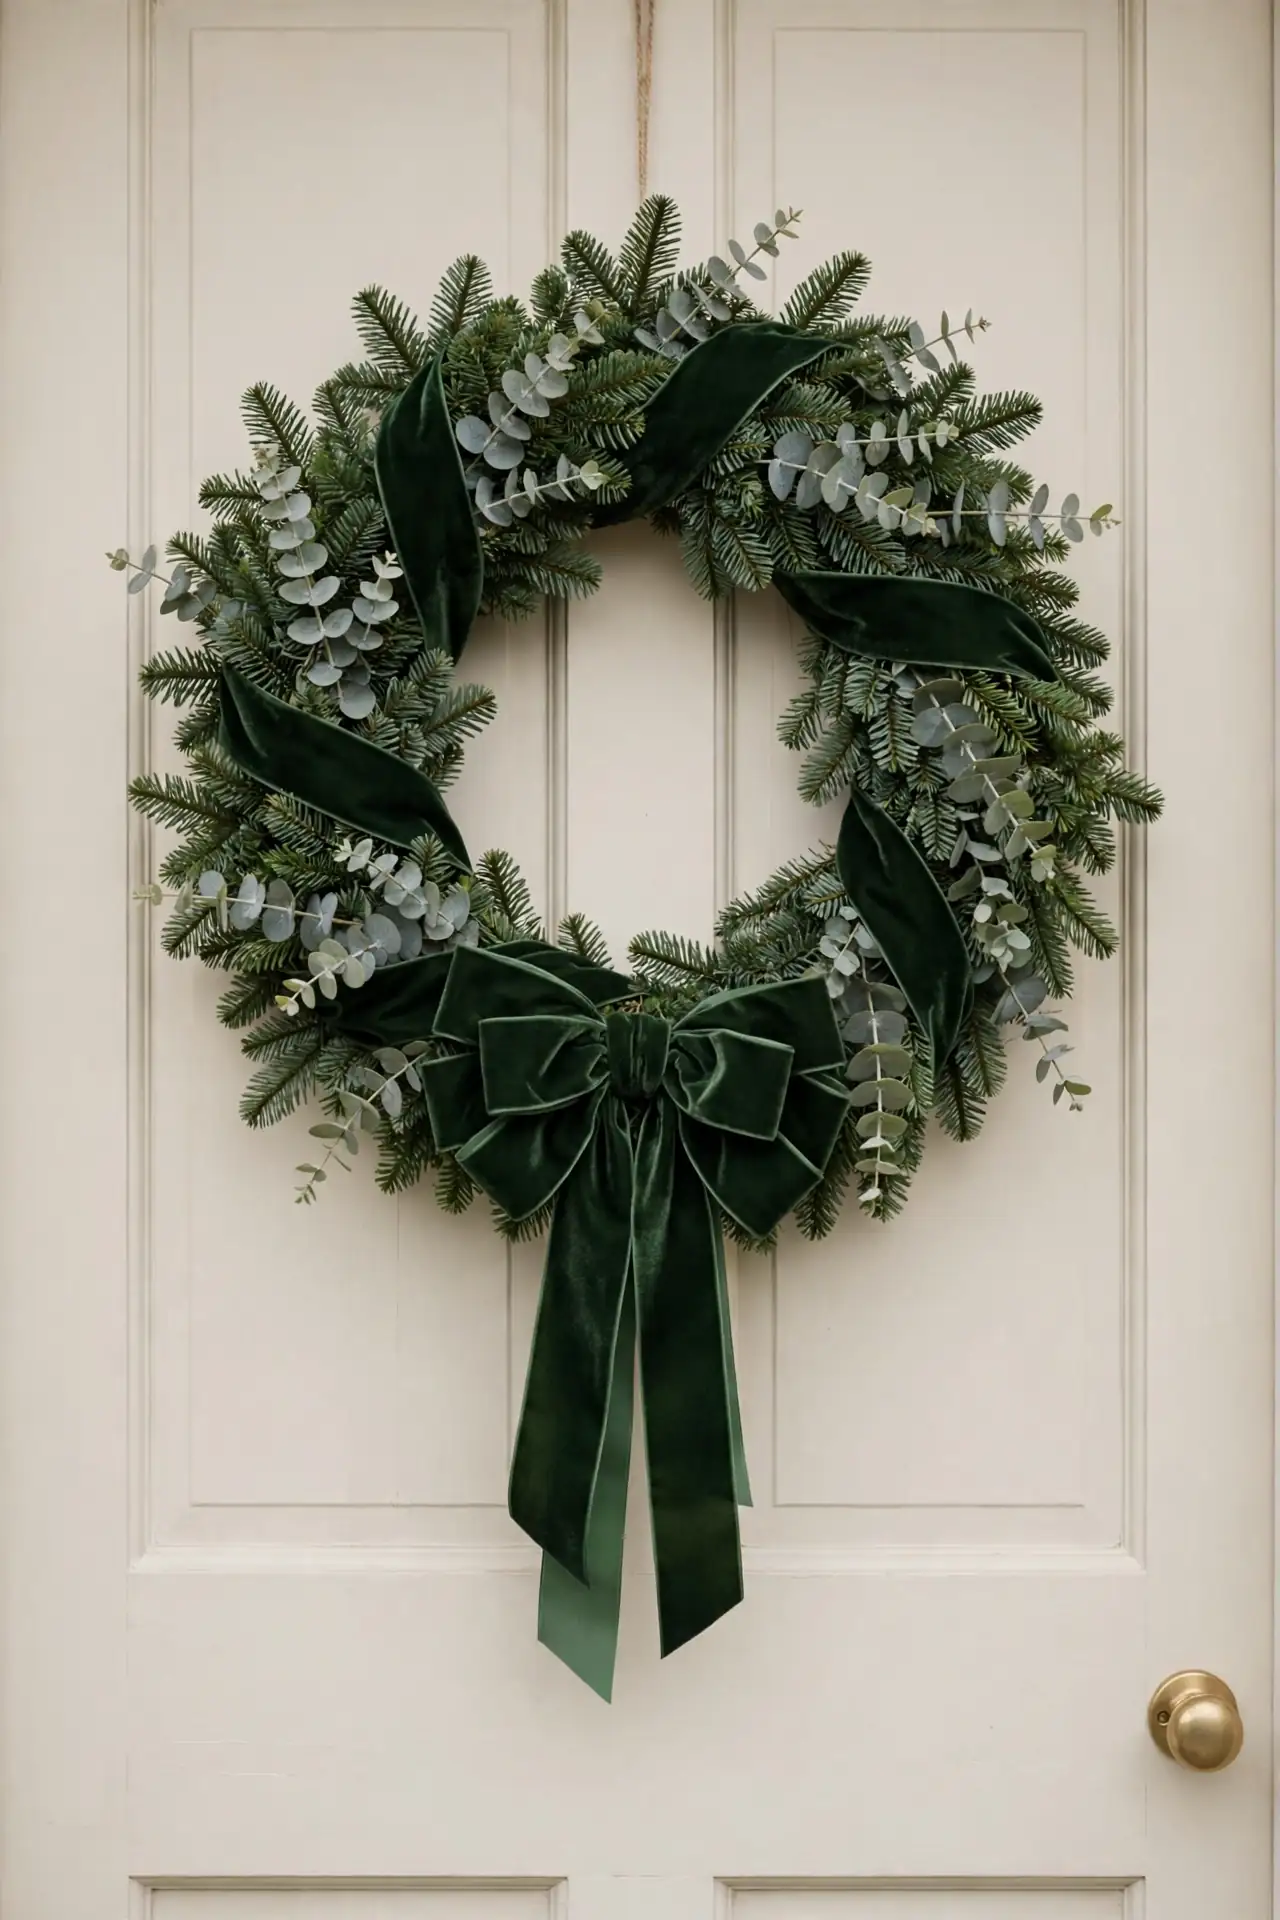
- Wrap a foam wreath form tightly with wide velvet ribbon, overlapping each round.
- Pin the ribbon end with floral pins, then cover the pins with a layered bow.
- Add a sprig of faux eucalyptus behind the bow for a natural accent.
- Hang the wreath with a matching velvet loop from a hook or nail.
Velvet reads luxurious in deep green, burgundy, or midnight blue against a light door. The ribbon hides the foam completely, so no one guesses the base cost almost nothing. Make a smaller matching wreath for an interior door. I have noticed guests always touch velvet wreaths to check if they are real.
Painted Pine Vases
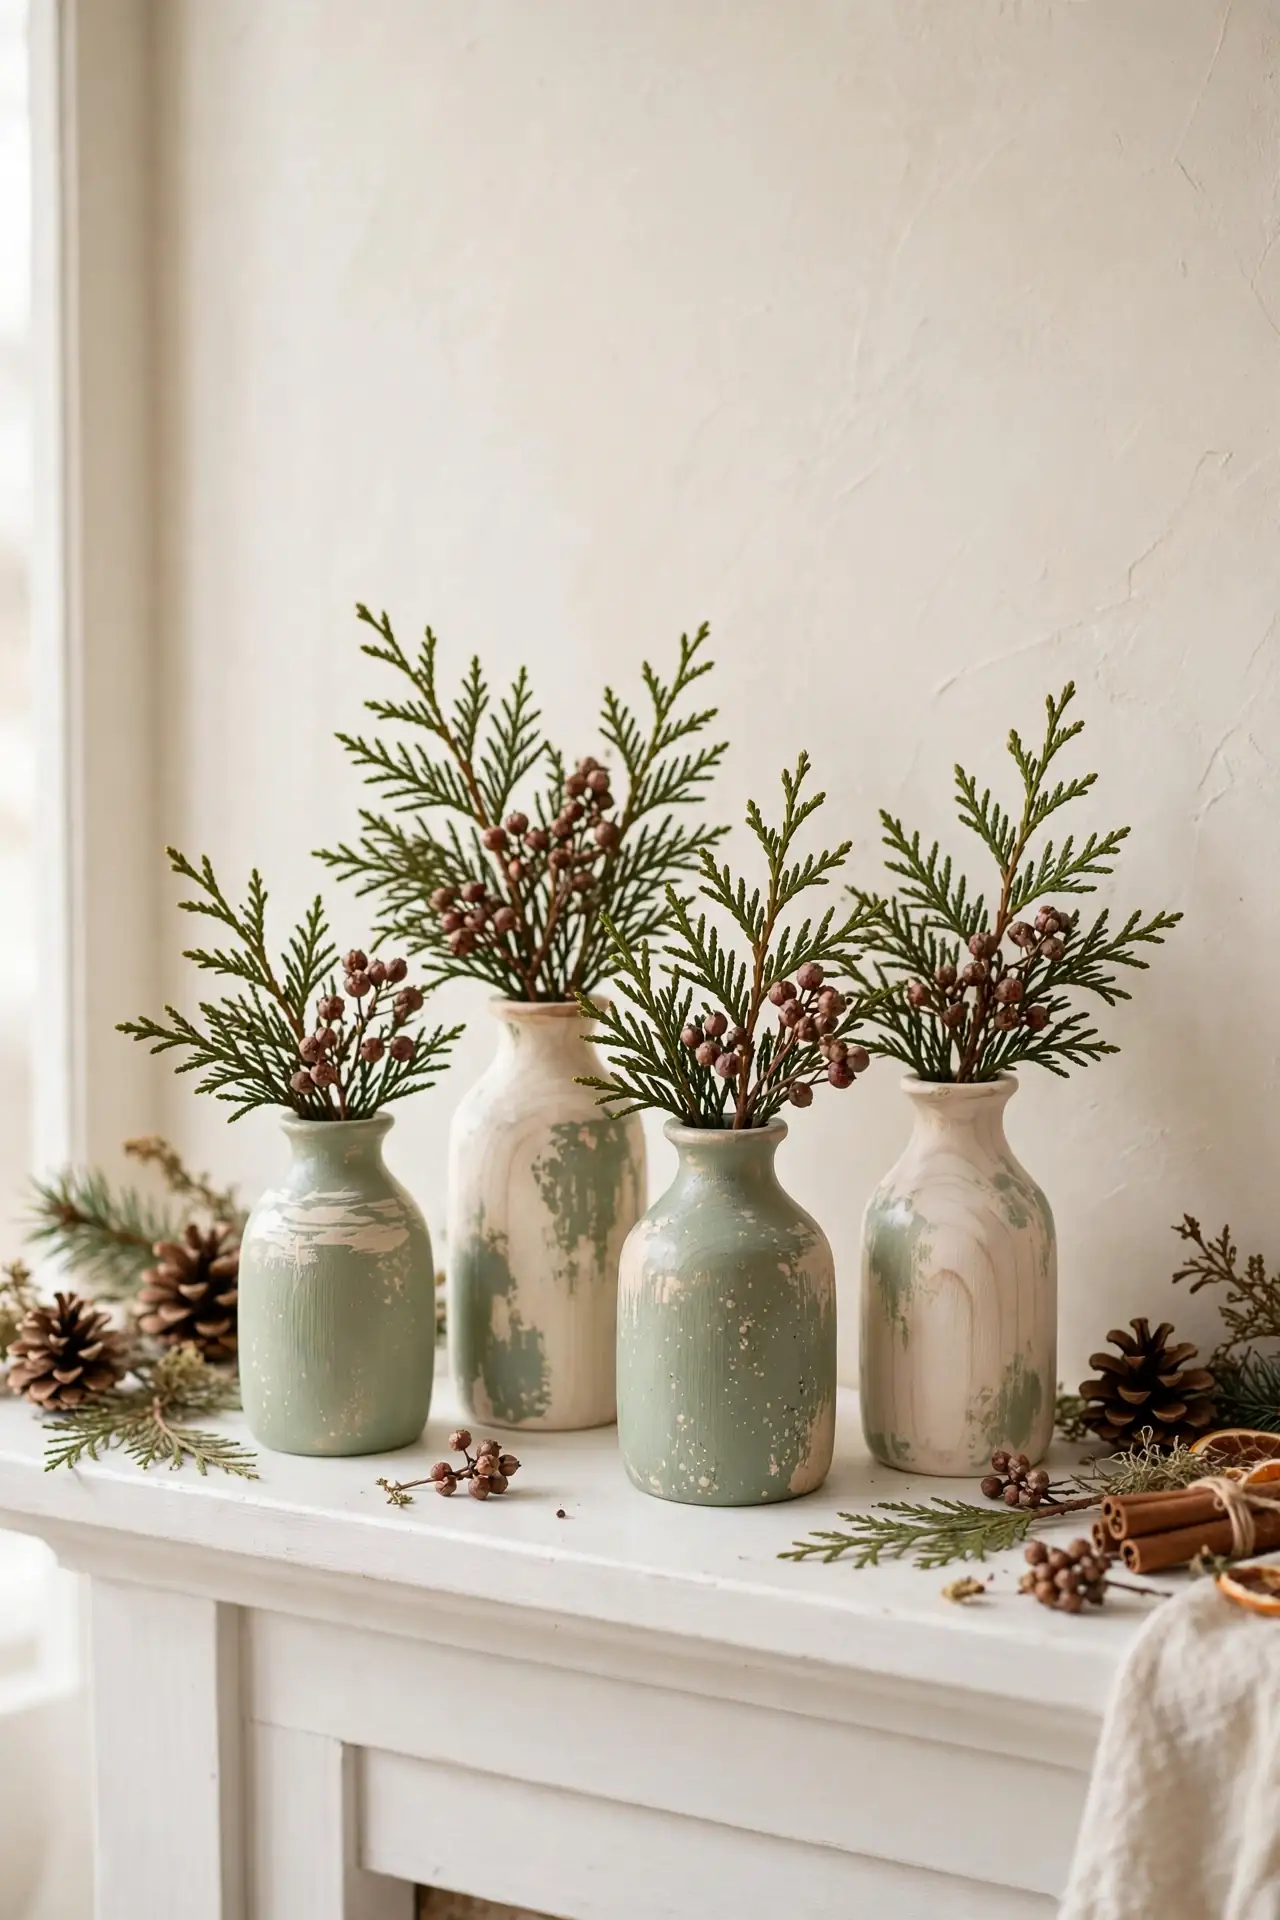
| Option | Milk Paint Pine | Chalk Paint Pine |
|---|---|---|
| Finish look | soft matte, vintage | velvety matte, modern |
| Coats needed | two thin coats | one to two coats |
| Dry time | 30 minutes each | one hour each |
| Best color | sage or cream | charcoal or white |
Sand small pine vases or turned wood cups lightly, then brush on your chosen paint in thin even strokes. Distress the edges with fine sandpaper for a vintage feel, or keep them crisp for modern shelves. Fill the finished vases with cedar sprigs, dried berries, or a single amaryllis stem. They work on the mantel, the entry table, or as a handmade gift.
Cookie Cutter Candleholders
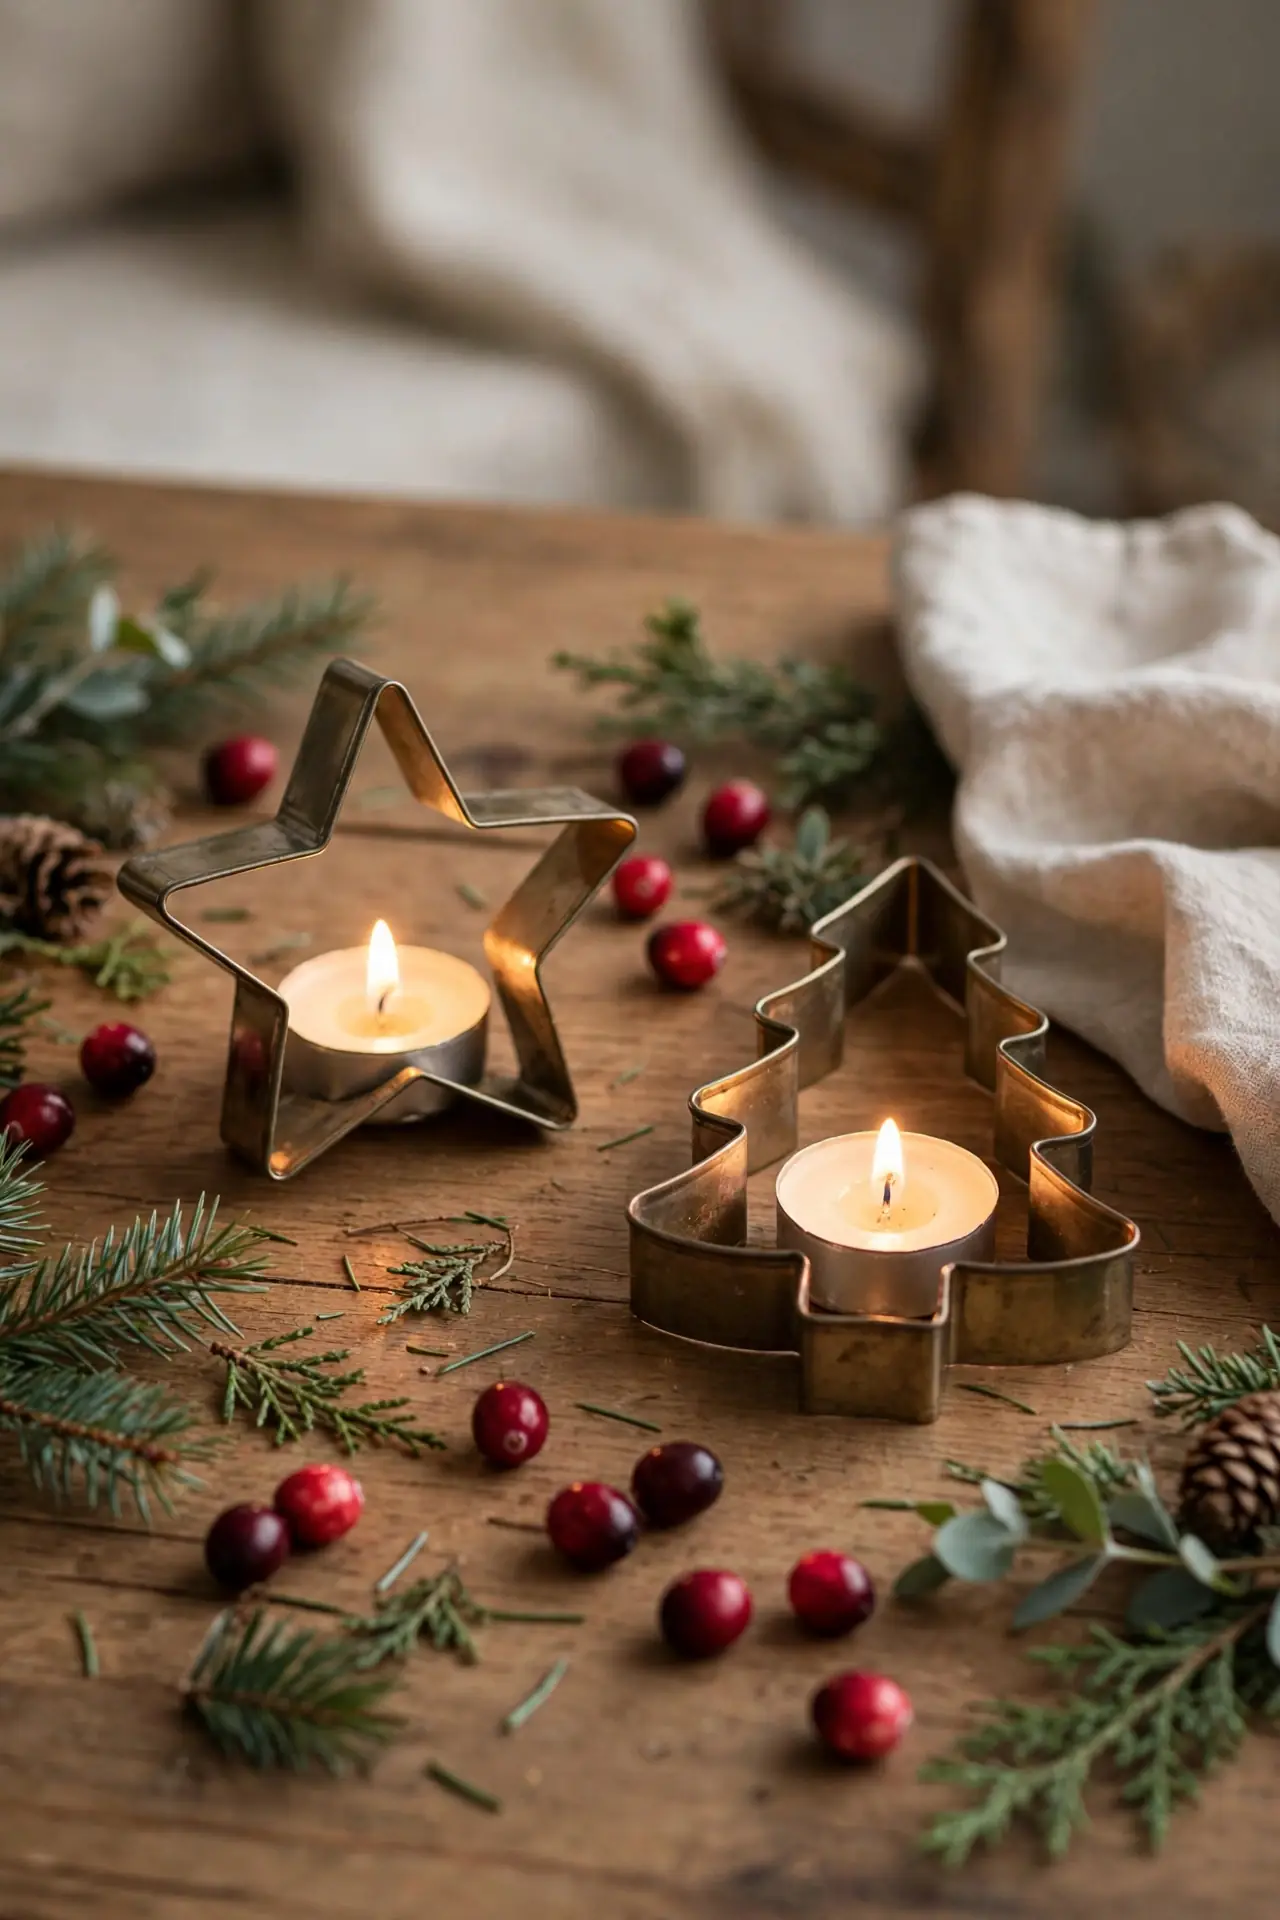
DO
- Choose metal cookie cutters with simple shapes that stand steady on their own.
- Set a tea light inside each cutter on a heat-safe tray or tile.
- Surround the cutters with cranberries and pine sprigs for color.
DON’T
- Do not use plastic cutters near any open flame.
- Do not leave the candles burning when you leave the room.
- Do not let the flame touch the cutter sides; trim the wick short.
Stars, trees, and gingerbread men all throw playful shadows on the table when lit. Line five or six down the center of the dining table for a centerpiece that costs almost nothing. Blow them out before dessert so the shapes stay safe and ready for next year.
Embroidered Hoop Art
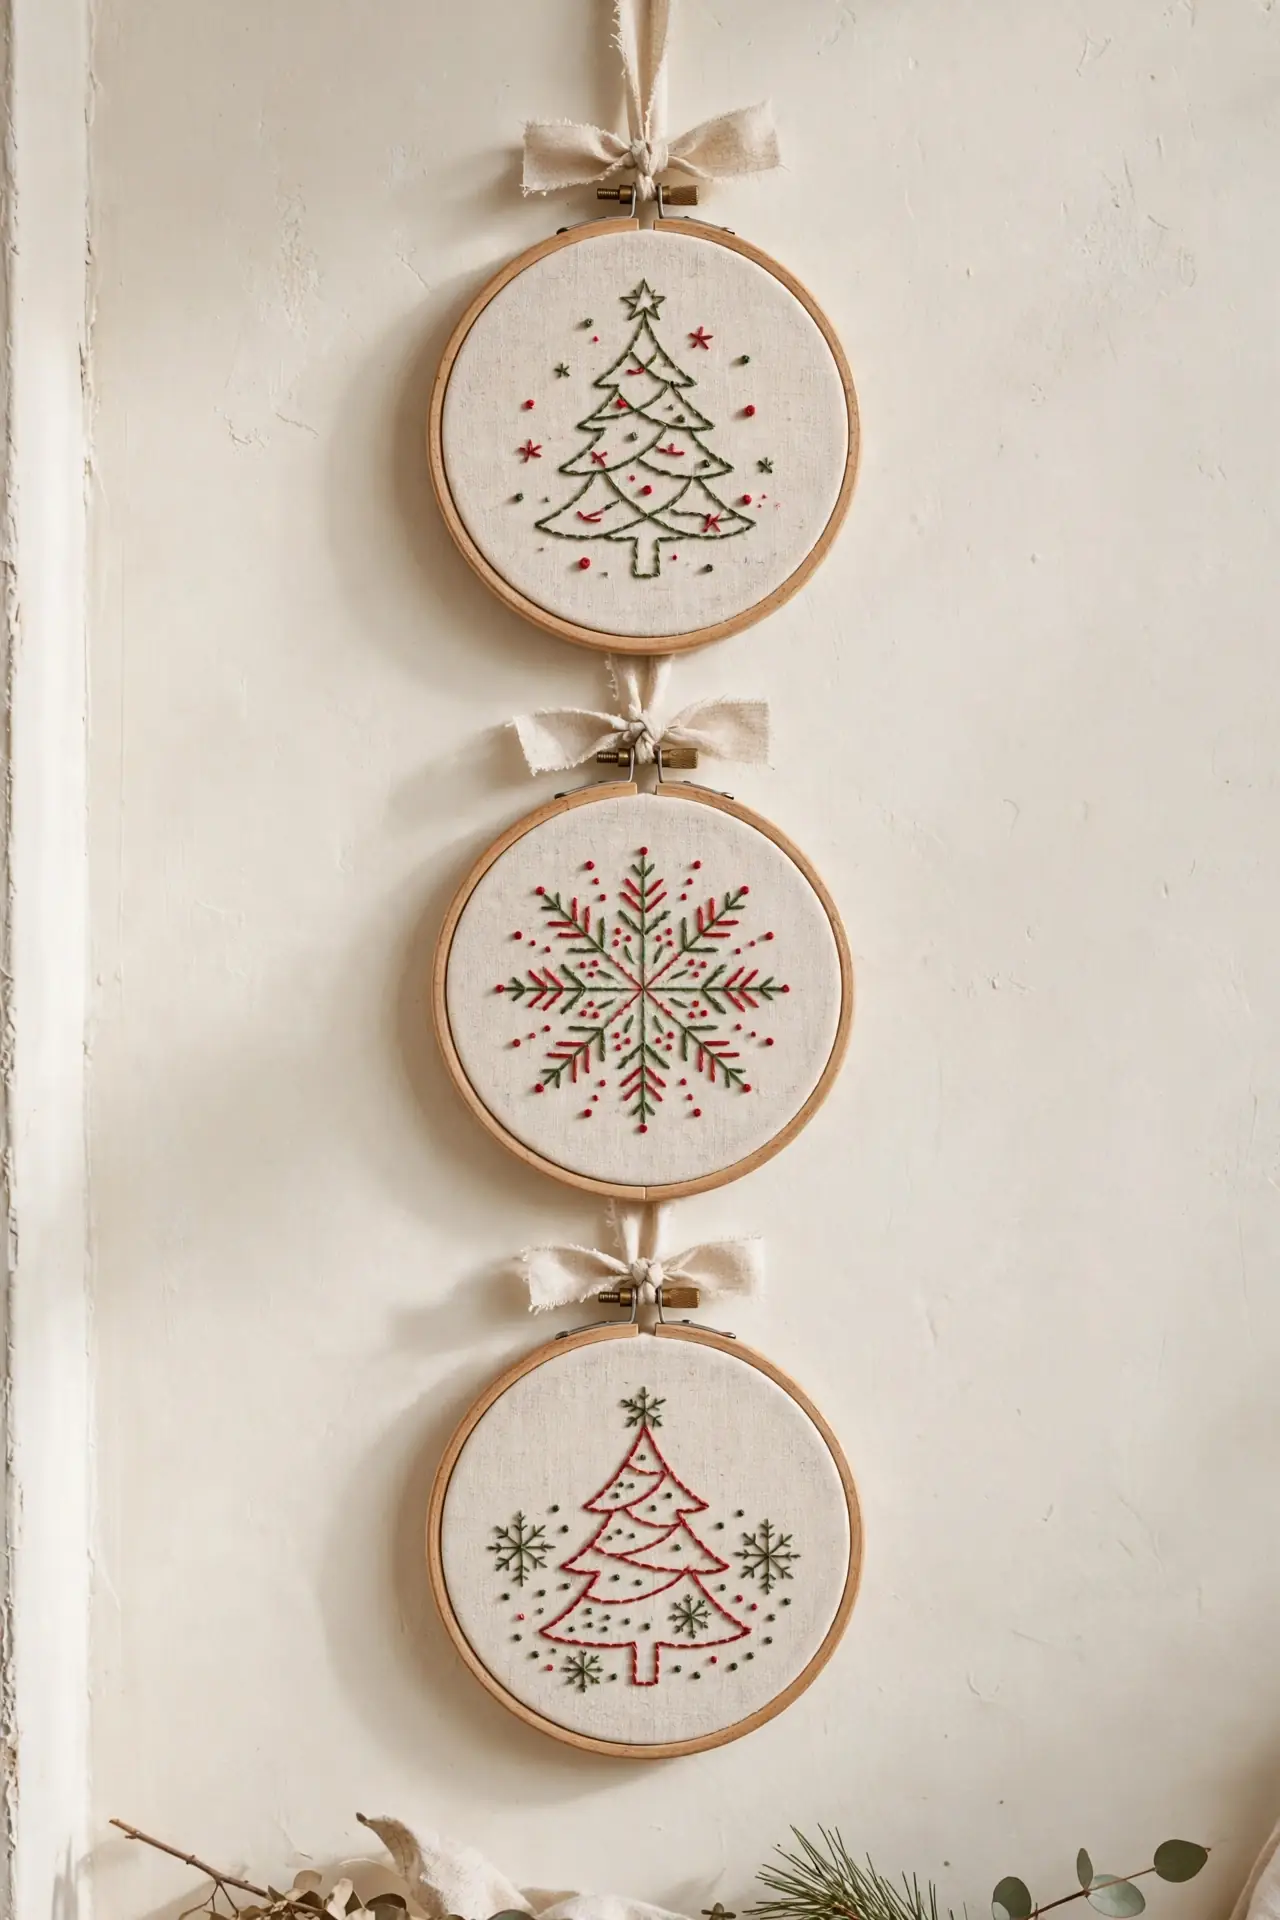
Cost: $5 to $12 per hoop including thread.
Time: Two to three evenings per design.
Skill Level: Beginner; basic stitches are enough.
Best For: Gallery walls, gifts, and tree ornaments.
Result: Heirloom-style art with a handmade feel.
Stretch linen in a wooden hoop and stitch simple holiday motifs like trees, stars, or snowflakes with red and green thread. French knots make perfect berries, and backstitch outlines keep shapes crisp. Leave the hoop as the frame and hang it with a ribbon loop. A cluster of three hoops in different sizes fills an empty wall fast. These make thoughtful handmade gifts that people keep for years.
Conclusion
Handmade holidays stay with you longer than bought ones. Every ornament, wreath, and candle you finish this year becomes part of your family’s story, pulled out and admired each December. Start with the craft that caught your eye first, then work through the list at your own pace. If these christmas craft ideas for adults inspired you, save this post to your Pinterest board so it waits for you next season. Share your finished pieces with friends, gift a few, and keep making. Your home deserves decor with your fingerprints on it.


3 Comments