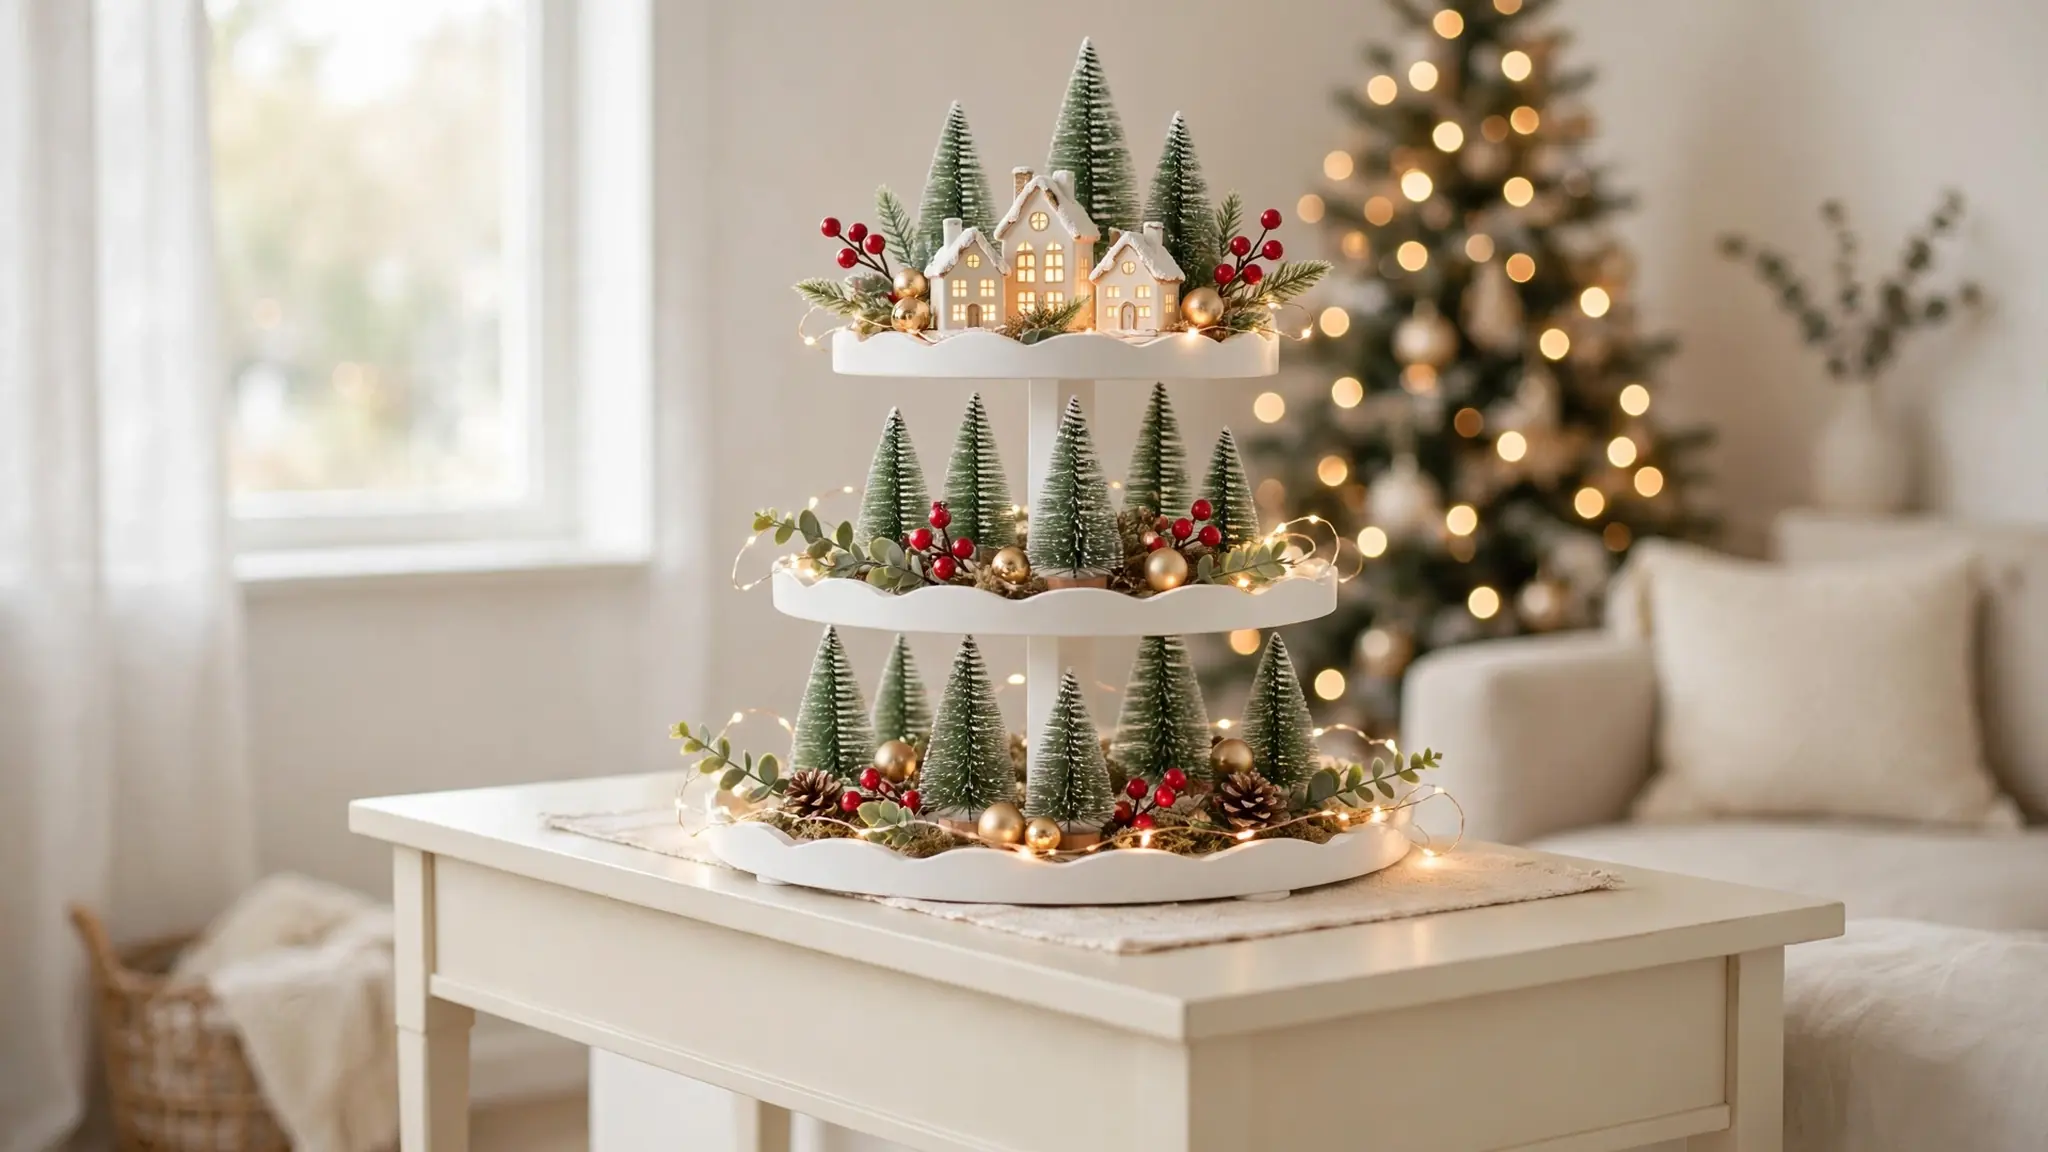
23 Christmas Tiered Tray Ideas for a Magical Display
A two-tiered tray might be the hardest-working piece in your holiday home, and these christmas tiered tray ideas prove it. I’ve noticed the best trays tell a little story: a glowing village, a cocoa bar, or a forest of mini trees. The magic is in the layers, since each tier gets its own moment while the whole stack reads as one display. You don’t need expensive pieces or a big budget. Most of these ideas use bits you already own, plus a few thrifted treasures. This guide walks through 23 ideas, from snowy pinecones to twinkling lights, each one simple enough for a cozy weekend project. Pick your favorite and start styling.
Tiered trays shine in every room, and fans of our christmas bedroom ideas for kids know that small displays make the biggest impact. In my experience, starting with a color palette keeps the whole tray pulled together. Below are 23 ideas to mix, match, and make your own.
Winter Village Scene
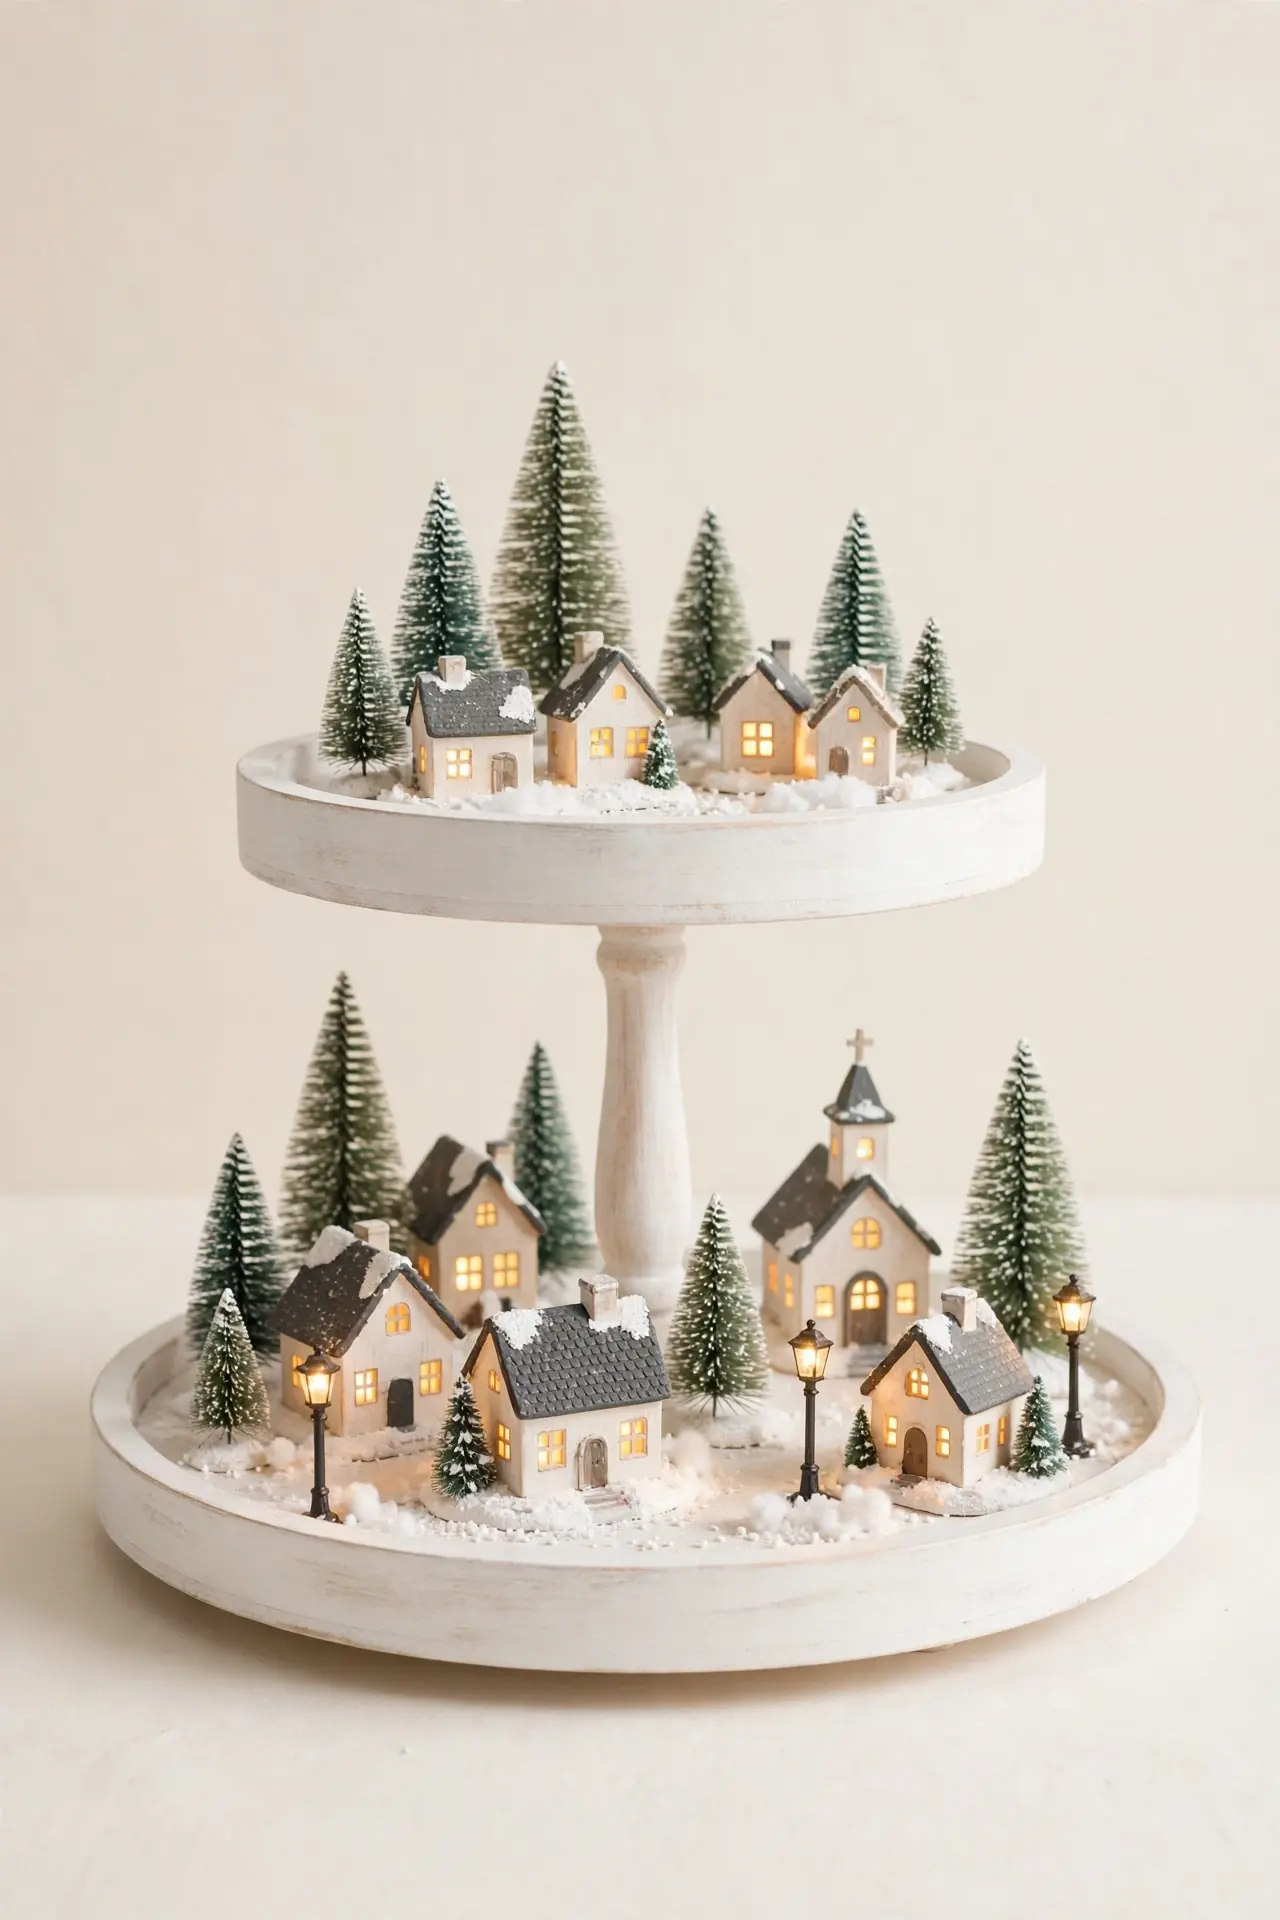
A little lit village turns a plain tray into the heart of your holiday table. Start with the biggest tier and arrange tiny houses, bottle-brush trees, and a pinch of faux snow. Battery tealights tucked behind the houses make windows glow after dark. Keep colors soft: whites, warm golds, and pale greens.
Let the smaller tiers hold the details: tiny street lamps, miniature fences, and a few cotton-ball snowdrifts. Leave breathing room between pieces so the village reads cozy, not crowded. In my experience, grouping houses in odd numbers looks most natural. Once lit, this tray draws every eye in the room.
Cocoa Bar Setup
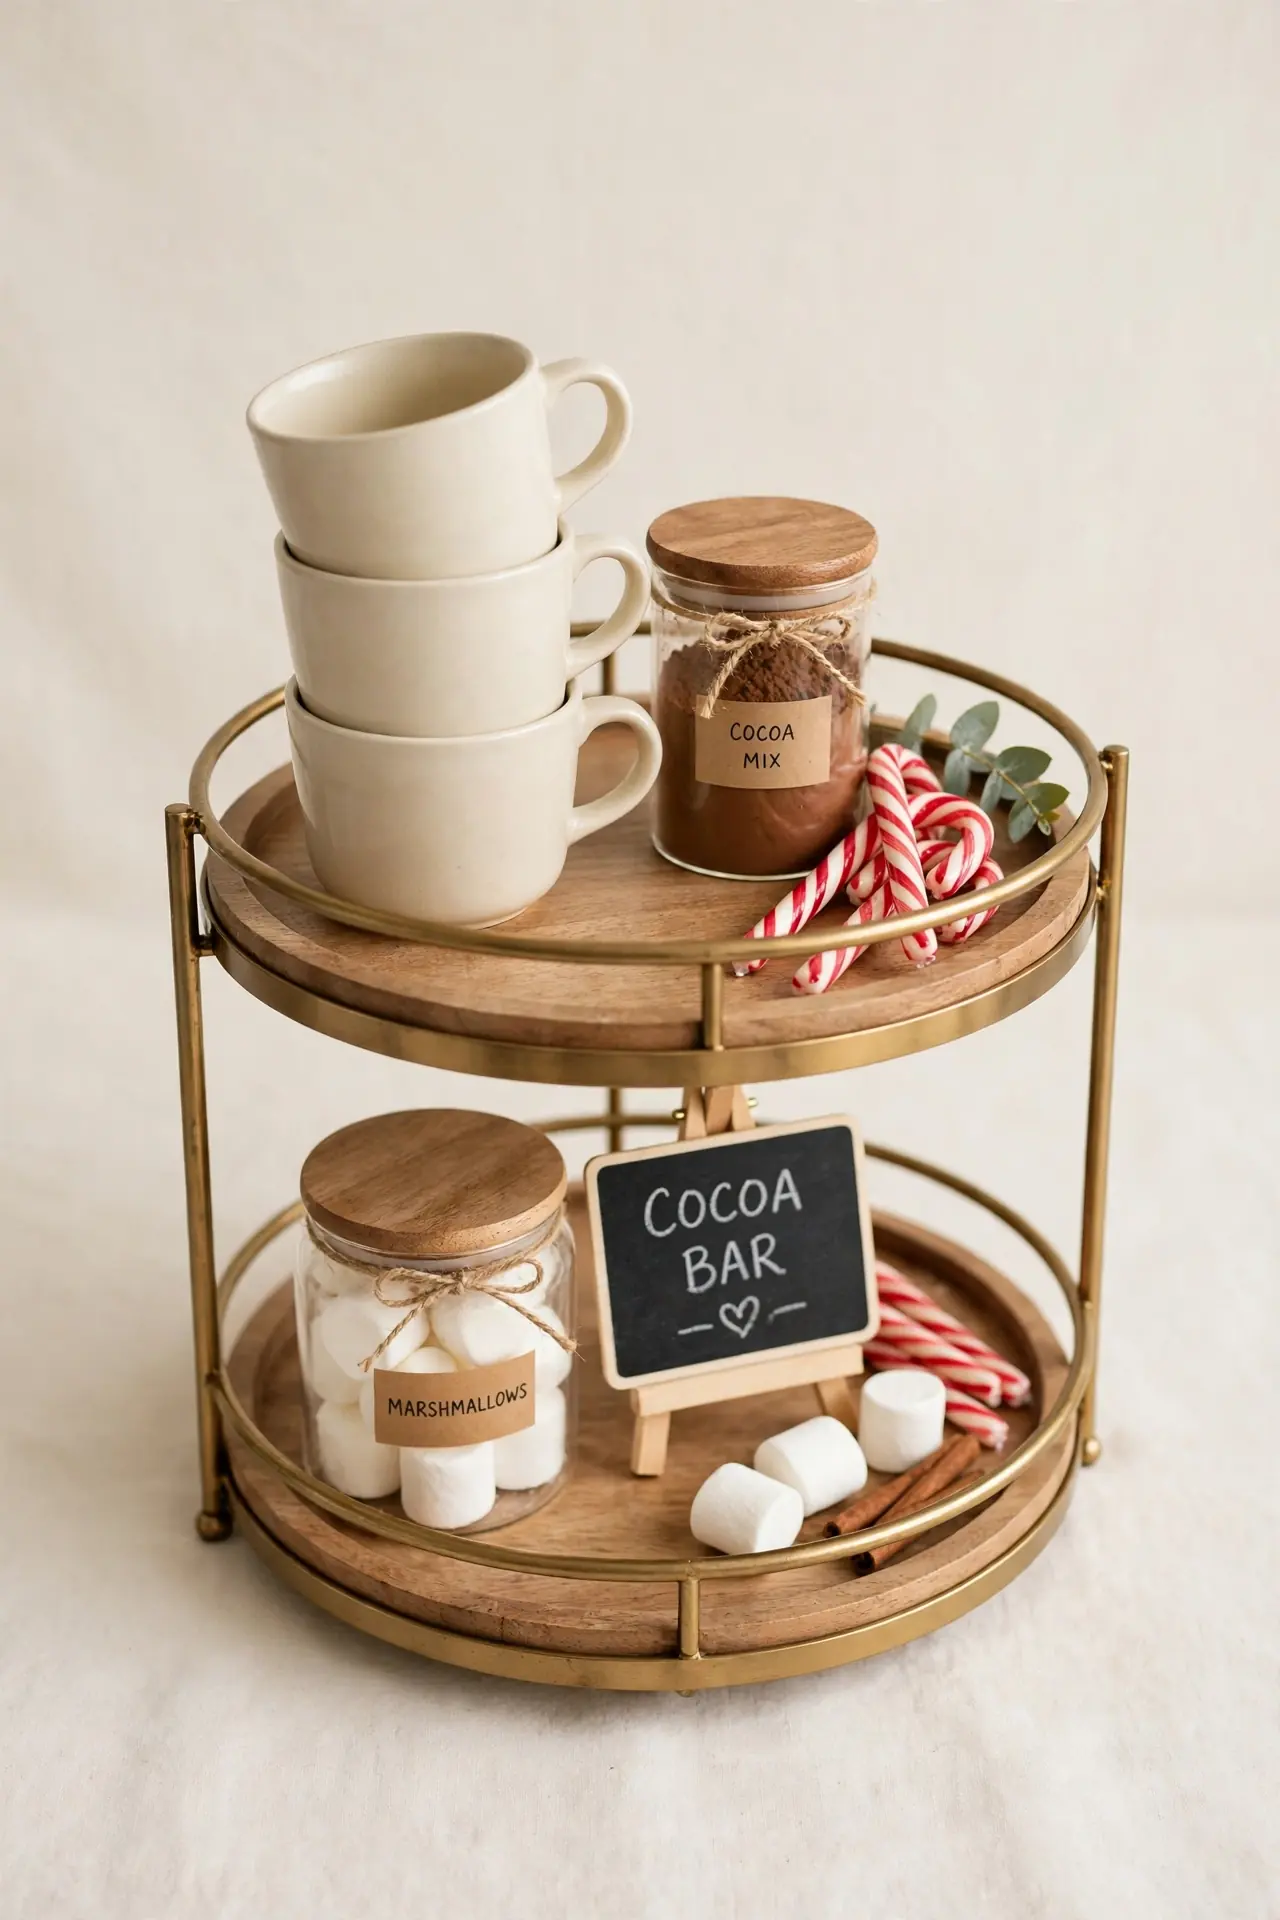
- Place two stacked mugs on the top tier with jars of cocoa mix, marshmallows, and candy canes beside them.
- Add a tiny spoon and a small pitcher on the lower tier for milk or whipped cream.
- Tuck in a few wrapped chocolates and a mini candy cane bundle for color.
- Finish with a small chalkboard sign that reads hot cocoa bar for charm.
Set the tray where guests gather, like the kitchen island or entry console. Keep marshmallows in a covered jar so they stay fresh all week. In my experience, a cocoa bar tray gets more use than any other holiday display. Swap in peppermint sticks after Christmas for a winter look.
Red Berry Layers
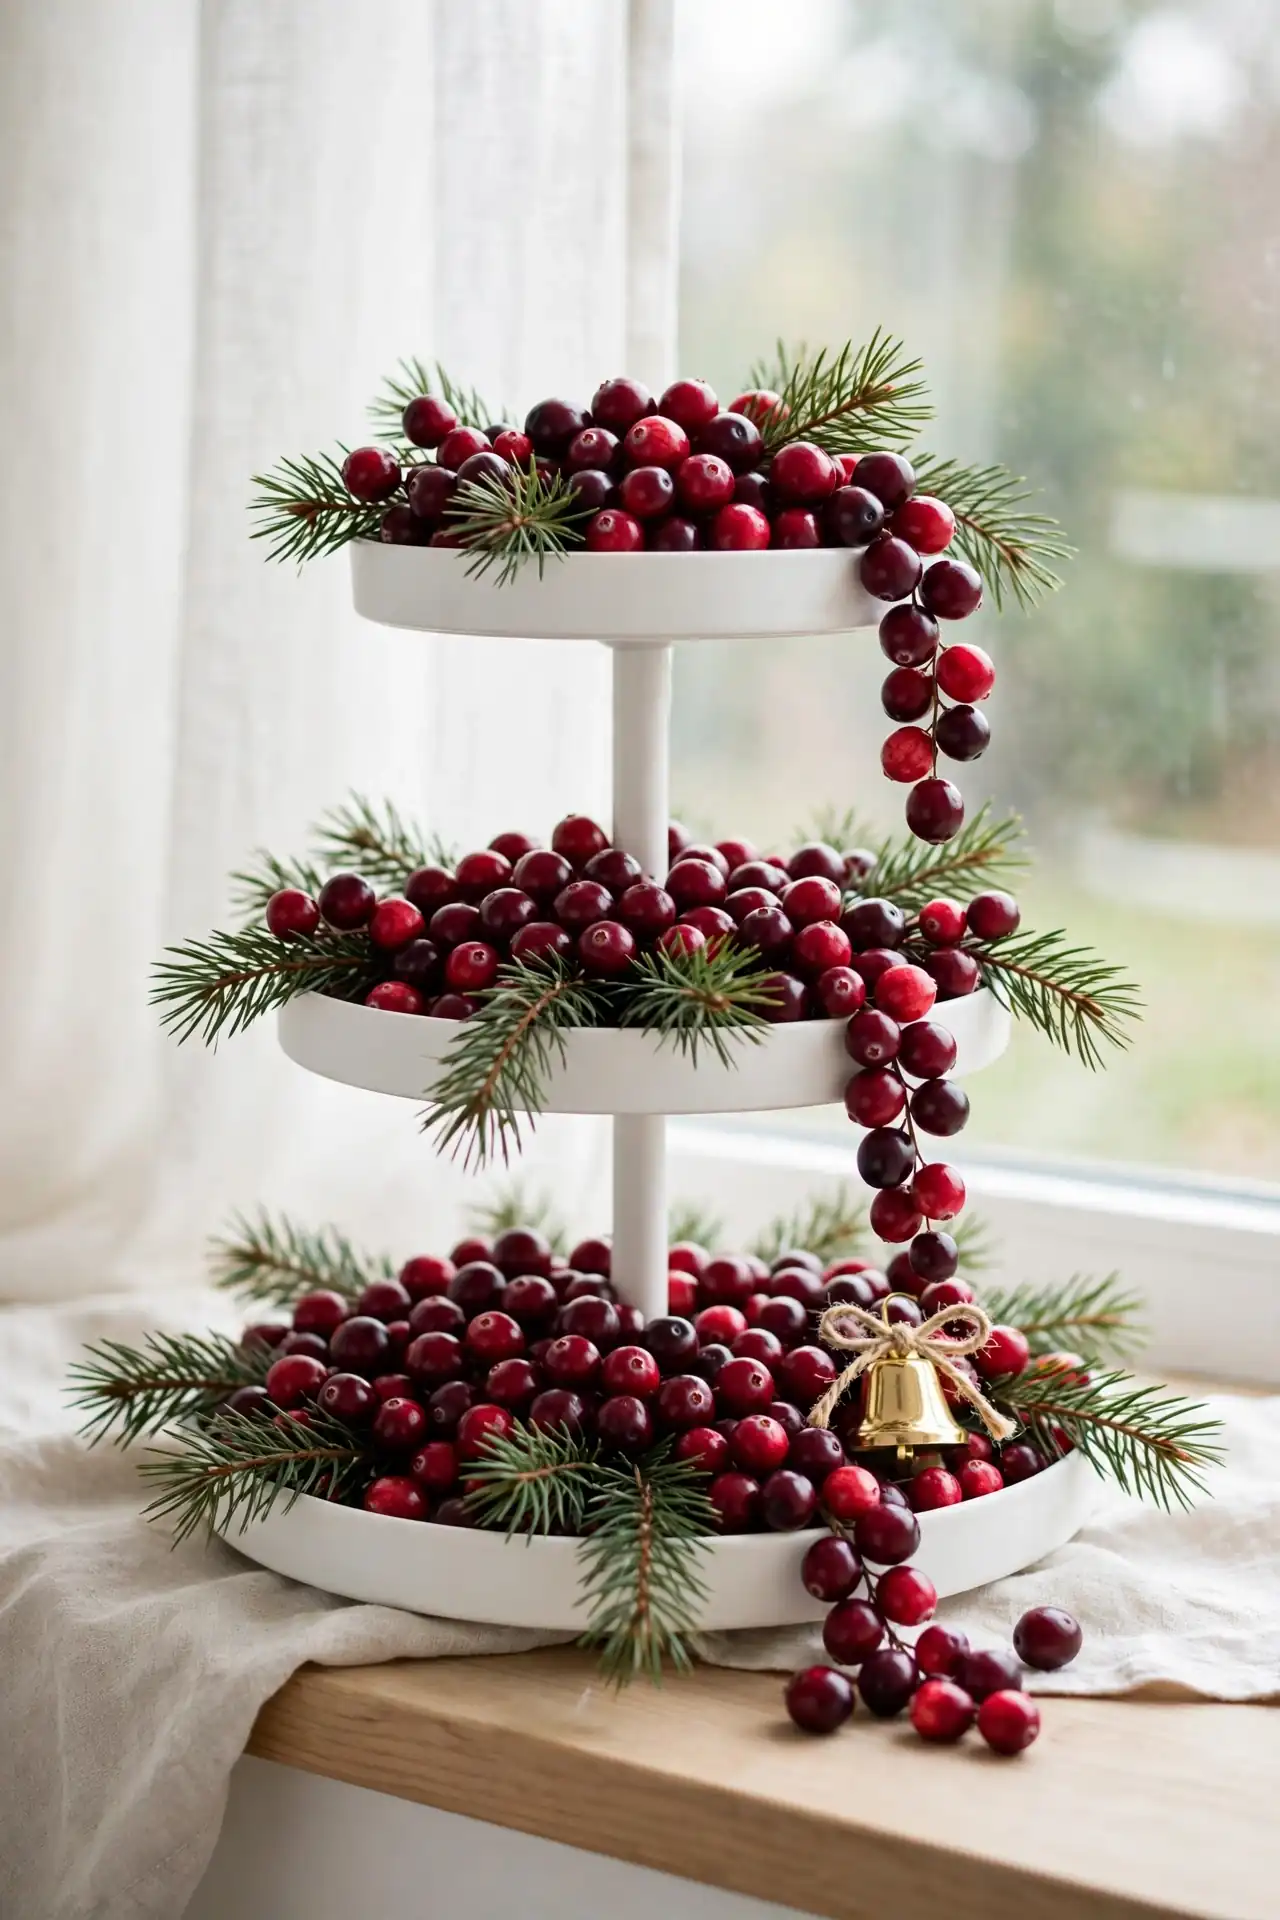
Quick Tip: Start with deep crimson faux berries and layer them thick on every tier so no bare spots show. Mix a few pine sprigs between the berries for fresh green contrast. Let some strands drape over the edges for a natural, overflowing look that feels gathered, not arranged. Real berries dry out fast, so faux ones keep this look fresh from Thanksgiving to New Year.
Red berries against a white or natural wood tray create instant holiday drama. I’ve noticed this look photographs beautifully against a plain wall. Add one gold accent, like a small bell, to keep the red from feeling flat. Keep the tray away from direct sun so the berries stay vivid.
Vintage Ornament Trio
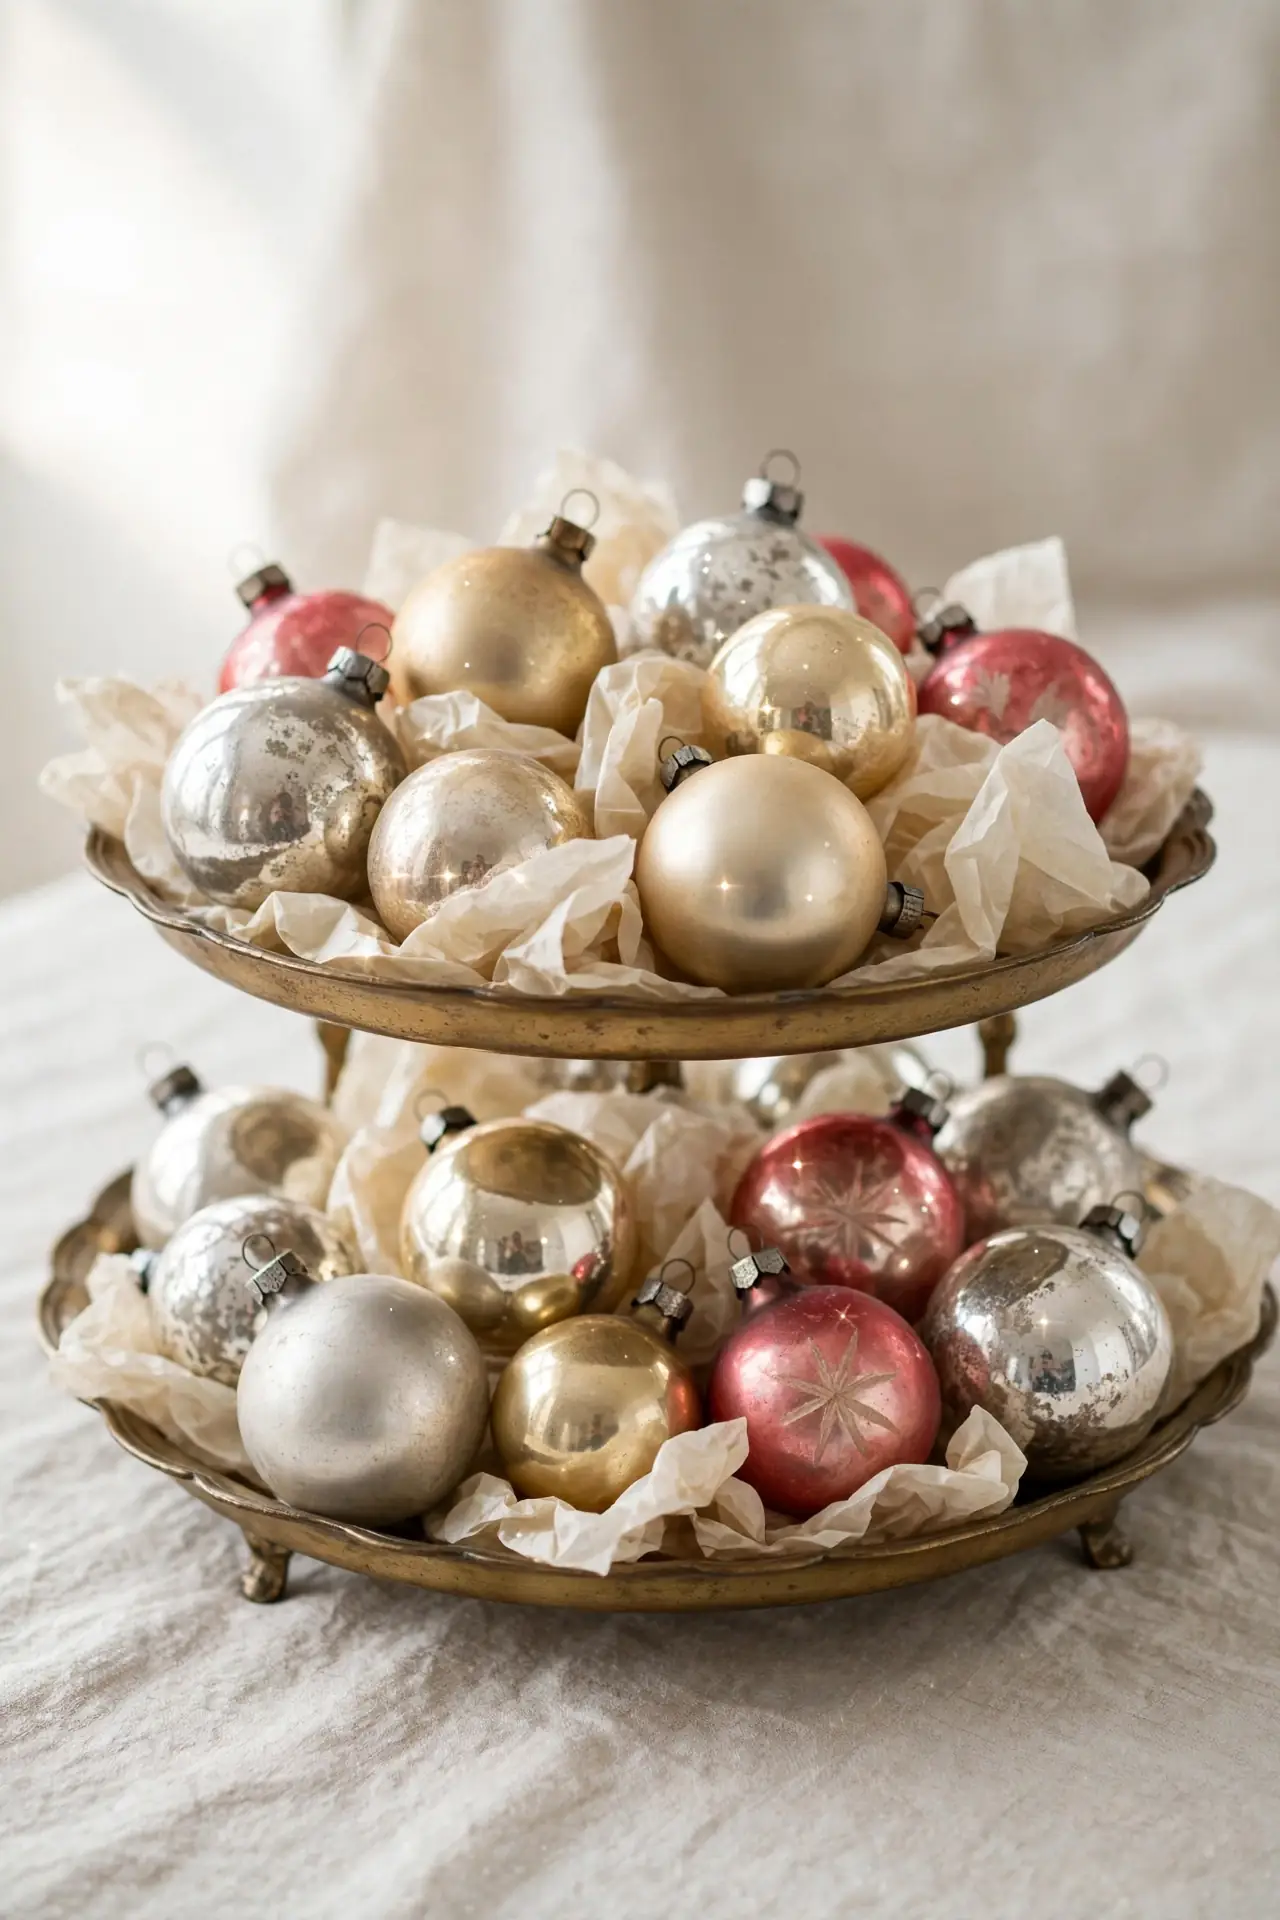
BEFORE: Before, a bare tiered tray sat in the corner holding nothing but dust. The corner felt empty despite the twinkling tree nearby. Holiday guests barely glanced at it.
AFTER: After, clusters of vintage glass ornaments fill each tier in silver, gold, and soft red. The baubles catch the tree lights and sparkle from across the room. That forgotten corner now feels like part of the celebration.
Mix matte and shiny finishes for depth, and tuck tissue paper between fragile pieces. I’ve seen this work well in many cases with thrifted ornaments. Place larger baubles at the back and tiny ones up front. This idea costs almost nothing and looks rich.
Snowy Pinecone Stack
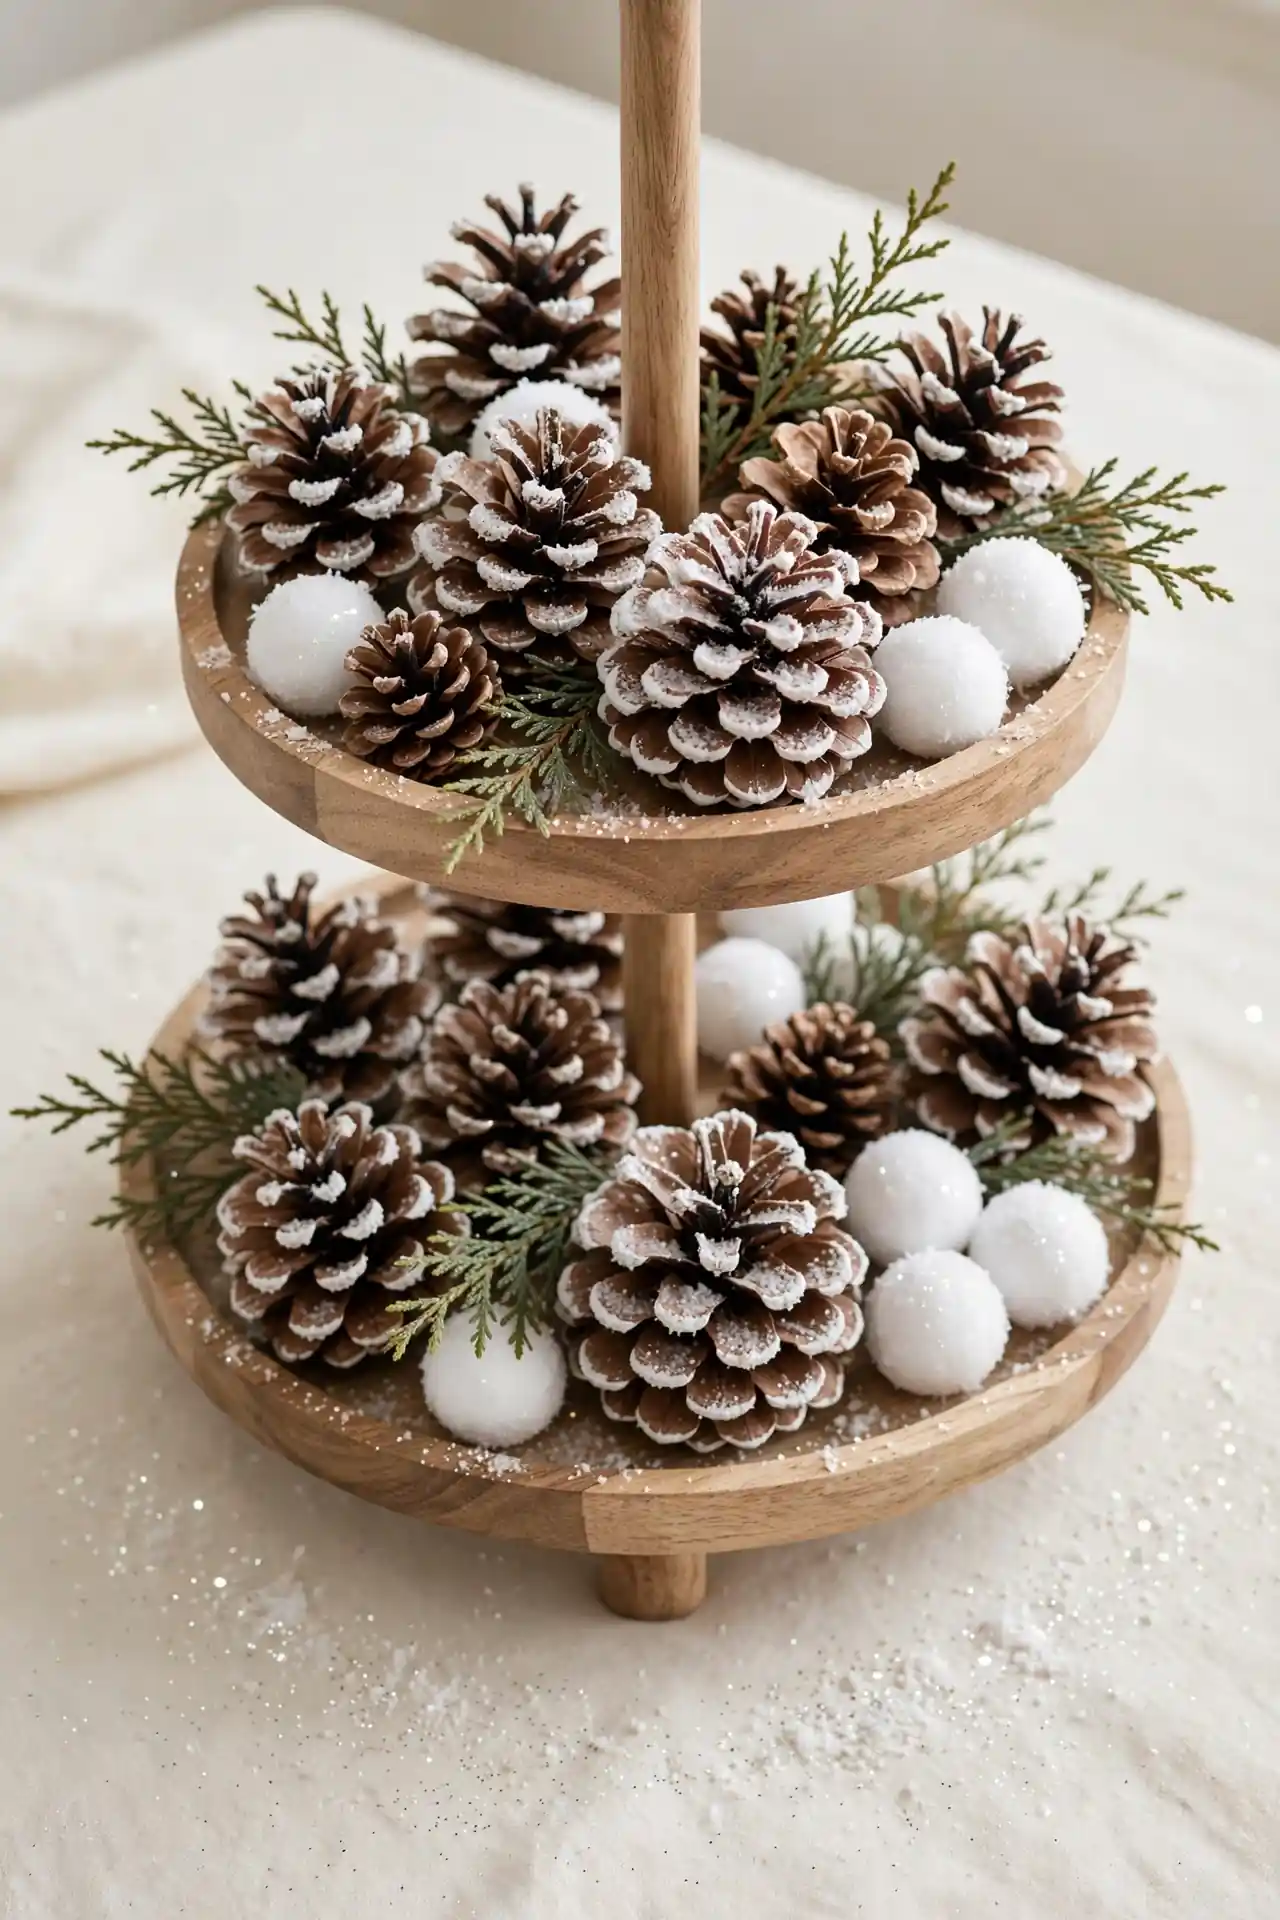
- Brush white craft paint over the tips of natural pinecones and let them dry fully.
- Stack the largest cones on the bottom tier and smaller ones above for balance.
- Tuck sprigs of cedar and a few faux snowballs between the cones.
- Dust everything lightly with glitter snow for a fresh-fallen finish.
Pinecones bring honest texture to a tiered tray, and snow paint makes them festive. Collect cones in different sizes for a natural look. A spritz of matte sealer keeps the glitter from shedding. This tray works on a porch table or a hallway console. I’ve seen this work well in many cases on covered porches too.
Gingerbread Village
| Store-Bought Kits | Homemade Cookies | |
|---|---|---|
| Setup Time | Under an hour | A full afternoon |
| Skill Needed | None, just arrange | Basic baking skills |
| Cost | Higher per piece | Lower, pantry staples |
| Best For | Busy weeks | Baking with kids |
| Kid Appeal | Loved by all ages | Extra fun to decorate |
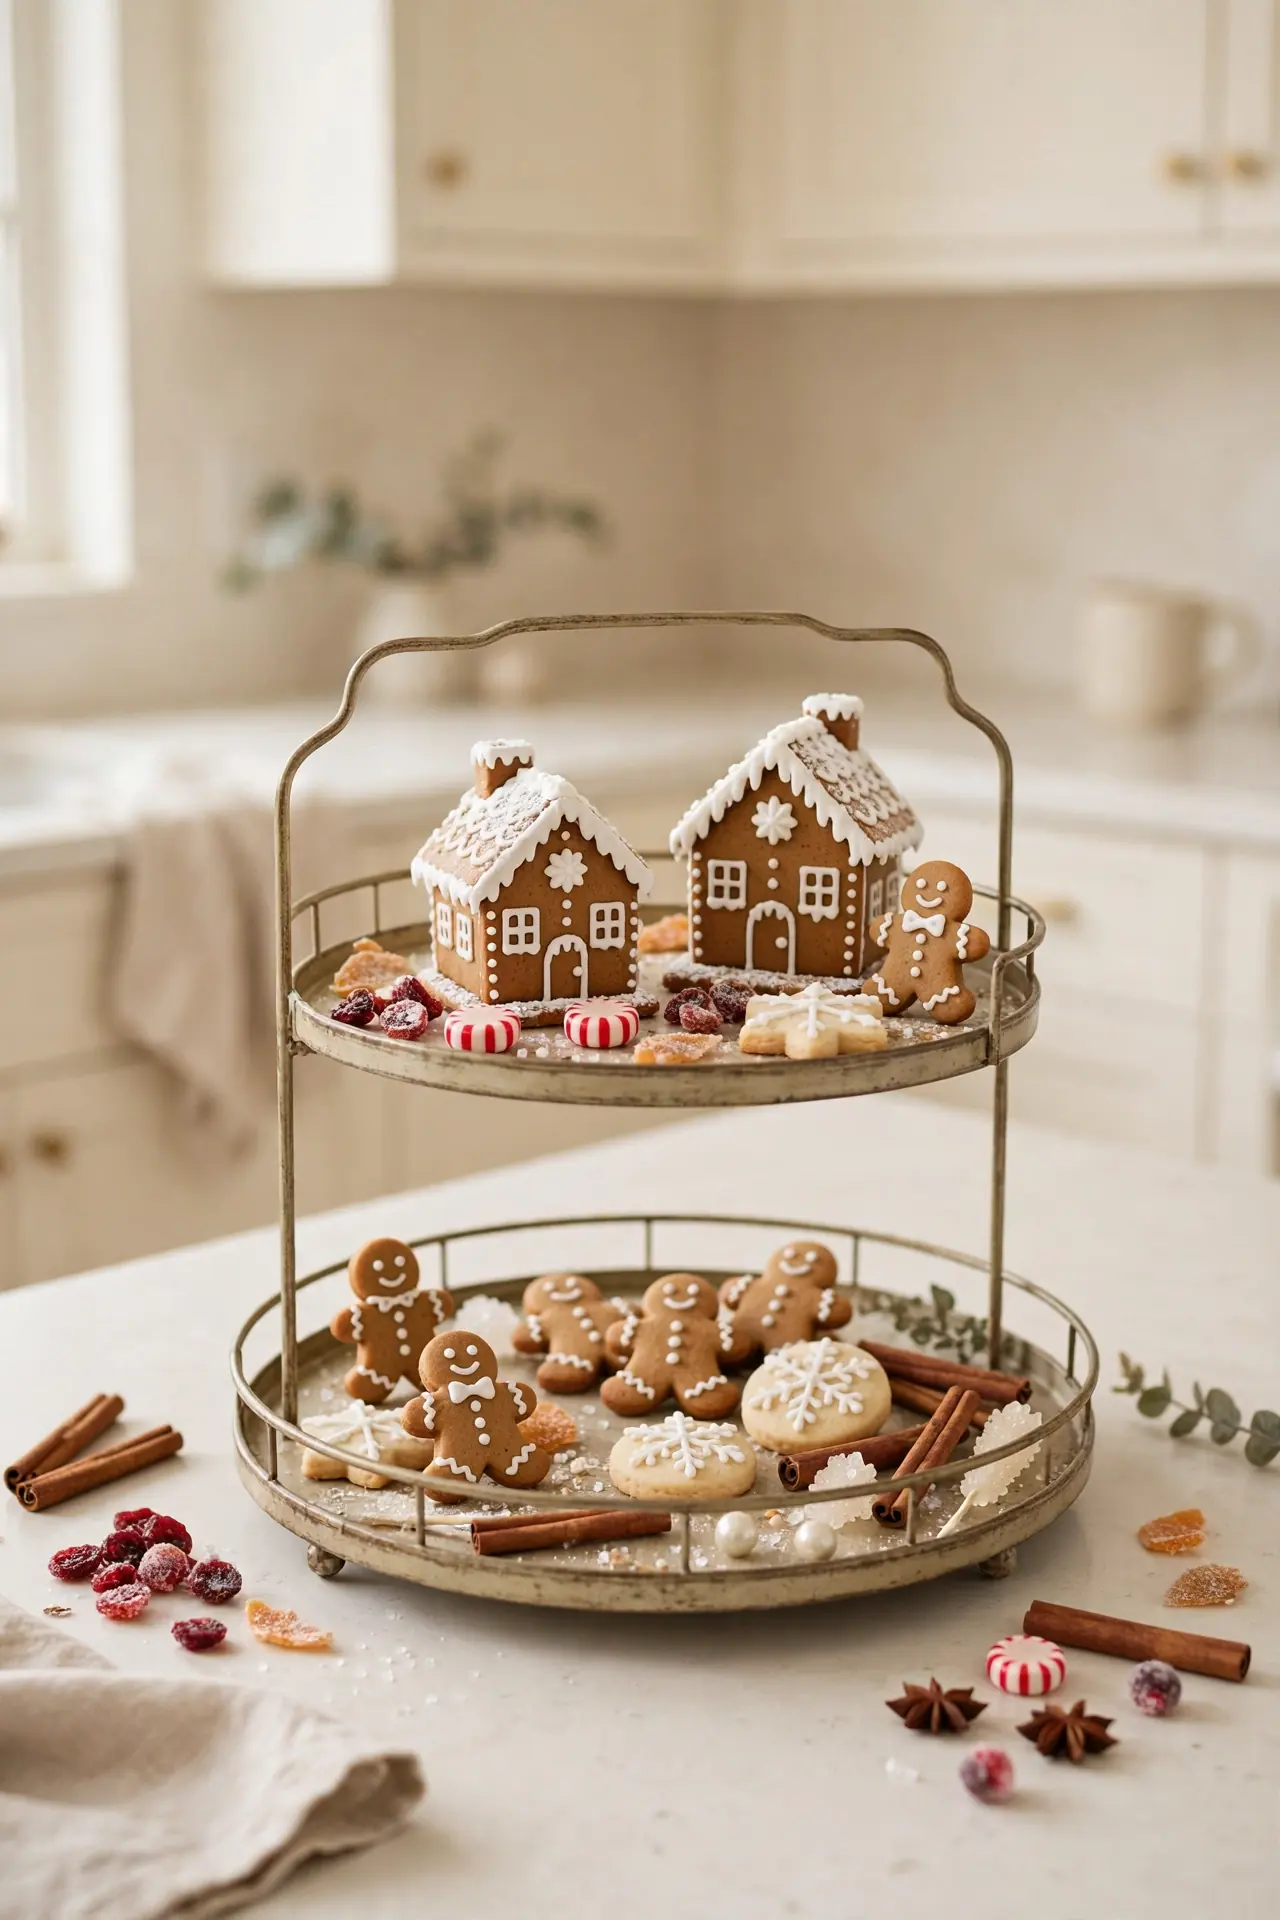
Gingerbread houses look charming whether you bake or buy, so pick the path that fits your week. Store-bought kits save time and still look adorable on a tray. Homemade cookies add a personal touch and fill the house with spice. Either way, keep icing simple so the houses read cute, not messy. Let kids decorate one house each and display the results proudly.
Gold Candle Glow
DO:
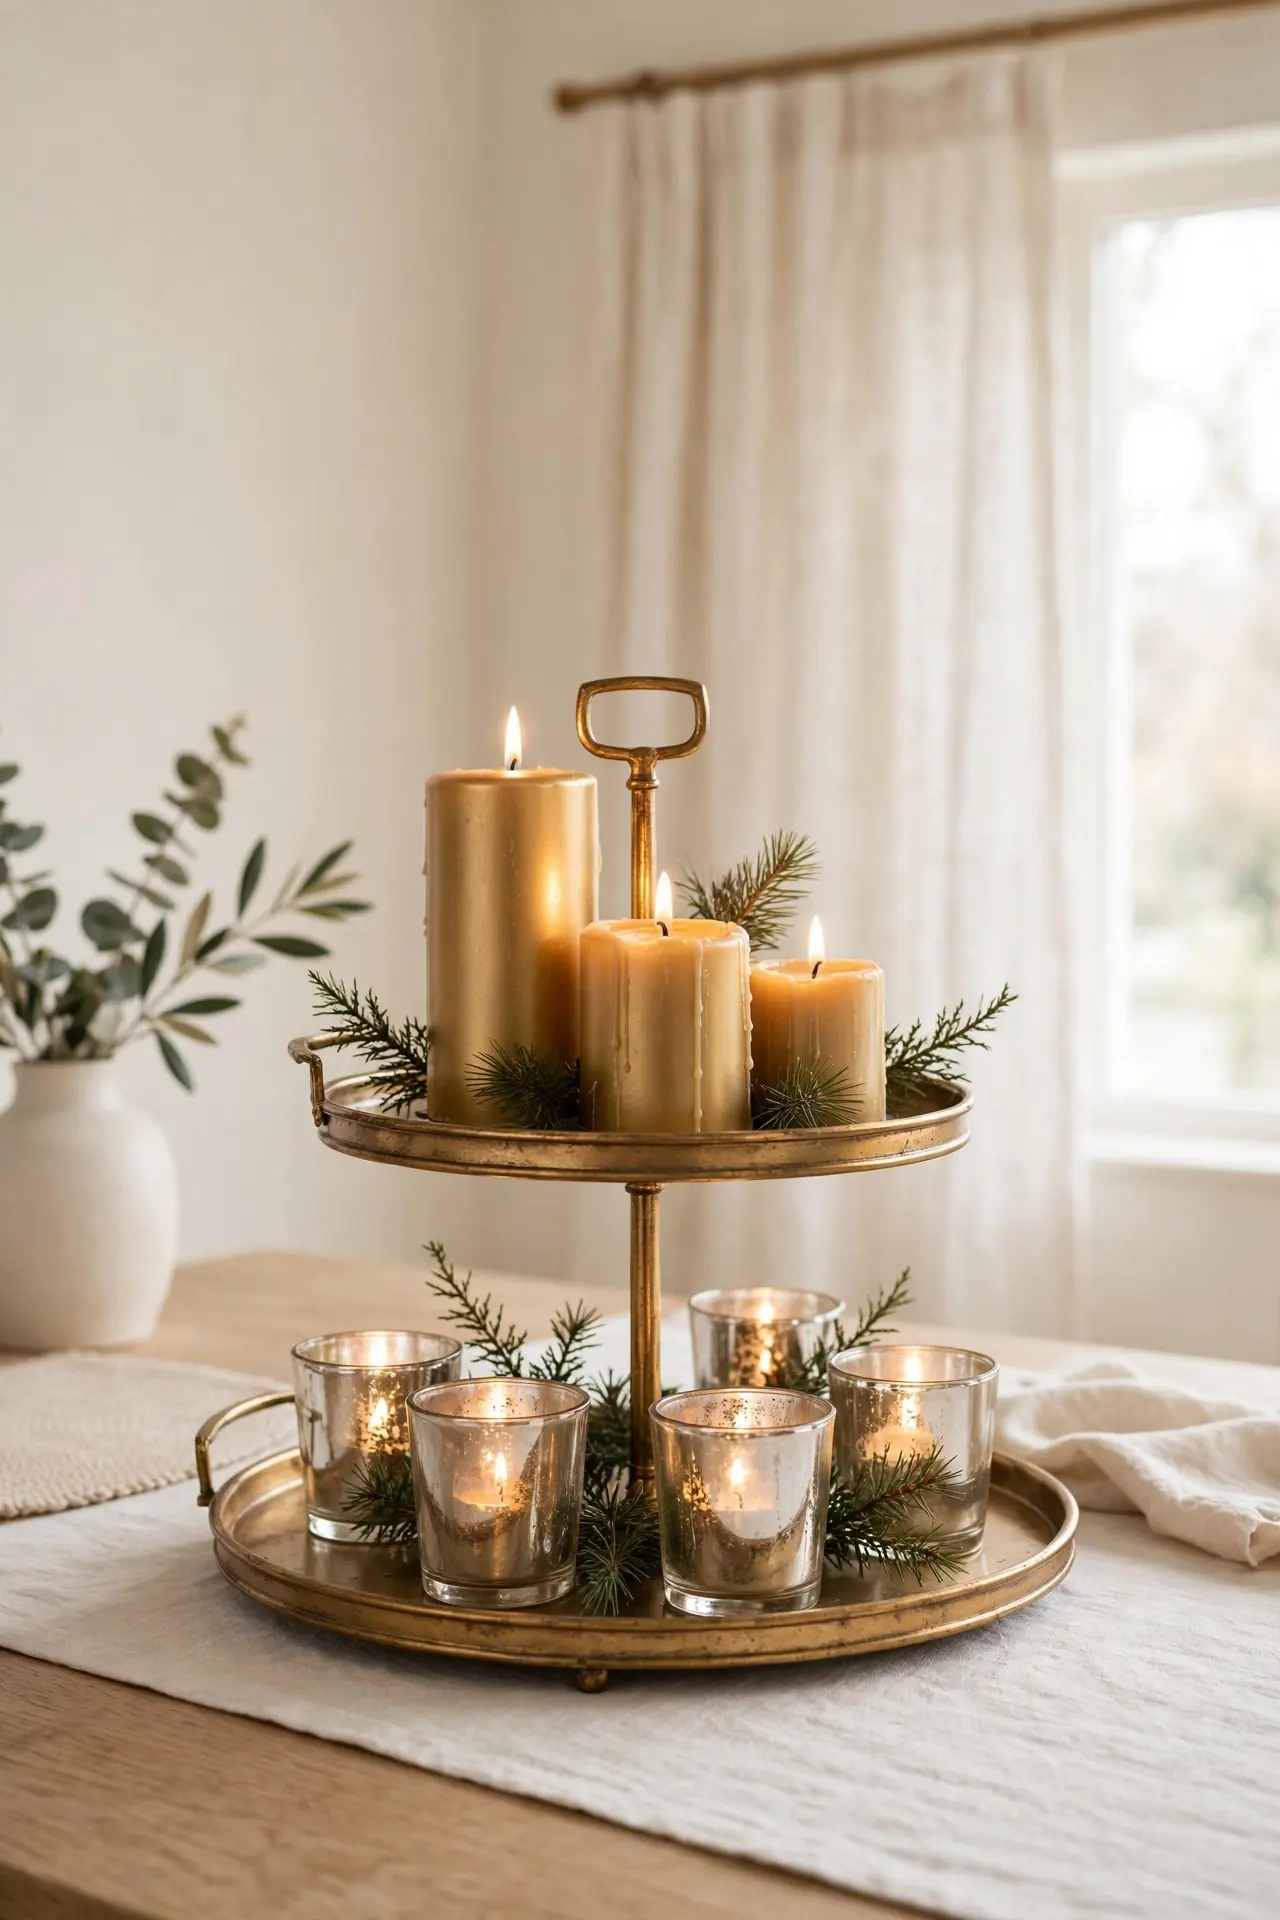
- Use battery candles so the tray stays safe near kids and pets.
- Group candles in odd numbers for a natural glow.
- Add gold holders or mercury glass for warm reflections.
DON’T:
- Don’t place real flames near dried greenery.
- Don’t overcrowd; leave space between each candle.
- Don’t skip a tray liner if wax might drip.
Candlelight flatters every tray, and gold holders multiply the glow. Battery candles give the same warm look with zero worry. Keep the flames away from anything dry or paper. In my experience, one glowing tray makes the whole room feel festive. Dust the holders weekly so the gold stays bright all season.
Woodland Greenery Mix
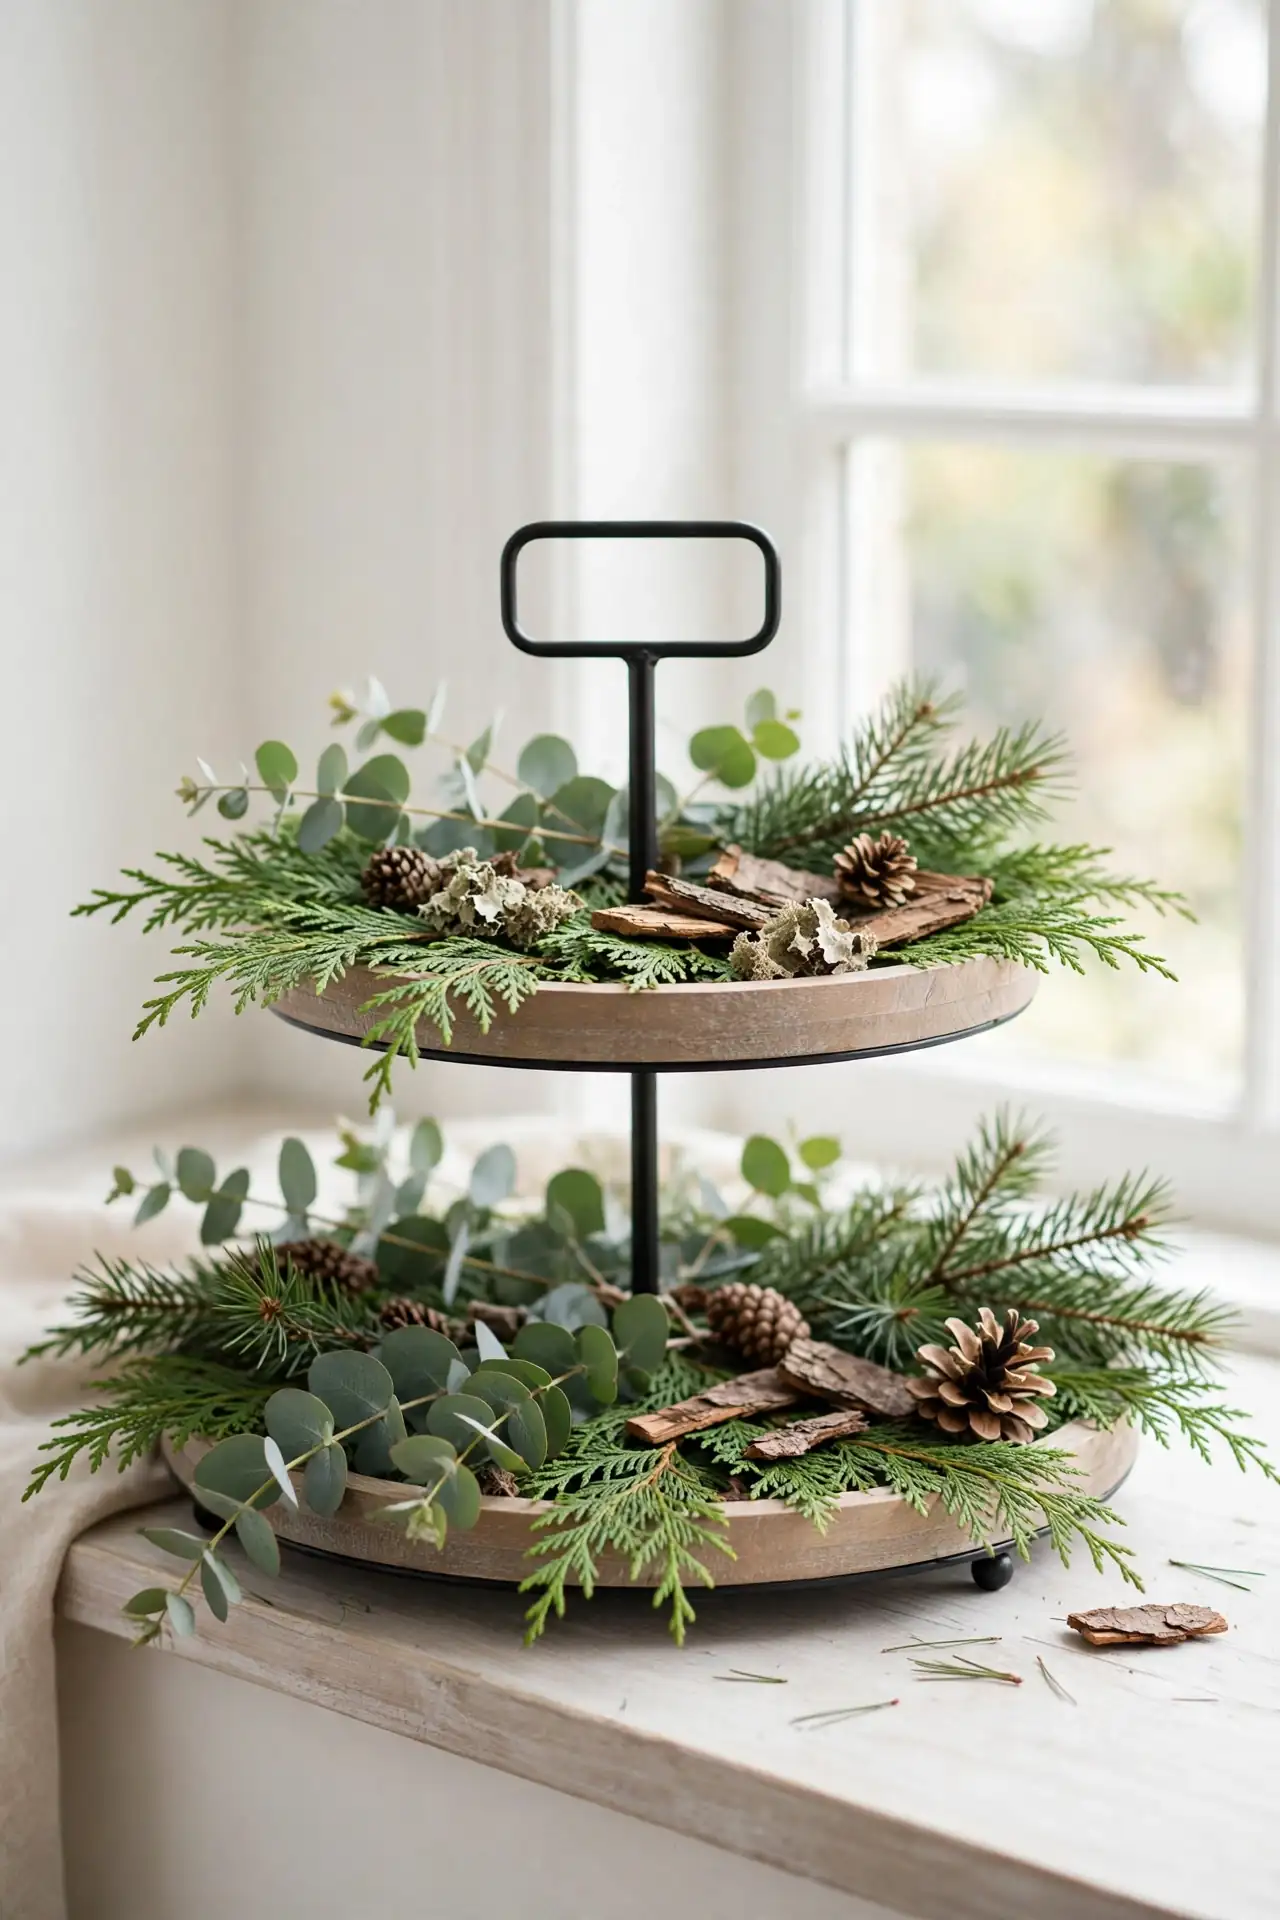
Cost: Low; foraged greens and one tray cost little.
Time: Under an hour to gather and arrange.
Skill Level: Beginner; layering branches takes no training.
Best For: Entryways and mantels that need fresh life.
Works In: Farmhouse, cottage, and modern holiday styles.
Fresh greenery is the most forgiving tray filler there is. Layer cedar, pine, and eucalyptus so the textures mix. Tuck pinecones and bark pieces into the gaps for woodland charm. Mist the branches lightly every few days to keep them fresh. In my experience, real greens beat faux ones for scent alone. This tray welcomes guests before they even step inside.
Candy Cane Stripes
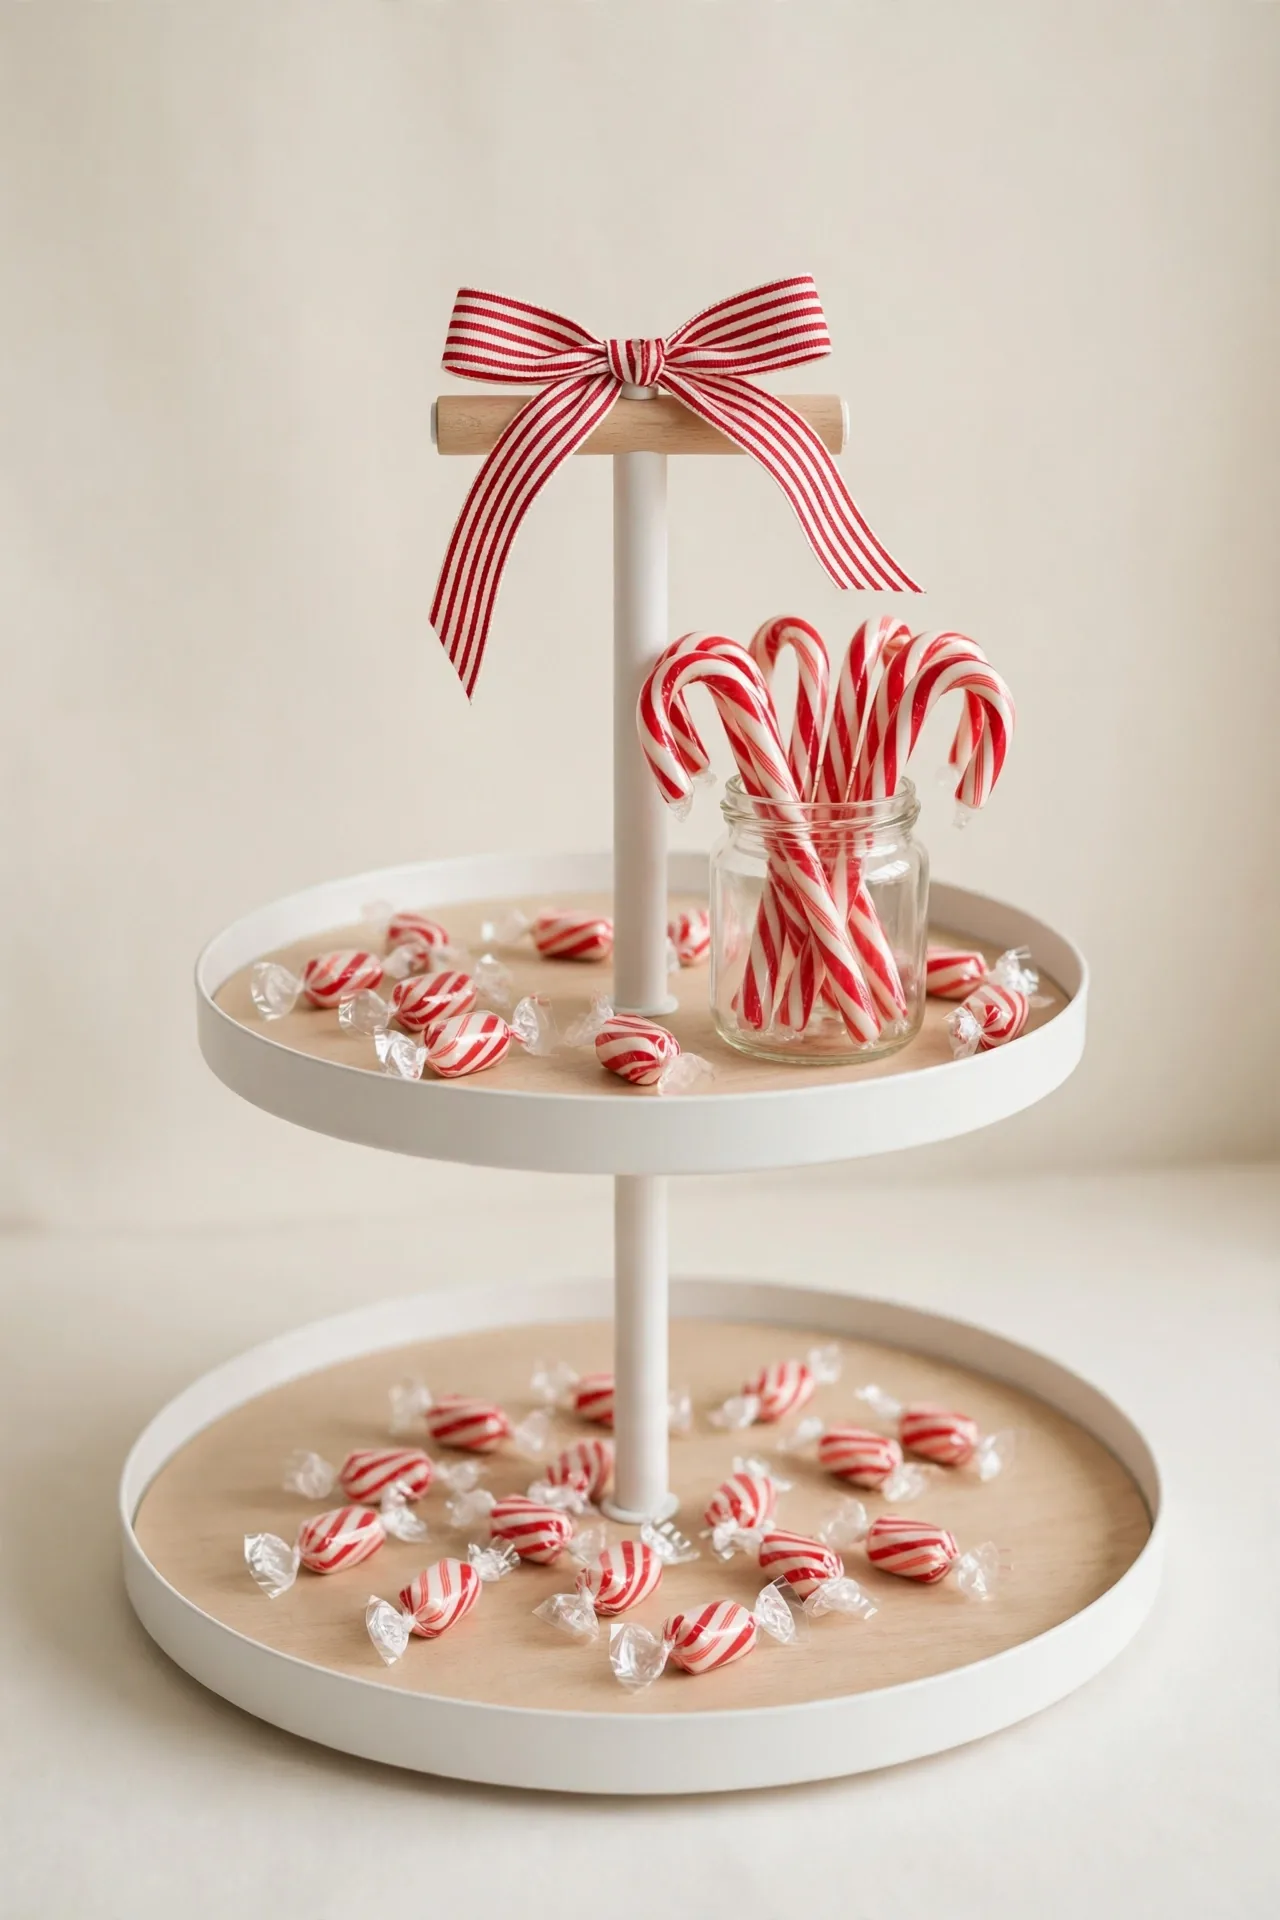
Red and white stripes wake up any neutral tray instantly. Lean full-size candy canes in a small jar on the top tier and scatter wrapped minis around the base. Add a striped ribbon bow on the tray handle for one more pop. The classic colors read Christmas from across the room.
Keep the rest of the styling simple so the stripes stay the star. White dishes, clear jars, and a little greenery balance the bold red. I’ve noticed candy cane trays disappear fastest at parties, so buy extra. Store leftovers in a sealed bag and they stay fresh for months.
Frosted Eucalyptus Touch
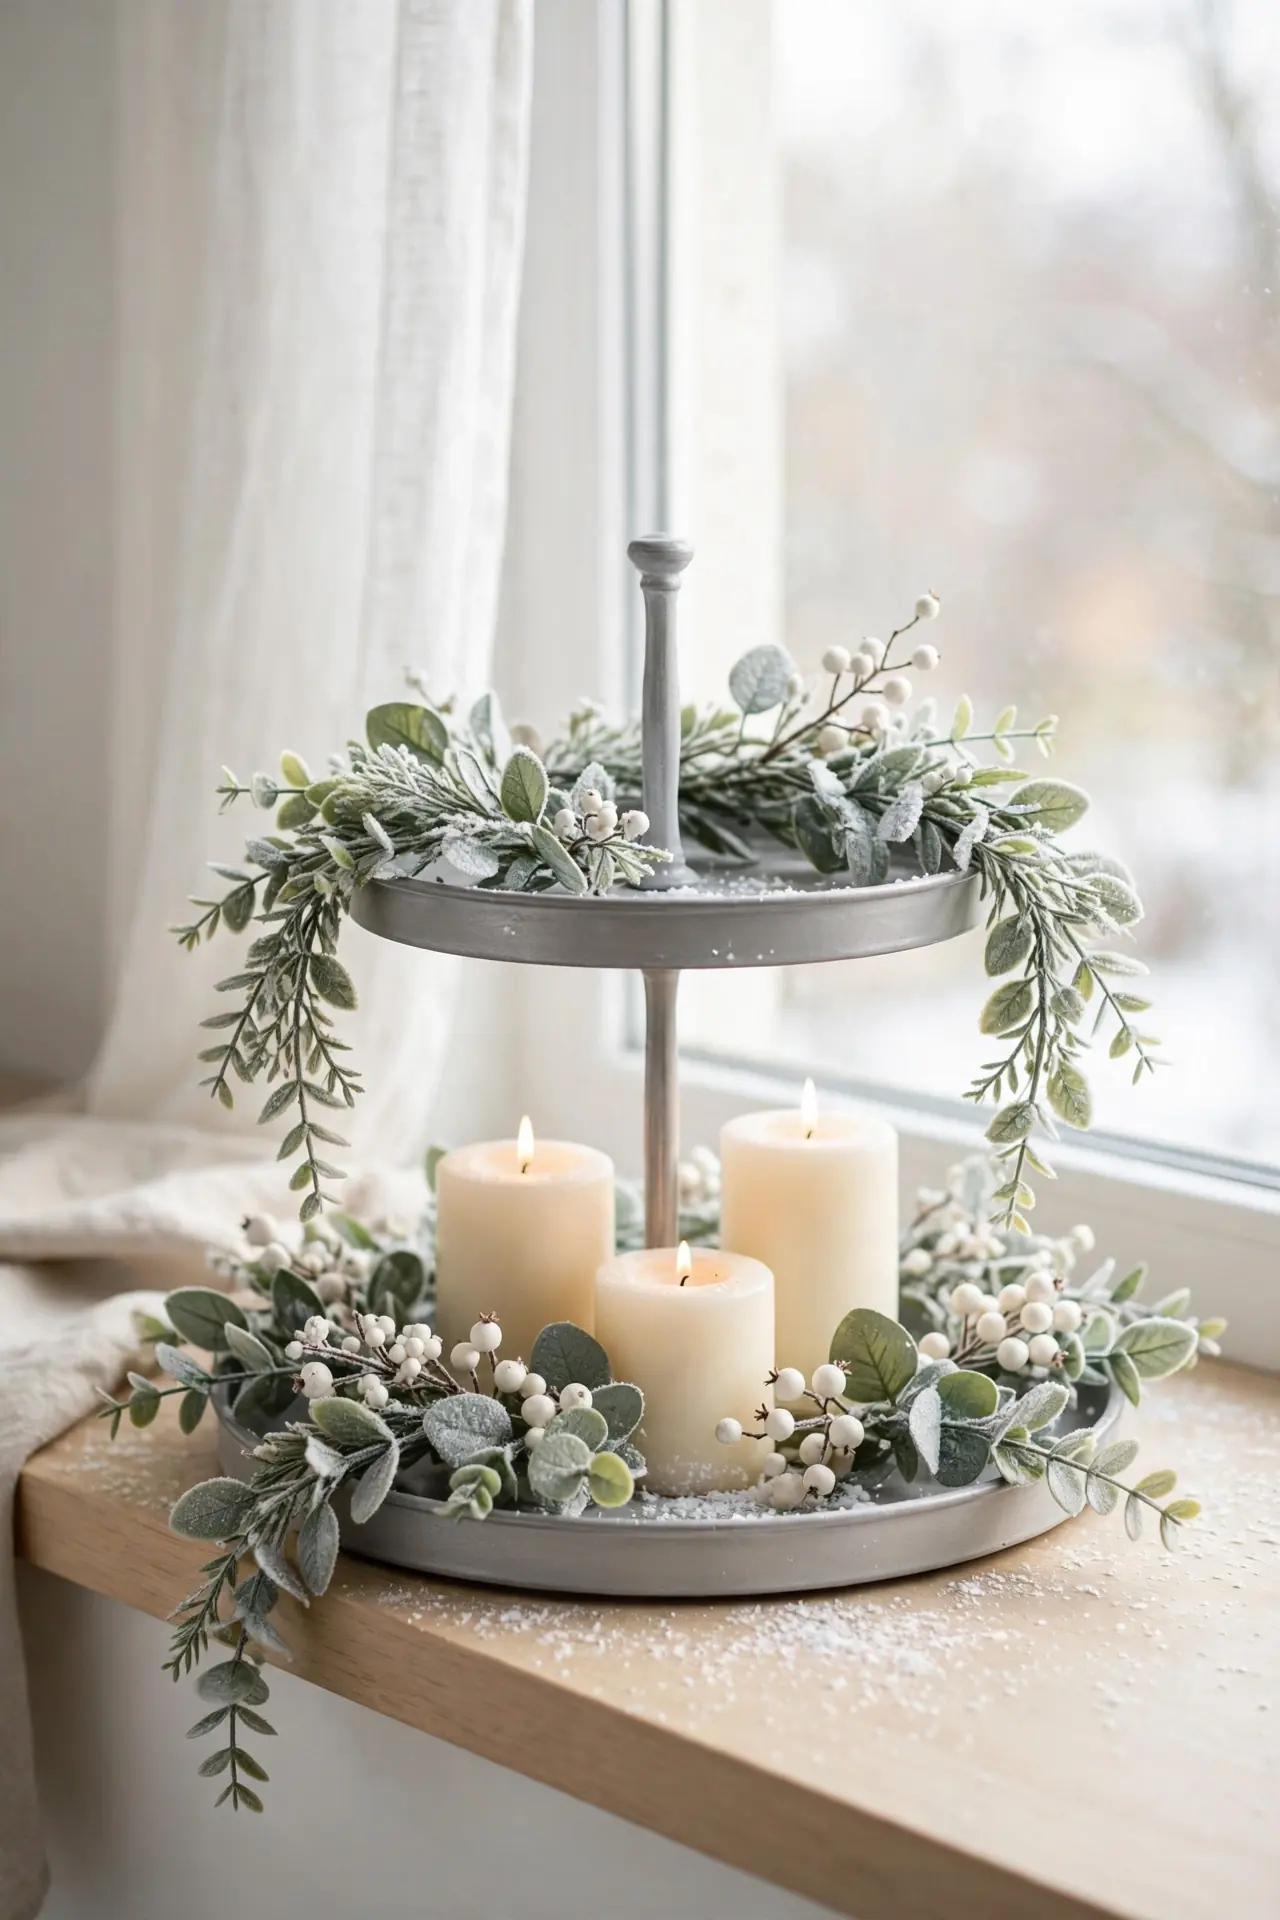
- Drape frosted eucalyptus garlands around each tier for soft silver-green color.
- Tuck in a few white berry sprigs for a frosty, wintry feel.
- Add one or two cream candles to warm up the cool palette.
- Finish with a light dusting of faux snow along the tray edges.
Frosted eucalyptus feels calm and modern next to traditional red decor. The silvery leaves catch light beautifully on a sunny windowsill. I’ve noticed this look works in every room, from bathrooms to bedrooms. Mist the leaves lightly with water to keep them fresh for weeks. Pair it with one warm candle so the cool palette feels inviting.
Mini Tree Forest
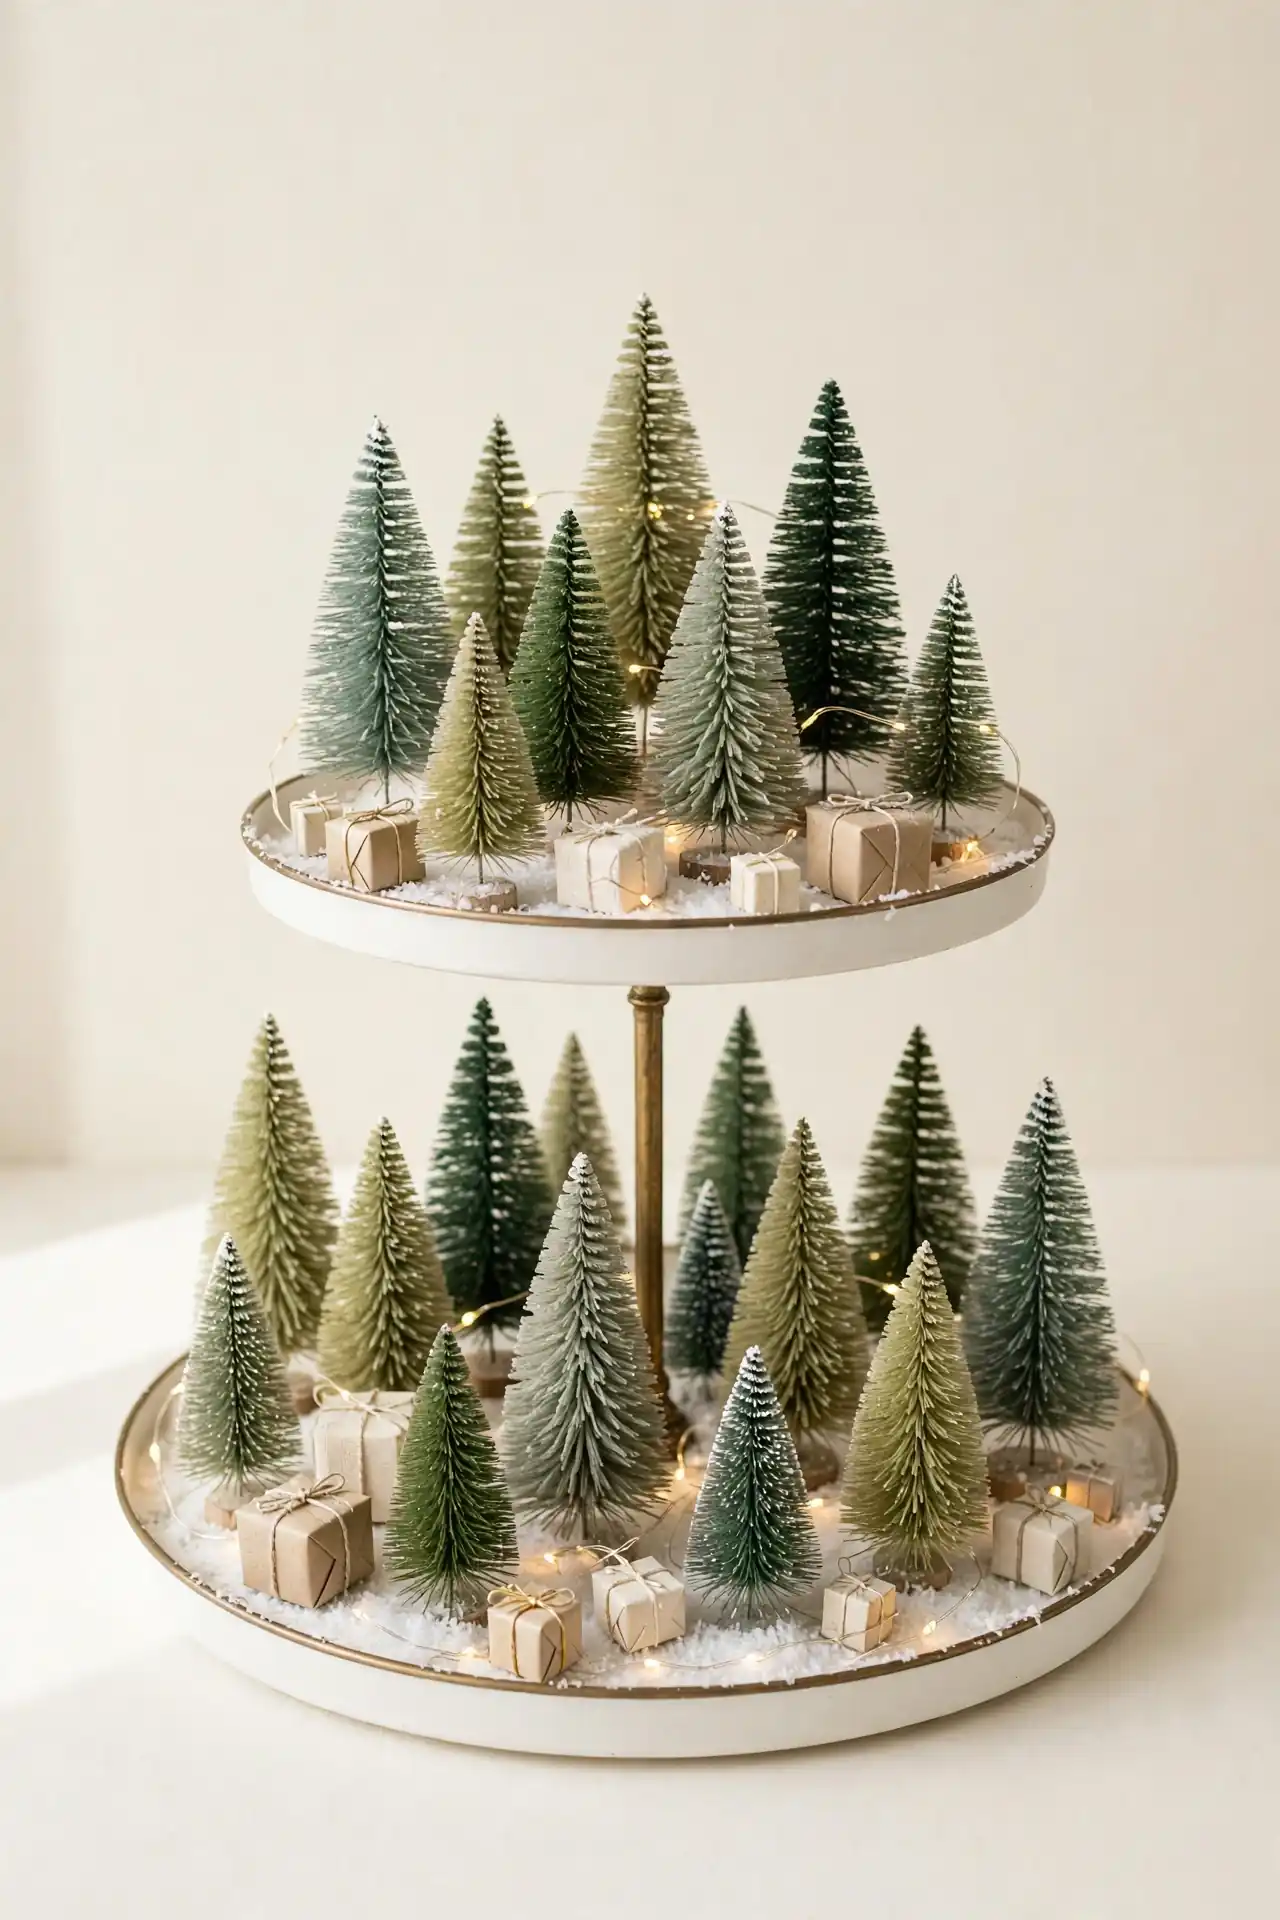
Quick Tip: Choose bottle-brush trees in three heights and group them on the middle tier. Vary the greens, from deep pine to pale frosted, for depth. A sprinkle of faux snow at the base hides any bare spots. Keep the tallest tree in back so every tree shows from the front.
A forest of mini trees brings big Christmas energy to a small tray. Tuck tiny presents or a string of micro lights between the trees for extra magic. Our christmas dining table decor ideas pair well with this tray as a sideboard accent. In my experience, guests always ask where the tiny trees came from.
Plaid Ribbon Wrap
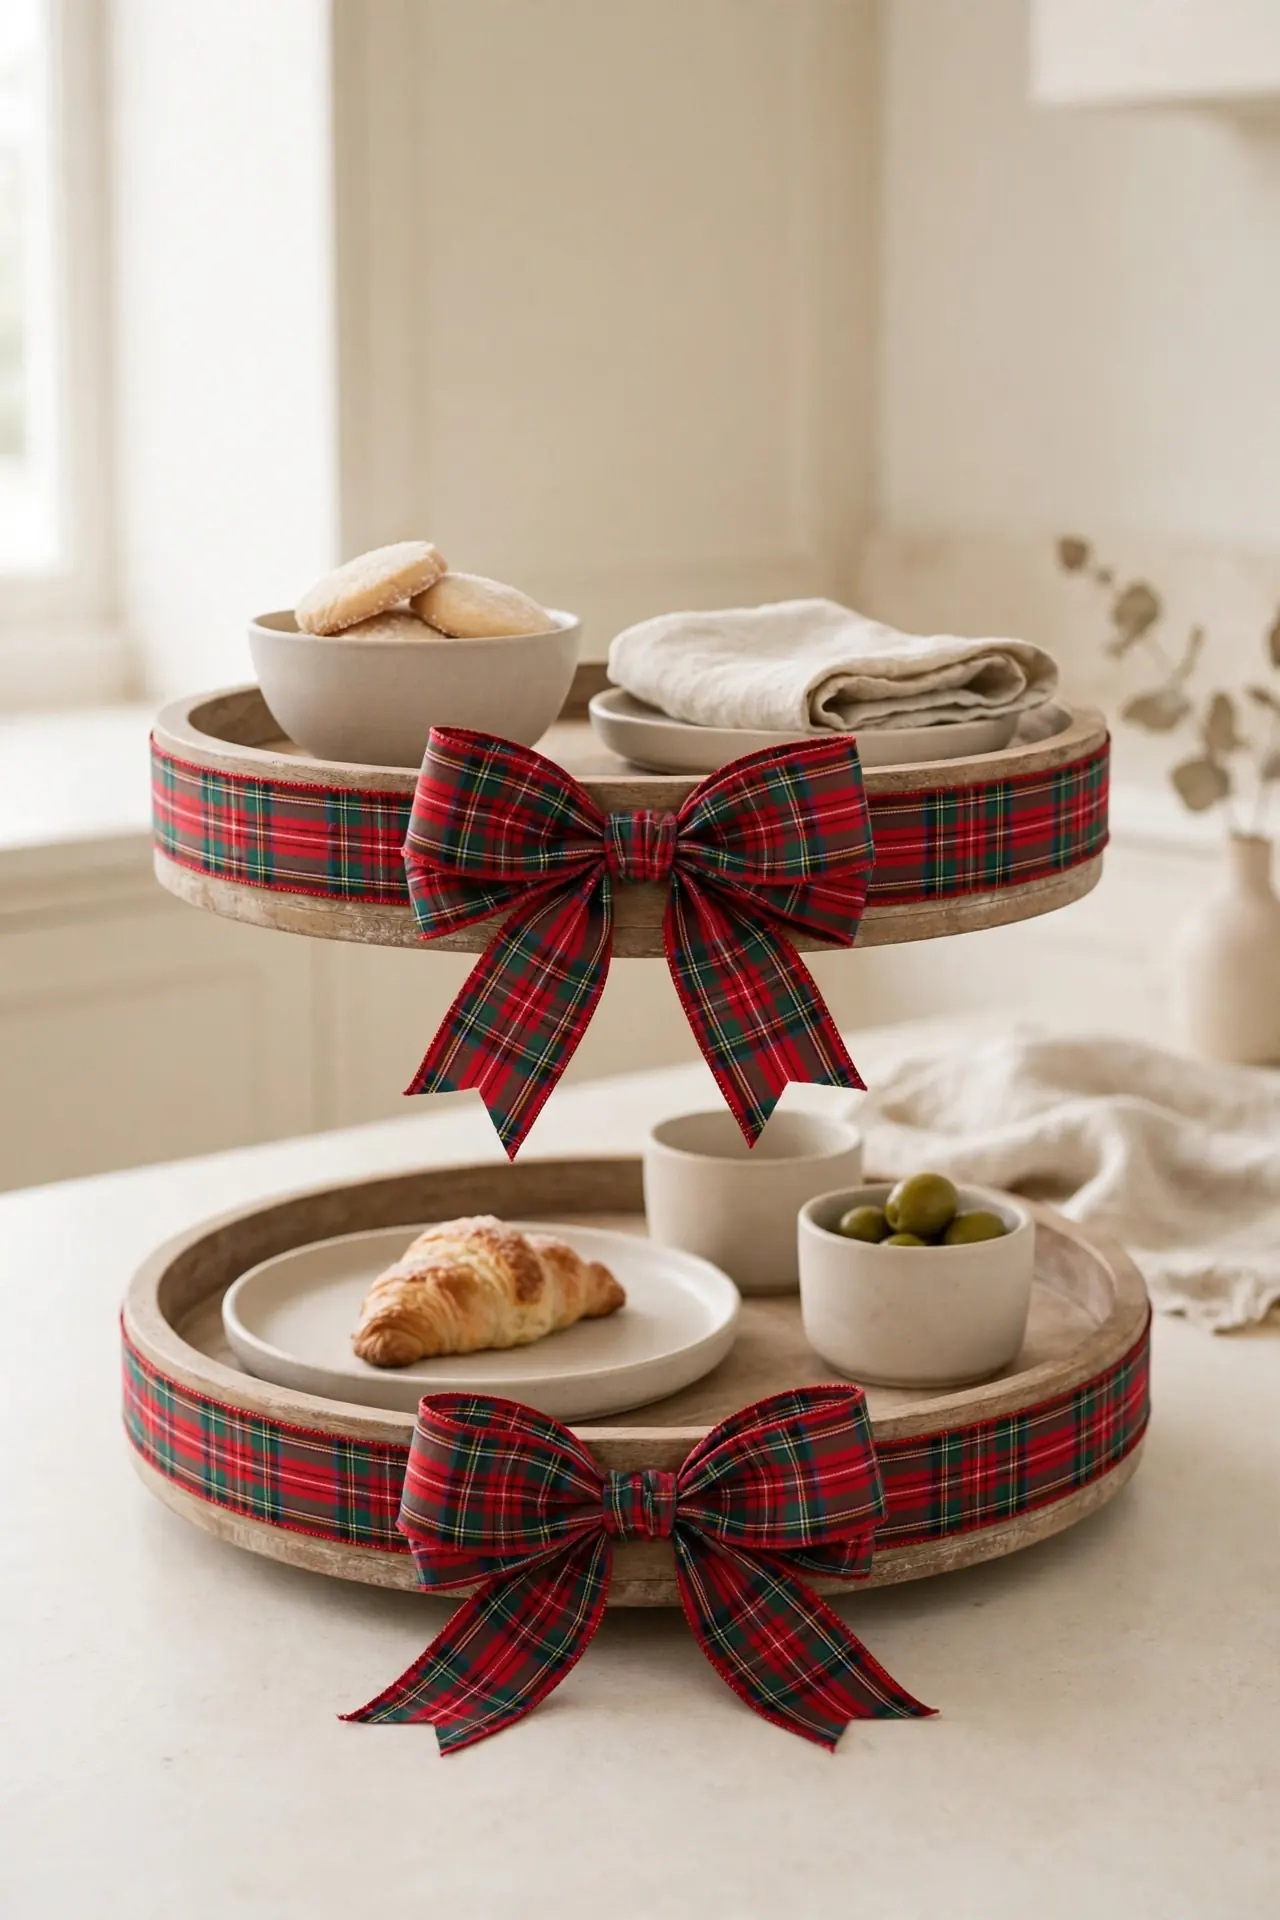
BEFORE: Before, the tray blended into the background with pale dishes and no color. The kitchen island looked tidy but plain. Nothing said Christmas yet.
AFTER: After, red and green plaid ribbon wraps each tier edge and ties in big bows. The pattern adds instant holiday spirit without new dishes. The whole island feels dressed for the season.
Plaid ribbon is the cheapest way to Christmas-ify a tray you already own. Wrap wide ribbon around each tier and secure it with double-sided tape. Choose a classic tartan that matches your tree. Swap the ribbon in January for a fresh winter look.
White Christmas Theme
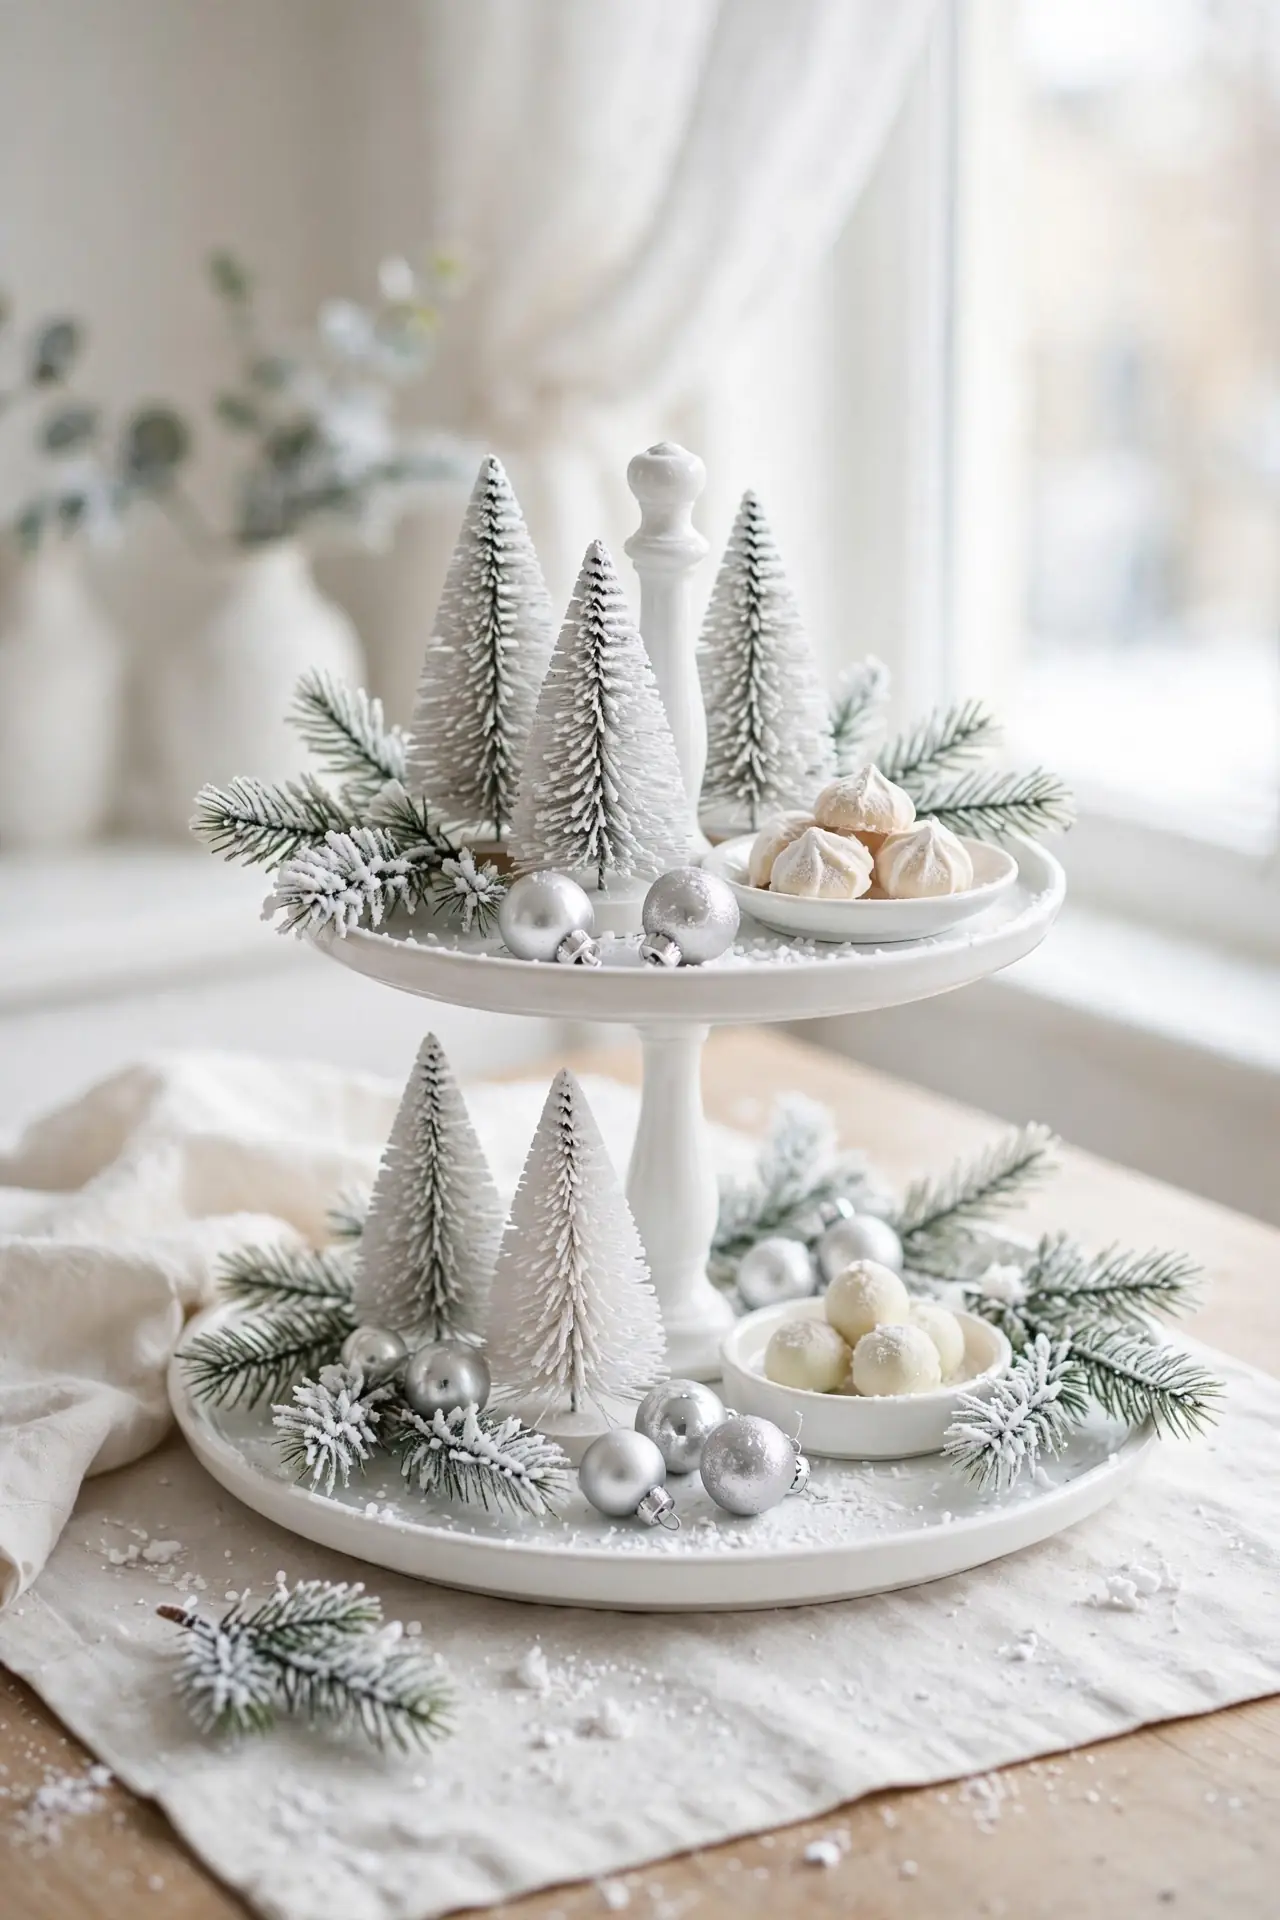
- Cover each tier with white or cream dishes, cups, and small bowls.
- Add snowy white bottle-brush trees and frosted pine sprigs.
- Tuck in silver ornaments and clear glass baubles for sparkle.
- Finish with a dusting of faux snow and one white candle.
- Hang a tiny white stocking from the tray handle for charm.
An all-white tray glows against darker rooms and busy holiday corners. Stick to whites, creams, and silvers so the look stays calm. In my experience, white trays photograph best near a window. Add one textured piece, like a knit stocking, to keep it cozy. Refresh the faux snow each week so it stays bright and clean.
Cookie Display Towers
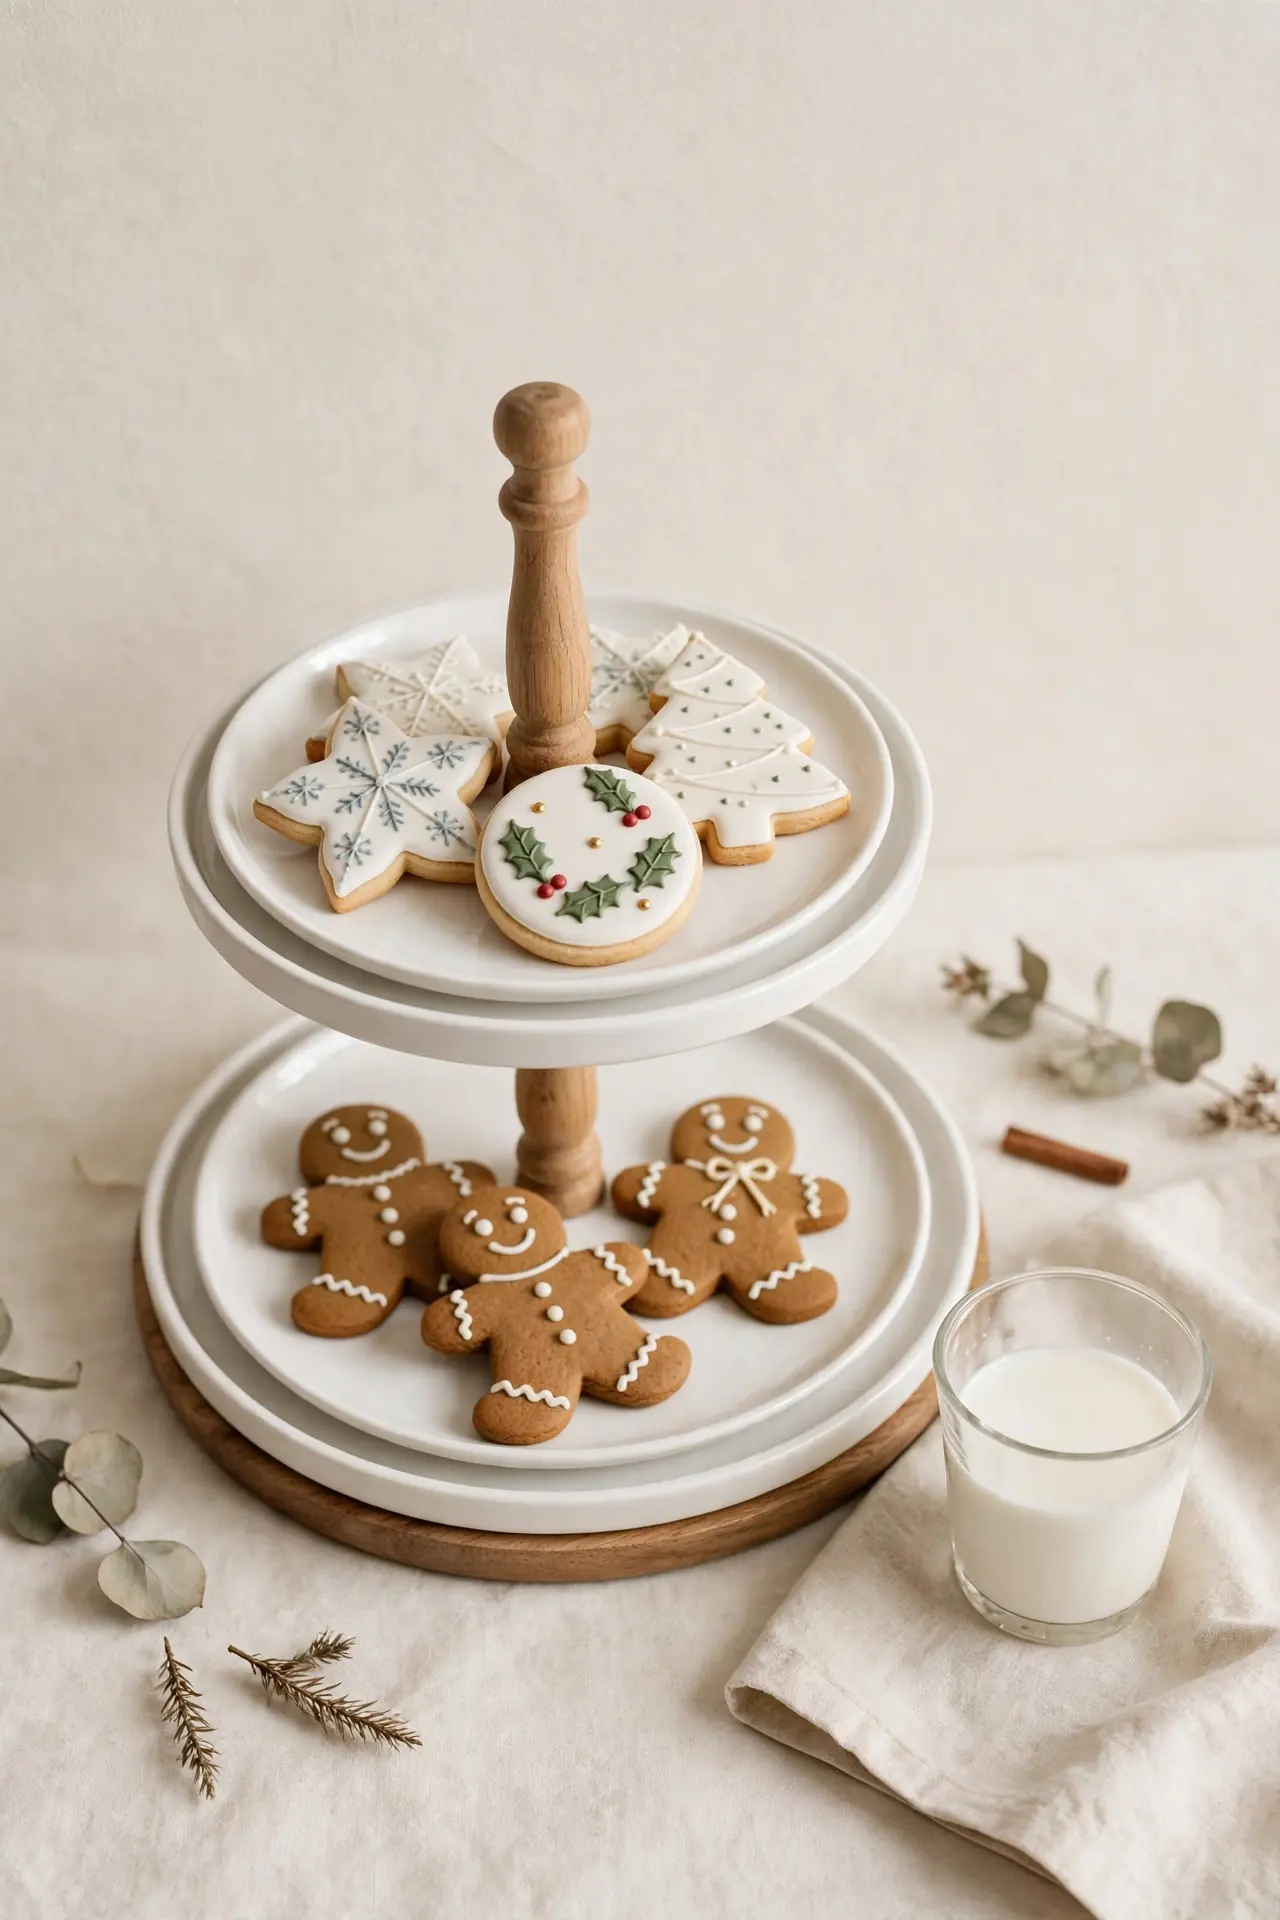
| Sugar Cookies | Gingerbread Cookies | |
|---|---|---|
| Best Display | Stacked on plates | Standing in a jar |
| Storage Life | One week sealed | Two weeks sealed |
| Kid Appeal | Decorating favorite | Spicy and fun |
| Pairing Drink | Cold milk | Hot cocoa |
Cookies belong on a tiered tray all December long. Arrange them on white plates so the icing colors pop. Keep a small glass of milk beside the tray for a playful touch. Refresh the stack every few days so it always looks full. Store extras in a sealed tin to keep them crisp. In my experience, guests reach for the tray before they even say hello.
Advent Countdown Tray
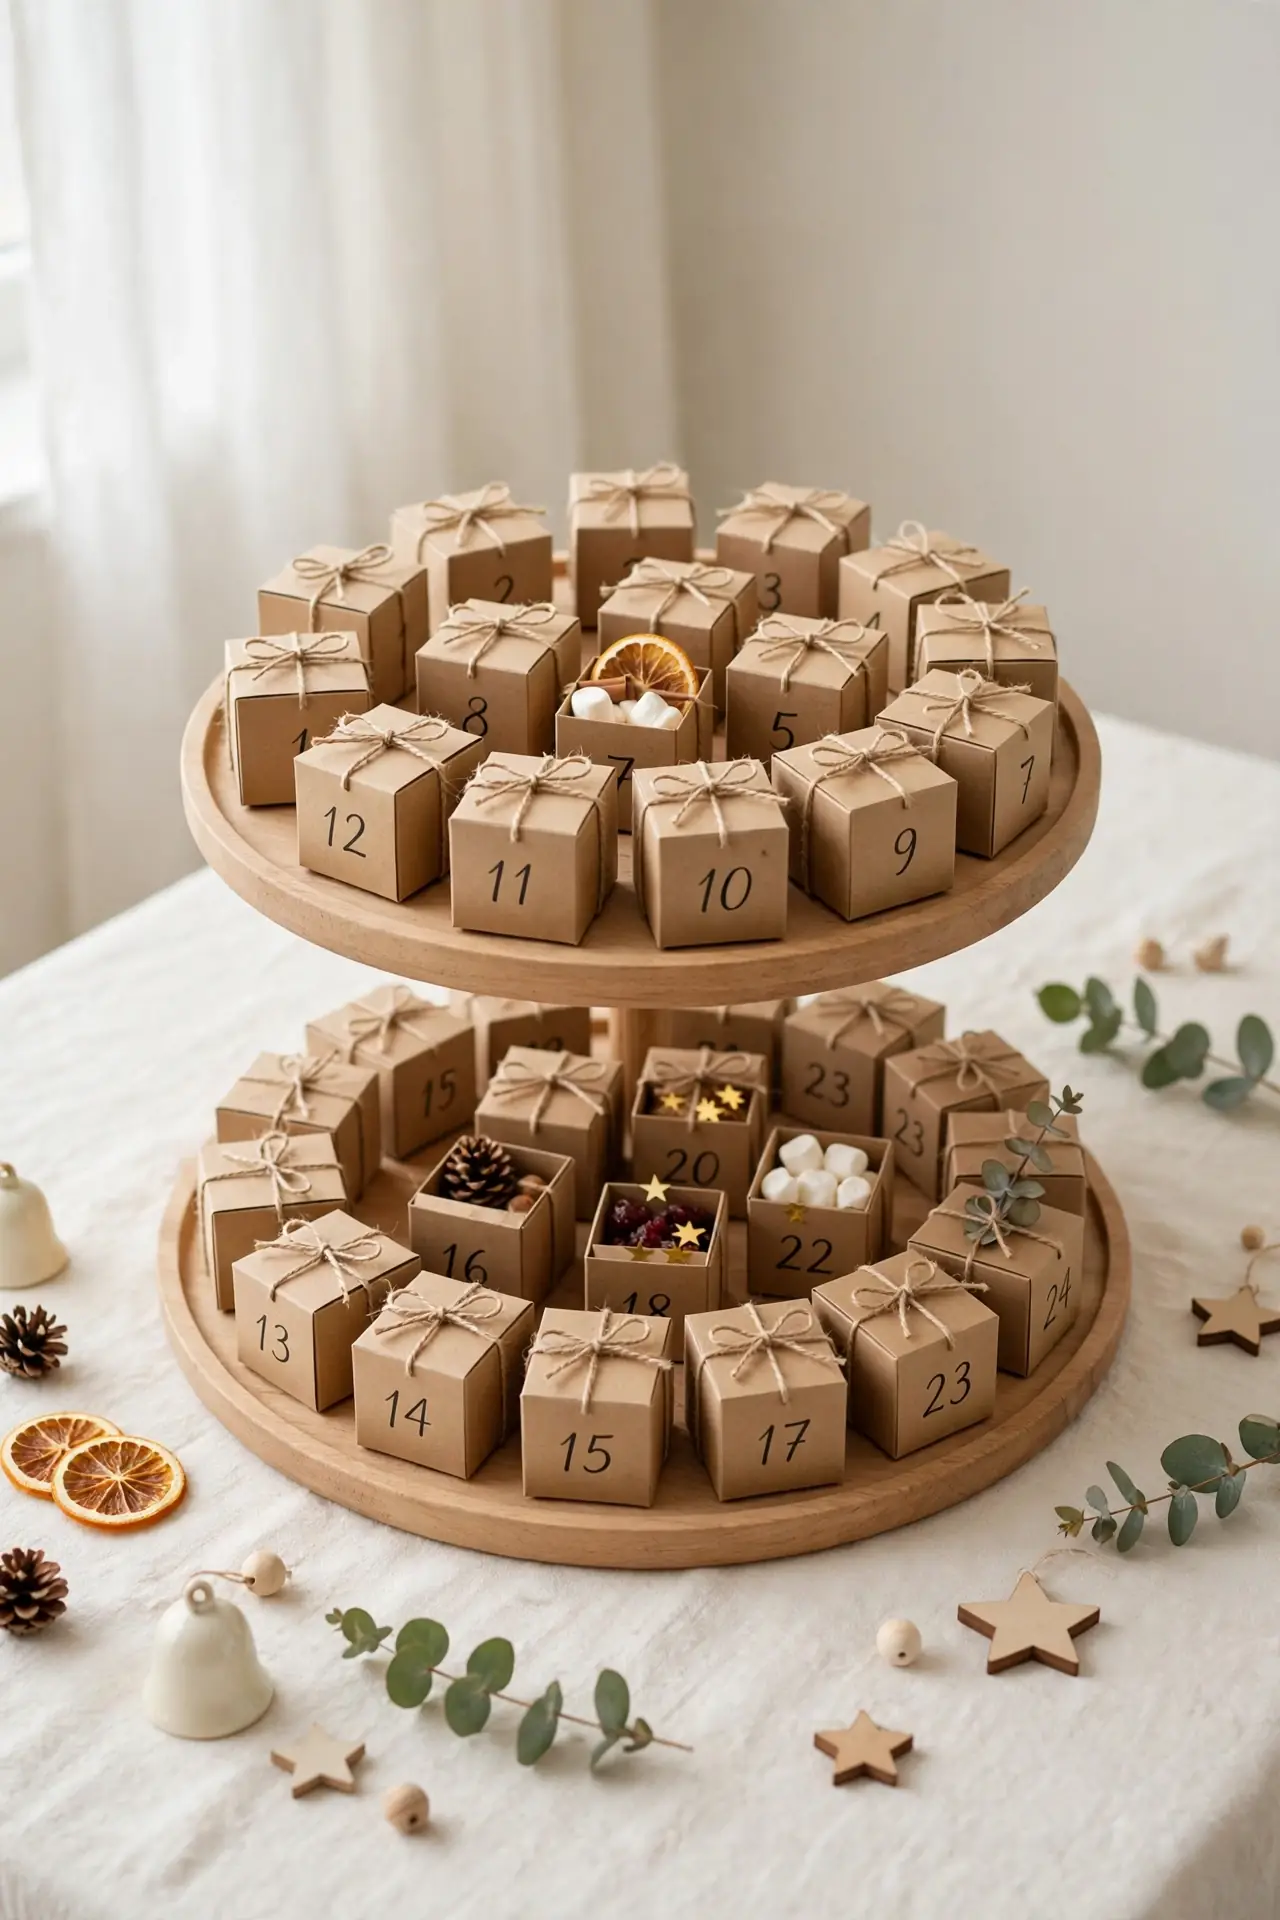
DO:
- Number 24 small boxes or bags and fill each with a tiny treat.
- Arrange them across the tiers from 1 to 24 in order.
- Let kids open one number each morning through December.
DON’T:
- Don’t use treats that melt near warm lights.
- Don’t skip the numbers; the countdown is the fun part.
- Don’t place it where little hands reach it unsupervised.
An advent tray turns December mornings into a daily celebration. Fill the boxes with treats, notes, or tiny toys. Let the countdown build excitement toward the big day. I’ve noticed families guard their advent trays like treasure. Refill the boxes each year and the tradition grows.
Rustic Farmhouse Look
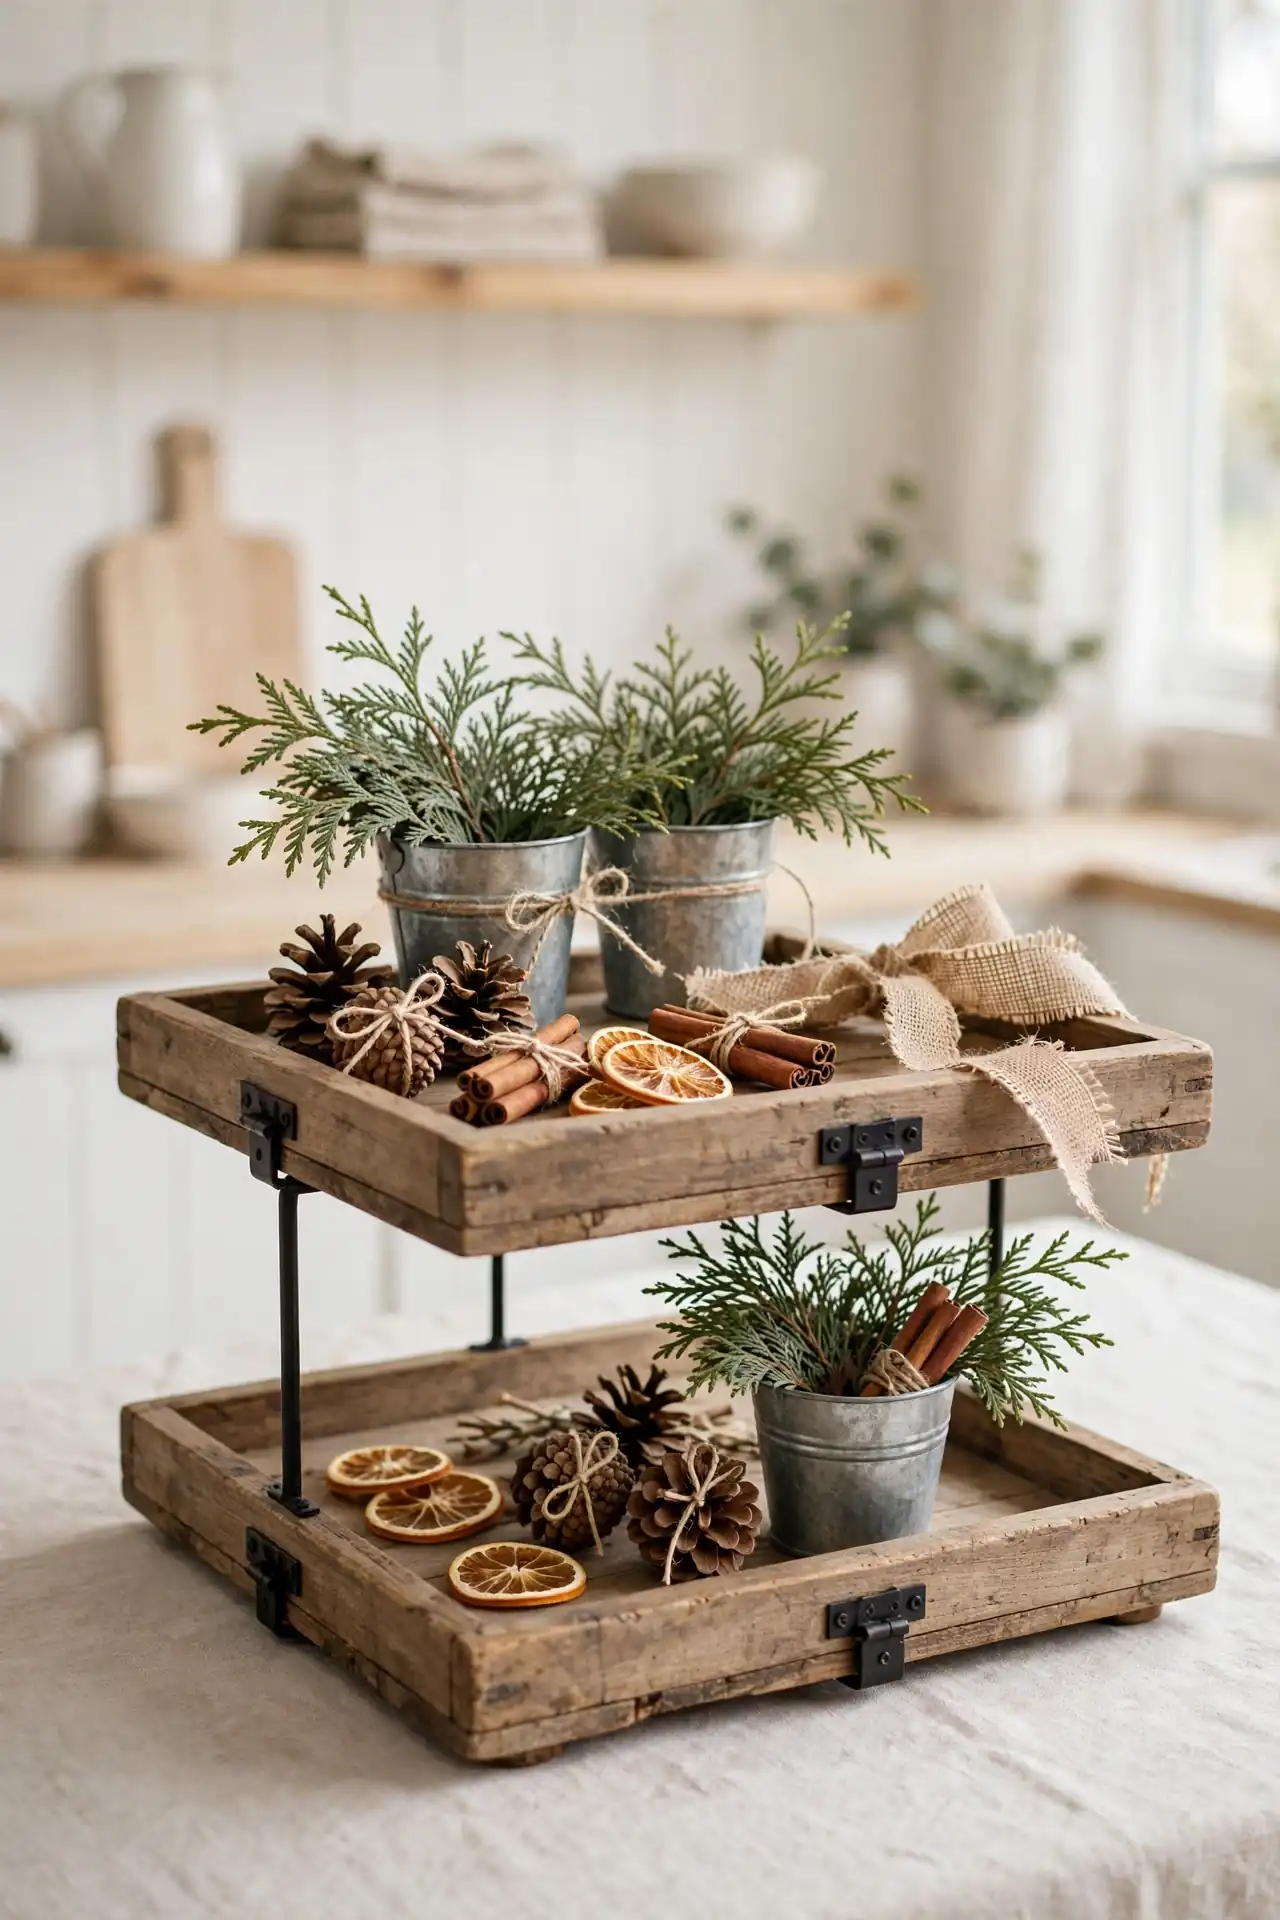
Cost: Low; burlap, twine, and pinecones cost little.
Time: About forty-five minutes to style both tiers.
Skill Level: Beginner friendly; rustic forgives rough edges.
Best For: Kitchens and dining rooms with wood tones.
Works In: Farmhouse, cottage, and rustic holiday styles.
Rustic style shines when you let natural materials do the talking. Burlap ribbon and twine add texture without any fuss. Galvanized buckets hold sprigs and keep the look casual. Dried orange slices bring warm color against the wood. I’ve noticed rustic trays feel at home in busy family kitchens. Nothing here needs to be perfect, and that is the charm.
Champagne Sparkle Accents
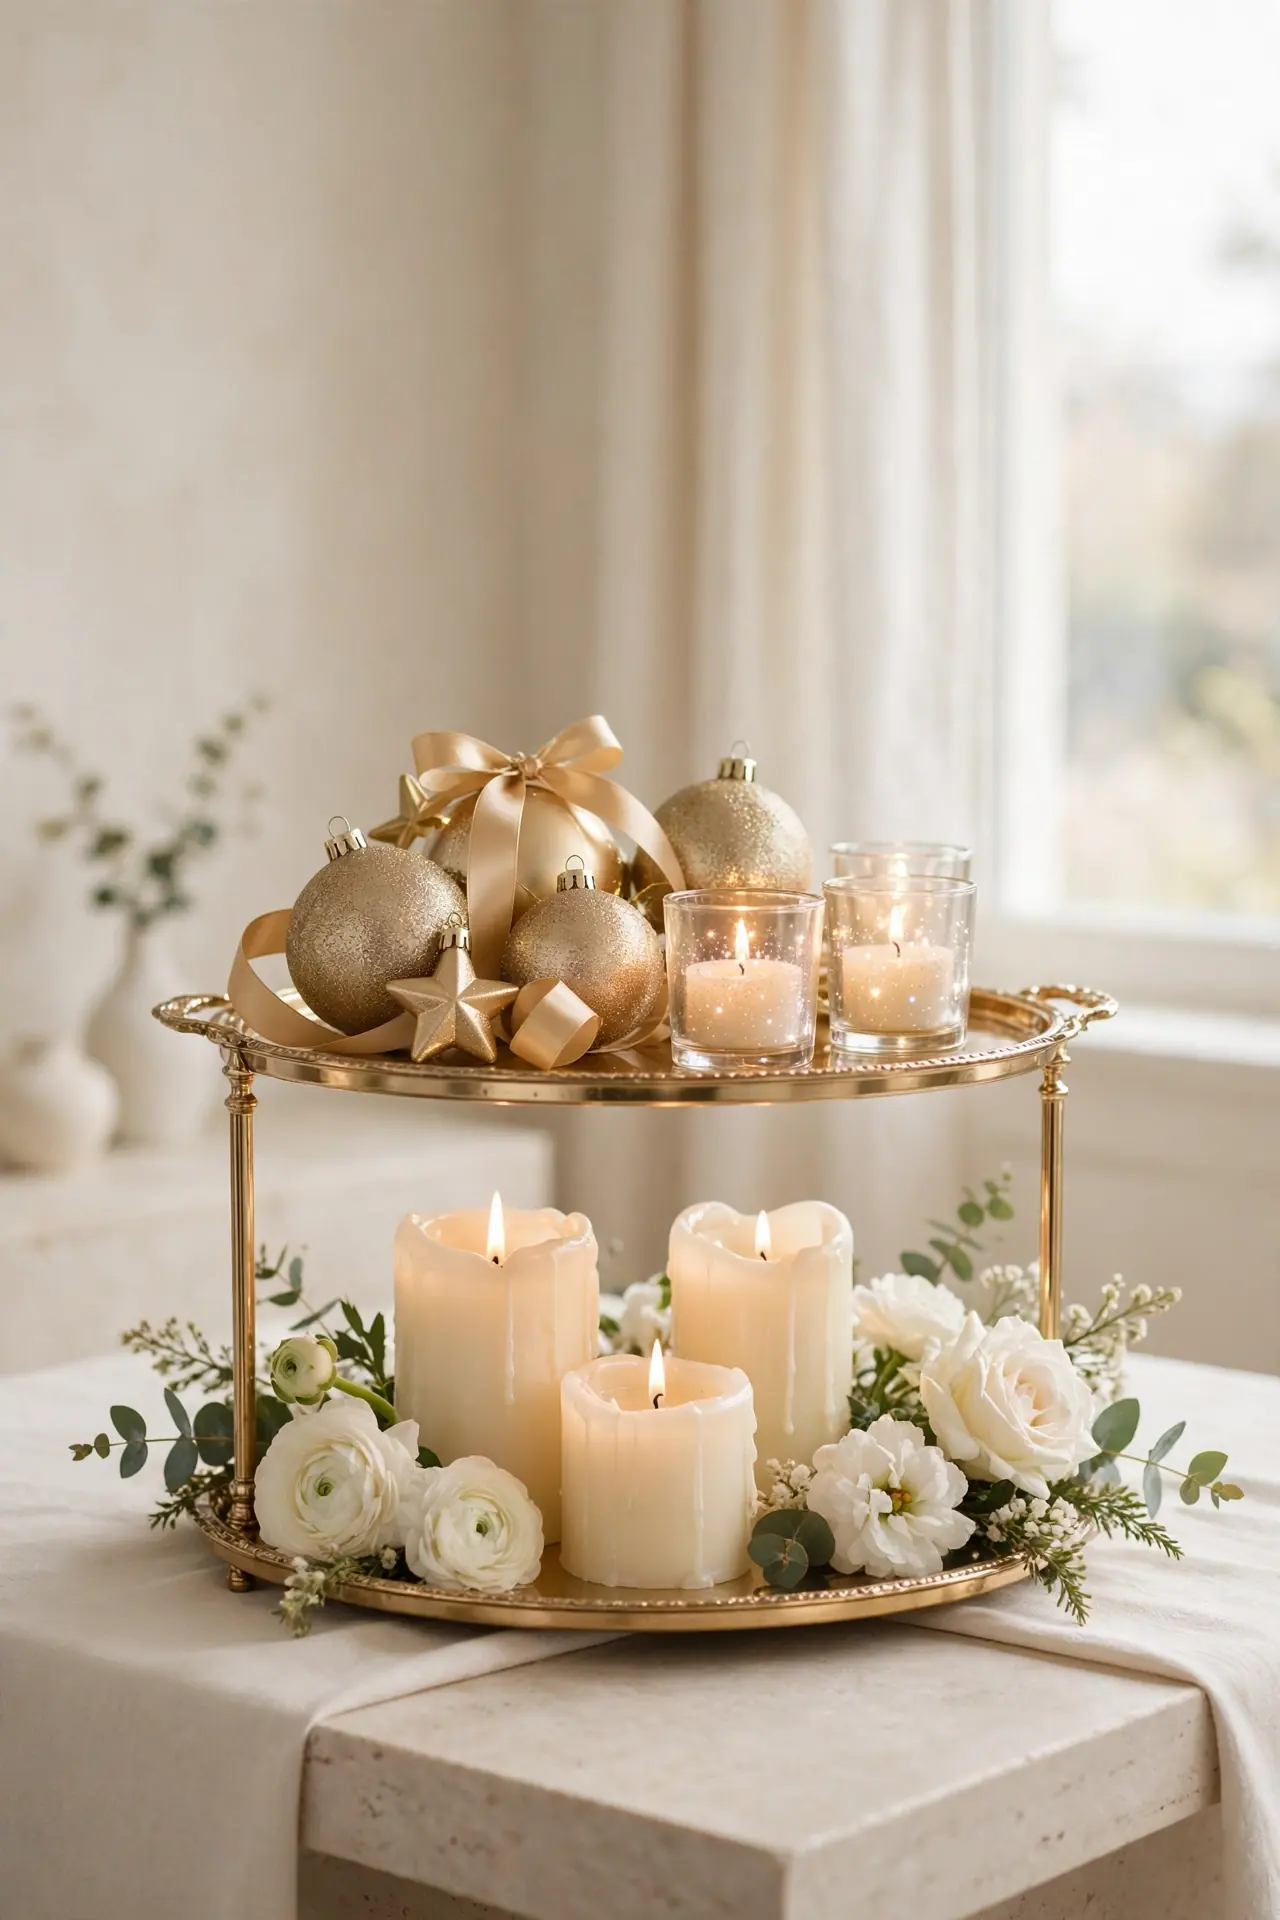
Metallic gold and champagne tones give a tray instant New Year glam. Start with champagne-colored ornaments and gold ribbon on the top tier. Add a few sparkling votives so the metals catch the light. The shimmer reads festive without a single bright color.
Balance the sparkle with soft neutrals like cream candles and white blooms. Too much metallic feels cold, so one natural element grounds it. I’ve noticed gold trays photograph best in daylight near a window. Keep this display up through January for an easy holiday-to-winter look. A small potted orchid or white amaryllis adds living softness to the shine.
Mercury Glass Shine
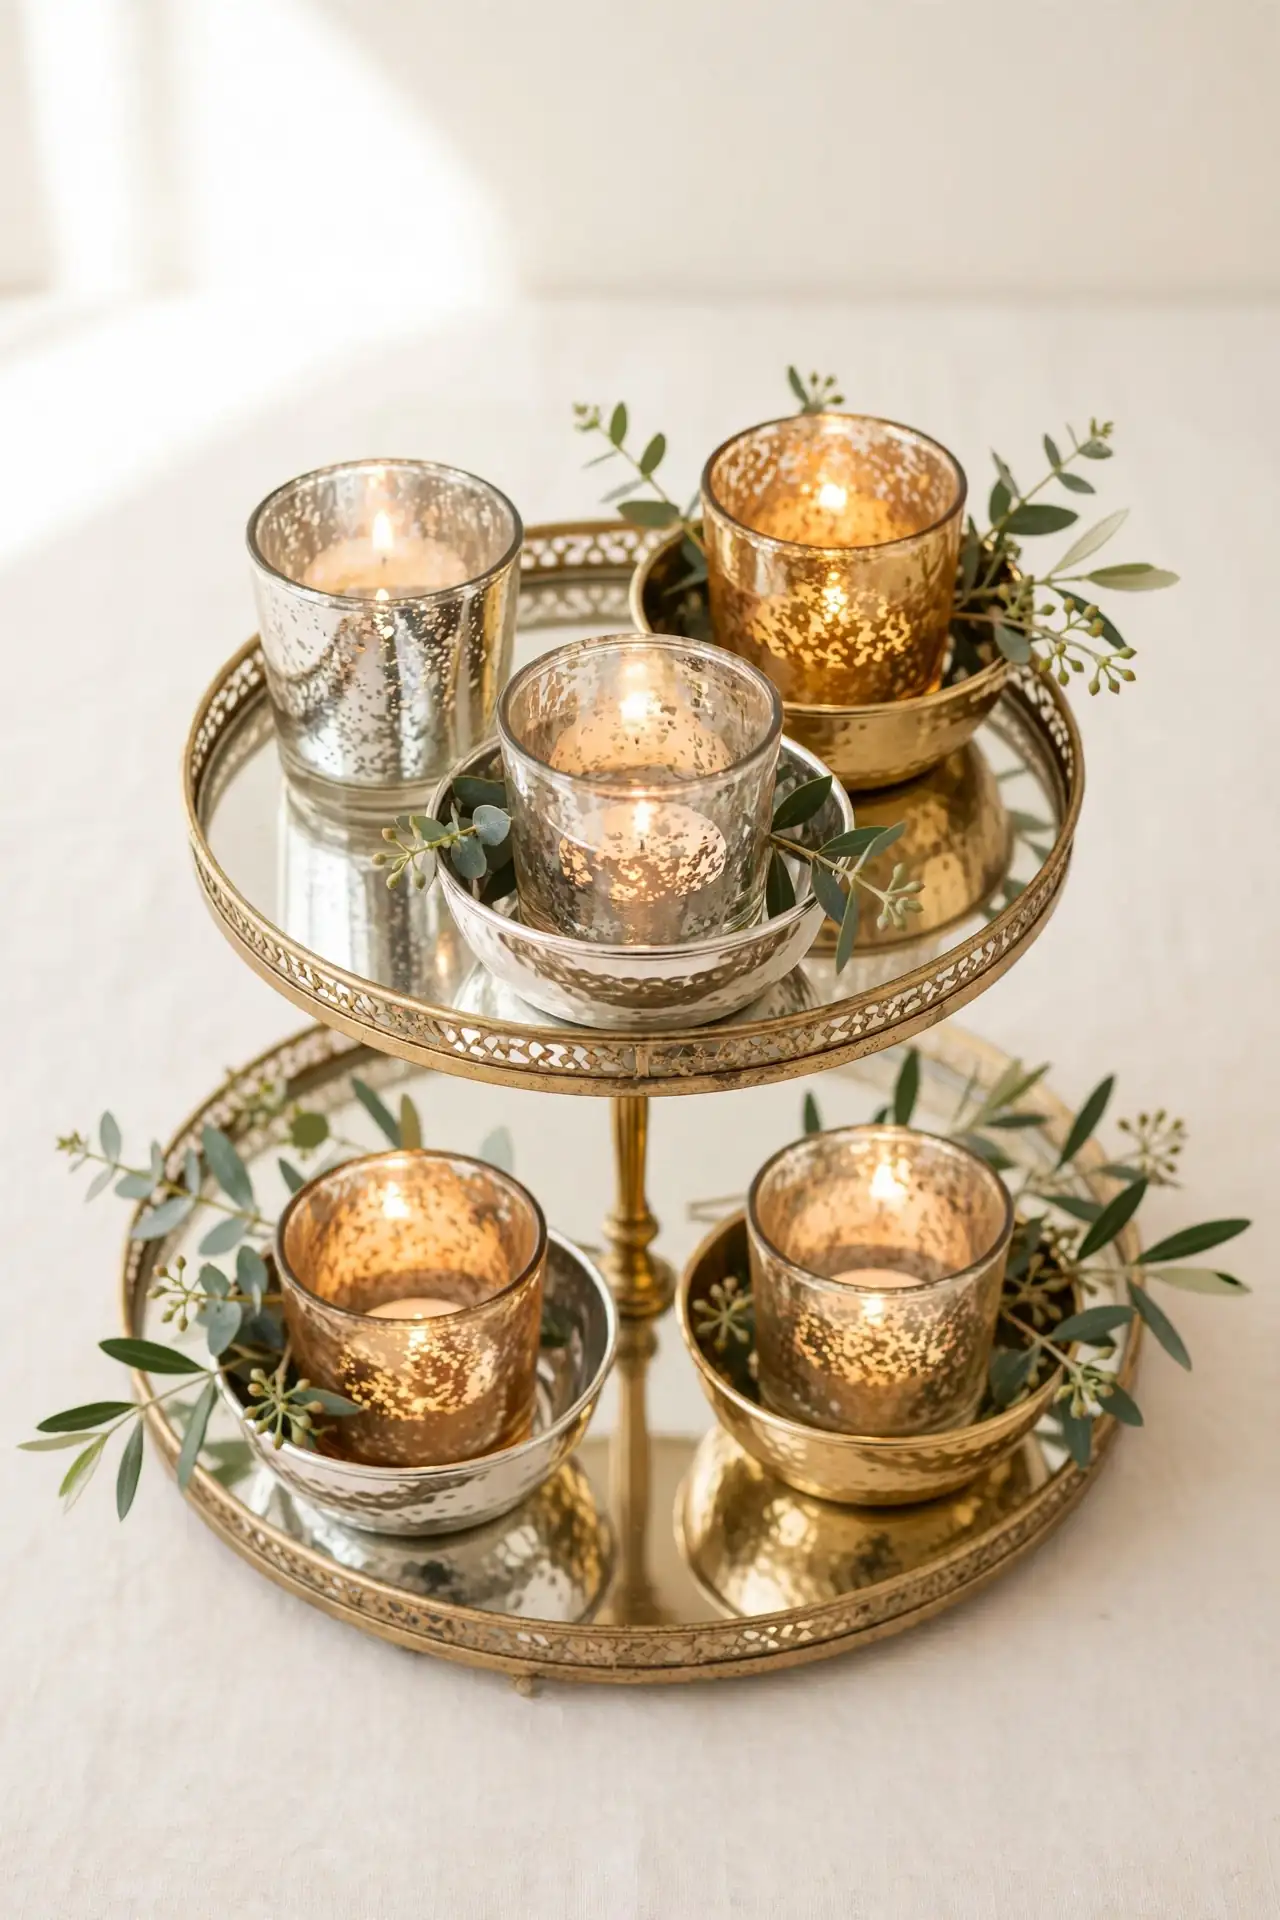
- Collect mercury glass votives, vases, and small bowls in silver and gold.
- Cluster them across the tiers so the mottled glass catches the light.
- Tuck battery tealights inside each piece for a warm inner glow.
- Add one sprig of greenery per tier to soften the shine.
- Place the tallest piece in back so every item shows.
Mercury glass looks antique and precious without the antique price. Thrift stores carry it cheaply all year, so stock up early. I’ve noticed mixed metals look richer than matching sets. Keep pieces close together so the glow multiplies across the tray. A soft cloth polish once a season keeps every piece gleaming.
Holiday Gift Station
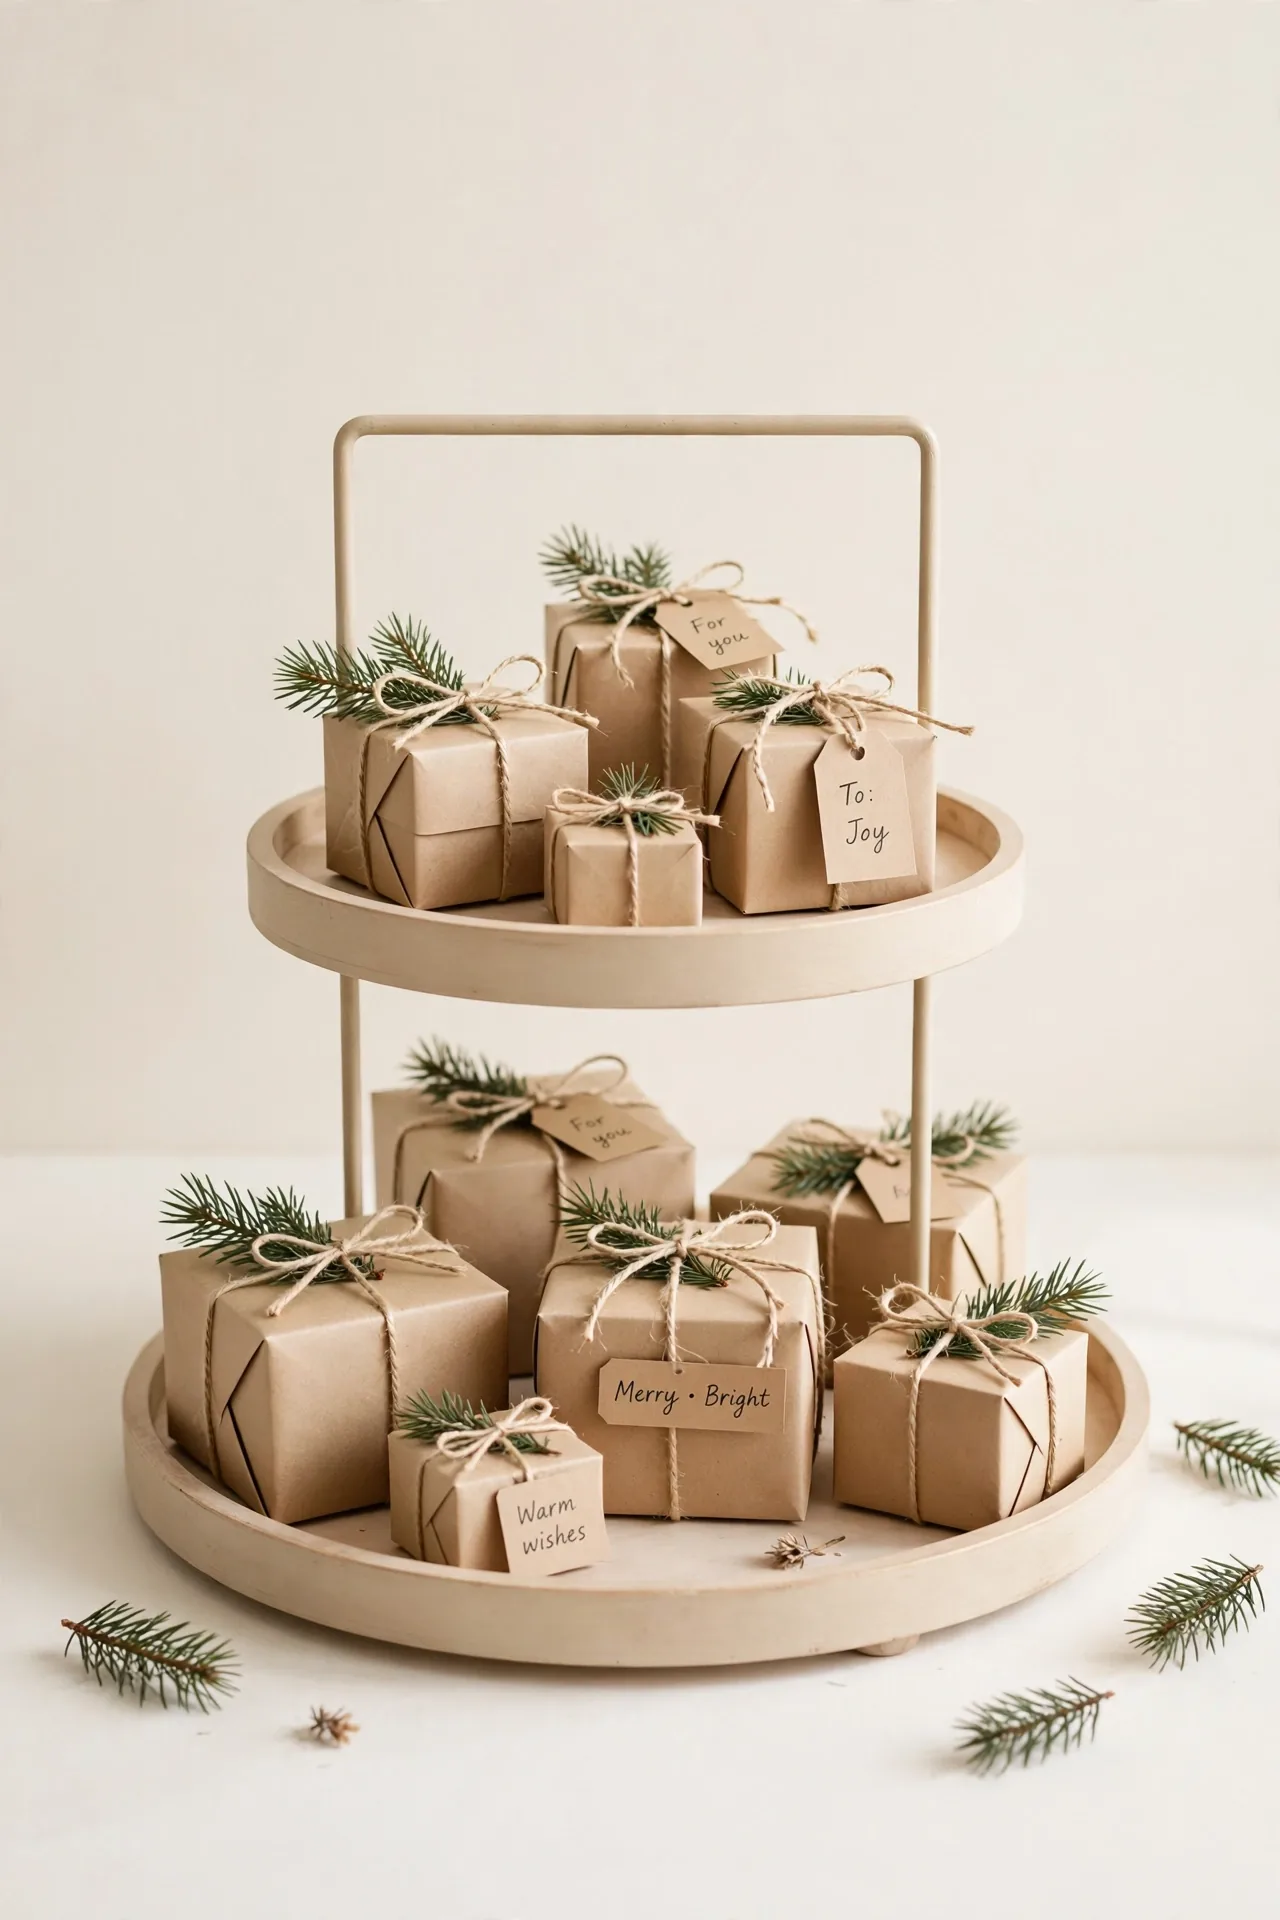
Quick Tip: Wrap tiny empty boxes in kraft paper and stack them like presents on each tier. Tie each with twine and a sprig of pine for a finished look. Vary the box sizes so the tiers feel full and playful. Stamp each tag with a name so the tiny gifts feel personal.
A gift-station tray doubles as decor and a handy wrap-free present spot. Slip small gift cards or candy inside a few boxes for a sweet surprise. I’ve noticed kids love rearranging these tiny packages. Keep the color palette tight so the display reads styled, not random. Restock the candy boxes weekly so the tray always looks full.
Starry Night Glow
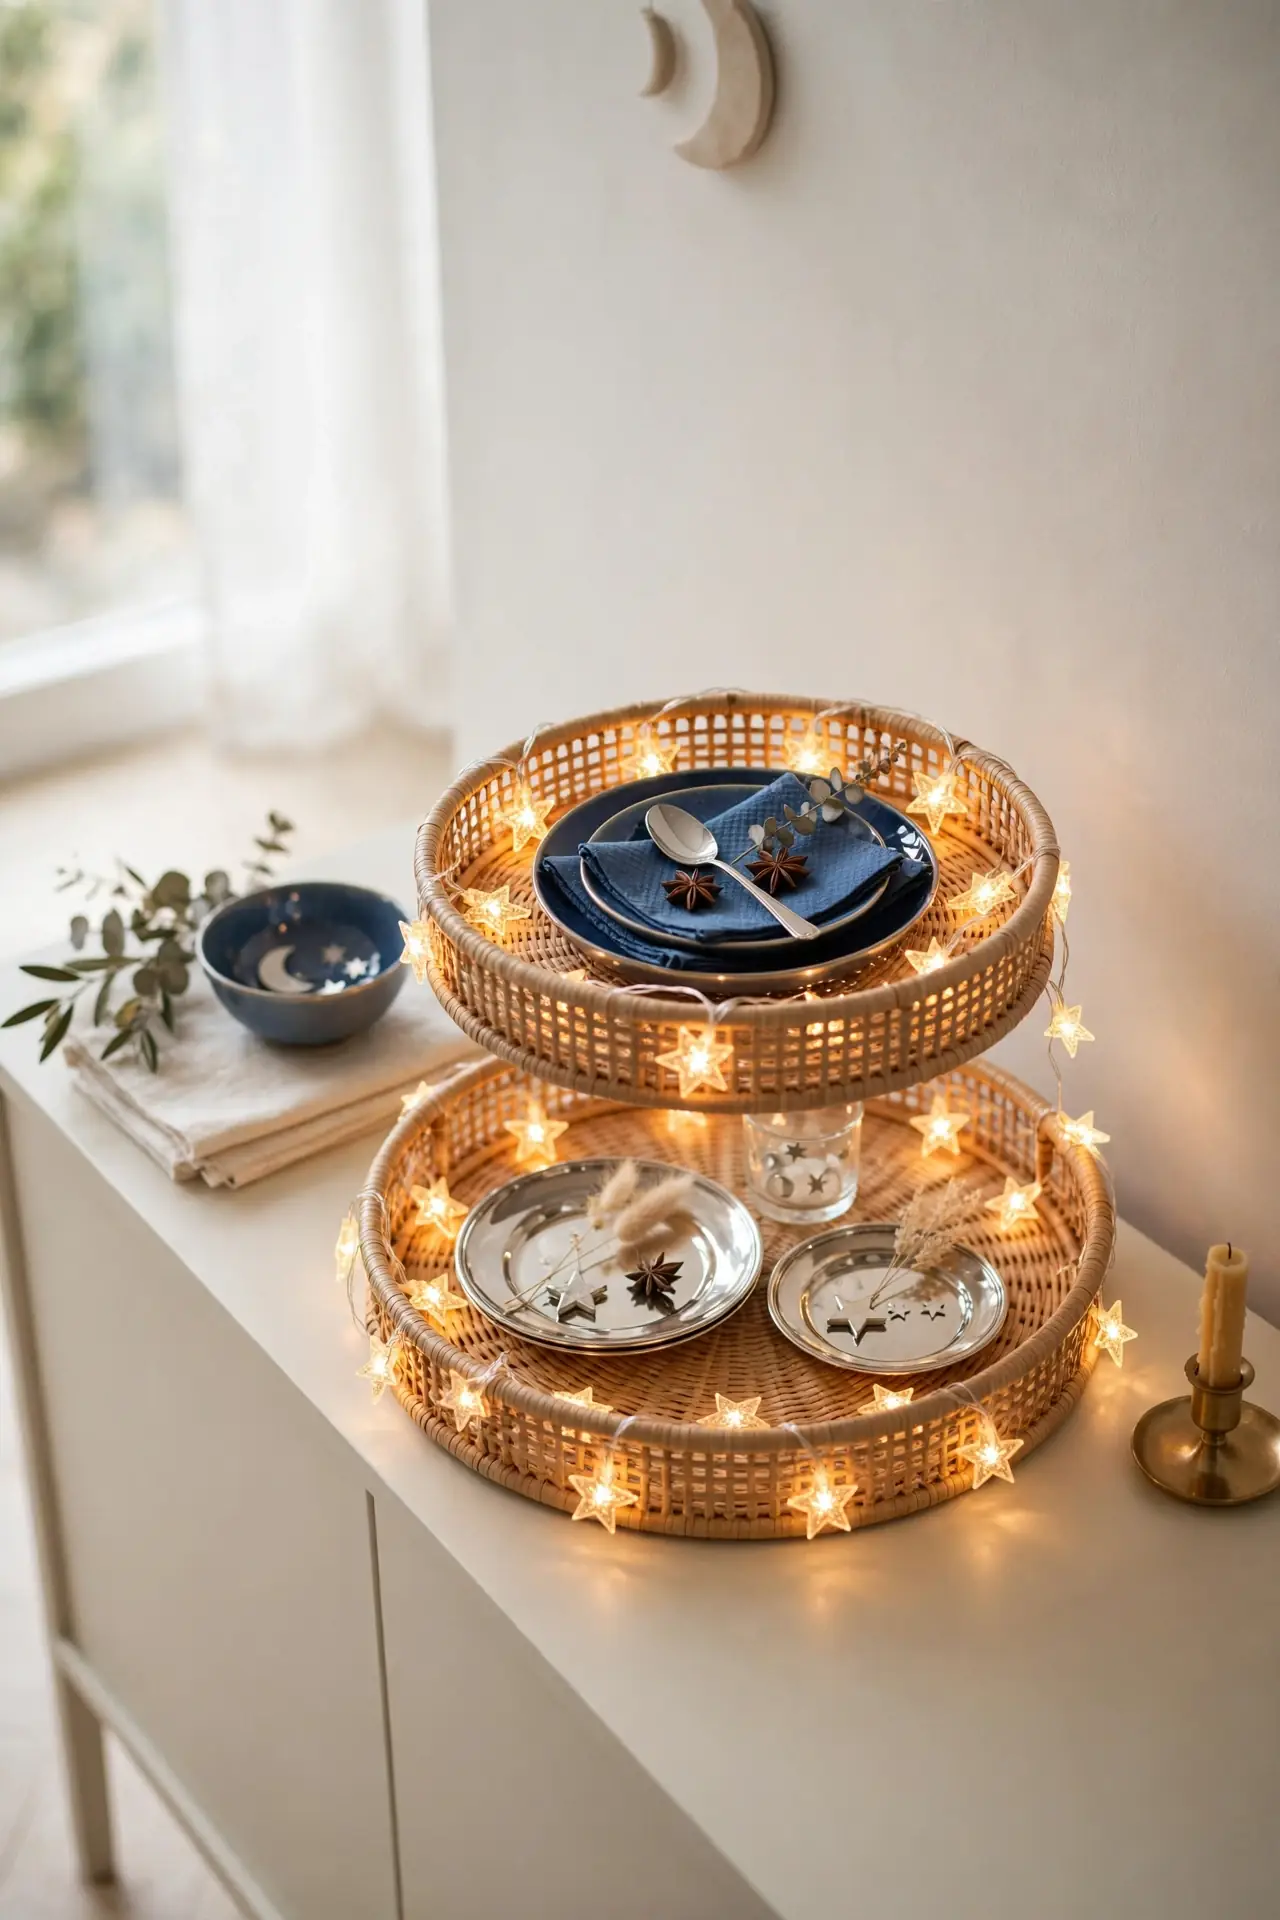
BEFORE: Before, the dark hallway corner swallowed the tray whole. The pale dishes looked gray and flat. Evening guests walked right past it.
AFTER: After, a string of star-shaped fairy lights weaves through each tier. The tiny stars glow against deep blue and silver dishes. That dark corner now feels like a midnight sky, and guests pause to admire it.
Star lights turn any tray into an evening showpiece. Weave the strand loosely so the stars spread evenly. Choose warm white for a classic look or cool white for a modern feel. A timer plug keeps the magic hands-free every night.
Dried Orange Slices
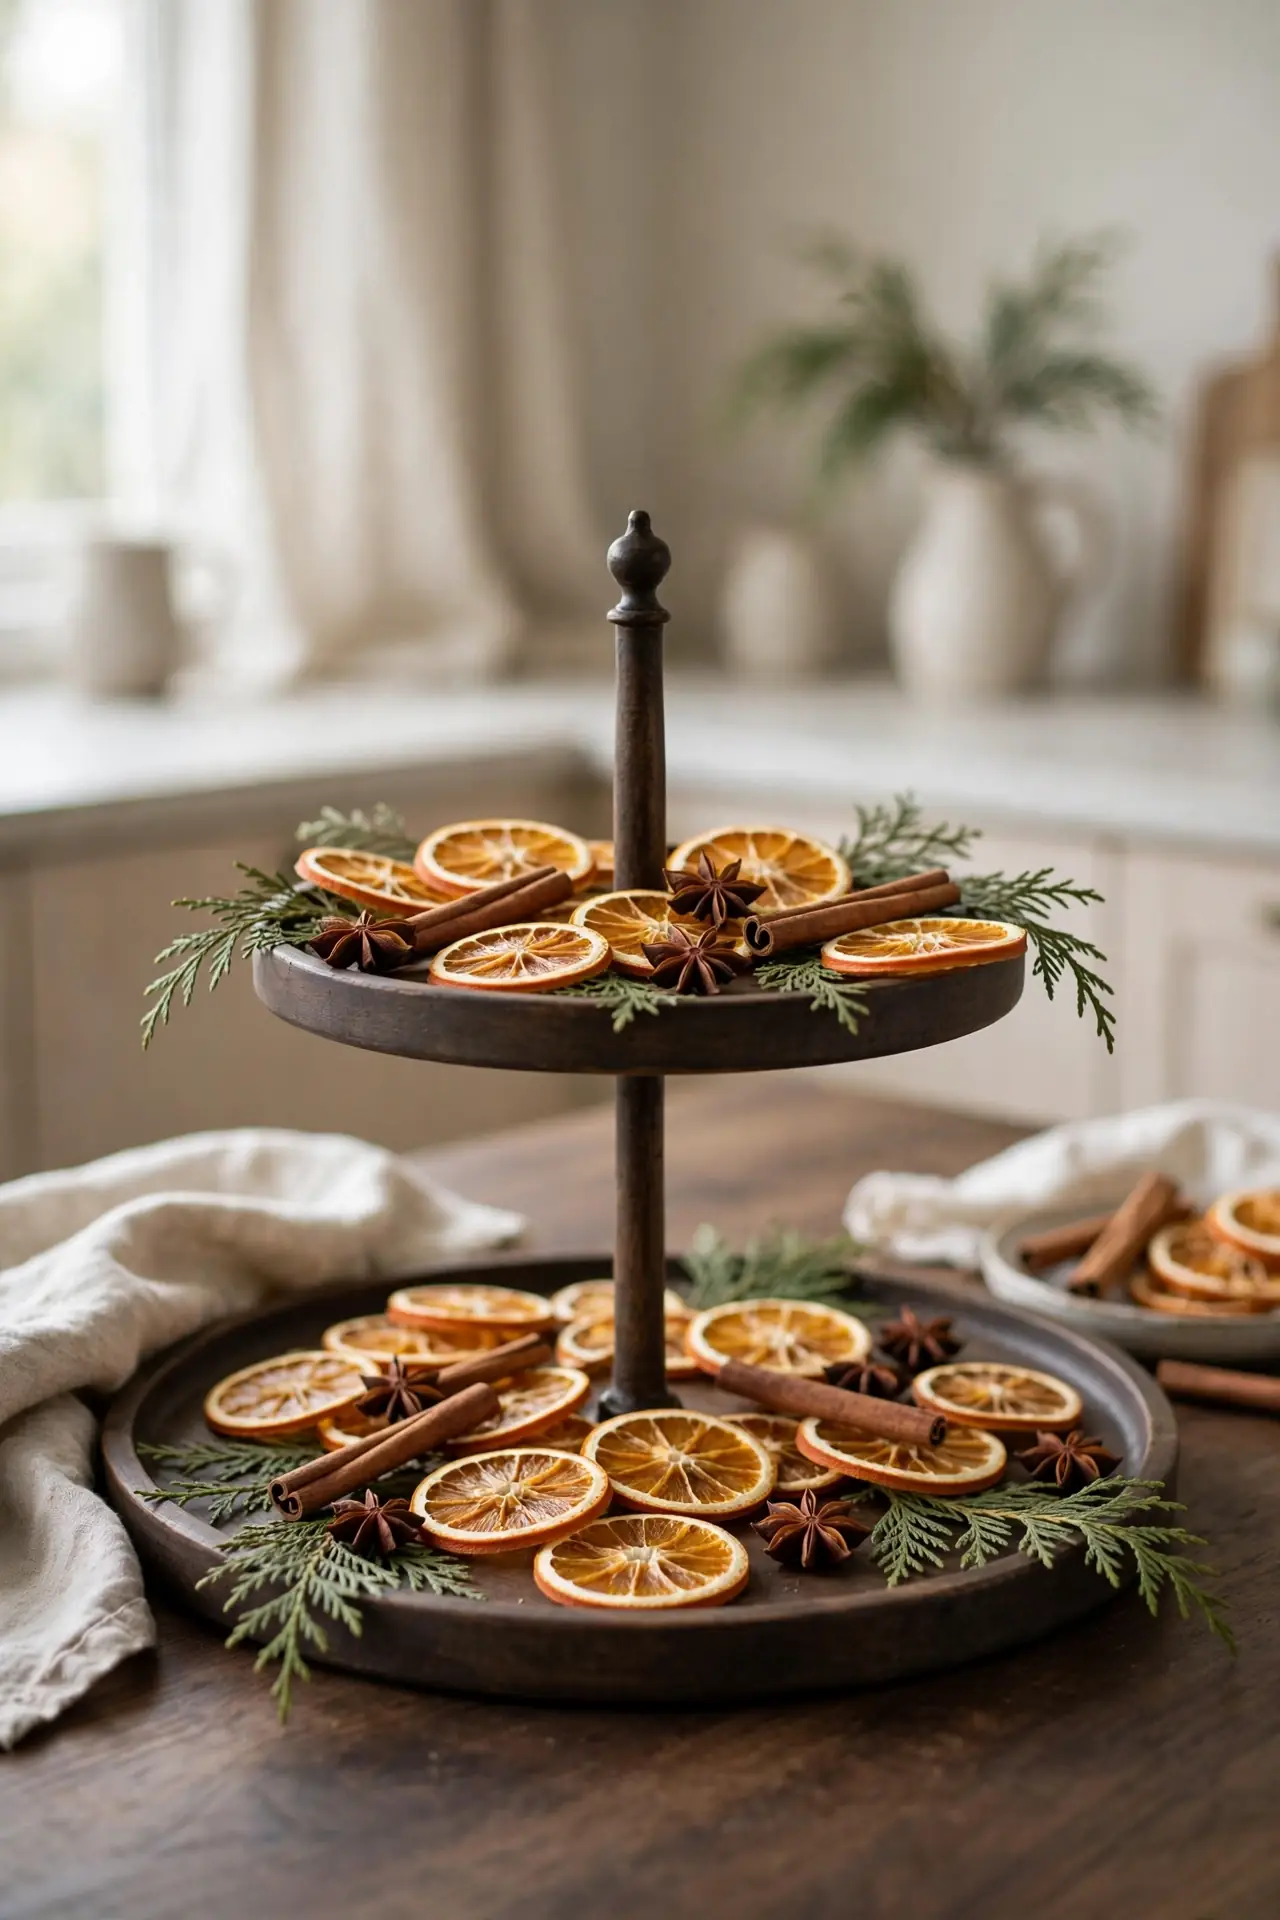
- Slice oranges thin and dry them low in the oven until crisp.
- Thread twine through a few slices to hang from the tray handle.
- Scatter the rest across the tiers with cinnamon sticks and star anise.
- Tuck in cedar sprigs so the warm citrus pops against green.
Dried oranges add old-world charm and a gentle citrus scent. Their amber glow looks stunning against dark wood trays. I’ve seen this work well in many cases on kitchen islands. Store extras in a paper bag and reuse them for years. String a few slices into a garland and drape it over the tray edge.
Festive Fruit Accents
| Fresh Fruit | Faux Fruit | |
|---|---|---|
| Lifespan | Three to five days | All season long |
| Cost | Low, grocery store | Higher upfront |
| Realism | Perfectly real | Nearly real |
| Upkeep | Check daily | Dust weekly |
| Best For | Holiday week | Long-season styling |
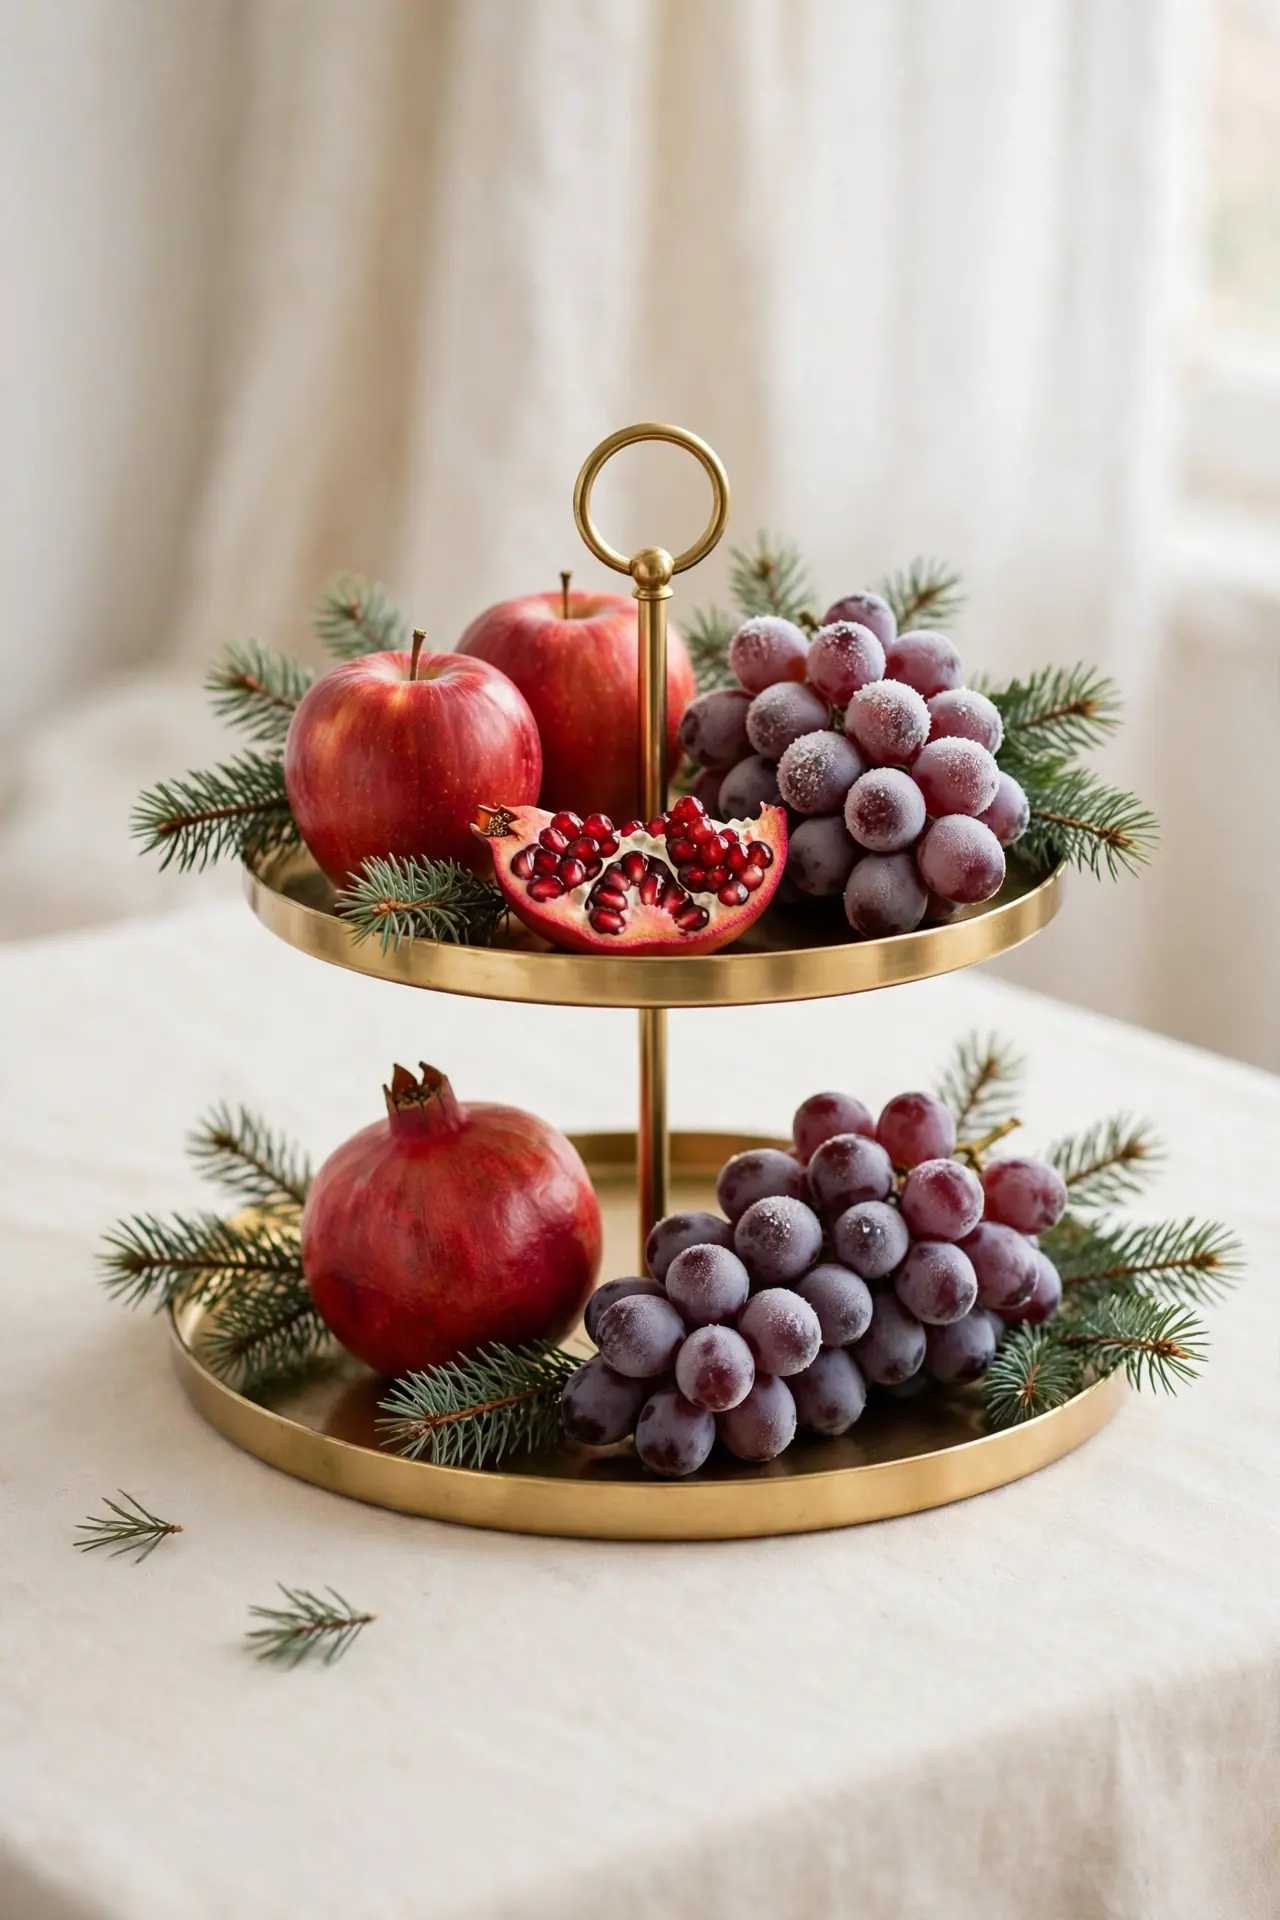
Fruit brings juicy color and natural shine to a tiered tray. Red apples, pomegranates, and frosted grapes look rich against greenery. Fresh fruit works best for holiday week when guests visit daily. Faux fruit suits long-season displays with zero upkeep. Mix both if you want realism without the waste. Tuck pine sprigs between the fruit for a gathered-from-the-orchard feel. I’ve noticed fruit trays photograph beautifully in morning light. Keep fresh pieces away from heat so they last longer.
Twinkle Light Magic
DO:
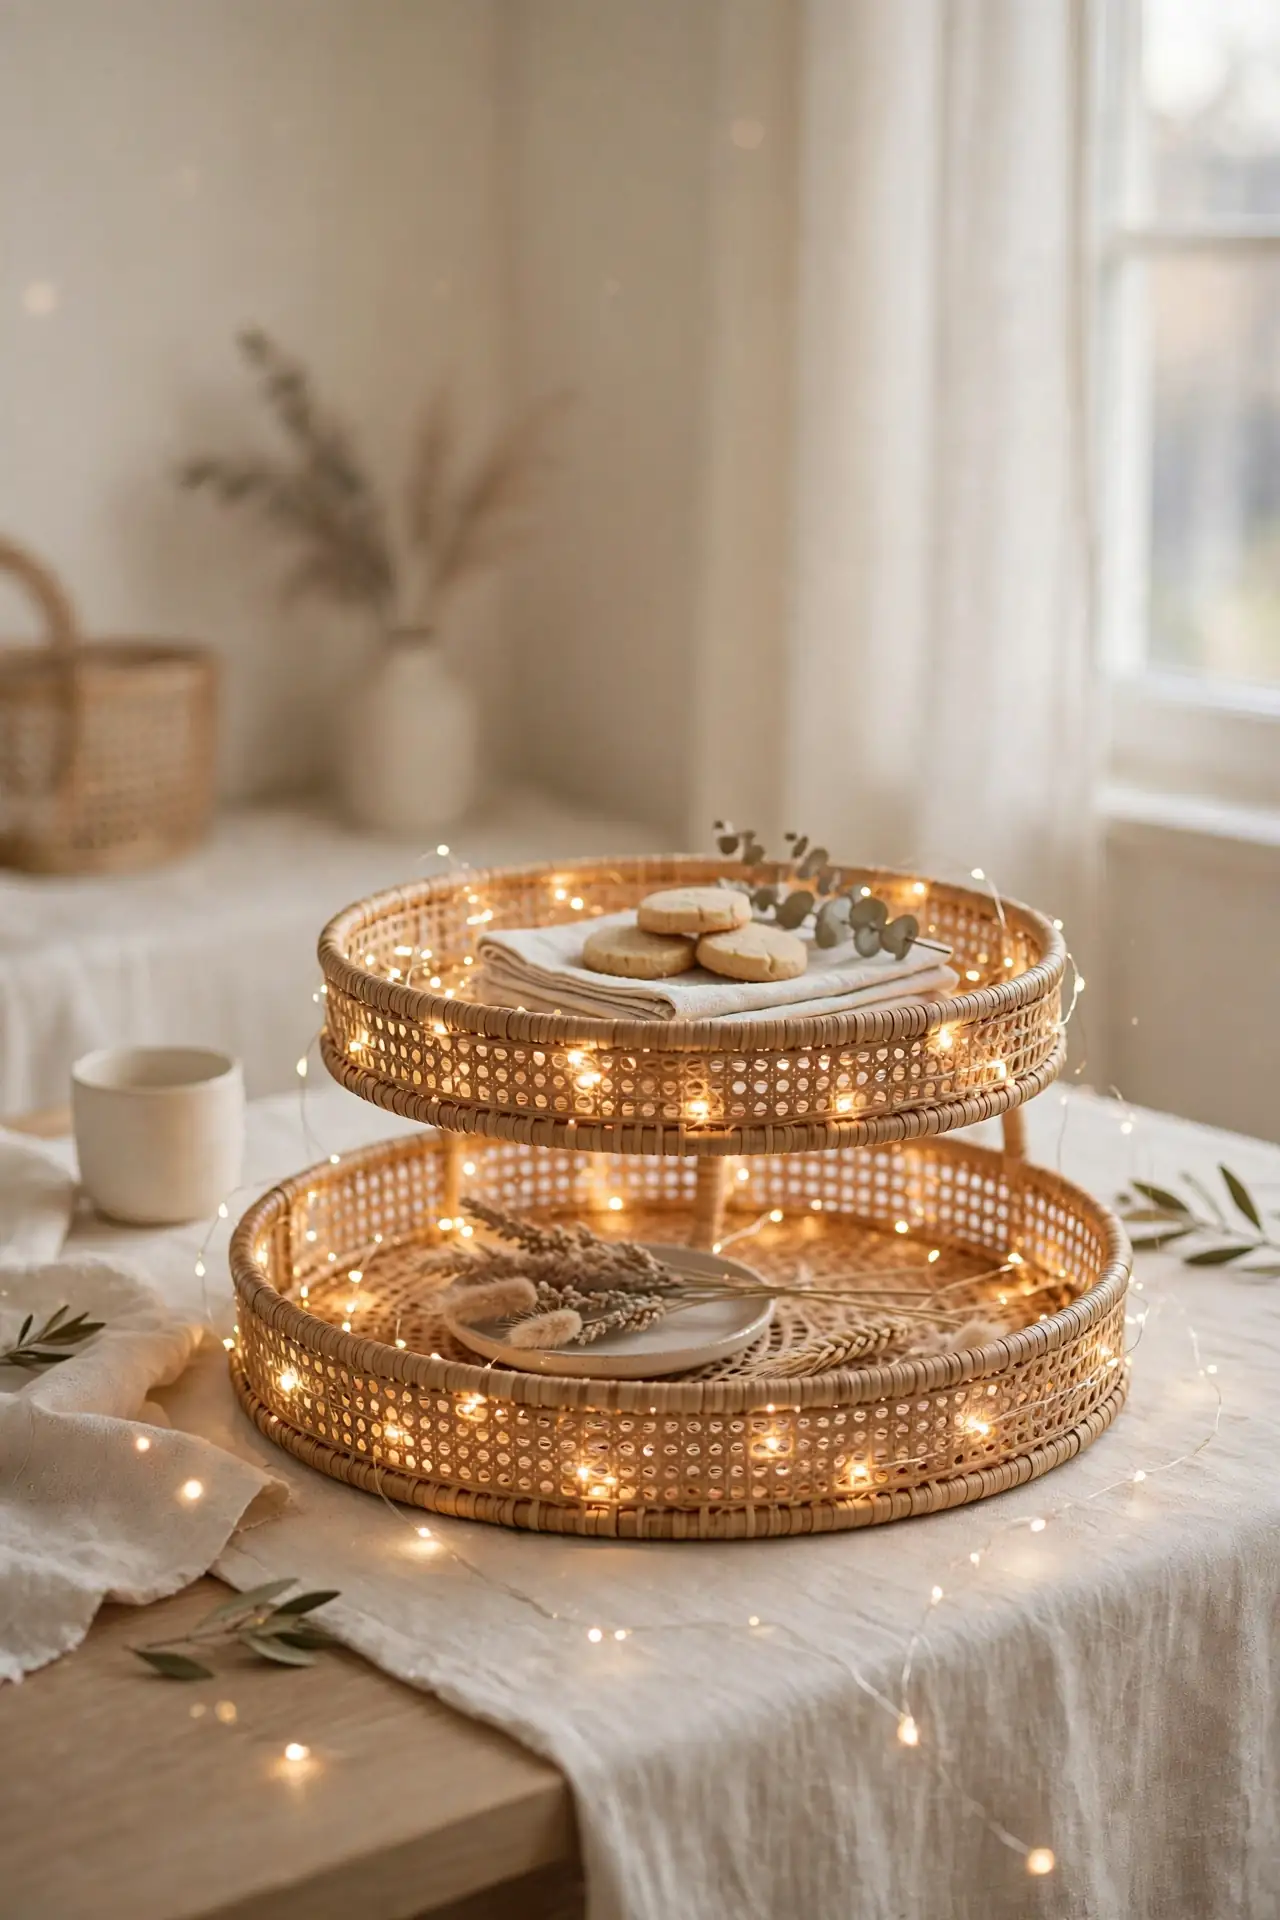
- Weave one strand of warm micro lights through every tier.
- Hide the battery pack behind the tallest item.
- Use a timer so the lights glow each evening.
DON’T:
- Don’t tangle cords where they show from the front.
- Don’t choose cool white if your room runs warm.
- Don’t leave lights on all day; save the battery.
Twinkle lights make the simplest tray feel magical after dark. Micro lights on thin wire disappear into the styling. I’ve noticed one strand per tier gives the best glow without glare. This is the finishing touch that makes guests say wow. Coil any extra wire neatly behind the tray base.
Conclusion
These 23 christmas tiered tray ideas prove that small displays make a big holiday impact. Pick the one that fits your style, gather a few simple pieces, and let the layers do the work. I’ve seen how small changes like these can completely shift the way a space feels. Save your favorites on Pinterest so you can find them again next year, then try one this weekend. Share a photo of your tray with friends and family to spread the cheer. Your magical holiday display is closer than you think. Start with one tray today and watch your home glow with holiday warmth.
One Comment