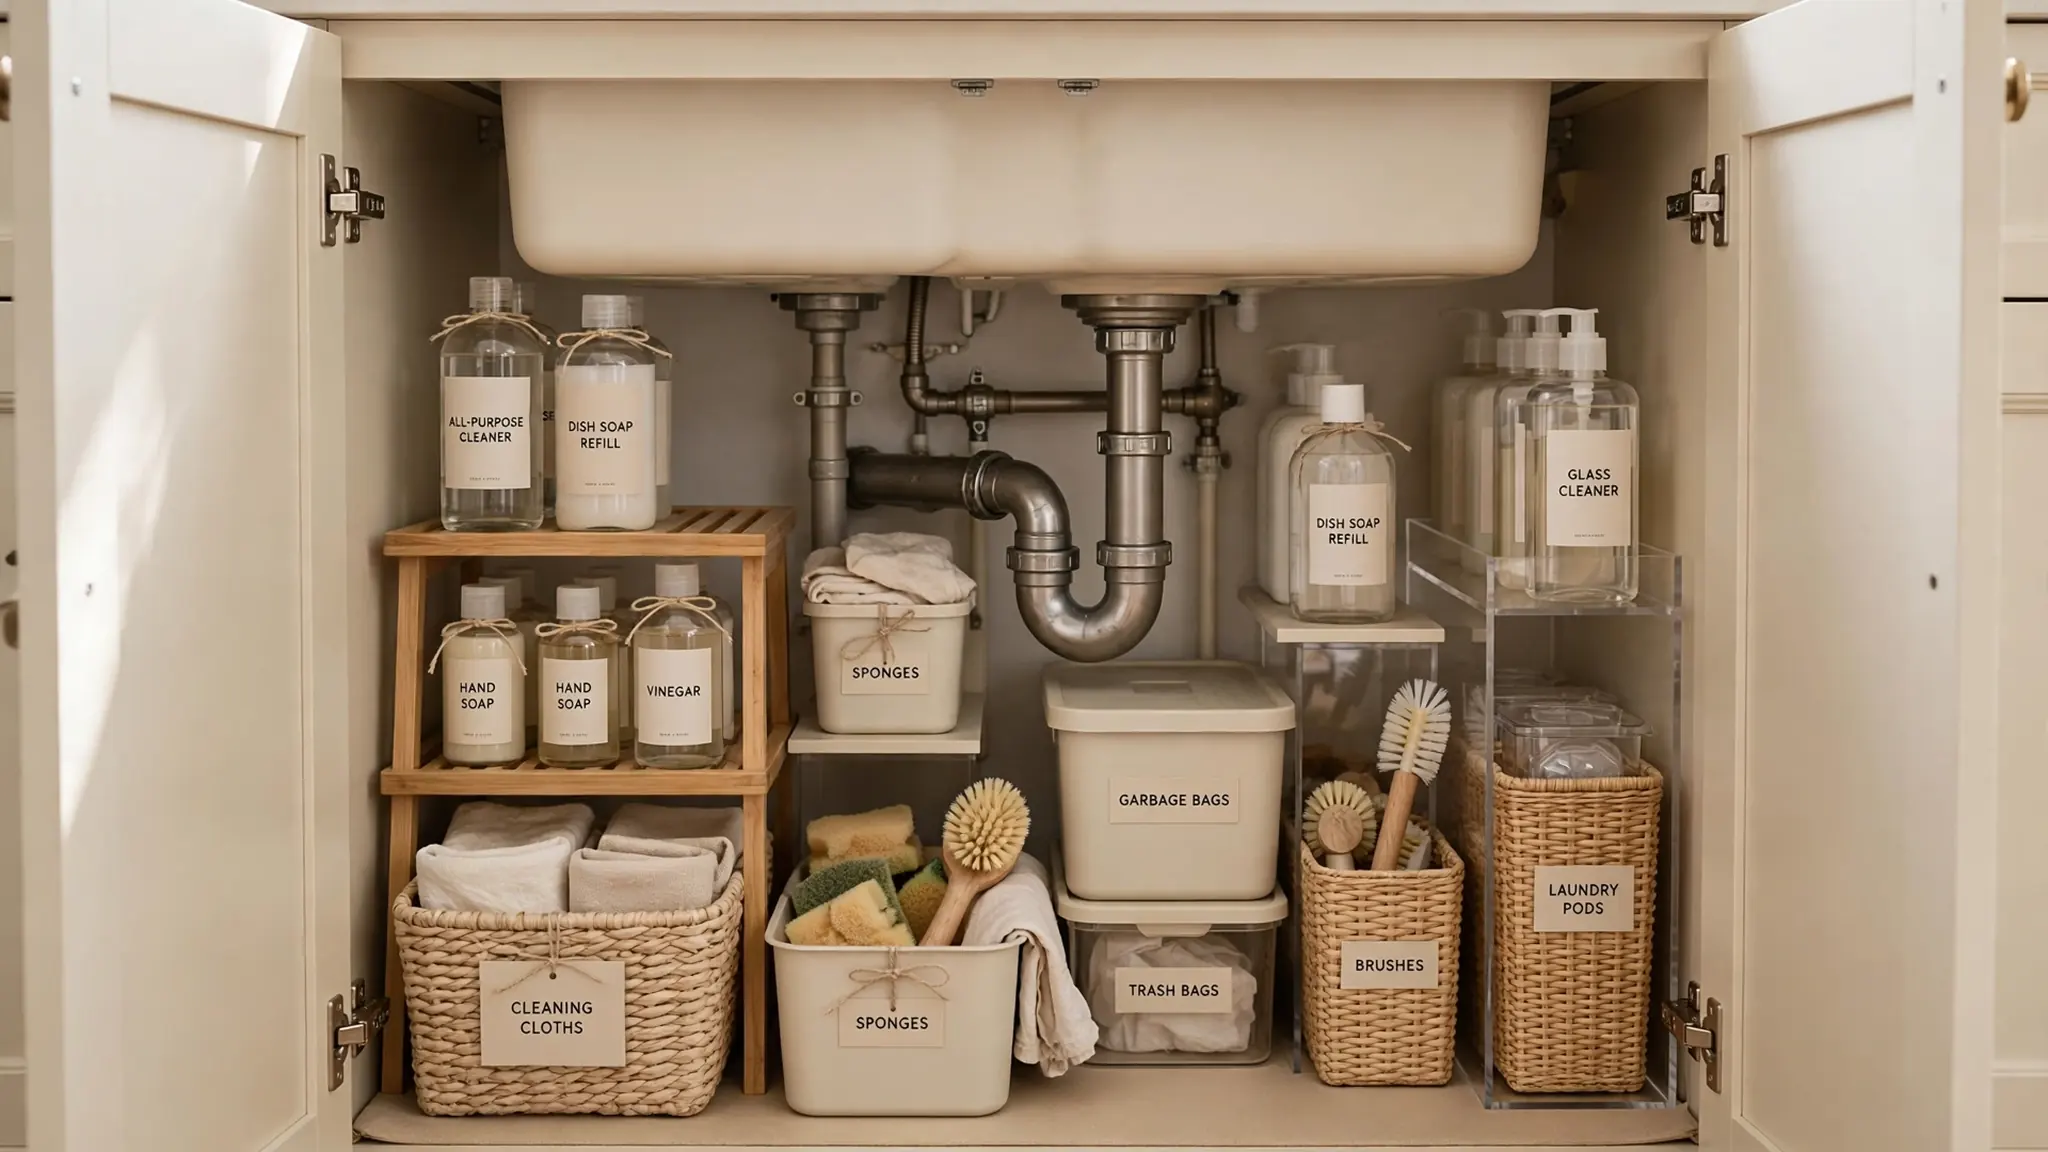
20 Under Kitchen Sink Organization Ideas That Work Wonders
Finding smart under kitchen sink organization ideas can turn one of the messiest spots in your home into a model of order. The cabinet under your sink collects cleaning sprays, sponges, trash bags, and half-empty bottles until opening the door feels like a gamble. I have faced that jumbled pile myself, and small changes made a huge difference. With the right bins, risers, and hooks, every bottle gets a home and nothing gets lost in the back again.
The trick is working around the pipes instead of fighting them, stacking upward and using the cabinet doors for extra storage. These ideas suit renters and homeowners alike since most need no drilling. If you love tidy small spaces, these small bathroom organization ideas will inspire you too. These 20 ideas will help you build a cabinet that stays neat every single day.
Stackable Sliding Bins
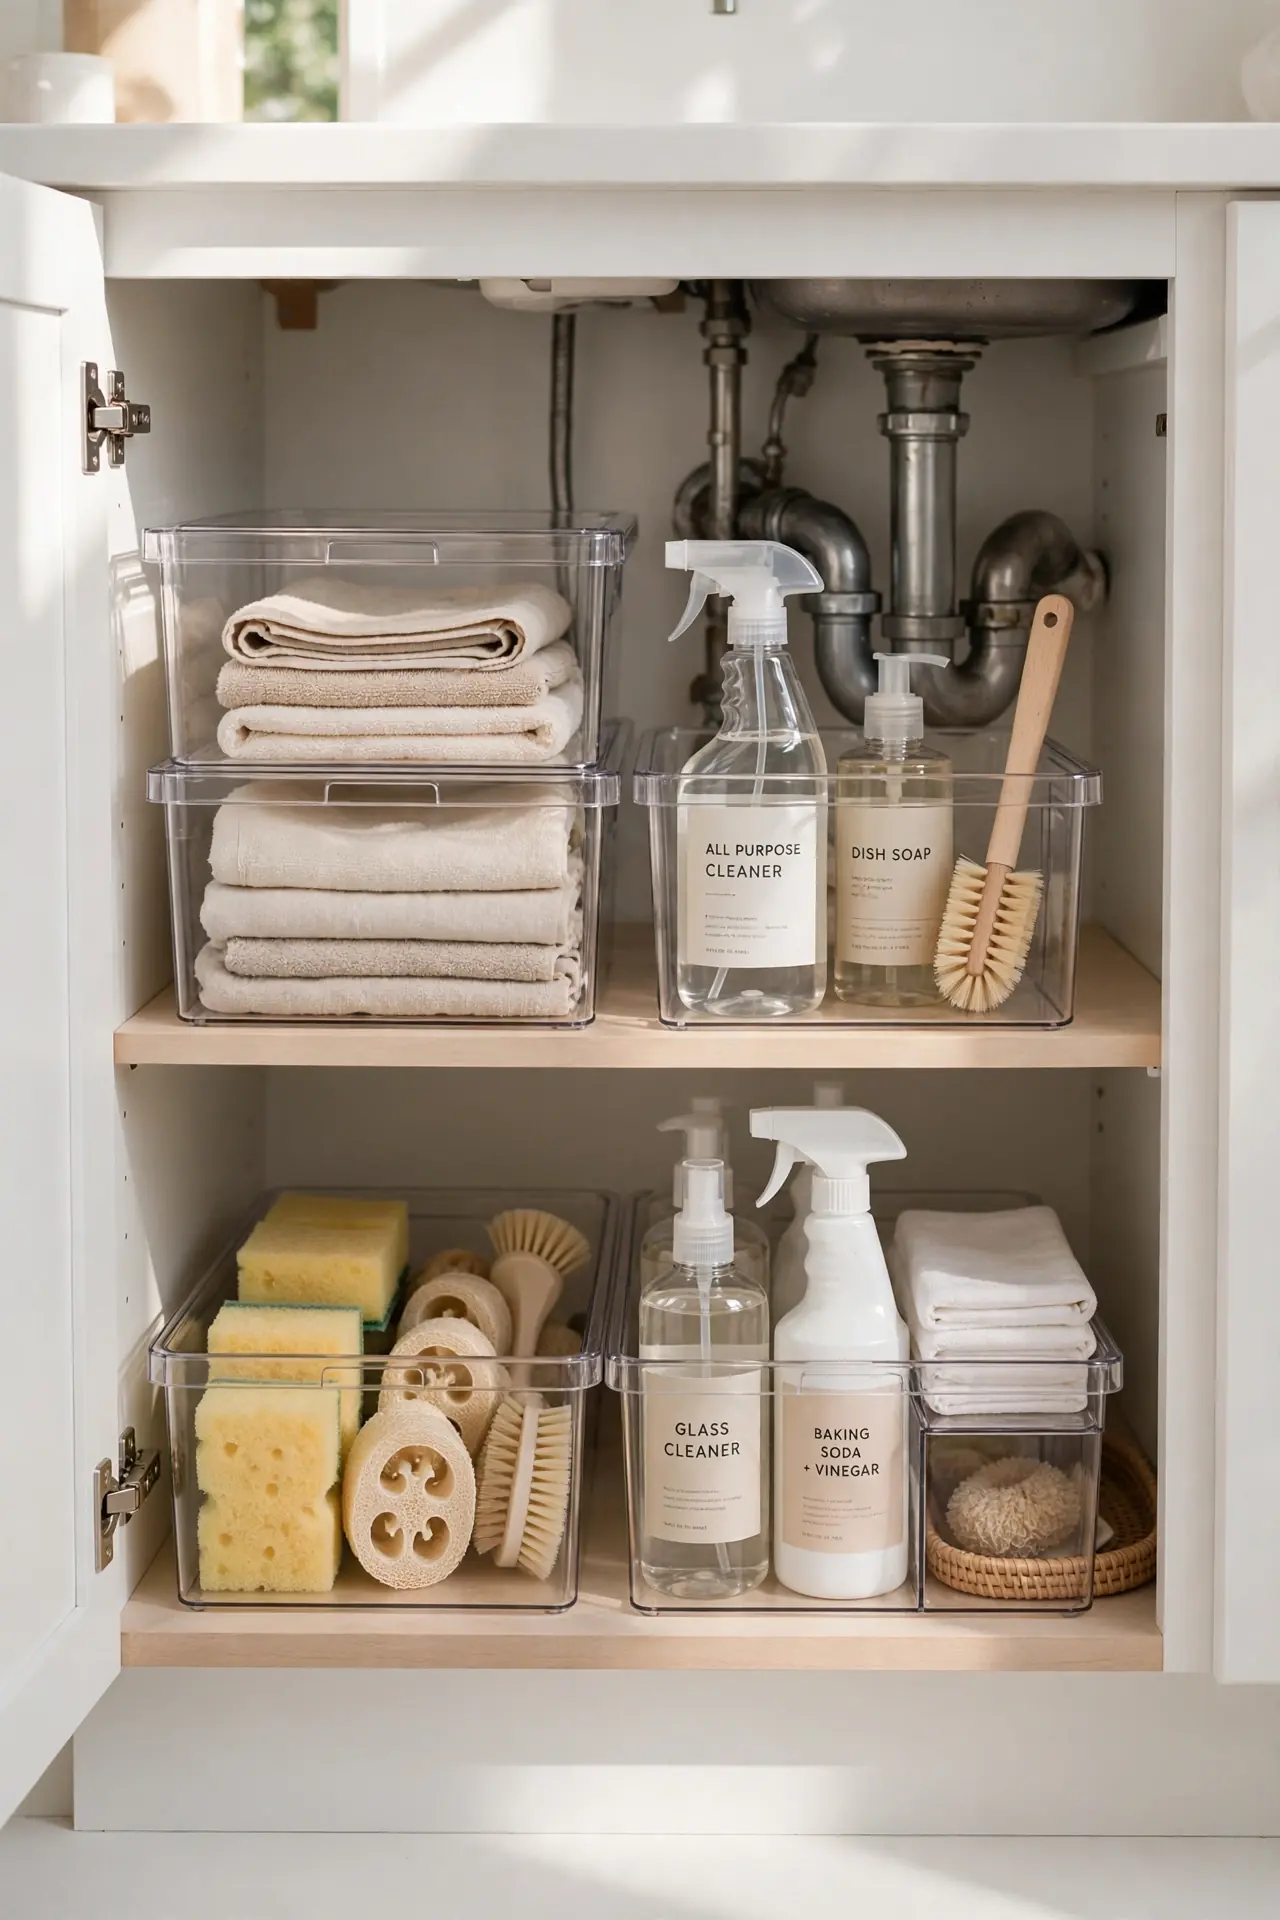
Stacks of cleaning bottles topple every time you reach for one, and that chaos ends the moment you give them sliding homes. Stackable bins with built-in handles let you pull out the whole category like a drawer, grab what you need, and slide it back in seconds. Pick clear bins and a narrow depth that clears your pipes. Two stacked levels instantly double your usable floor space without any tools.
Keep the heaviest bottles on the bottom tier so the stack stays steady, and reserve the top for lighter extras like sponges and cloths. Label each bin by task to end the daily hunt. I have noticed this one change makes the cabinet feel twice as big, and it takes only minutes to set up.
Tension Rod Hangers
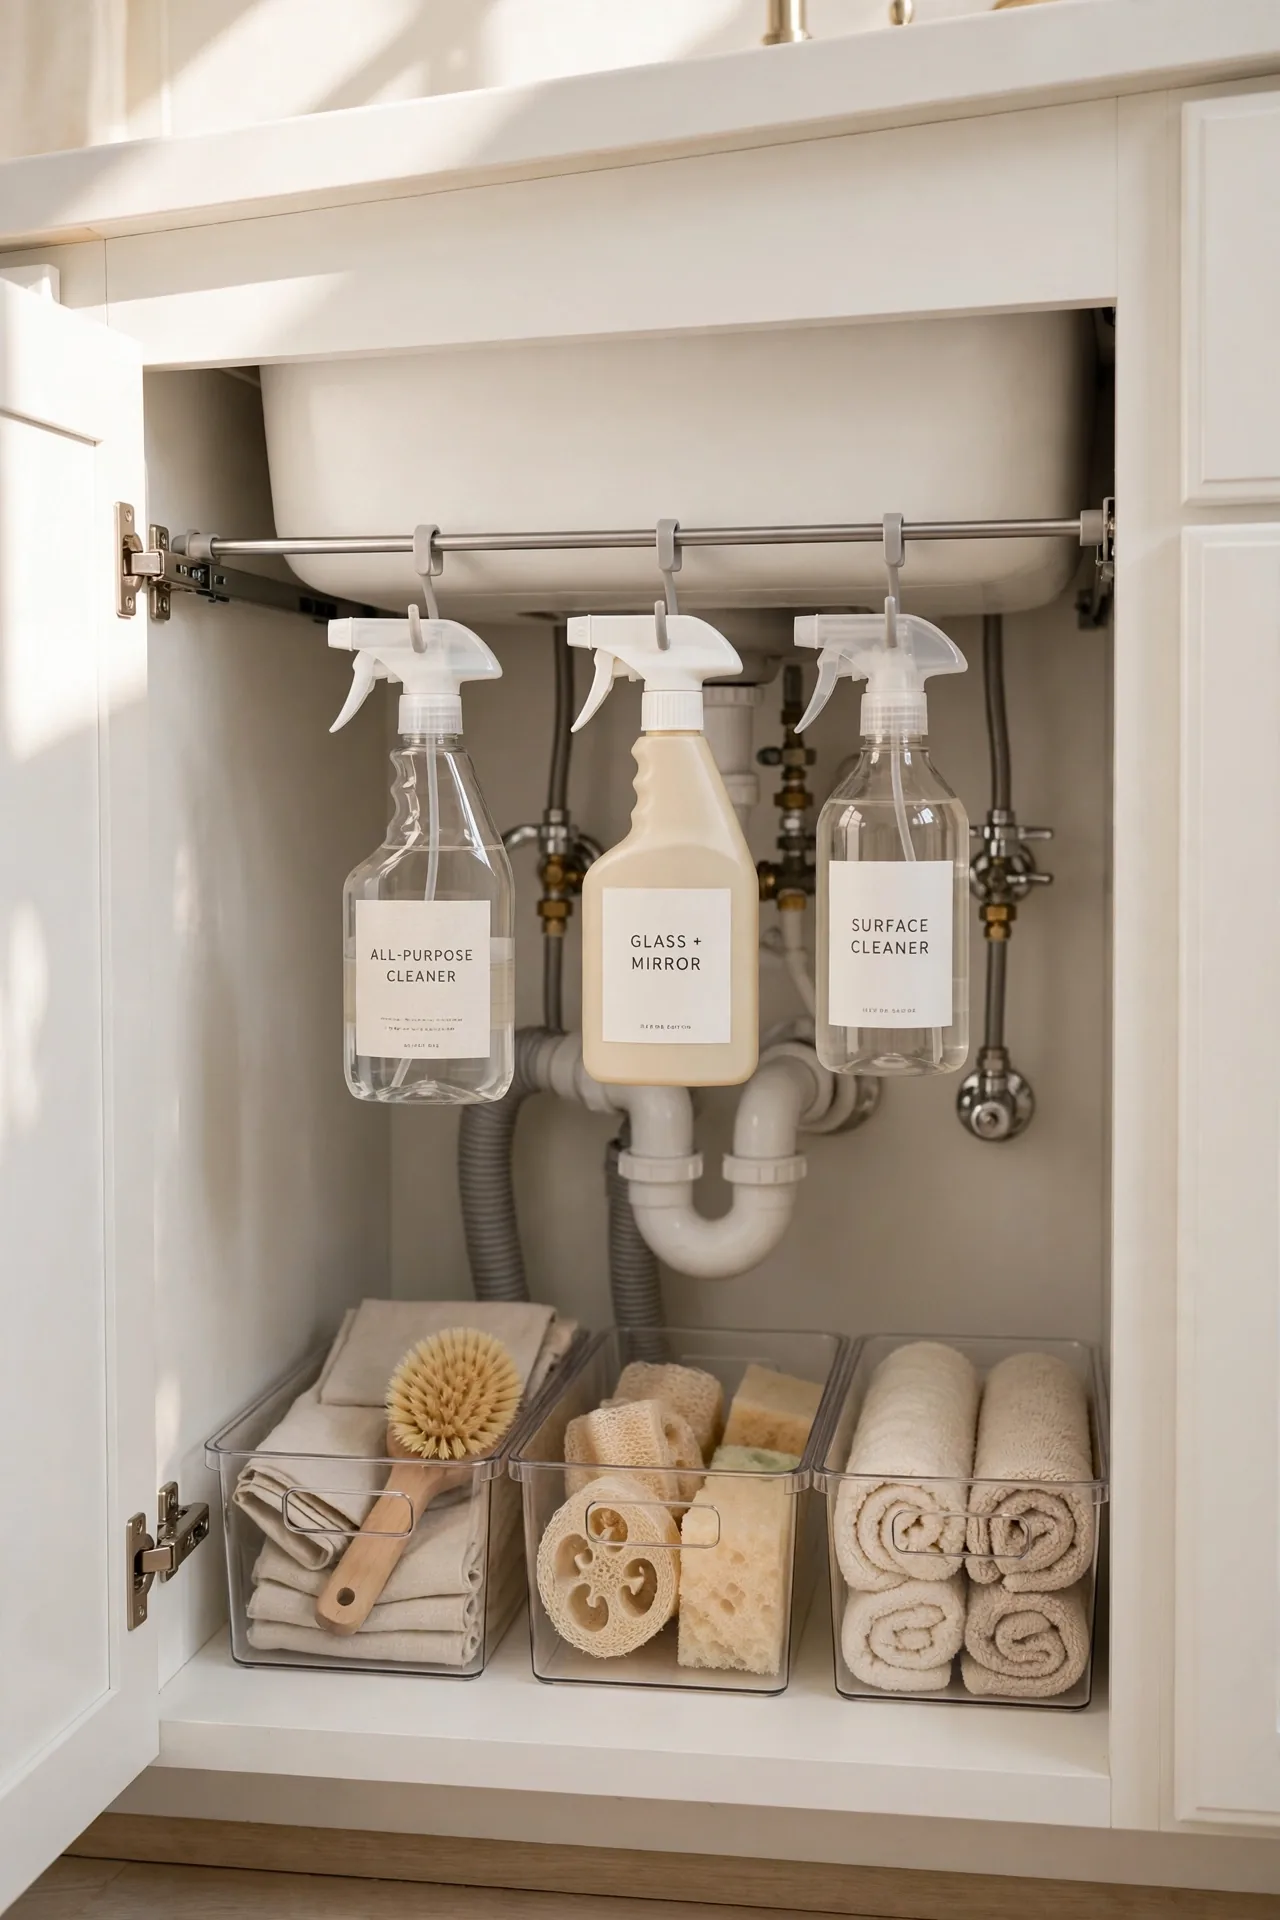
The vertical gap above your pipes is wasted space in most cabinets, but a simple tension rod turns it into prime real estate. Hang spray bottles by their triggers so they float above the floor, freeing the base for bins and baskets. This upgrade costs very little and needs zero drilling.
- Measure the cabinet width and buy a rod that extends slightly beyond it.
- Mount the rod to clear your tallest spray bottle.
- Hang bottles by their triggers for easy grabbing.
- Add a second rod lower down for small bottles and cleaning cloths.
This trick frees up precious floor space for storage below. I have seen this work well in many cases, especially in narrow cabinets. Setup takes minutes and removes in seconds if you move.
Spray Bottle Station
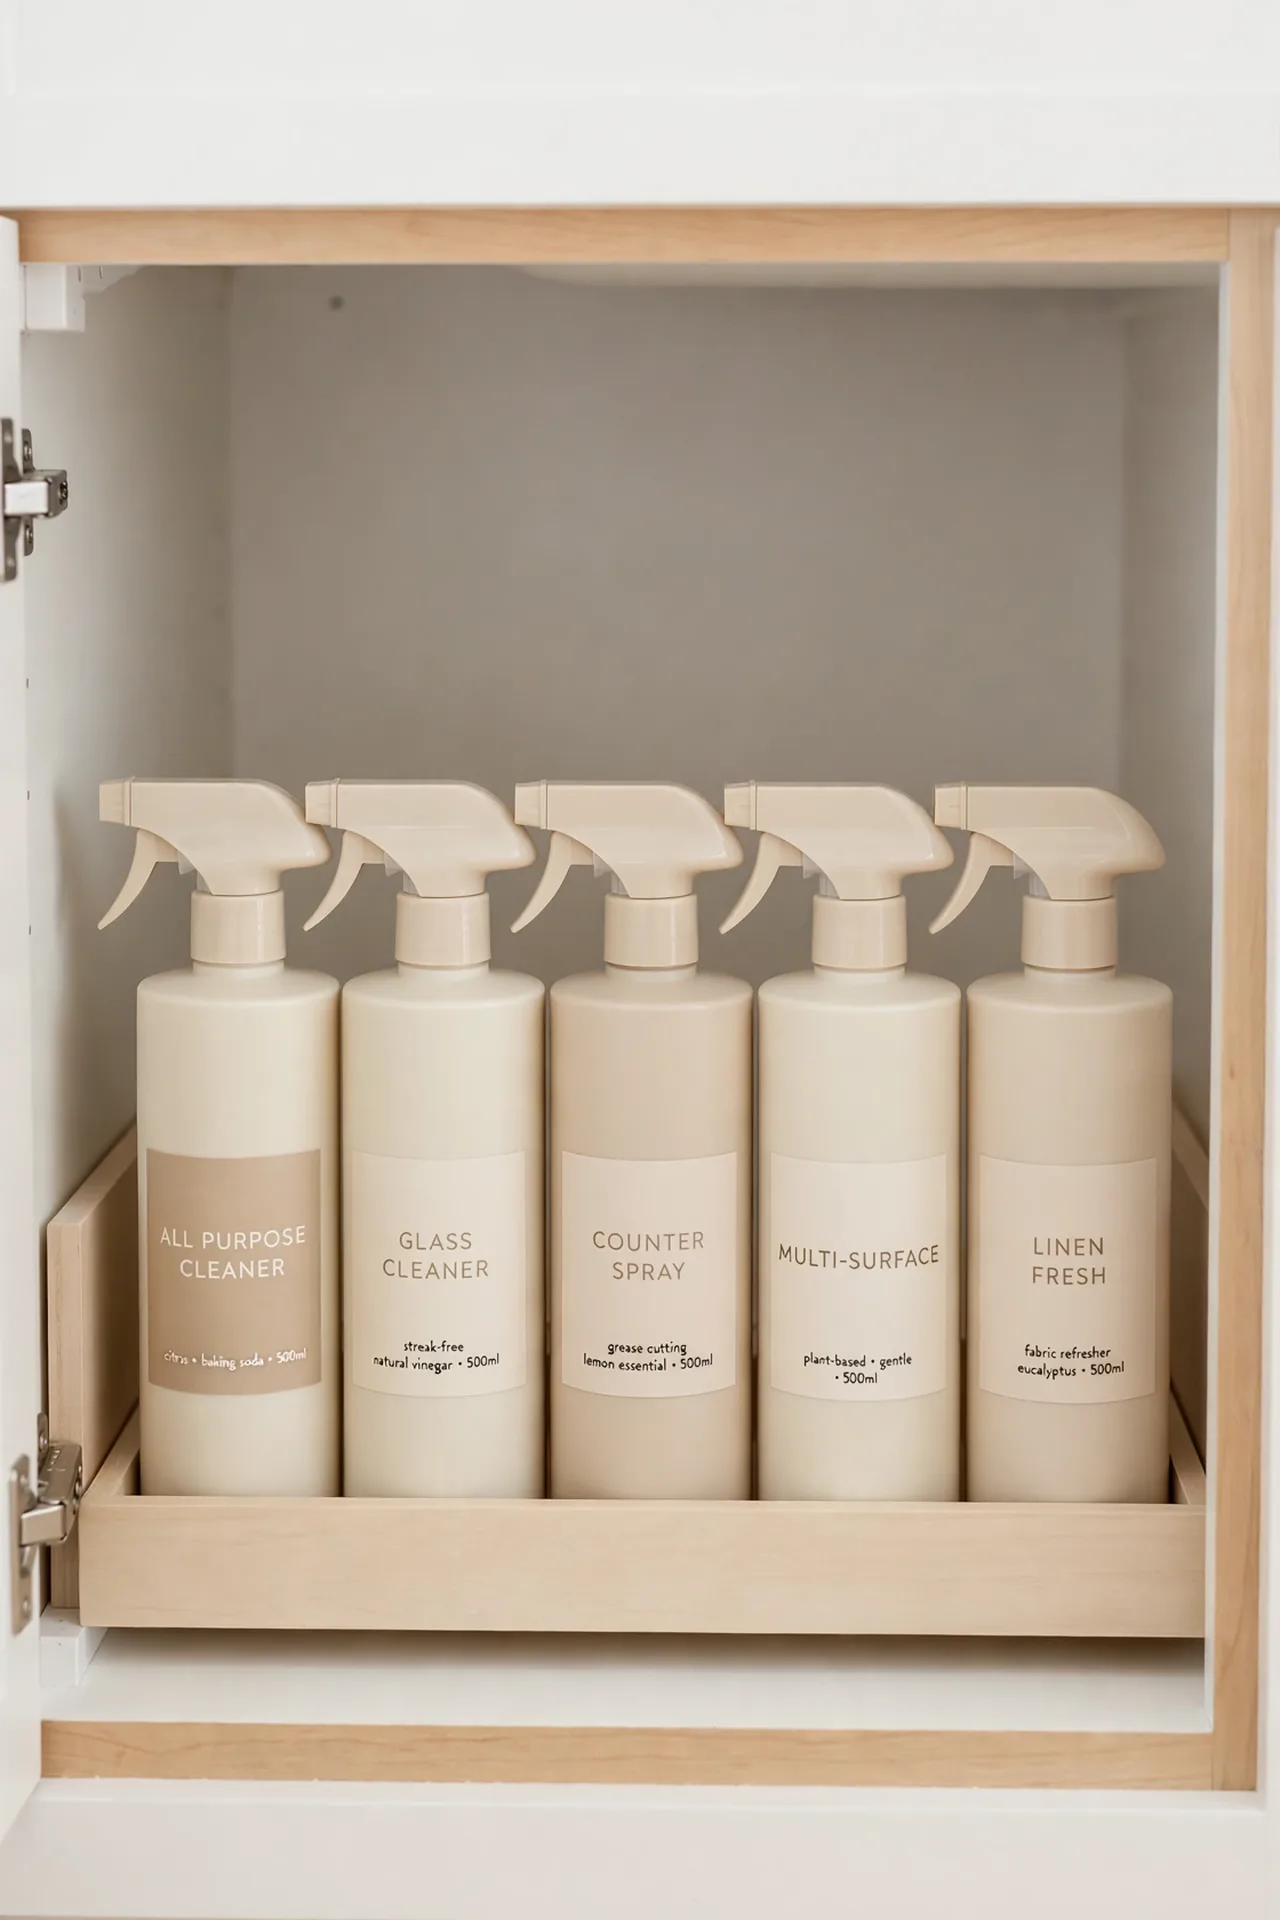
Quick Tip: Decant your cleaning products into matching spray bottles and line them up in a shallow tray. Uniform bottles look calmer, spray better than worn-out originals, and the tray catches every drip. Stick simple labels on each bottle so nobody grabs the wrong cleaner. The tray pulls out like a drawer for easy access.
Grouping sprays into one station stops bottles from wandering across the cabinet. Pick a tray with low sides so tall bottles stay stable but remain easy to lift out. I always keep a spare empty spray bottle in the station for homemade mixes. This small habit keeps the most-used supplies in one tidy, grab-and-go spot.
Door-Mount Caddies
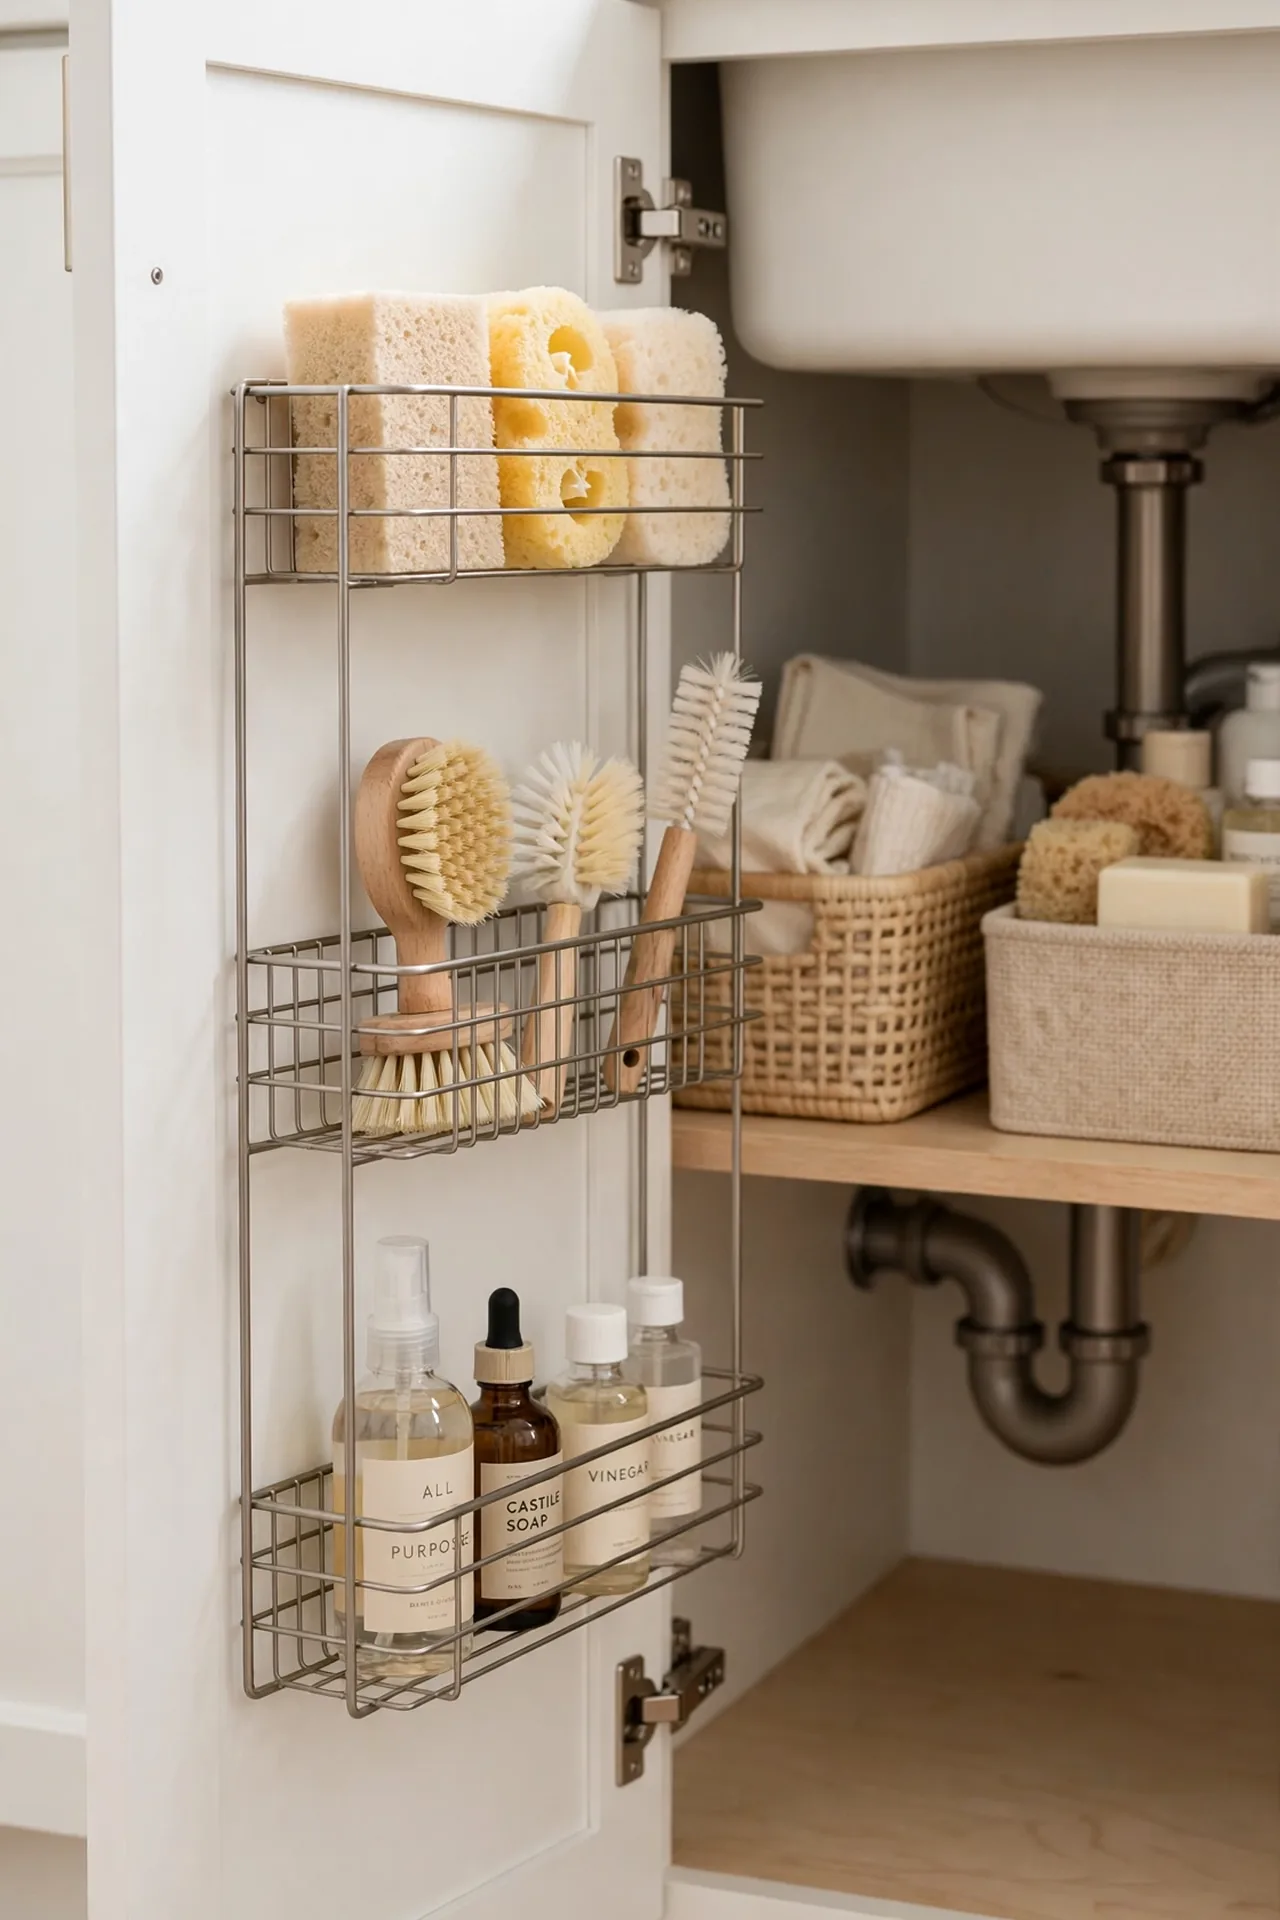
BEFORE: Sponges, brushes, and gloves pile up on the cabinet floor in a soggy heap. Everything stays damp, smells musty, and small items vanish behind big bottles within days.
AFTER: Slim caddies mounted on the inside of the cabinet door hold every small tool upright and aired out. Sponges dry between uses, brushes hang within reach, and the floor stays clear for bigger bins. The door becomes useful storage instead of wasted space.
Choose caddies with drainage holes so wet tools dry properly. Most mount with adhesive strips, so renters can use them too. Check the door clearance before buying to make sure the cabinet still closes. This is the fastest way to reclaim floor space for the bulky items.
Rotating Lazy Susans
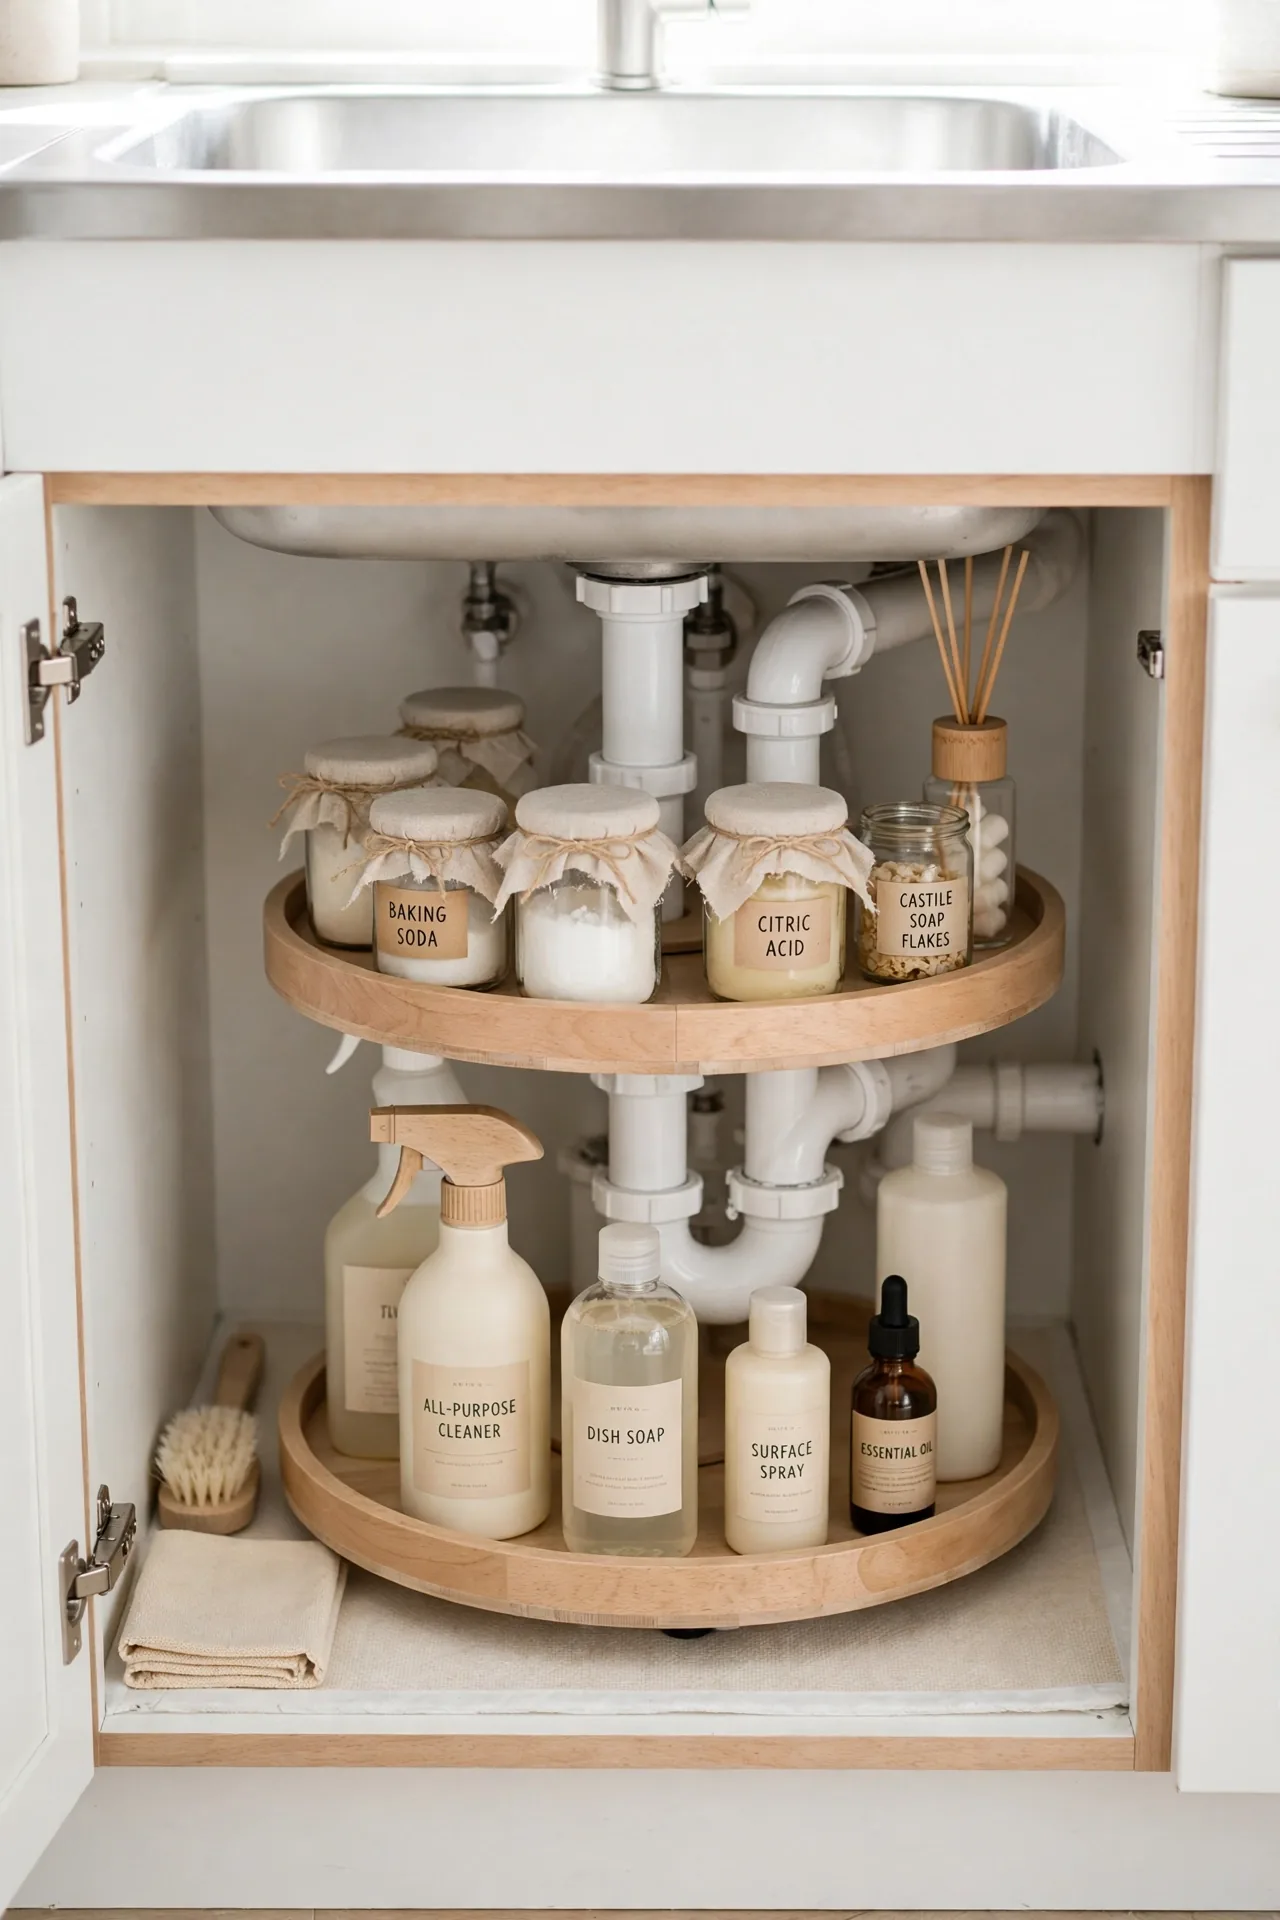
Dead corners swallow small bottles whole, but a lazy susan brings them back with one spin. Place a turntable on each side of the pipes for items like polishes, scrubbies, and spare parts. One twist reveals everything, so nothing expires forgotten in the dark.
- Measure the clear space on each side of the pipes.
- Pick a turntable with a raised lip.
- Group small items by task before placing them on the spinner.
- Give the susan a quick wipe each month to prevent sticky residue.
Spinners work especially well for short bottles that hide behind taller ones. I have noticed kids and guests actually put things back when storage spins so easily. Choose a model with a non-slip base so it stays put when you turn it.
Pull-Out Under Shelves
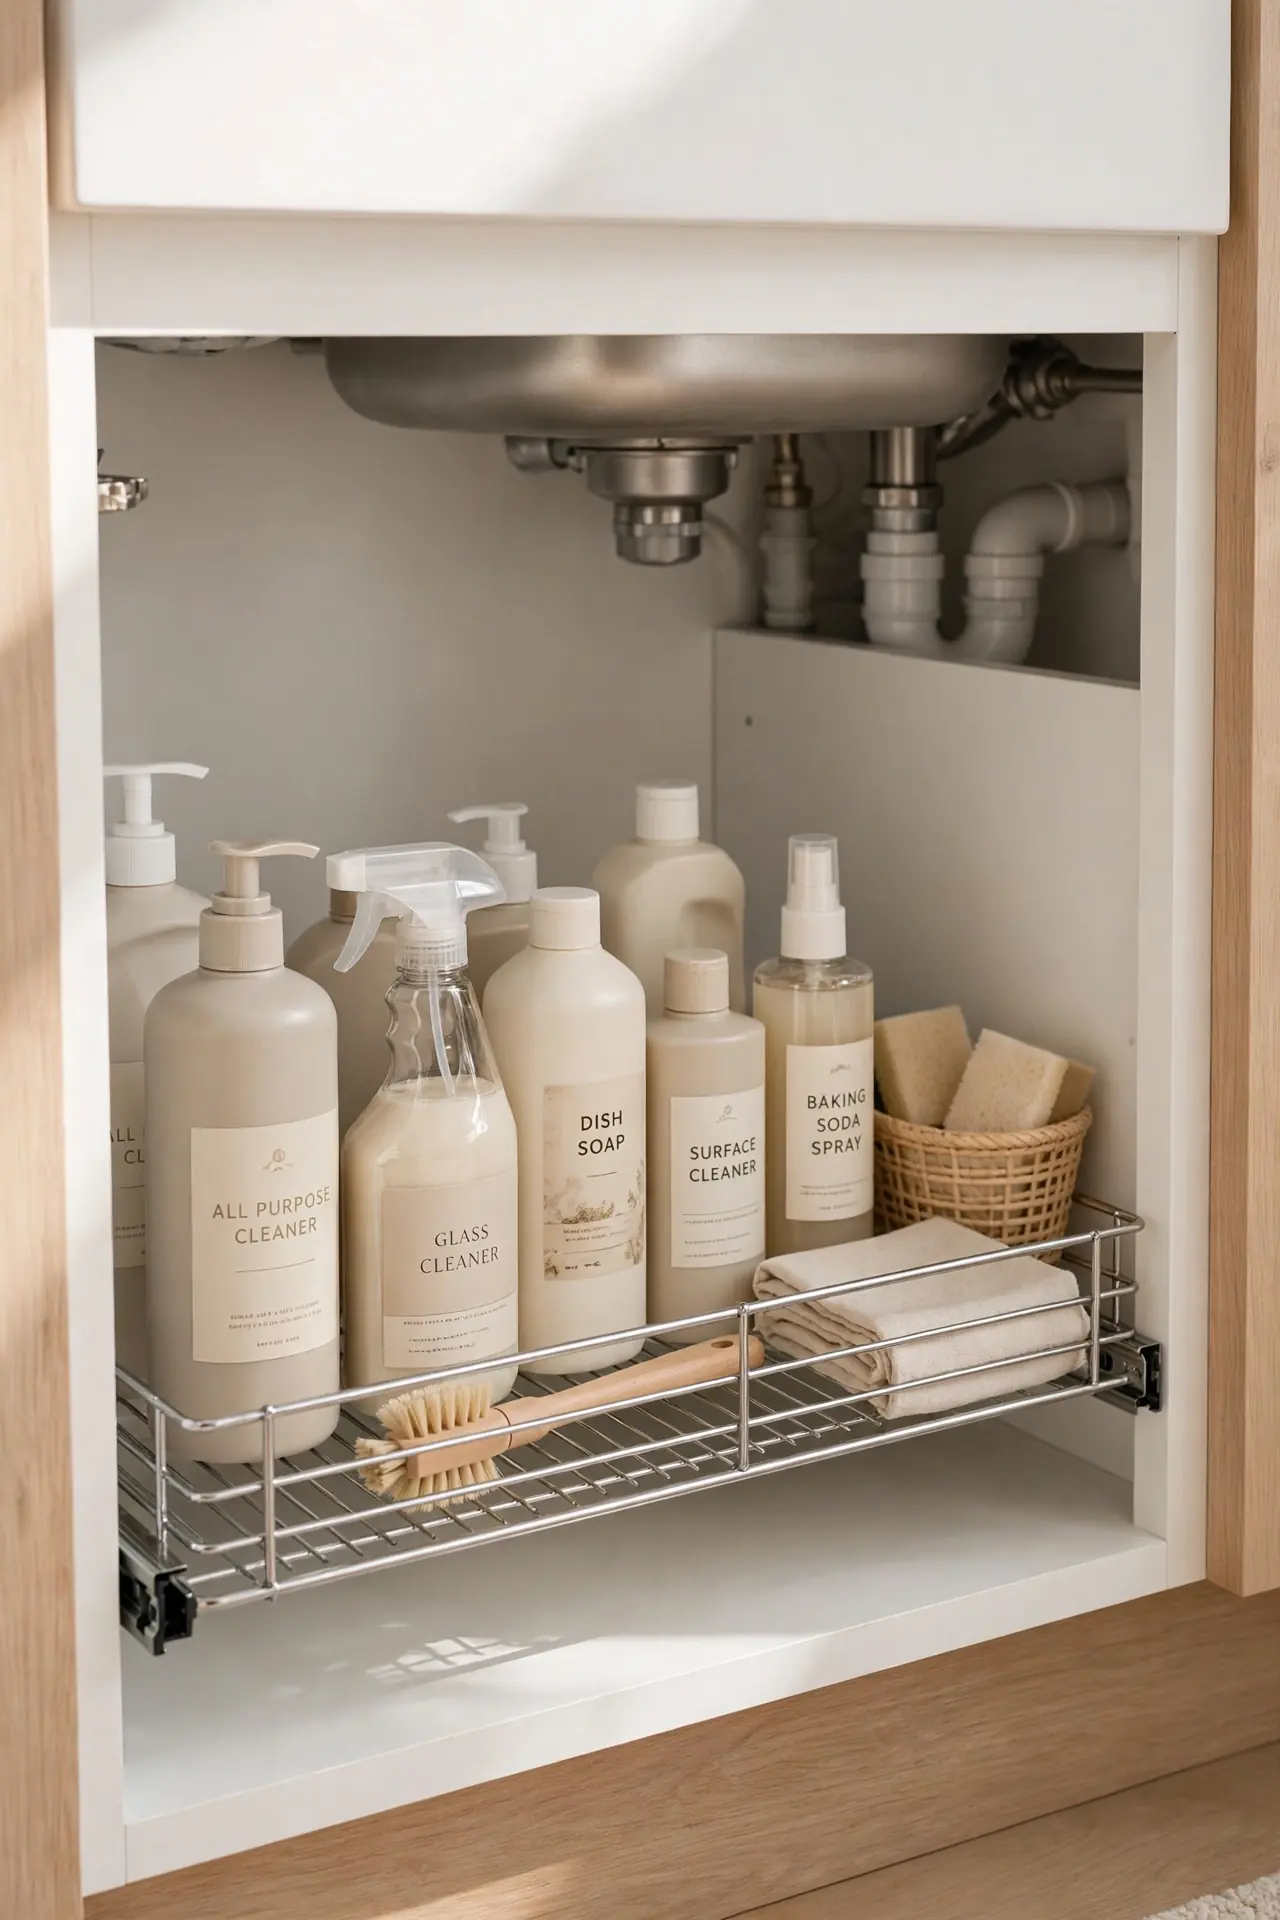
| Pull-Out Shelves | Fixed Shelves |
| Slide toward you for full access to every bottle | Back items stay hidden and get forgotten |
| No reaching deep into dark corners | Kneeling and stretching to find supplies |
| Easy to install around existing pipes | Custom cutting needed to fit around pipes |
Pull-out shelves turn the deep cabinet into a drawer you can actually use. Everything slides into the light, so you stop buying duplicates of cleaners you already own. Look for kits designed for under-sink spaces with cutouts that fit around plumbing. The install takes under an hour with basic tools and no plumbing changes. Once installed, even the back corners become reachable with one smooth pull.
Adhesive Hook Holders
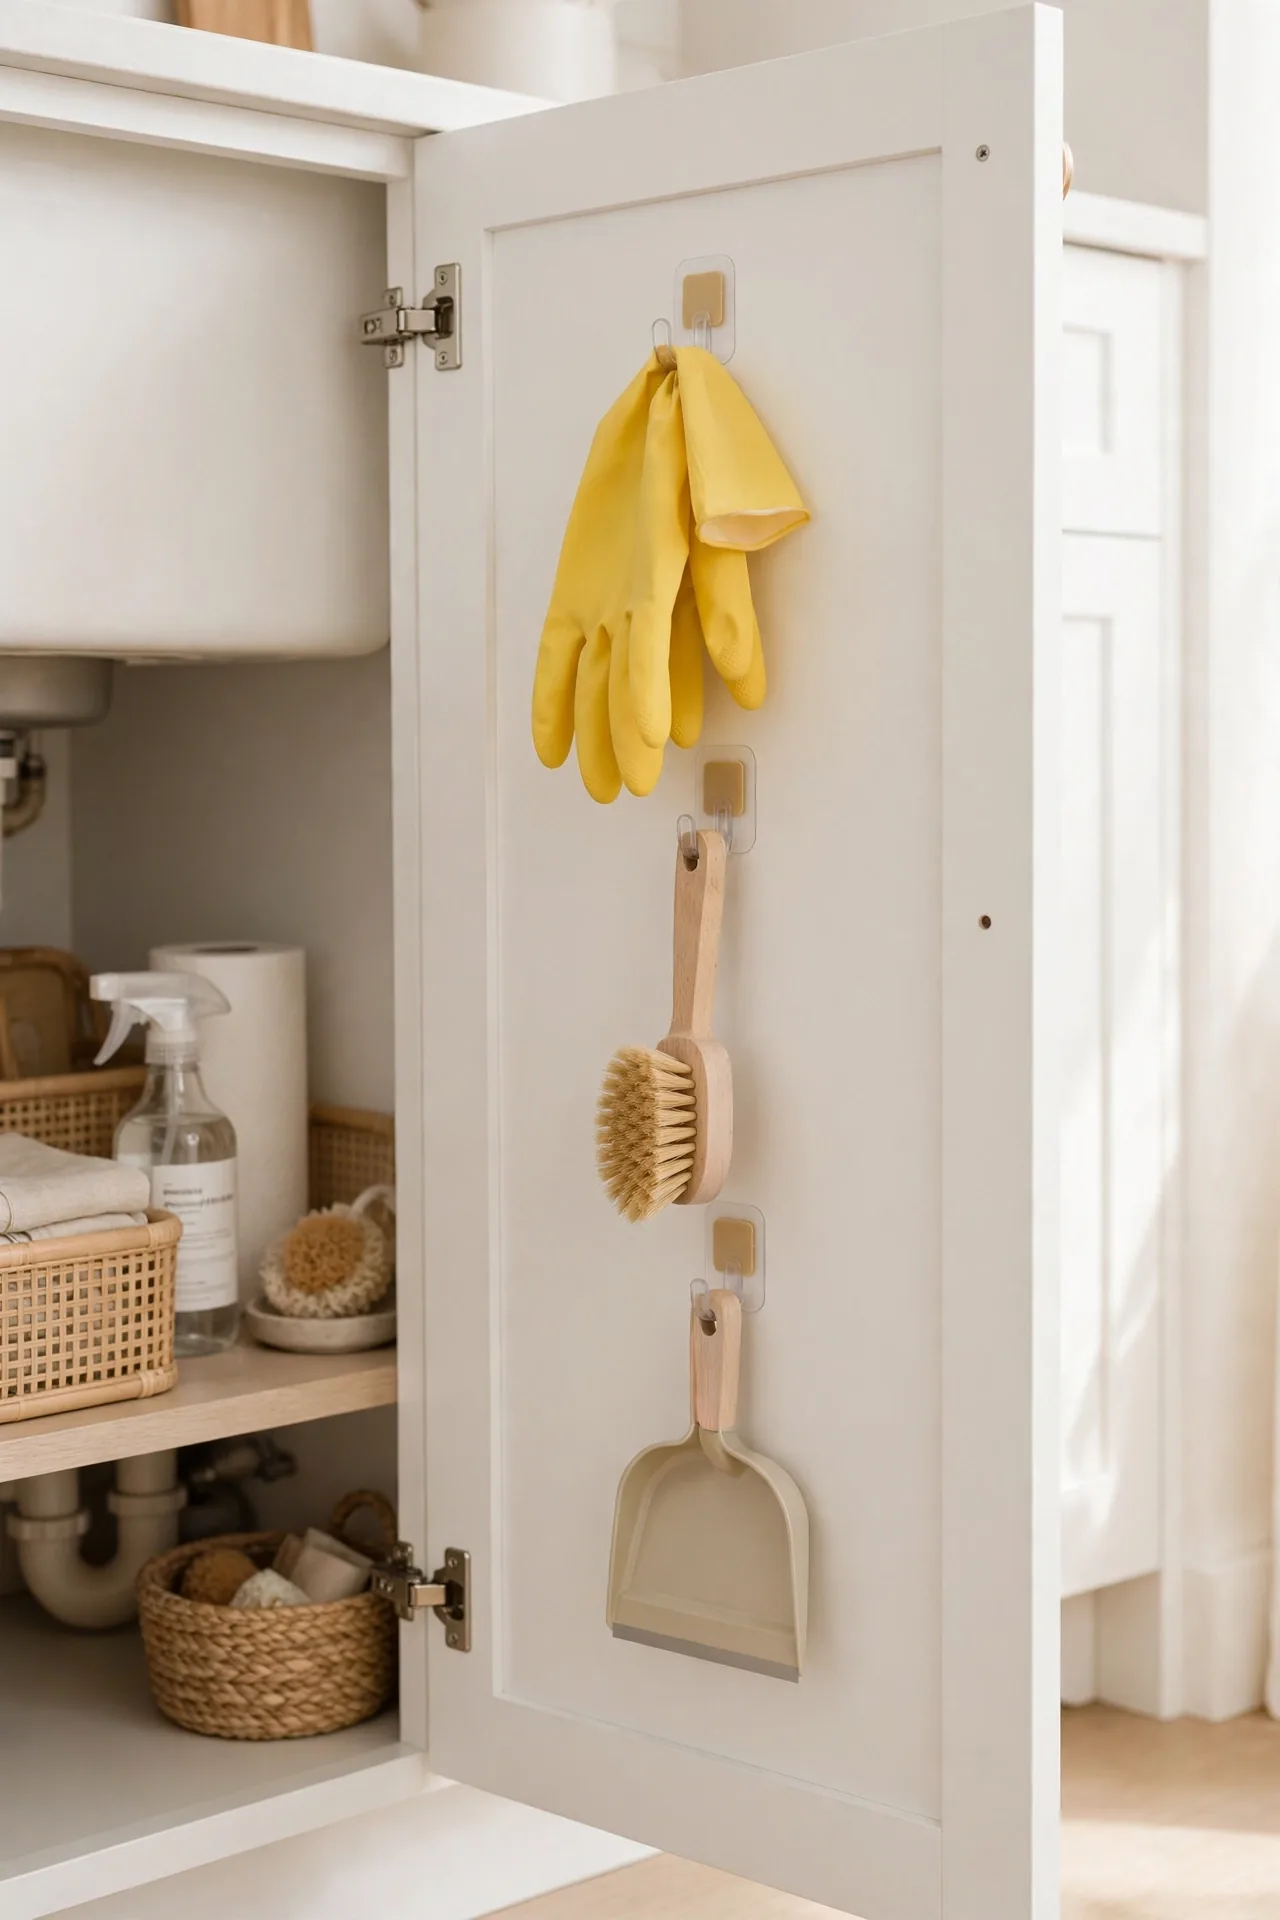
DO: Stick strong adhesive hooks on the cabinet door or side walls for gloves, brushes, and dusters. Hang items you grab daily so they are always within reach. Wipe the surface with alcohol before sticking for a bond that lasts.
DON’T: Hang heavy bottles that could pull the hooks down. Place hooks where they block the door from closing fully. Skip the weight rating on the package, since wet tools weigh more.
Hooks cost almost nothing and install in seconds, yet they clear surprising clutter off the floor. I keep my dish gloves on one hook and a small brush on another, and both dry faster hanging. Replace the adhesive strips yearly for a hold you can trust.
Waterproof Shelf Liners
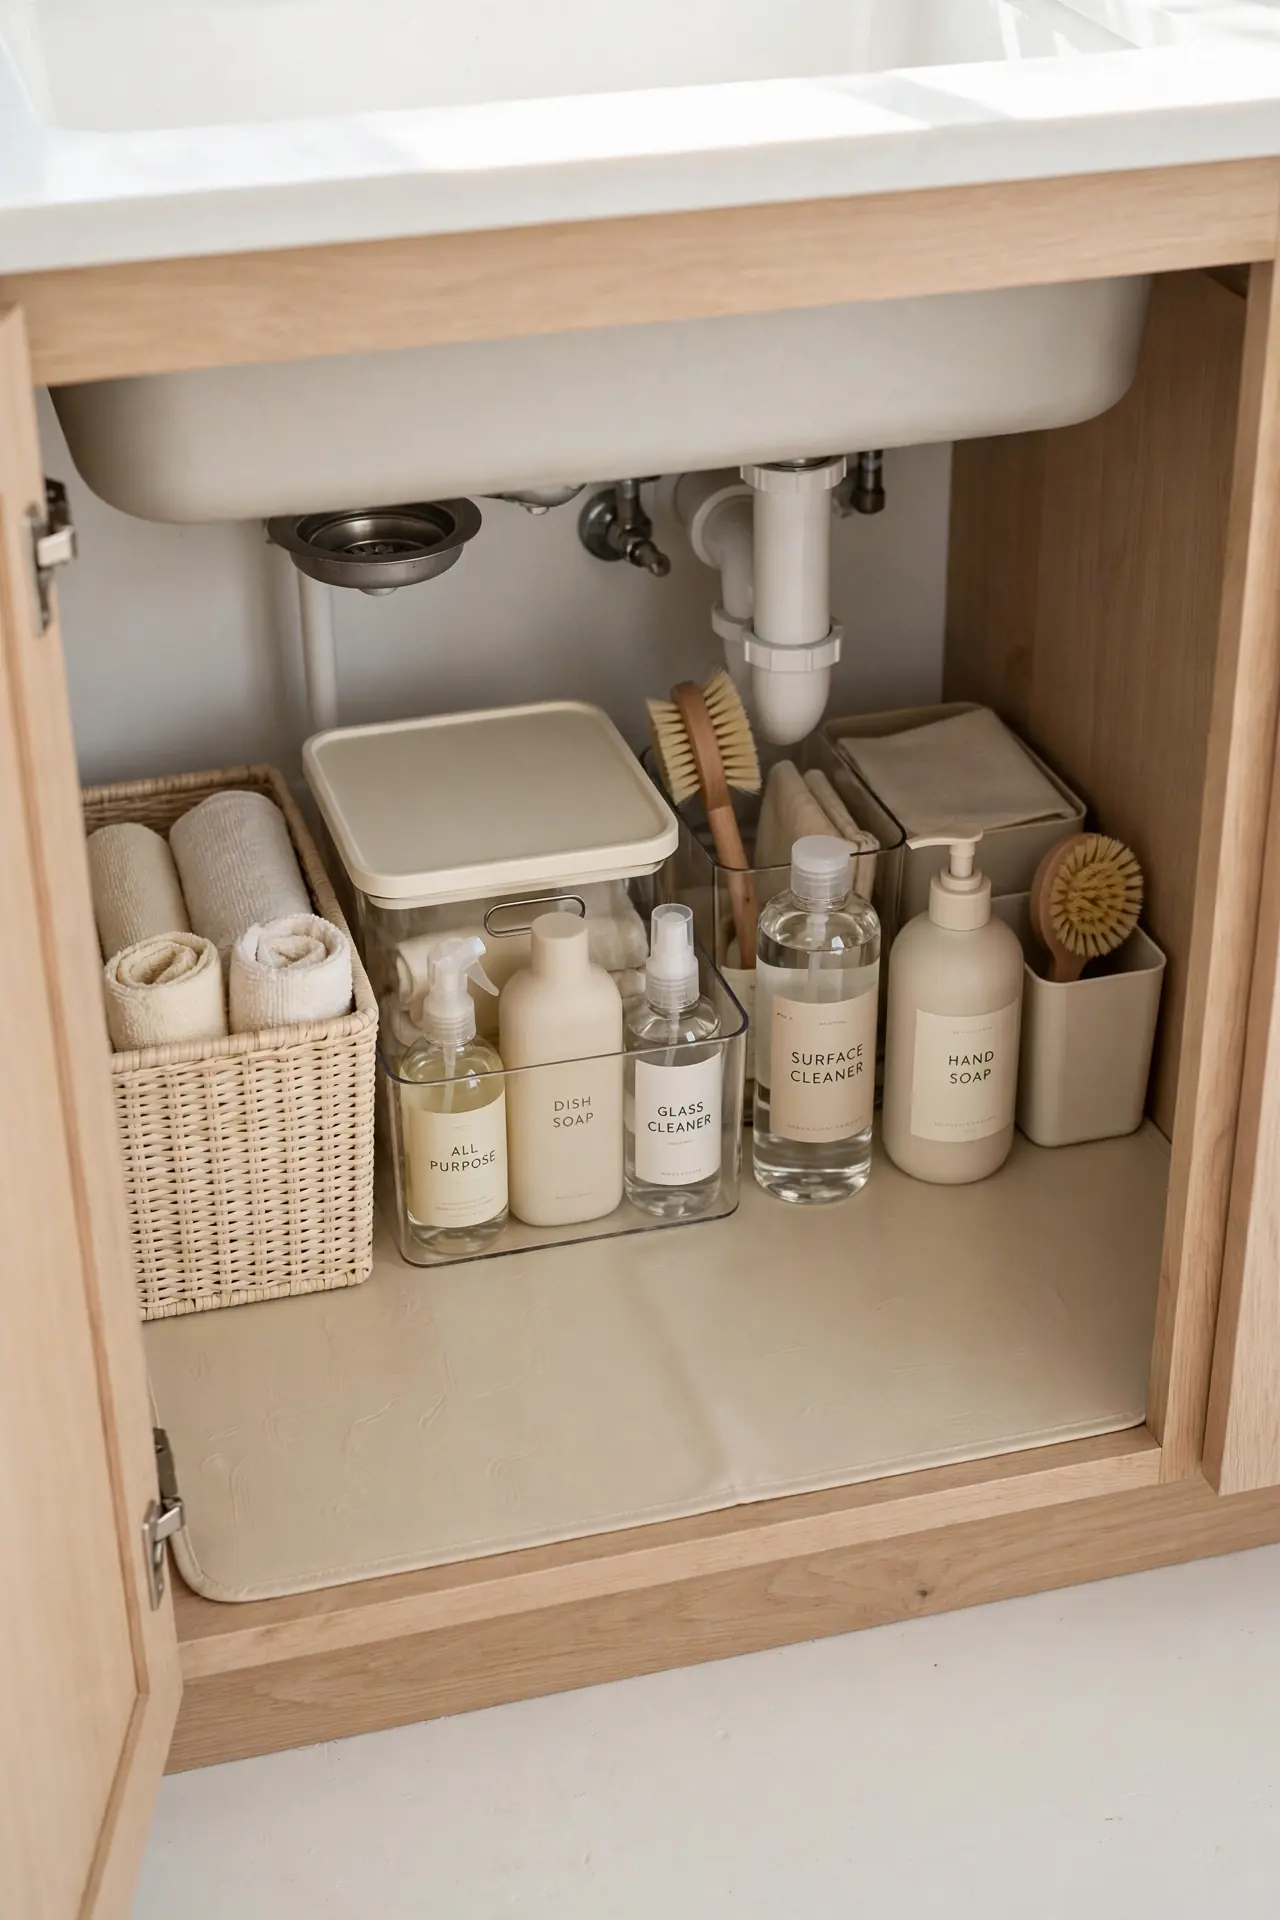
Cost: Low | Time: Under 30 minutes | Skill Level: Beginner | Best For: Protecting cabinet floors from leaks and drips.
Every under-sink cabinet eventually meets a leak, and a waterproof liner is cheap insurance. A wipeable mat or peel-and-stick liner catches drips from bottles and minor pipe sweating before they soak into the wood. Cut the mat to fit around the pipes and lay it flat before adding any bins. When spills happen, you pull the mat out, rinse it, and slide it back.
This small upgrade also makes the whole cabinet look cleaner and more intentional. Choose a light color so leaks show up early instead of hiding. I recommend replacing worn liners once a year for steady protection.
Grid Basket Layout
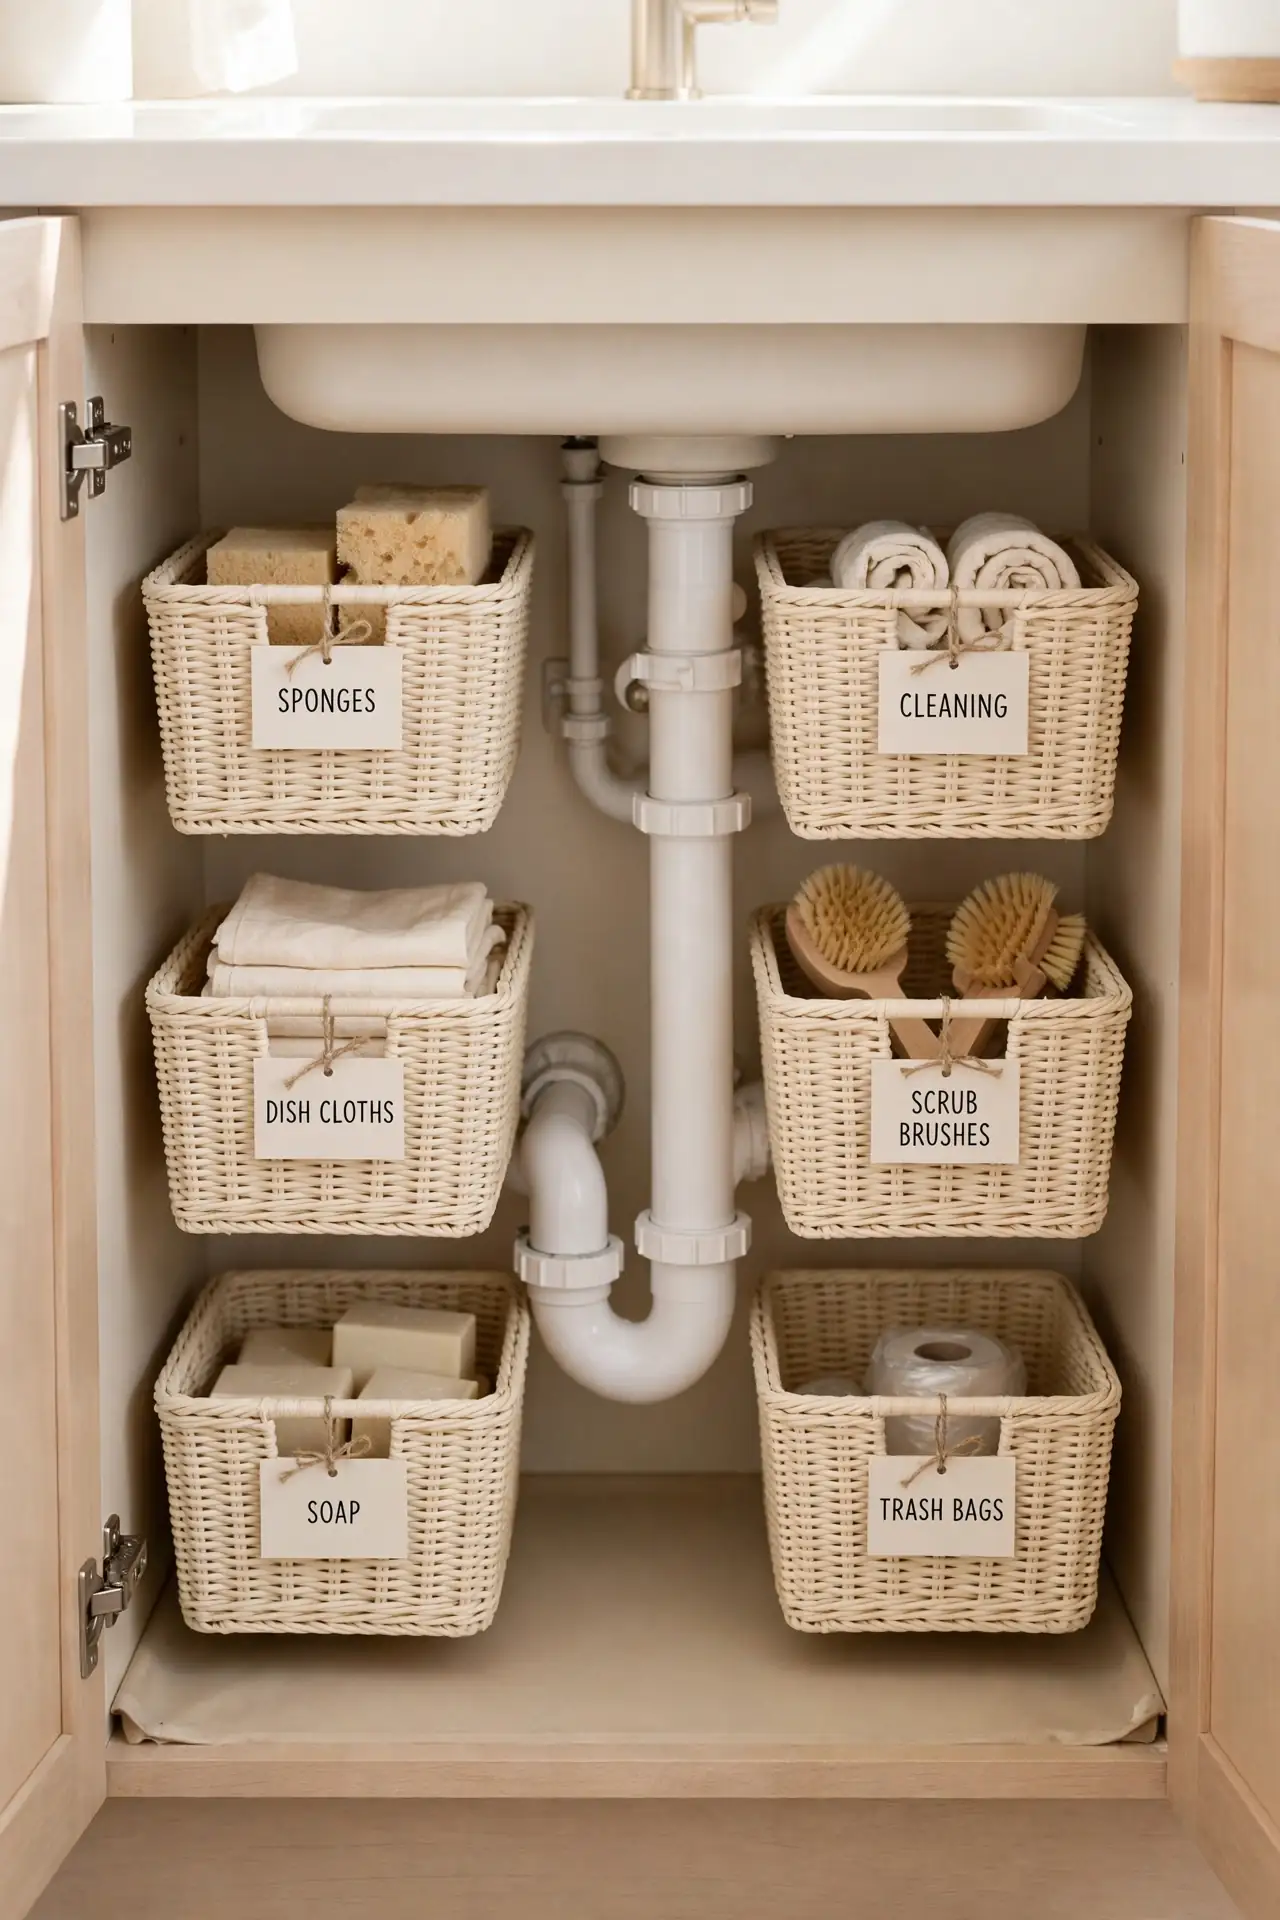
A grid of small matching baskets divides the cabinet floor into tidy zones that never drift. Each basket holds one category: dish soap and sponges in one, trash bags in another, extra cloths in a third. Because the baskets fit edge to edge, nothing slides around when you open the door. Matching baskets also make the whole space look calm and deliberate.
Measure your cabinet first, then buy baskets in two or three sizes that tile the floor neatly. Leave the pipe area open and build the grid around it. Label the front of each basket so the system stays obvious to everyone. I have noticed that once a grid exists, family members actually keep it tidy without being asked.
Tiered Step Shelves
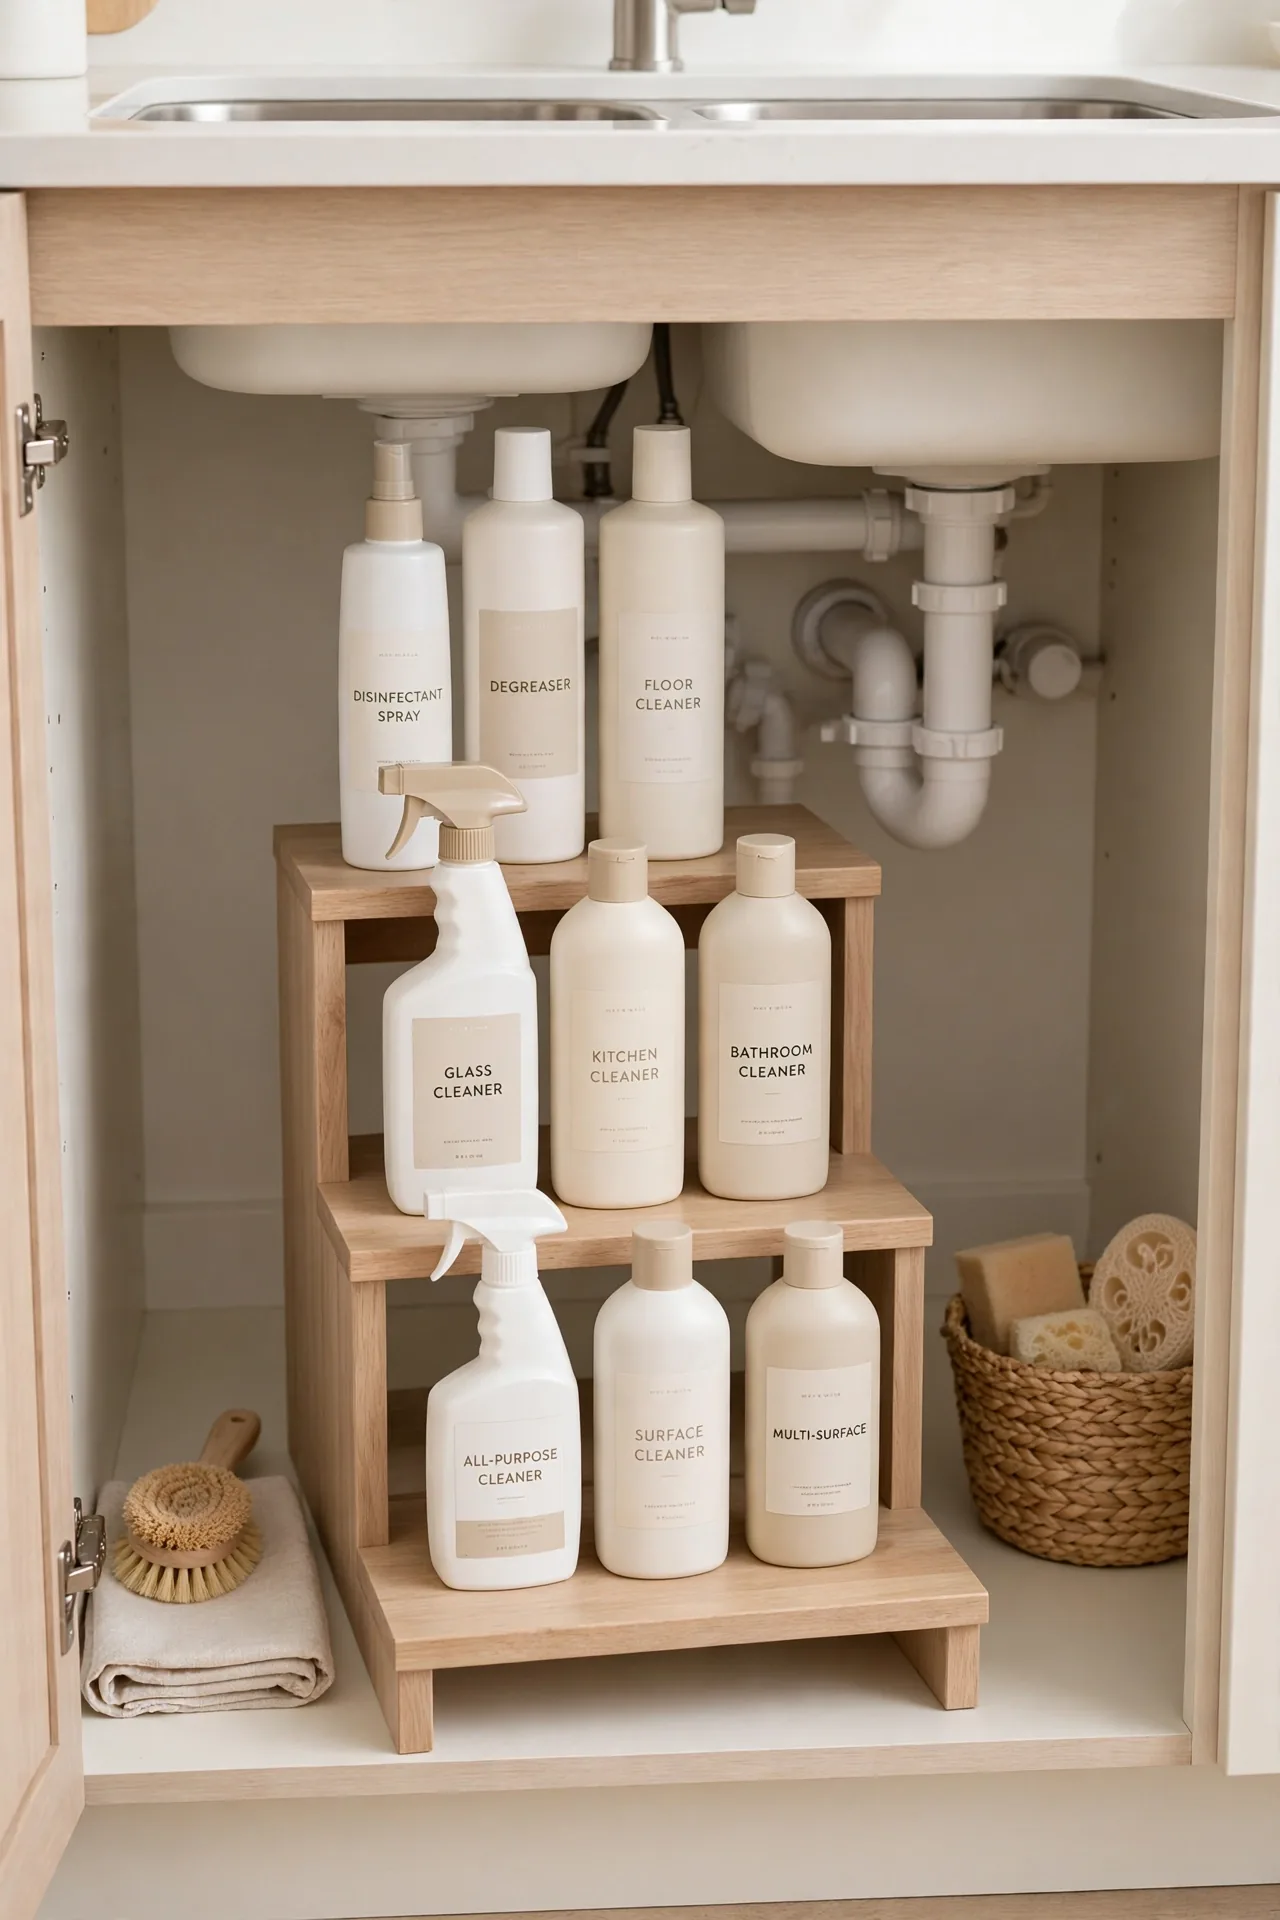
Short bottles hide behind tall ones, and tiered step shelves end that problem for good. Each row sits higher than the last, so every label stays visible from the front. This stadium-style layout fits neatly on one side of the pipes.
- Place the tallest bottles on the back row for a clear view.
- Use the middle tier for medium bottles and refill pouches.
- Keep daily-use items on the front row within easy reach.
- Choose a freestanding unit so you can lift it out to clean.
Visibility is the whole secret: when you can see every bottle, you use what you have. I have seen this work well in many cases with deep cabinets. Wipe the tiers monthly so drips never build up unnoticed.
Vertical Tray Slots
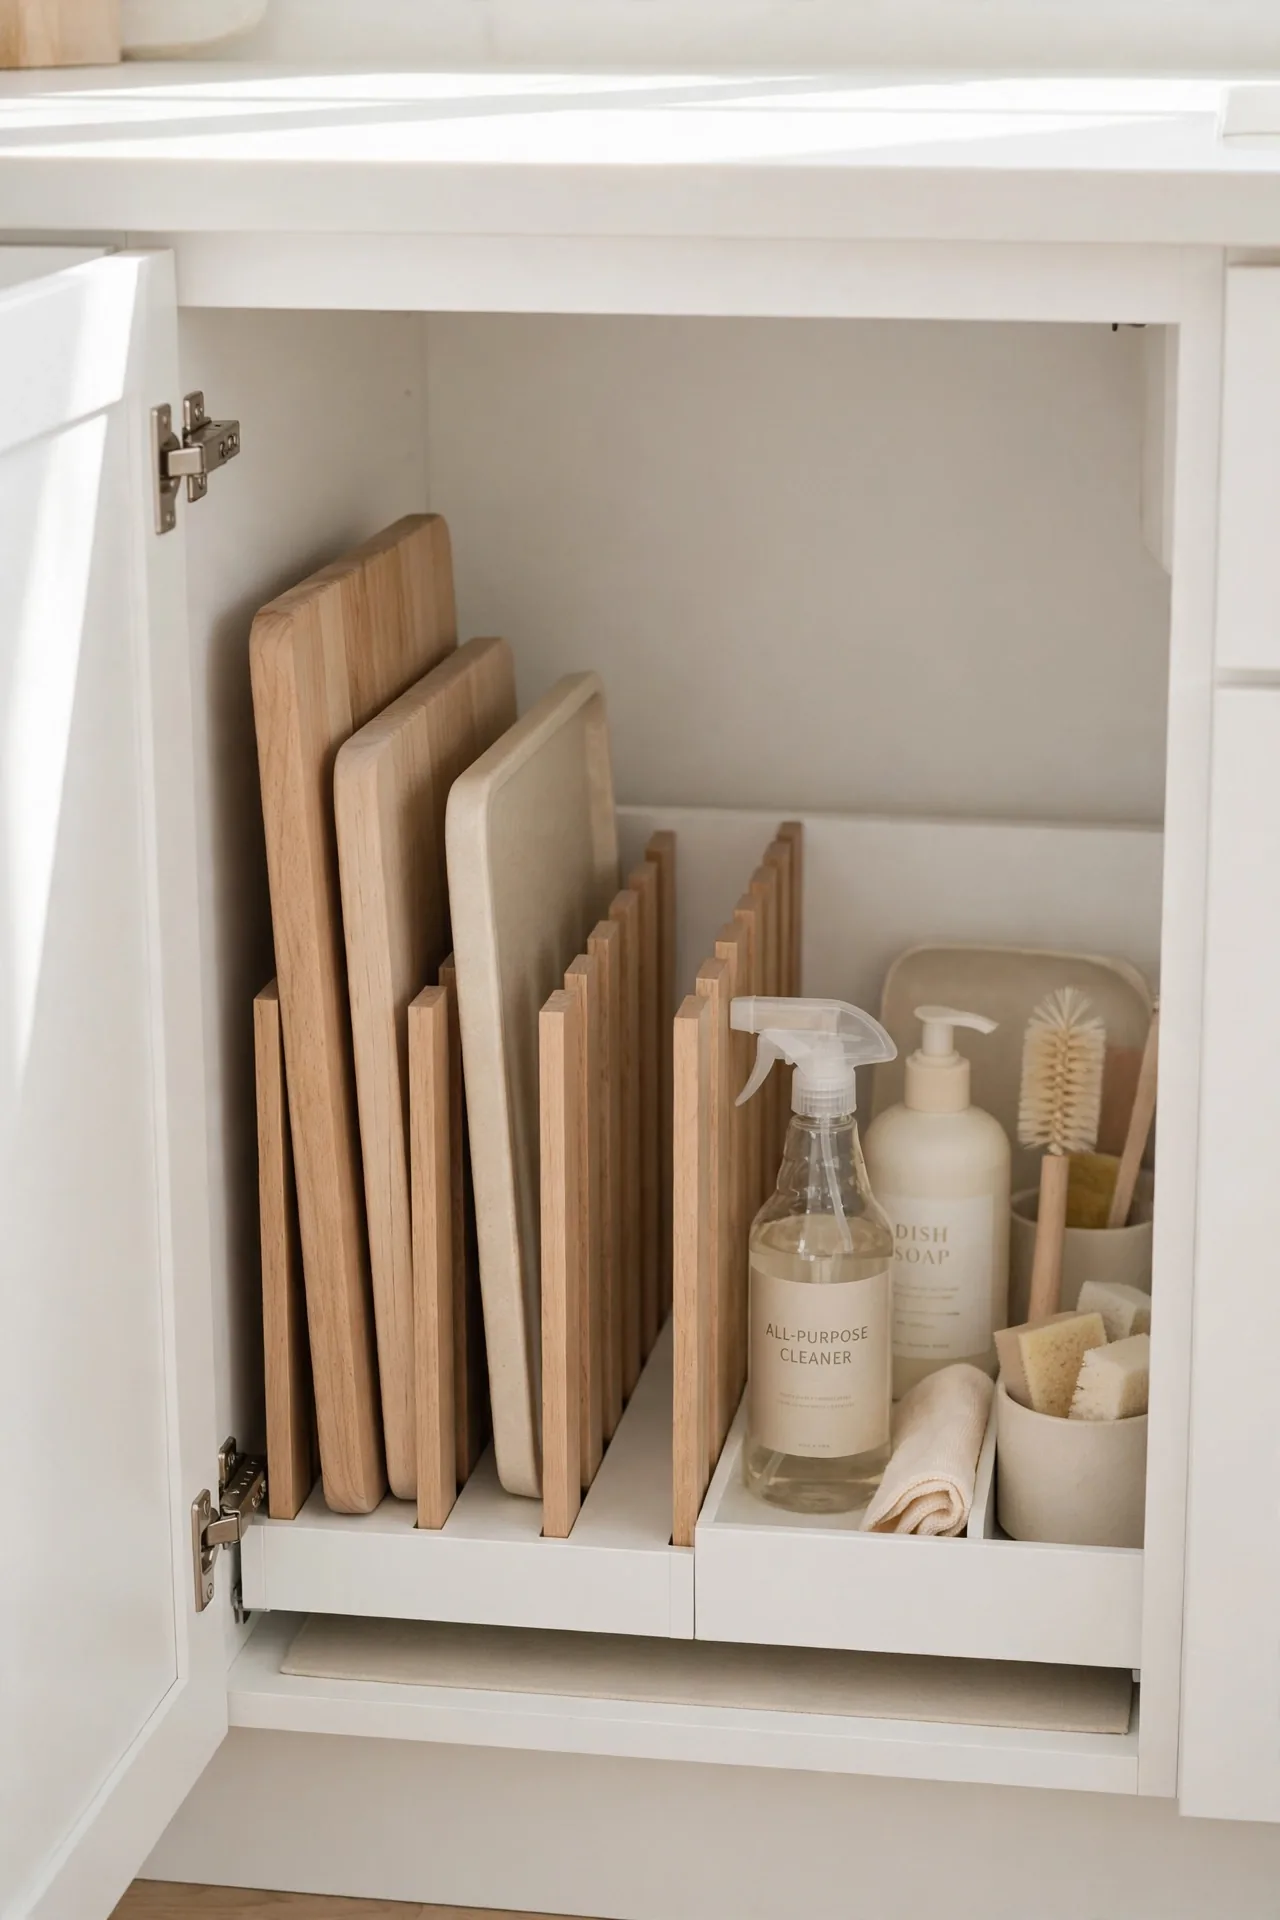
Quick Tip: File slim items upright in vertical slots instead of stacking them flat. A simple divider rack holds cutting boards, trays, and baking sheets like files in a drawer. Sliding one out no longer topples the whole pile. Tuck the rack against the cabinet wall beside your cleaning bins for a neat split.
Vertical filing works for anything flat that lives under the sink. Measure your tallest item before buying a rack so it fits without forcing. If you are styling other hardworking corners, these coffee station ideas show the same tidy logic. Keep the slots snug but not tight so boards slide out smoothly.
Wire Door Baskets
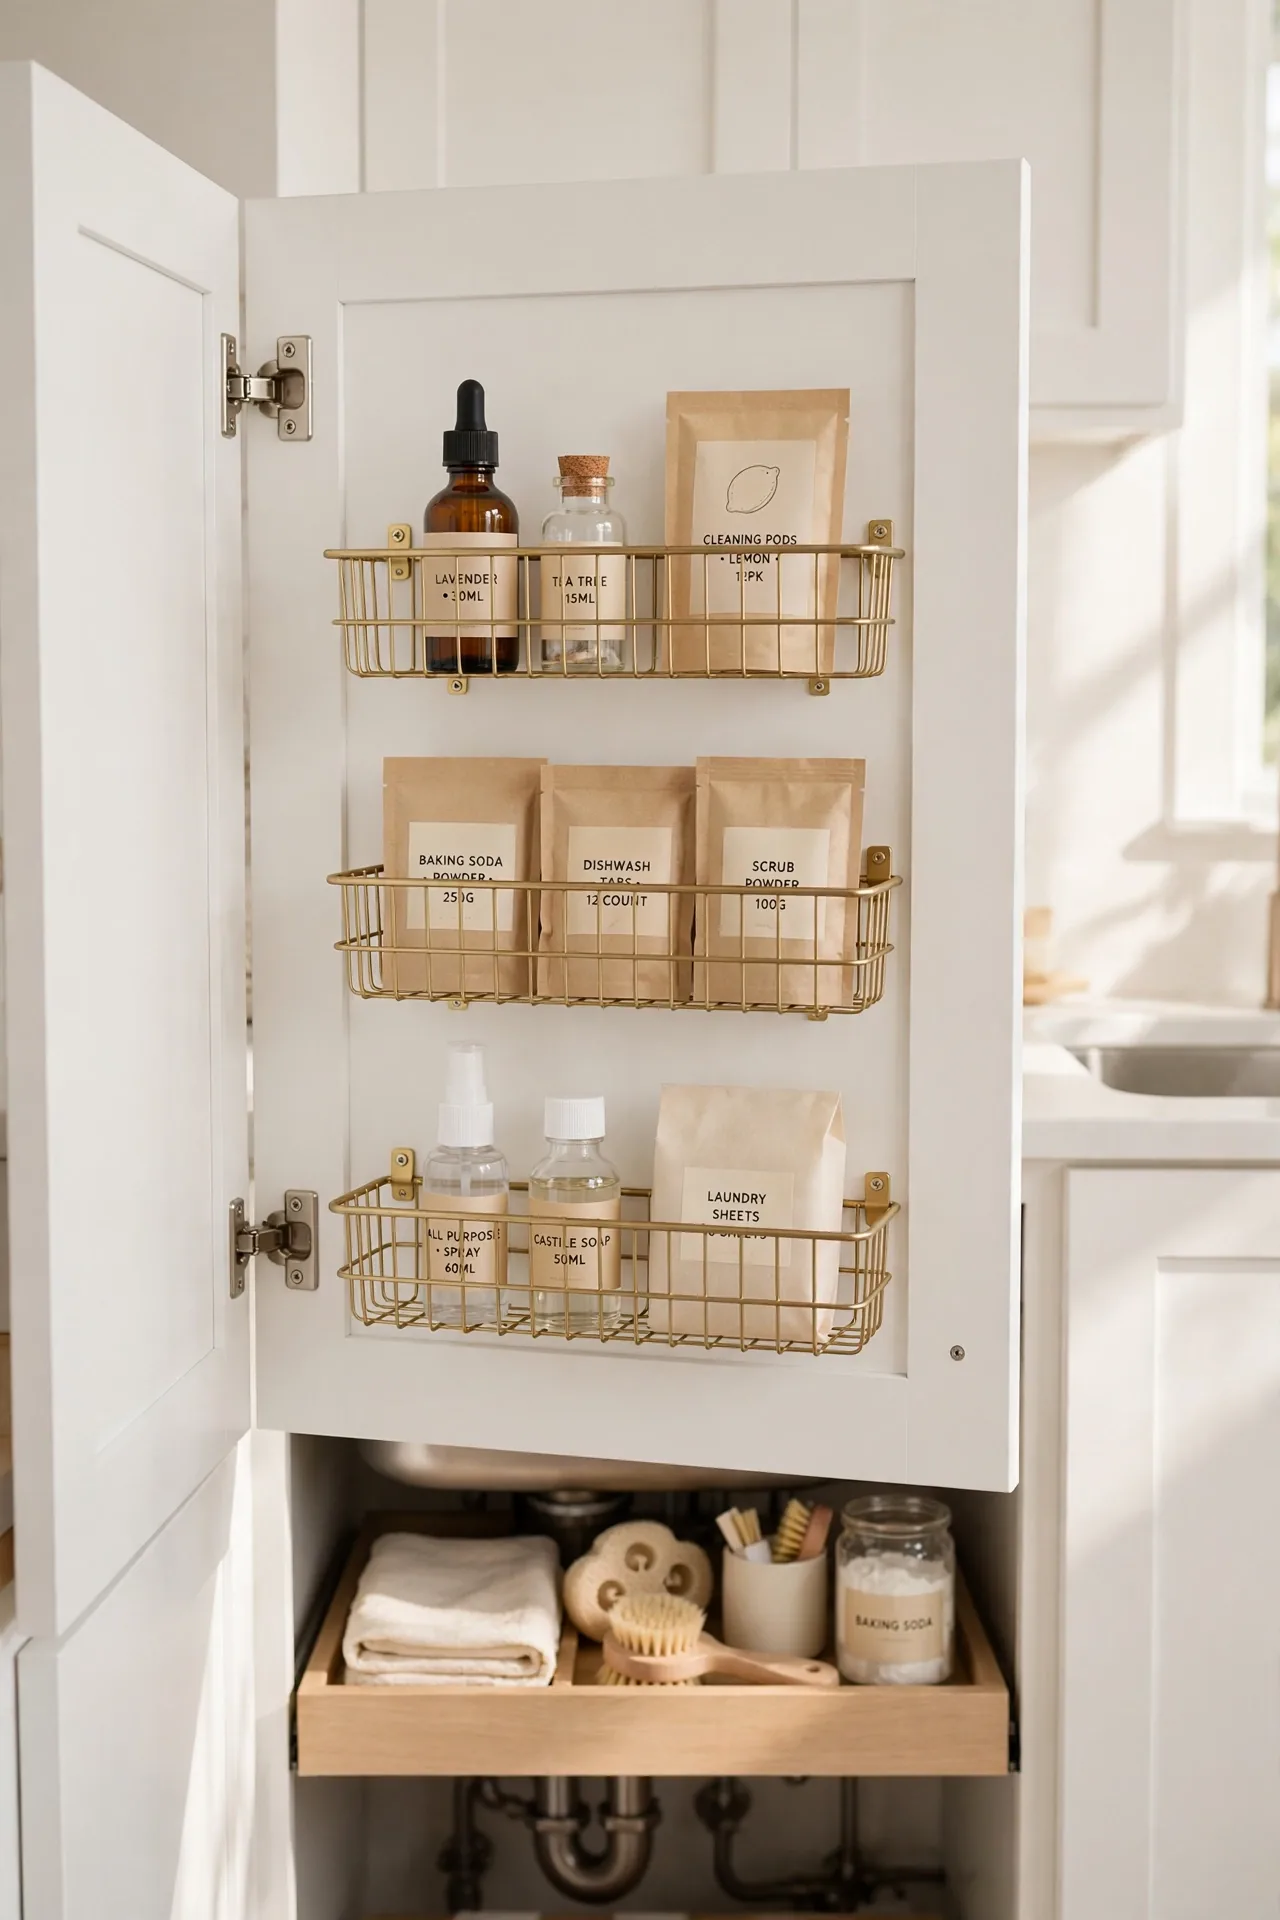
BEFORE: Small packets, extra sponges, and sample bottles scatter across the cabinet floor and disappear. Every search means moving big bottles aside and hoping the small stuff turns up.
AFTER: Wire baskets on the cabinet door gather all the small extras in one visible spot. Packets stand upright, sponges stay dry, and nothing hides behind the bleach bottle anymore. The door swing brings everything into view at once.
Pick shallow baskets so the door still closes with clearance to spare. Wire styles let air circulate, which keeps damp items fresh. Mount with screws for a permanent hold or heavy-duty adhesive for a rental. This keeps the little things from becoming lost things.
Adjustable Shelf Risers
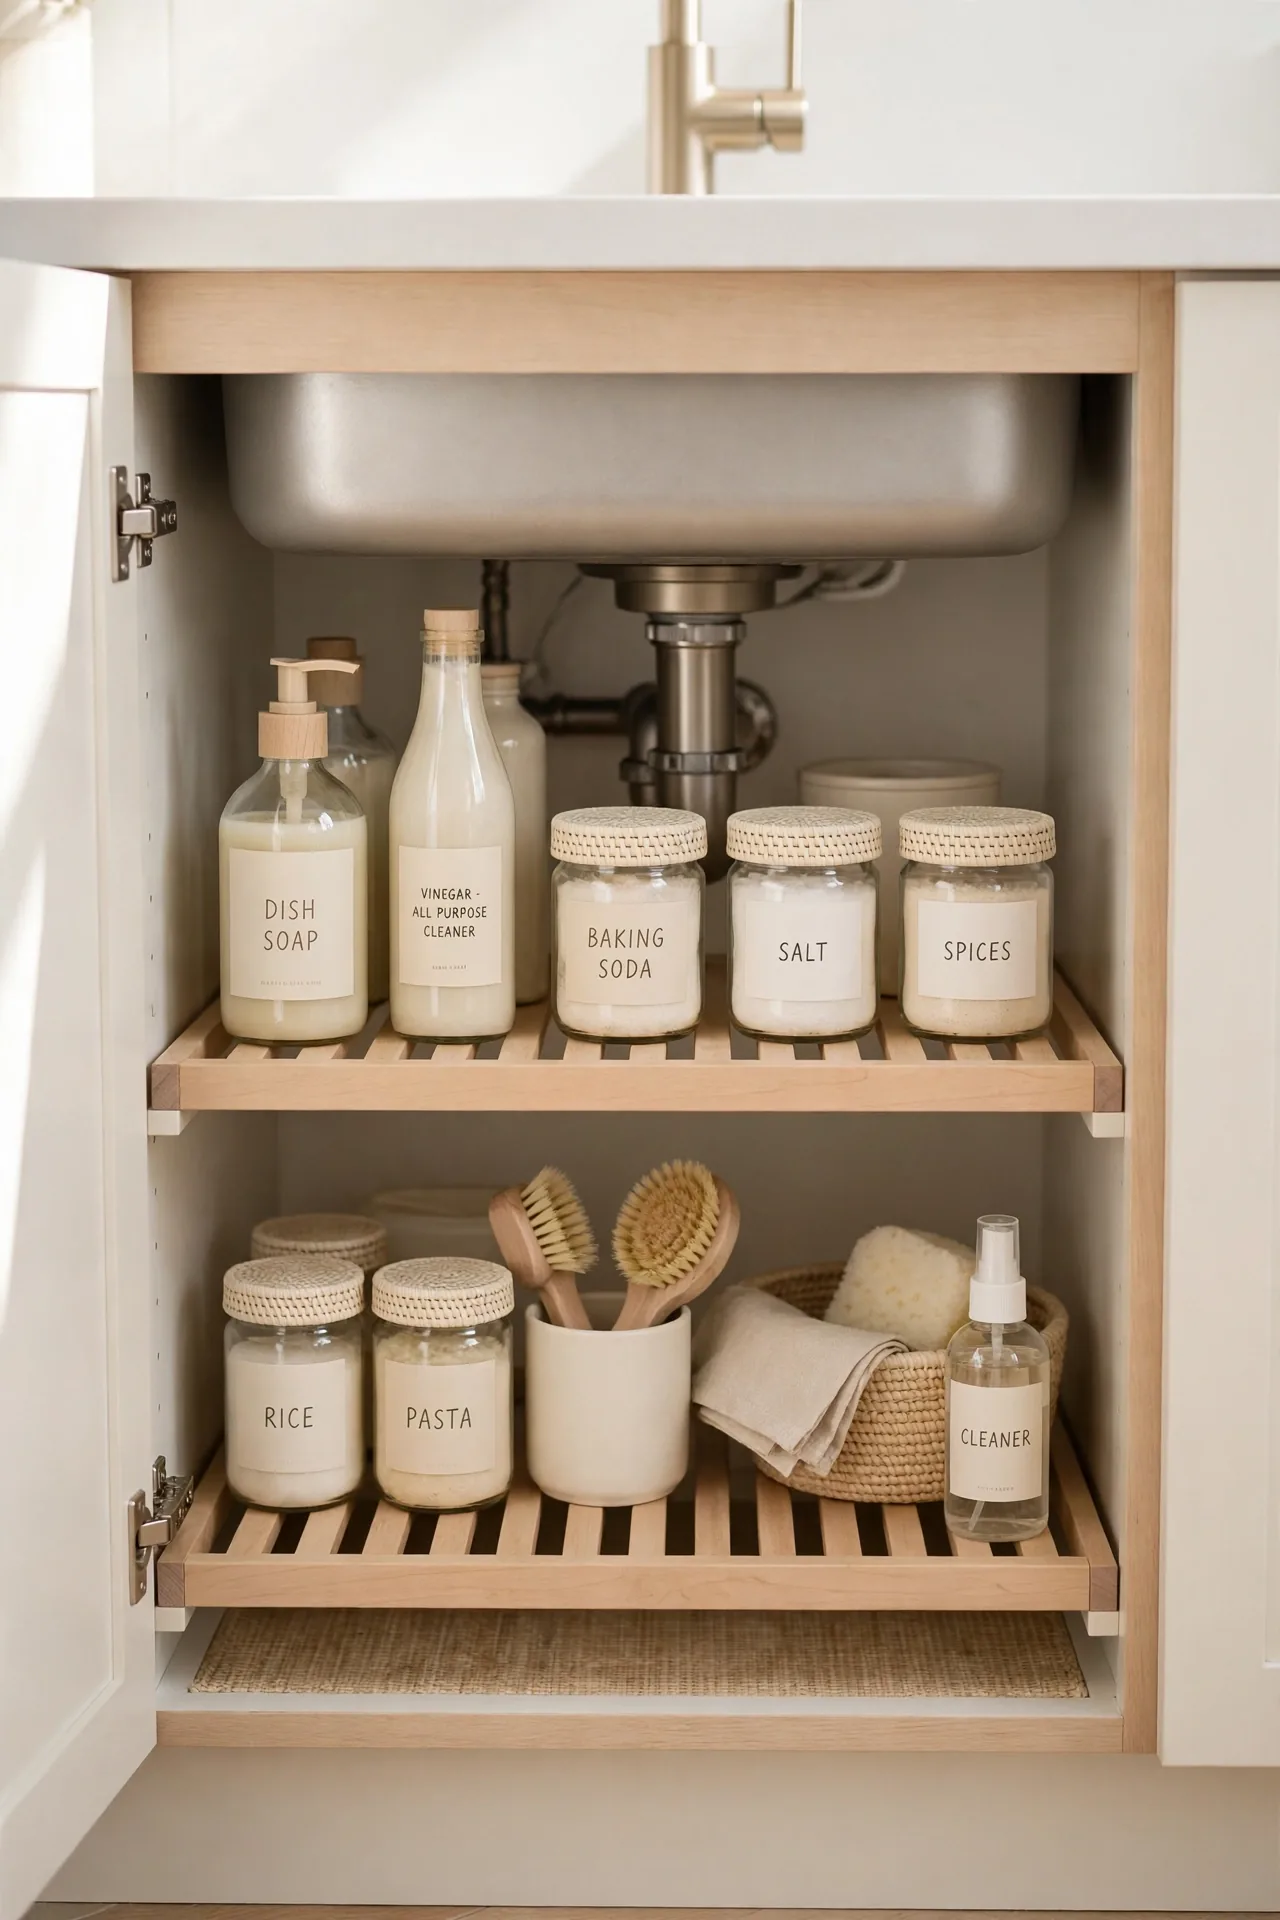
The empty air above your bins is free storage waiting to happen, and adjustable risers claim it. These small platforms create a second level for shorter bottles, jars, and boxes. Because the height adjusts, you can fit them around pipes of any shape.
- Clear the cabinet and group items by height.
- Set each riser to a height that clears your tallest item beneath it.
- Place short bottles and jars on the new upper level.
- Keep the front edge open so nothing slides off unseen.
Risers stack storage vertically without any installation at all. I like models with non-slip surfaces since under-sink floors get damp. They also lift items off wet surfaces, which keeps labels readable longer.
Two-Tier Rack
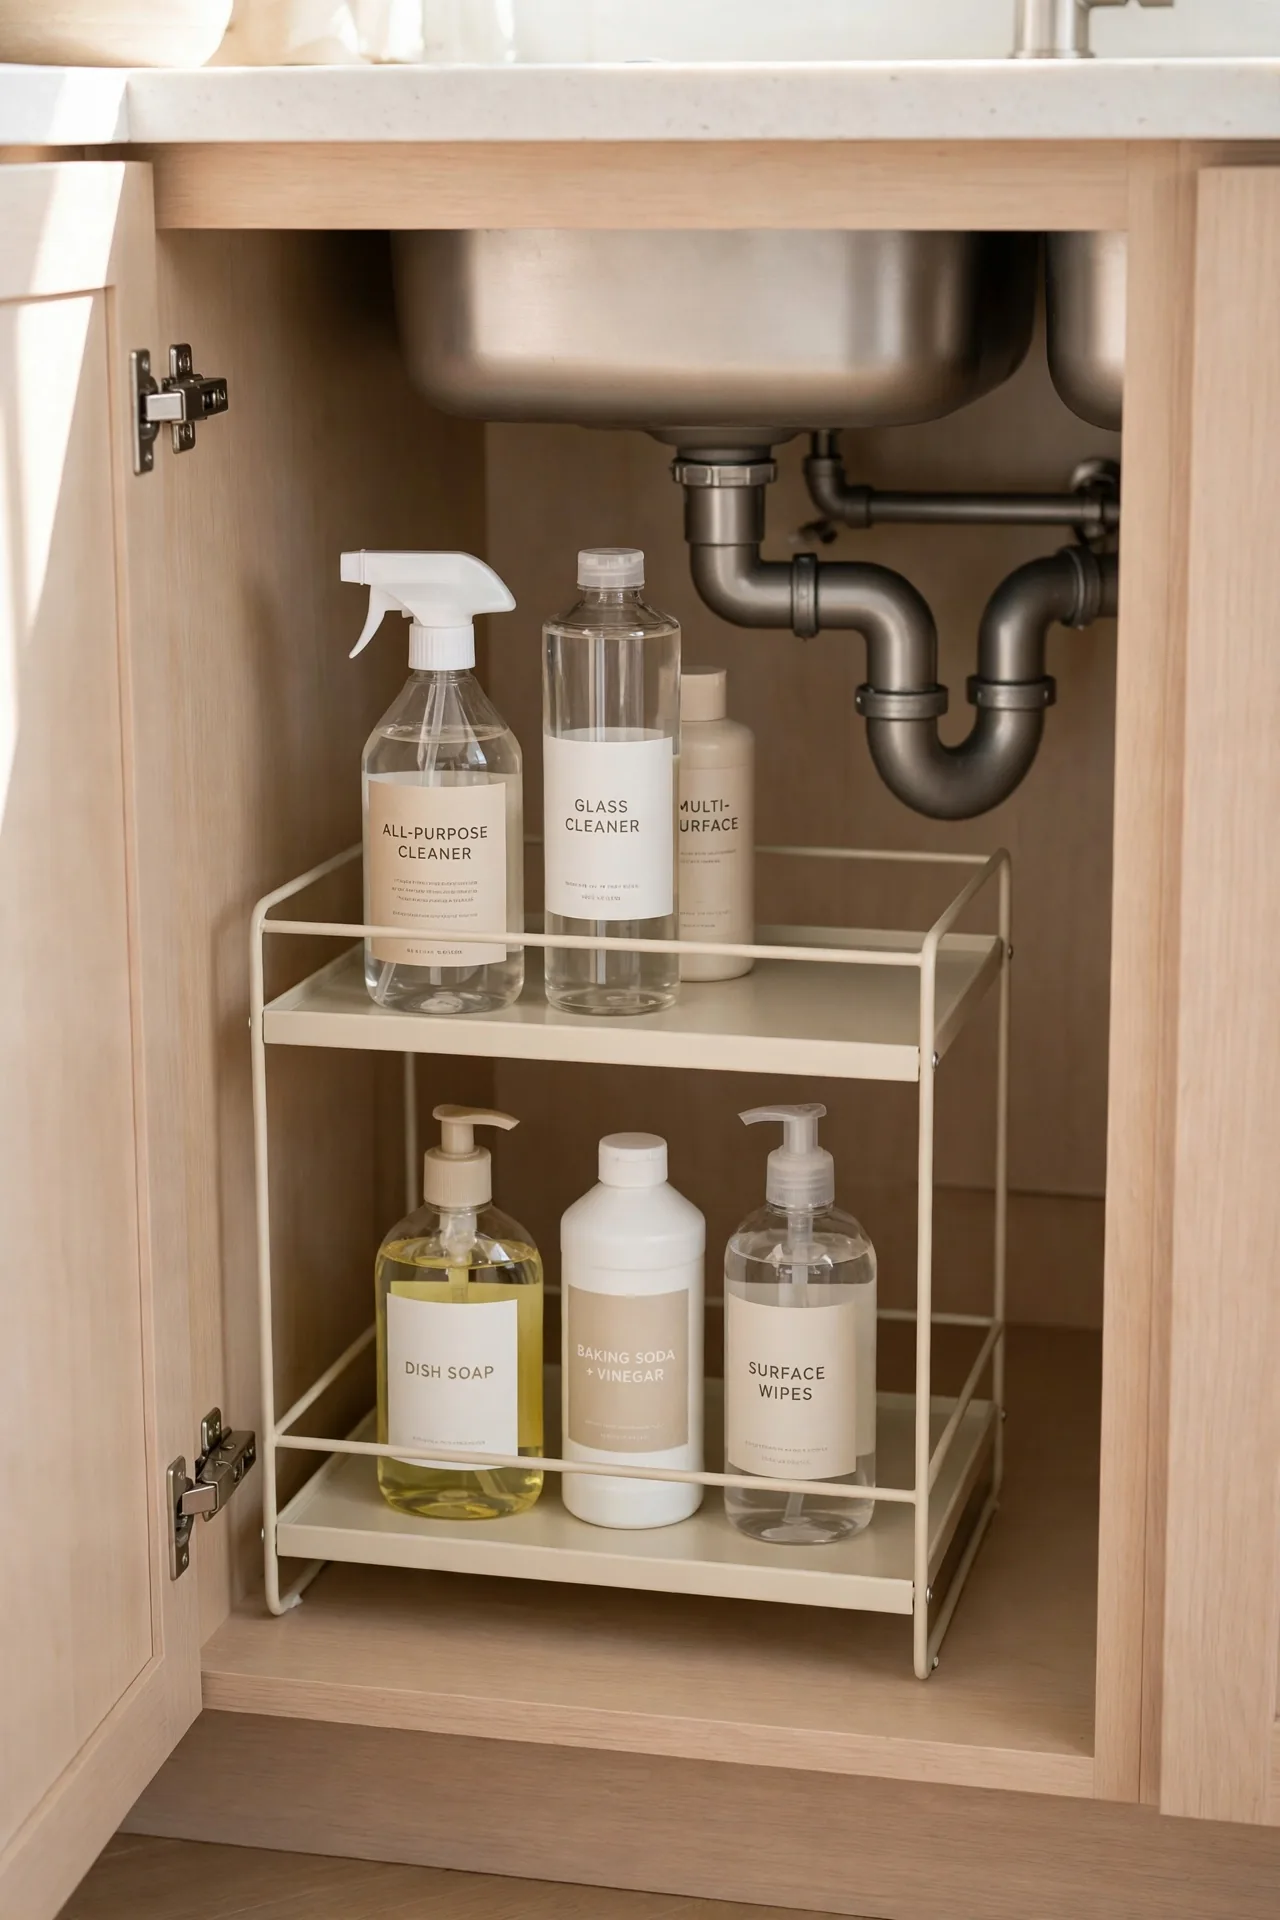
| Two-Tier Rack | Single-Level Tray |
| Doubles storage with an upper level | Uses only the cabinet floor space |
| Upper tier keeps small items visible | Small items hide behind tall bottles |
| Fits around pipes with open design | Blocked by pipe placement |
A two-tier rack gives you an instant second shelf exactly where you need it. The open frame slips around pipes that would block solid shelving, and both levels stay fully visible. Place daily cleaners on top and bulky refills below. Most racks need no tools and lift out easily for a deep clean. The result is a cabinet that works like a drawer, with every cleaner one smooth pull away.
Magnetic Cup Holders
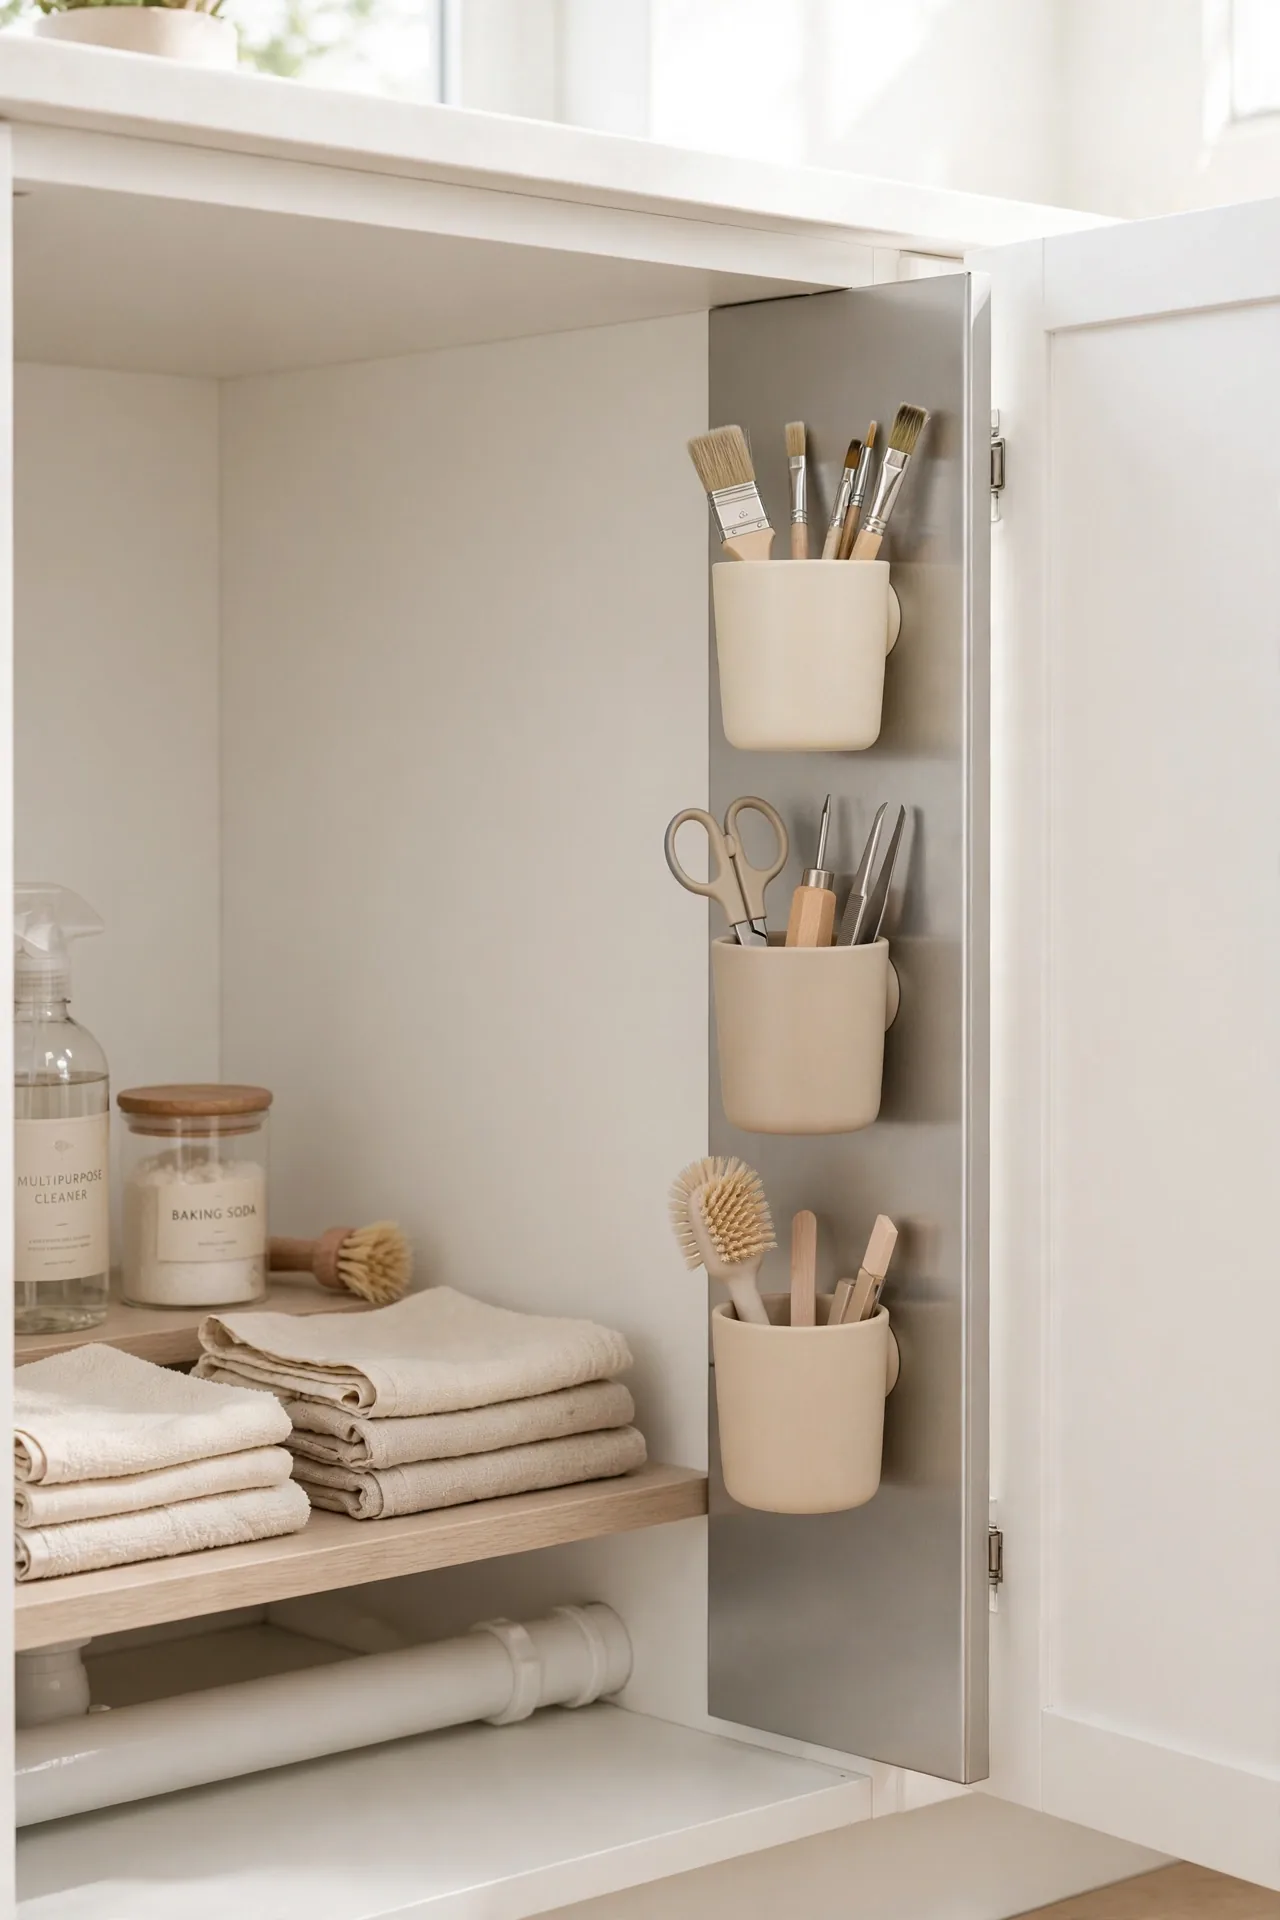
DO: Attach magnetic cups to the metal cabinet wall or a mounted steel strip for brushes, pens, and small tools. Keep one cup for items you grab daily. Choose cups with strong magnets rated for the weight.
DON’T: Stick magnets on painted wood, since they will not hold. Overload a cup until it slides down the wall. Forget to check the grip after humid weeks loosen it.
Magnetic cups turn a blank side wall into bonus storage in seconds. I use one for my scrub brush and another for spare batteries and twist ties. If your cabinet has no metal surface, mount a slim steel strip first. The cups pop off for cleaning and snap right back.
Labeled Bin Zones
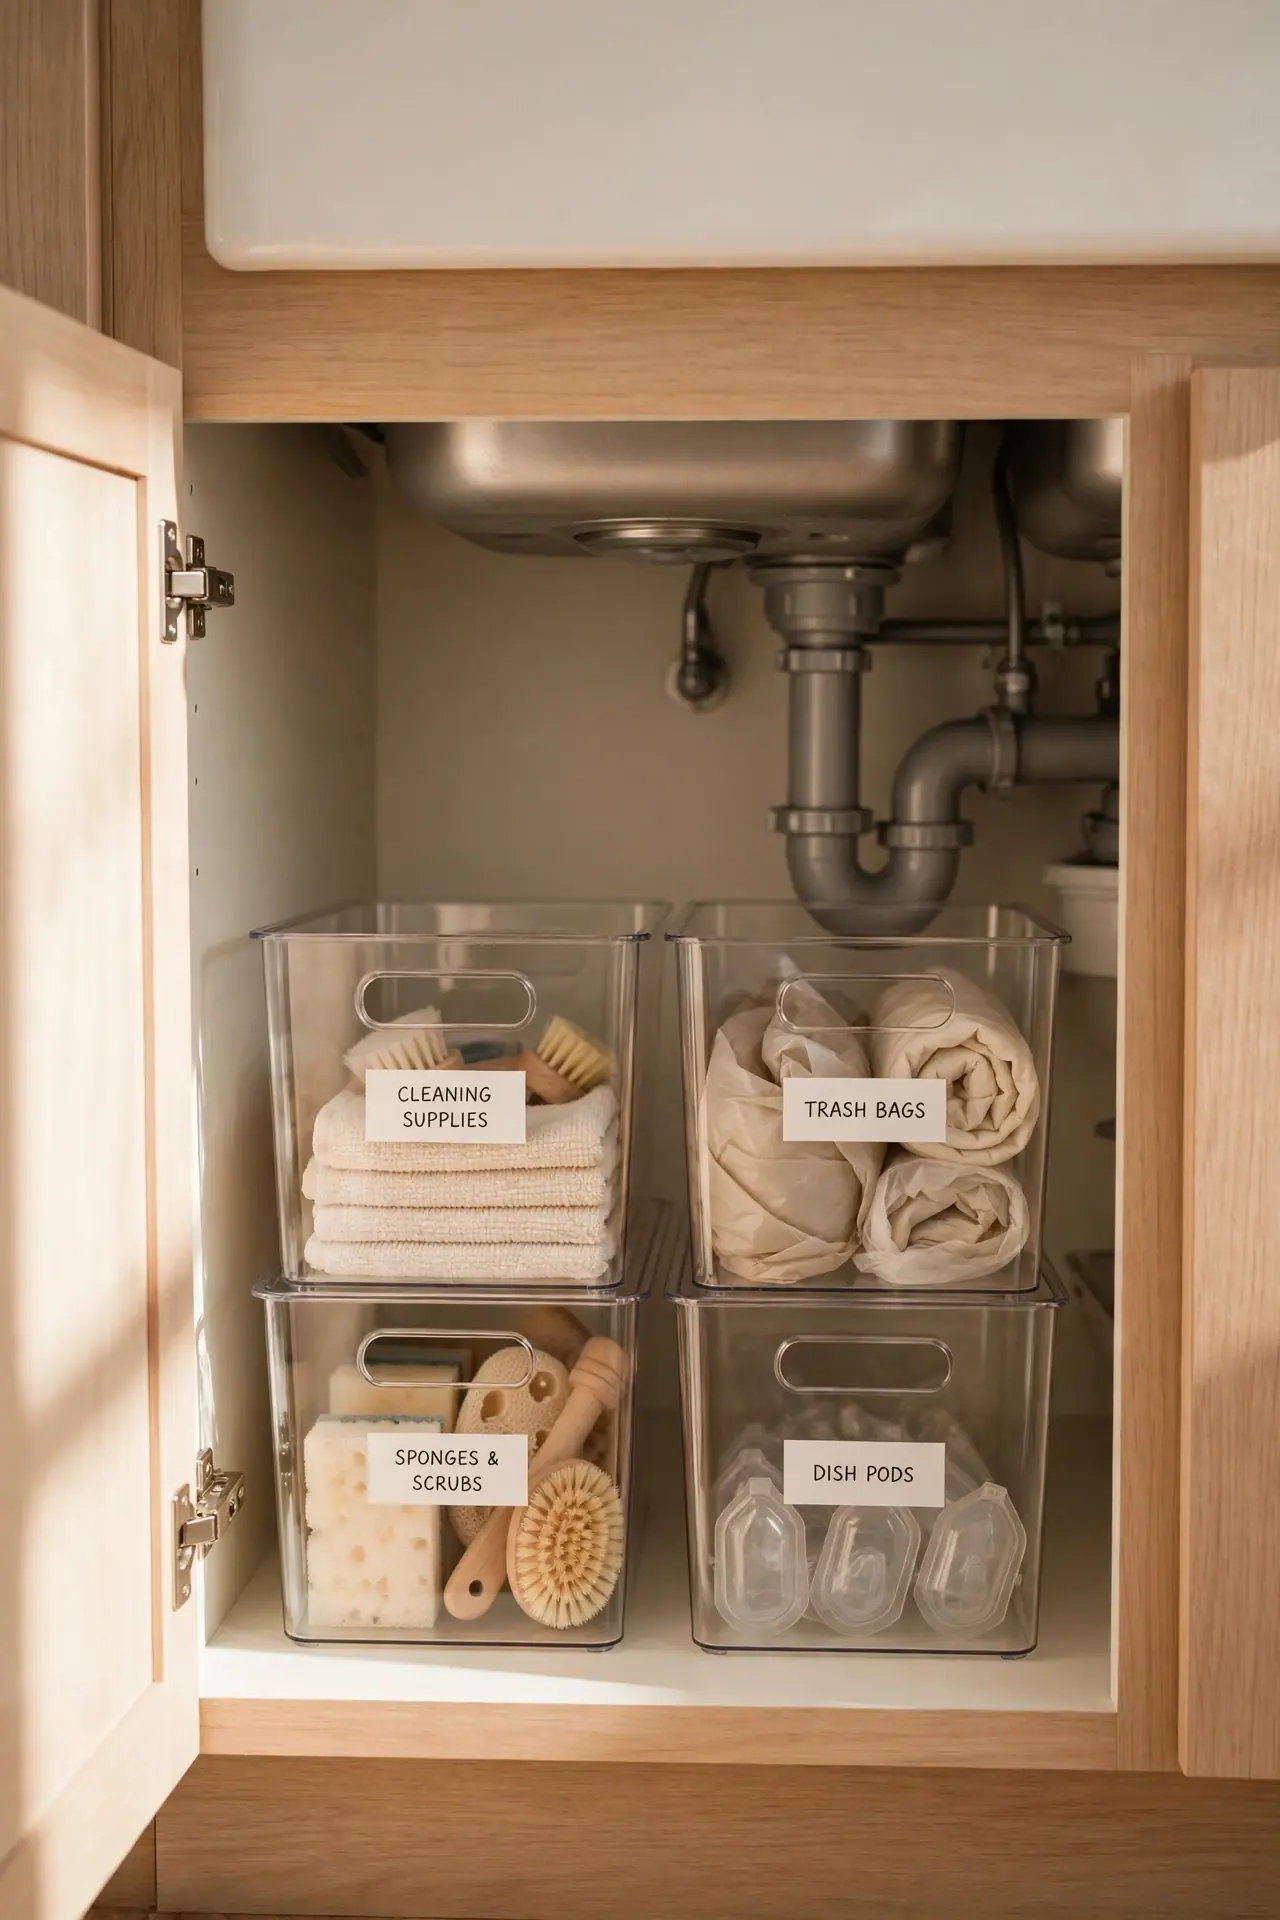
Cost: Low | Time: One afternoon | Skill Level: Beginner | Best For: Families sharing one busy kitchen.
Zones keep the cabinet organized even when everyone tosses things back in a hurry. Assign each bin a job: dishes, surfaces, laundry, and trash extras. Big clear labels on the front tell every family member exactly where things belong. When everything has a labeled home, the cabinet resets itself with almost no effort.
Start by emptying the cabinet and sorting supplies into piles by task. Match each pile to a bin that fits the pipe layout. I have noticed labeled zones survive busy households far longer than unlabeled ones. Refresh the labels once a year as your supplies change.
Slide-Out Trash Bin
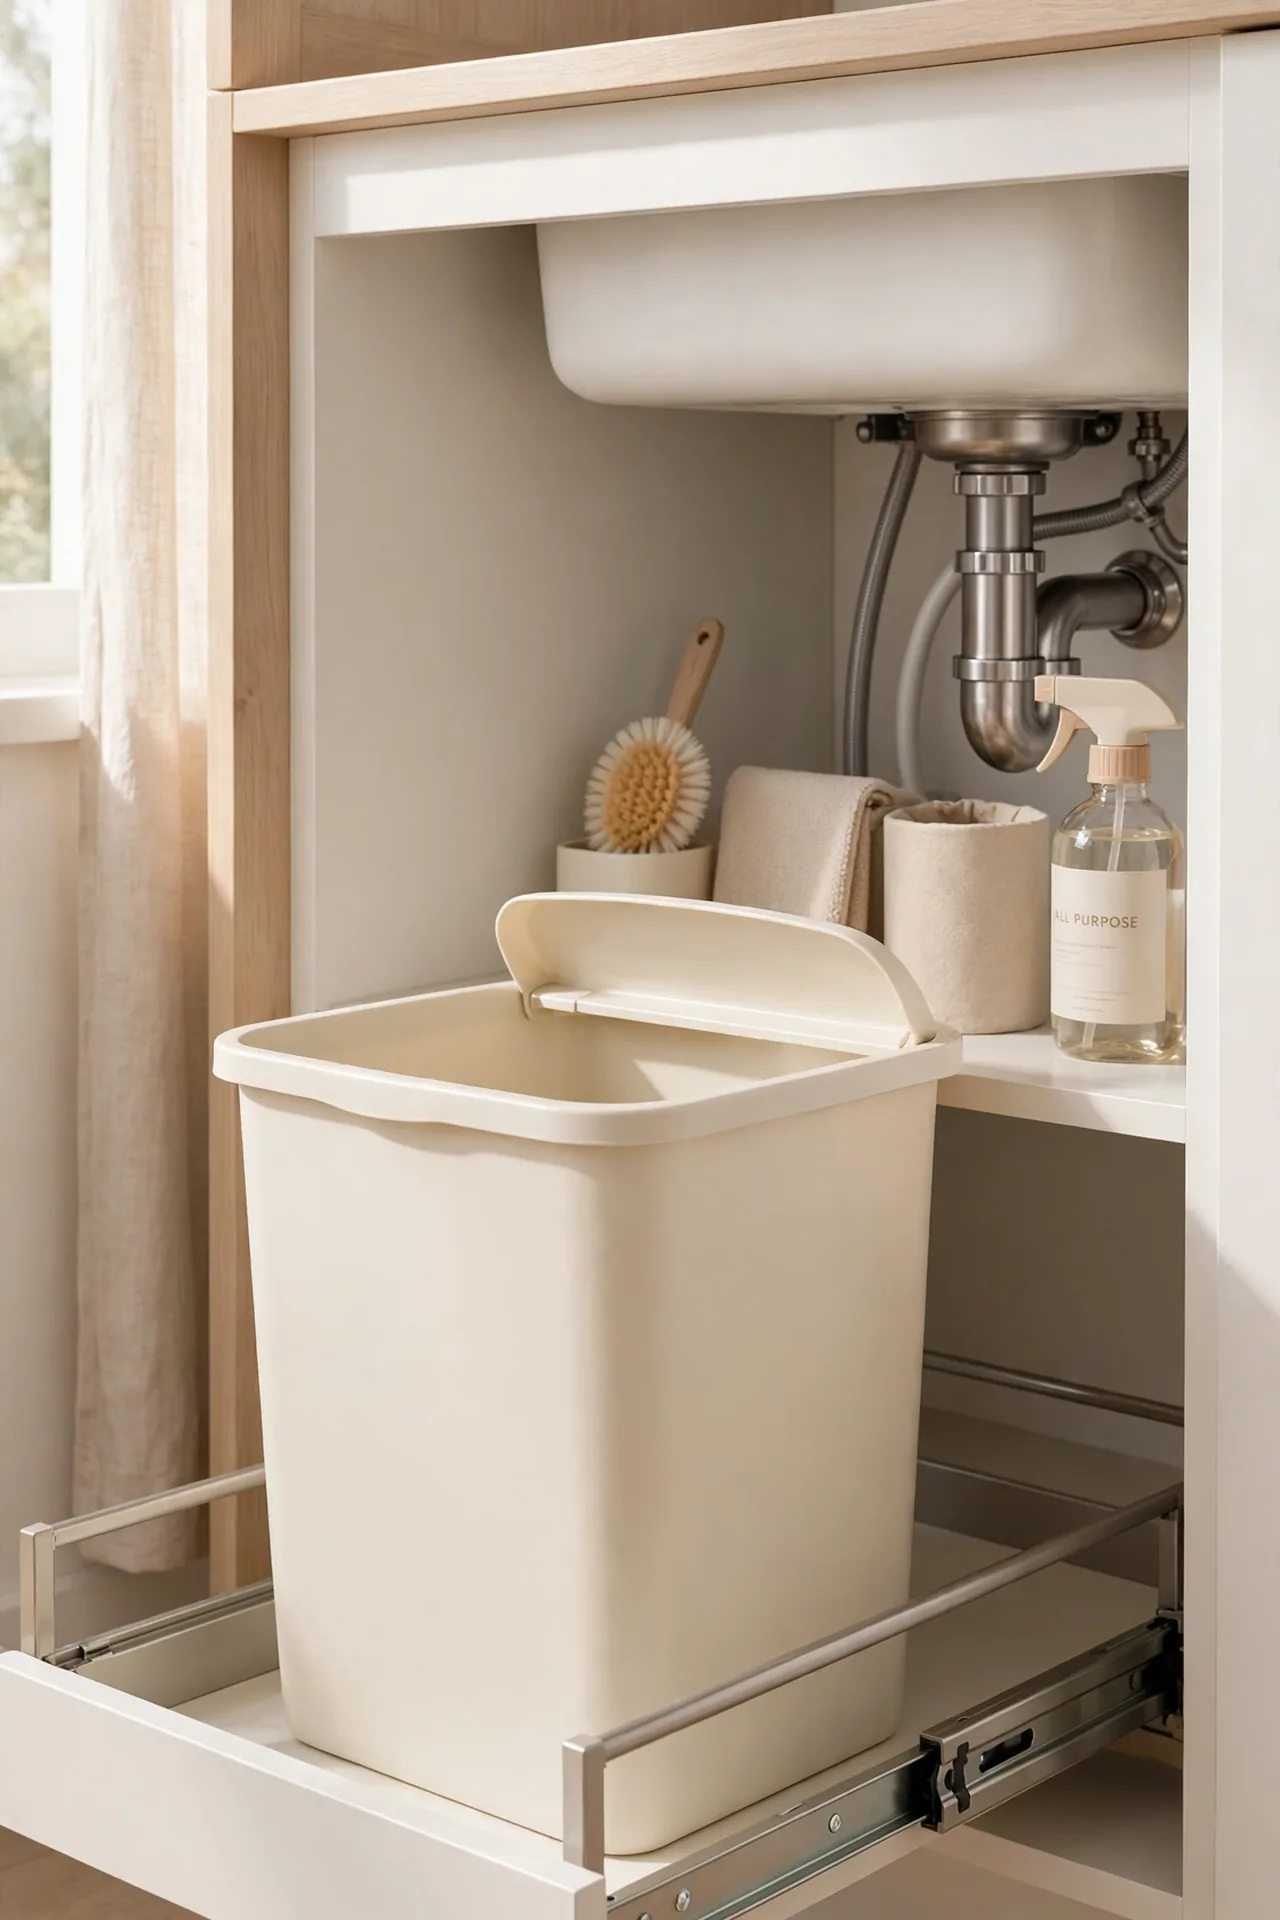
A trash bin crammed beside the pipes is awkward to reach and harder to empty, but a slide-out frame fixes both. The bin rides on a track that glides toward you, so bag changes take seconds and spills stay contained. Mount the frame to the cabinet floor with a few screws and drop in a bin that fits the space.
Choose a bin with a lid to keep odors in and a handle for easy lifting. Line it before sliding it back so the next change is painless. I recommend keeping spare bags in a basket right beside the frame. This small upgrade makes the least-loved chore under your sink noticeably easier.
Sponge Sink Caddy
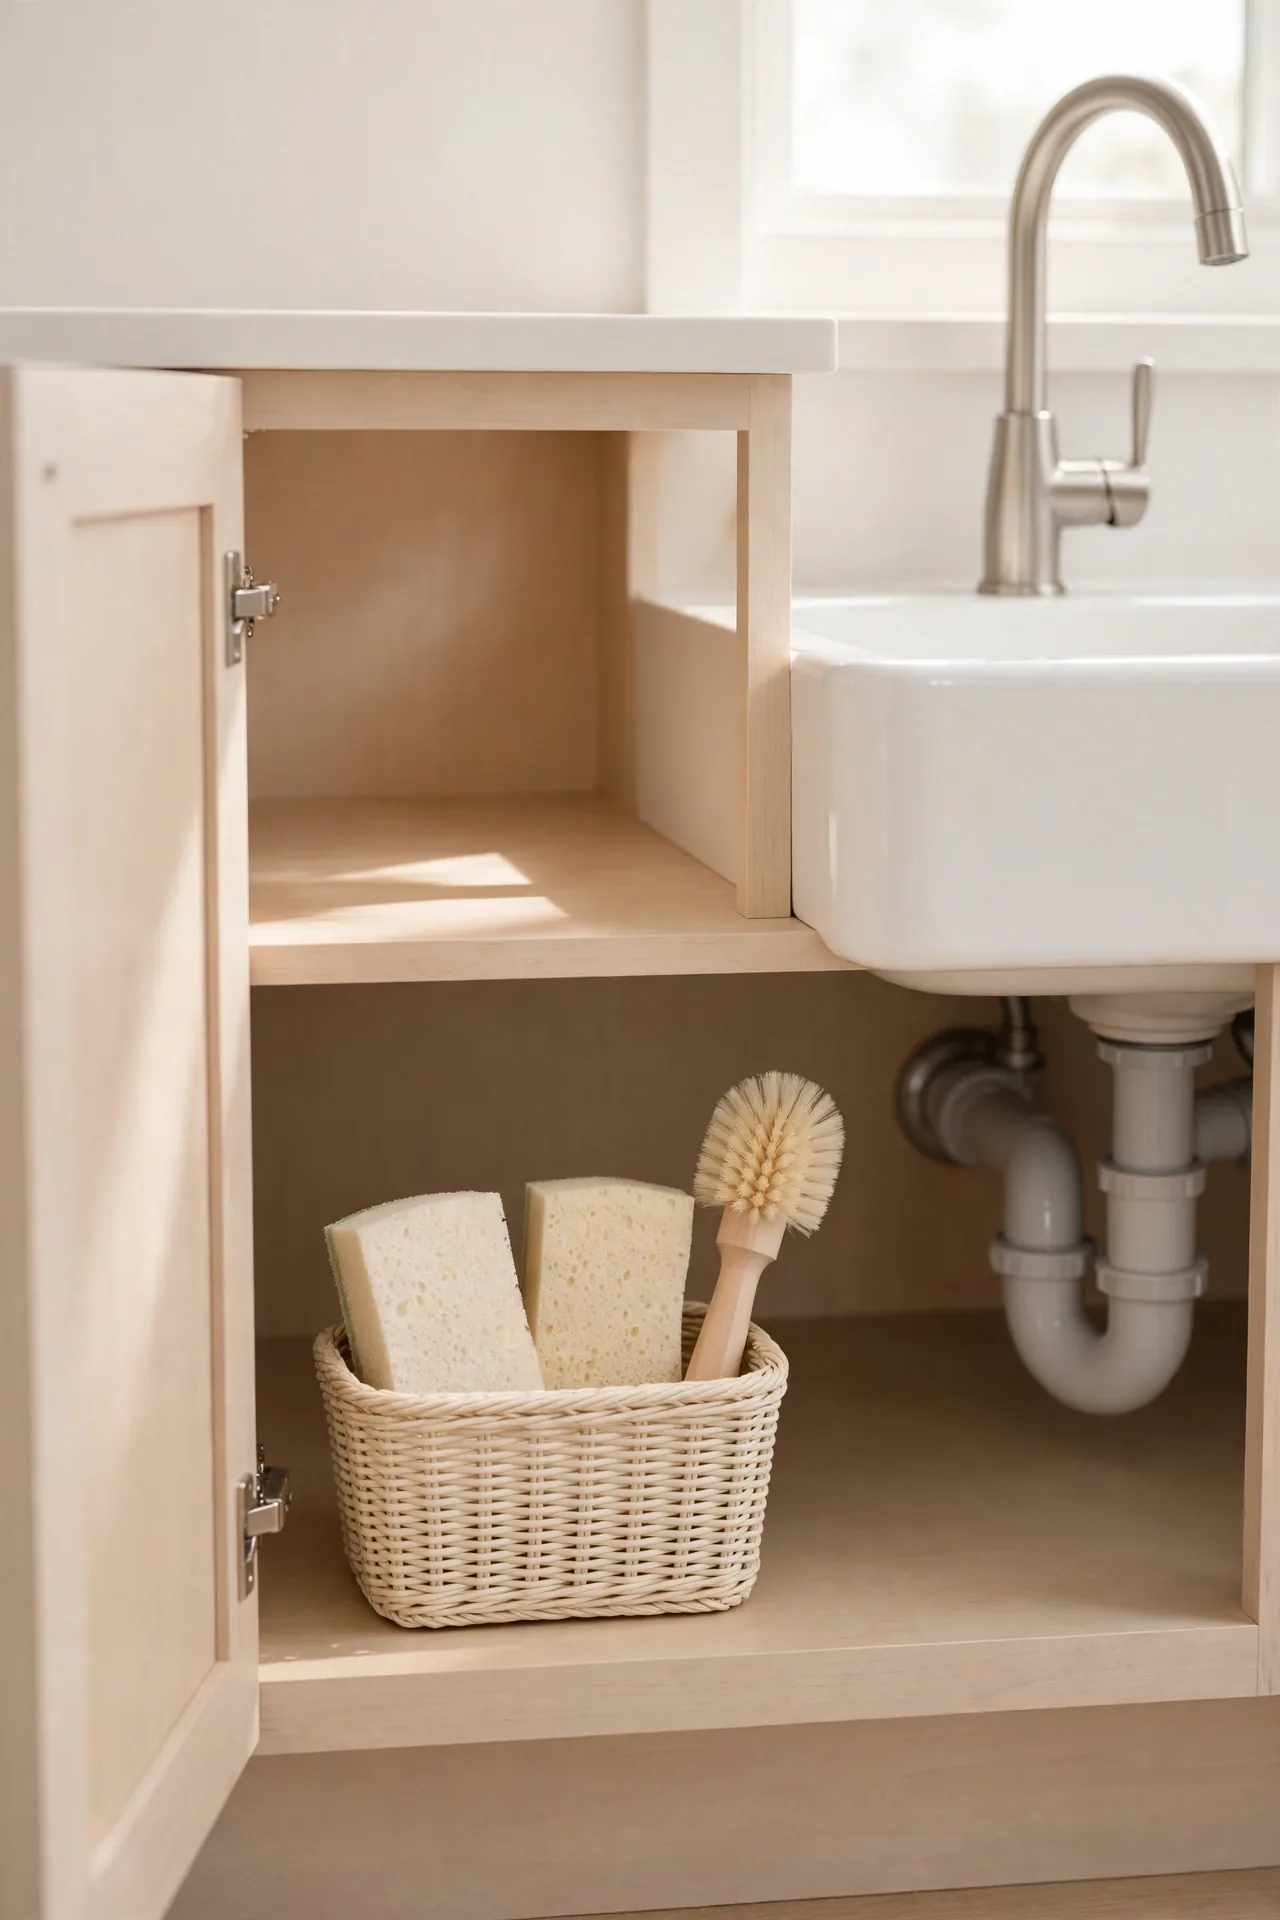
Wet sponges left on the cabinet floor breed odor fast, and a dedicated caddy solves it. A small ventilated tray holds your sponge, brush, and dish soap in one neat spot. Airflow dries everything between uses, so nothing stays soggy.
- Pick a caddy with drainage holes or a slatted base.
- Keep it near the front for easy daily access.
- Rinse the caddy weekly to prevent buildup.
- Replace sponges monthly for a fresh, odor-free start.
This tiny station keeps the dampest items contained and dry. I have seen this work well in many cases where odor was the main complaint. A caddy also stops soap bottles from tipping onto their sides.
Pipe-Hugging Shelves
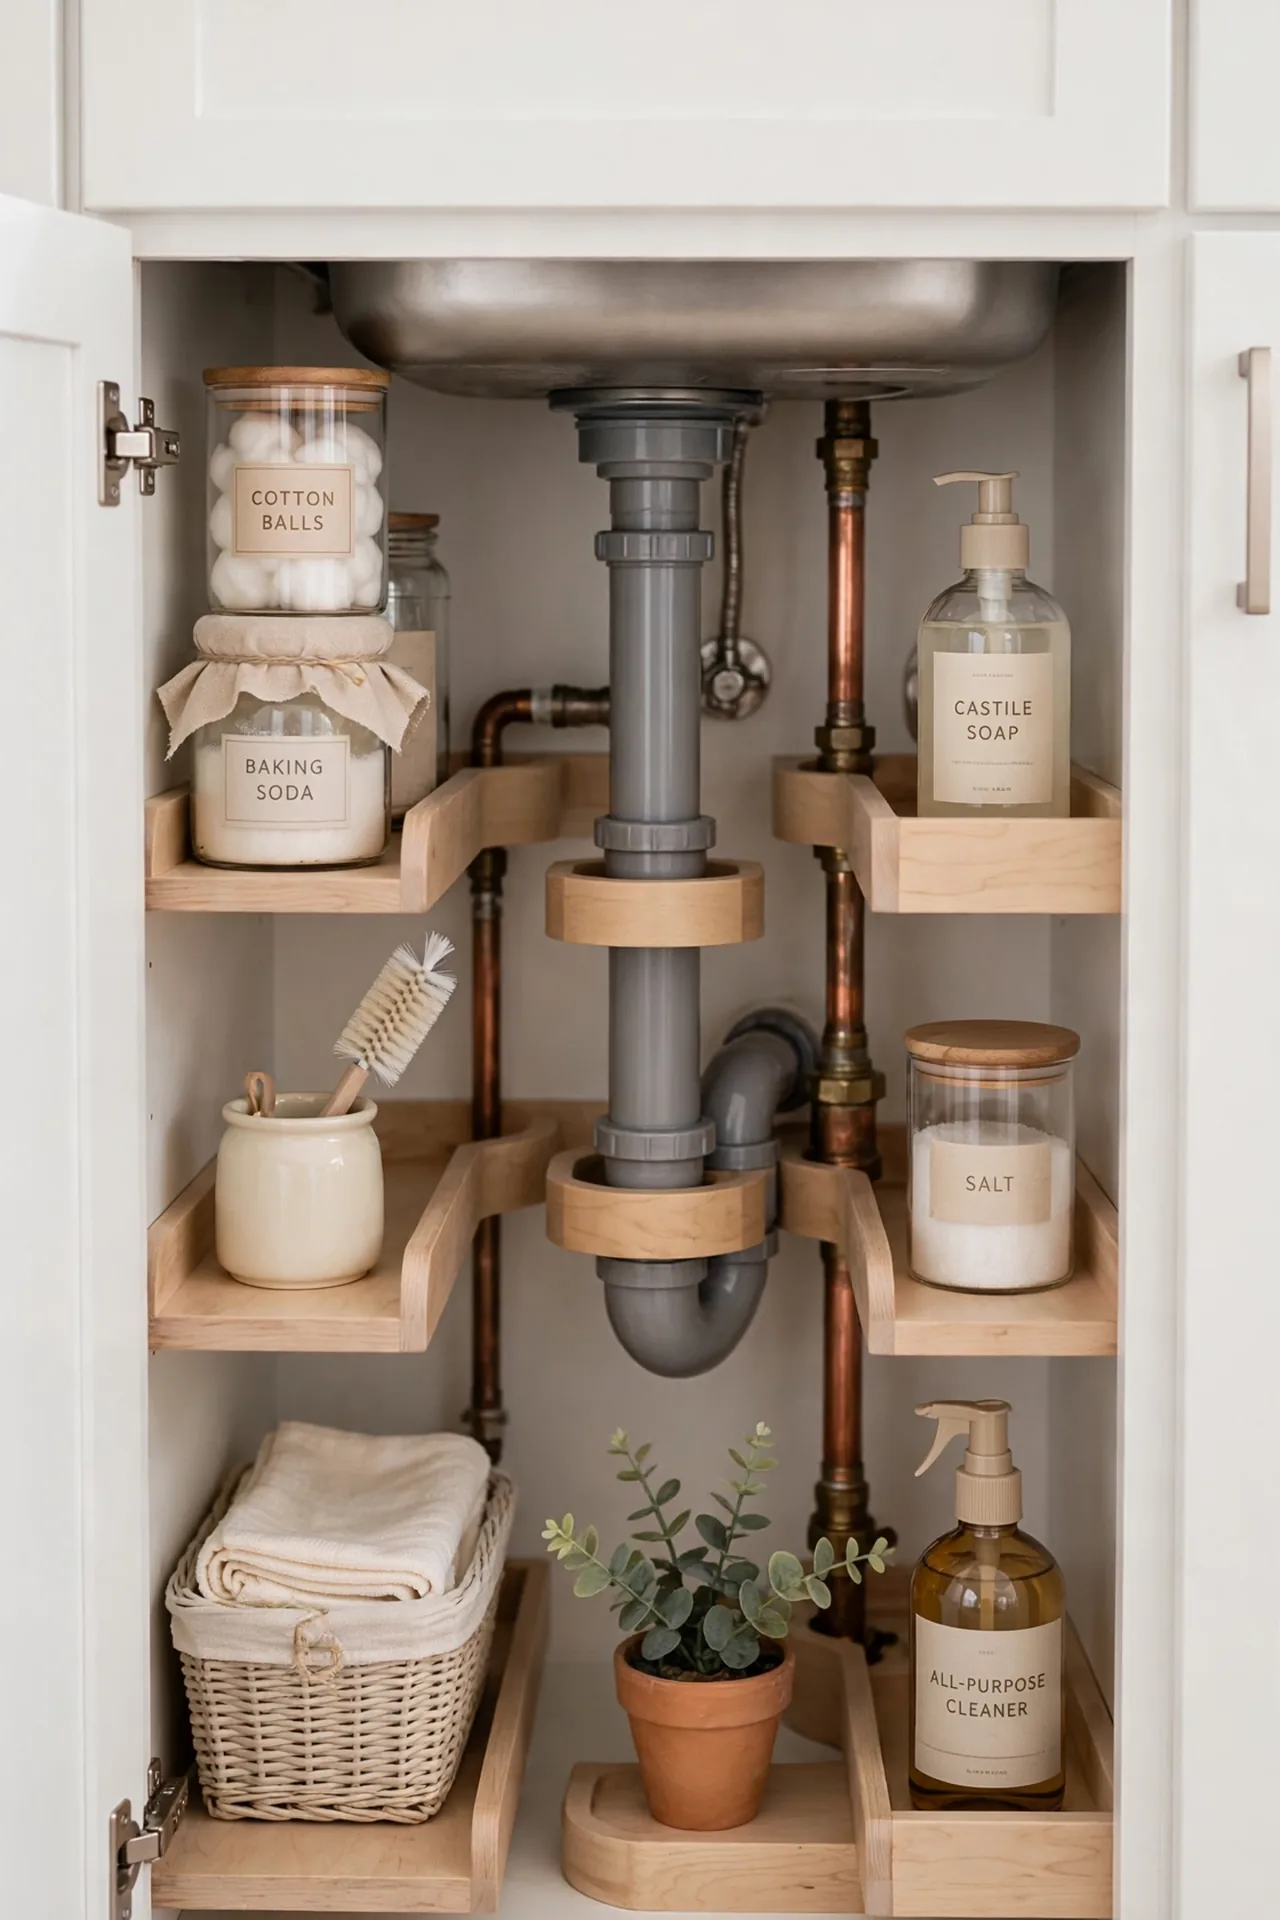
Quick Tip: Use shelves with cutouts that hug your pipes instead of fighting them. U-shaped or split shelves wrap around the plumbing and turn dead space into storage. Measure the pipe positions carefully, then choose a shelf with matching cutouts. The result looks built-in and uses nearly every inch.
These shelves work best when you measure twice and buy once. Cardboard templates help you test the fit before committing. I always leave a small gap around pipes for easy plumbing access later. This approach squeezes storage from the trickiest part of the cabinet. Pair them with a waterproof liner underneath for full protection against drips.
Drawer-Style Organizer Box
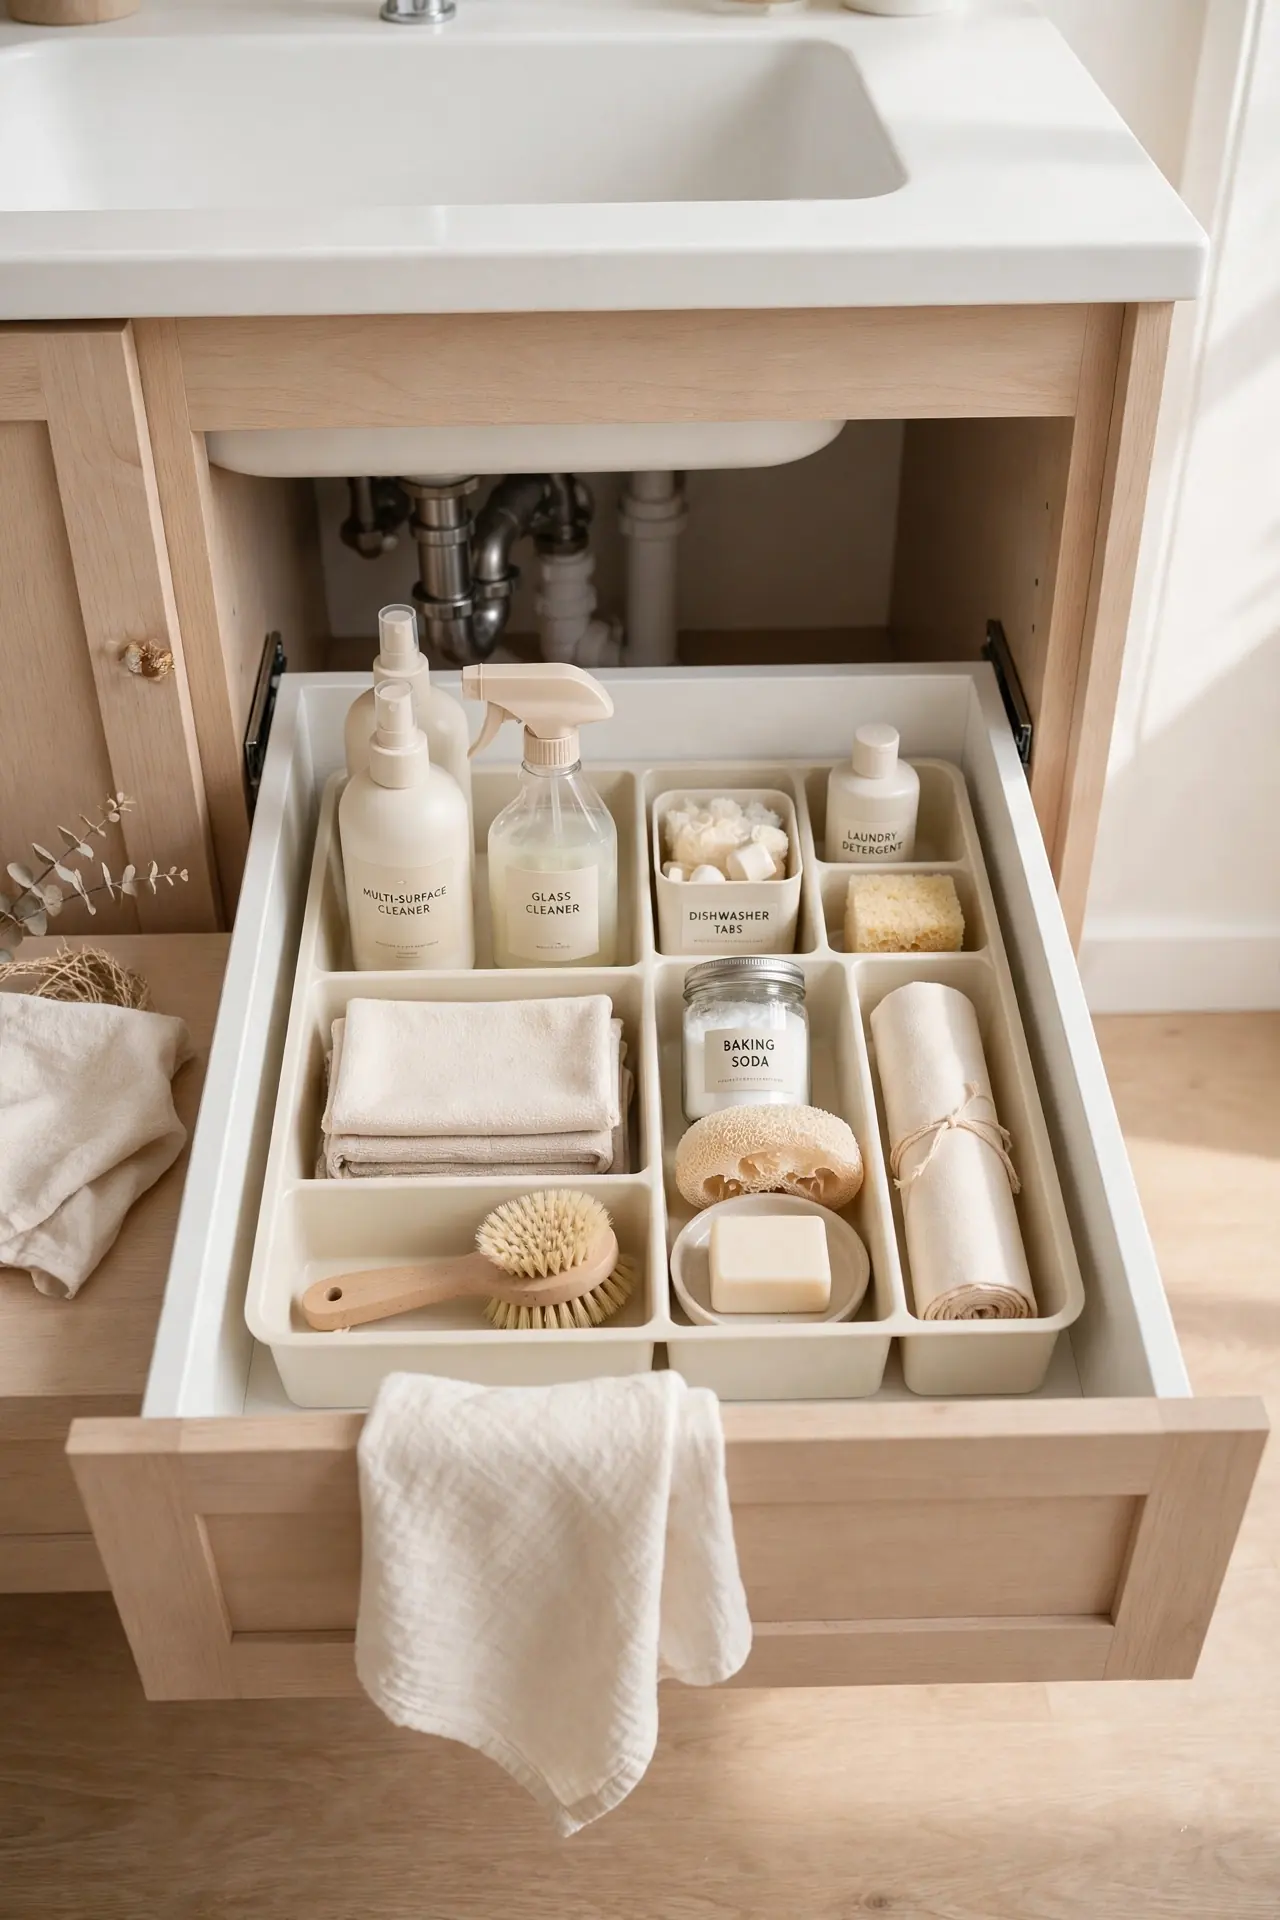
BEFORE: A deep cabinet forces you to kneel, reach, and guess what sits in the dark back corner. Bottles migrate, labels face the wrong way, and duplicates pile up unnoticed.
AFTER: A drawer-style organizer box pulls the whole back row into the light with one smooth motion. Compartments keep bottles upright and sorted, and the soft-close glide feels premium. Everything stays visible, reachable, and exactly where you left it.
Look for boxes with adjustable dividers so compartments fit your tallest bottles. Most slide on the cabinet floor with no mounting needed. I recommend wiping the tracks monthly so the glide stays smooth. This is the closest thing to custom cabinetry without the custom price.
These under kitchen sink organization ideas prove that even the most awkward cabinet can become a model of order. Start with one or two ideas that fit your space, then build the system over a weekend. I have seen how small changes like these can completely shift the way a space feels. Save your favorites on Pinterest, try them out, and share the results with someone who needs a tidier kitchen.
2 Comments