20 Under Sink Kitchen Organization Ideas to Maximize Every Inch
That dark cabinet under your kitchen sink holds more potential than you think. With smart under sink kitchen organization ideas, the jumble of bottles and bags becomes a tidy system you actually enjoy opening. I’ve noticed most kitchens waste this space completely, yet it sits right where cleaning supplies get used daily. A few clever containers and hooks change everything.
Start by pulling everything out and wiping the cabinet floor clean. Group items by how often you reach for them, then give each group a home. If your whole kitchen feels cramped, these galley kitchen organization ideas for small spaces pair perfectly with an under-sink reset. Small upgrades here save real time every single day.
Stackable Bins for under sink kitchen organization ideas
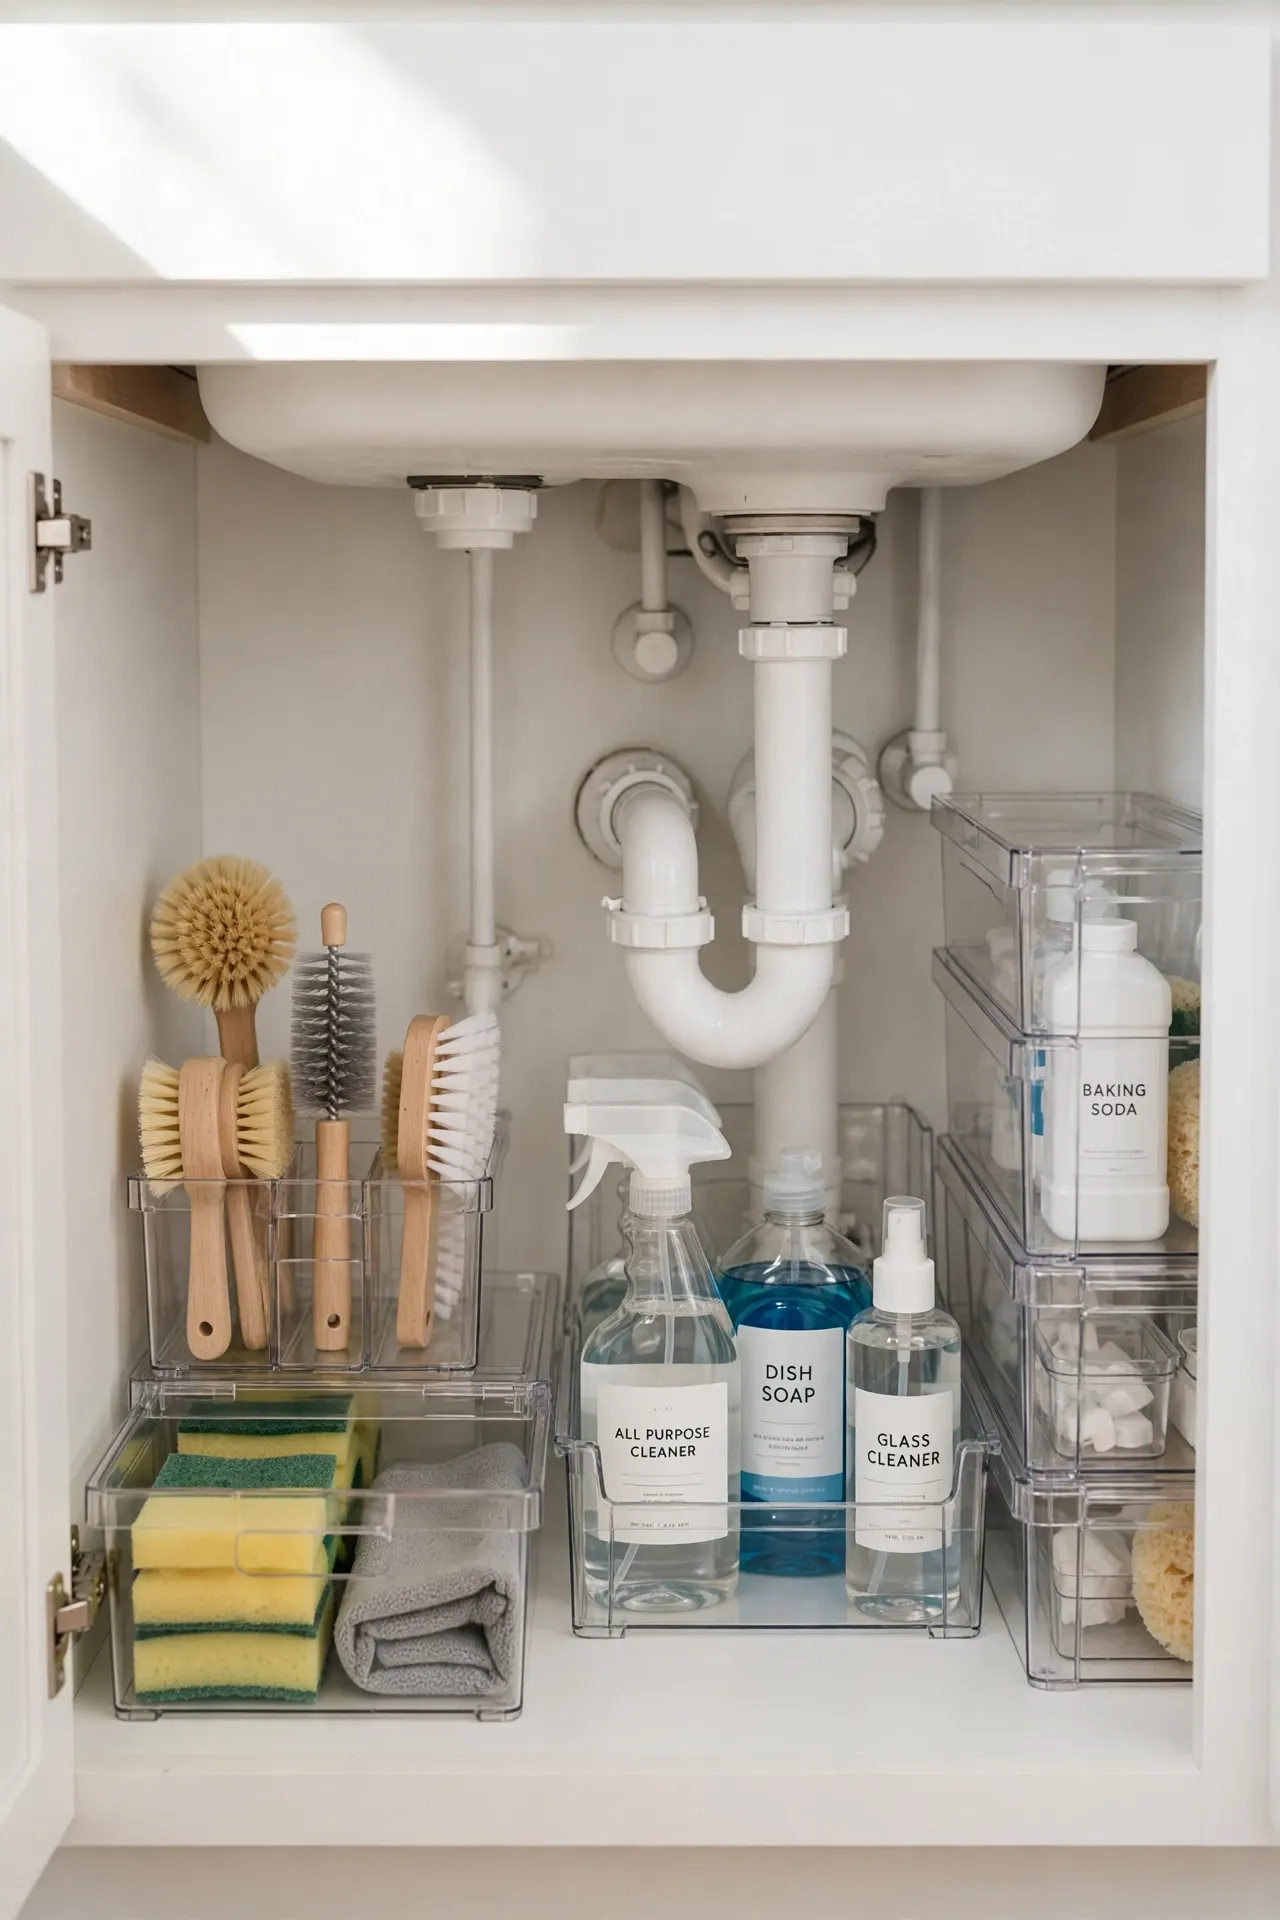
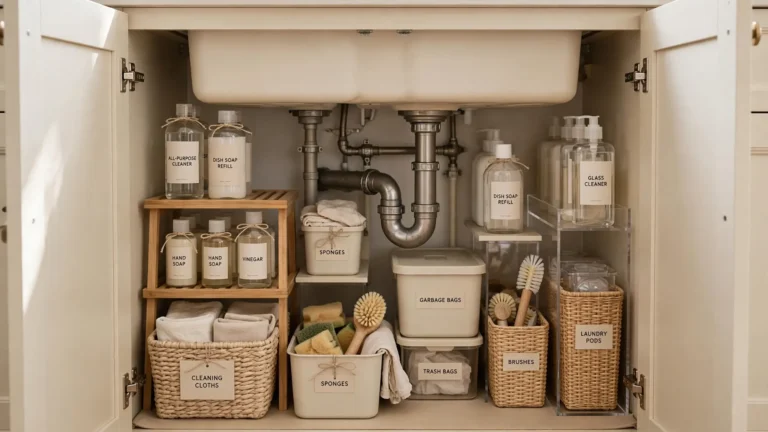
Stackable bins turn that awkward under-sink void into usable vertical storage. Choose clear bins so you spot supplies at a glance, and pick sizes that slide around the pipes without forcing. I’ve seen this work well in many cases where the cabinet felt impossibly cramped before a simple bin system went in.
Label each bin for dish soap, sponges, or trash bags so family members return items to the right spot. The bins lift out for quick wipe-downs, which keeps the cabinet fresh underneath. Start with two bins and add more once you see how the layout works for your routine.
Tension Rod Trick
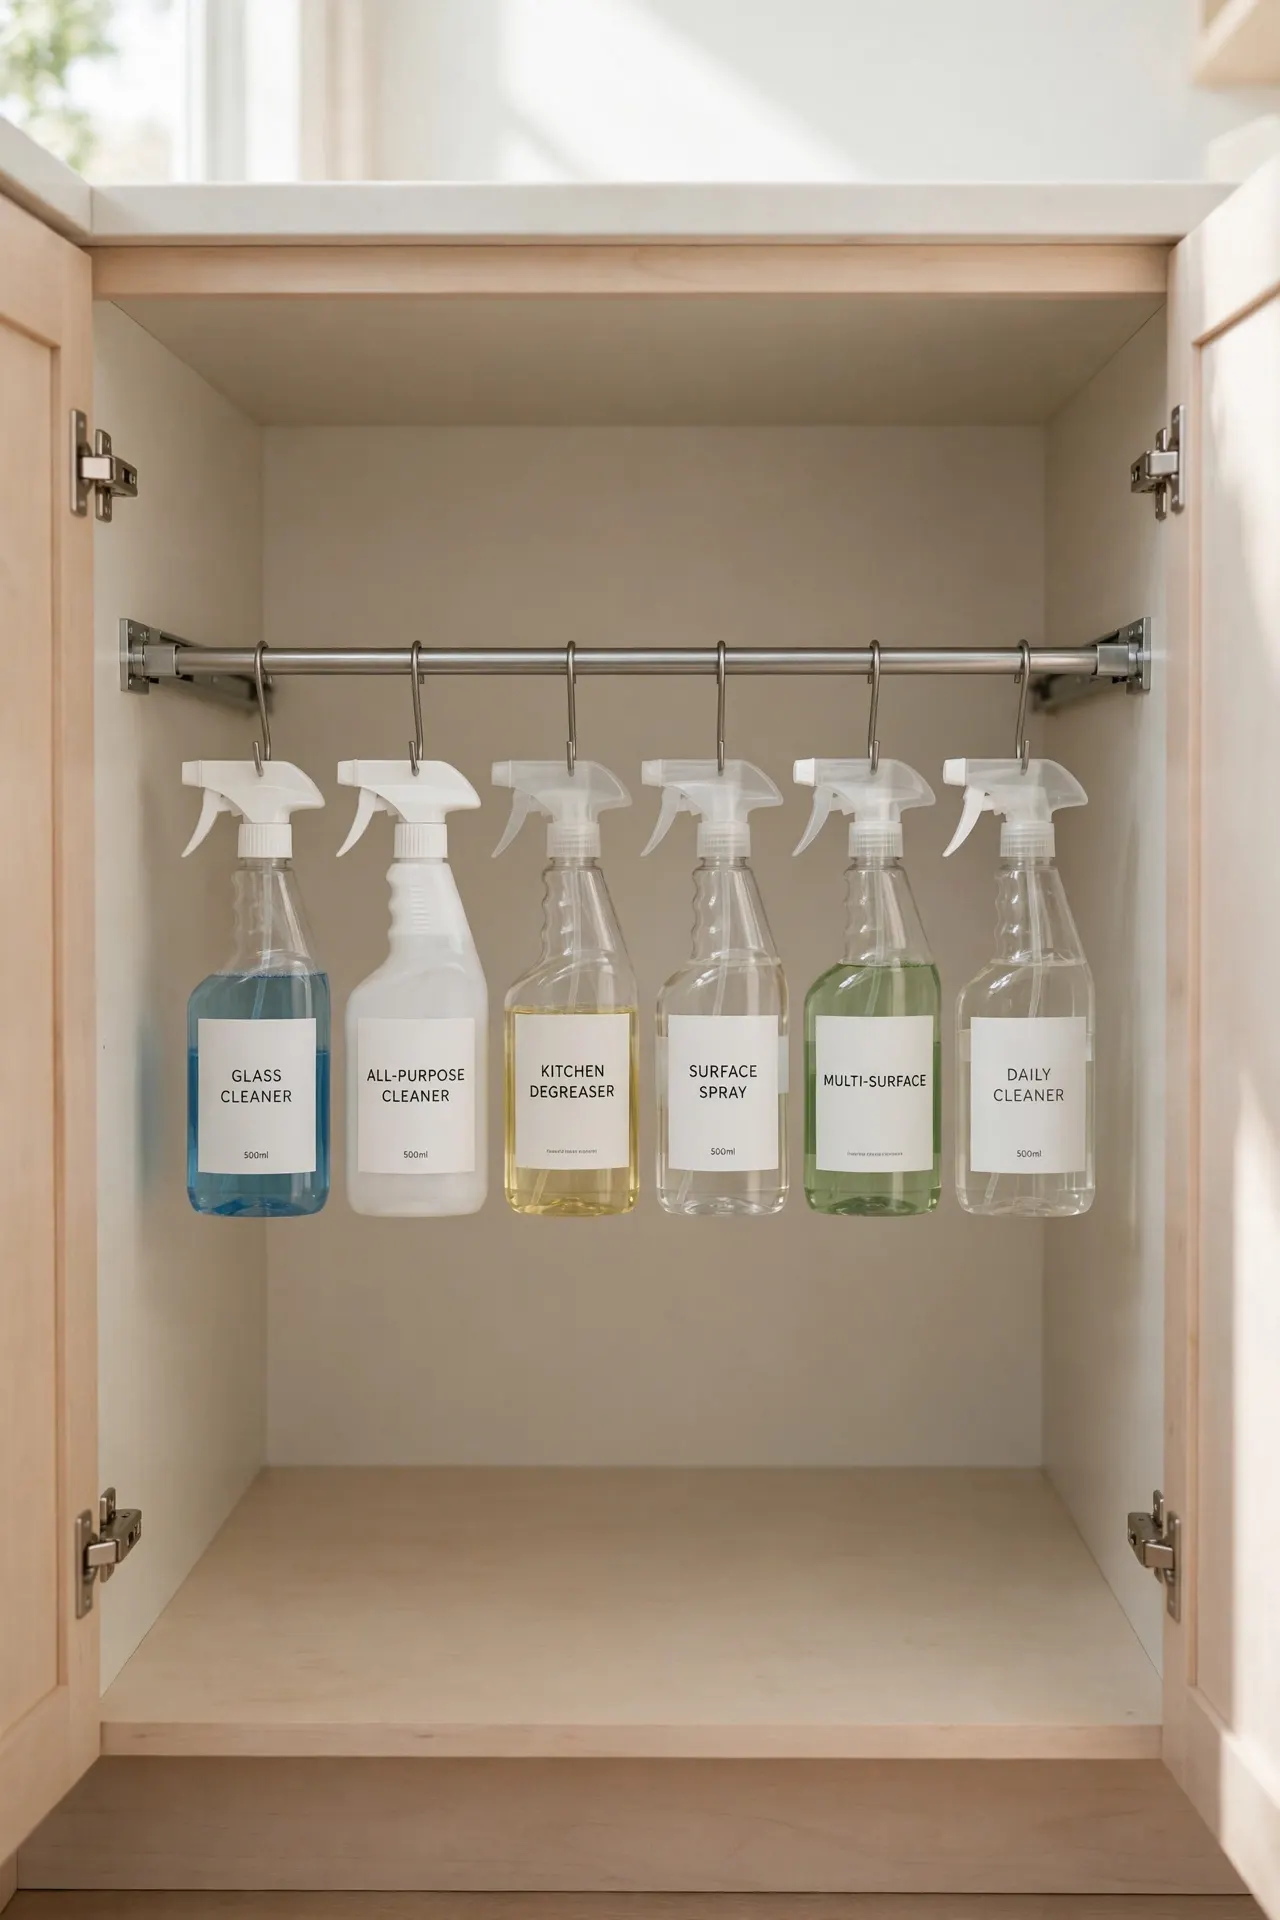
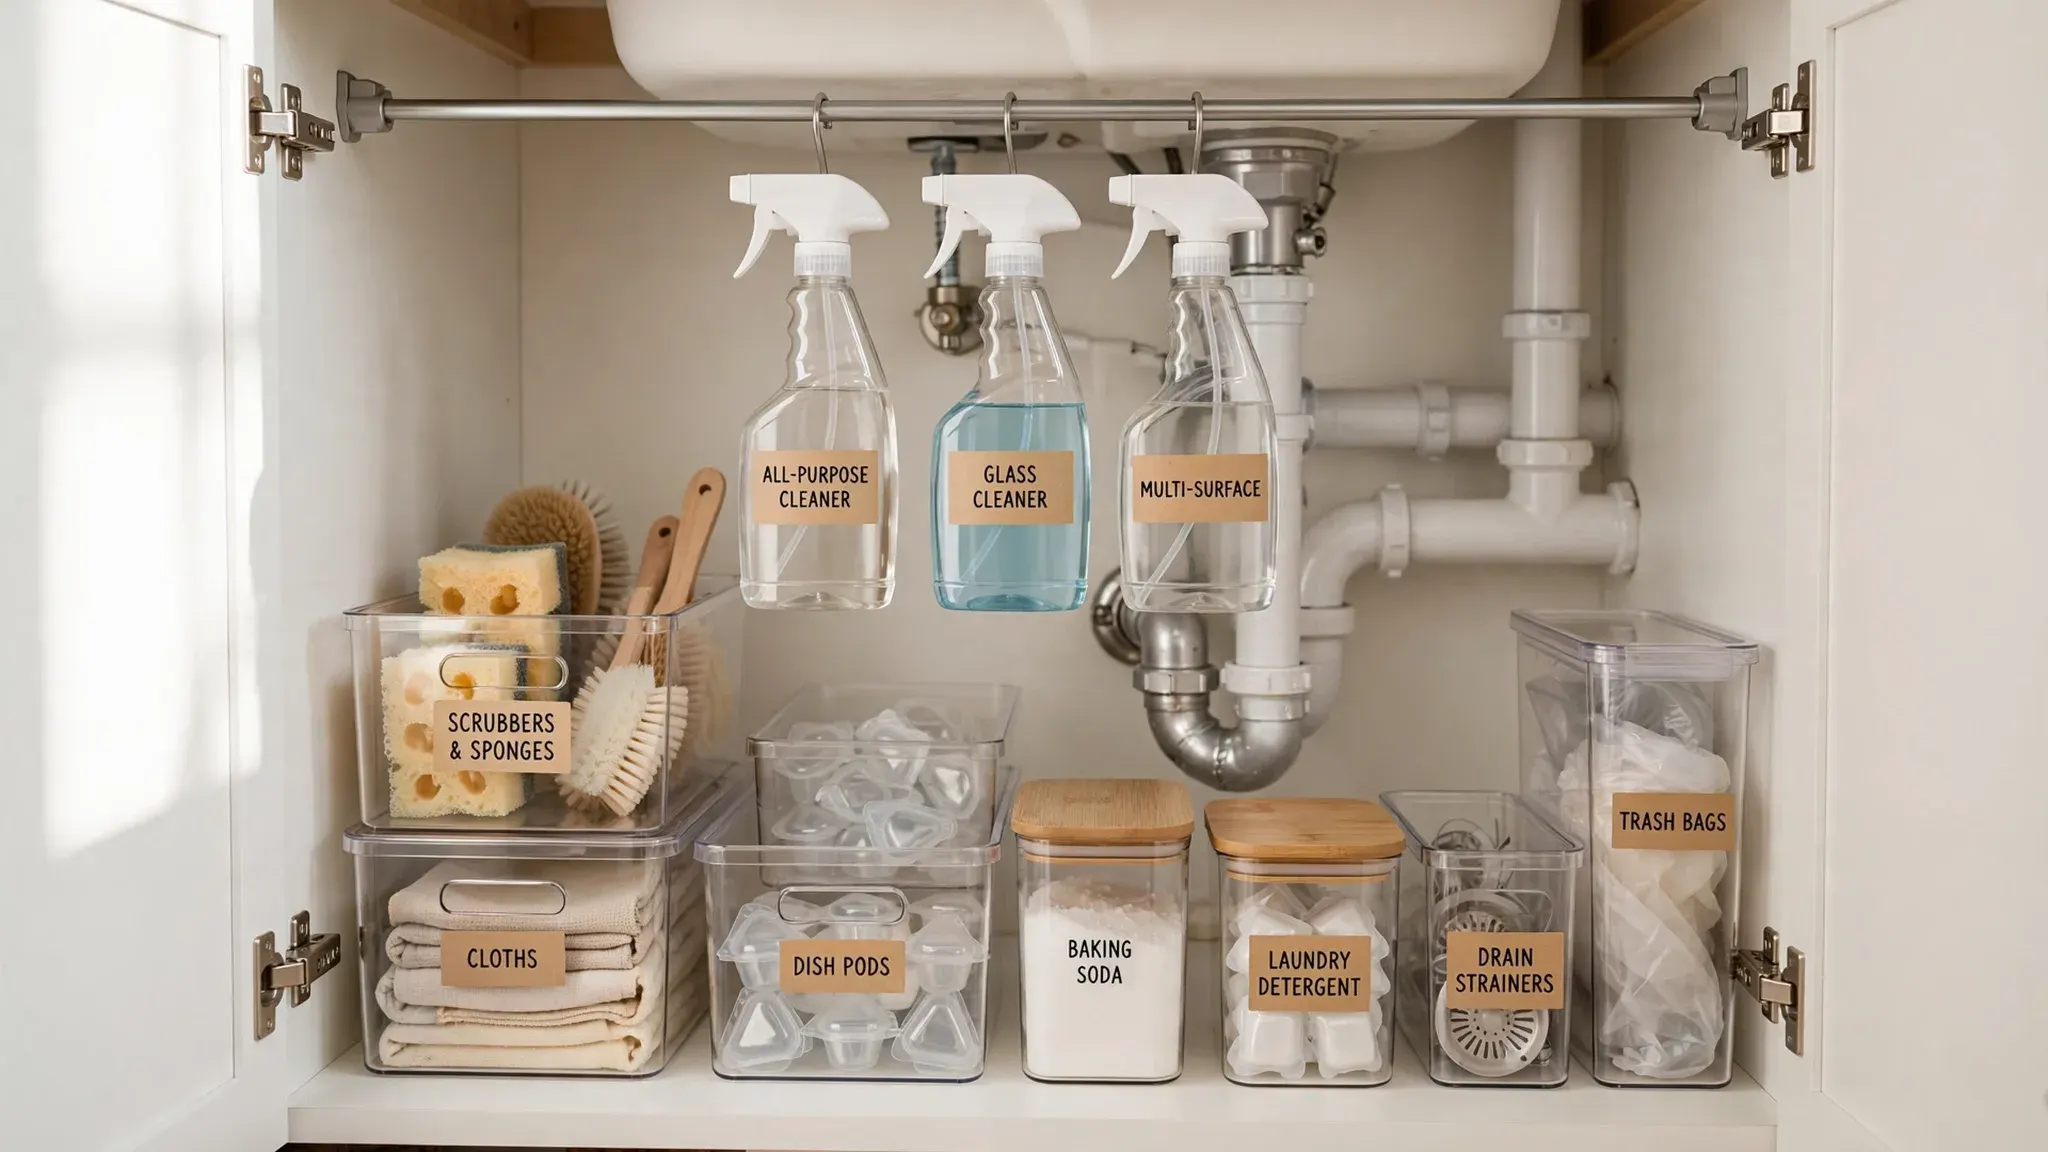
- Mount a spring-loaded tension rod across the cabinet, just below the top, to create an instant hanging rail for bottles.
- Hook spray bottles by their triggers so they dangle above the floor, freeing the entire base for bins and baskets.
- Measure the cabinet width first, since rods come in adjustable ranges that fit most standard kitchen cabinets.
- Slide a shallow tray underneath the hanging bottles to catch drips and keep the cabinet floor spotless.
- This trick costs very little and installs in minutes without any tools or drilling into the cabinet.
This approach reclaims floor space in seconds flat. Bottles that once crowded together now hang in a neat row, easy to grab and return. Renters love it because the rod leaves zero marks behind.
Pull-Out Caddy
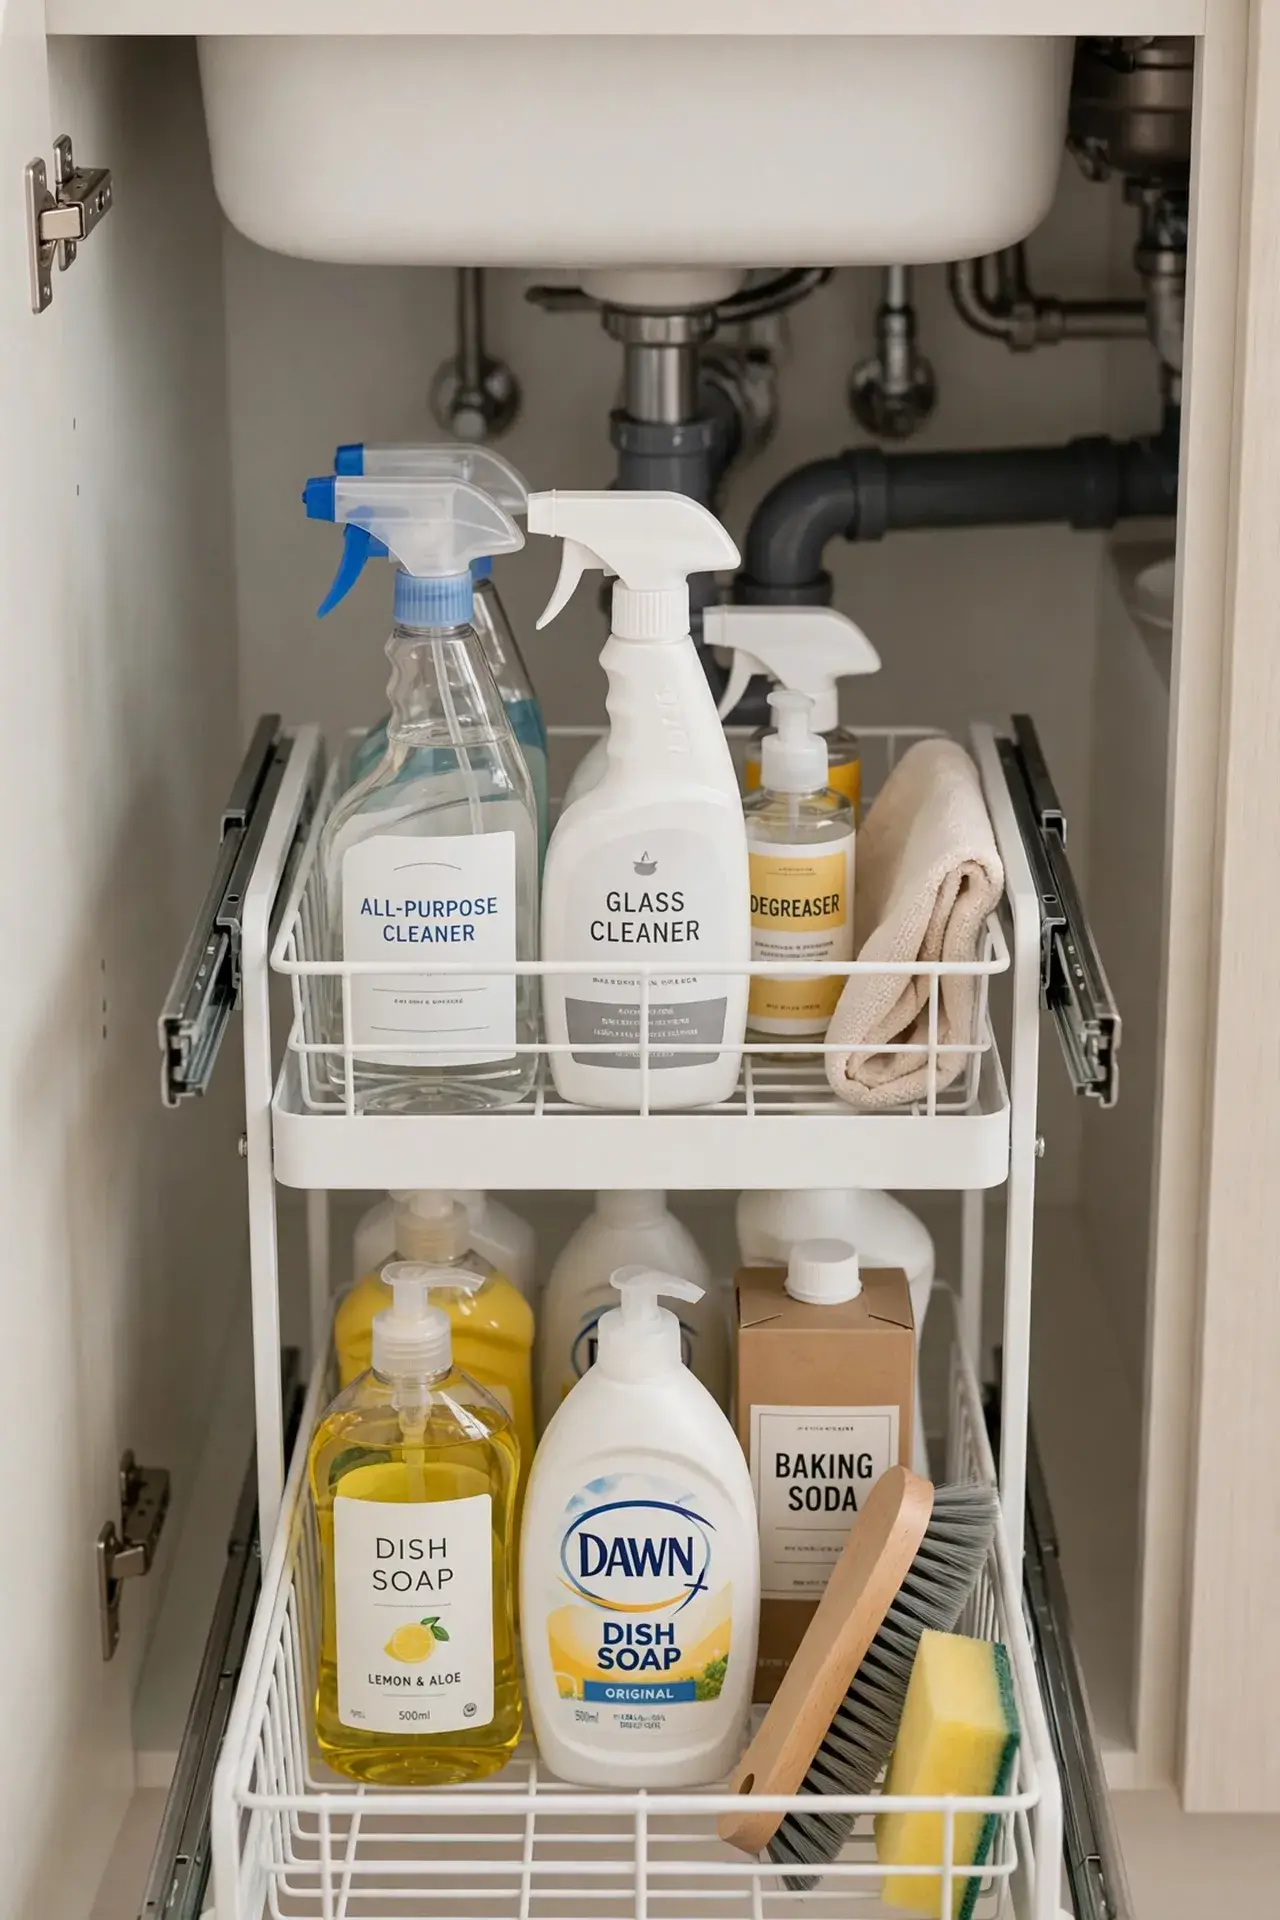
Quick Tip: Pick a caddy with adjustable dividers so it adapts as your supply collection changes. Measure around the pipes before buying, and look for smooth ball-bearing slides that glide even when the caddy is fully loaded with heavy bottles.
A pull-out caddy brings everything at the back of the cabinet within easy reach. No more kneeling and reaching blindly past the pipes for the dish soap hiding behind the drain. Many renters swear by these under sink kitchen organization ideas because they install with adhesive mounts and remove cleanly later. Wipe the slides clean every few months so the glide stays smooth and silent.
Door-Mounted Rack
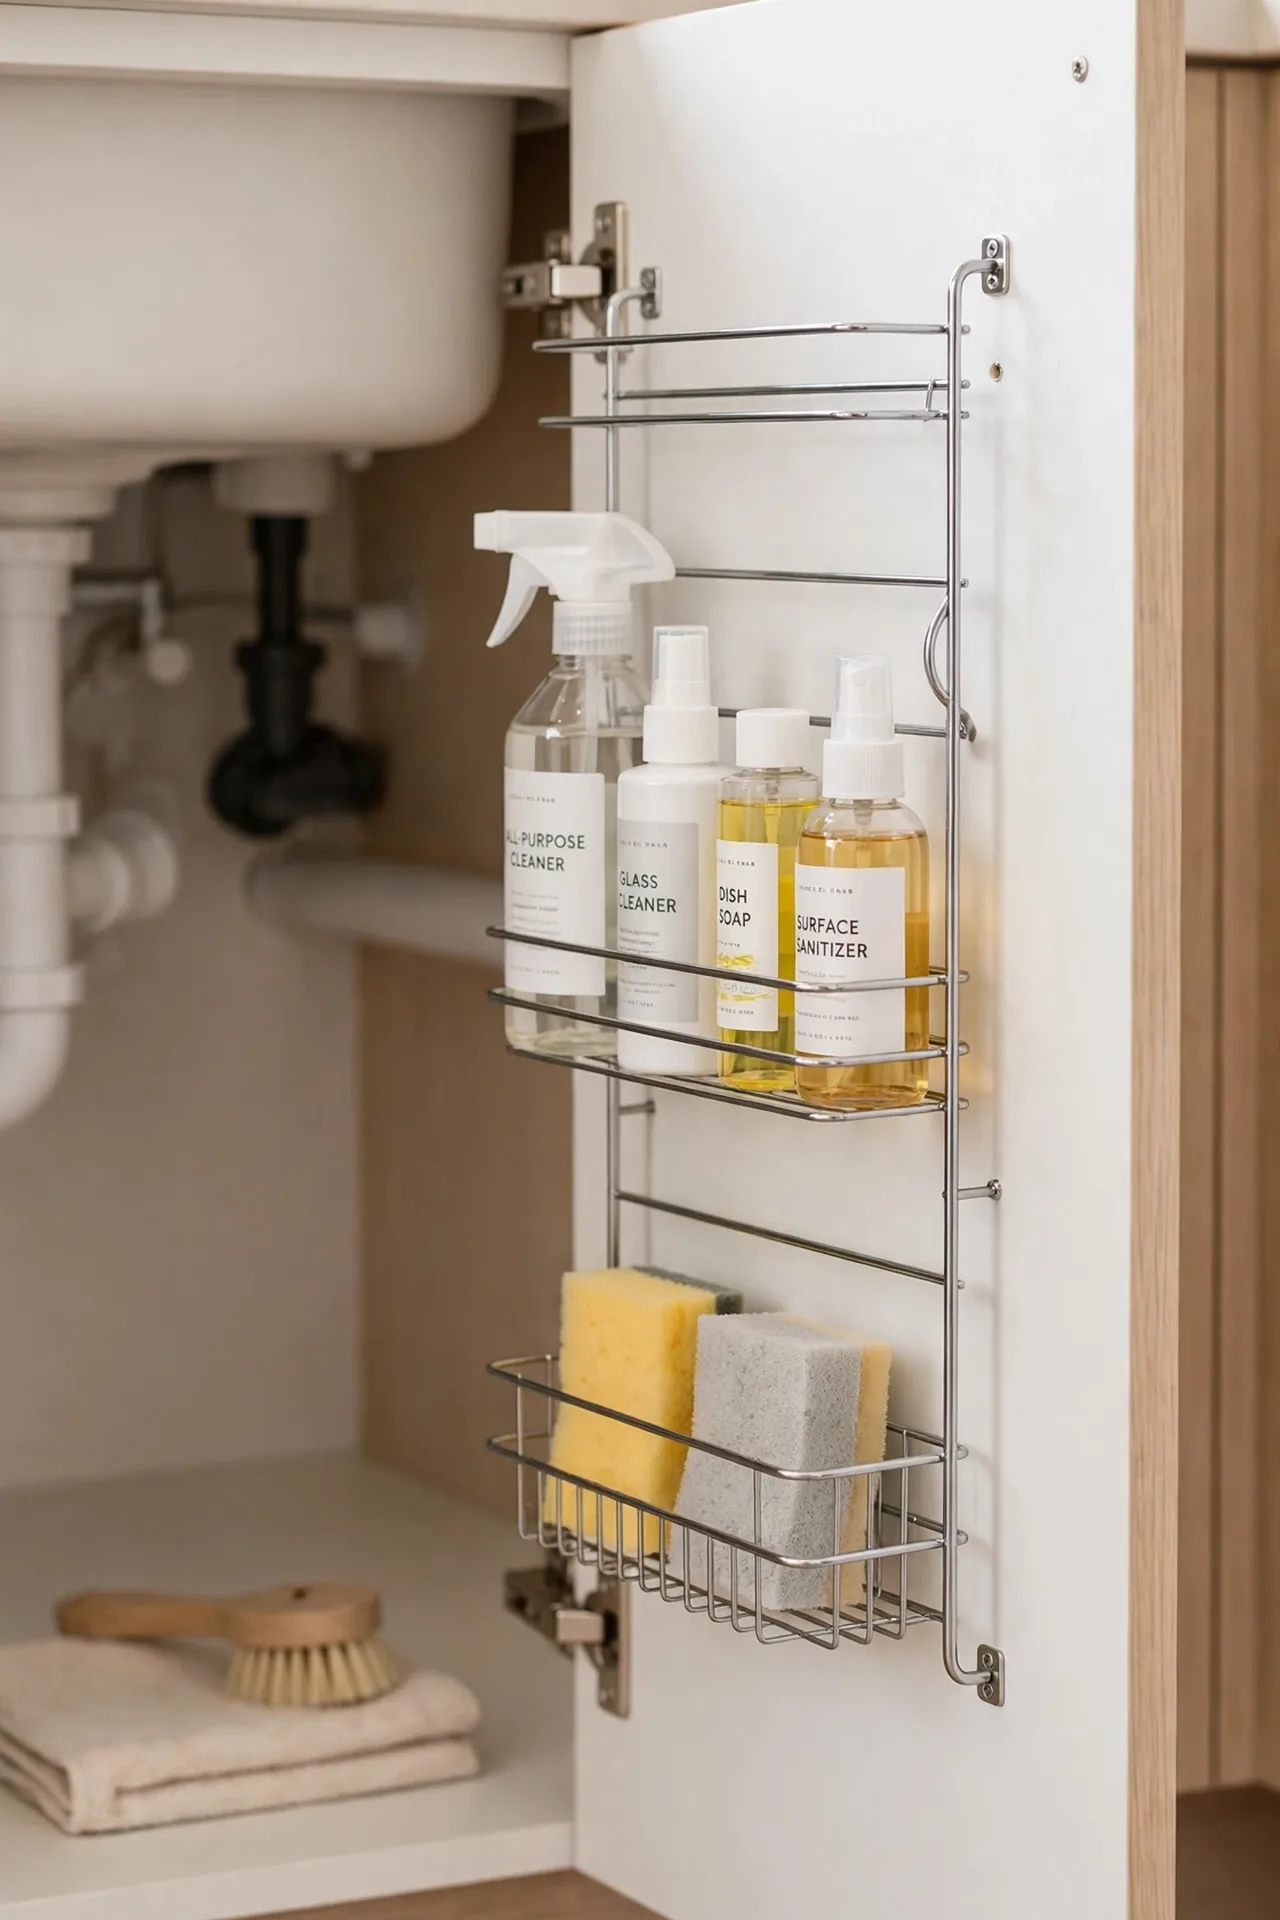
BEFORE: The inside of the cabinet door sat empty while bottles crowded the floor below. Every door swing risked knocking something over, and small items like sponges had no fixed home at all.
AFTER: A slim rack on the door holds sponges, gloves, and small bottles in tidy rows. The floor stays clear for bigger items, and everything has a visible spot. This vertical real estate works hardest in narrow cabinets where floor space is scarce.
Choose a rack with adjustable hooks so it fits your door’s thickness and panel style. Adhesive-mounted versions suit renters perfectly, while screw-mounted racks hold heavier loads for homeowners. Either way, the door becomes hardworking storage instead of wasted space.
Lazy Susan Turntable
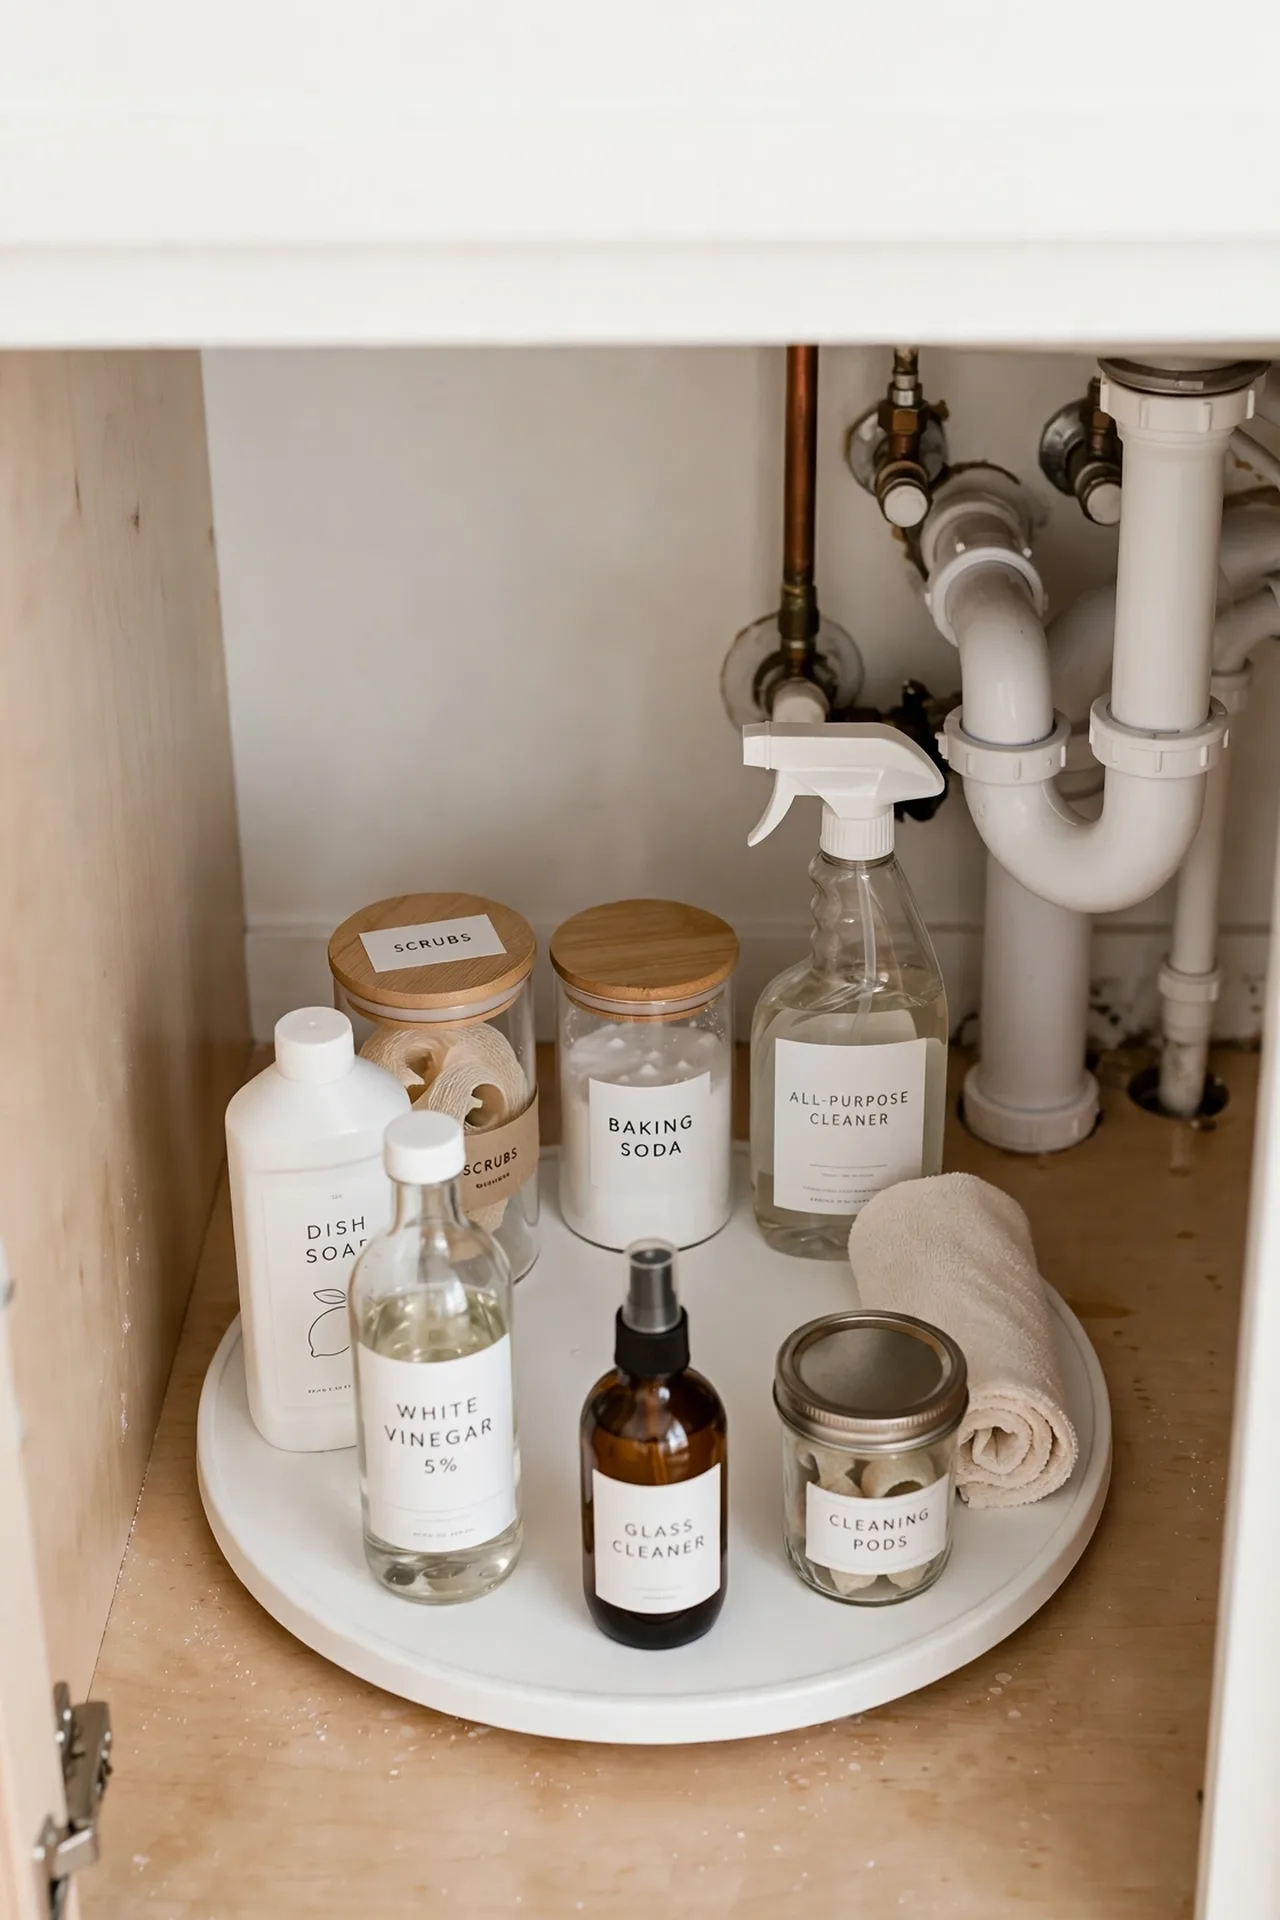
- Place a low-profile turntable on the cabinet floor, positioned to clear the pipes and the door swing.
- Arrange bottles and jars on the turntable with the tallest items in the center for balance.
- Give the turntable a spin to confirm nothing catches on the pipes or the cabinet walls.
- Group similar items together, like all dish care on one side and surface cleaners on the other.
Spinning the turntable beats digging through a dark cabinet every time. Items at the back rotate to the front with one easy motion, so nothing gets forgotten or expires unused. Pick a turntable with a raised rim to stop bottles sliding off mid-spin.
Shelf Riser Lift
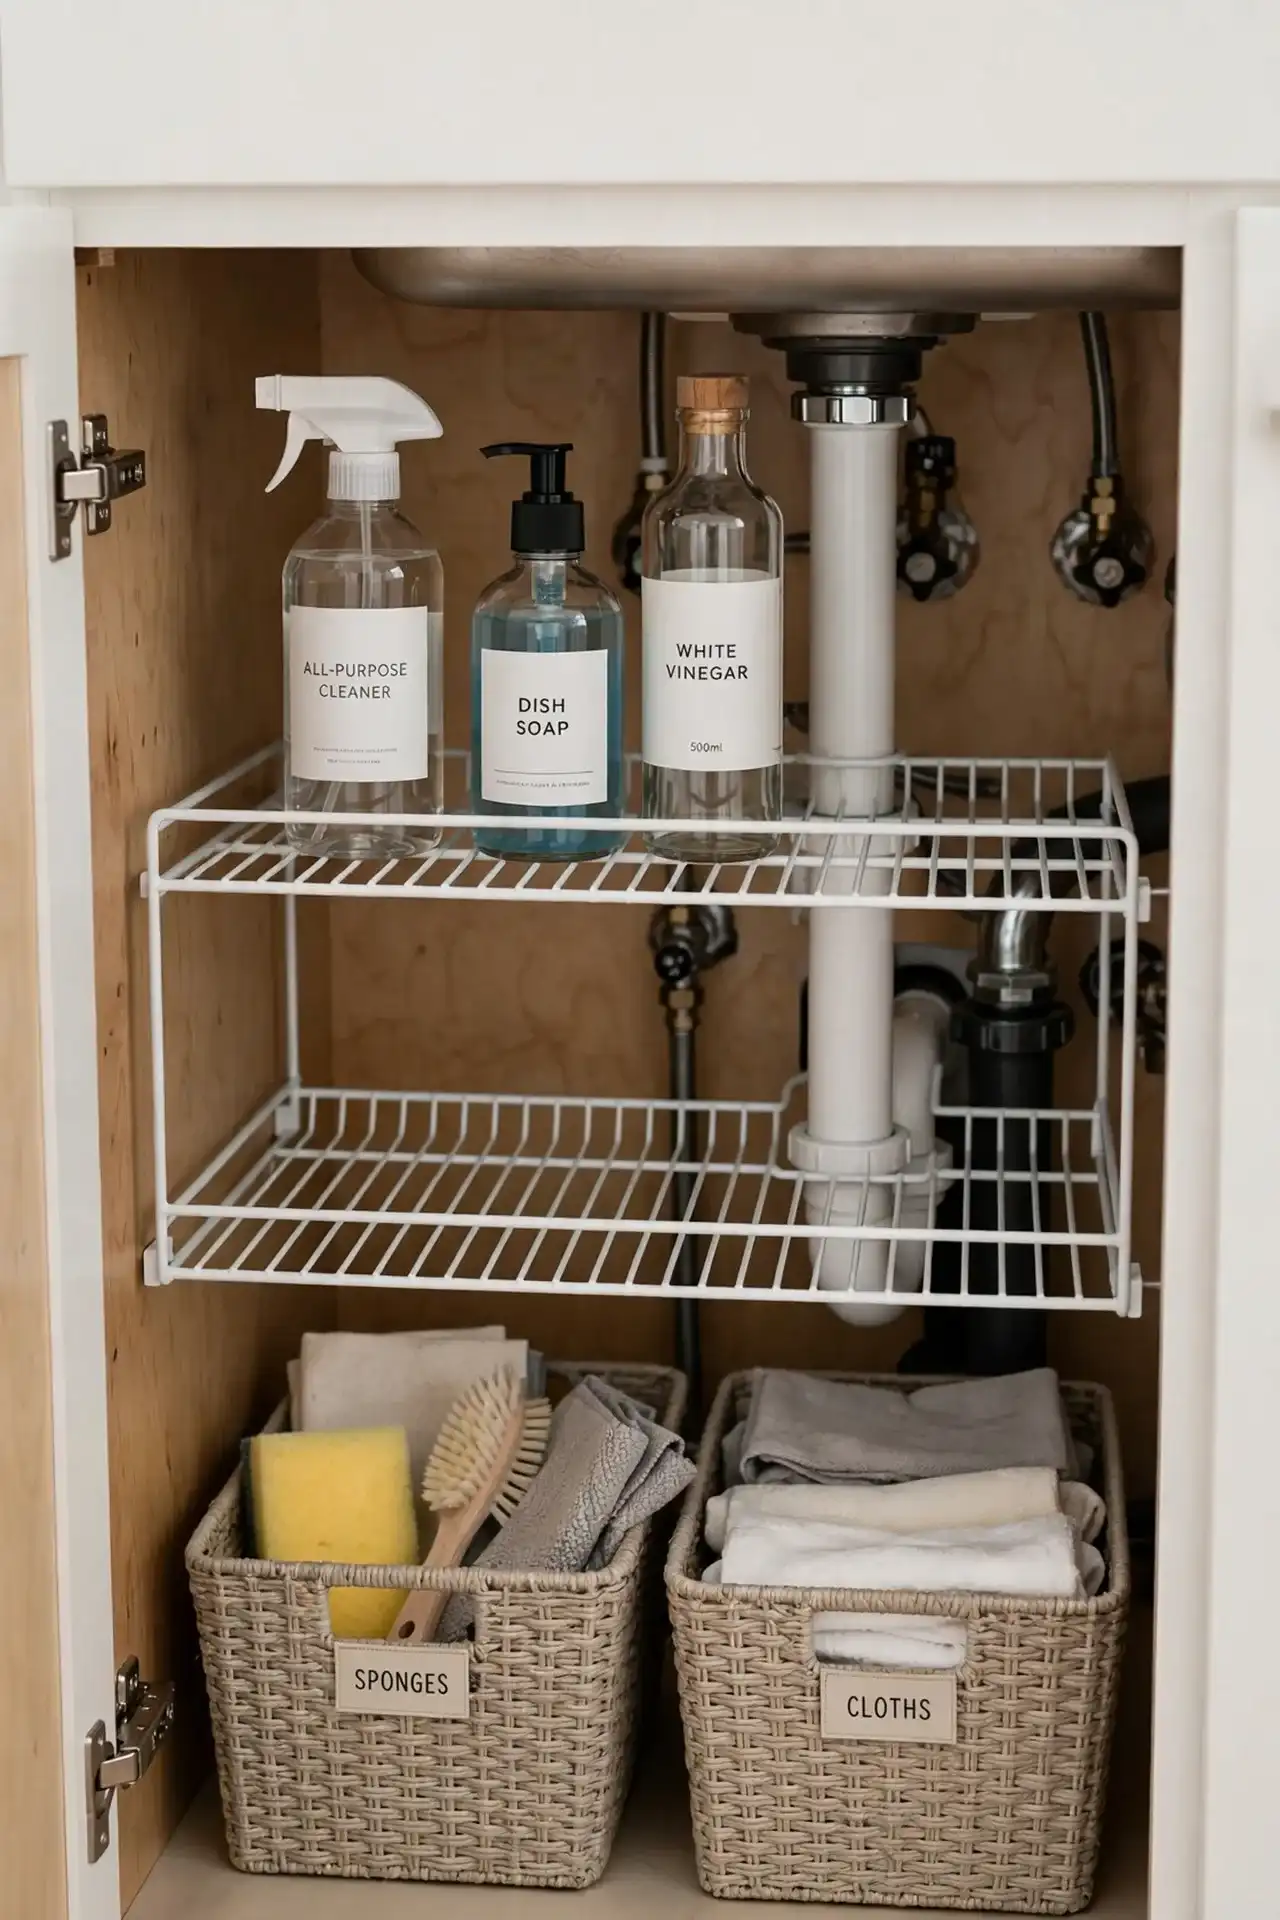
| Single level | With shelf riser |
| One flat layer of bottles | Two usable tiers of storage |
| Back items hidden from view | Upper tier keeps items visible |
| Wasted air space above | Vertical space fully claimed |
A shelf riser doubles your storage without a single screw or tool. The upper tier lifts shorter items into clear view while the space below holds taller bottles with room to spare. Measure your cabinet height first so the riser clears the top comfortably, and choose a rust-proof metal finish that stands up to the damp air under the sink. Stack two risers side by side in wide cabinets to create a full second shelf across the entire width.
Hanging Spray Bottles
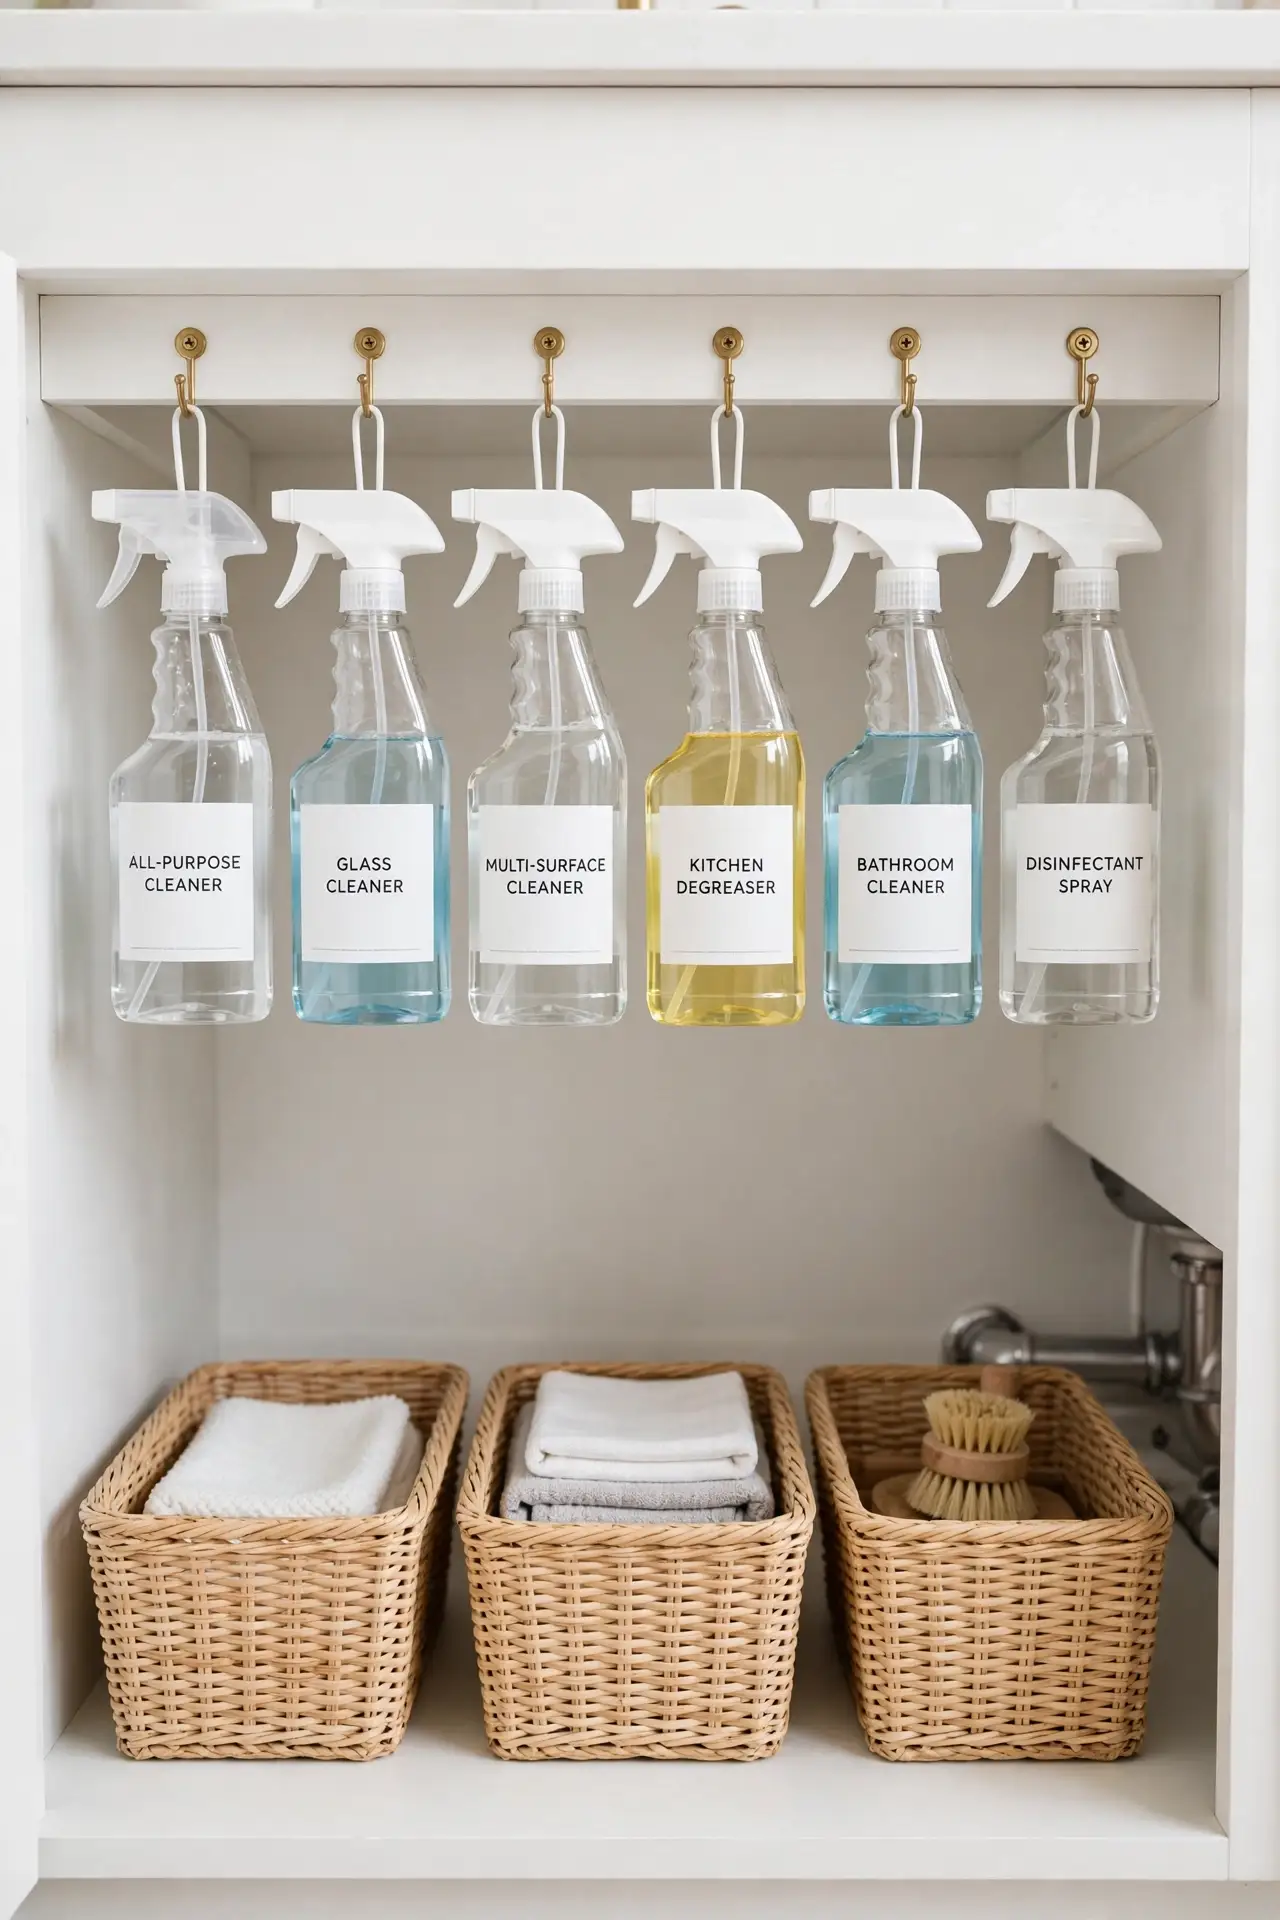
DO:
- Use sturdy adhesive hooks rated for the weight of full spray bottles.
- Space hooks evenly so bottles hang without bumping into each other.
- Clean the mounting surface with alcohol first for maximum hook grip.
DON’T:
- Hang bottles from flimsy hooks that peel off under weight.
- Crowd too many bottles in one spot where they tangle together.
- Ignore the door swing, which can knock hanging bottles loose.
Hooks turn dead air under the cabinet top into prime bottle storage. Many of the best under sink kitchen organization ideas use this trick because it costs almost nothing and frees the floor completely. Replace adhesive hooks yearly since steam and moisture slowly weaken their grip over time.
Labeled Clear Bins
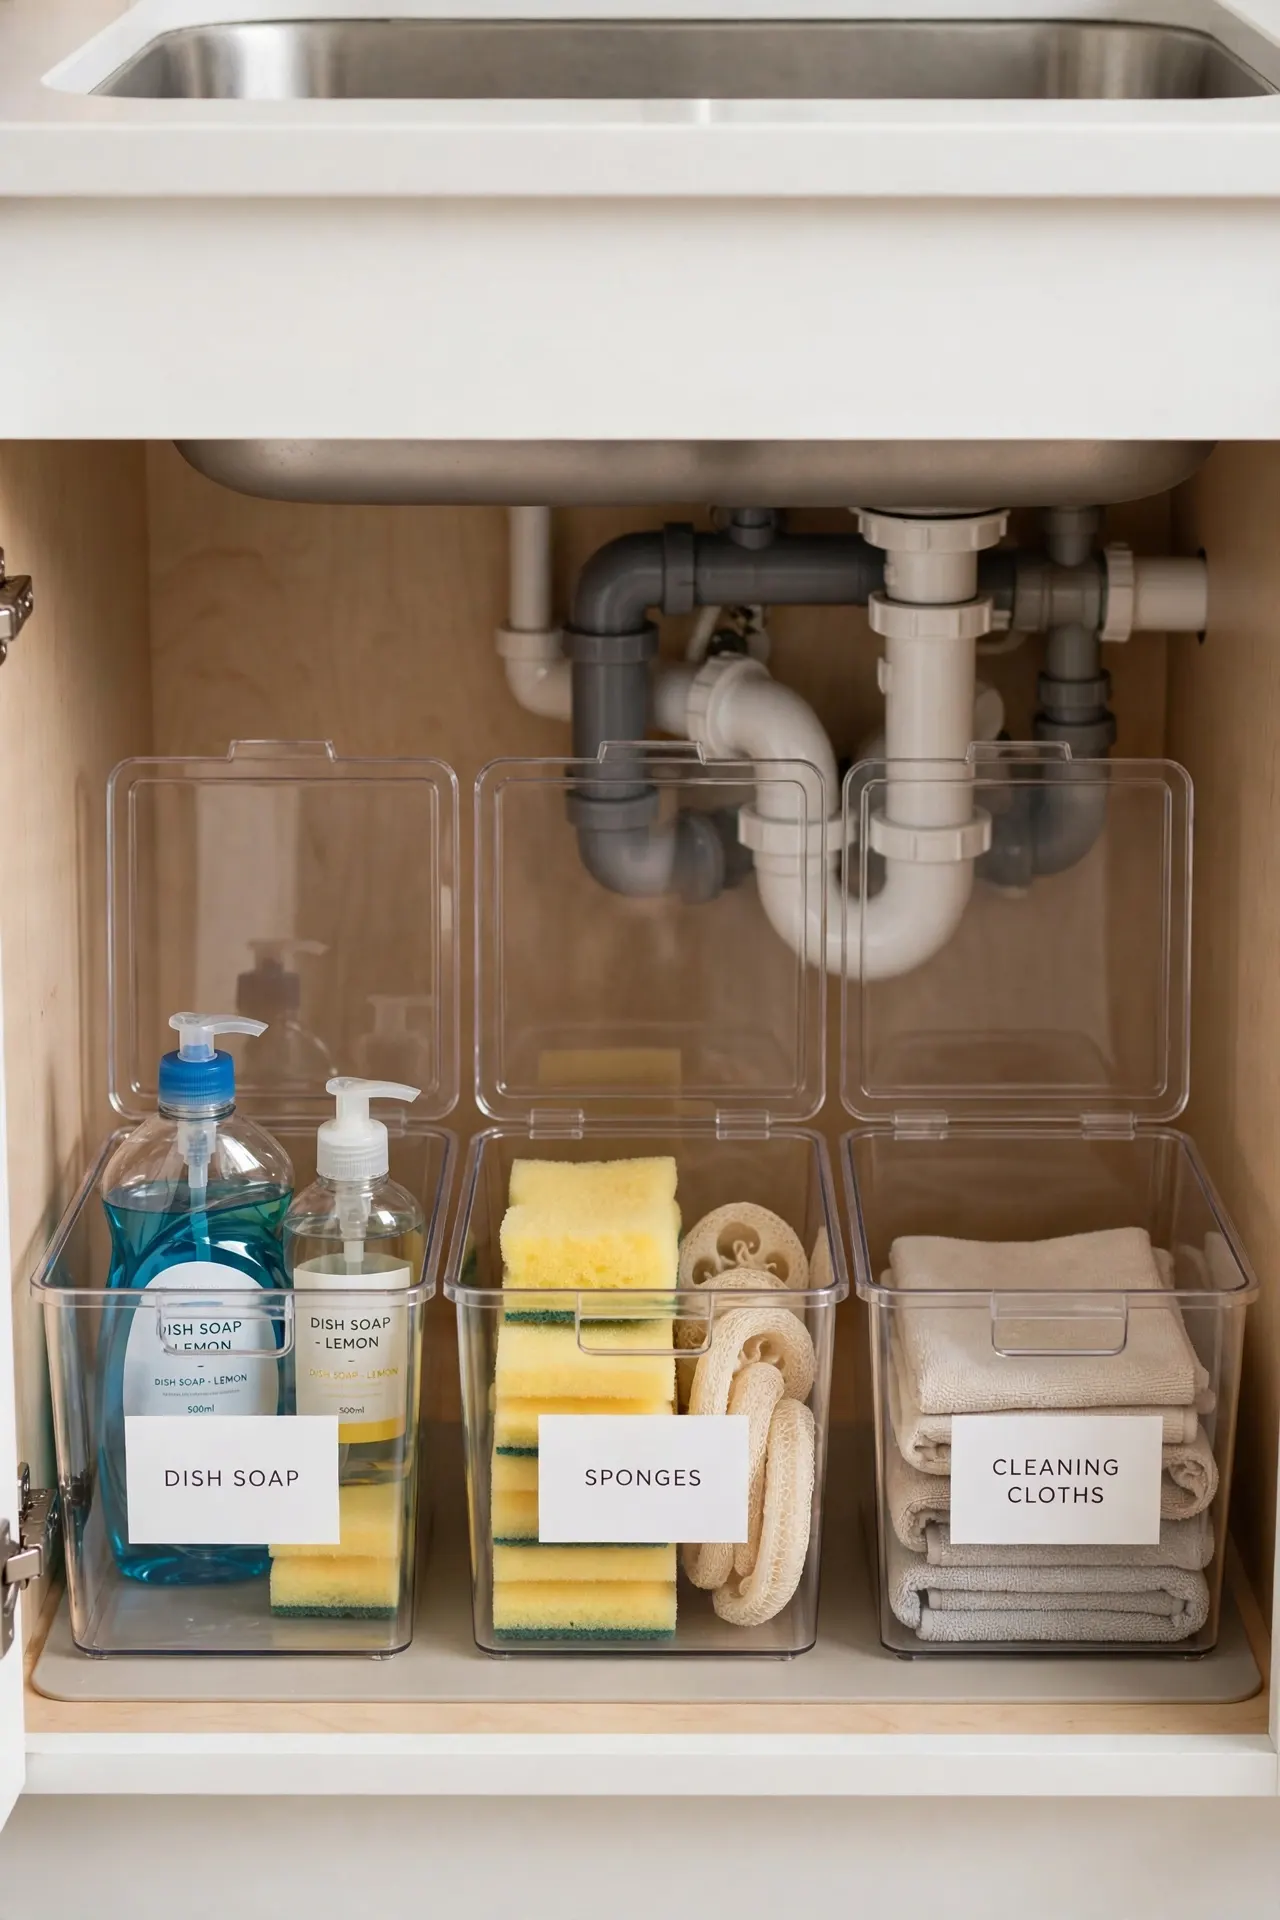
Cost: Low, just bins plus a label maker or stickers | Time: Under an hour | Skill Level: Beginner | Best For: Shared kitchens where everyone needs to find things fast
Clear bins with bold labels end the mystery of what lives under your sink. Anyone in the household can find the dish soap or grab a fresh sponge without asking. That’s why many experts recommend labeling even when bins look obvious, because clarity keeps the system working long after the initial organizing energy fades. Revisit the labels twice a year and update any that no longer match what the bin actually holds today.
Pipe-Hugging Tray
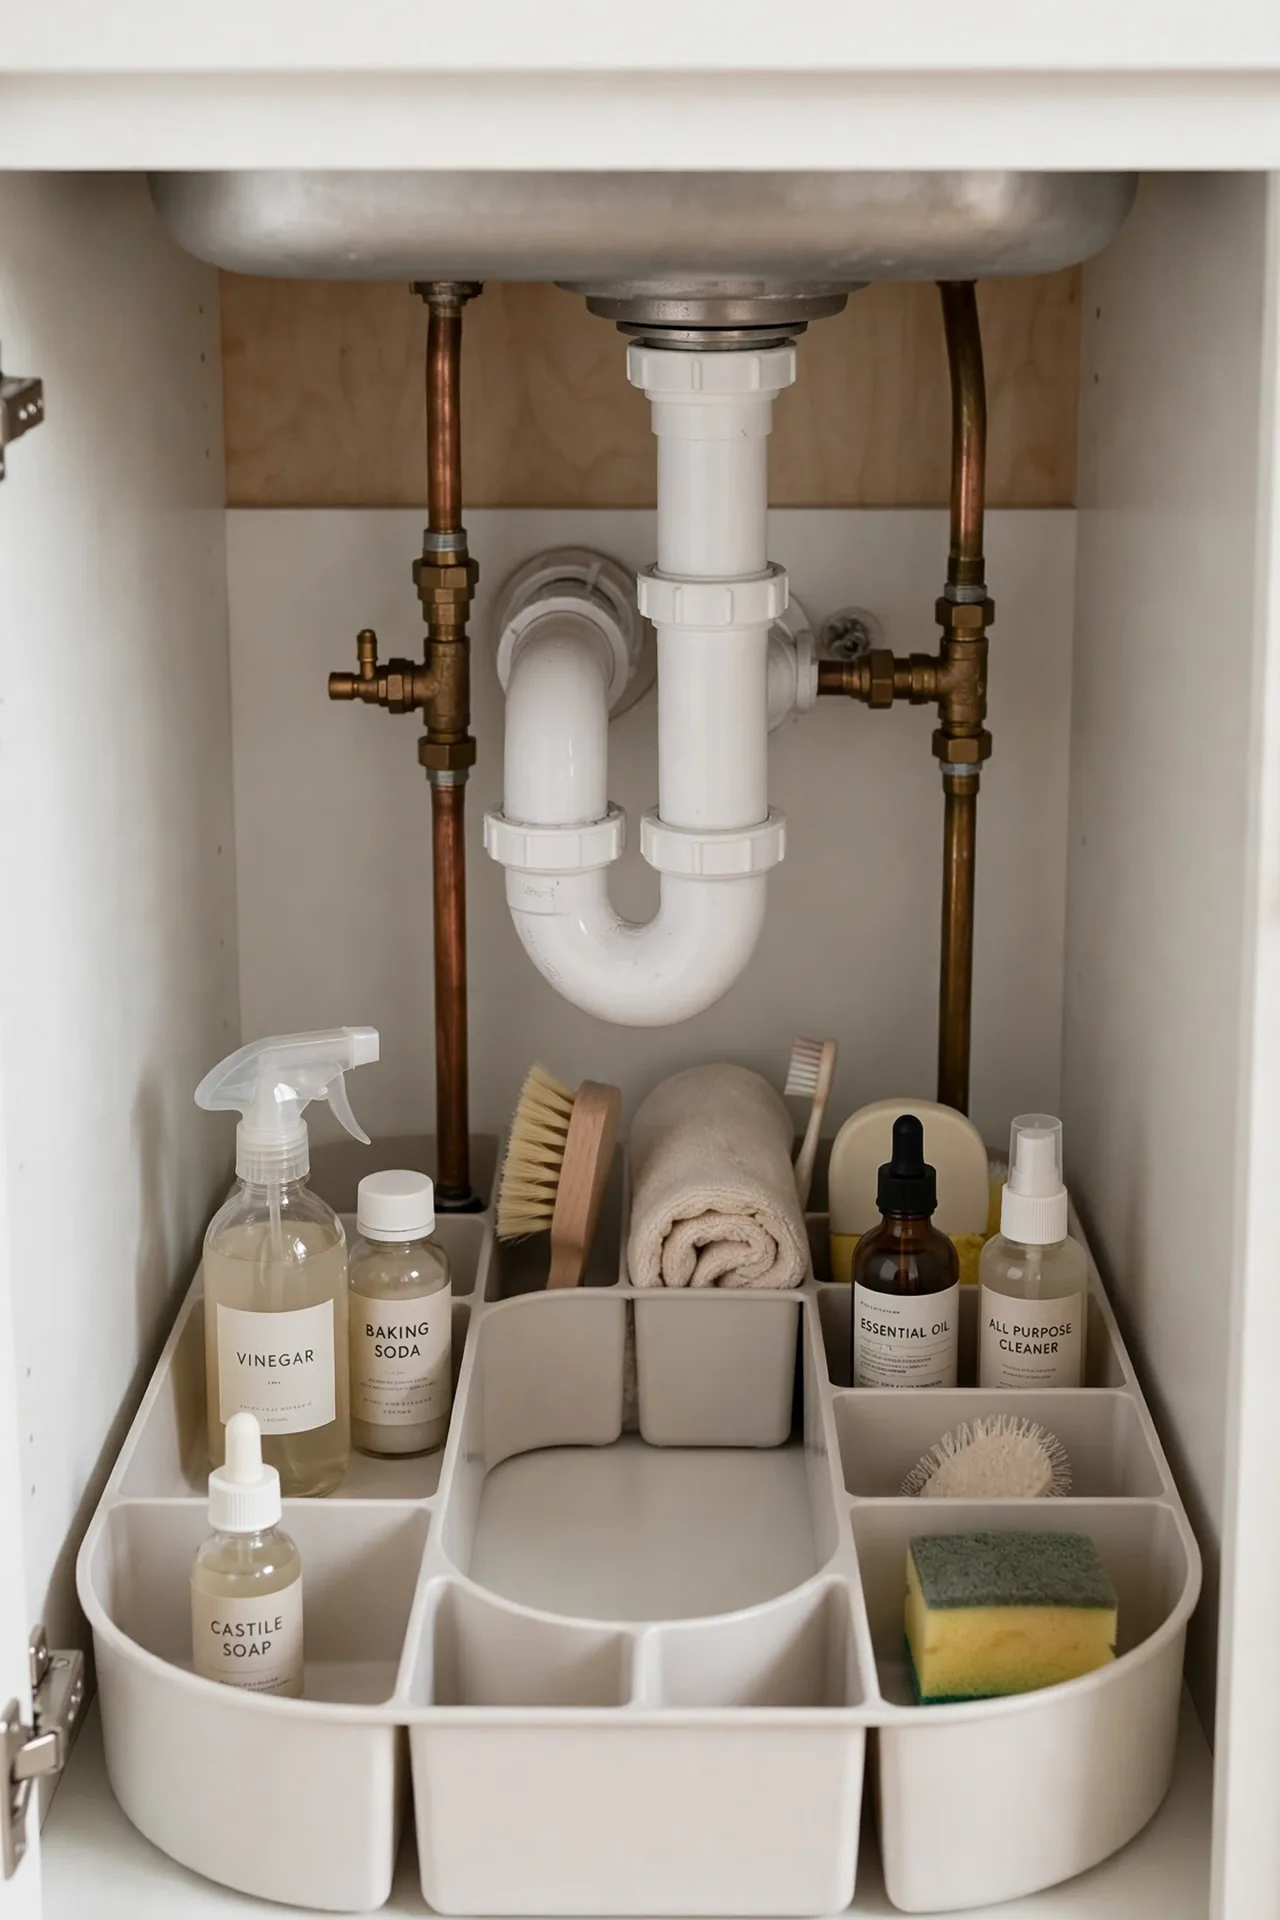
A U-shaped tray wraps right around the pipes, claiming the dead zone most organizers ignore. The curved cutout hugs the plumbing while the tray surface holds bottles, brushes, and small tools in neat compartments. It slides out as one unit for fast cleaning underneath.
Look for trays with raised edges so items stay put when you pull the tray forward. This design shines in older cabinets where bulky pipes eat up the center. Pair it with door-mounted storage and the whole cabinet suddenly feels twice as large as before. Wipe the tray monthly since it sits closest to the pipes where condensation collects.
Tiered Cabinet Shelf
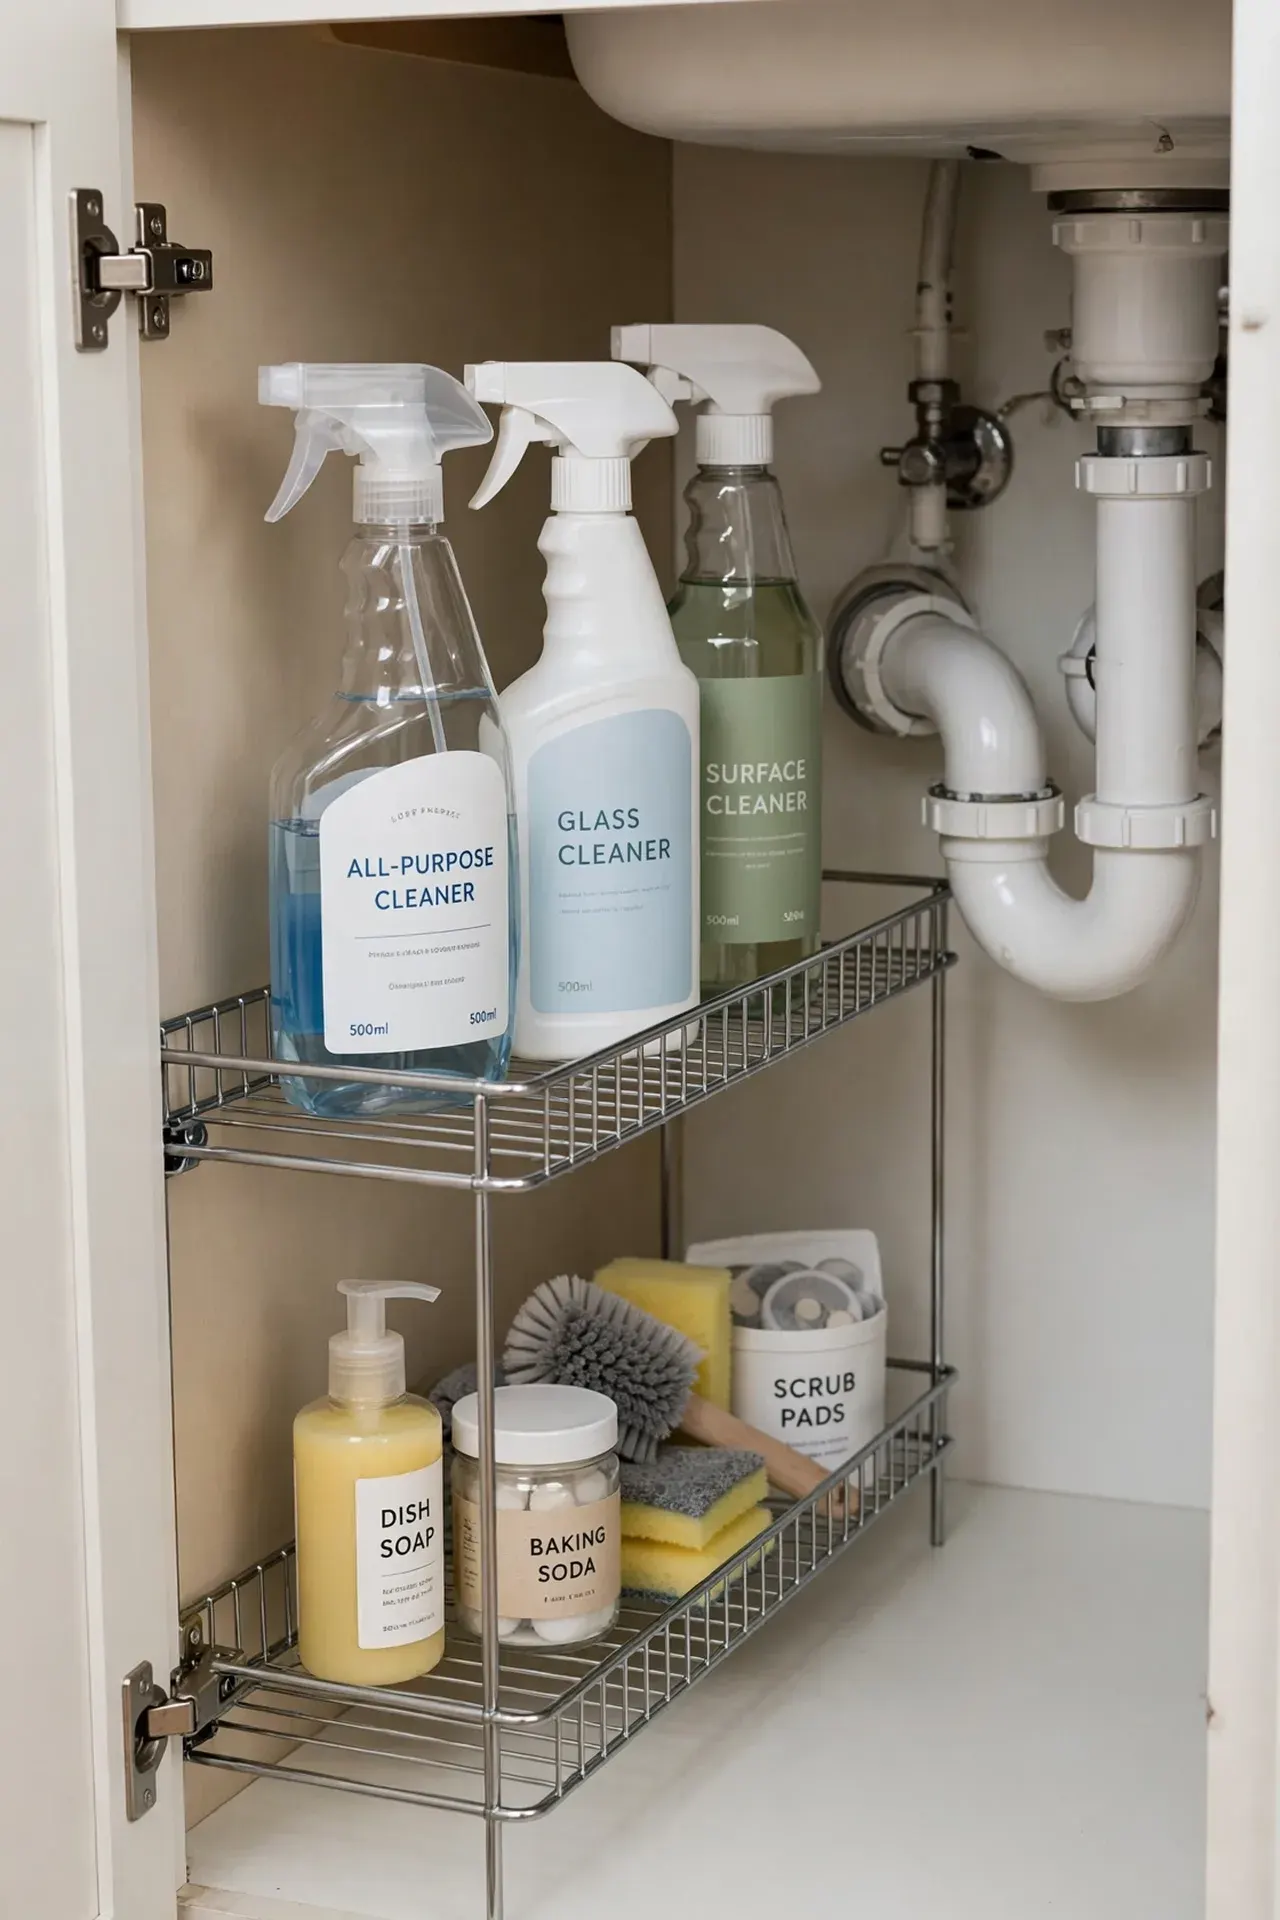
- Set a freestanding two-tier shelf on the cabinet floor to double your usable surface area instantly.
- Place shorter items like sponges and scrubbers on the lower tier where they stay easy to reach.
- Reserve the upper tier for taller spray bottles that need the extra headroom to stand upright.
- Choose a rust-resistant finish since the under-sink area sees moisture and occasional drips.
Tiered shelving works like a mini bookcase for your cleaning supplies. Everything stays visible across both levels, so you stop buying duplicates of products you already own. The open wire design also lets air circulate, which helps damp items dry faster.
Cleaning Caddy Zone
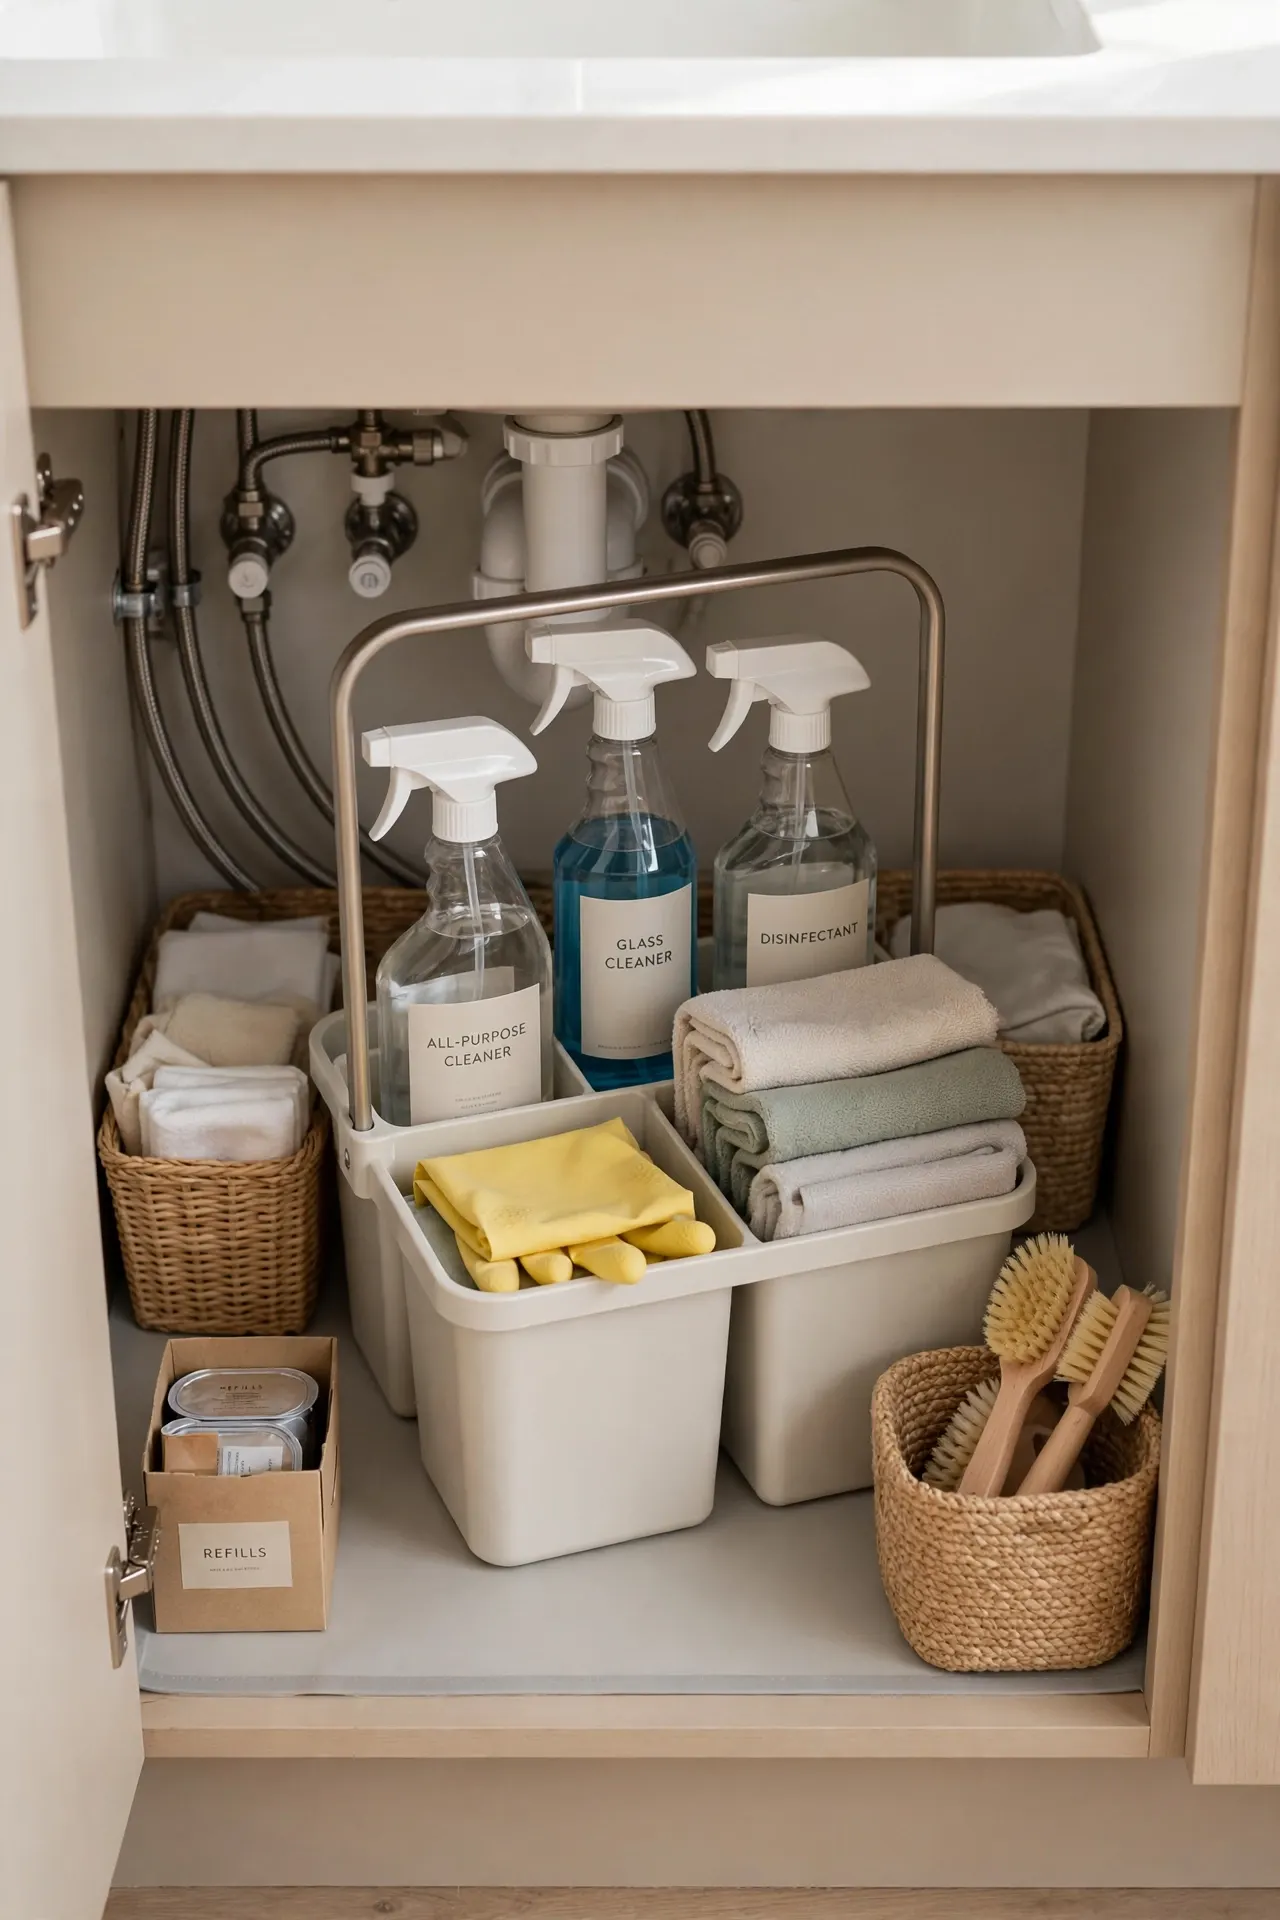
Quick Tip: Keep one portable caddy stocked with your daily essentials so whole-house cleaning starts with a single grab. Restock it each Sunday evening and the caddy stays ready all week. A handle makes it easy to carry from kitchen to bathroom without multiple trips. Keep a spare set of cloths in the caddy so you never start cleaning without the basics.
Designating a caddy zone keeps your most-used supplies together instead of scattered. These under sink kitchen organization ideas work best when the caddy has a permanent parking spot it returns to after each use. In my experience, the grab-and-go habit sticks only when the caddy lives somewhere obvious and uncluttered.
Slide-Out Drawers
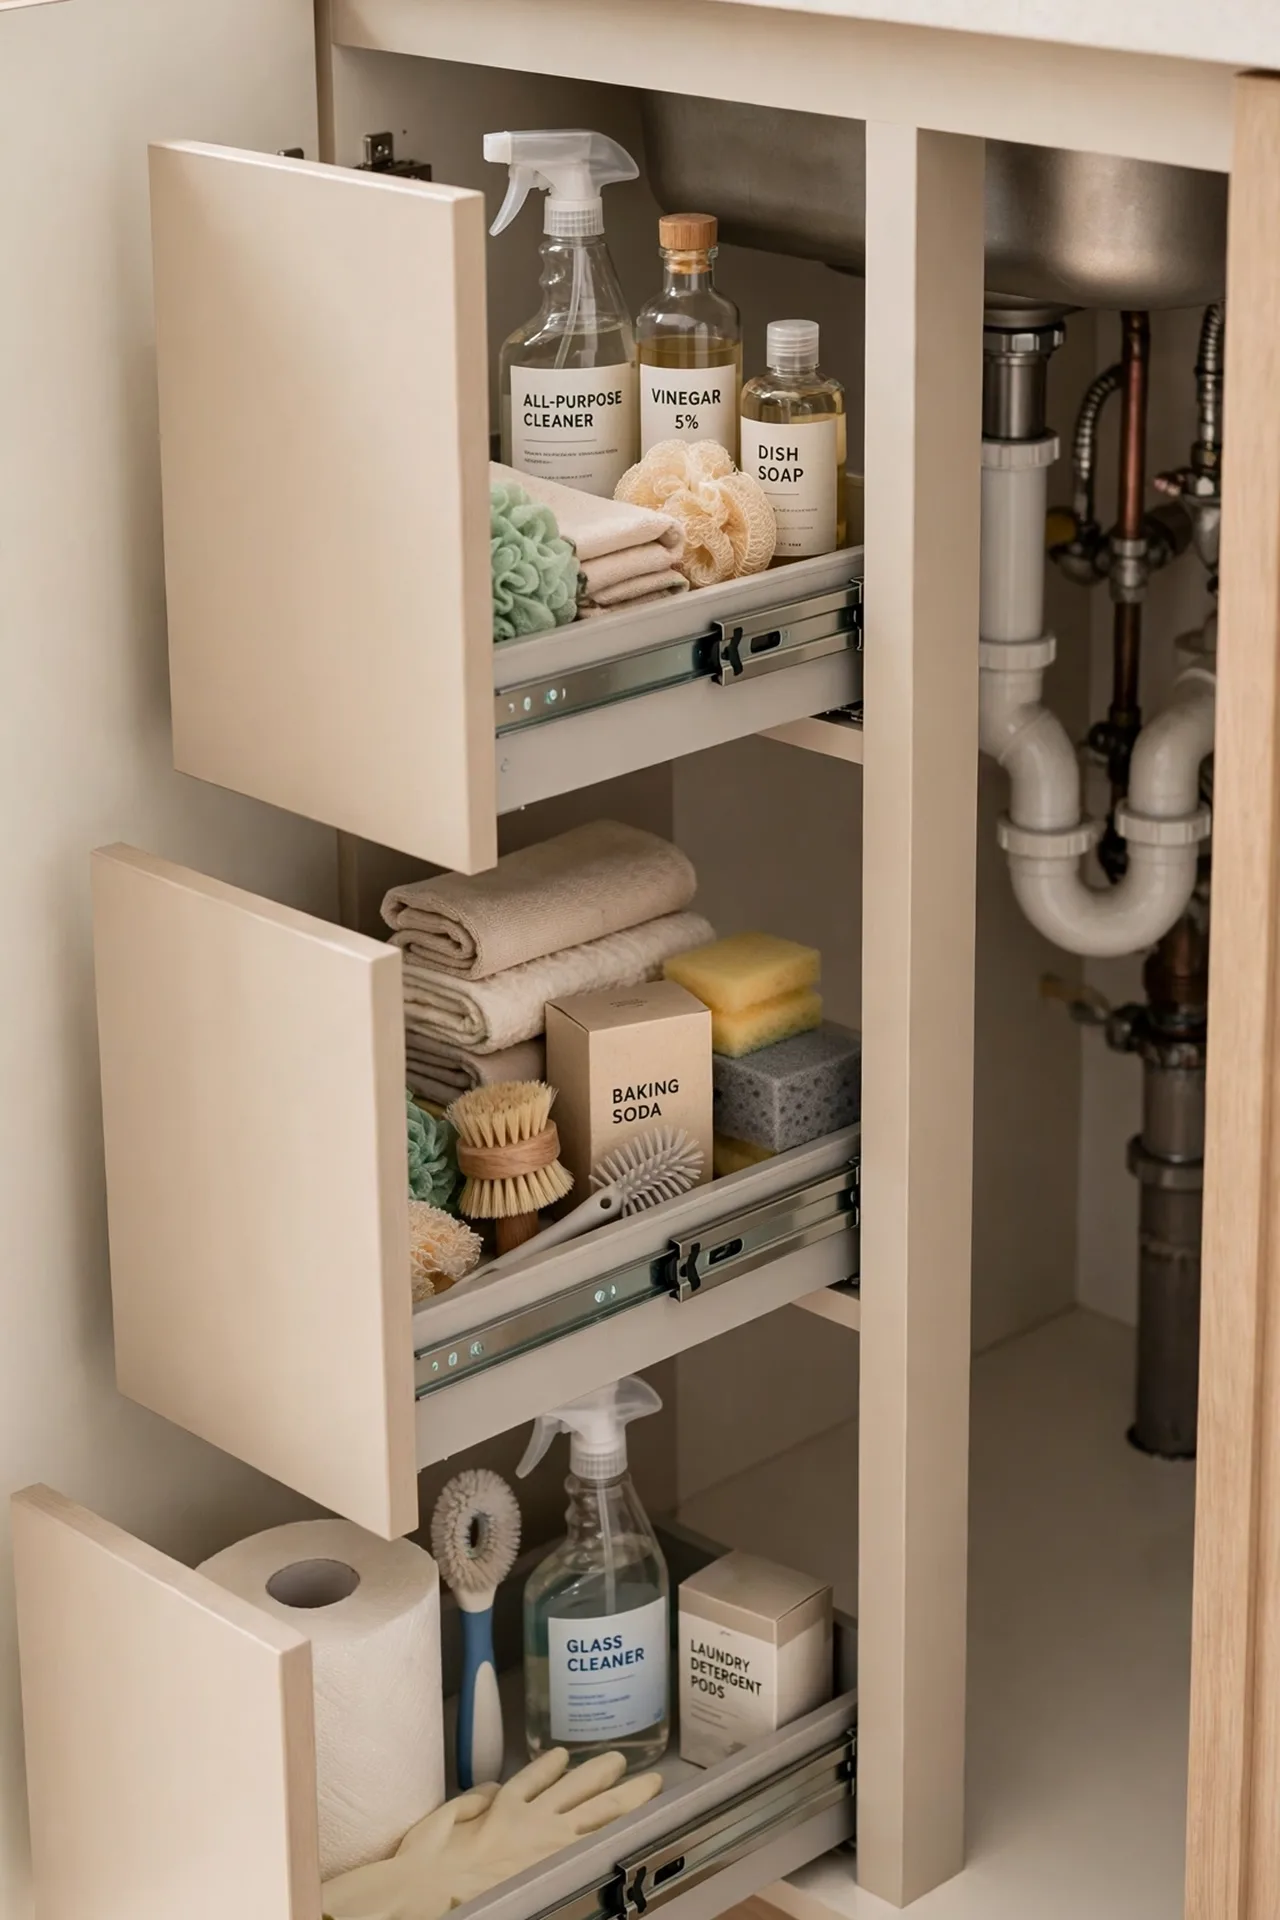
BEFORE: Items shoved to the back of the cabinet disappeared into the dark. Reaching them meant kneeling down and knocking over everything in front, which made tidying feel like a chore worth avoiding.
AFTER: Shallow drawers glide out smoothly, presenting every item at once. The back of the cabinet becomes just as reachable as the front, and putting things away takes seconds instead of minutes.
Measure carefully around pipes and the garbage disposal before choosing drawer widths. Many slide-out kits adjust to fit, and adhesive-mounted tracks work for renters who cannot drill. The result feels like a custom cabinet upgrade at a fraction of the cost.
Magnetic Strip Hooks
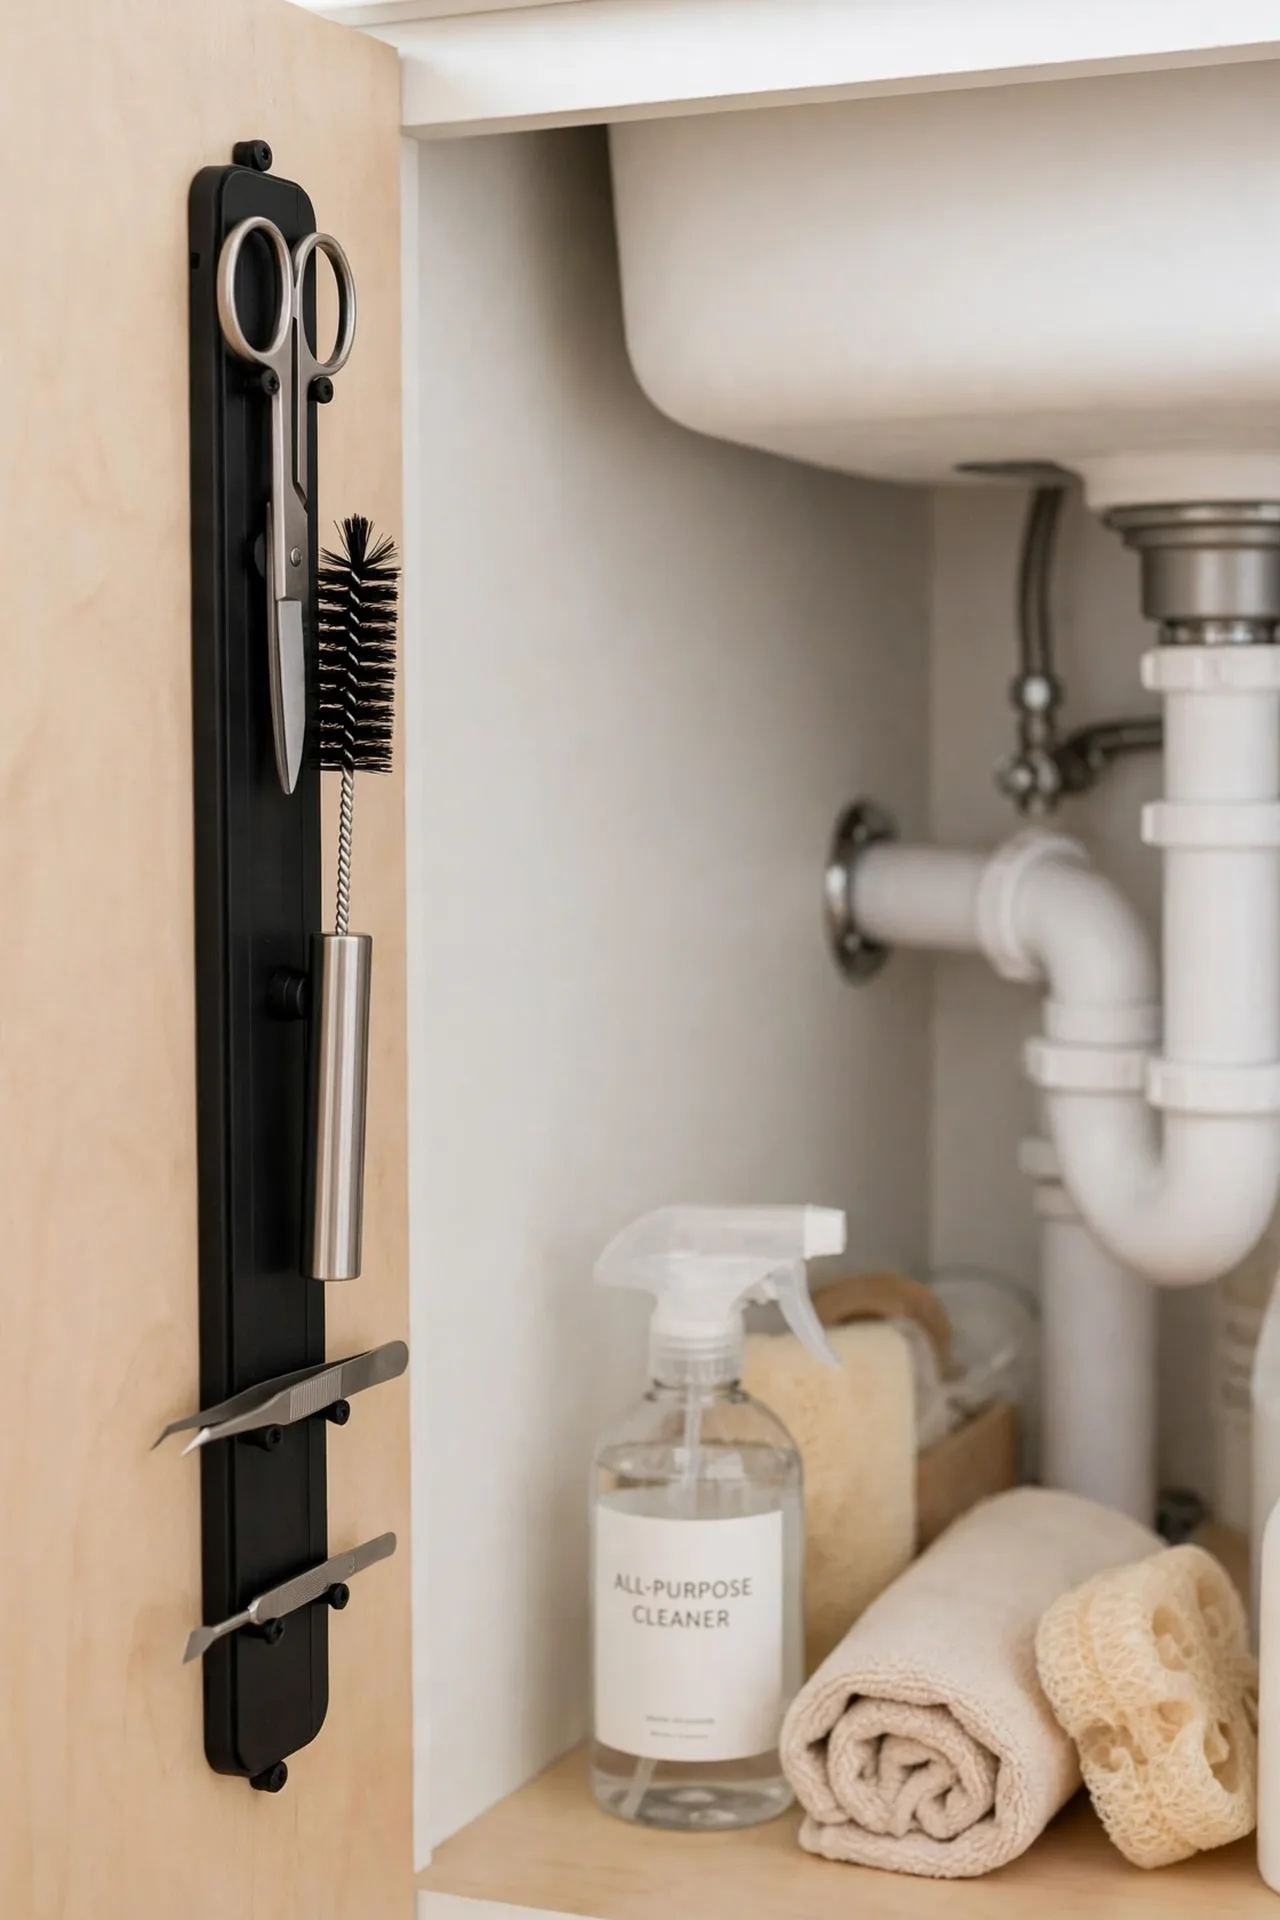
- Mount a magnetic knife-style strip on the cabinet’s side wall using strong adhesive or small screws.
- Attach metal-handled tools like scissors, tweezers, or small brushes directly to the strip.
- Keep heavier items on the floor and reserve the strip for light tools you grab often.
- Test the hold by gently tugging each item before trusting it long term.
Magnetic strips borrow a kitchen knife-storage trick for the under-sink zone. Small metal tools stay visible and within reach instead of sinking to the bottom of a bin. This works beautifully on the flat side panels that most organizers leave completely empty.
Adhesive Hook Rows
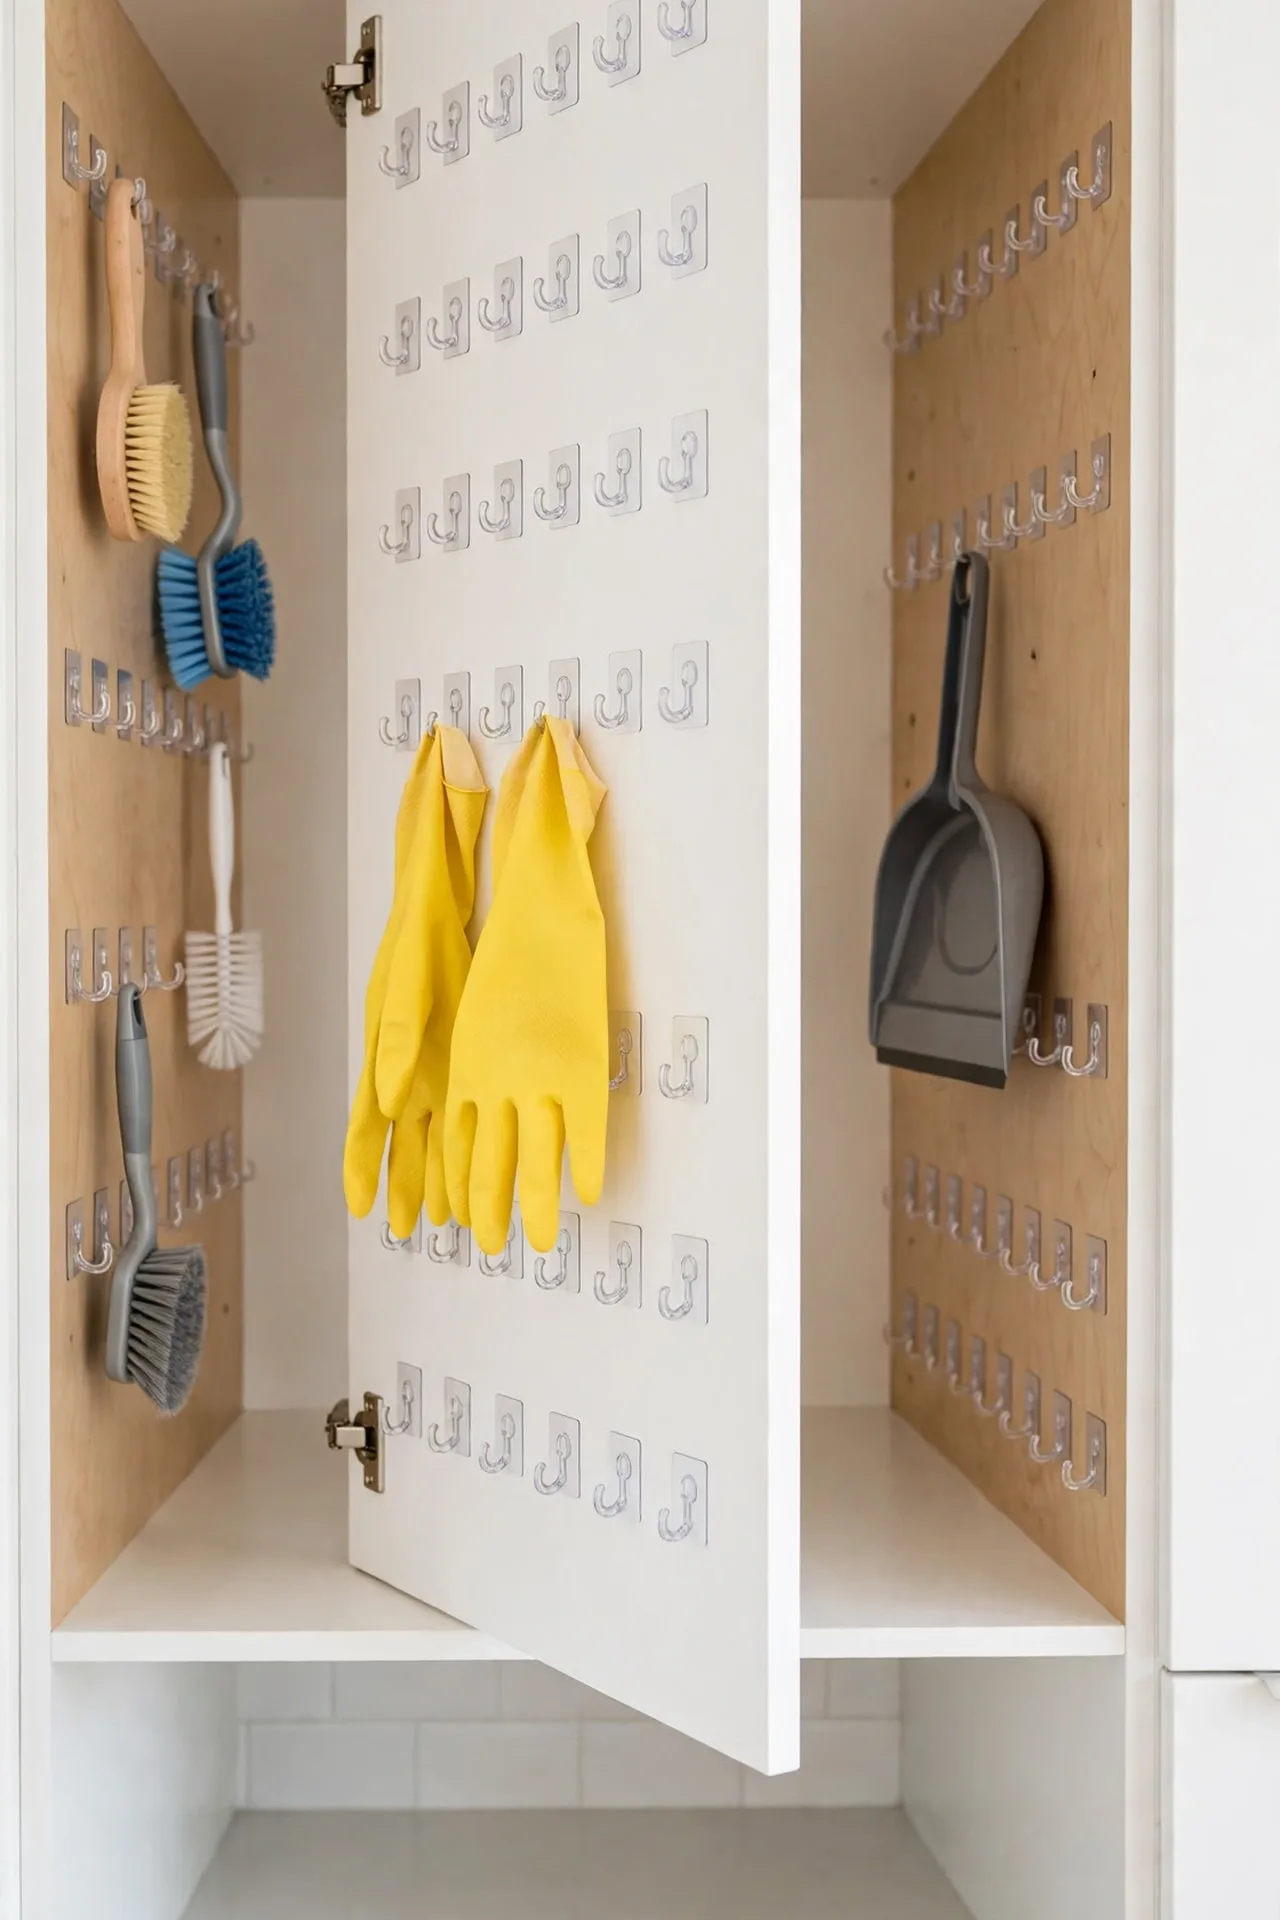
| Hook type | Best use |
| Small clear hooks | Light items like gloves and cloths |
| Medium utility hooks | Brushes and dustpans |
| Wire over-door hooks | Heavier spray bottles |
Rows of adhesive hooks turn every flat surface into hanging storage, from side walls to the door interior. If you are also refreshing the walls above the counter, these small kitchen backsplash ideas for renters pair nicely with a fully organized cabinet below. Hooks remove cleanly without residue, so renters can go bold without worry, and replacing a tired hook takes seconds. Buy hooks in multi-packs so you always have spares when one loses its grip in the steamy cabinet air.
Waterproof Mat Liner
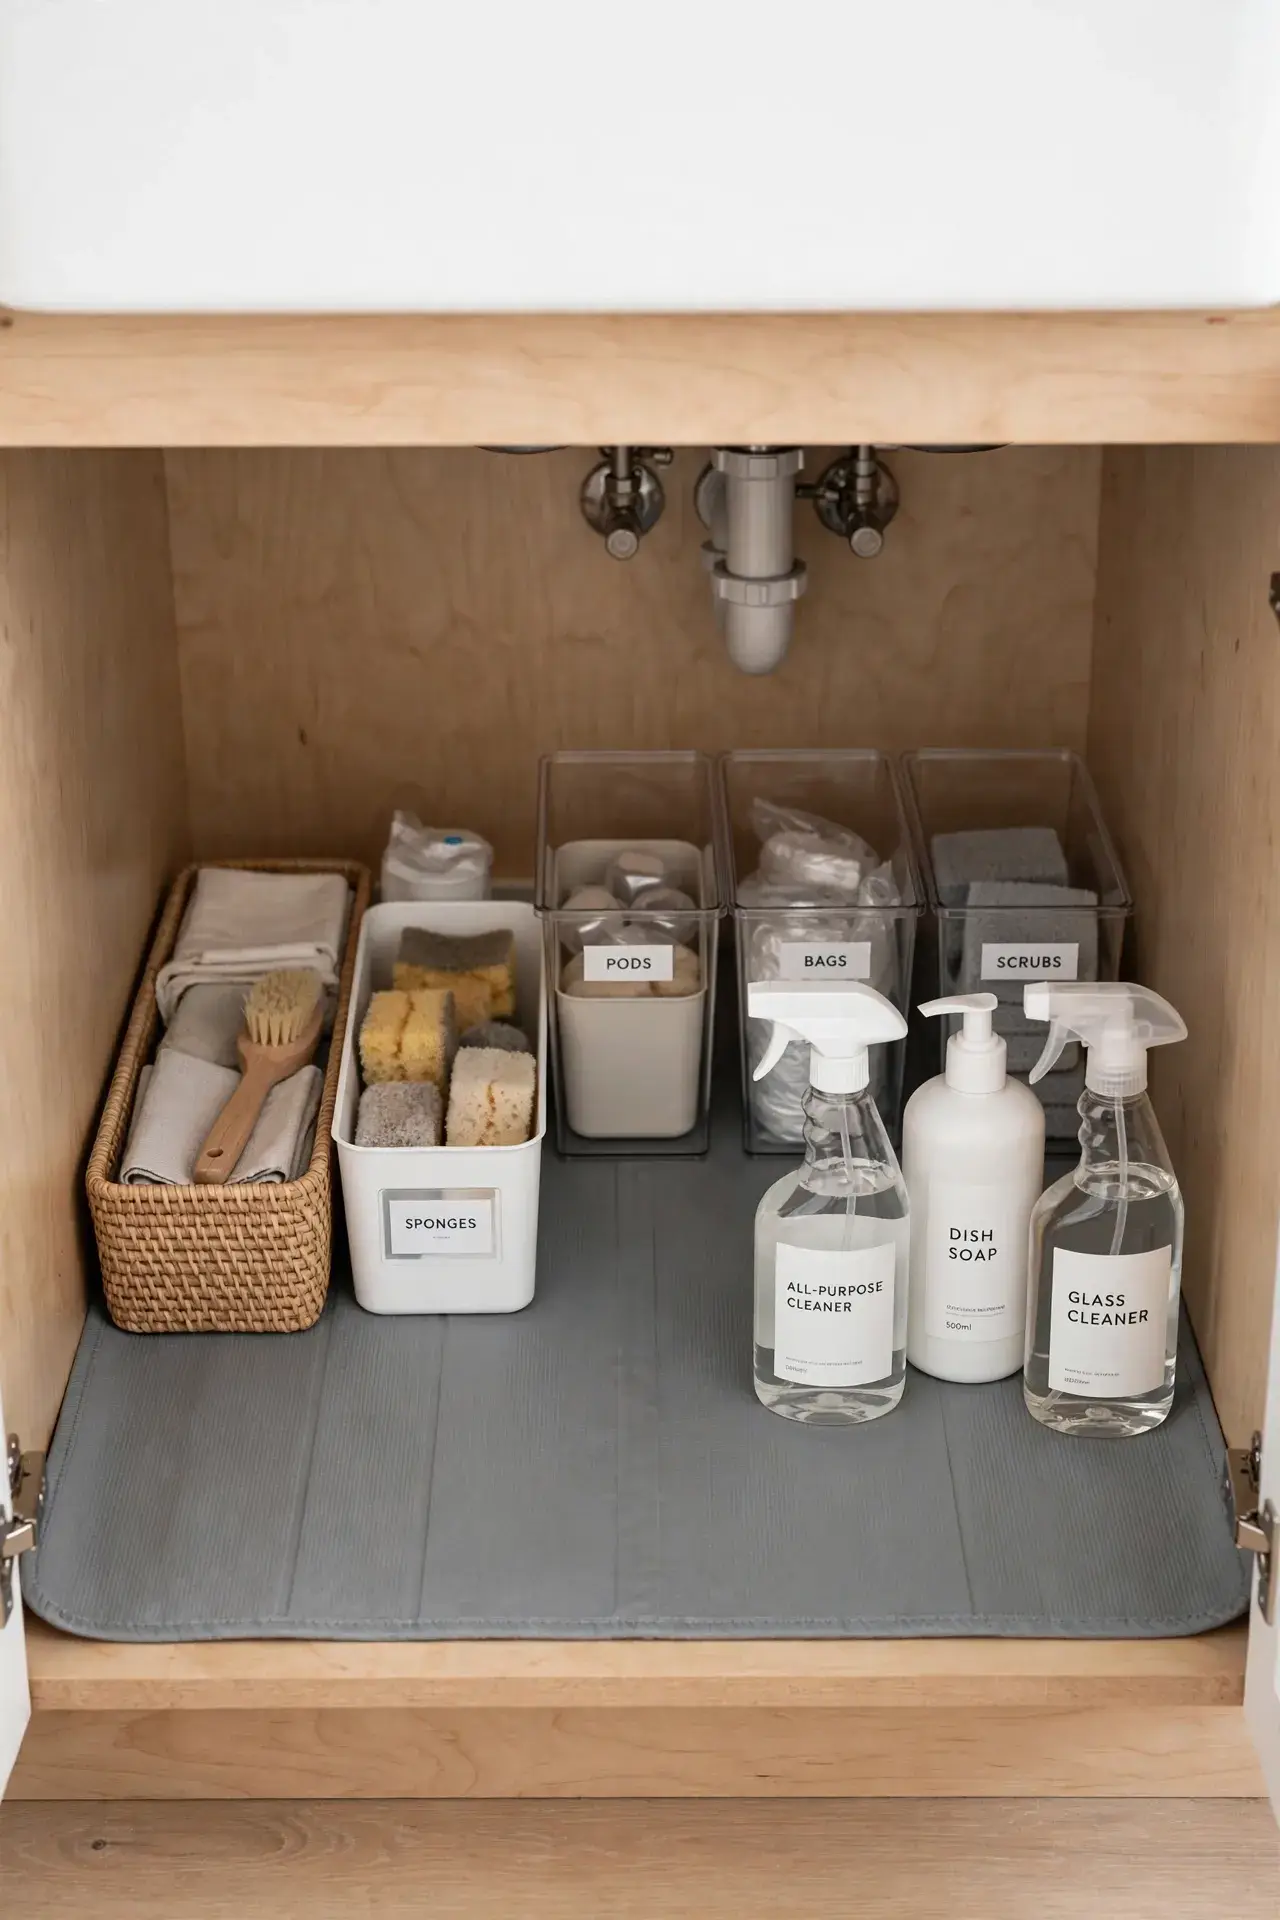
DO:
- Cut the mat to fit the full cabinet floor, tucking edges neatly into the corners.
- Choose a mat with a raised lip that contains spills before they reach the wood.
- Wipe the mat down monthly so grime never builds up underneath your organizers.
DON’T:
- Skip the liner and let slow drips warp the cabinet floor over time.
- Use fabric mats that soak up moisture instead of repelling it.
- Forget to check under the mat twice a year for hidden leaks.
A waterproof liner is the unsung hero of under sink kitchen organization ideas because it protects the cabinet itself. Leaks happen, and a good mat buys you time to catch them before damage sets in. Think of it as insurance for all the organizing work above it.
Trash Bag Dispenser for under sink kitchen organization ideas
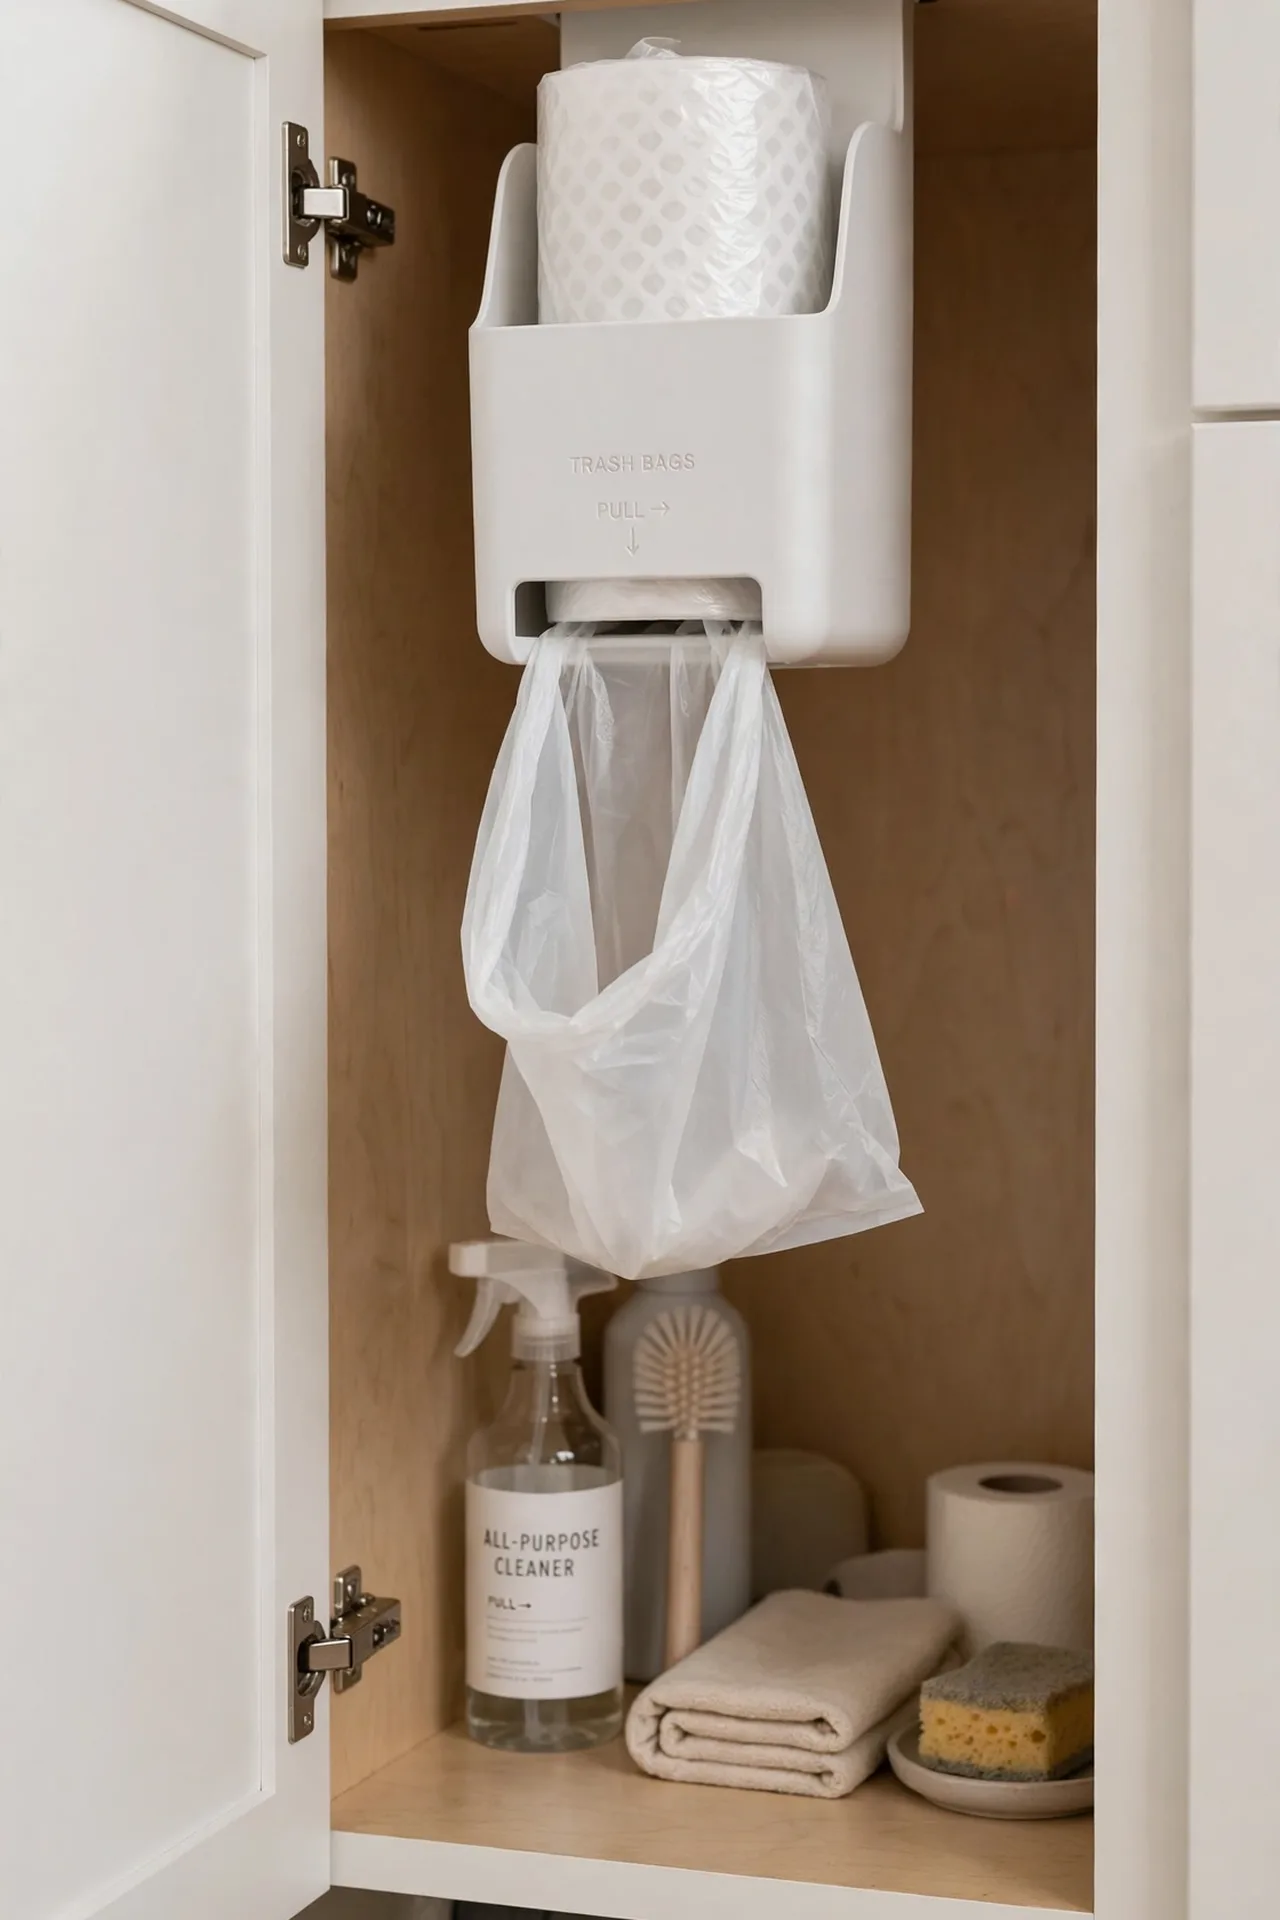
Cost: Very low, a simple dispenser or repurposed tissue box | Time: Ten minutes | Skill Level: Beginner | Best For: Anyone tired of wrestling crumpled bags from a stuffed grocery sack
A dedicated dispenser ends the tangled mess of loose trash bags for good. Mount it on the door or a side wall where one quick pull grabs the next bag. I’ve noticed this tiny upgrade gets used daily, which makes it one of the highest-value changes per dollar in the whole cabinet. Choose a dispenser that fits standard roll sizes so refills stay cheap and easy to find anywhere. Mount it at chest height inside the door so grabbing a bag never requires bending down.
Vertical Divider Slots
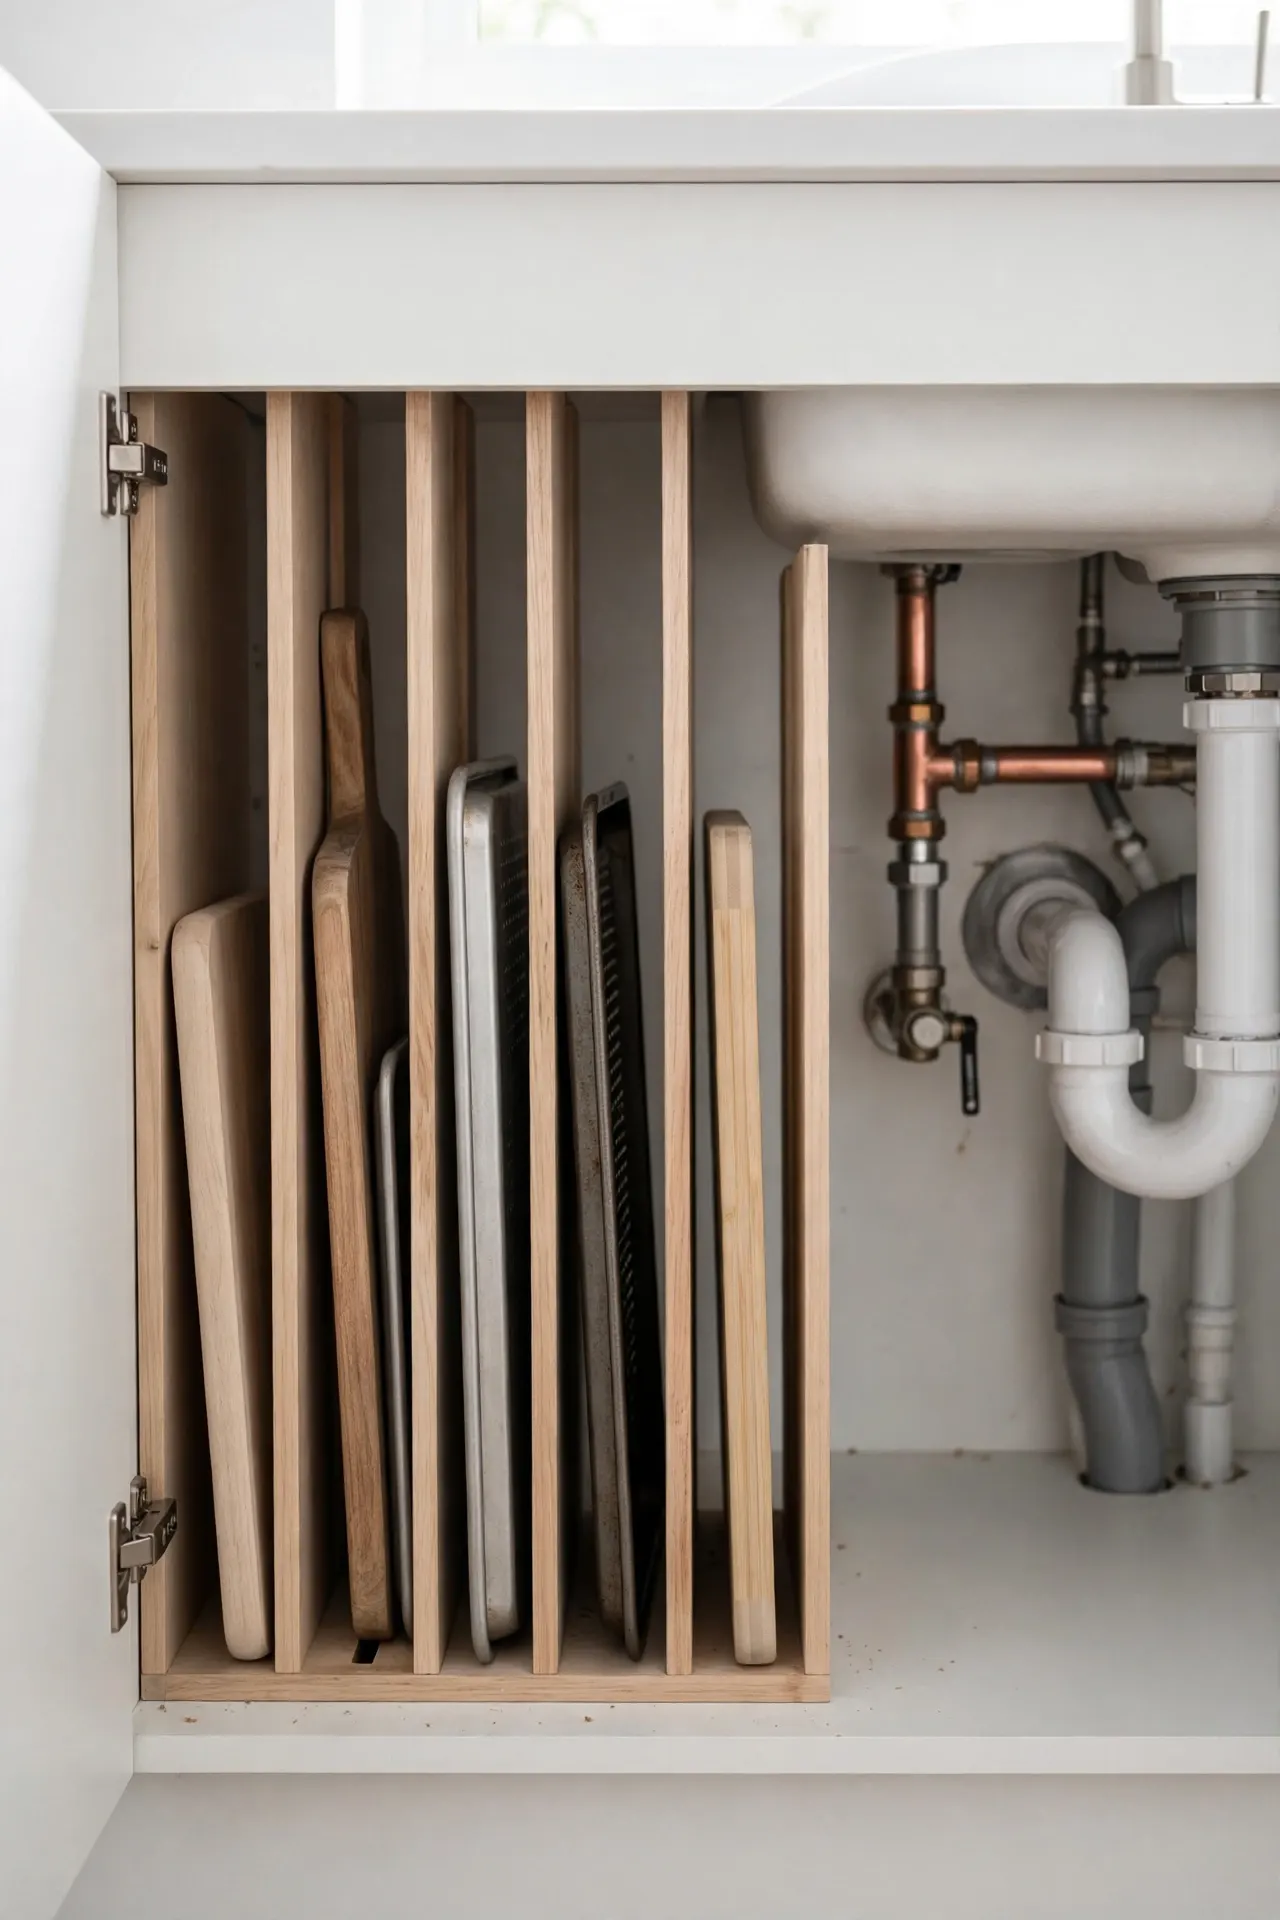
Vertical dividers store flat items on edge instead of stacked in a wobbly pile. Cutting boards, baking trays, and even damp cleaning pads slide into their own slots. The upright position lets air circulate so items dry faster between uses.
Tension-style dividers wedge between the cabinet floor and the fixed shelf above with no hardware needed. This approach rescues the narrow gaps beside the pipes that nothing else fits. Once flat items stand upright, the remaining floor space opens up for bins and bottles. Slide the dividers in last, after the larger organizers are placed, so they fill whatever narrow gaps remain. Adjust the spacing seasonally as your collection of trays and boards changes over time.
Small Item Corral
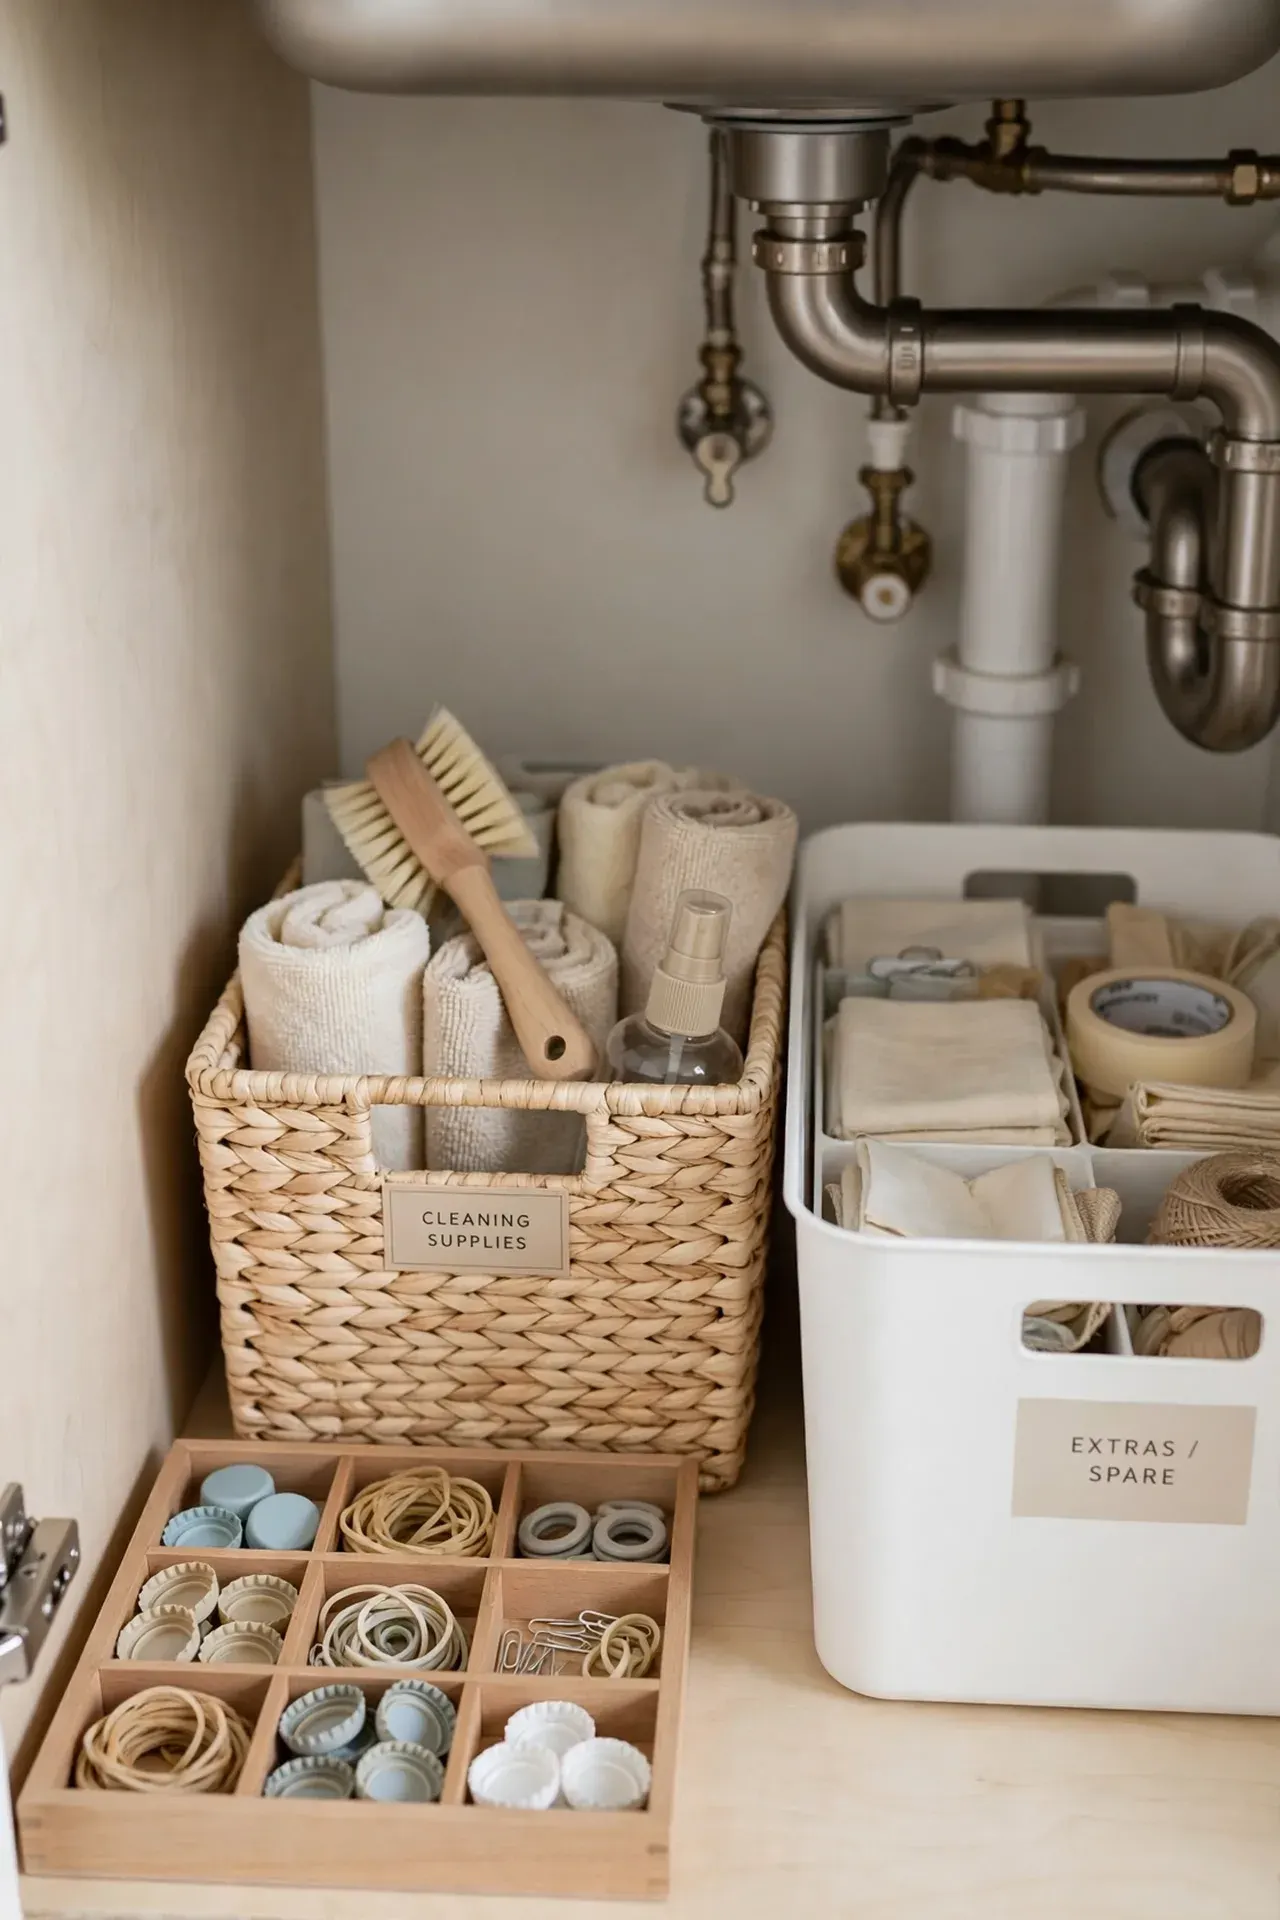
- Drop a small divided tray into the cabinet to catch the tiny items that always drift loose.
- Sort spare caps, rubber bands, and batteries into separate compartments so each has a home.
- Place the corral near the front where you will actually see it and use it daily.
- Empty and wipe the tray every few months to stop clutter creeping back in.
Small items cause outsized chaos under the sink, and a corral tray tames them all. Smart under sink kitchen organization ideas always account for the little things, because loose caps and bands multiply fast. This five-minute fix keeps the cabinet feeling calm instead of chaotic.
Dish Soap Station
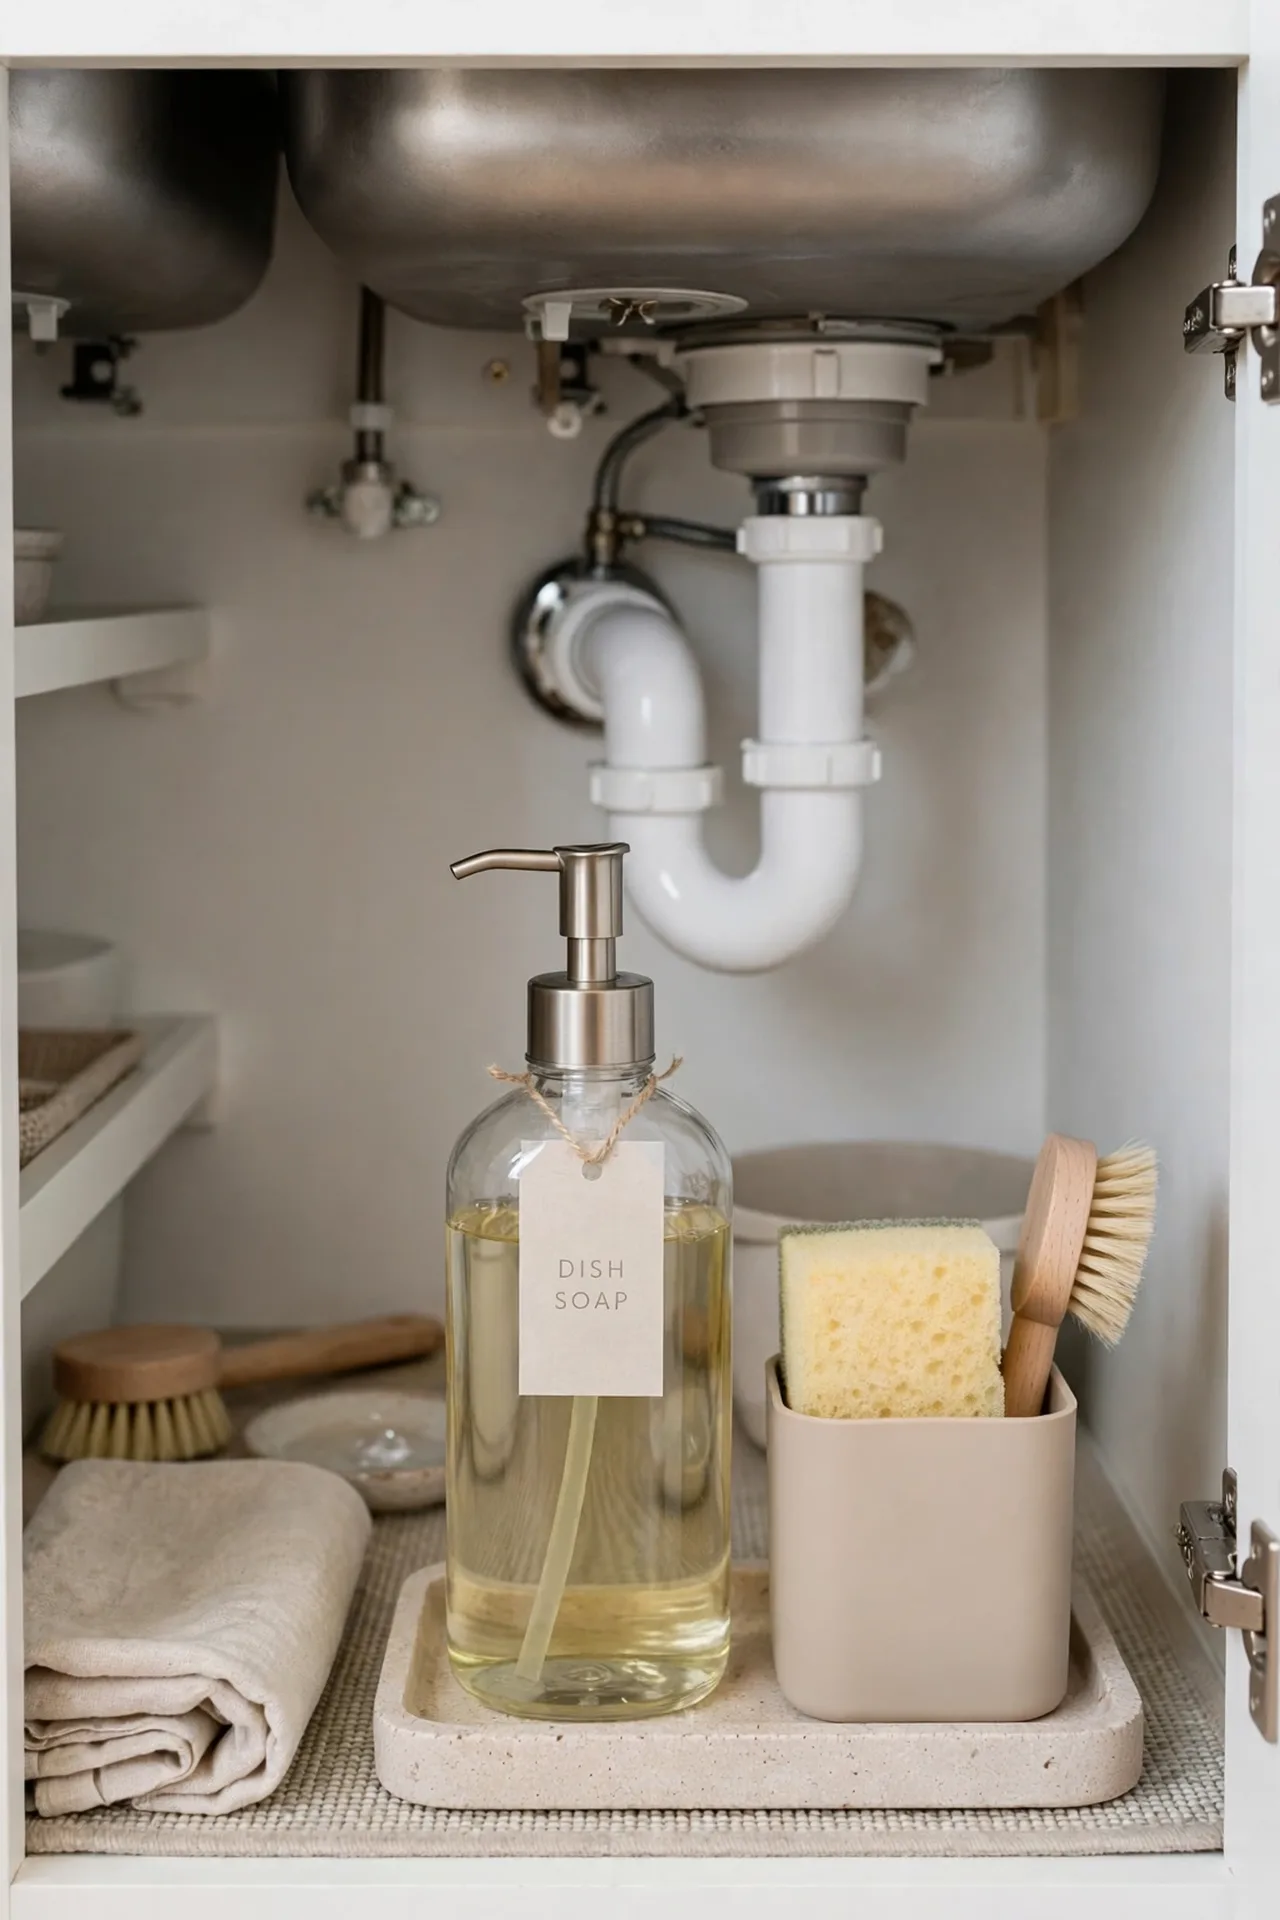
Quick Tip: Decant dish soap into a pretty pump bottle and keep the bulky refill stored at the back. A small tray under the pump catches drips and keeps the area looking intentional. Refill the pump monthly so it never runs dry mid-dishwashing.
A dedicated soap station turns a daily chore into a smoother ritual. The pump dispenses with one hand while the tray keeps everything contained and clean. Pair the station with a sponge holder and the whole sink area feels thoughtfully designed rather than improvised. Choose a pump with a large opening for easy refills without spills or funnels. Wipe the tray weekly to stop soap film from building up around the base.
Sponge Holder Rail for under sink kitchen organization ideas
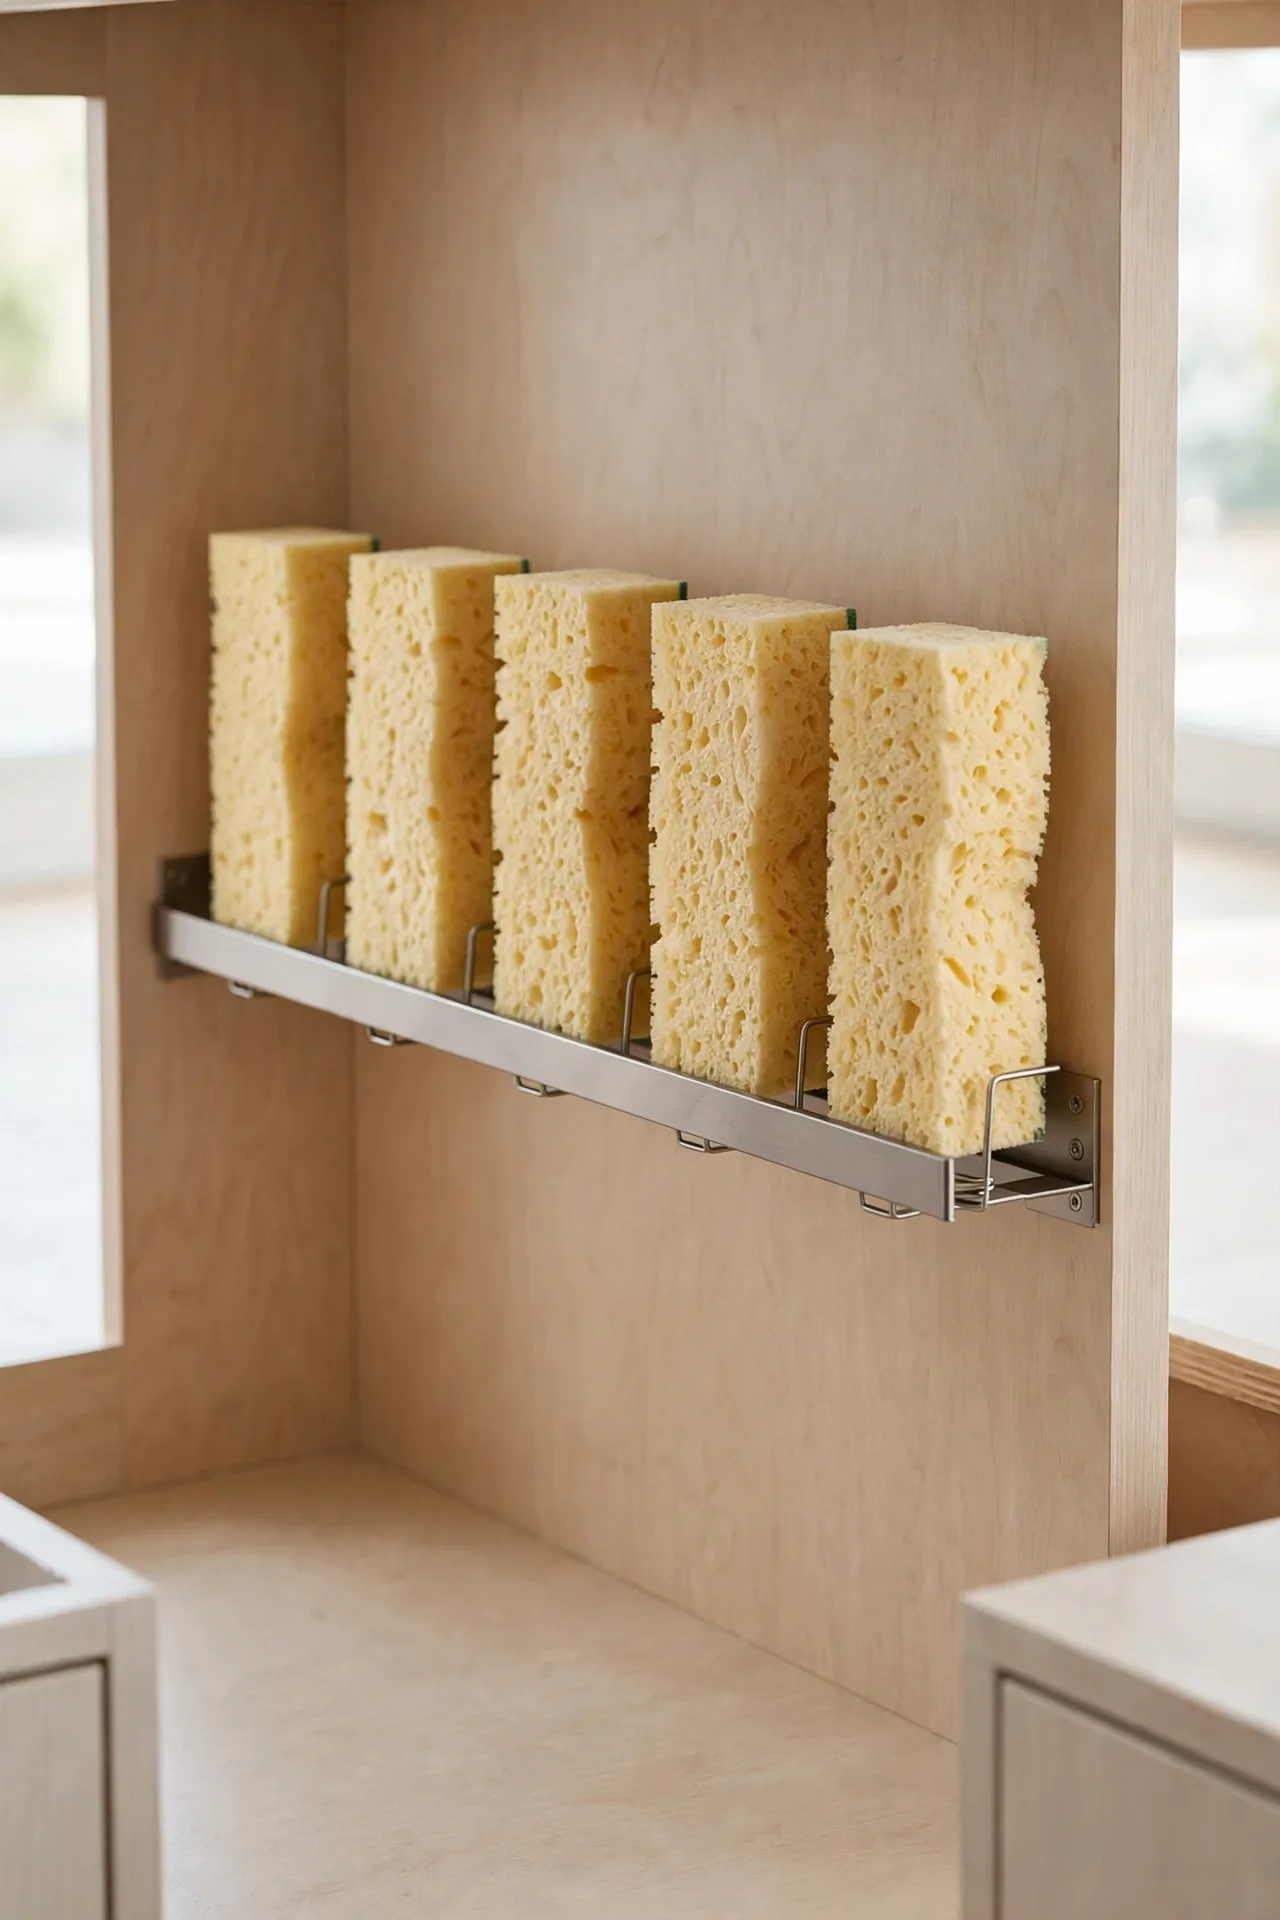
BEFORE: Damp sponges sat in a soggy pile at the back of the cabinet, developing odors within days. They stuck together, stayed wet, and needed replacing far too often for such a simple item.
AFTER: A slim rail holds each sponge upright with air flowing around it. Sponges dry between uses, last weeks longer, and smell fresh. The rail mounts in minutes and claims almost no space at all.
Position the rail where drips fall onto the waterproof mat rather than bare wood. Rinse sponges well before parking them so they dry clean. This small habit stretches every sponge further and keeps the cabinet smelling neutral.
Conclusion
The space under your kitchen sink works harder than almost any other cabinet in the house. These under sink kitchen organization ideas prove that a few bins, hooks, and smart habits turn chaos into calm. I’ve seen how small changes like these can completely shift the way a space feels, and this cabinet is no exception. Pick three ideas that fit your space and try them this weekend. Save your favorites on Pinterest, share the transformation with a friend, and enjoy opening that cabinet door every single day.