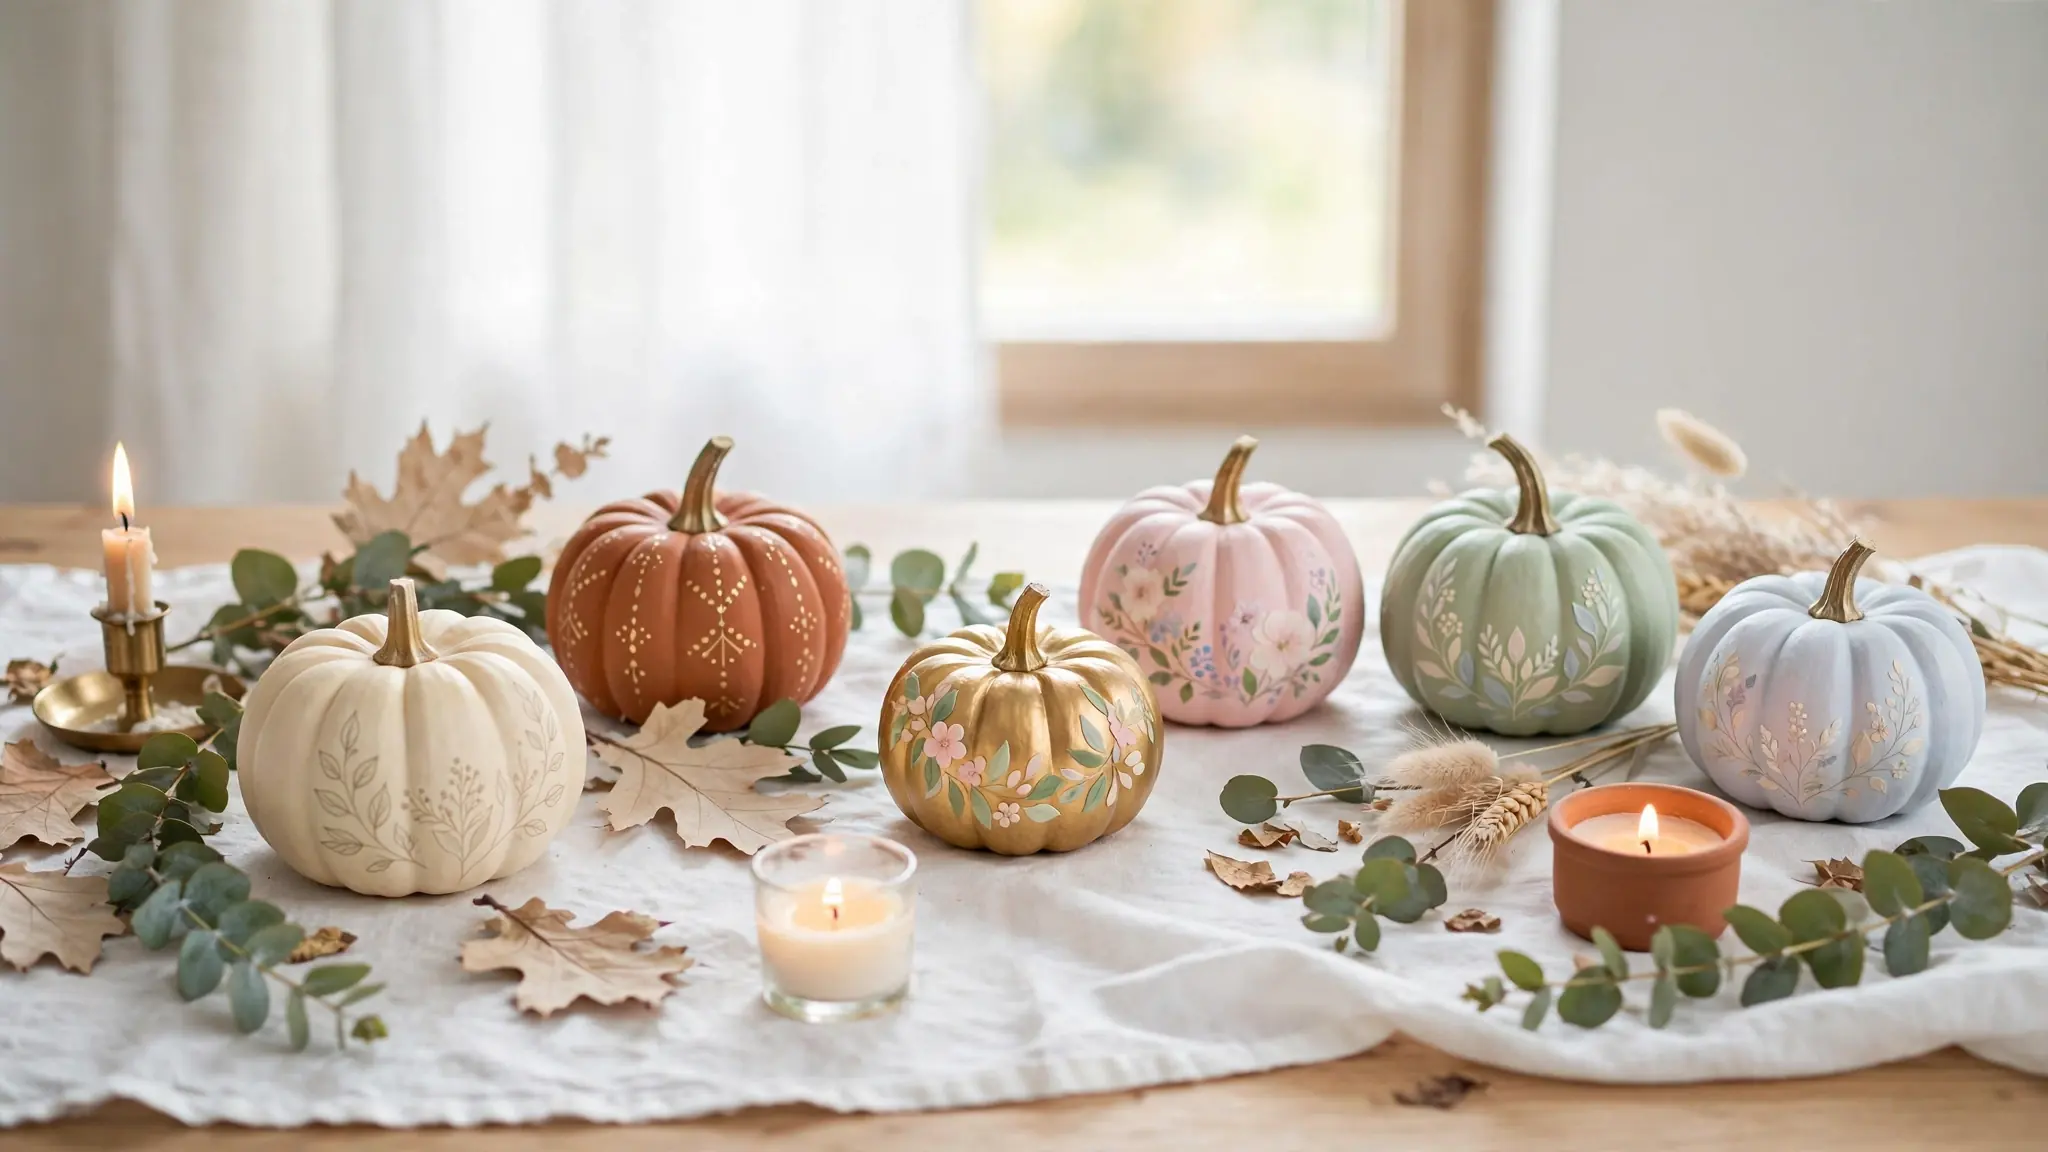
22 Mini Pumpkin Painting Ideas for Adorable Fall Decor
Mini pumpkins are the cutest canvas of fall, and mini pumpkin painting ideas turn a five-minute craft into decor you will love all season. These little gourds need no carving, no mess, and no special skill. Just grab acrylic paint, a few brushes, and a free afternoon. Each pumpkin becomes a tiny work of art that fits anywhere: mantels, shelves, tables, and entryways welcome these small seasonal touches.
Painting also stretches your craft budget beautifully, since supplies from one project often carry into the next. For handmade holiday cheer, browse our homemade christmas gift ideas next, where painted pumpkins double as charming gifts. Below are twenty-two painted mini pumpkin designs, each one beginner friendly, quick to finish, and ready for your fall tablescape. Pick your favorites and start painting today.
Speckled White Pumpkins
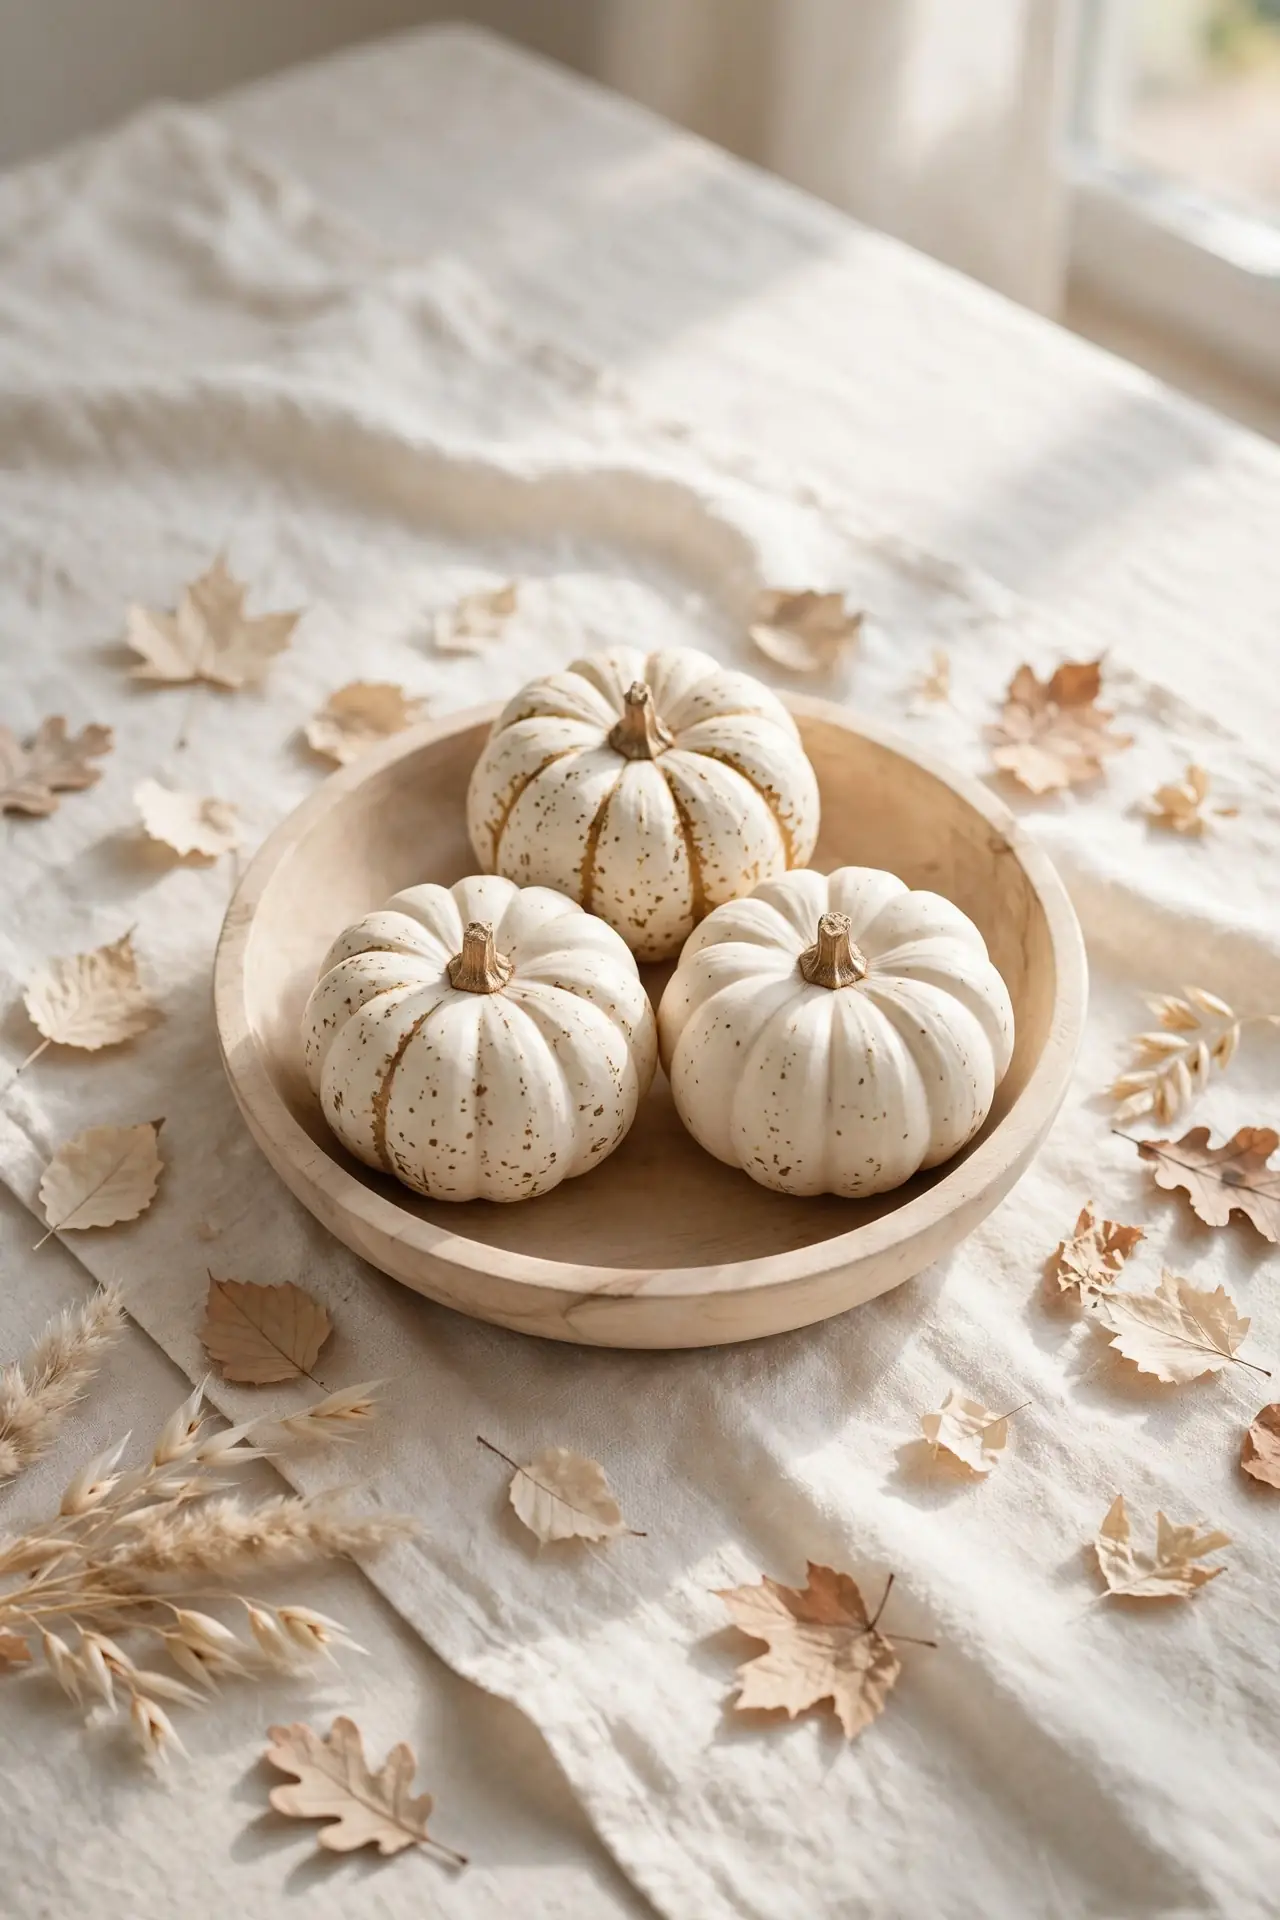
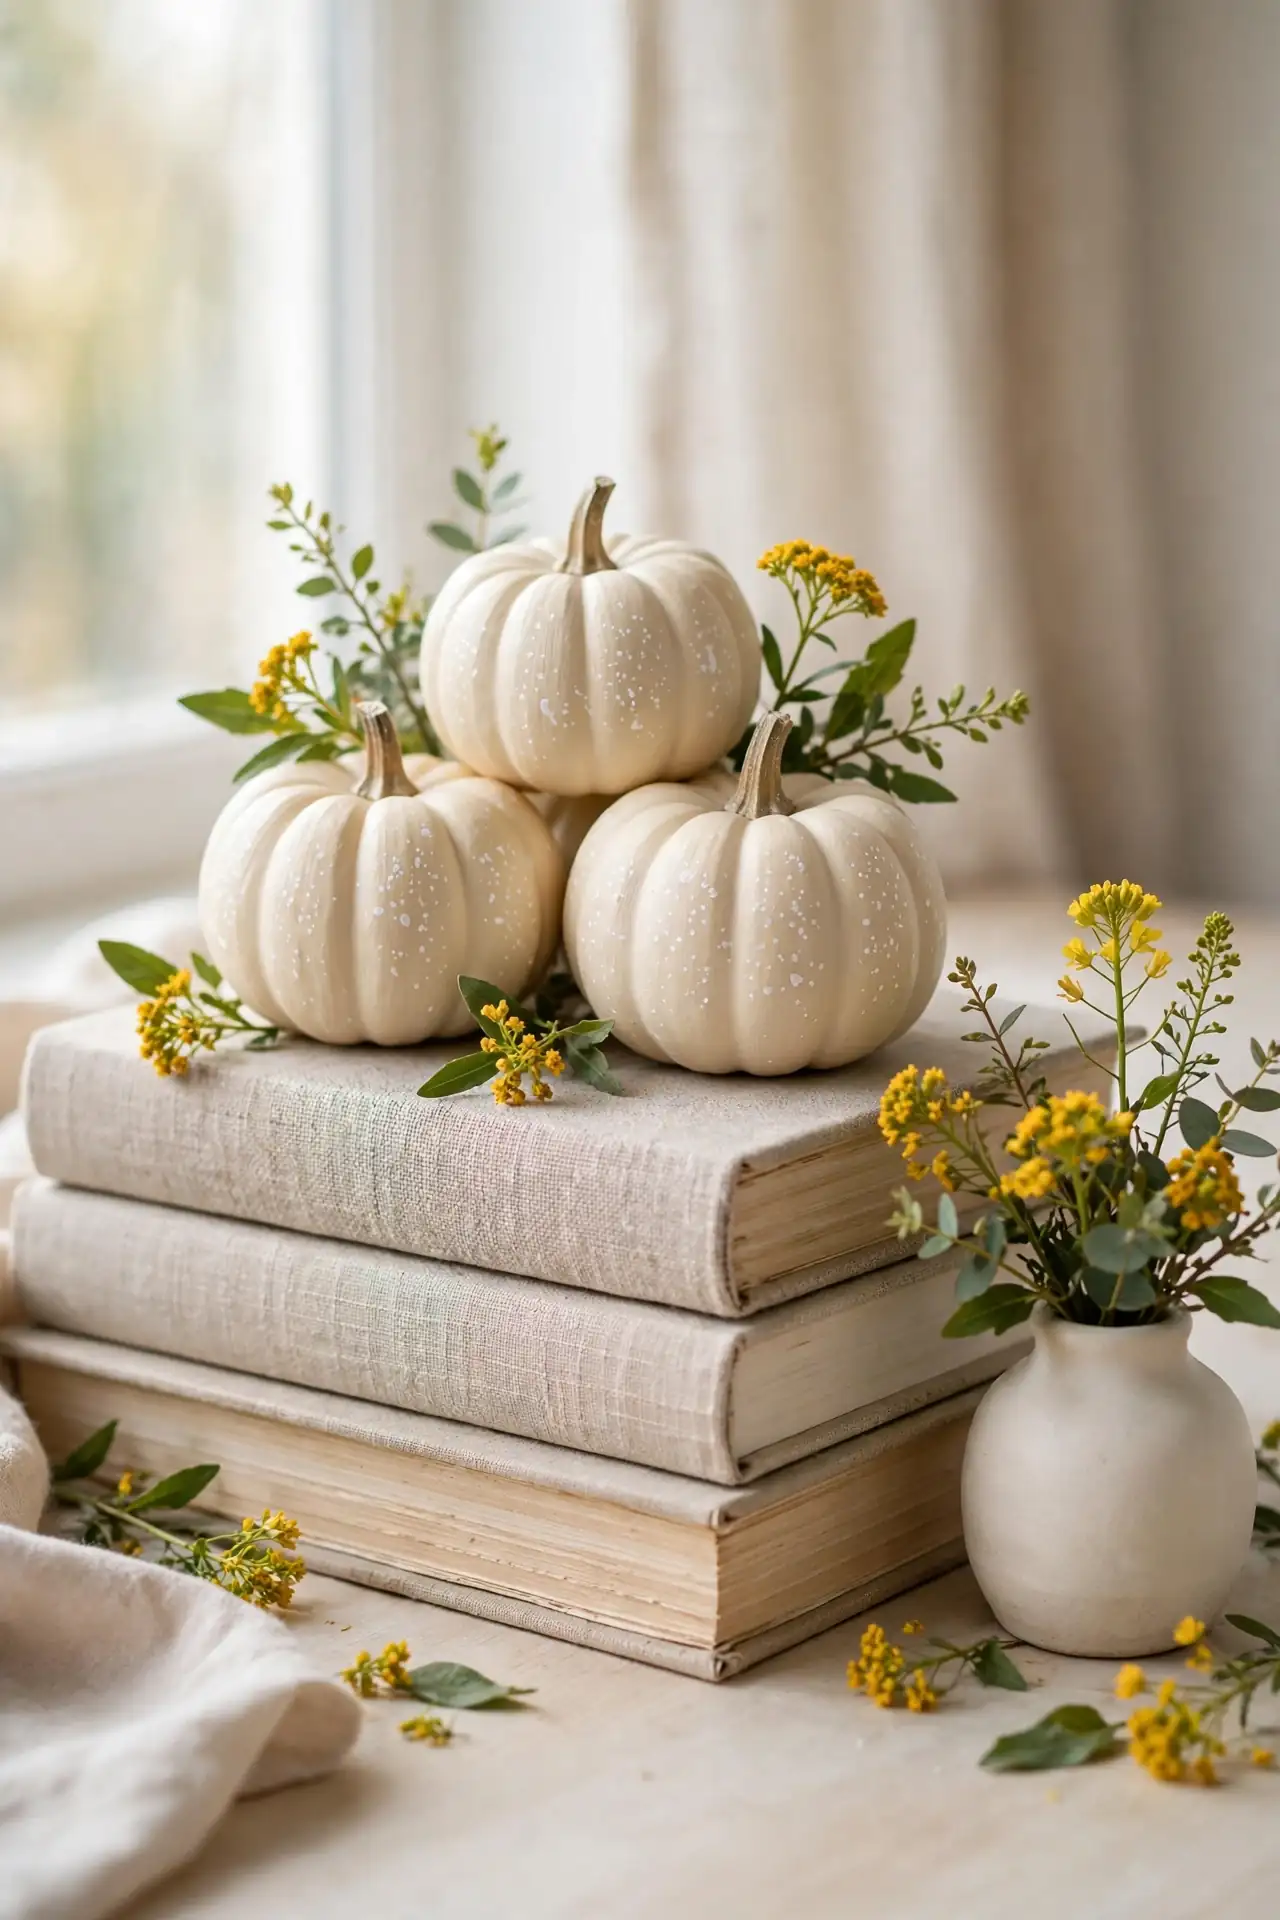
Tiny white pumpkins with hand-painted speckles bring a fresh, modern twist to fall decorating. A simple coat of matte white paint turns an ordinary mini gourd into a blank canvas. Then load a dry toothbrush with brown or gray paint and flick tiny speckles across the surface for a speckled egg effect.
Group three or five speckled minis in a shallow wooden bowl for a centerpiece that suits any table. The neutral palette blends with cream linens, beige runners, and soft candlelight. Practice the flicking motion on paper first so the speckles land evenly. Once dry, seal with matte spray and these little pumpkins stay pretty through Thanksgiving.
Gold Leaf Accents
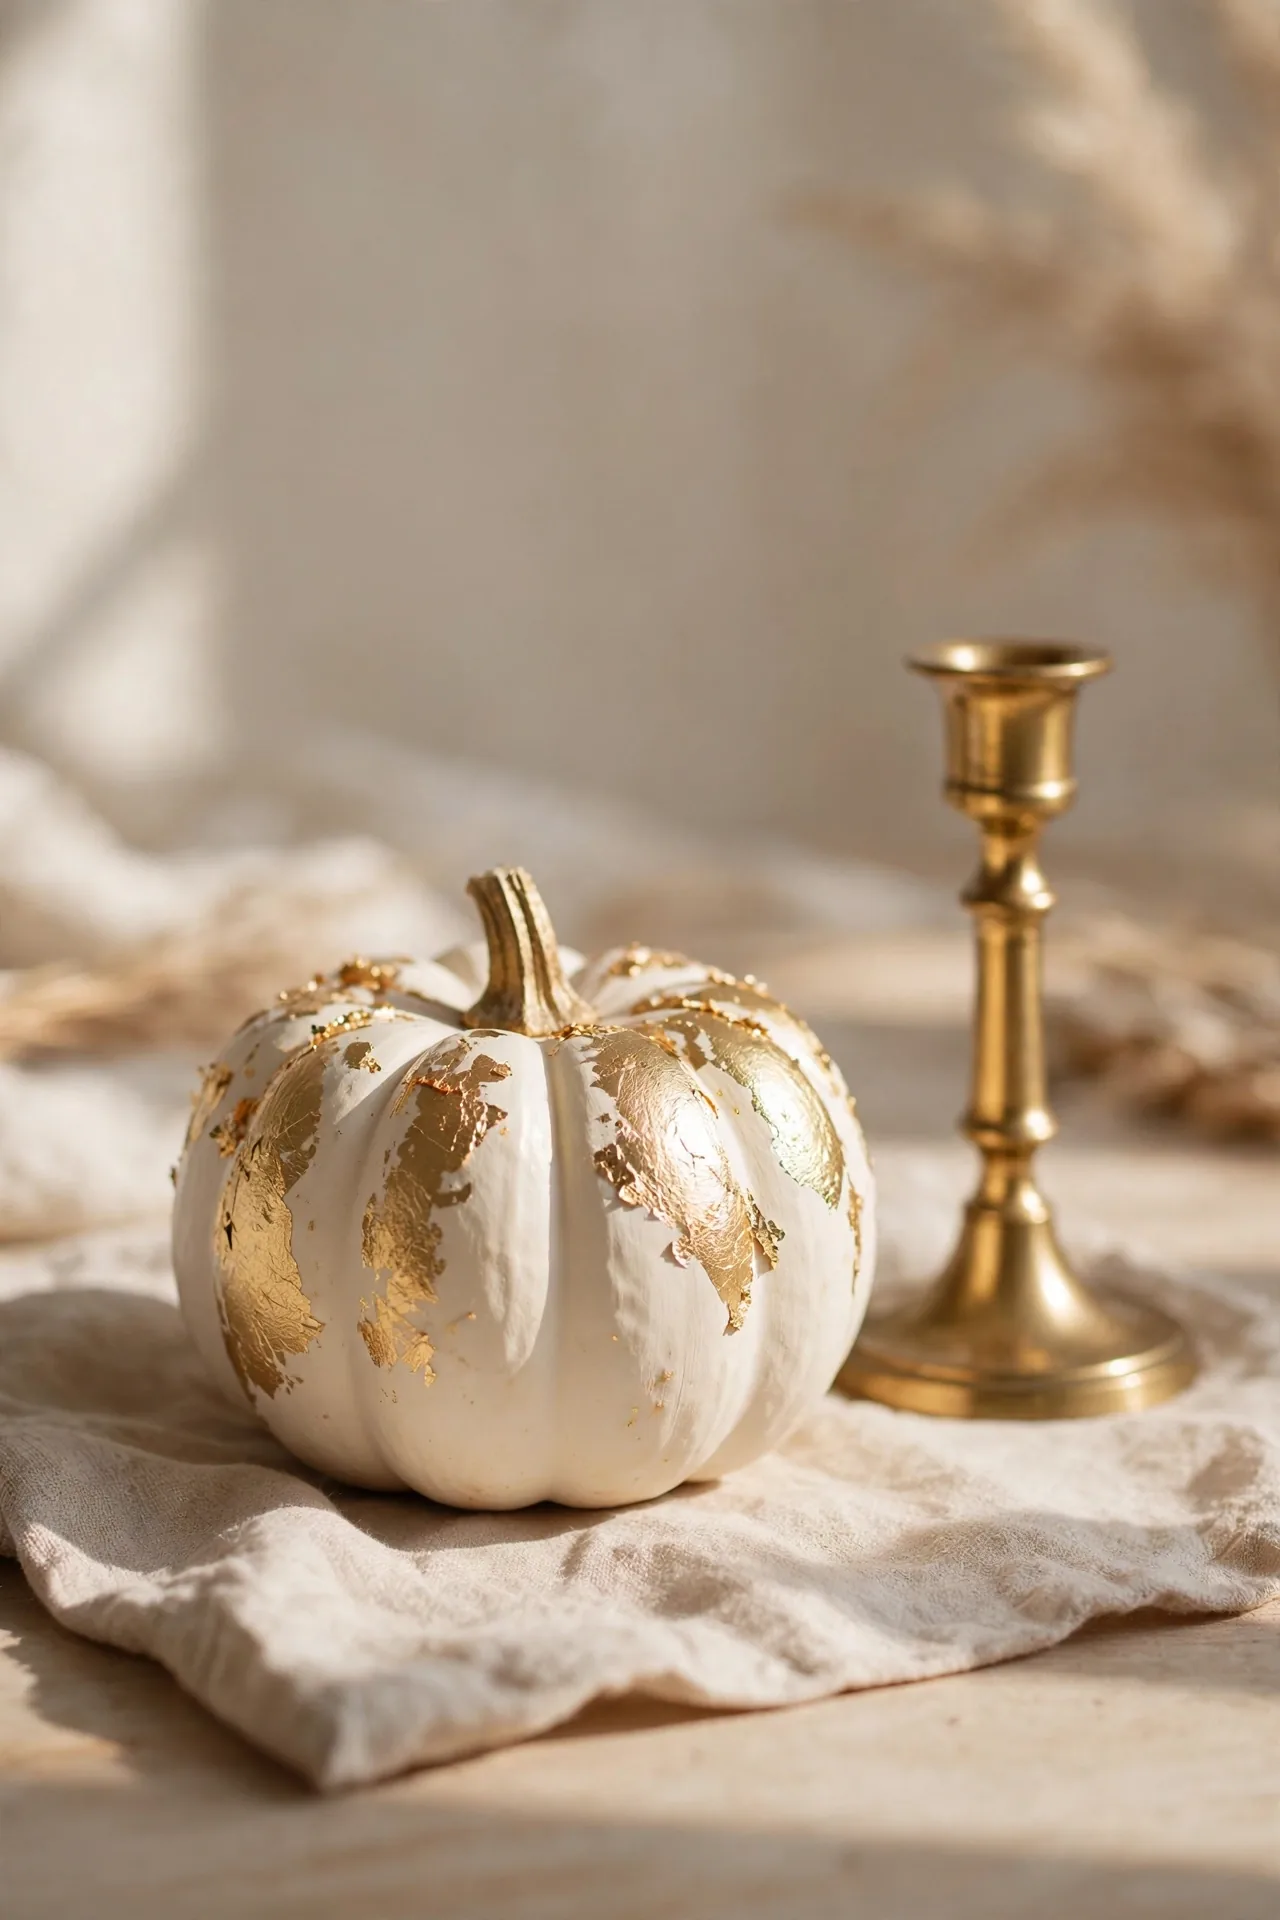
- Paint the mini pumpkin in soft cream or ivory first, then let it dry fully before adding gold.
- Brush craft glue onto small patches, then press gold leaf sheets gently over the sticky areas.
- Smooth the leaf with a soft dry brush and let the edges crumble naturally for an organic look.
- Seal with clear gloss sealer so the metallic shine survives handling all season long.
Gold leaf turns a humble mini pumpkin into a jewel-box accent for shelves and mantels. The metallic patches catch lamplight and candlelight beautifully, so place these where evening light hits them. In my experience, less gold reads more expensive than full coverage. One shining pumpkin among plain ones creates the perfect focal point.
Buffalo Check Charm
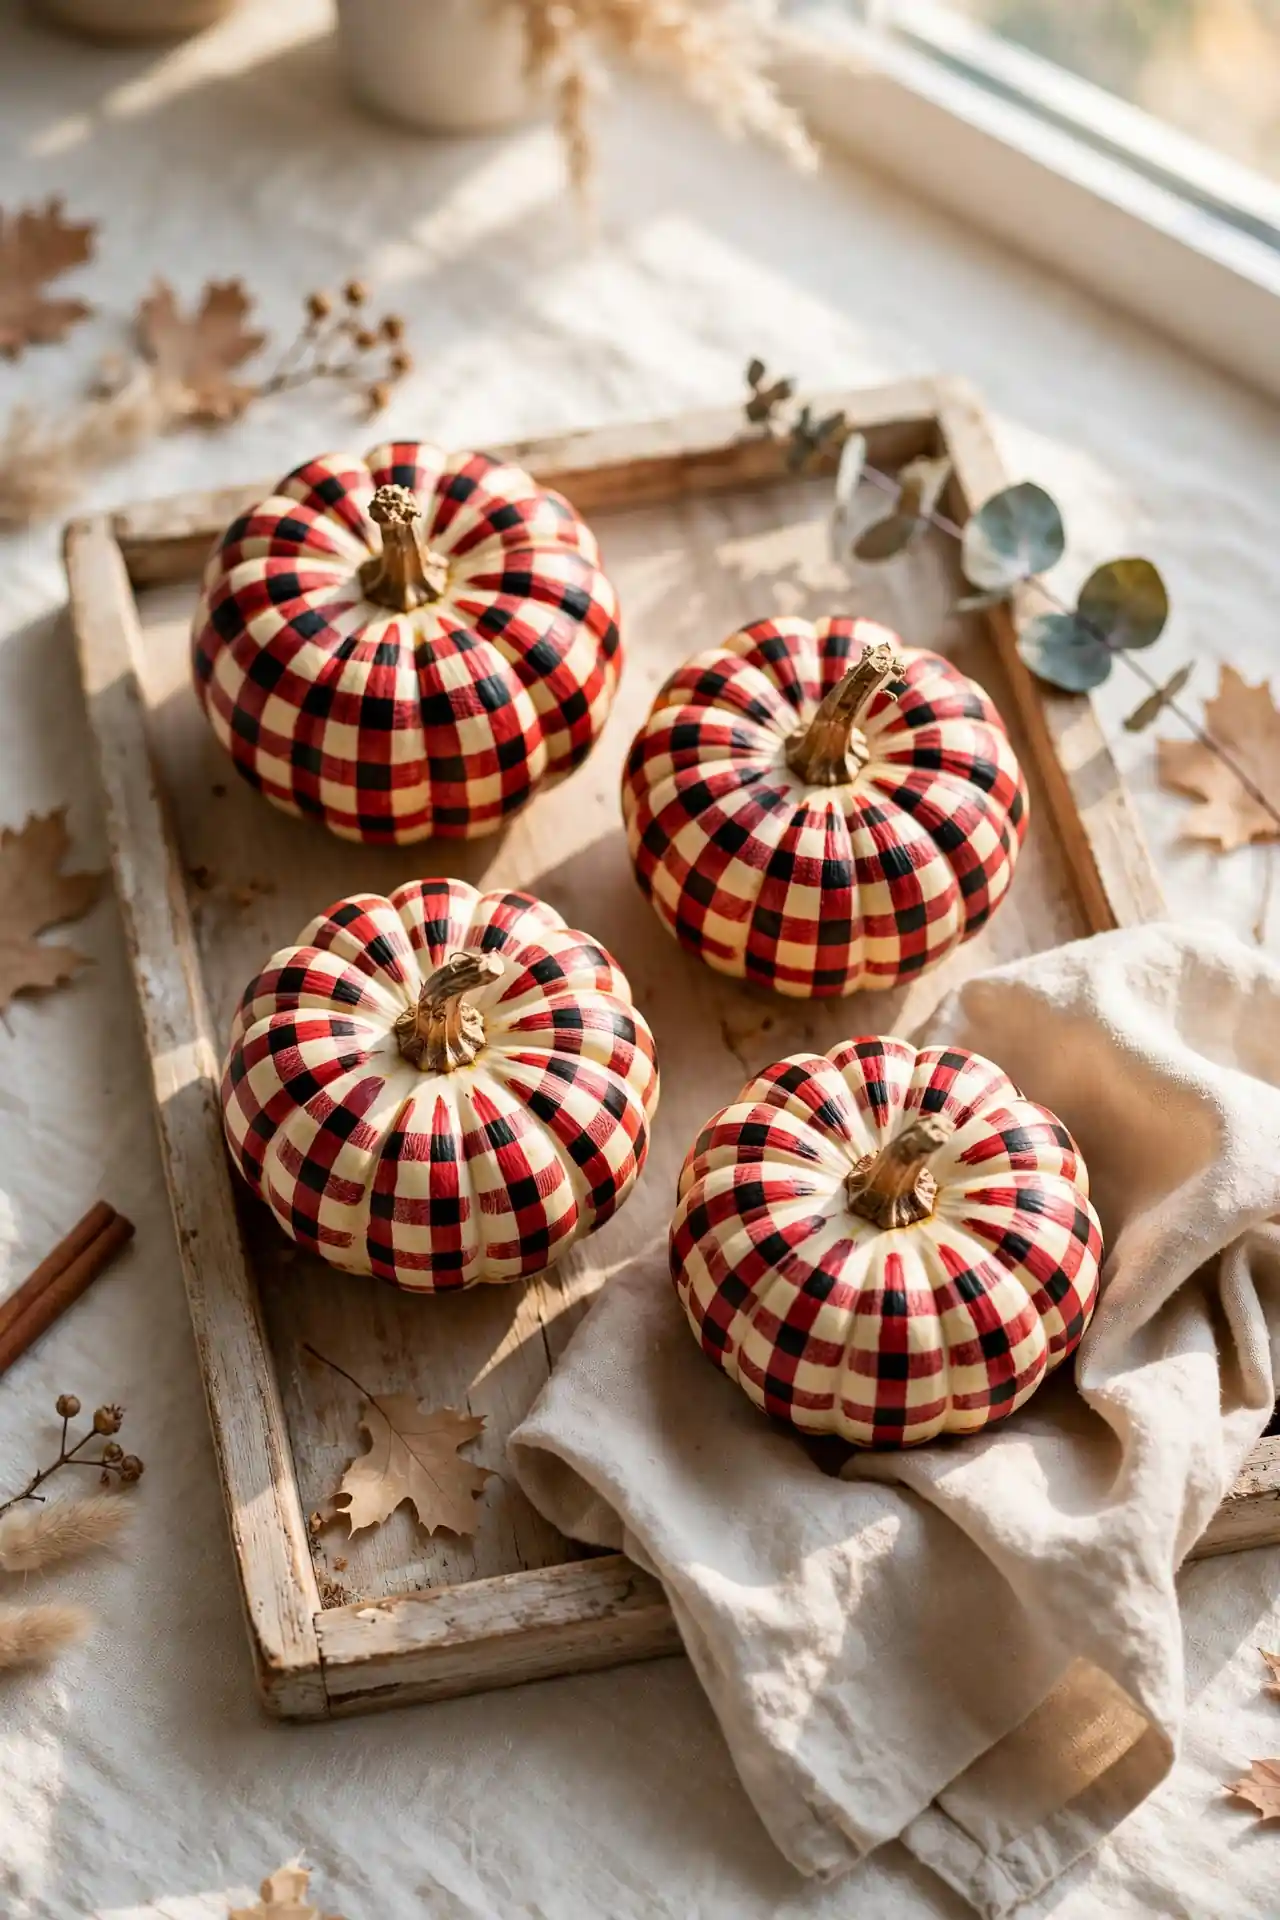
Quick Tip: Paint the whole mini pumpkin cream, then use the edge of a flat brush to stamp red and black checks in a grid. Keep the squares tiny, about the size of a pencil eraser, so the pattern reads crisp on a small gourd. Tape guides help only on larger pumpkins; freehand works better on minis.
Buffalo check gives mini pumpkins a cozy cabin feel that fits farmhouse tables and rustic mantels. Red and black is the classic pairing, but charcoal and cream works for quieter rooms. Let each color dry before adding the next so the grid stays sharp. Cluster three checked pumpkins with plain cream ones for balance.
Rainbow Striped Minis
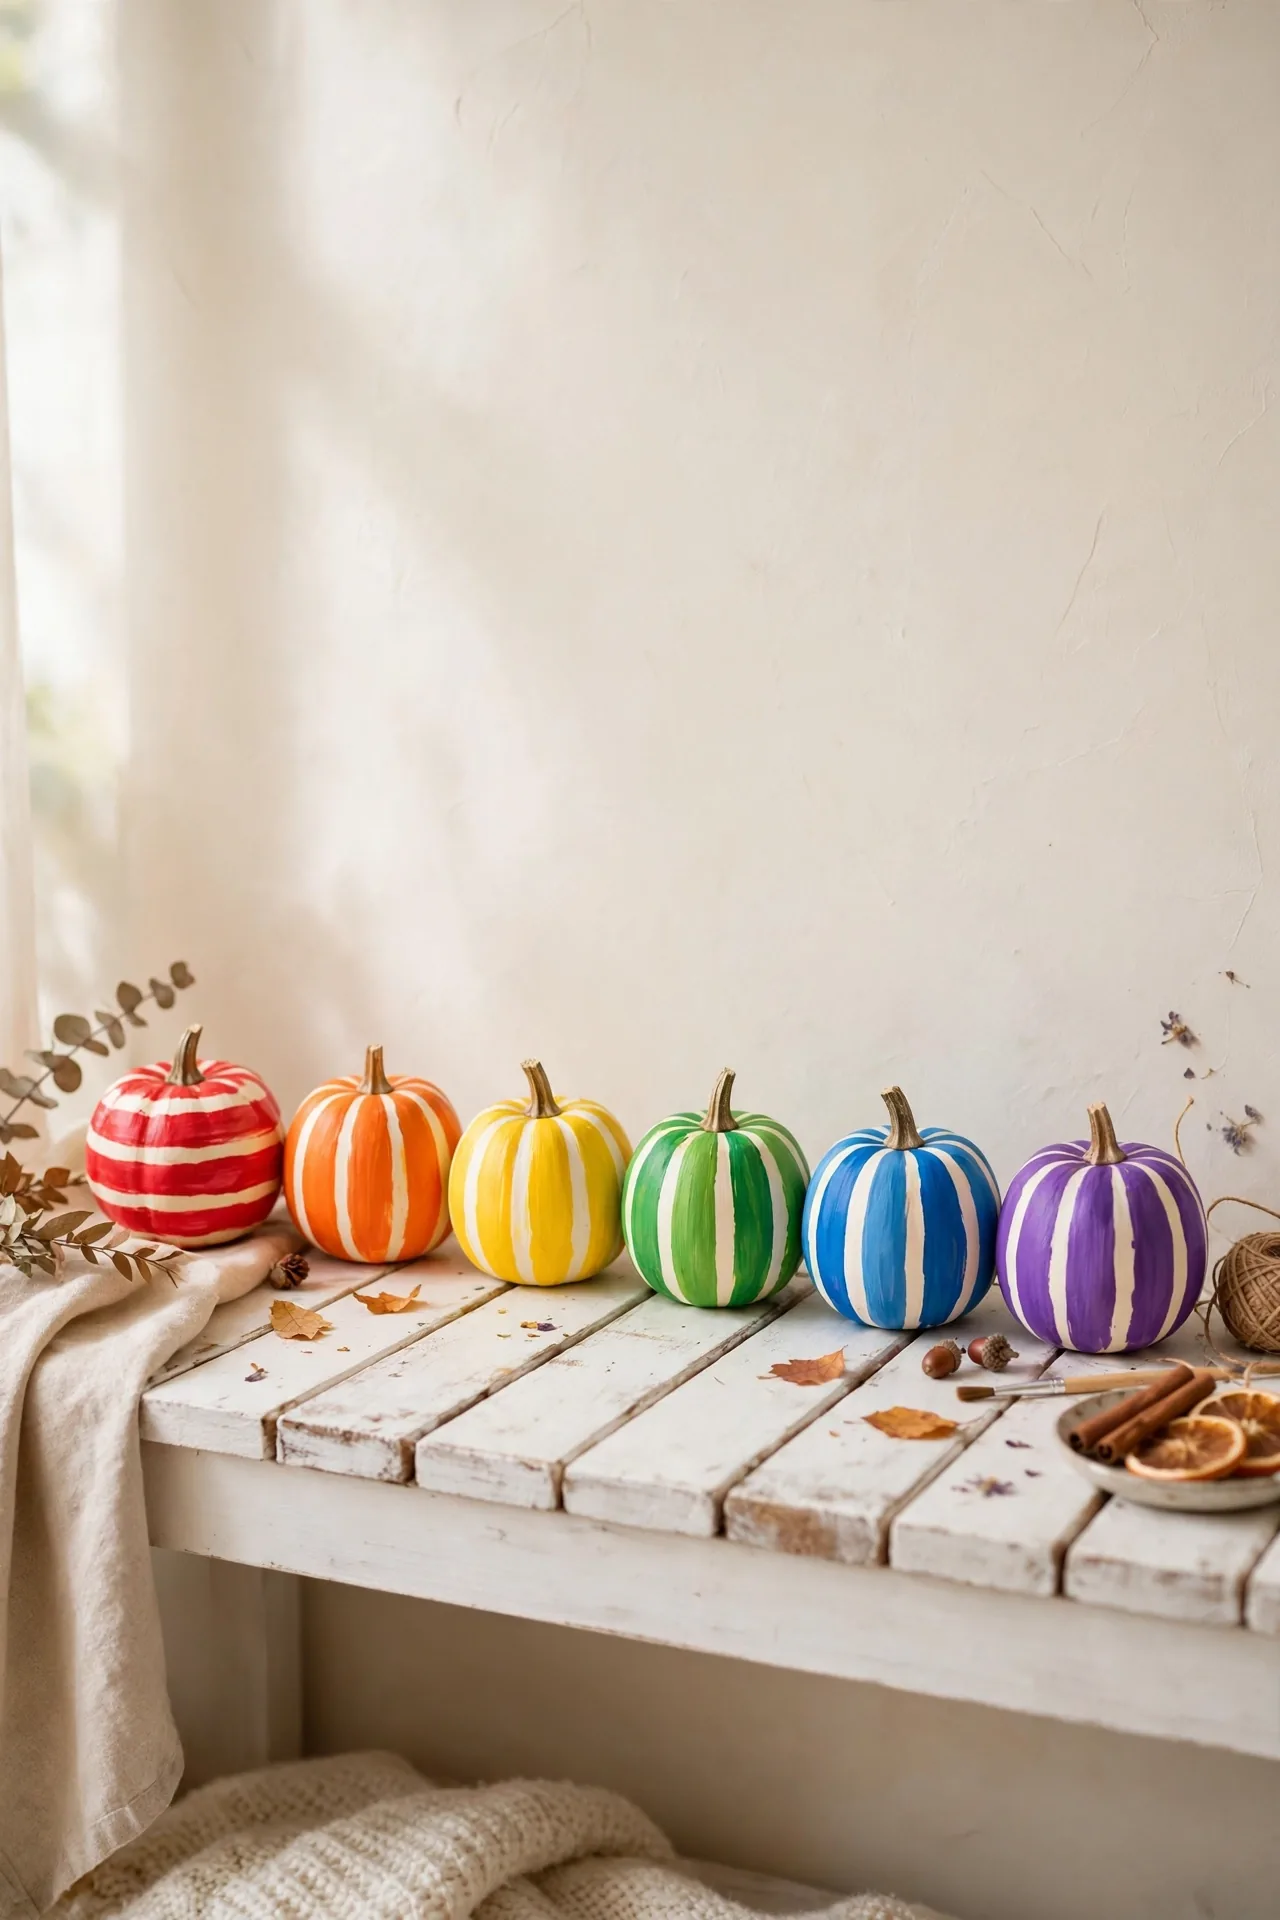
BEFORE: Plain orange mini pumpkins blend into every other fall display on the block. Kids walk right past them, and the table feels flat and predictable every single year.
AFTER: Cheerful rainbow stripes wrap each tiny pumpkin in color. The display pops from across the room, and little hands reach for them first. Guests smile before they even say hello.
Paint thin horizontal stripes in red, orange, yellow, green, blue, and purple around the widest part of the pumpkin. A small round brush keeps the lines neat, and white gaps between colors keep it fresh. These happy minis shine in playrooms, on classroom desks, and anywhere kids gather.
Floral Meadow Tops
- Paint the pumpkin in a soft sage or cream base and let it dry completely.
- Dot tiny five-petal flowers in white, blush, and mustard using the round end of a paintbrush handle.
- Add small green leaves between the blooms with the tip of a fine liner brush.
- Finish with a light matte sealer so the delicate design stays crisp.
Floral minis bring spring garden charm into your fall decorating without clashing. The soft blooms suit bedrooms, bathrooms, and reading nooks where bold autumn colors feel heavy. Keep the flowers small and scattered, since tiny scale is the whole charm here. A cluster of three floral pumpkins on a stack of books makes a lovely side-table moment.
Chalkboard Message Pumpkins
| Feature | Chalkboard Paint | Chalk Markers |
|---|---|---|
| Base Coat | Two coats black chalkboard paint | One coat, dries faster |
| Writing Tool | Real chalk sticks | Chalk ink markers |
| Erasable | Wipes clean with damp cloth | Needs wet cloth, some ghosting |
| Look | Rustic, soft matte lines | Bold, crisp bright lines |
| Best For | Changing messages weekly | Detailed drawings, keepsakes |
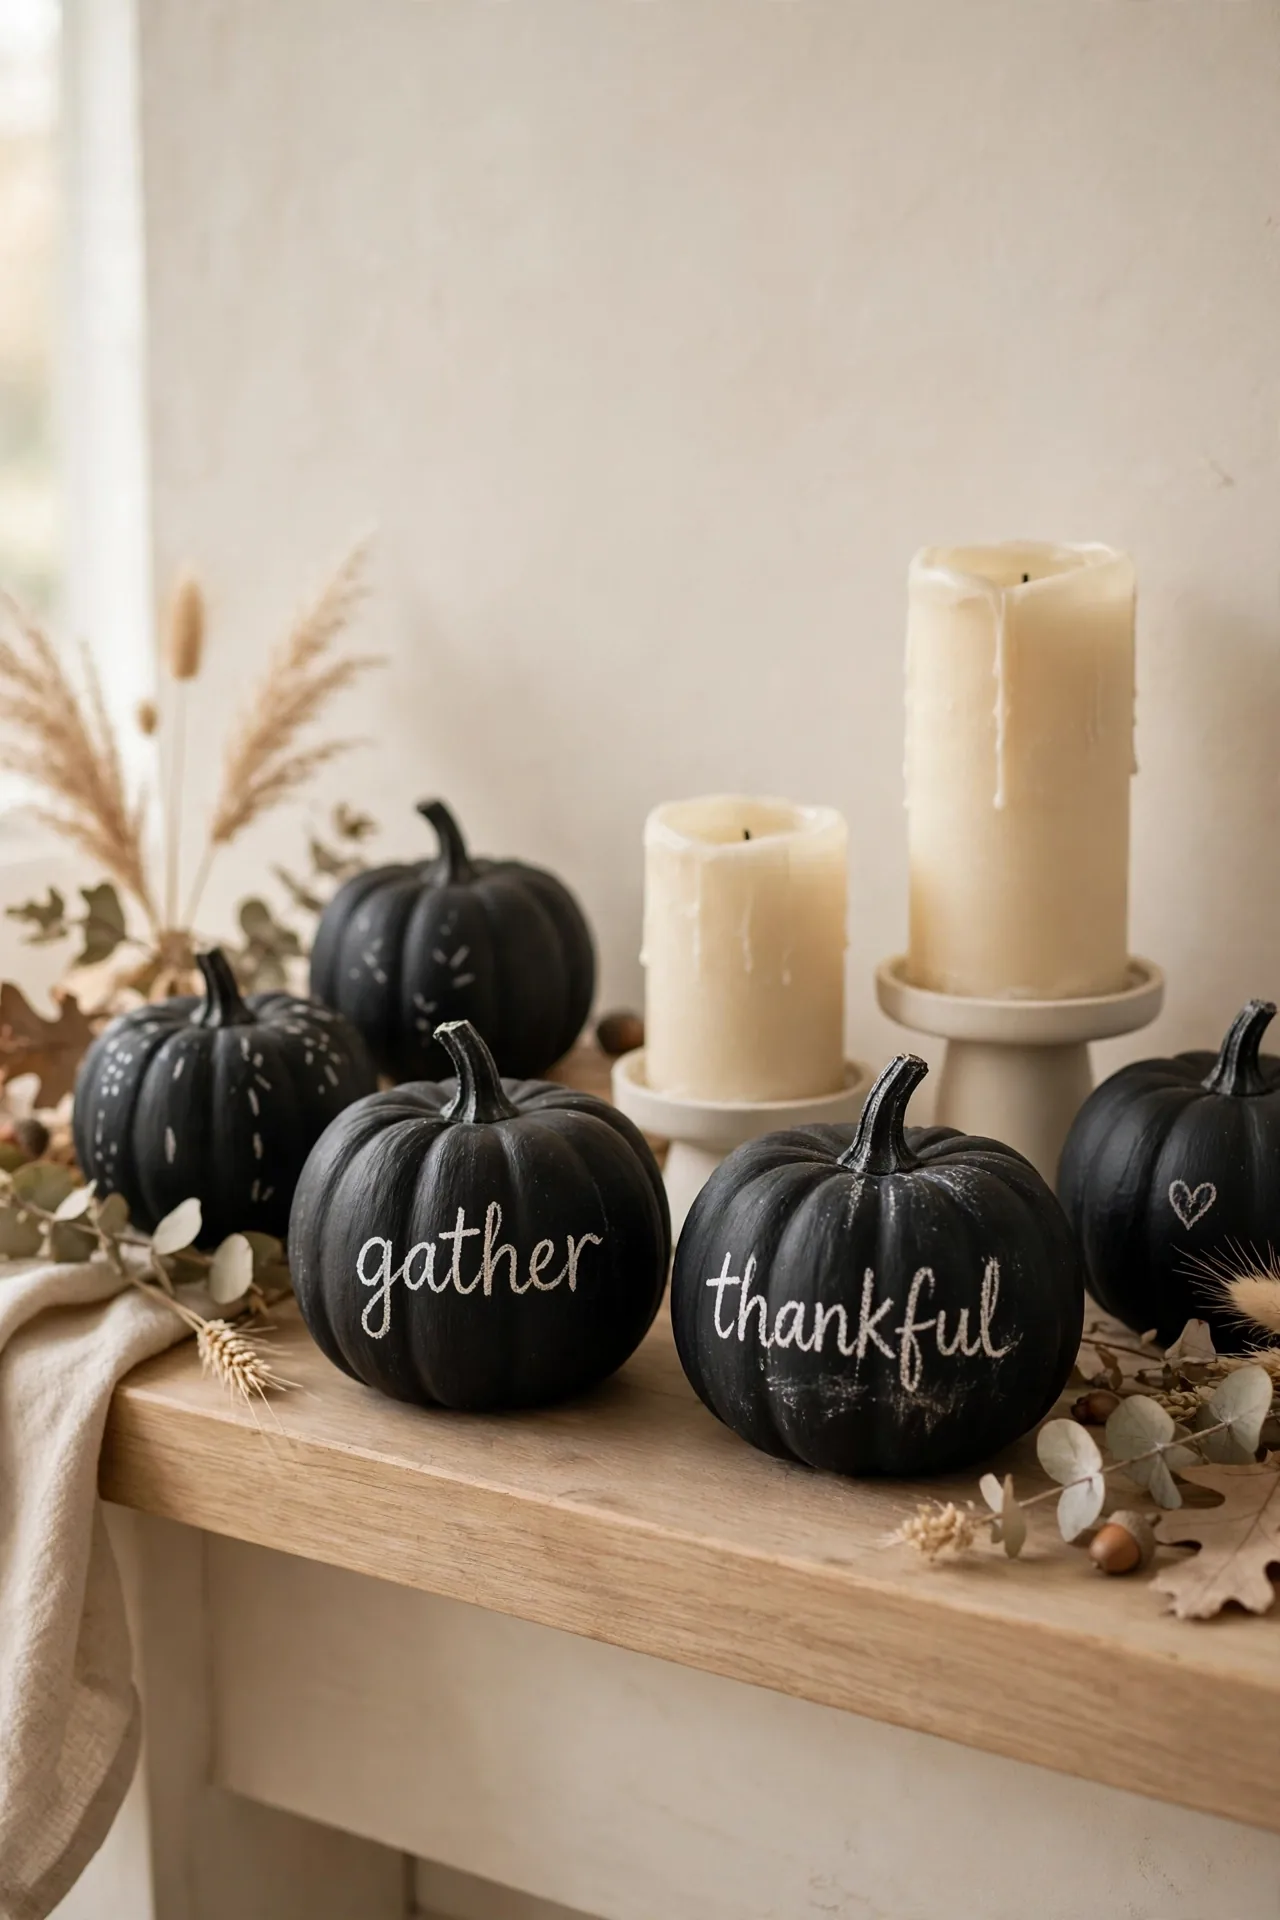
Message pumpkins act like tiny love notes scattered through your fall decor. Write one word each, like gather, thankful, or cozy, and line them along the mantel. Chalkboard paint needs a full day to cure before writing, so plan ahead. Refresh the words for Halloween, then again for Thanksgiving, and the same pumpkins serve the whole season.
Polka Dot Play
DO:
- Use the round end of a pencil eraser to stamp perfectly even dots.
- Mix dot sizes, from tiny pinpricks to bold spots, for playful rhythm.
- Stick to two colors, like white on terracotta, for a clean graphic look.
DON’T:
- Don’t freehand dots with a brush tip; wobbly circles ruin the crisp effect.
- Don’t overload the eraser with paint or the dots will blob.
- Don’t crowd the dots; breathing room keeps the pattern elegant.
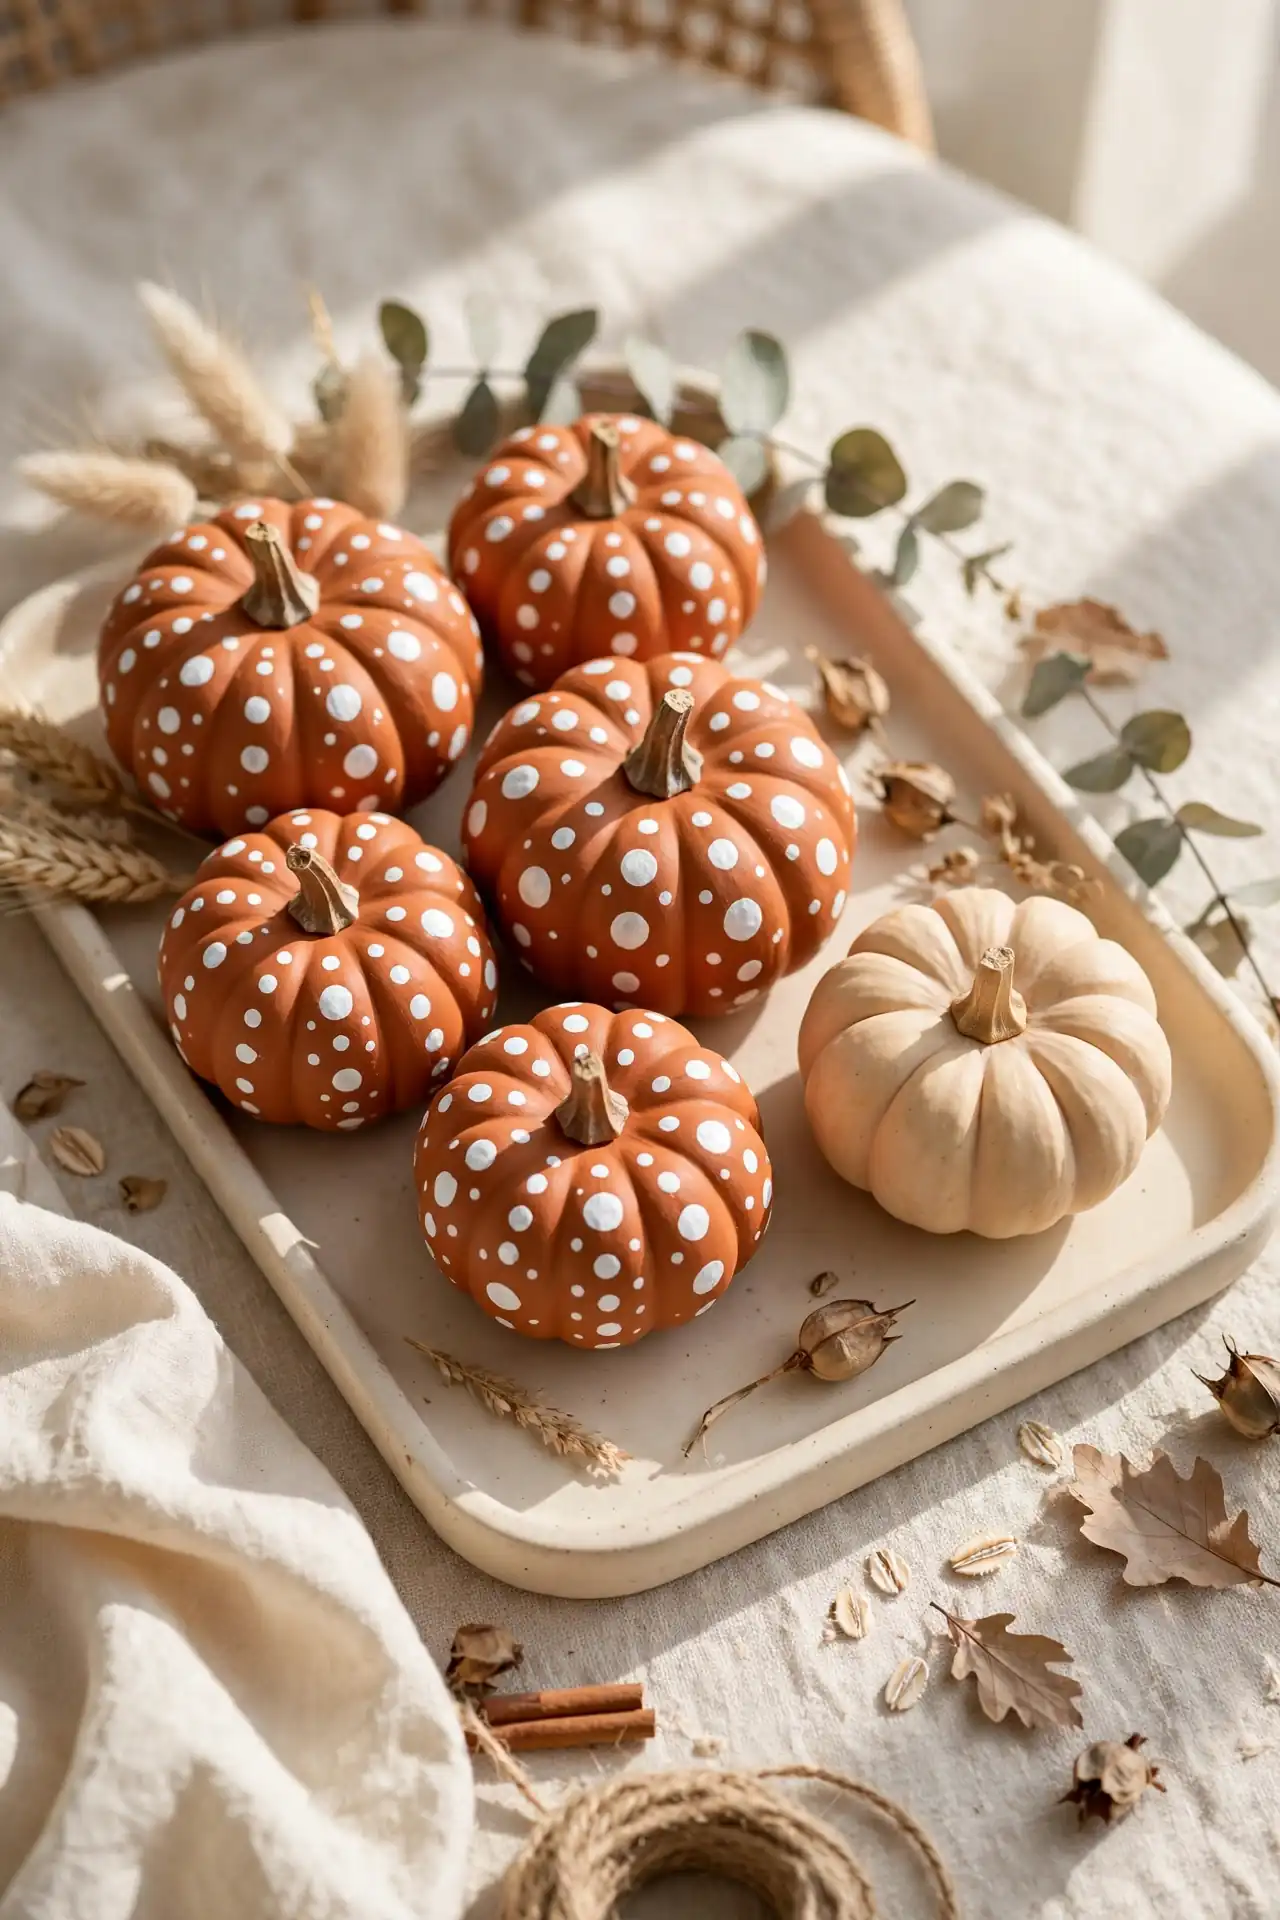
Polka dots are the friendliest pattern in the painted pumpkin world. They suit kids’ rooms, cheerful kitchens, and anyone who finds fussy florals intimidating. The stamping trick means zero drawing skill is required. Space your dots evenly and step back often; a balanced scatter reads modern while a crowded one reads messy.
Autumn Leaf Prints
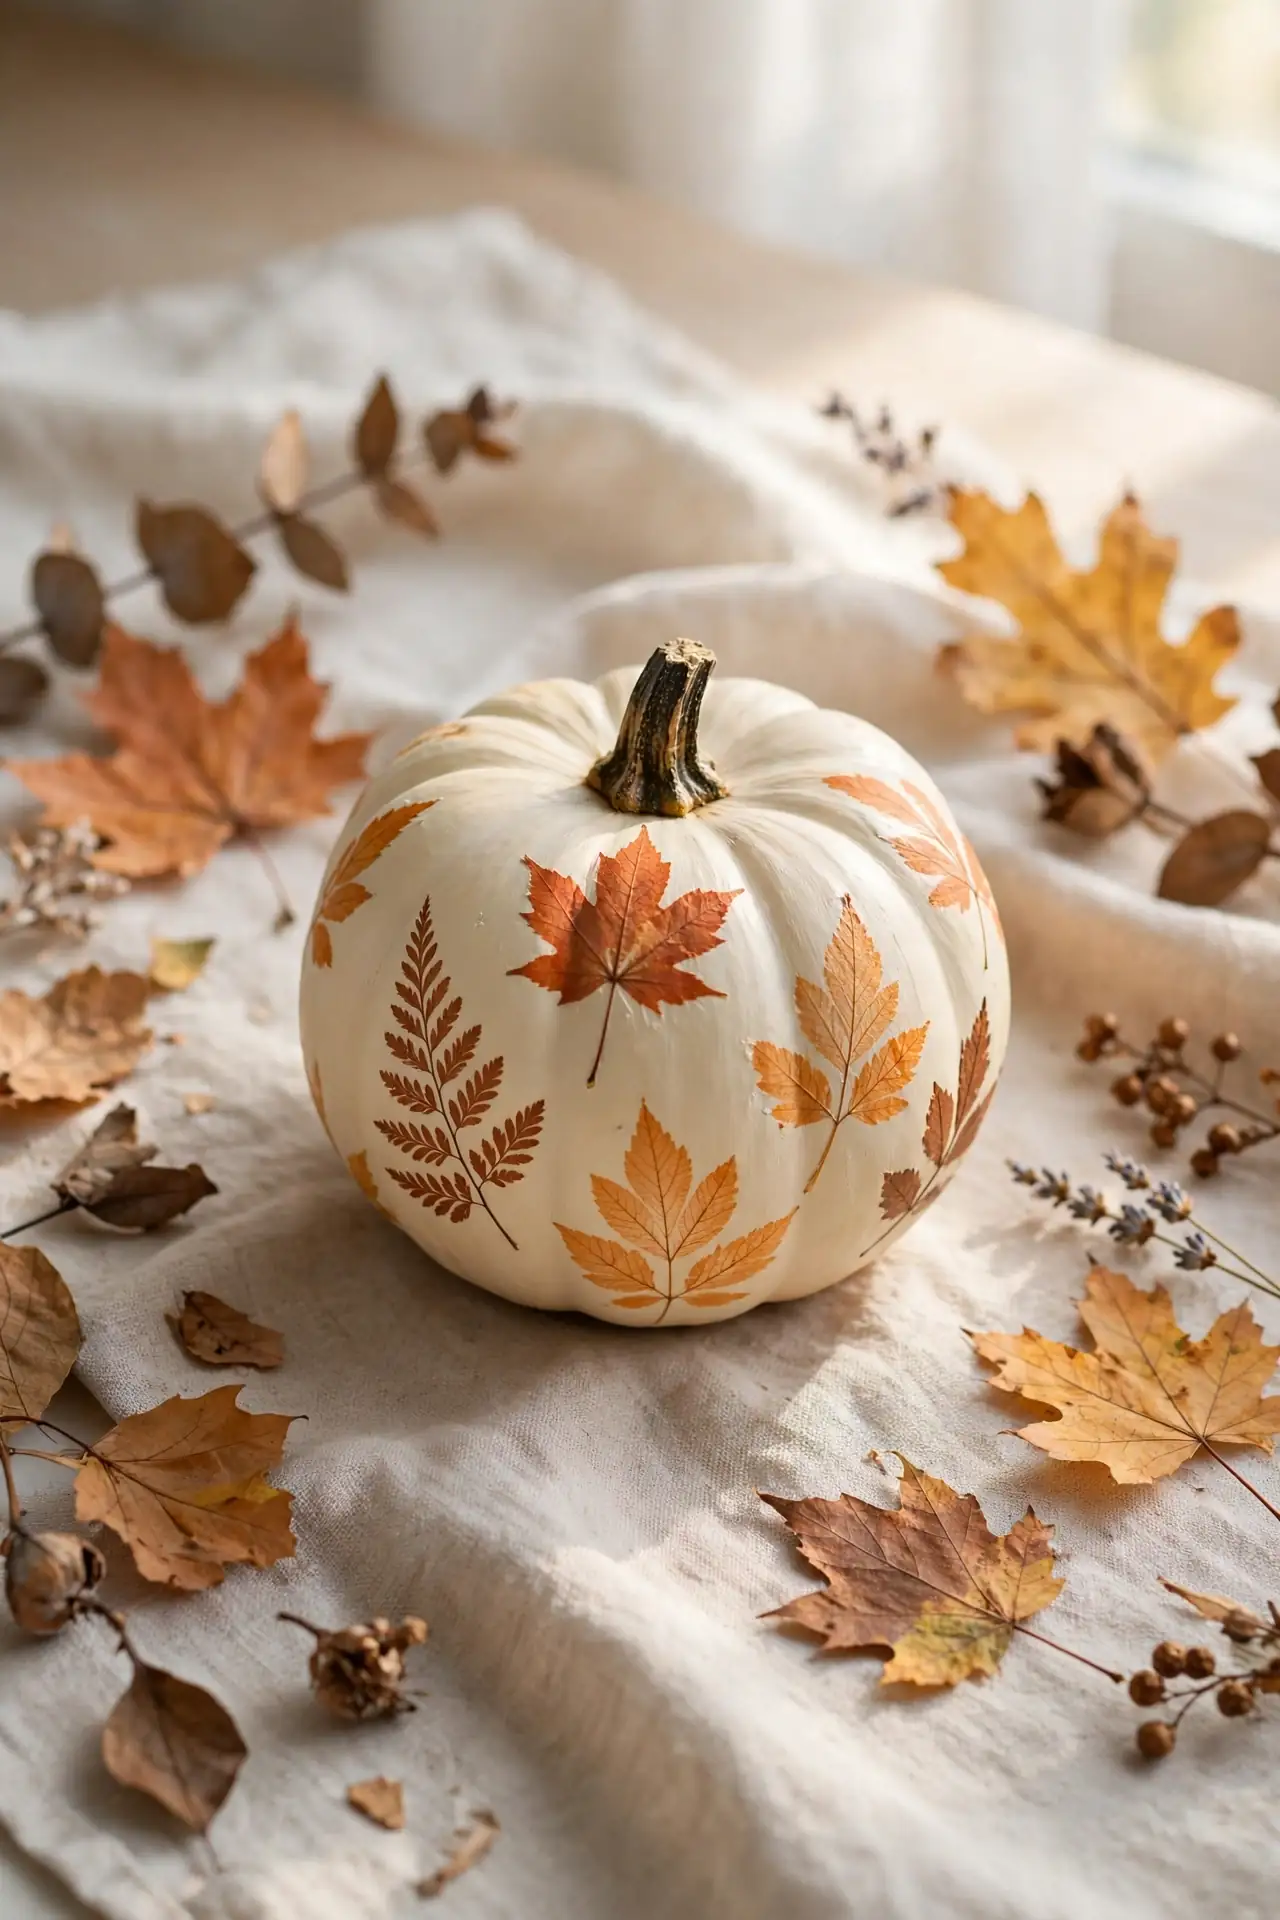
Cost: Under $10 | Time: 45 minutes | Skill Level: Beginner | Best For: Nature lovers
Real pressed leaves make the prettiest stencils, and autumn hands you the supplies for free. Paint the back of a small maple or oak leaf with acrylic, press it firmly onto the pumpkin, then lift straight up. The vein detail transfers beautifully on the first try. I’ve noticed lighter base colors, like cream or pale yellow, show the print best. Overlap two or three leaves around the pumpkin for a wreath effect. These nature-printed minis suit rustic tables, cabin weekends, and Thanksgiving centerpieces. Seal lightly so the delicate edges never peel.
Metallic Copper Glow
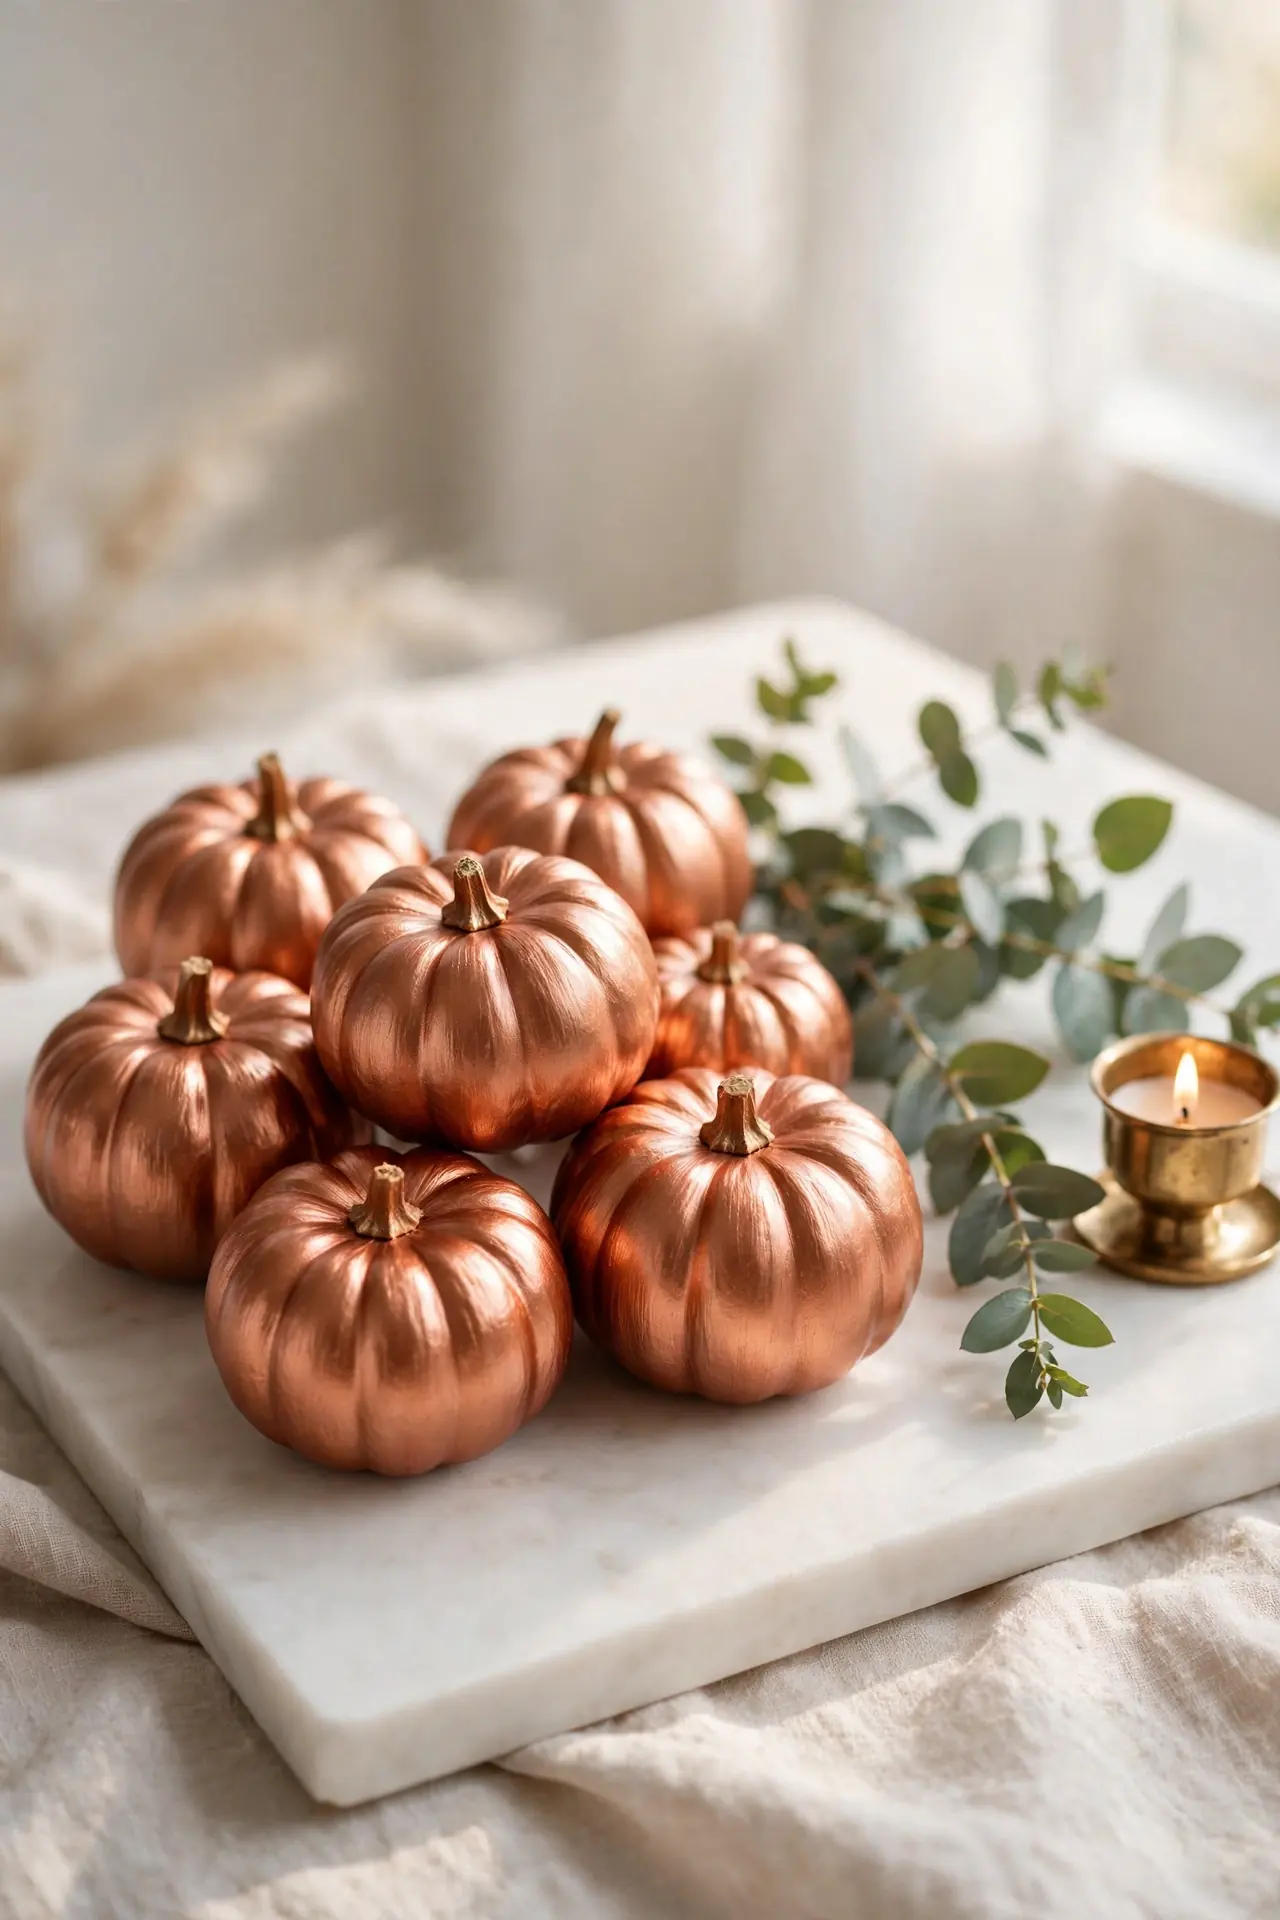
Evening light loves metallic paint, and copper minis glow like tiny lanterns on the shelf. Start with a warm brown base coat so the copper metallic layer above it looks rich and deep. Two thin coats beat one thick coat every time, since thin layers dry smooth and skip the brush marks.
Style copper pumpkins near brass candlesticks or amber glass for a collected, glowing vignette. The metallic finish flatters cream and beige surroundings, so these fit minimalist rooms as easily as rustic ones. A light clear coat protects the shine from fingerprints. Scatter five or six among plain pumpkins and the whole display feels warm and intentional.
Candy Corn Tiers
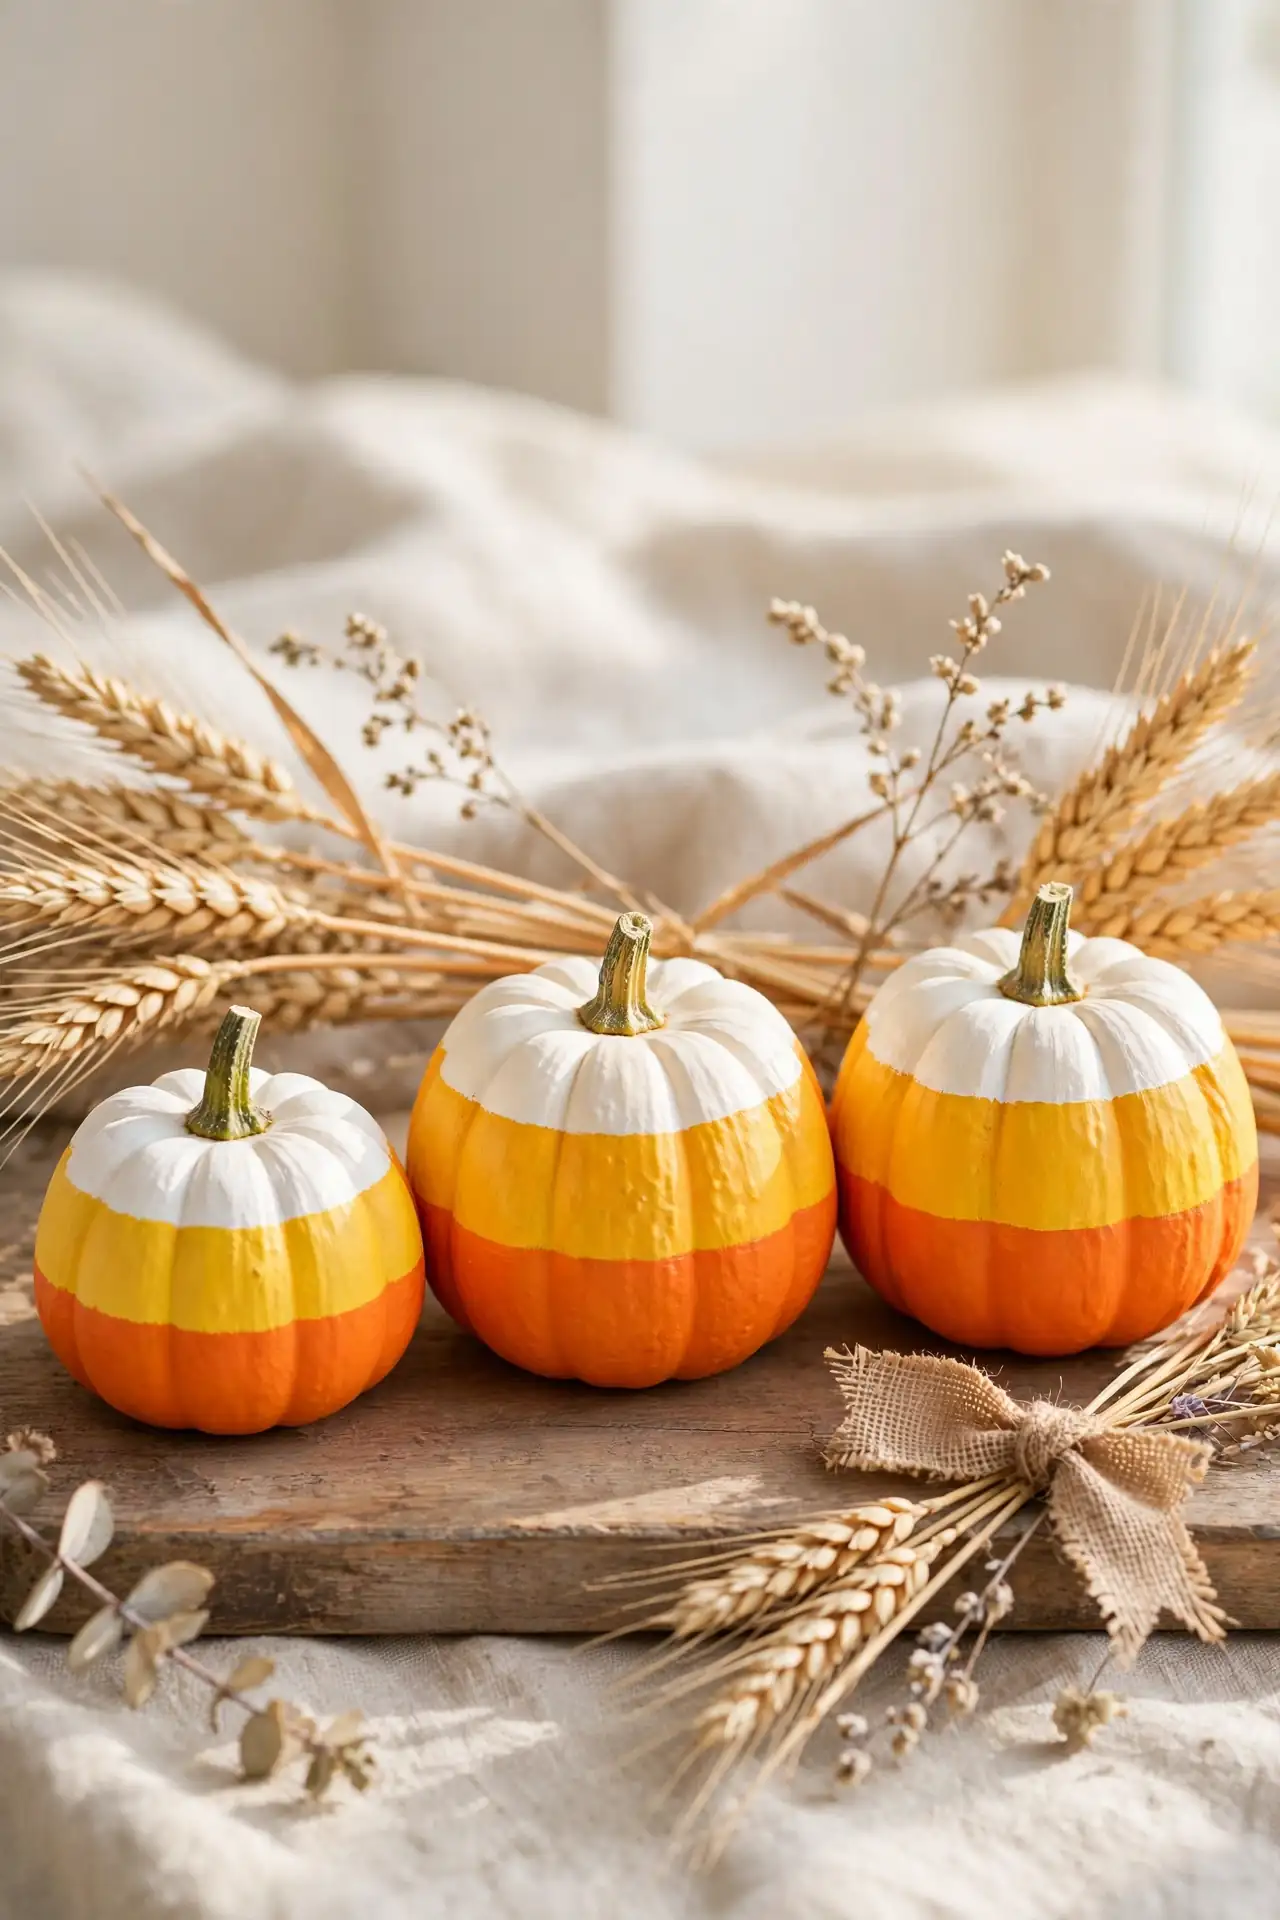
- Paint the top third white, the middle band yellow, and the bottom orange for the classic candy corn look.
- Use painter’s tape to mask each band so the dividing lines stay perfectly crisp.
- Peel the tape while the paint is slightly tacky to avoid lifting the color underneath.
- Line the finished pumpkins along a mantel or windowsill in a neat row for maximum charm.
Candy corn pumpkins deliver instant Halloween nostalgia without a single spooky element. The three bold bands read clearly even from across the room, which makes them perfect for entryway displays. I’ve tried this design with kids, and the taping step keeps little hands from making a mess. These striped treats look sweetest grouped in odd numbers.
Monogrammed Initial Pumpkins
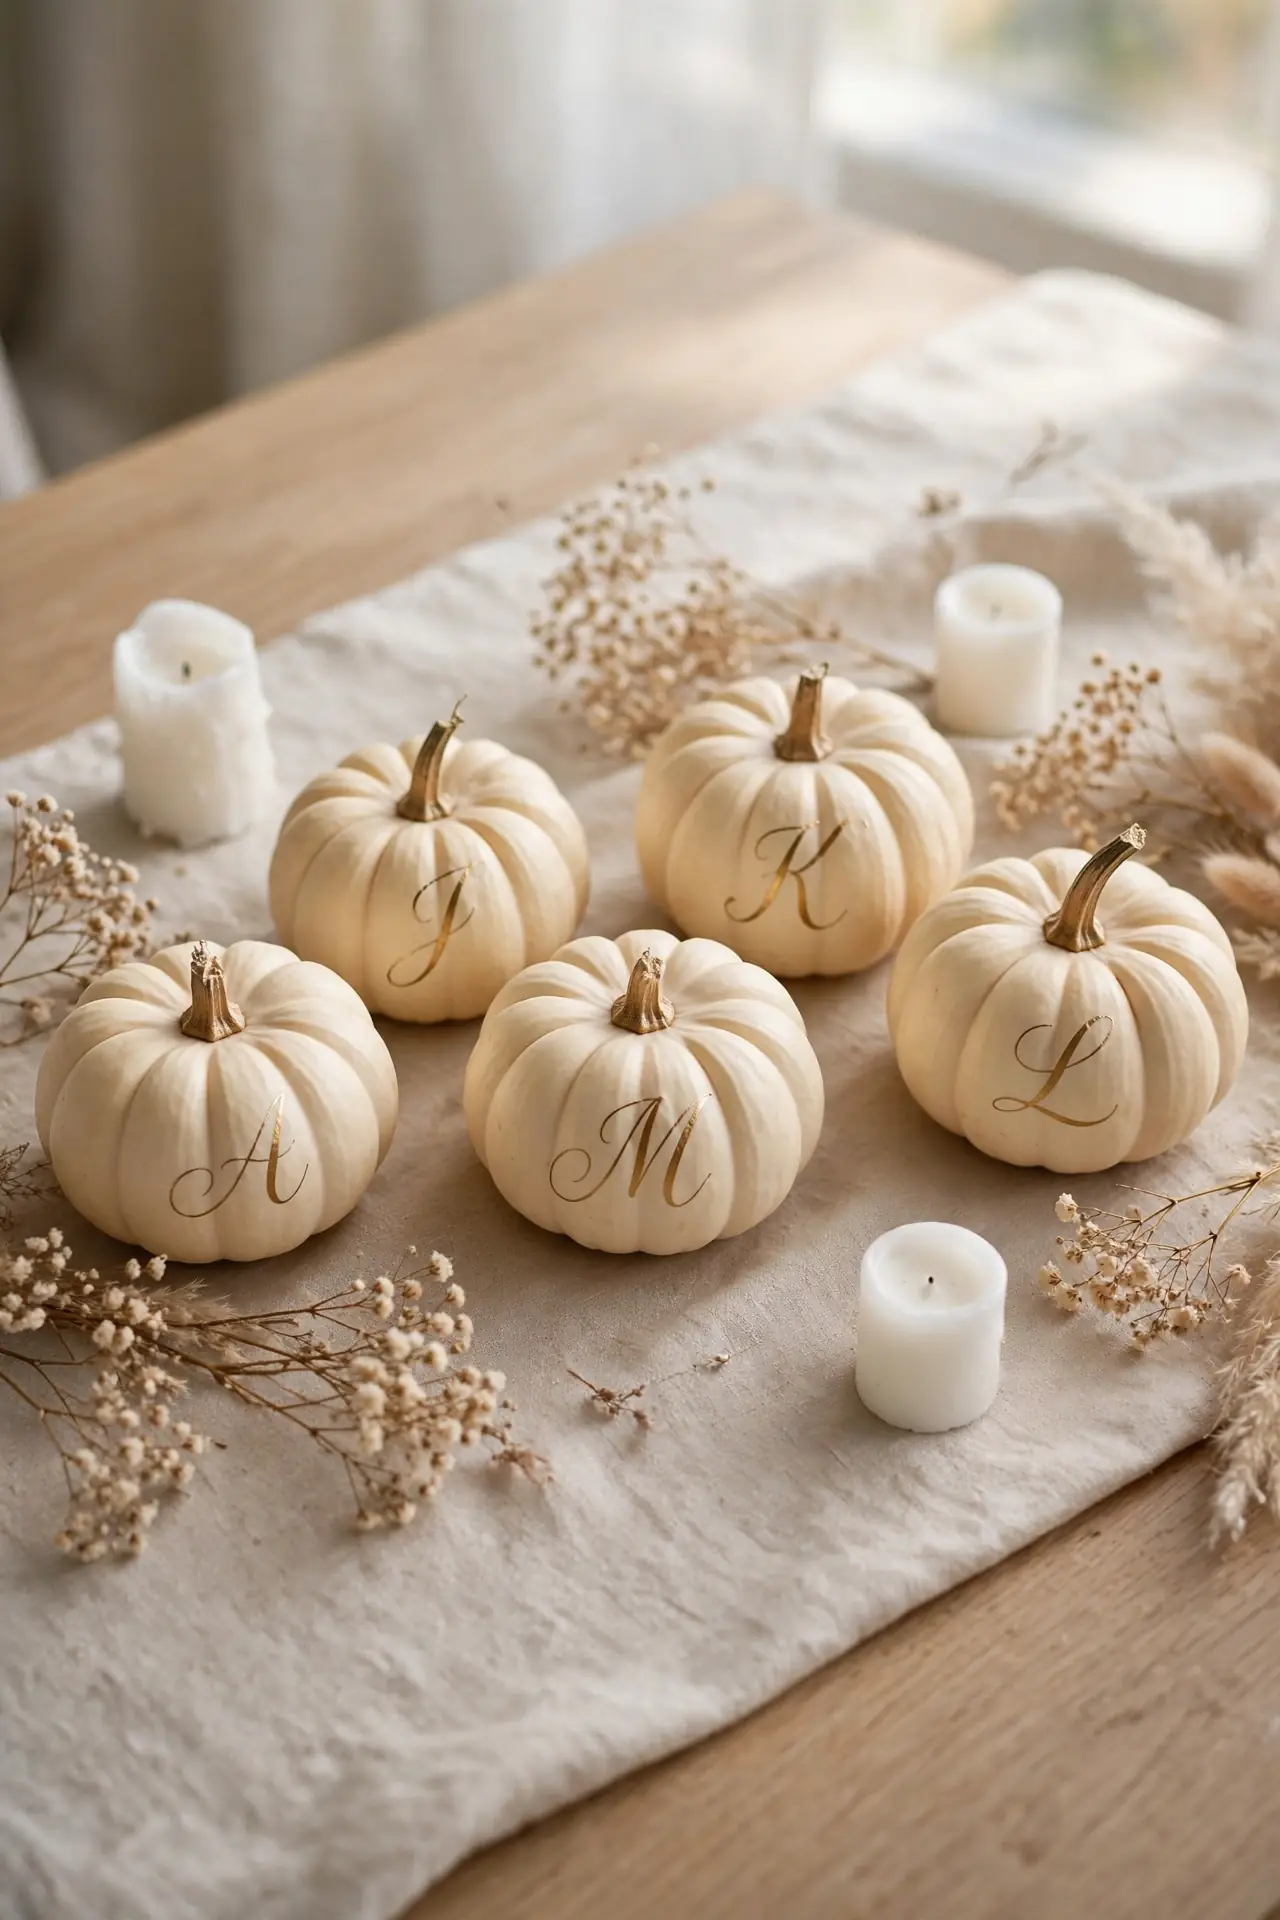
Quick Tip: Print your initial in a favorite font, rub pencil on the back of the paper, and trace it onto the pumpkin as a transfer guide. Fill in the traced letter with a fine liner brush and metallic gold paint. This transfer trick gives you crisp, confident lettering even with shaky hands.
Personalized pumpkins make thoughtful hostess gifts and place cards that guests take home. One initial per pumpkin keeps the look elegant, and gold on cream suits almost any table setting. Practice on paper first to find the letter size that fits the curve. Seal with gloss sealer so the metallic lettering catches the light beautifully.
Sunset Ombre Blend
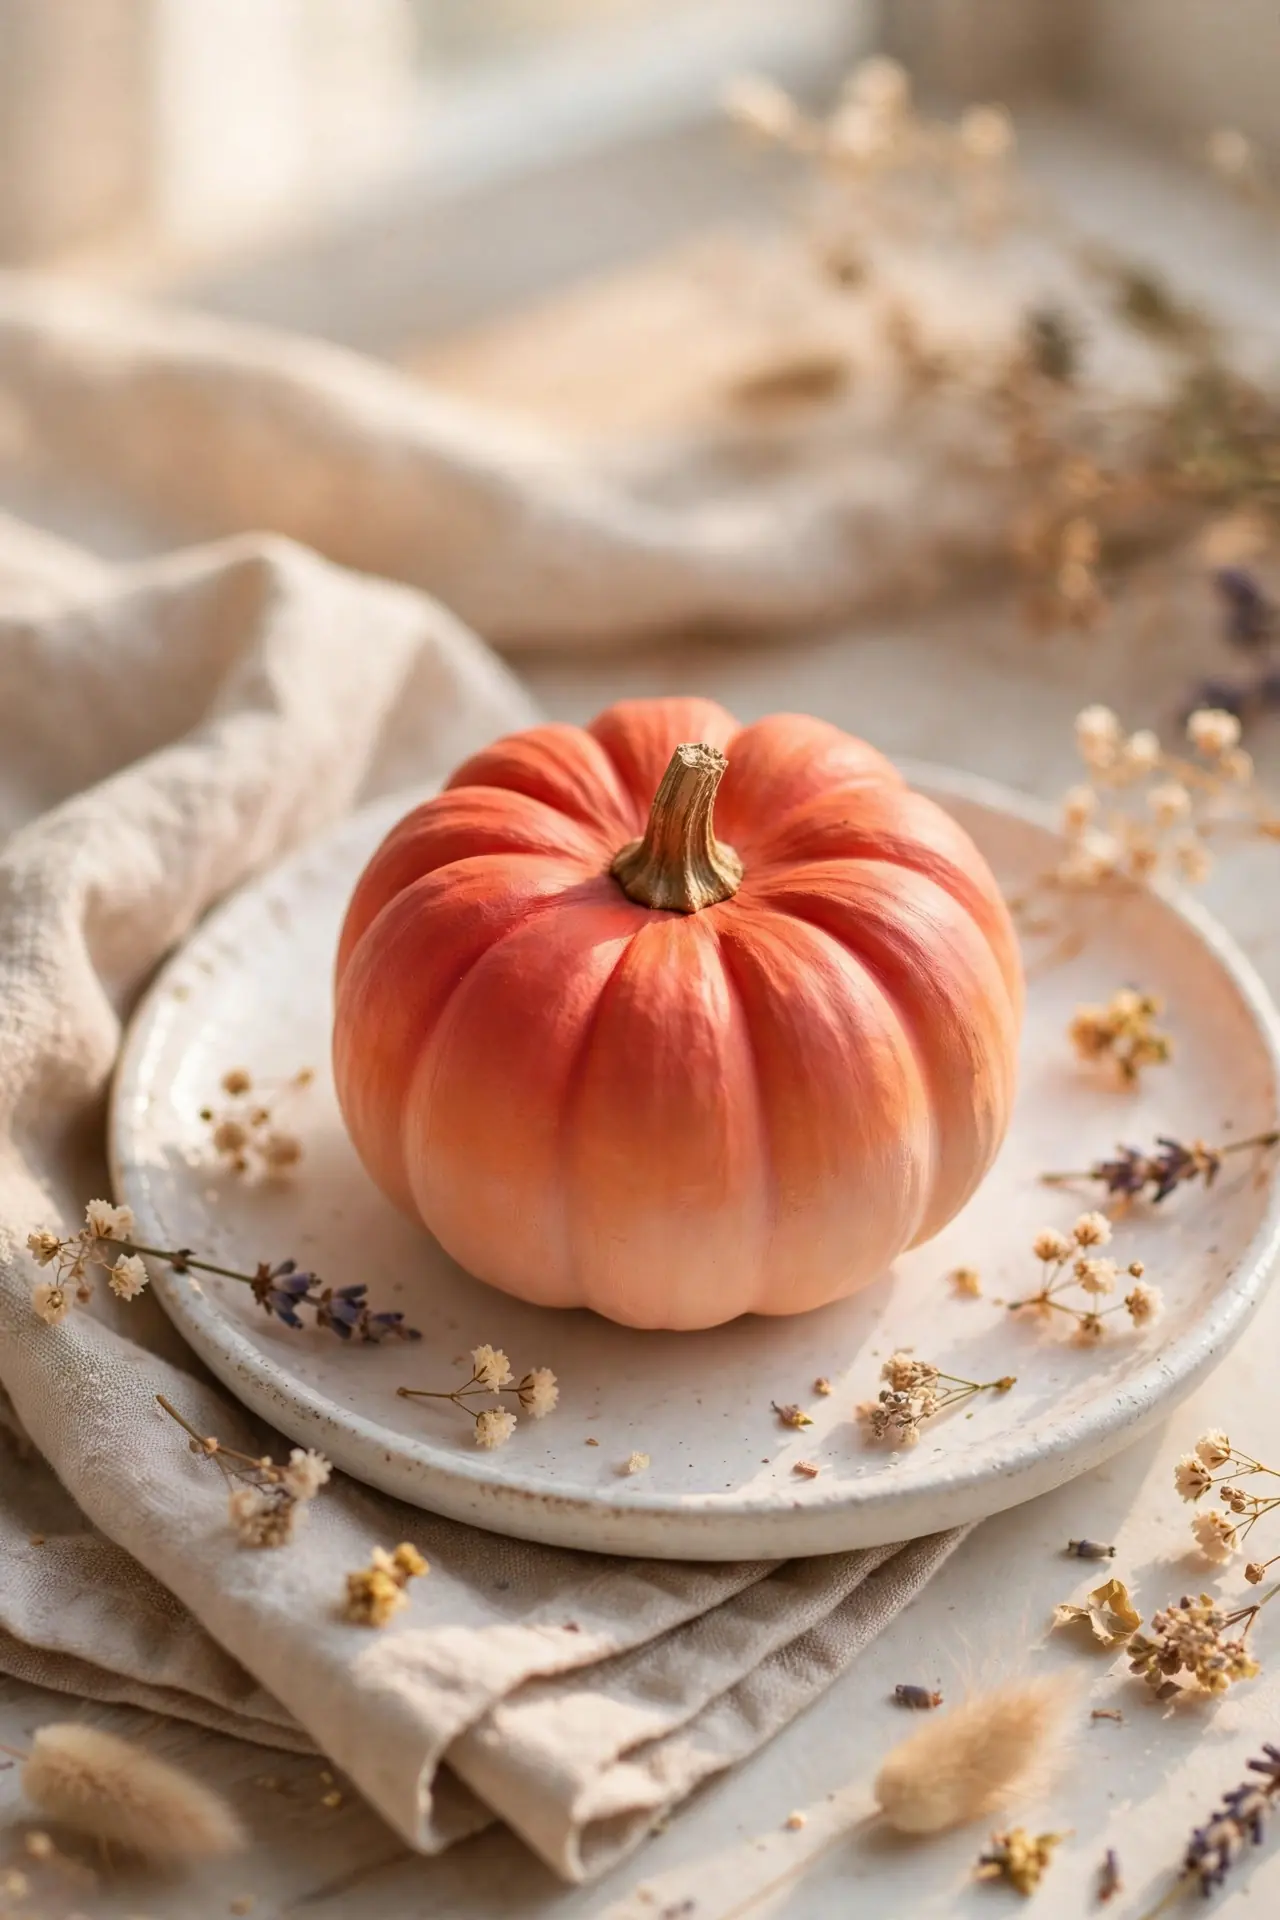
BEFORE: Flat single-color pumpkins look fine but forgettable, blending into the background of a busy fall table. The color sits on the surface without any depth or movement.
AFTER: A soft ombre melt from deep coral at the top to pale peach at the base glows like a tiny sunset. Each pumpkin looks hand-dyed and artistic, drawing eyes across the whole display.
Blend the colors while both are wet, using a dry soft brush to feather the meeting point. Work from the darkest shade at the stem down to the lightest at the base for the most natural fade. Keep a damp cloth nearby to soften any harsh line before it dries. This dreamy finish suits romantic tables and pastel fall themes.
Bee and Honeycomb
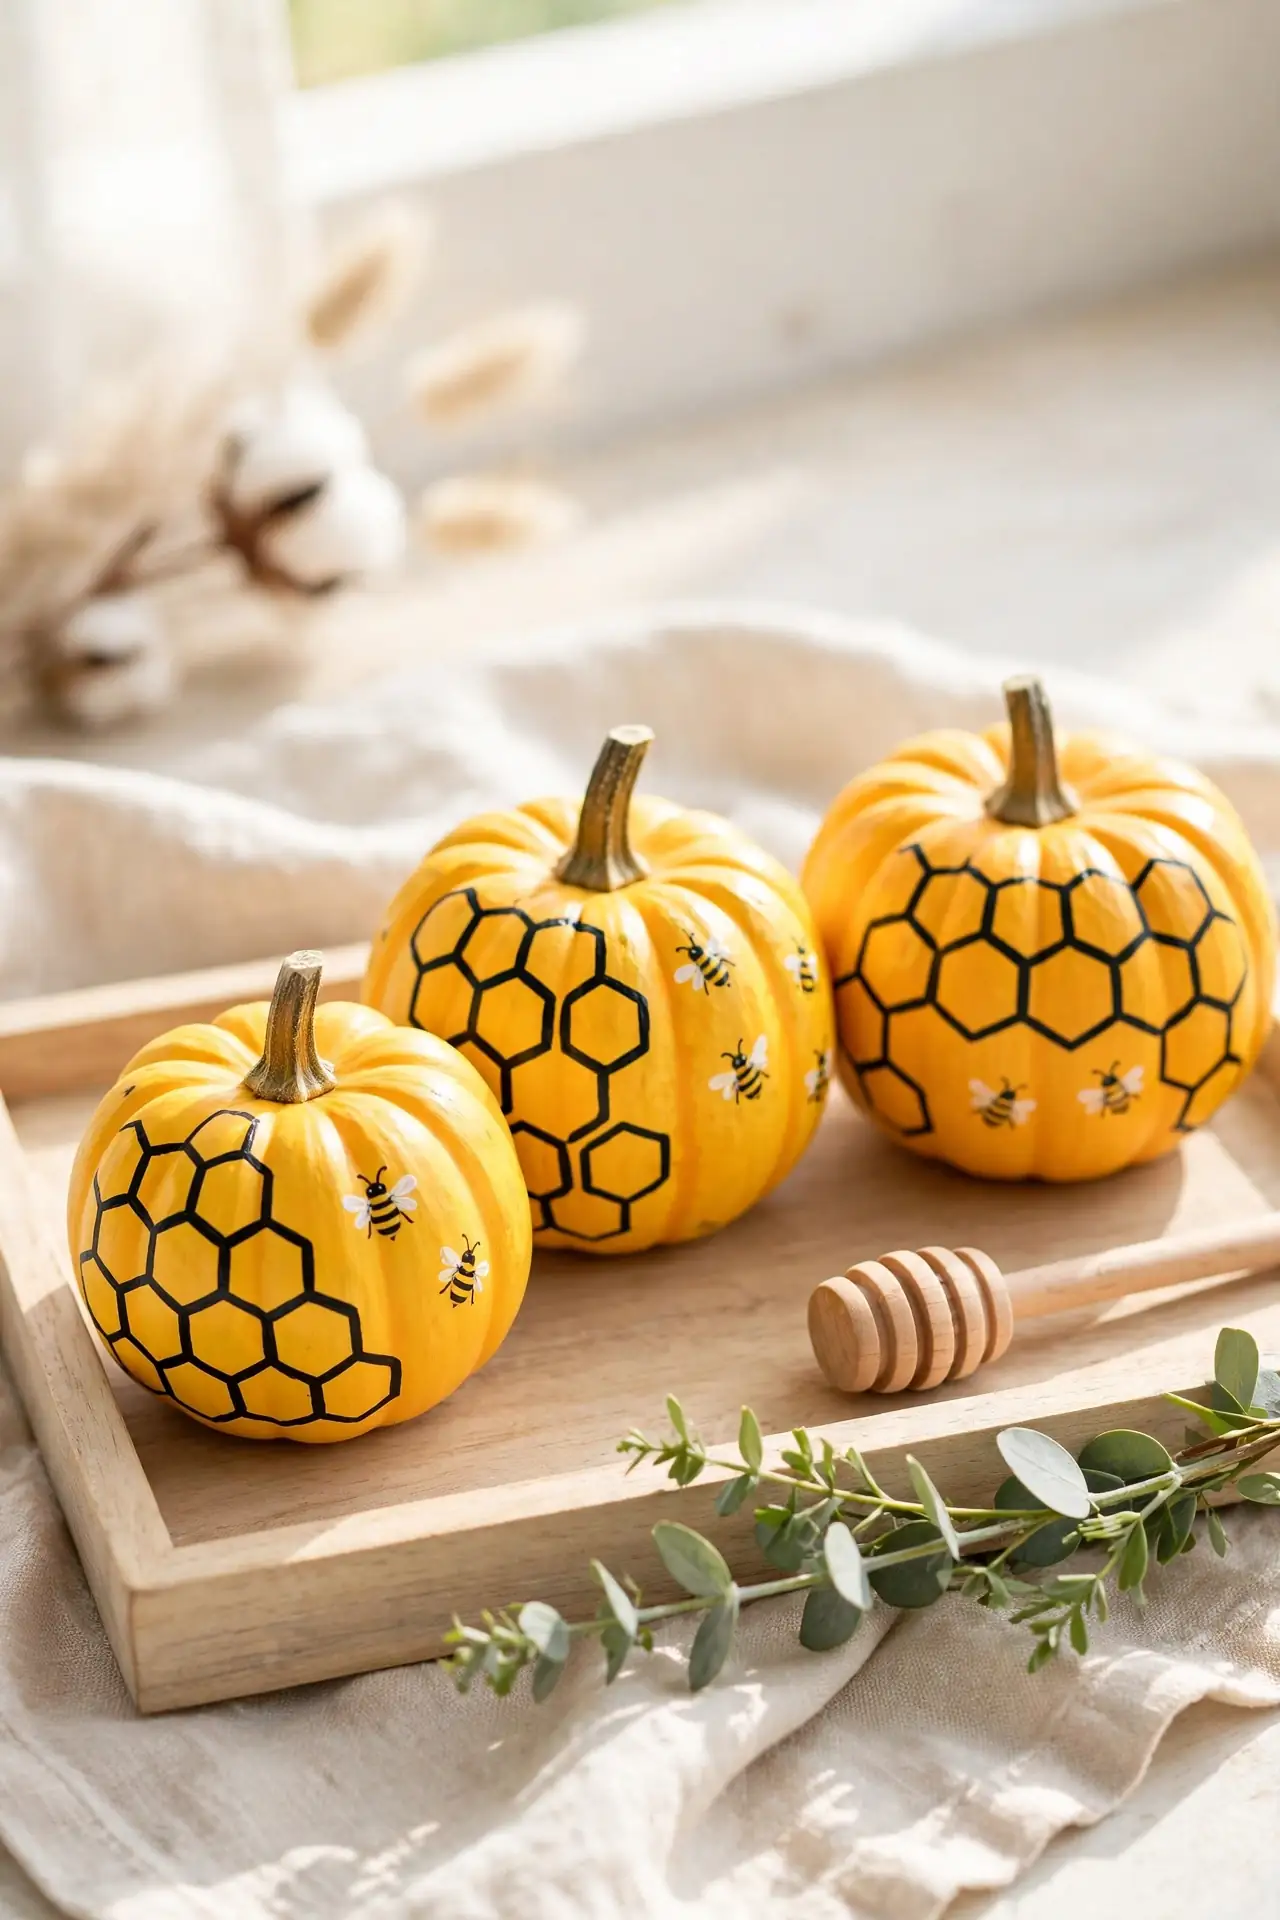
- Paint the pumpkin sunny yellow and let the base dry fully before drawing.
- Sketch a loose honeycomb pattern in pencil, then paint the hexagon outlines in dark brown.
- Add tiny bees with a black oval body, two white wings, and one thin stripe.
- Dot a few flying trails around the bees and seal everything with matte spray.
Busy little bees turn mini pumpkins into the sweetest kitchen decor. The yellow and black palette pops against white cabinets and open shelving. Keep the bees small and slightly wonky; perfect symmetry actually looks less charming here. That’s why many experts recommend simple motifs for beginners, and this one forgives every wobble. These sunny pumpkins also brighten a breakfast nook in October.
Geometric Triangle Art
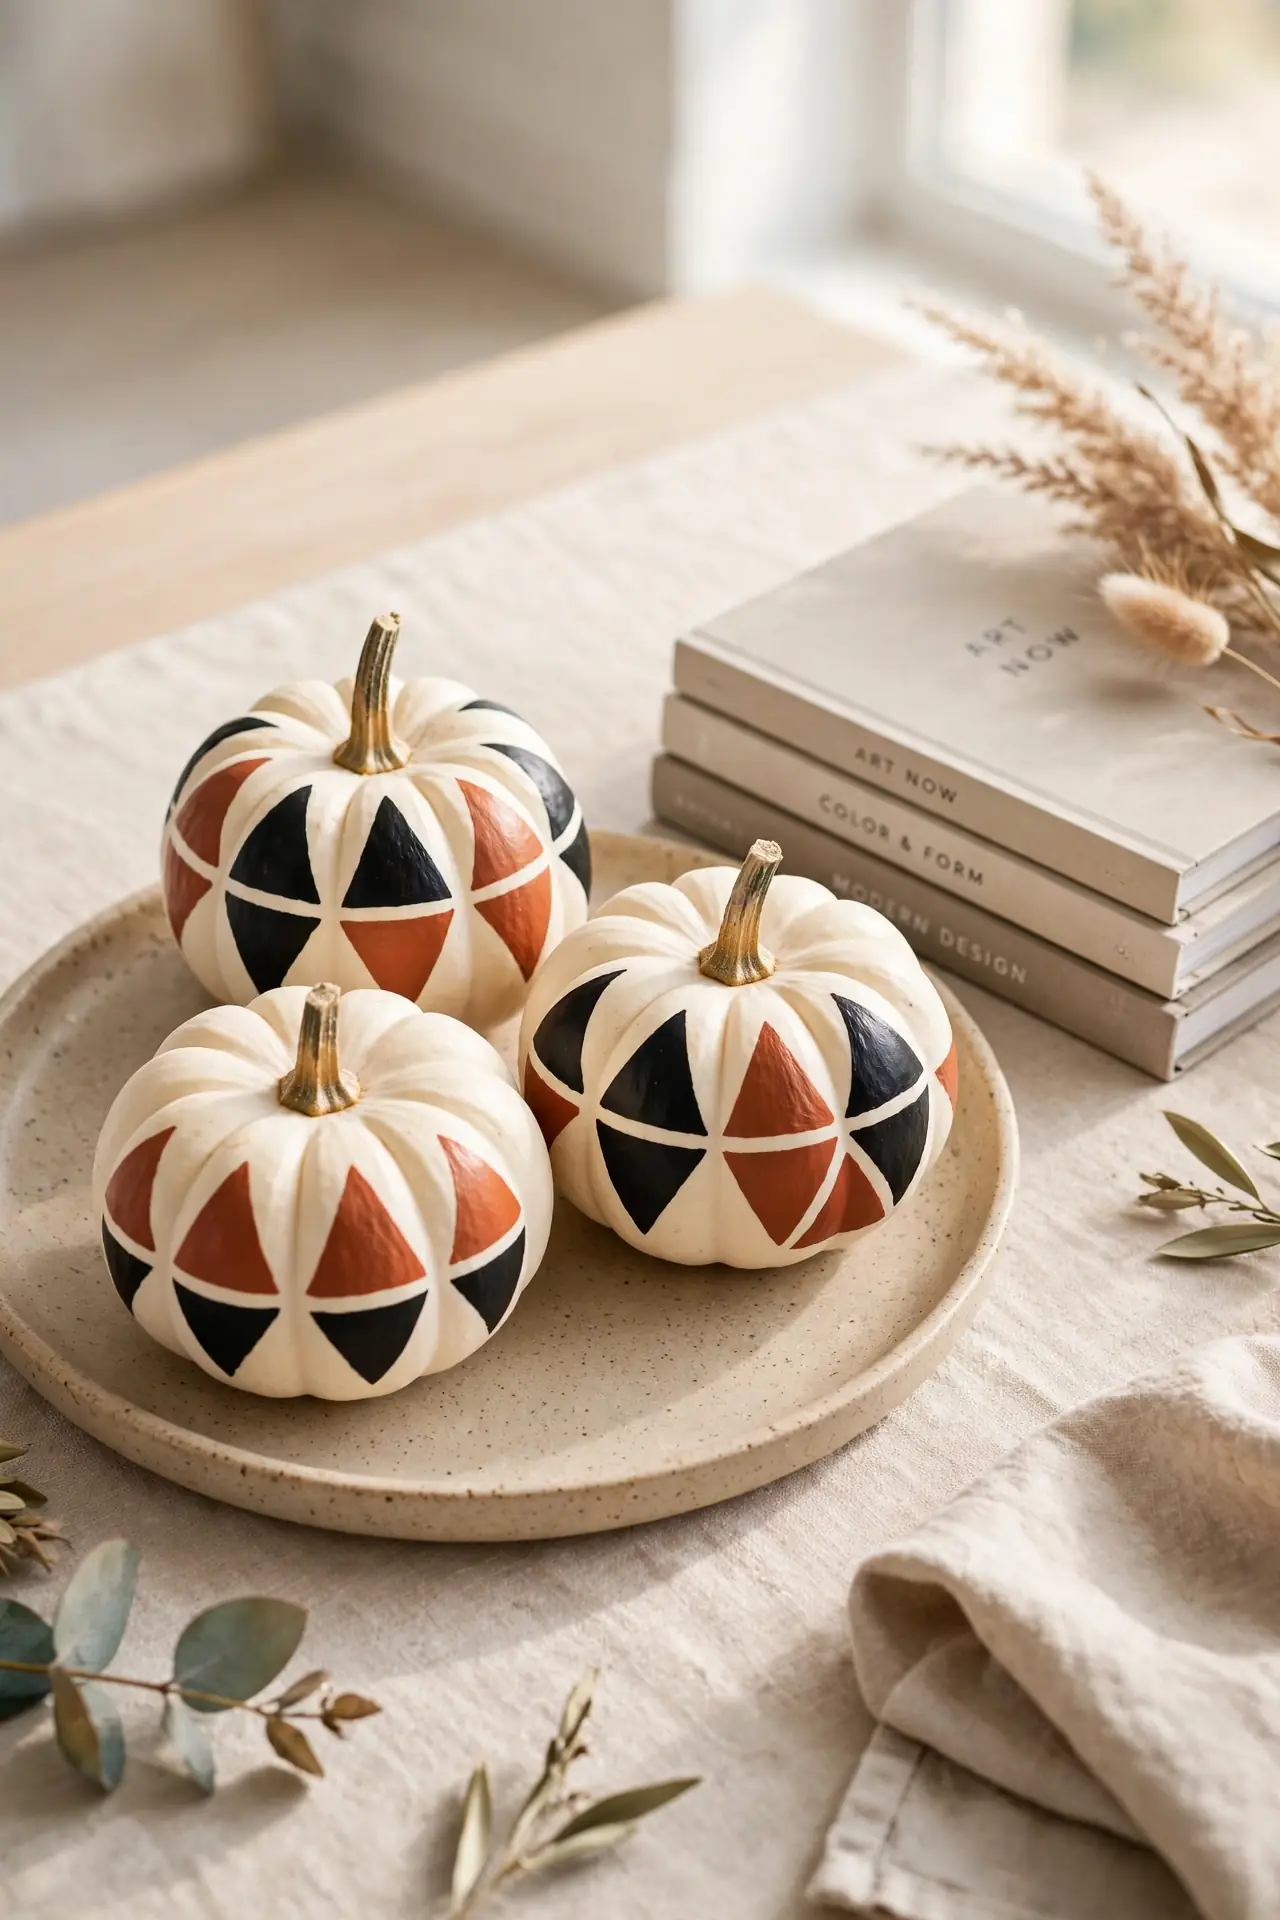
| Feature | Triangle Rows | Scattered Triangles |
|---|---|---|
| Method | Tape guides, neat horizontal bands | Freehand, playful and loose |
| Look | Bold, modern, graphic | Whimsical, folk-art feel |
| Colors | Two tones, high contrast | Three or more, mixed freely |
| Difficulty | Easy with tape | Easy, forgiving shapes |
| Best For | Modern shelves, desks | Kids’ rooms, craft fairs |
Triangles give mini pumpkins a sharp, contemporary edge that stands apart from classic fall motifs. Tape guides keep row patterns crisp, while scattered triangles forgive every wobble. Black on white reads boldest, but terracotta on cream feels warmer. Mix both approaches across a group of pumpkins for a collected gallery look. These graphic minis photograph beautifully for social sharing.
Tiny Owl Faces
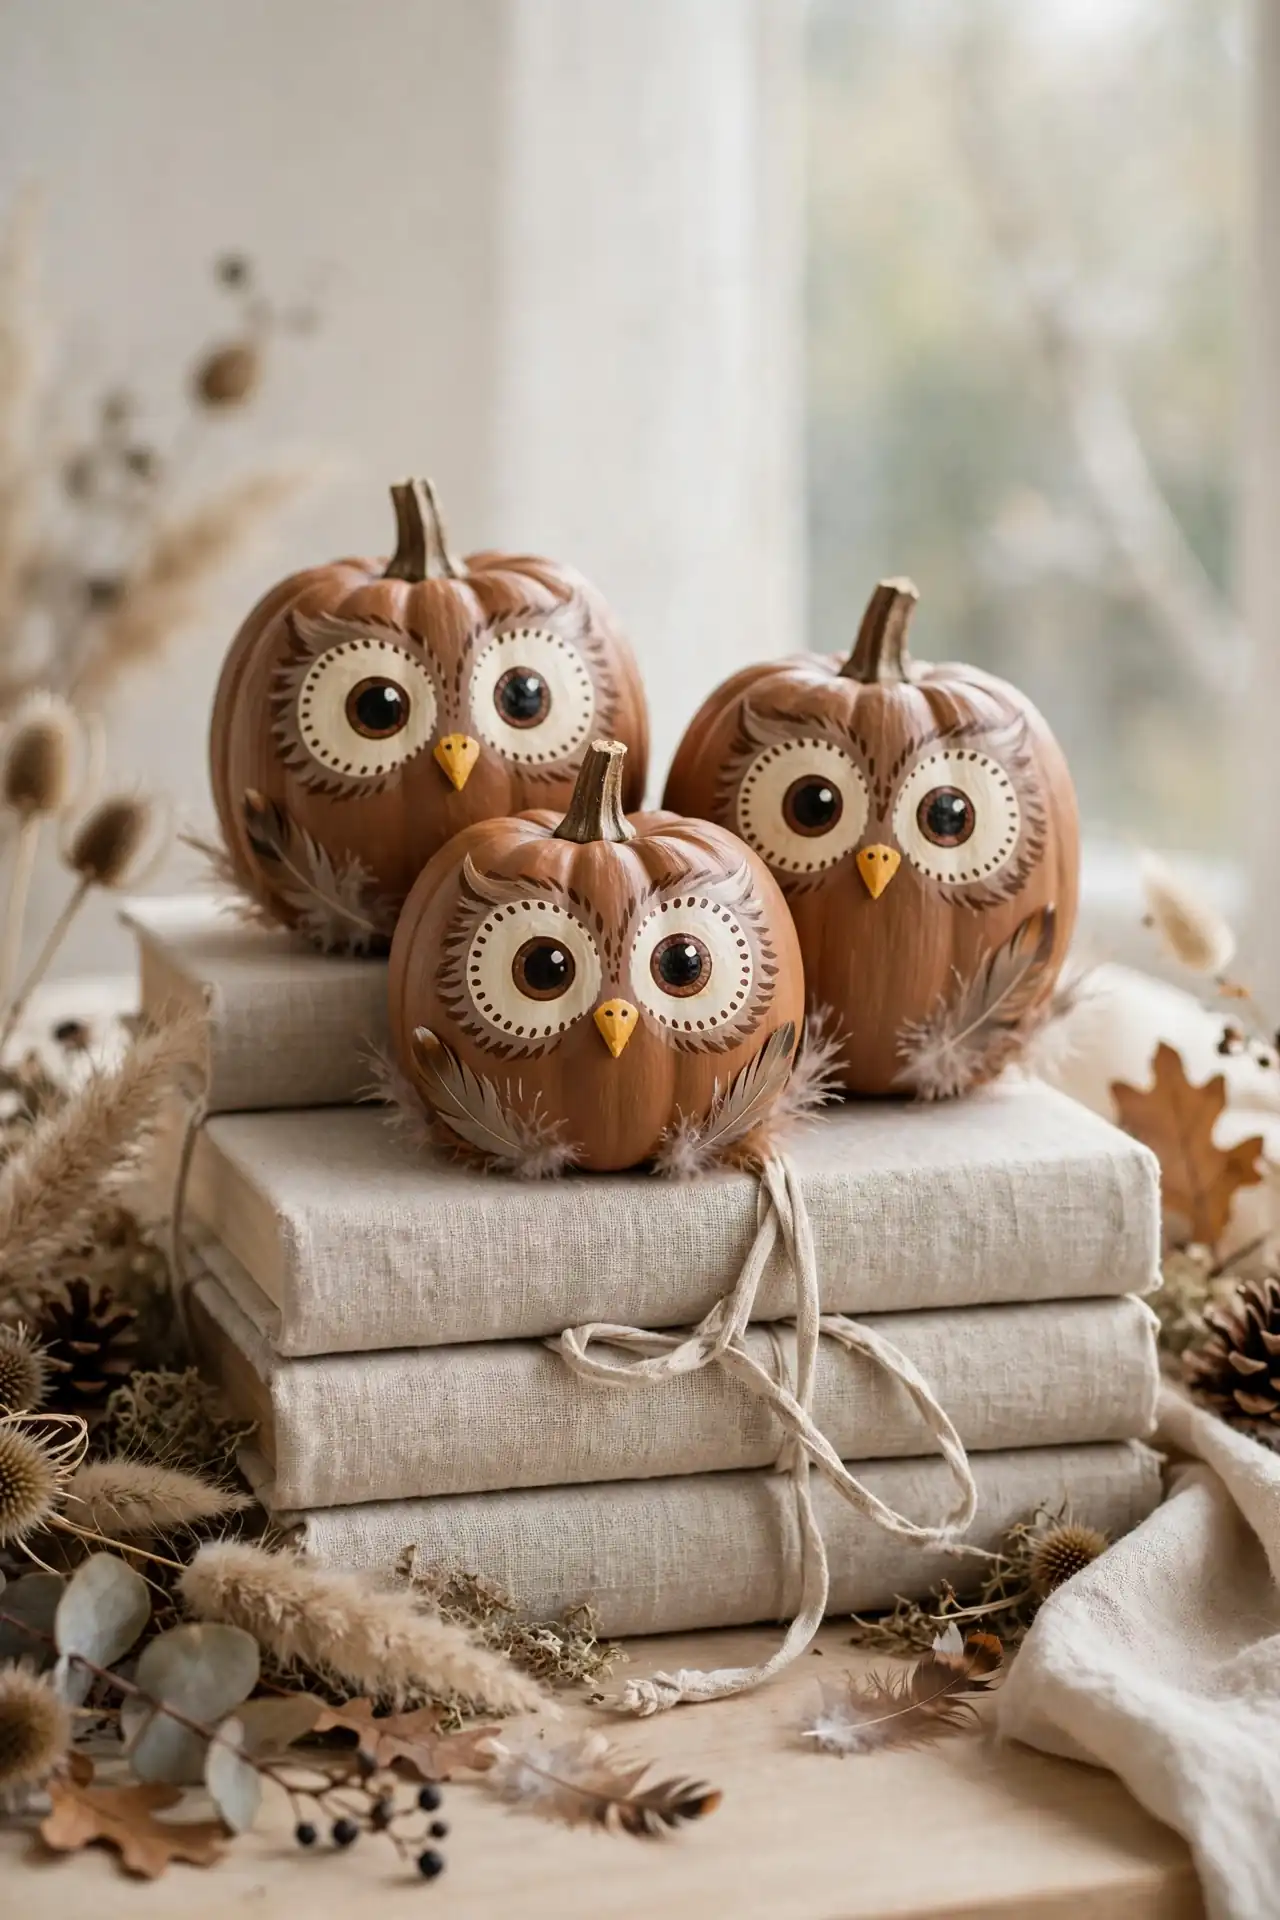
DO:
- Paint big round eyes with white circles, brown irises, and a black pupil dot.
- Add a tiny triangle beak in mustard yellow right between the eyes.
- Brush small feather strokes around the face with a dry brush technique.
DON’T:
- Don’t place the eyes too close together; wide-set eyes read cuter.
- Don’t use glossy paint for the face, since matte looks softer.
- Don’t forget the ears; two small tufts finish the owl look.
Owl faces turn mini pumpkins into woodland friends that kids absolutely adore. These little owls perch perfectly on bookshelves, nightstands, and classroom desks. For more seasonal handmade projects, explore our fall crafts for adults collection next. Paint a whole parliament of owls in different sizes for a family that delights everyone.
Watercolor Wash Pumpkins
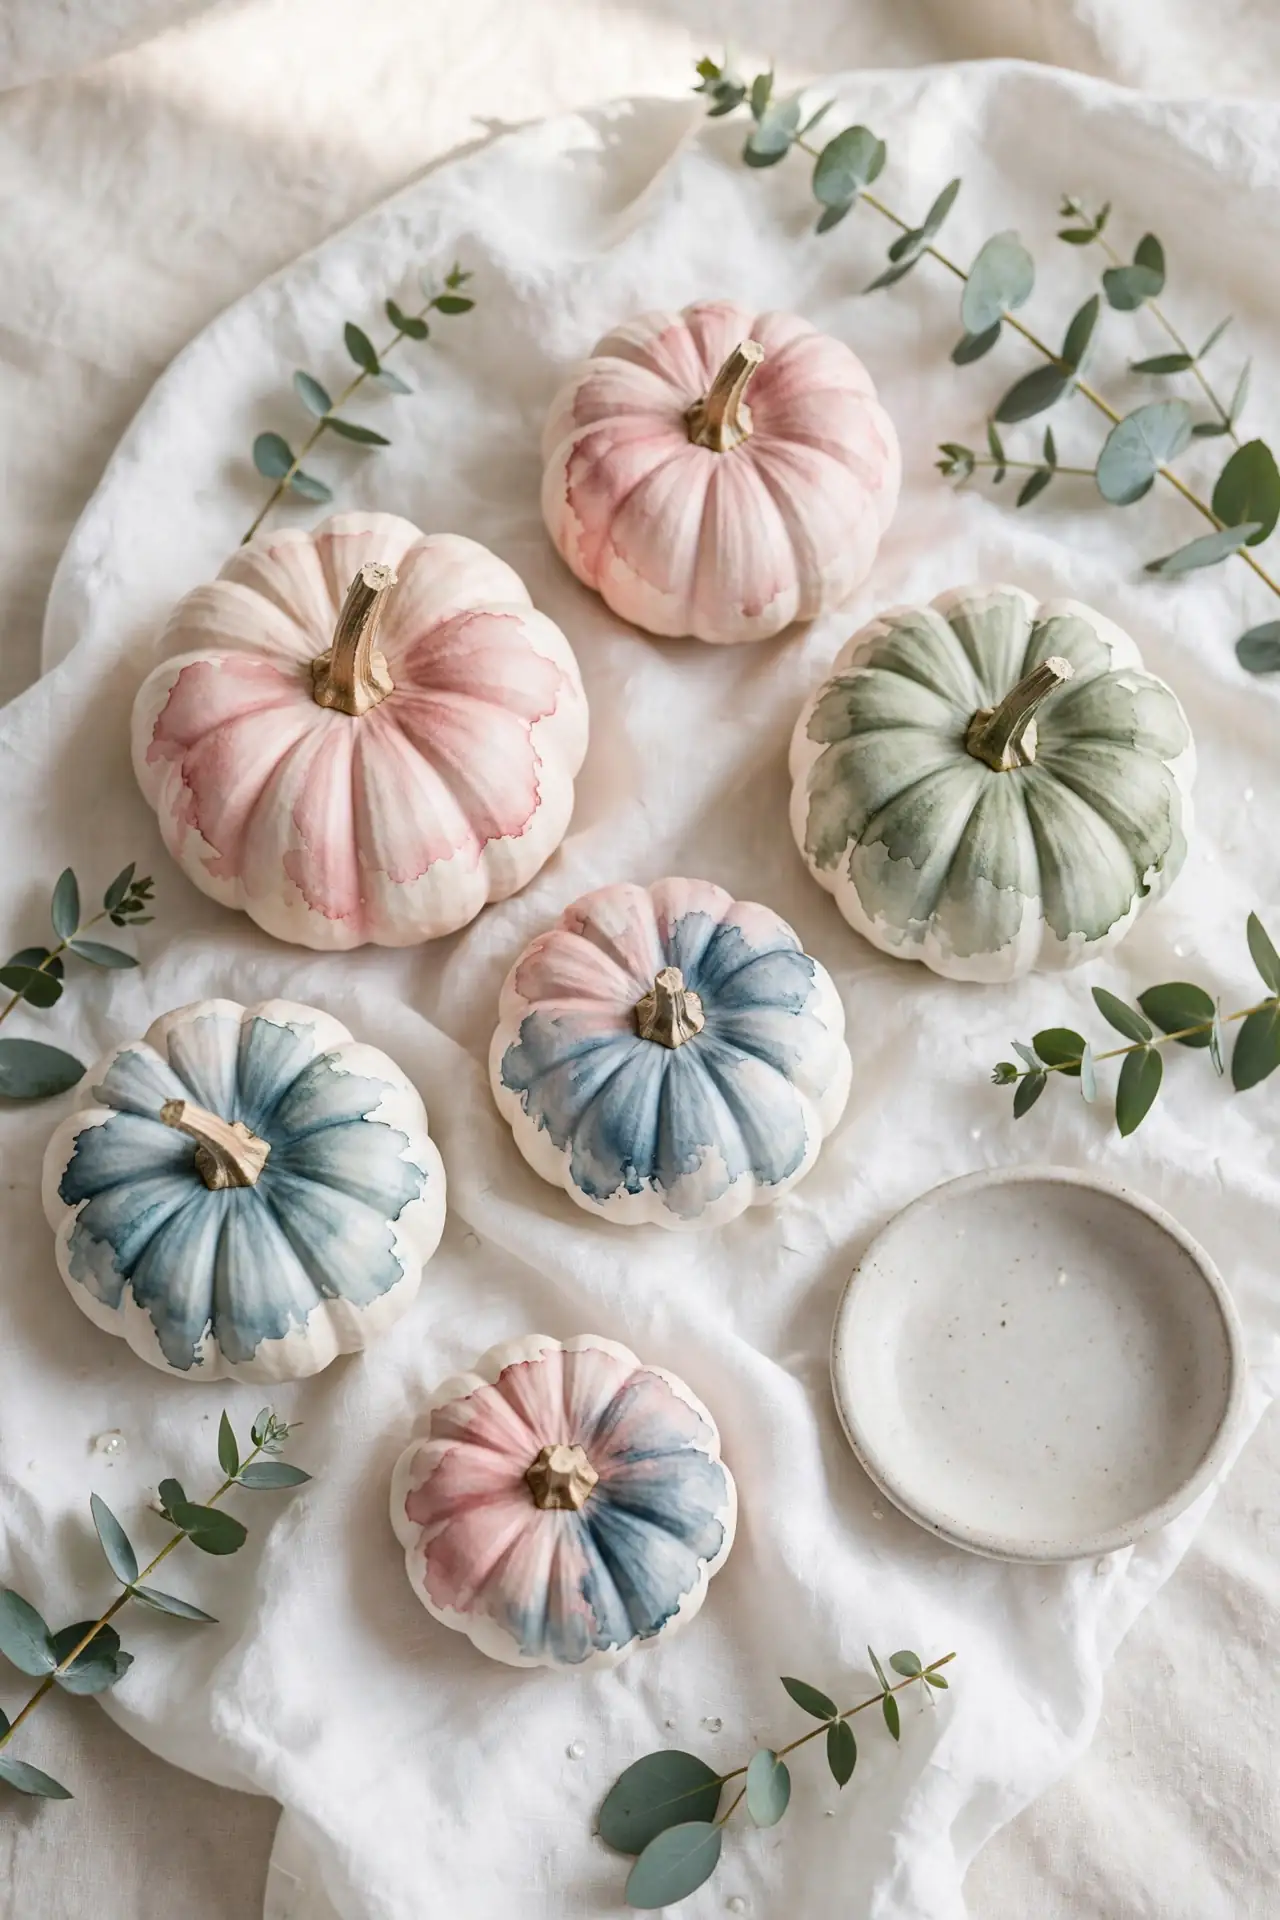
Cost: Under $15 | Time: One hour | Skill Level: Beginner | Works In: Bedrooms, bathrooms, nurseries
Thin your acrylic paint with water until it flows like ink, then brush soft washes of blush, sage, and dusty blue over a white base. The colors pool and blend on their own, creating dreamy marbled effects no brushwork could plan. Let each wash dry before adding the next so the colors stay clear instead of muddy. I’ve noticed these soft pumpkins suit quiet rooms best, where bold orange would shout. They glow in nurseries, powder rooms, and calm bedrooms. Mist the surface lightly with water while painting to keep the wash flowing smoothly.
Herringbone Lines
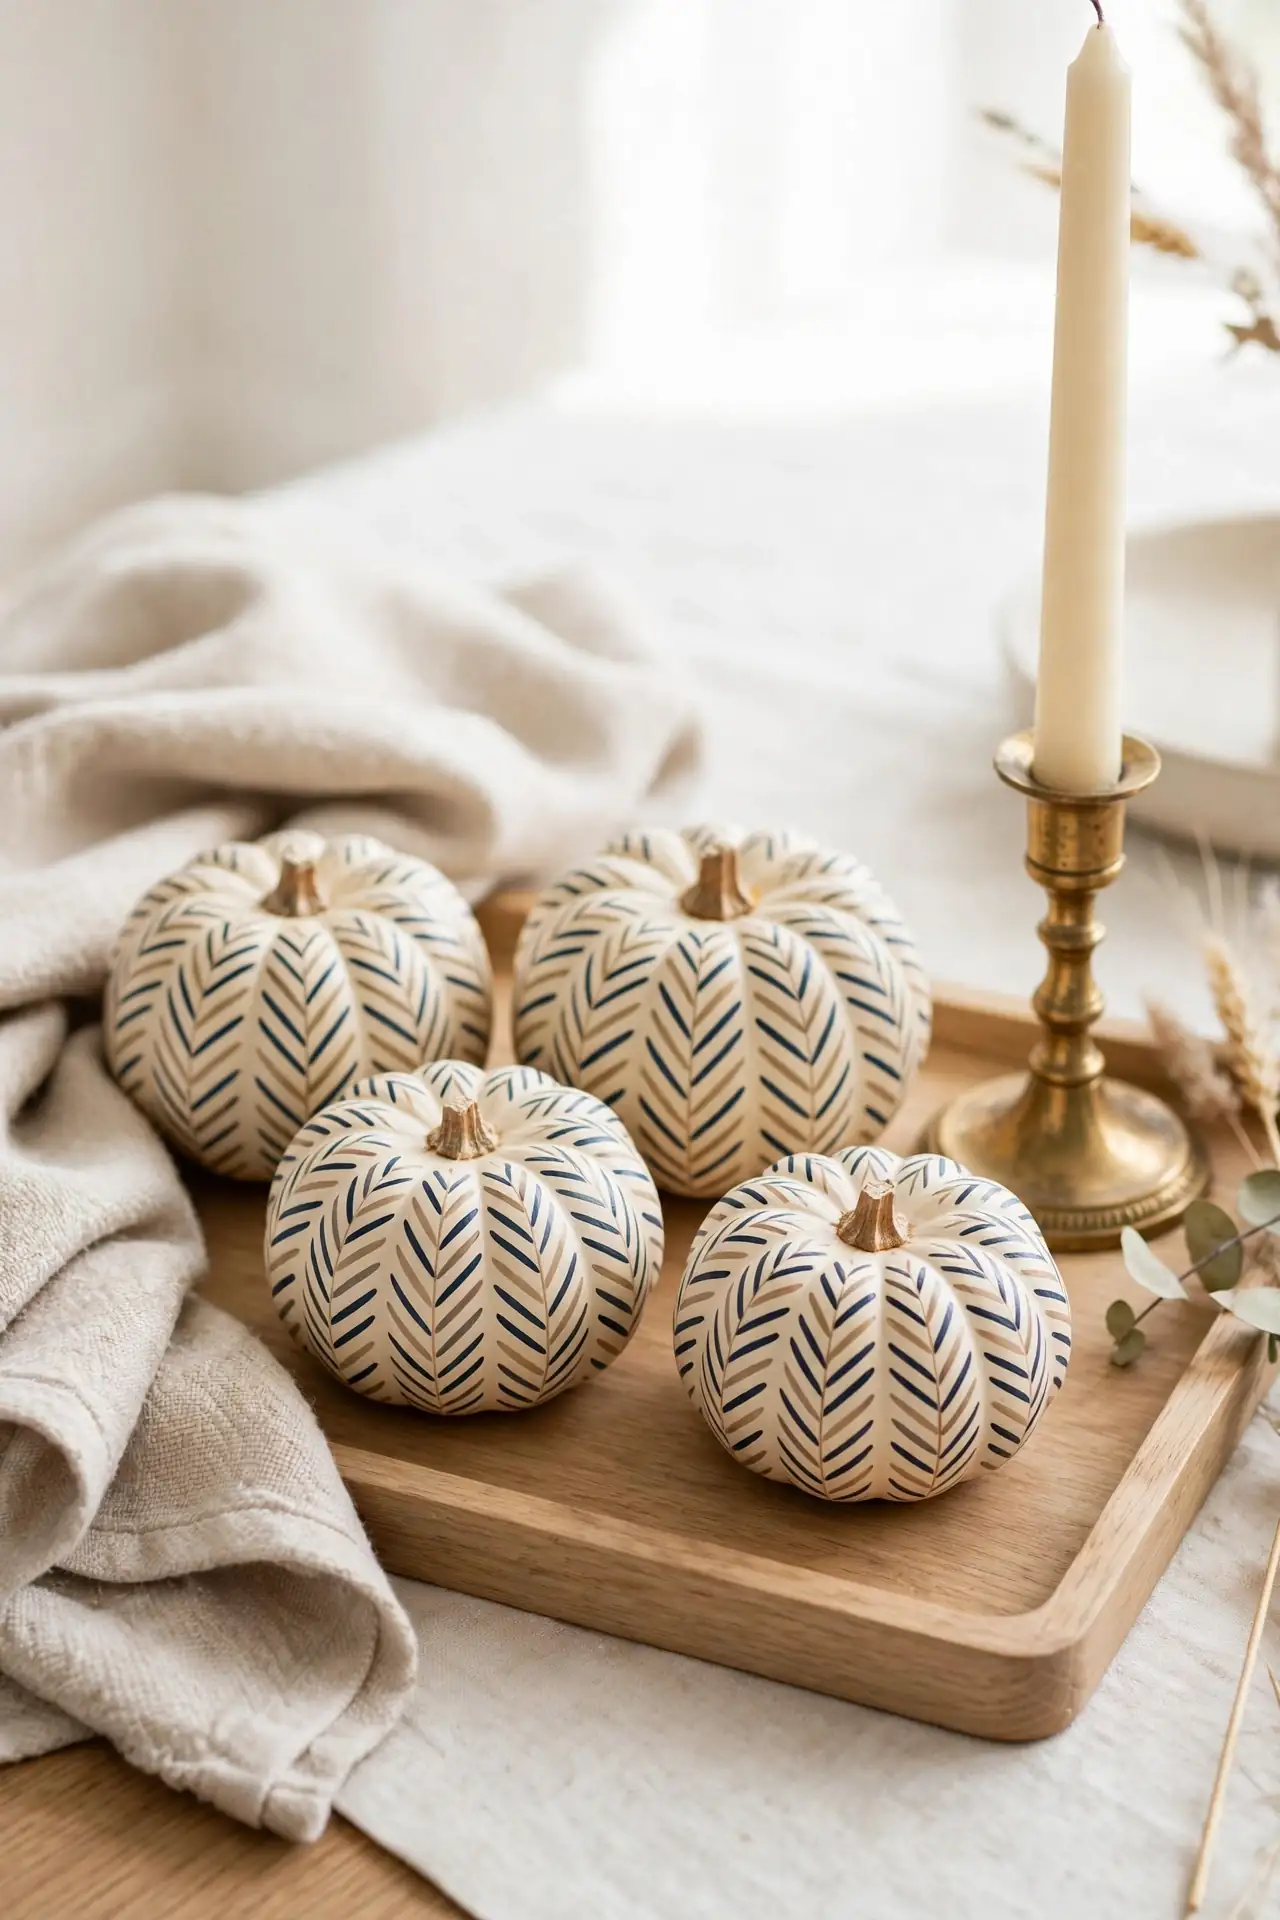
Herringbone brings tailored, menswear-inspired polish to the humblest fall craft. Paint the pumpkin cream, then draw short diagonal strokes in alternating directions with a fine liner brush. Navy and tan is the classic pairing, though charcoal and gold works for evening glam.
Keep the strokes short and evenly spaced, since rhythm matters more than precision here. A ruler helps on the first pumpkin, but your hand finds the pattern quickly after that. These preppy minis suit home offices, entryway consoles, and anyone who loves a crisp, classic look. Group them with leather-bound books and brass accents for a study in classic texture that works from September through Thanksgiving.
Starry Night Minis
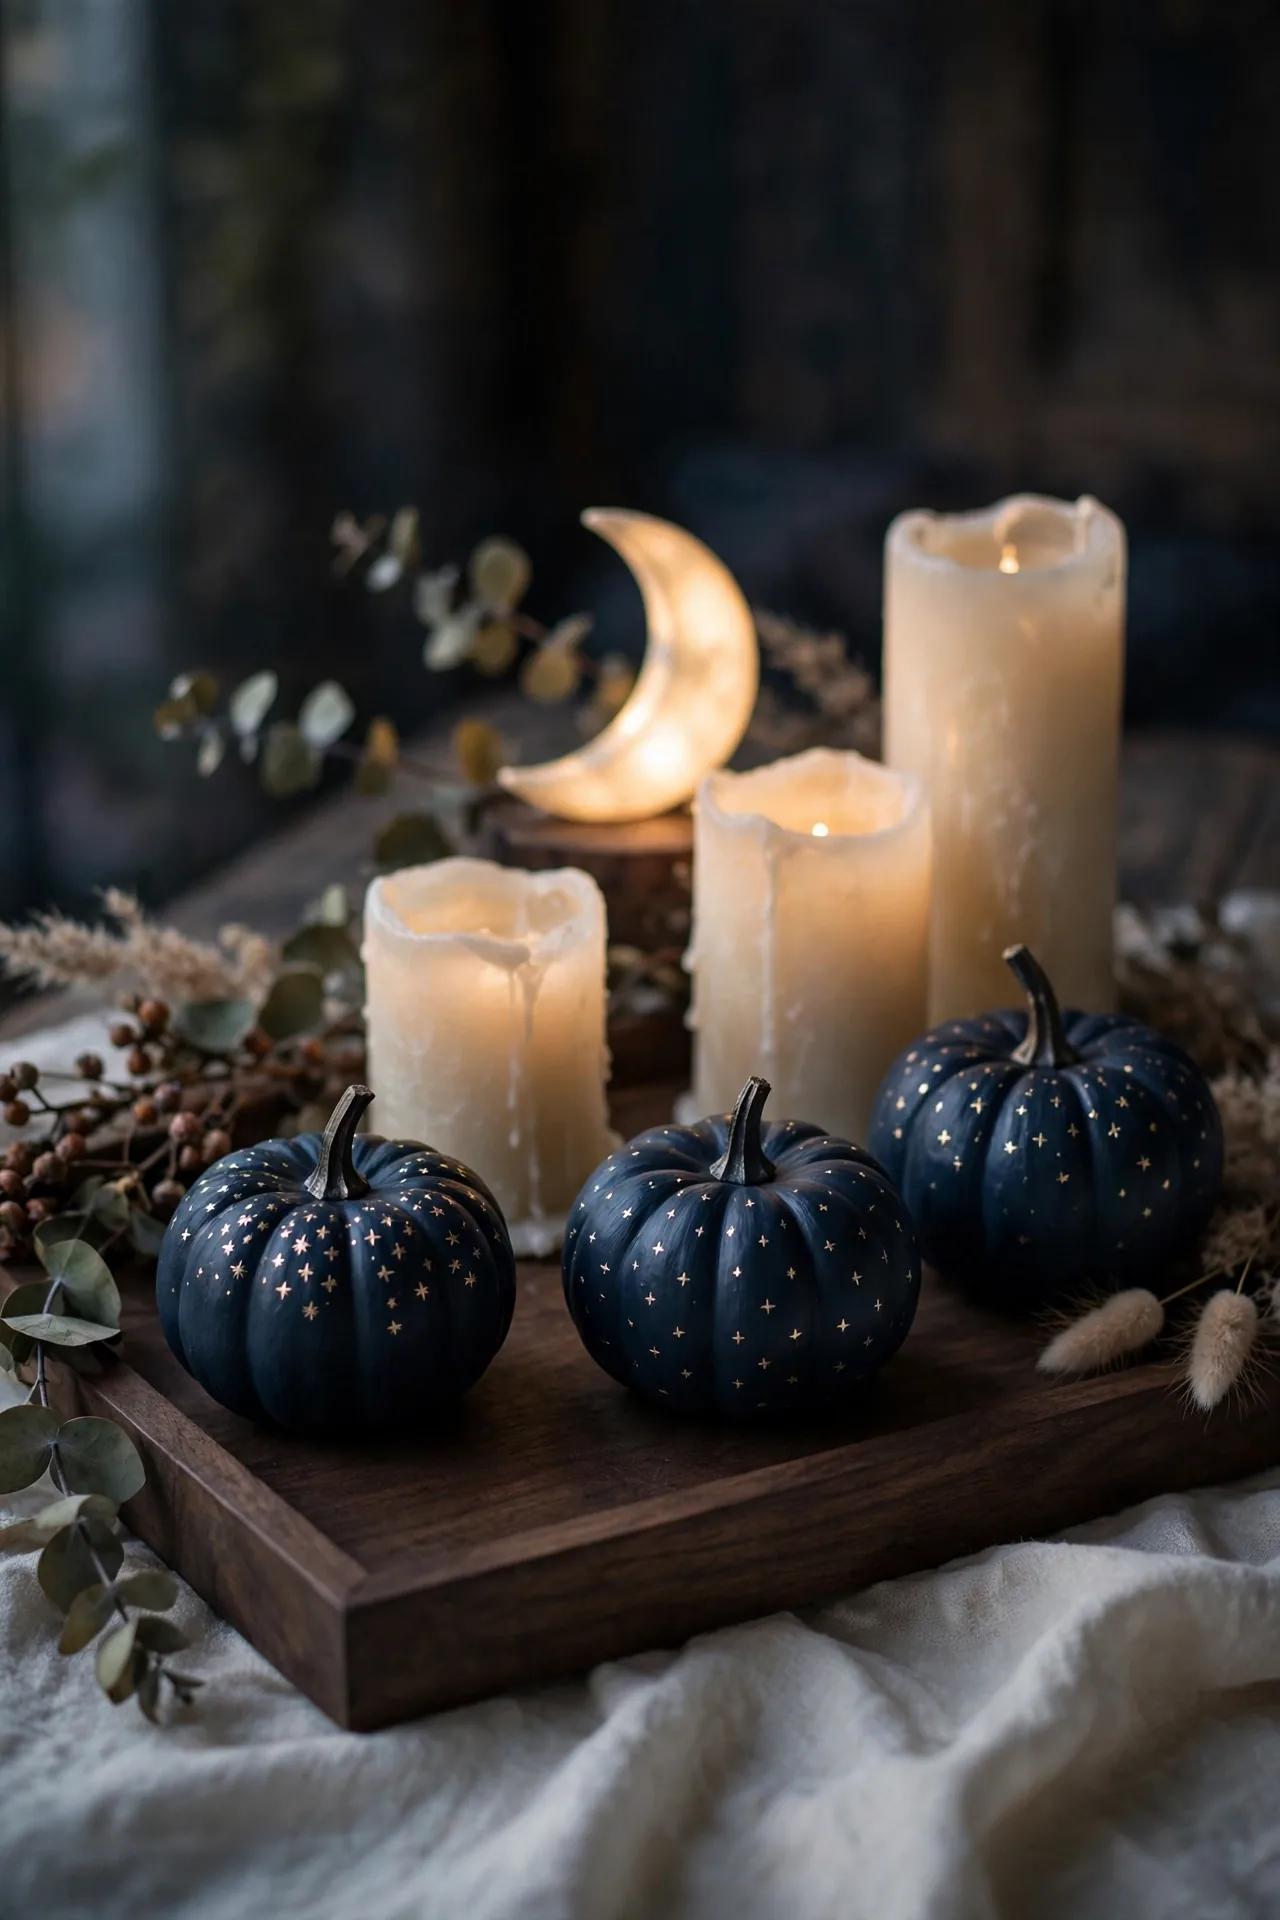
- Paint the pumpkin deep navy or midnight blue as the night-sky base.
- Stamp tiny stars with the tip of a round brush dipped in metallic gold.
- Add one crescent moon on the front with a steady, confident stroke.
- Scatter a few silver dots among the gold for depth and sparkle.
Starry night pumpkins glow after dark, making them perfect for porch steps and window sills. The deep blue base looks rich in daylight too, especially beside cream and beige decor. In my experience, metallic gold paint reads brighter than yellow for the stars. These celestial minis charm stargazers and dreamers of every age.
Pastel Fall Palette
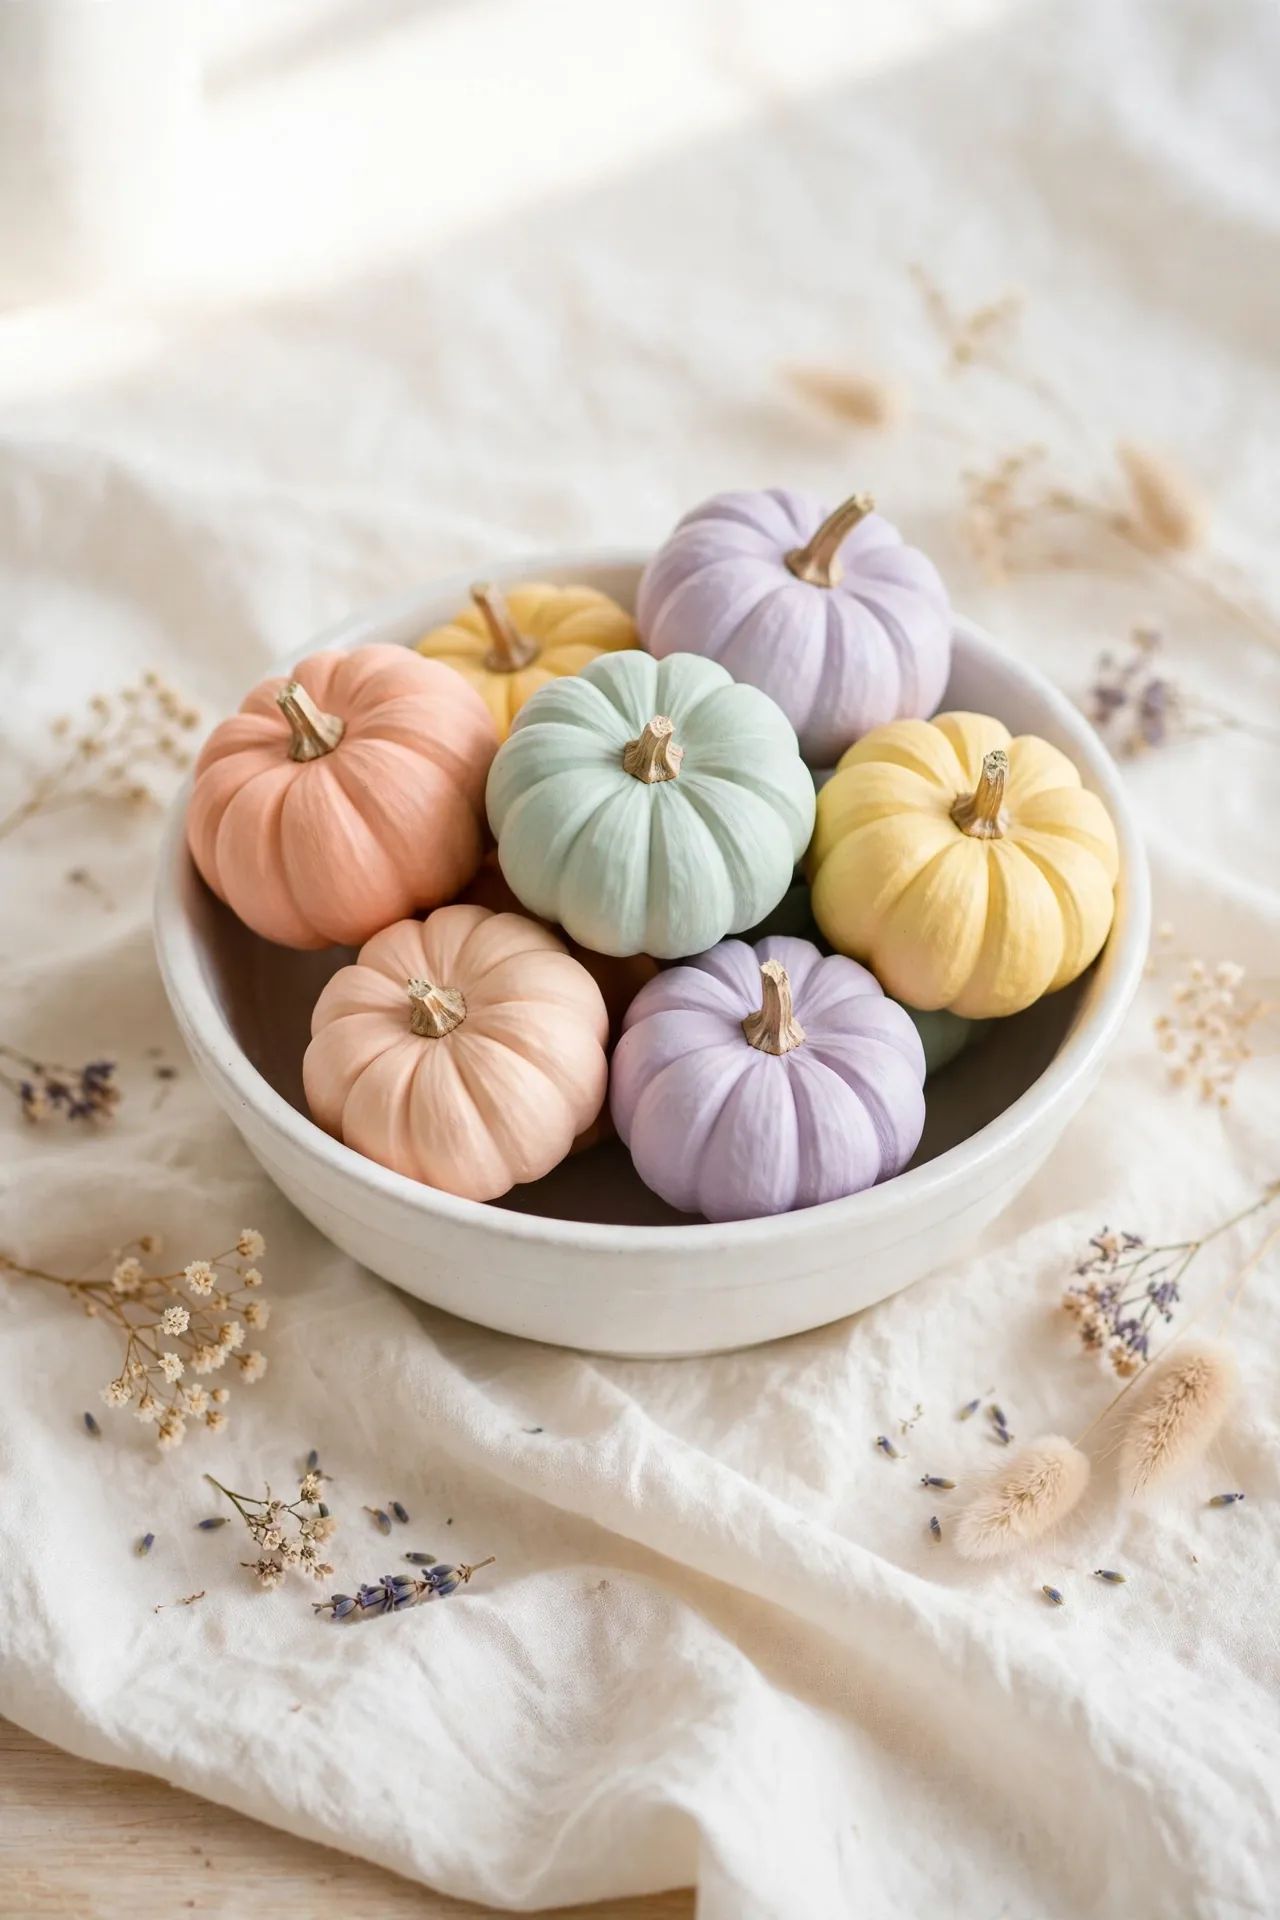
Quick Tip: Mix a drop of white into every autumn color to create the pastel version: peach from orange, mint from green, lavender from purple. Paint each pumpkin a single solid pastel shade for a cohesive candy-colored collection. The white keeps every shade in the same soft family.
Pastel pumpkins rewrite fall in the sweetest possible way. This palette suits nurseries, teen rooms, and spring-like autumn tables where traditional orange feels too loud. Keep the finishes matte for a chalky, sophisticated look. Arrange the pastels in a white bowl so the colors pop against the neutral base. These gentle minis photograph like a dream.
Button and Bow
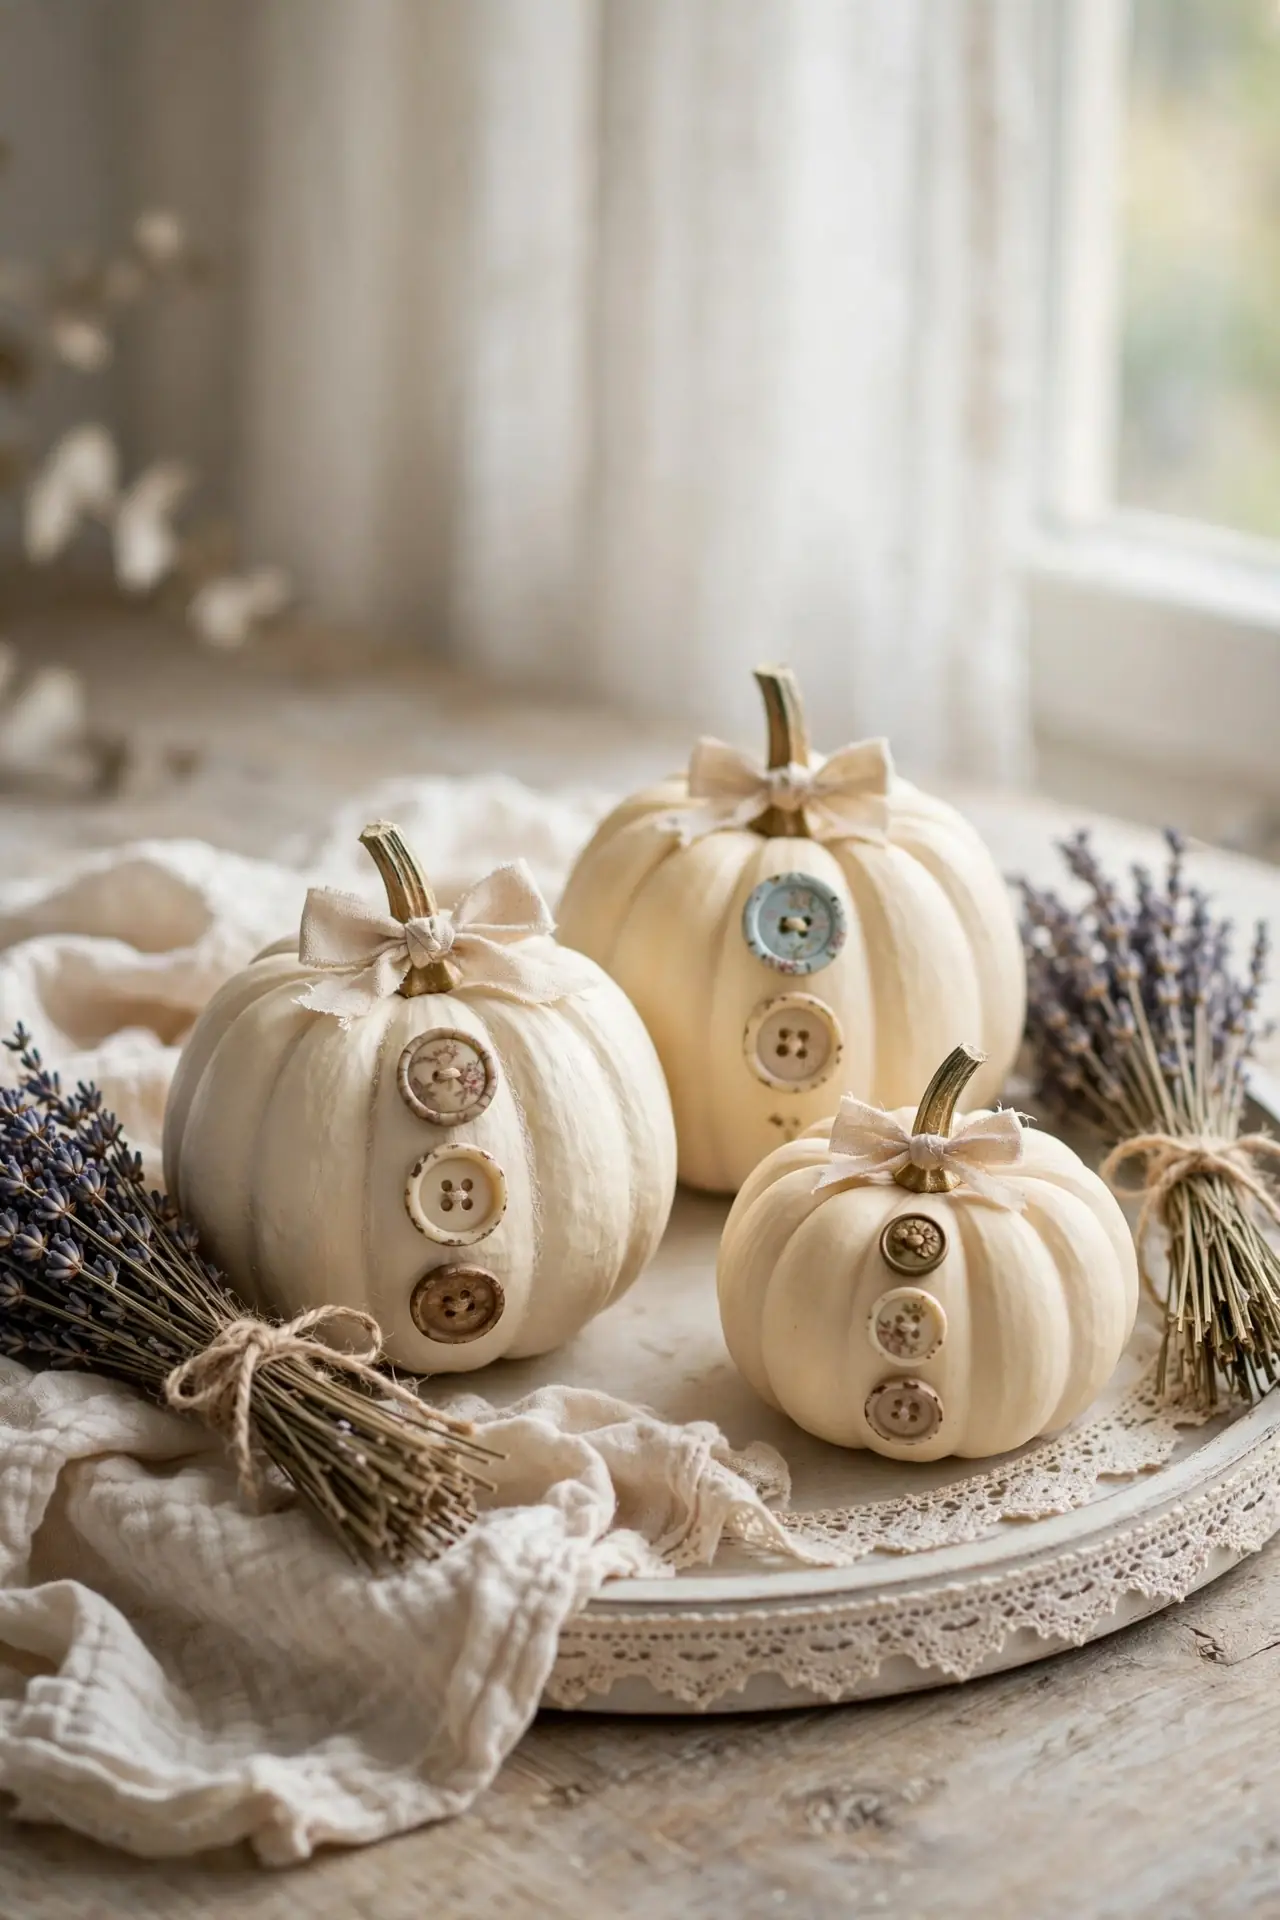
BEFORE: Painted pumpkins can feel flat and one-note, especially in soft neutral color schemes. The design looks complete but somehow unfinished, missing that final thoughtful detail.
AFTER: A tiny painted button cluster and a real fabric bow at the stem finish the pumpkin like a wrapped gift. The mixed materials add texture and charm that paint alone never achieves.
Paint three small circles in a triangle to suggest vintage buttons, then tie a narrow ribbon bow around the stem. Beige grosgrain or thin burlap ribbon suits the cottage look best. Dab the bow with fabric glue so it never slips. This finishing touch turns the simplest painted pumpkin into a keepsake.
Confetti Dot Party
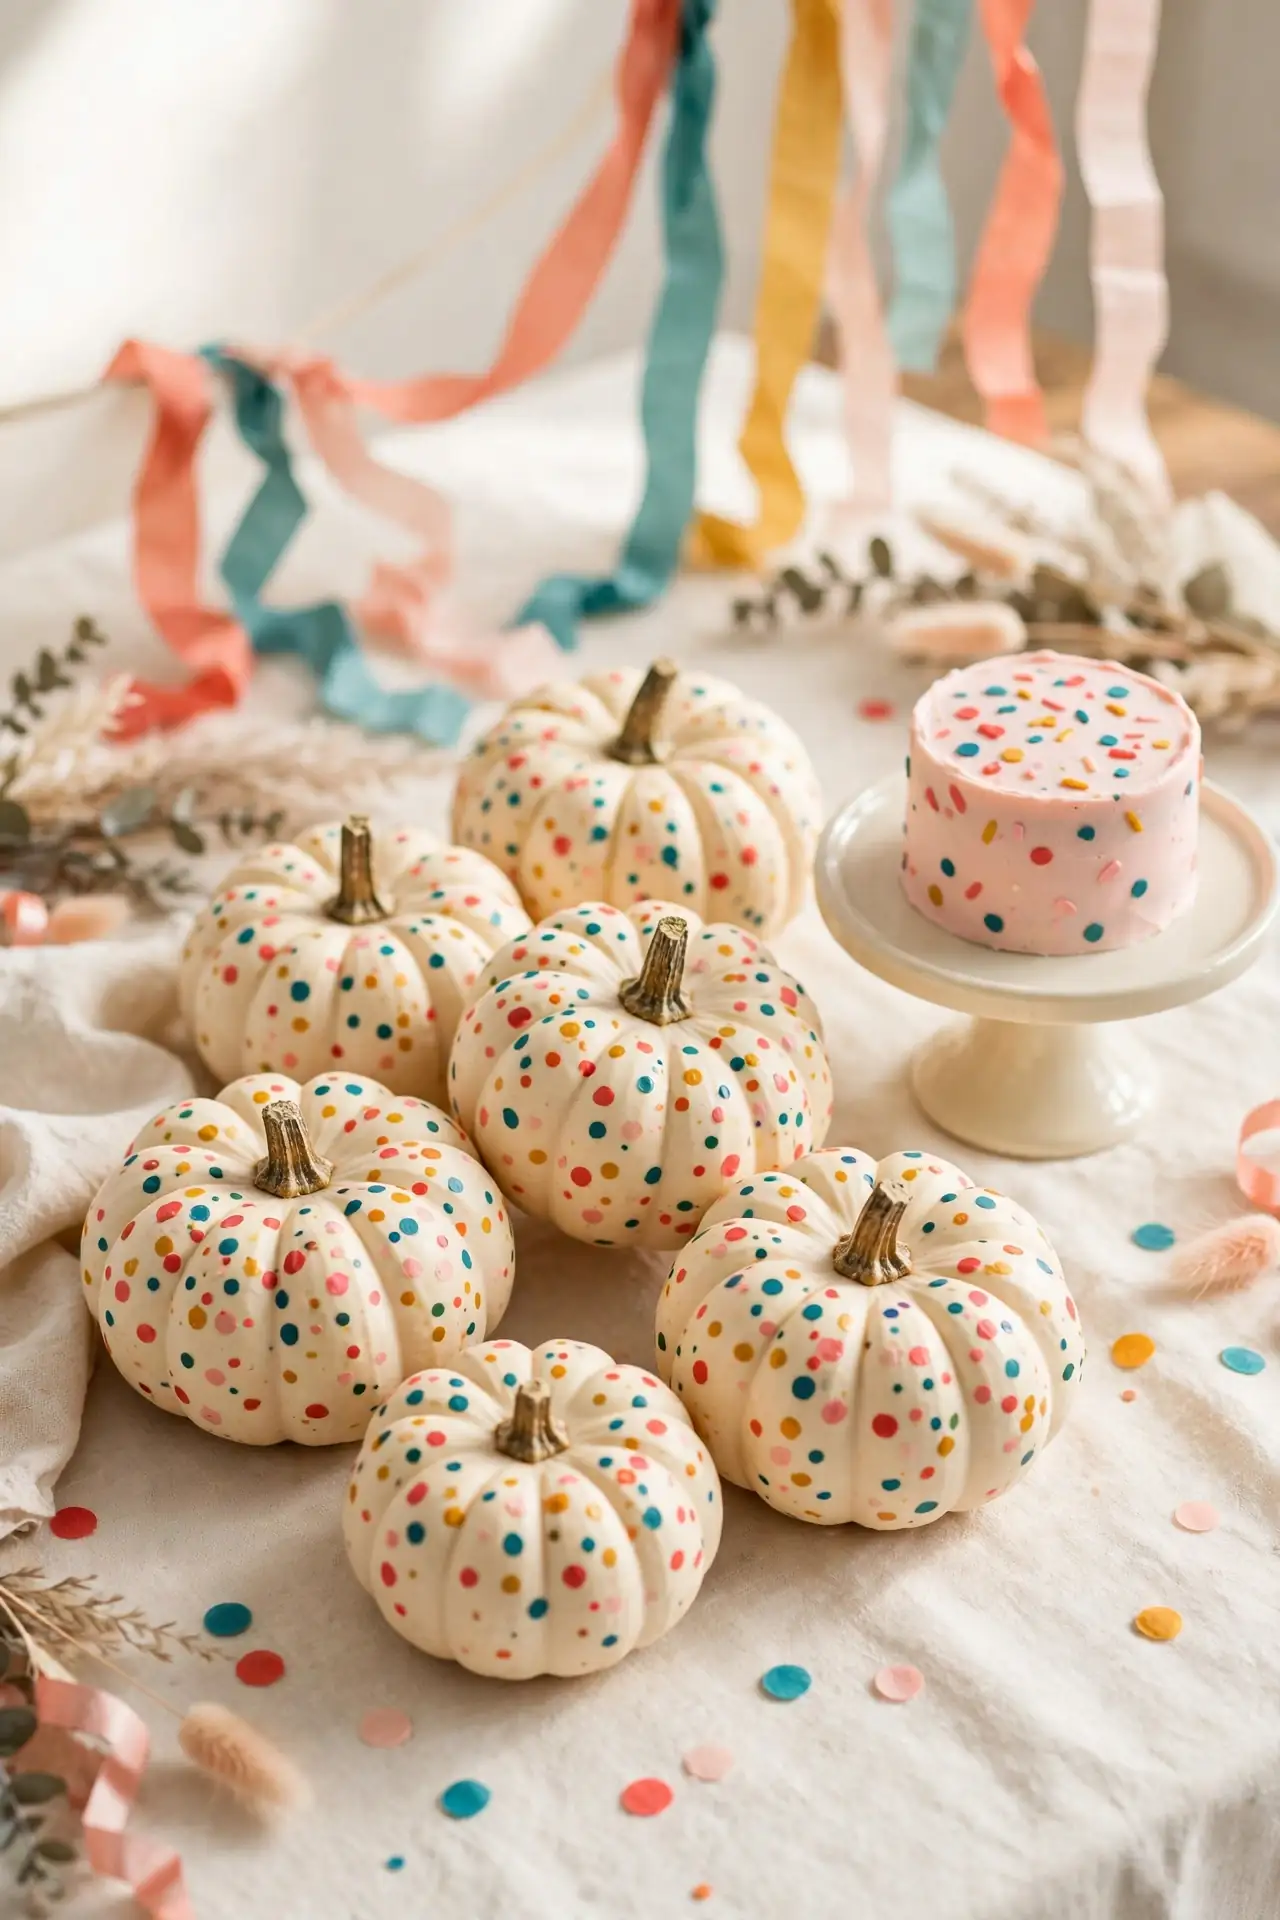
- Paint the pumpkin clean white and let the base dry completely.
- Dip the eraser end of different pencils in coral, teal, mustard, and blush paint.
- Stamp confetti dots randomly across the surface, overlapping a few for depth.
- Add tiny dash marks between the dots with a liner brush for extra festivity.
Confetti pumpkins bring birthday-party energy to your fall table. The scattered dots suit celebrations, from October birthdays to Friendsgiving dinners. Random placement looks best, so resist the urge to arrange the colors in a pattern. I’ve seen this work well in many cases as a kids’ table centerpiece. These joyful minis prove fall decor can be playful and bright.
Glitter Dipped Bottoms
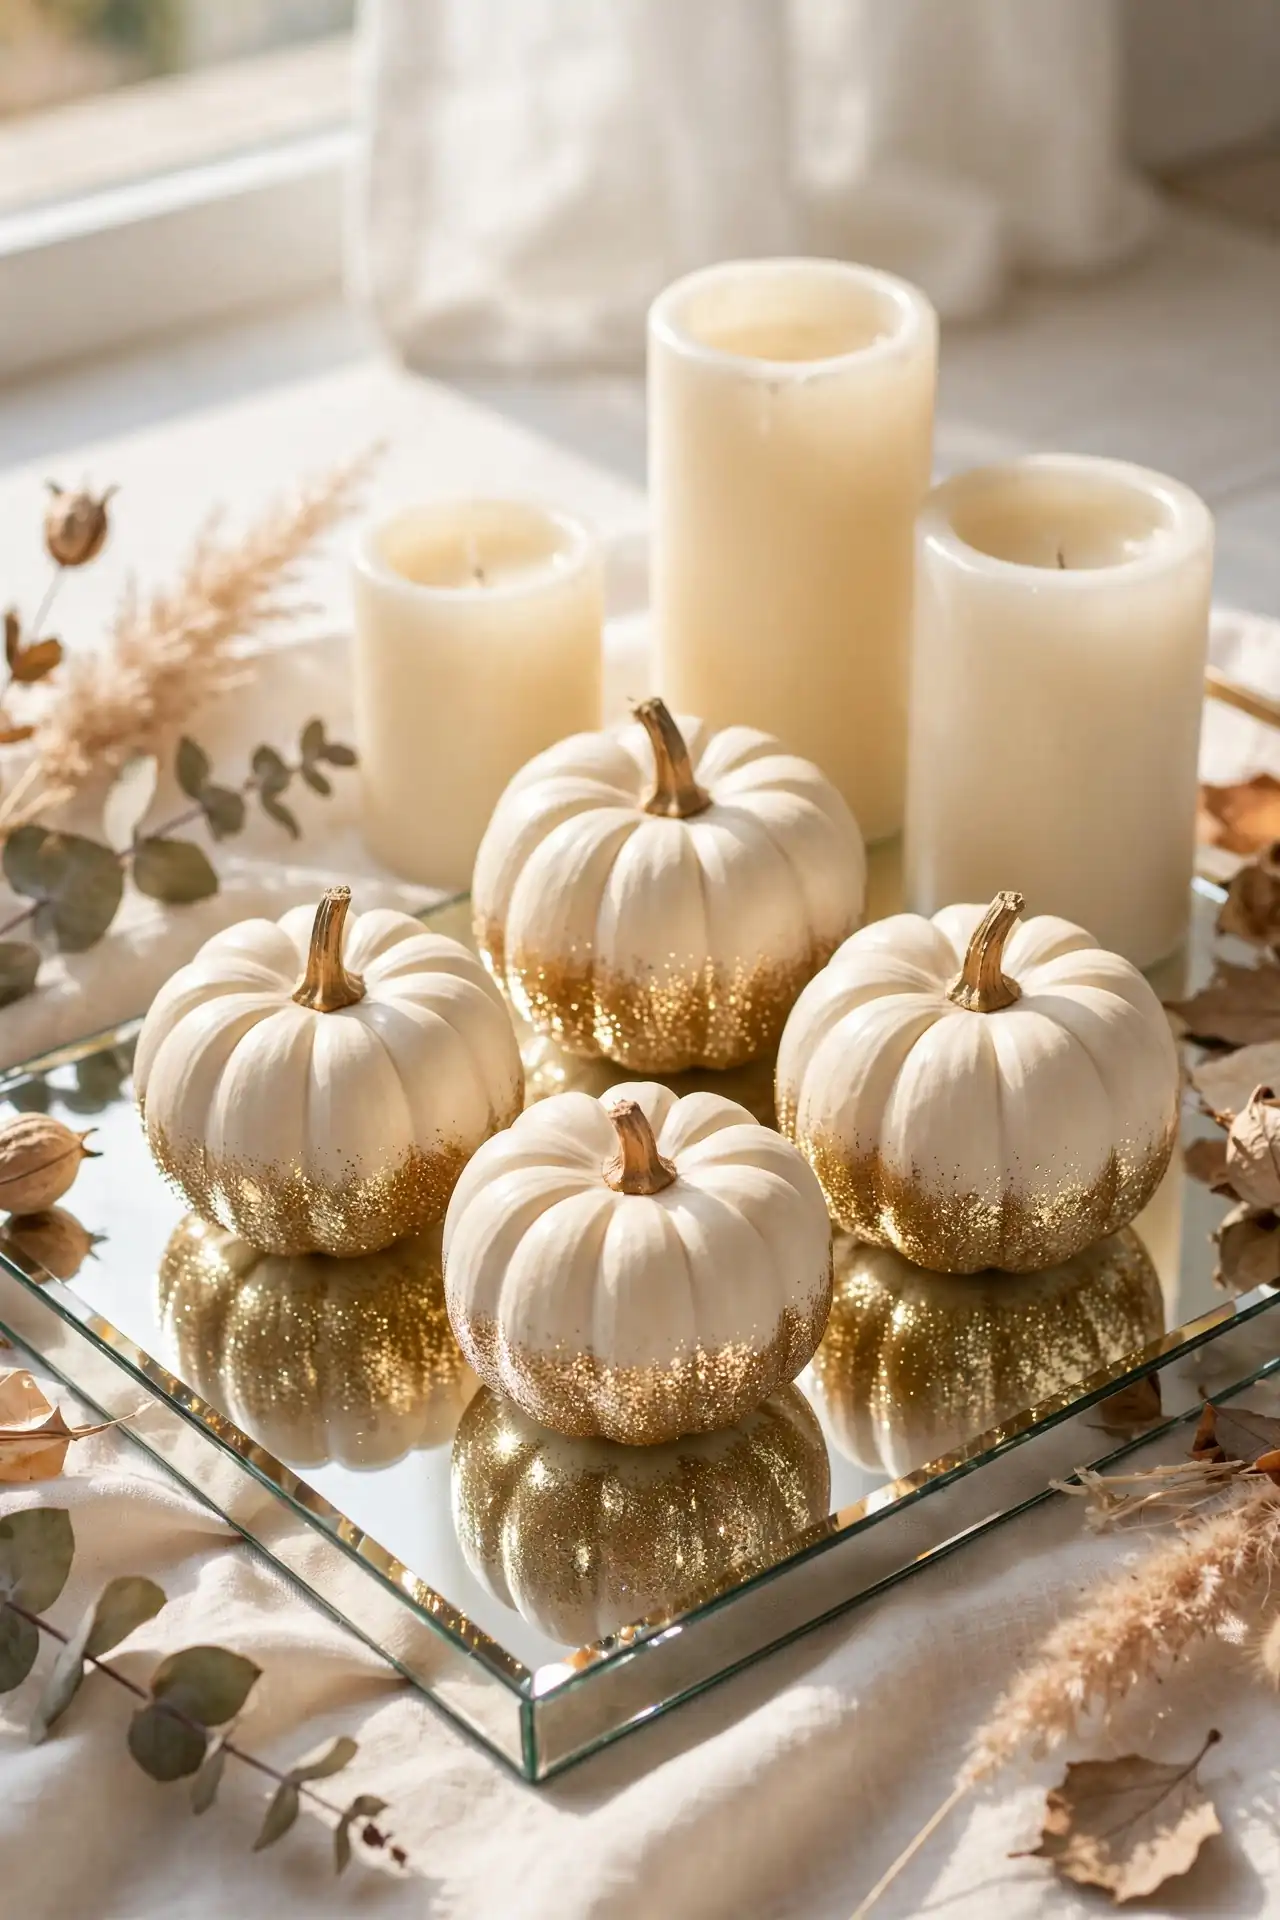
| Feature | Glitter Dip | Glitter Band |
|---|---|---|
| Coverage | Bottom third dipped in glitter | Middle stripe of glitter |
| Method | Brush glue, dip in glitter tray | Mask with tape, brush glitter on |
| Glitter Type | Fine gold glitter, smooth finish | Chunky glitter, bold sparkle |
| Mess Level | Medium, work over paper | Low, tape contains everything |
| Best For | Glam mantels, weddings | Party tables, gifts |
Glitter-dipped bottoms give mini pumpkins a champagne-glass elegance that plain paint never reaches. Brush craft glue on the lower third, then roll the pumpkin through a tray of fine gold glitter. Shake off the excess over paper so you can funnel it back into the jar. Seal with two light coats of clear spray to lock every sparkle in place. These glamorous minis shine at fall weddings and festive dinners.
Conclusion
One small pumpkin and a brush can spark more joy than an afternoon of complicated crafting, and these mini pumpkin painting ideas prove it beautifully. Choose two or three designs that match your home, gather your paints, and enjoy a cozy creative evening. I’ve seen how small changes like these can completely shift the way a space feels. Pin your favorite ideas to your fall board, share this guide with a crafty friend, and let your painted minis welcome autumn in the most adorable way. Your mantel, table, and shelves will thank you for the handmade charm, and every guest will ask how you made them.




One Comment