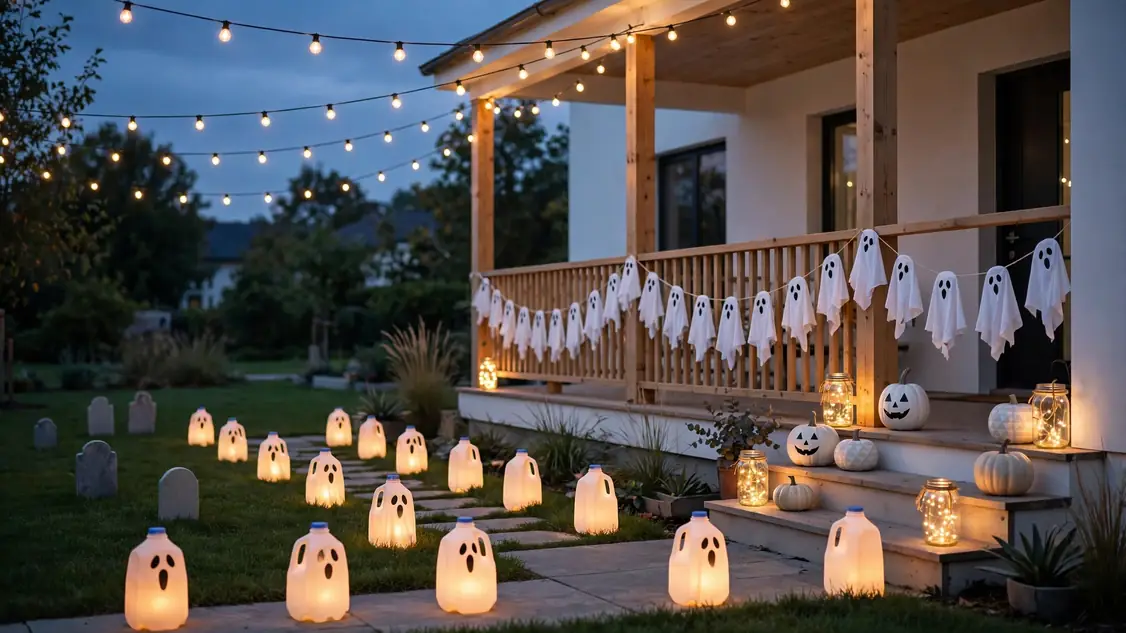
24 Homemade Halloween Decorations Outdoor Ideas on a Budget
Every October, my front yard turns into the neighborhood’s favorite spooky stop, and the secret is simple: homemade halloween decorations outdoor made from things I already had at home. Store-bought props can cost a fortune, but a few pumpkins, some old sheets, and a bag of craft supplies can build a display that looks like you hired a professional. In my experience, the homemade touches always get the most compliments from trick-or-treaters. Below you’ll find 24 budget-friendly ideas that use everyday materials, most costing under five dollars each. Each one takes an afternoon or less, and none require special skills. Let’s turn your yard into the spookiest street on the block.
I’ve seen this work well in many cases: start with one bold focal point, like a pumpkin arch or a ghost family, then fill in with smaller accents around it. That layered approach makes even a tiny porch feel like a full haunted scene. If you’re already planning ahead for the holidays, these christmas tree ideas for 2026 use the same budget-smart mindset for December. For now, grab your glue gun and let’s build something spooky.
Painted Pumpkin Path
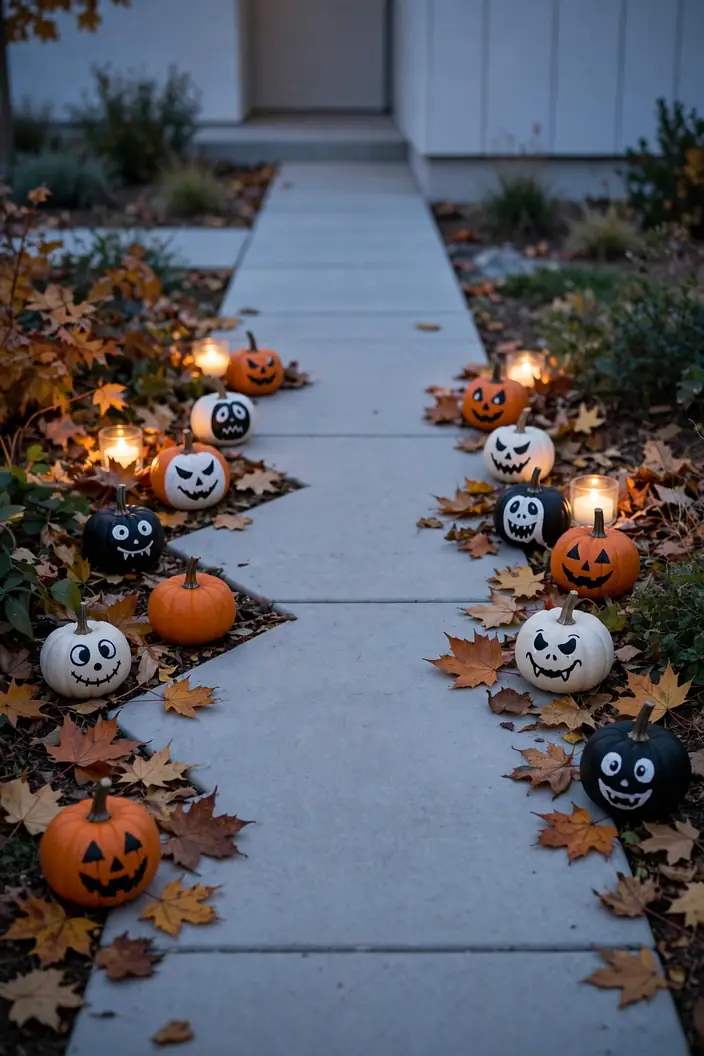
Line your walkway with hand-painted pumpkins and watch trick-or-treaters slow down to admire every one. Grab small craft pumpkins from the dollar store, then paint each with a different face: silly grins, sleepy eyes, surprised oohs. Acrylic craft paint costs almost nothing and dries in under an hour. Arrange them in a zigzag along your path, about a foot apart. Tuck battery tea lights behind a few for a soft glow after dark.
In my experience, kids remember the walkway more than the door itself, so this is where your effort pays off. Mix in a few real mini pumpkins for texture. If rain threatens, a quick coat of clear sealer keeps the paint bright all season. This project costs under ten dollars and takes one relaxed afternoon.
Sheet Ghost Garland
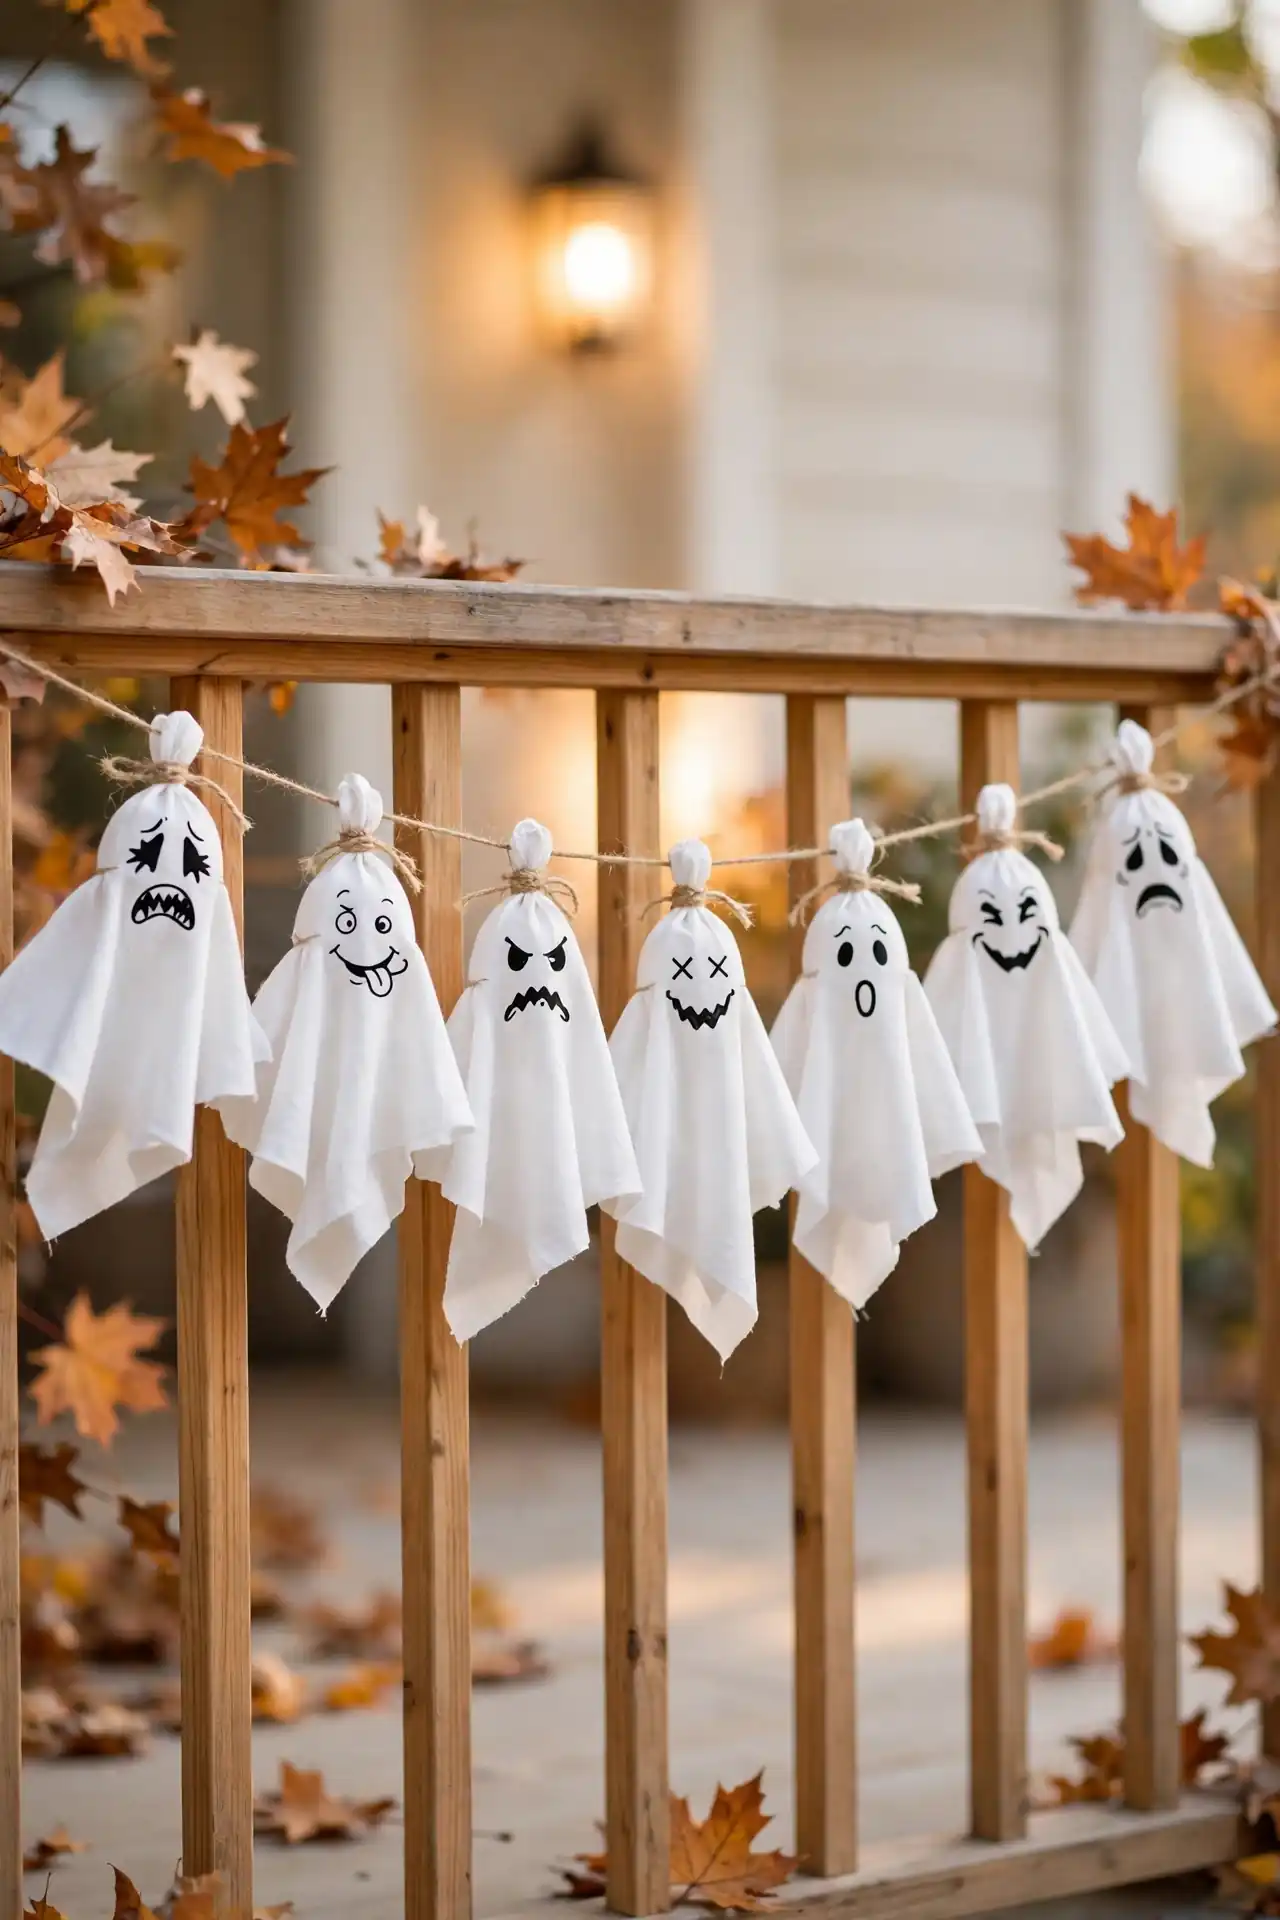
- Cut old white sheets into two-foot squares; thrift stores sell them for pennies apiece.
- Place a ball of newspaper in the center of each square and tie it off with string to form a head.
- Draw spooky or silly faces with a black marker, varying the expressions for fun.
- String the ghosts along a length of twine, spacing them about six inches apart.
- Hang the finished garland across your porch railing or along the fence line.
These floating ghosts dance in the autumn breeze and delight every visitor. The whole garland costs less than three dollars with sheets you already own. I’ve seen this work well in many cases when faces are mixed: some scary, some goofy, some surprised. A quick toss in the dryer revives any rain-soaked ghosts.
Mason Jar Lanterns
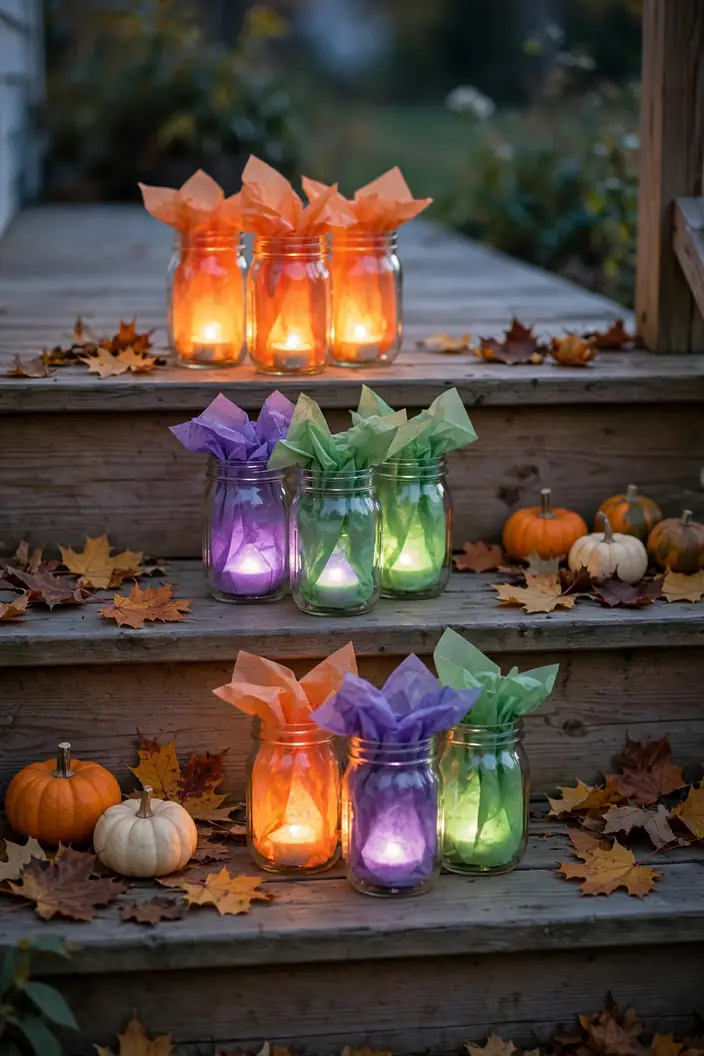
Quick Tip: Coat the inside of each mason jar with a thin layer of orange tissue paper using diluted white glue. The tissue diffuses the light beautifully and hides the LED source completely. Use flameless tea lights only, never real candles, and cluster the jars in groups of three at different heights for a professional, styled look.
Scatter these glowing jars along steps, window sills, and garden beds for instant Halloween magic after sunset. The tissue paper technique works with any color: purple for spooky, green for eerie, classic orange for traditional. That’s why many experts recommend LED lights for outdoor displays, since they stay cool and run for weeks on one battery. Make a dozen in under an hour and reuse them every October.
Cardboard Tombstone Village
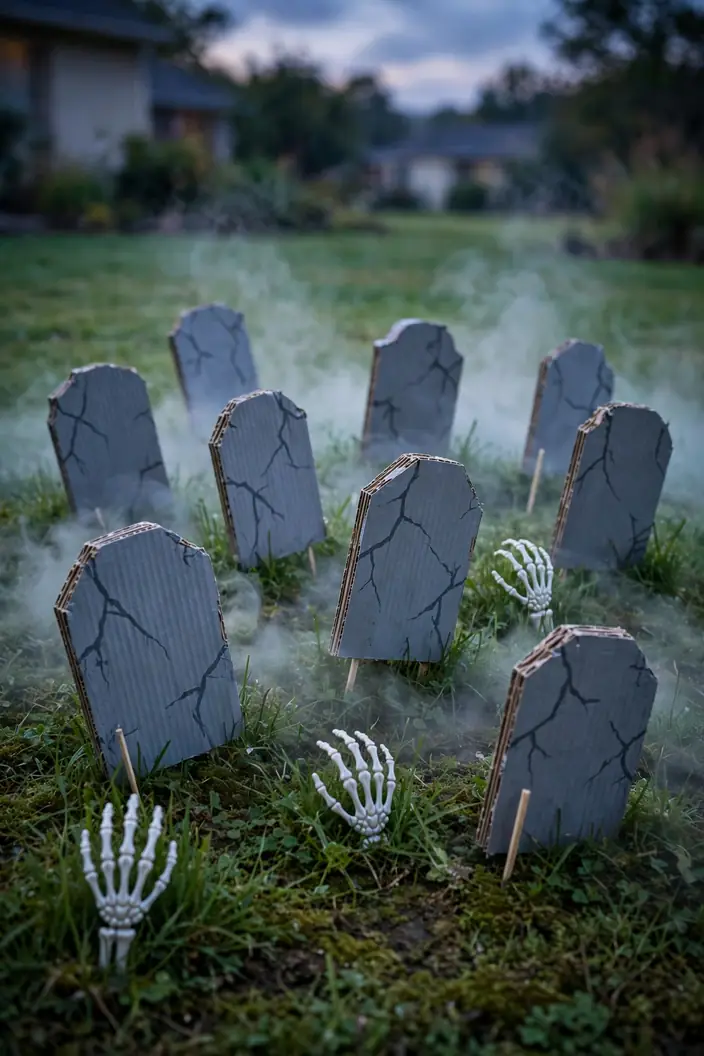
BEFORE: A flat front lawn with nothing but grass offers zero Halloween atmosphere, and trick-or-treaters hurry past without stopping. The yard feels empty and forgettable on the biggest candy night of the year.
AFTER: A crooked village of gray tombstones rises from the grass, each carrying a funny epitaph, instantly turning the lawn into a miniature graveyard. Kids stop to read every stone, and parents pull out their phones for photos.
Cut tombstone shapes from large cardboard boxes, paint them gray, and add cracks with a black marker. Funny epitaphs like “Here lies Fred, who scared himself to death” get the biggest laughs. Stake them into the ground with wooden skewers, leaning a few at angles. A coat of clear spray sealer helps them survive October rain.
Milk Jug Ghosts
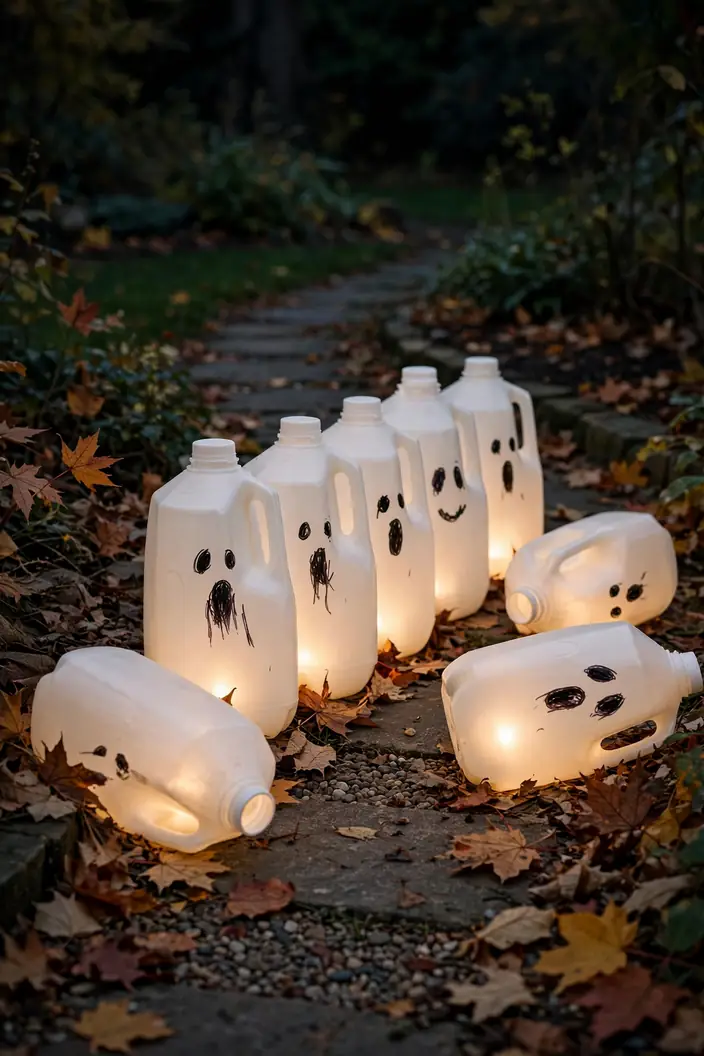
- Rinse empty gallon milk jugs thoroughly and let them dry completely in the sun.
- Draw ghost faces on each jug with a thick black permanent marker.
- Drop a flameless LED tea light or short string of fairy lights inside each jug.
- Arrange the glowing ghosts along your walkway, spacing them two feet apart.
- Replace the lights with fresh batteries halfway through October for lasting glow.
These glowing ghosts cost nothing if you drink milk, and they charm every kid on the block. The translucent plastic diffuses light into a soft, spooky glow that looks far more expensive than it is. I’ve noticed different faces on each jug, from friendly to frightened, make the row feel like a ghost family. Store them nested together after Halloween for next year.
Twig Broom Porch
| Option | Materials | Cost |
|---|---|---|
| Fallen twig broom | Yard twigs + branch | Free |
| Corn stalk broom | Dried corn stalks | Low |
| Store broom prop | Pre-made decoration | Medium |
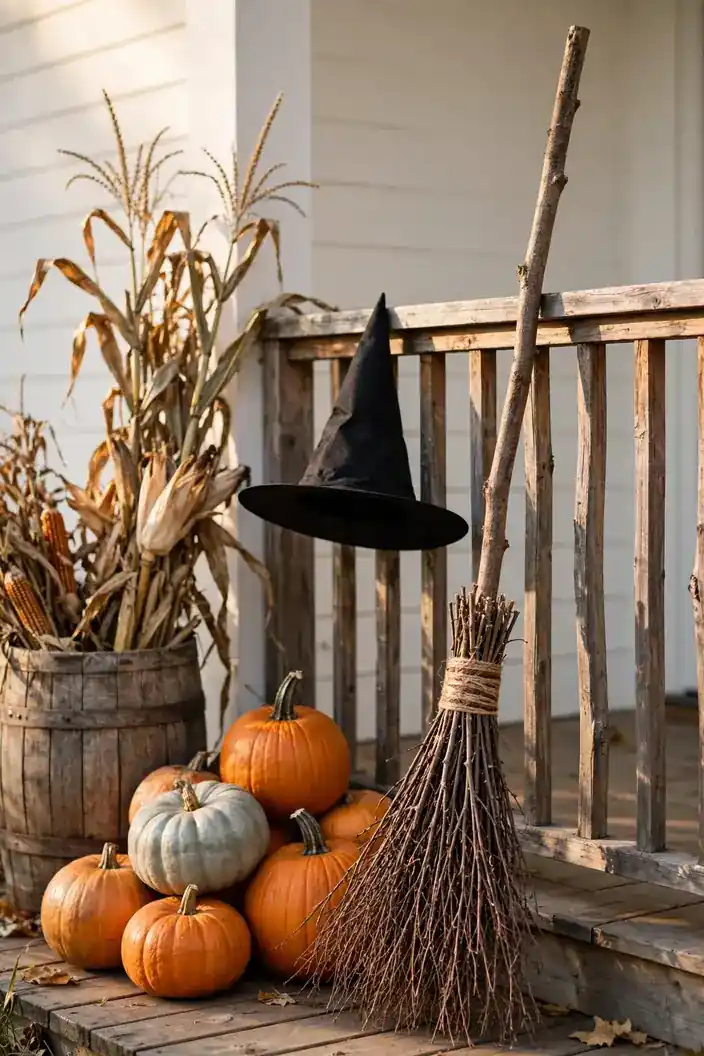
Gather fallen twigs from your yard and bundle them around a sturdy branch to craft an authentic witch broom. Tie the bundle tightly with twine in two places, then trim the twig ends evenly for a neat look. Lean it against your porch railing beside a pumpkin pile and a hanging witch hat. This rustic touch costs nothing but time, and it photographs beautifully in afternoon light. Add a pair of striped witch legs sticking out from behind a bush nearby for extra storytelling charm.
Pallet Sign Welcome
DO:
- Do sand rough pallet edges so the sign is safe for kids to touch.
- Do use outdoor acrylic paint so lettering survives rain and dew.
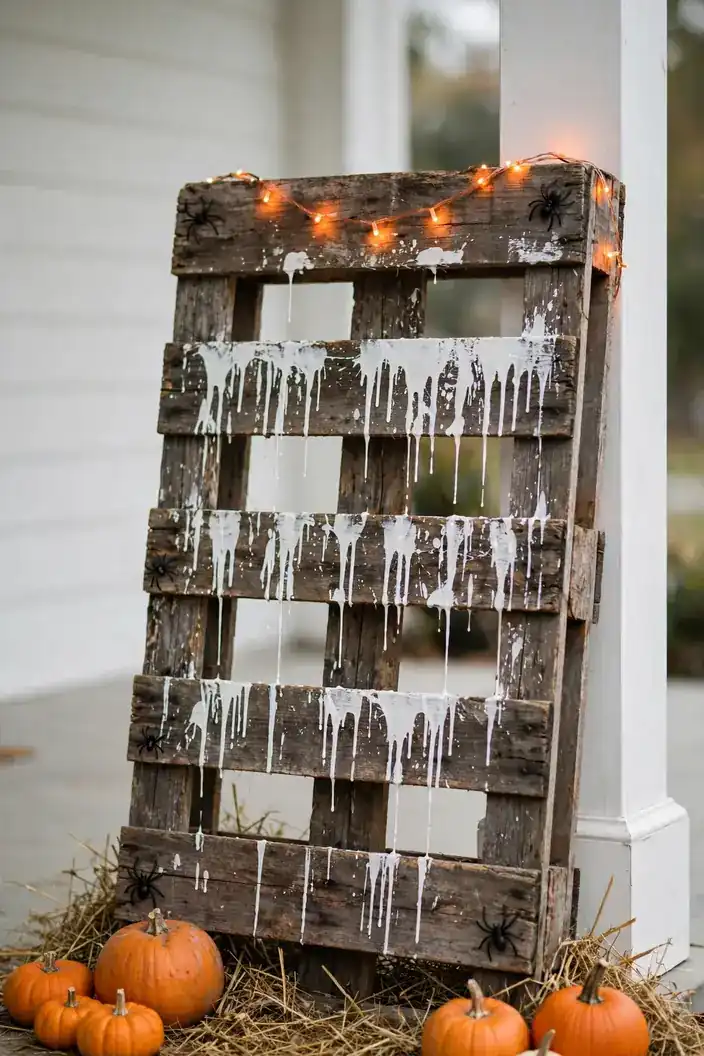
- Do add small accents like plastic spiders for texture.
DON’T:
- Don’t use a pallet with protruding nails; hammer them flat first.
- Don’t paint the sign too dark or it won’t read after sunset.
- Don’t place it where it blocks the walkway.
A hand-painted pallet sign gives your yard a custom feel store signs can’t match. Phrases like “Enter If You Dare” set the tone before visitors reach your door. That’s why many experts recommend one bold statement piece per yard. This sign takes an hour to paint and lasts for years in the garage.
Balloon Spider Colony
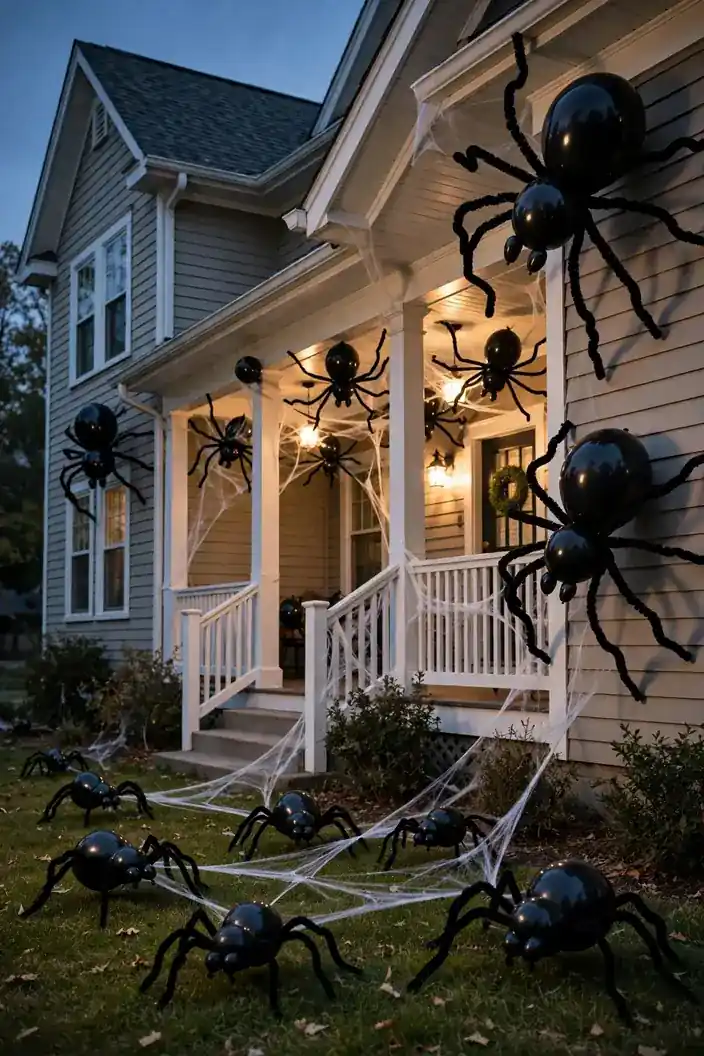
Cost: Low | Time: One afternoon | Skill Level: Beginner | Best For: Big visual impact on a budget
Blow up black balloons in several sizes and attach bent pipe cleaners as legs to create a colony of giant spiders. Tape the big ones climbing up your siding and across the porch ceiling, then scatter smaller ones on the lawn below. Stretch fake cobwebs between them to tie the whole scene together. This idea delivers maximum drama for the price of a balloon pack and some pipe cleaners. I’ve seen this work well in many cases when the spiders vary in size, since the mix of big and small reads as a real colony.
Leaf Pile Scarecrow
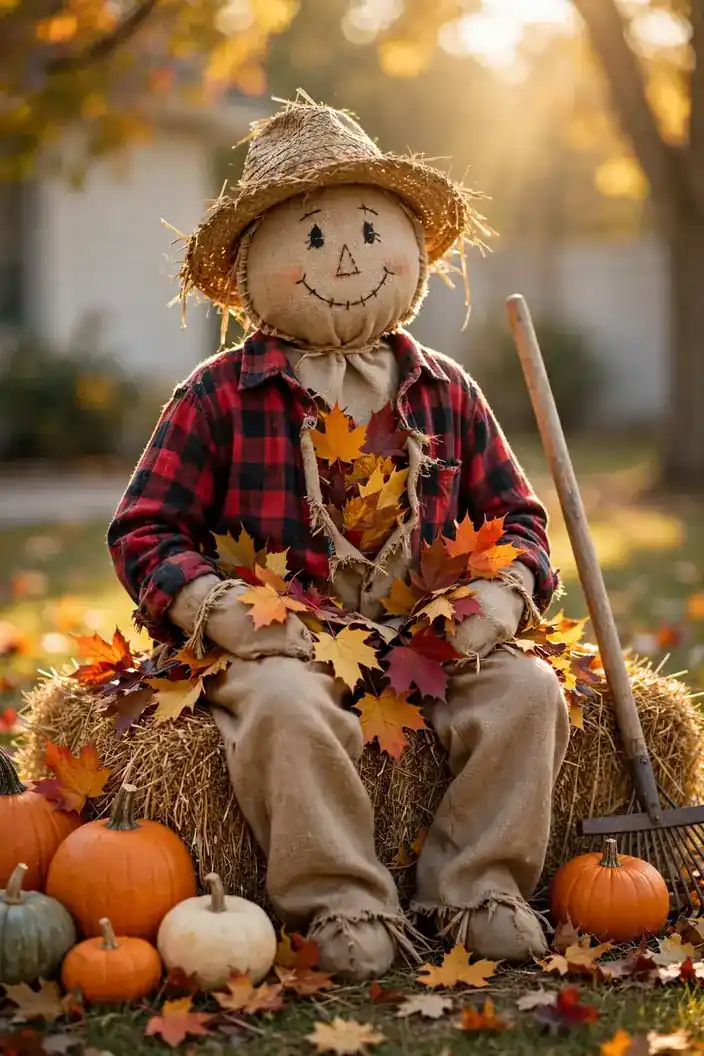
Rake your fallen leaves into a scarecrow instead of bagging them, and your yard work becomes your decoration. Stuff an old flannel shirt and jeans with crunchy leaves, tie off the wrists and ankles with twine, and top it with a straw hat. Draw a friendly face on a burlap sack for the head. Seat your scarecrow on a hay bale where every passerby can see it.
This project turns a weekend chore into the centerpiece of your display, which feels like pure magic. Kids love helping stuff the clothes, and rustling leaves add sound on windy days. When the season ends, the whole scarecrow composts into the garden. In my experience, a leaf scarecrow sparks more neighbor conversations than any store-bought prop.
Tin Can Luminaries
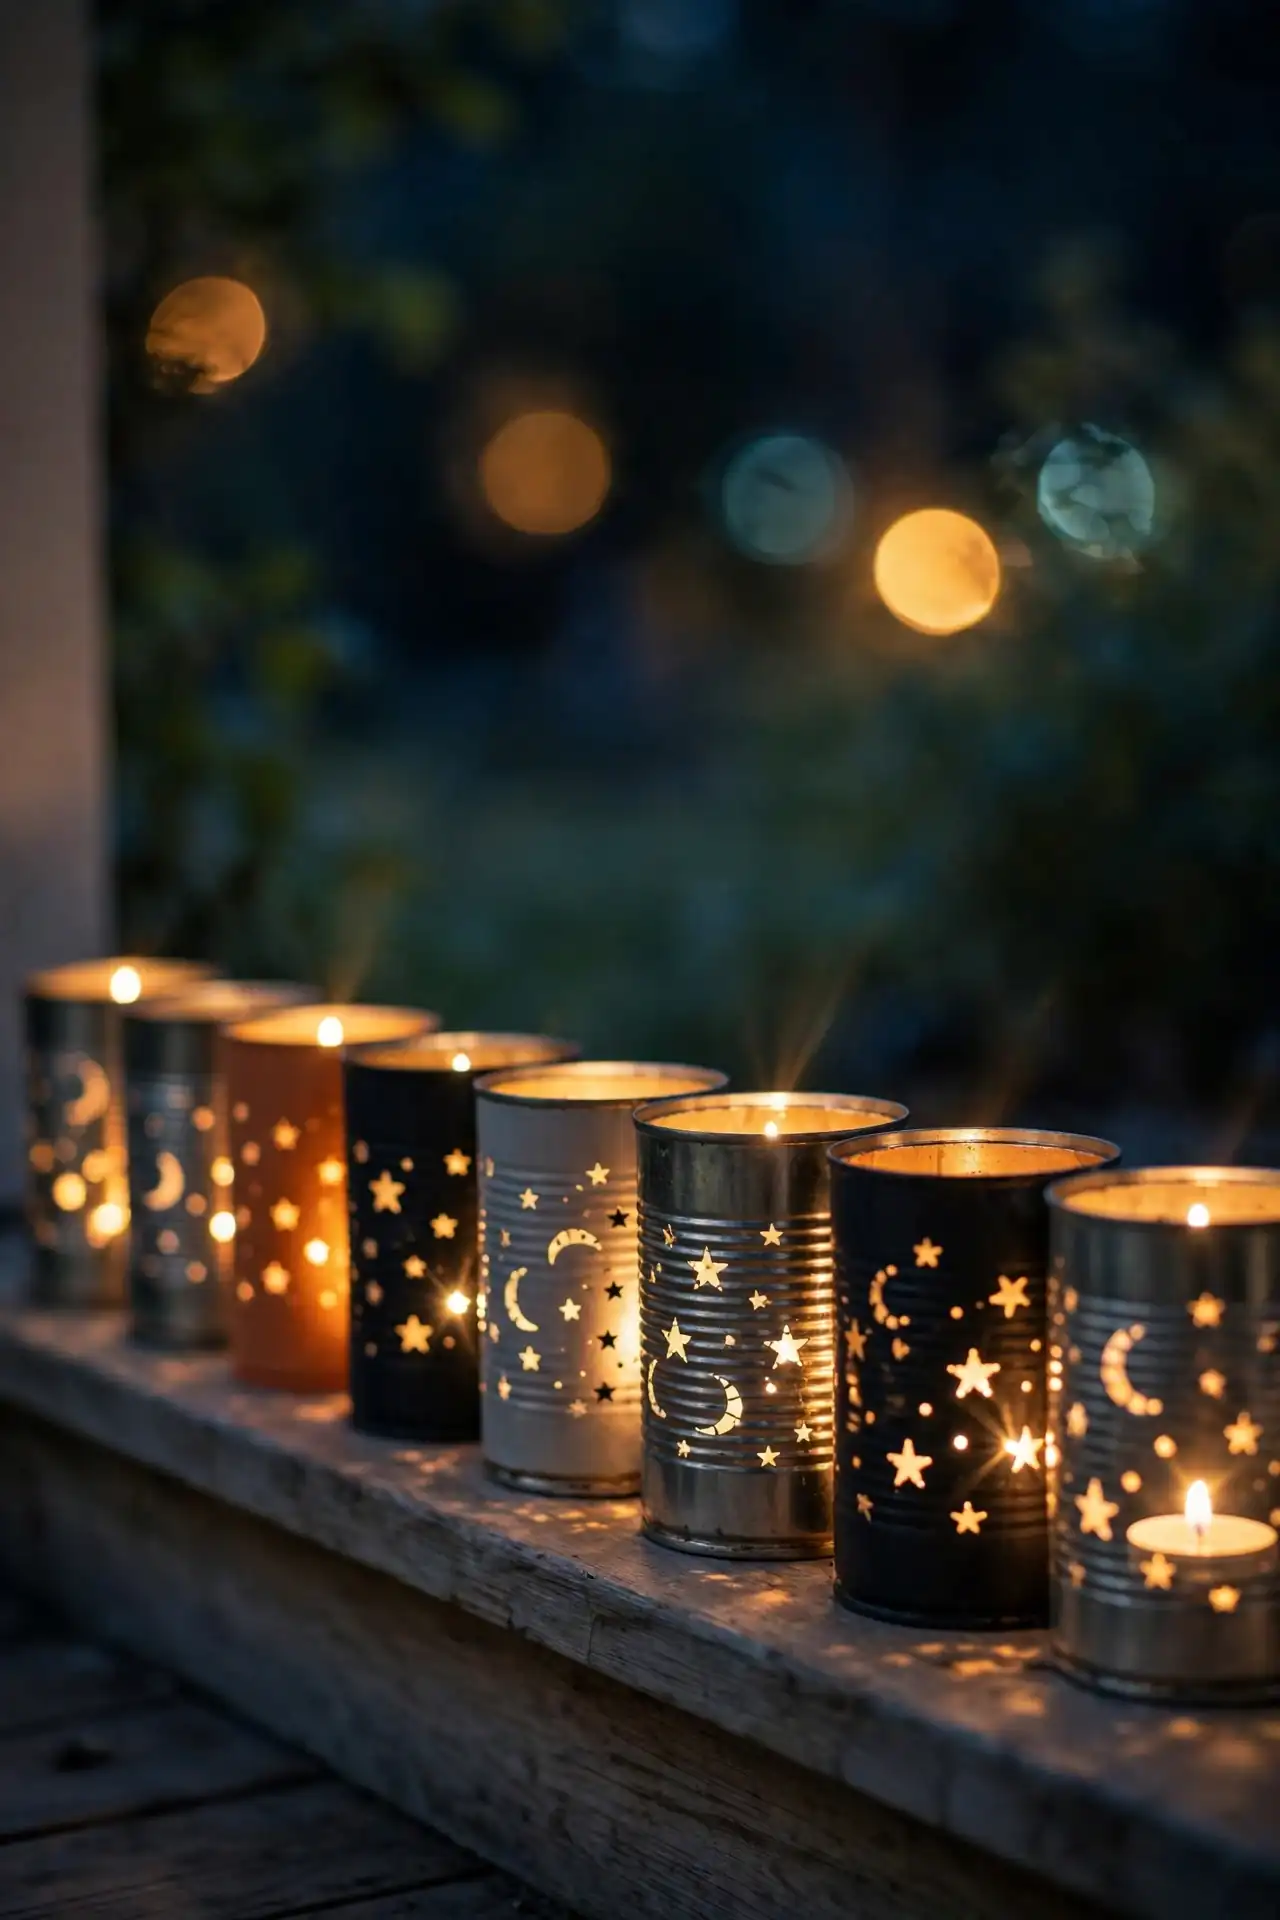
- Save tin cans in various sizes, peel off labels, and wash them thoroughly.
- Fill each can with water and freeze overnight so the metal holds its shape.
- Punch star, moon, or bat patterns through the metal with a hammer and nail.
- Let the ice melt, dry the cans, and spray paint them orange or black.
- Drop in LED tea lights and line them along porch edges or steps.
These punched-tin luminaries cast the most beautiful patterned light on your porch after dark. The freezing trick is the secret: it keeps the cans from denting while you hammer. I’ve noticed that mixing star and moon patterns across the row creates a magical night-sky effect. This craft costs nothing but a can of spray paint, and the luminaries last for many Halloweens.
Cheesecloth Spirit Drapes
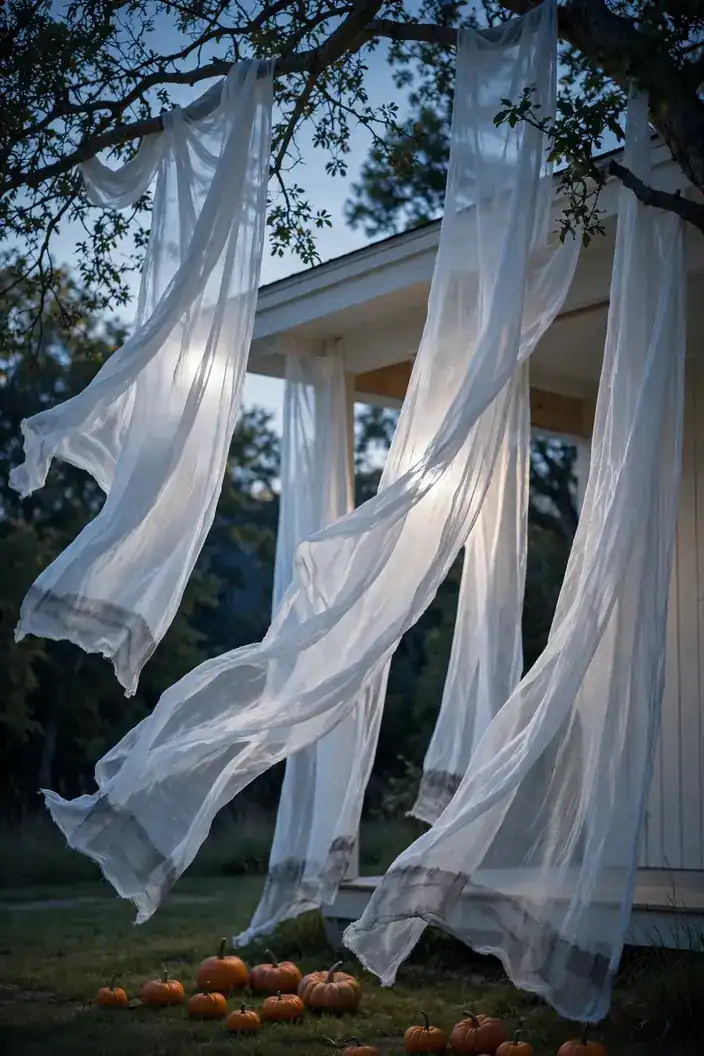
Quick Tip: Stiffen your cheesecloth spirits with a light spray of fabric stiffener so they hold ghostly shapes even on calm nights. Hang the strips from tree branches using clear fishing line, varying the lengths for a natural, floating look. Add subtle gray shading at the bottom with diluted acrylic paint to suggest tattered edges. The translucency is the whole magic: moonlight shining through looks genuinely haunting.
Drape these ethereal spirits from every high point in your yard for instant haunted atmosphere. Cheesecloth is cheap by the yard and tears into ragged strips with a simple pull. That’s why many experts recommend layering two or three strips per hanging point: the depth makes each spirit look fuller. Take them down before heavy rain, since wet cheesecloth sags.
Pumpkin Balloon Arch
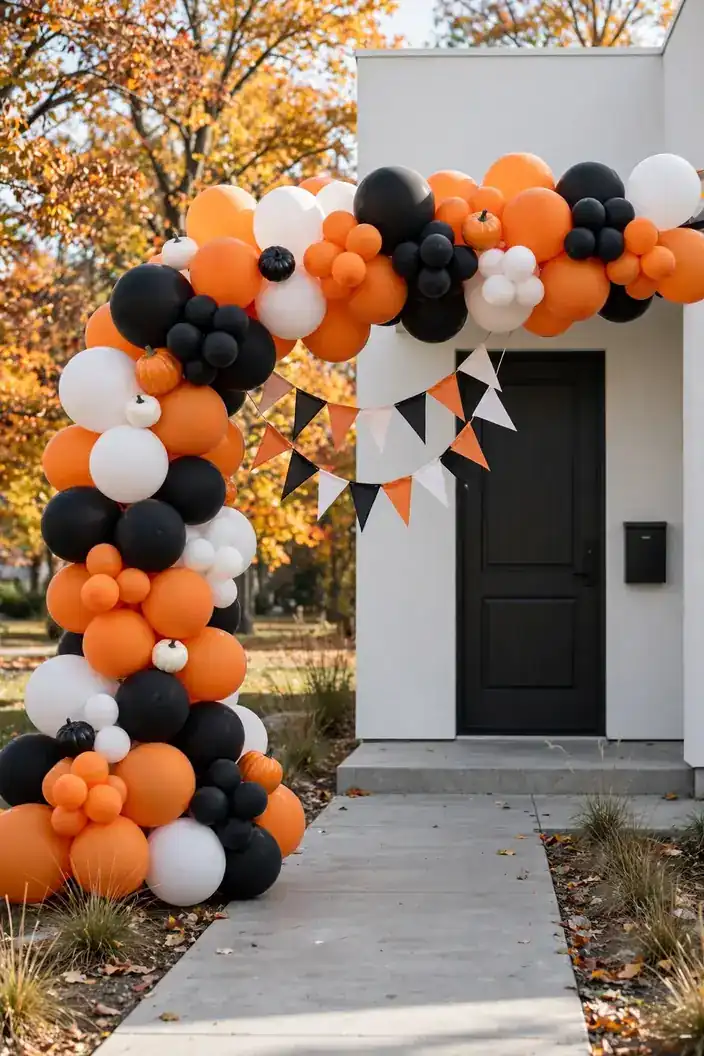
BEFORE: A plain front walkway with no overhead interest feels flat and unwelcoming, even with pumpkins lined along the edges. Guests walk straight through without pausing for a single photo.
AFTER: A towering balloon arch in Halloween colors frames the walkway, turning every arrival into a photo moment. Kids run underneath it shrieking with delight, and parents stop to snap pictures.
Build the arch with a simple PVC frame and cover it with twisted balloon clusters in orange, black, and white. Tuck small plastic pumpkins between the balloons for texture, and hang a banner from the center. This project takes about two hours with a balloon pump, and the impact is enormous. Anchor the base with sandbags so an October gust doesn’t carry your arch down the street.
Hay Bale Seating
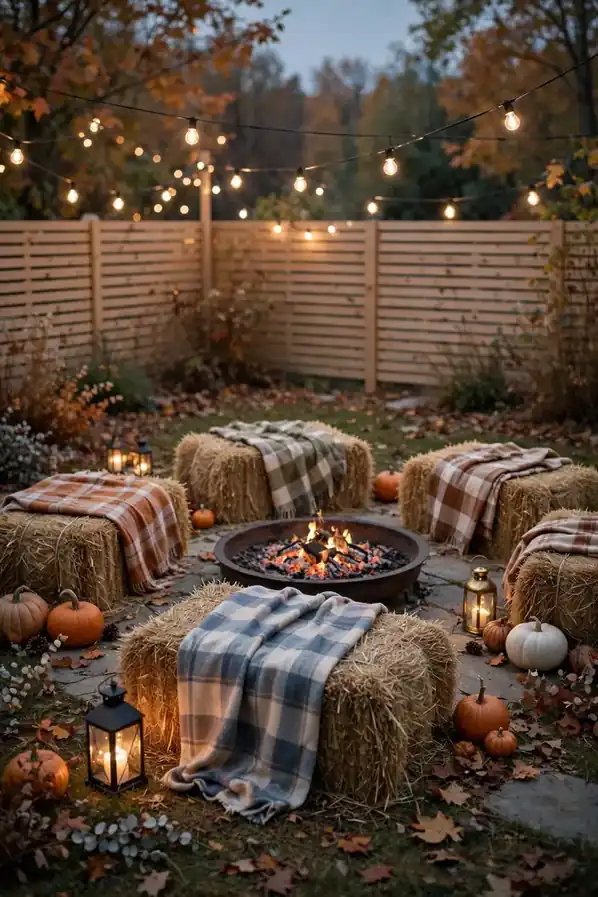
- Source two or three square hay bales from a local farm or garden center.
- Arrange them in a circle or row to create casual outdoor seating.
- Drape plaid blankets over the tops for comfort and autumn color.
- Surround the seating with pumpkins, lanterns, and corn stalks.
- String warm lights overhead to make the area glow after dark.
Hay bale seating turns your yard into a gathering spot, not just a display to walk past. Neighbors linger, kids climb on the bales, and your Halloween party suddenly has the coziest corner on the block. In my experience, the bales become the most photographed part of the whole setup. Cover them with a tarp if rain comes, and they’ll stay fresh through Thanksgiving too.
Paper Bag Luminaries
| Option | Best For | Cost |
|---|---|---|
| Paper bag luminaries | One-night glow | Very low |
| Plastic jug luminaries | Reusable yearly | Low |
| Metal lantern rows | Permanent display | Medium |
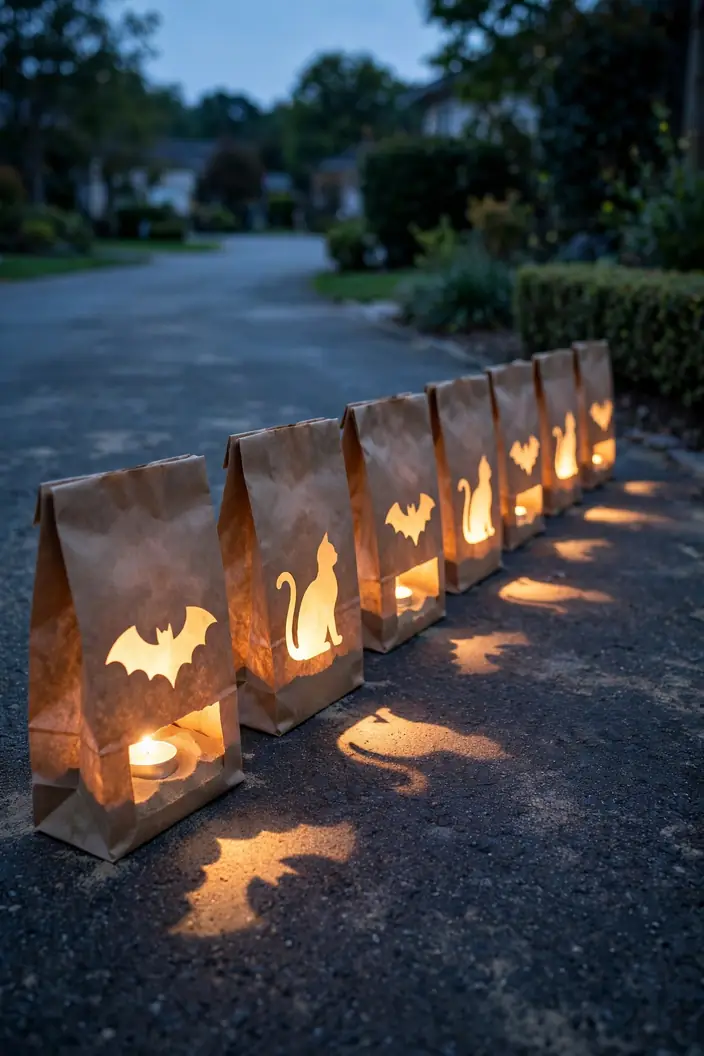
Cut simple bat, cat, and moon shapes from the sides of brown paper bags, then anchor each with a scoop of sand. Drop in a battery tea light and line them along your driveway or walkway for a magical glowing path. The cutout shapes project dancing shadows onto the pavement that mesmerize arriving guests. This is the cheapest luminaria on this list: a pack of bags and tea lights outfits a whole driveway. Bring them inside if rain threatens, since wet paper collapses fast.
Pool Noodle Candles
DO:
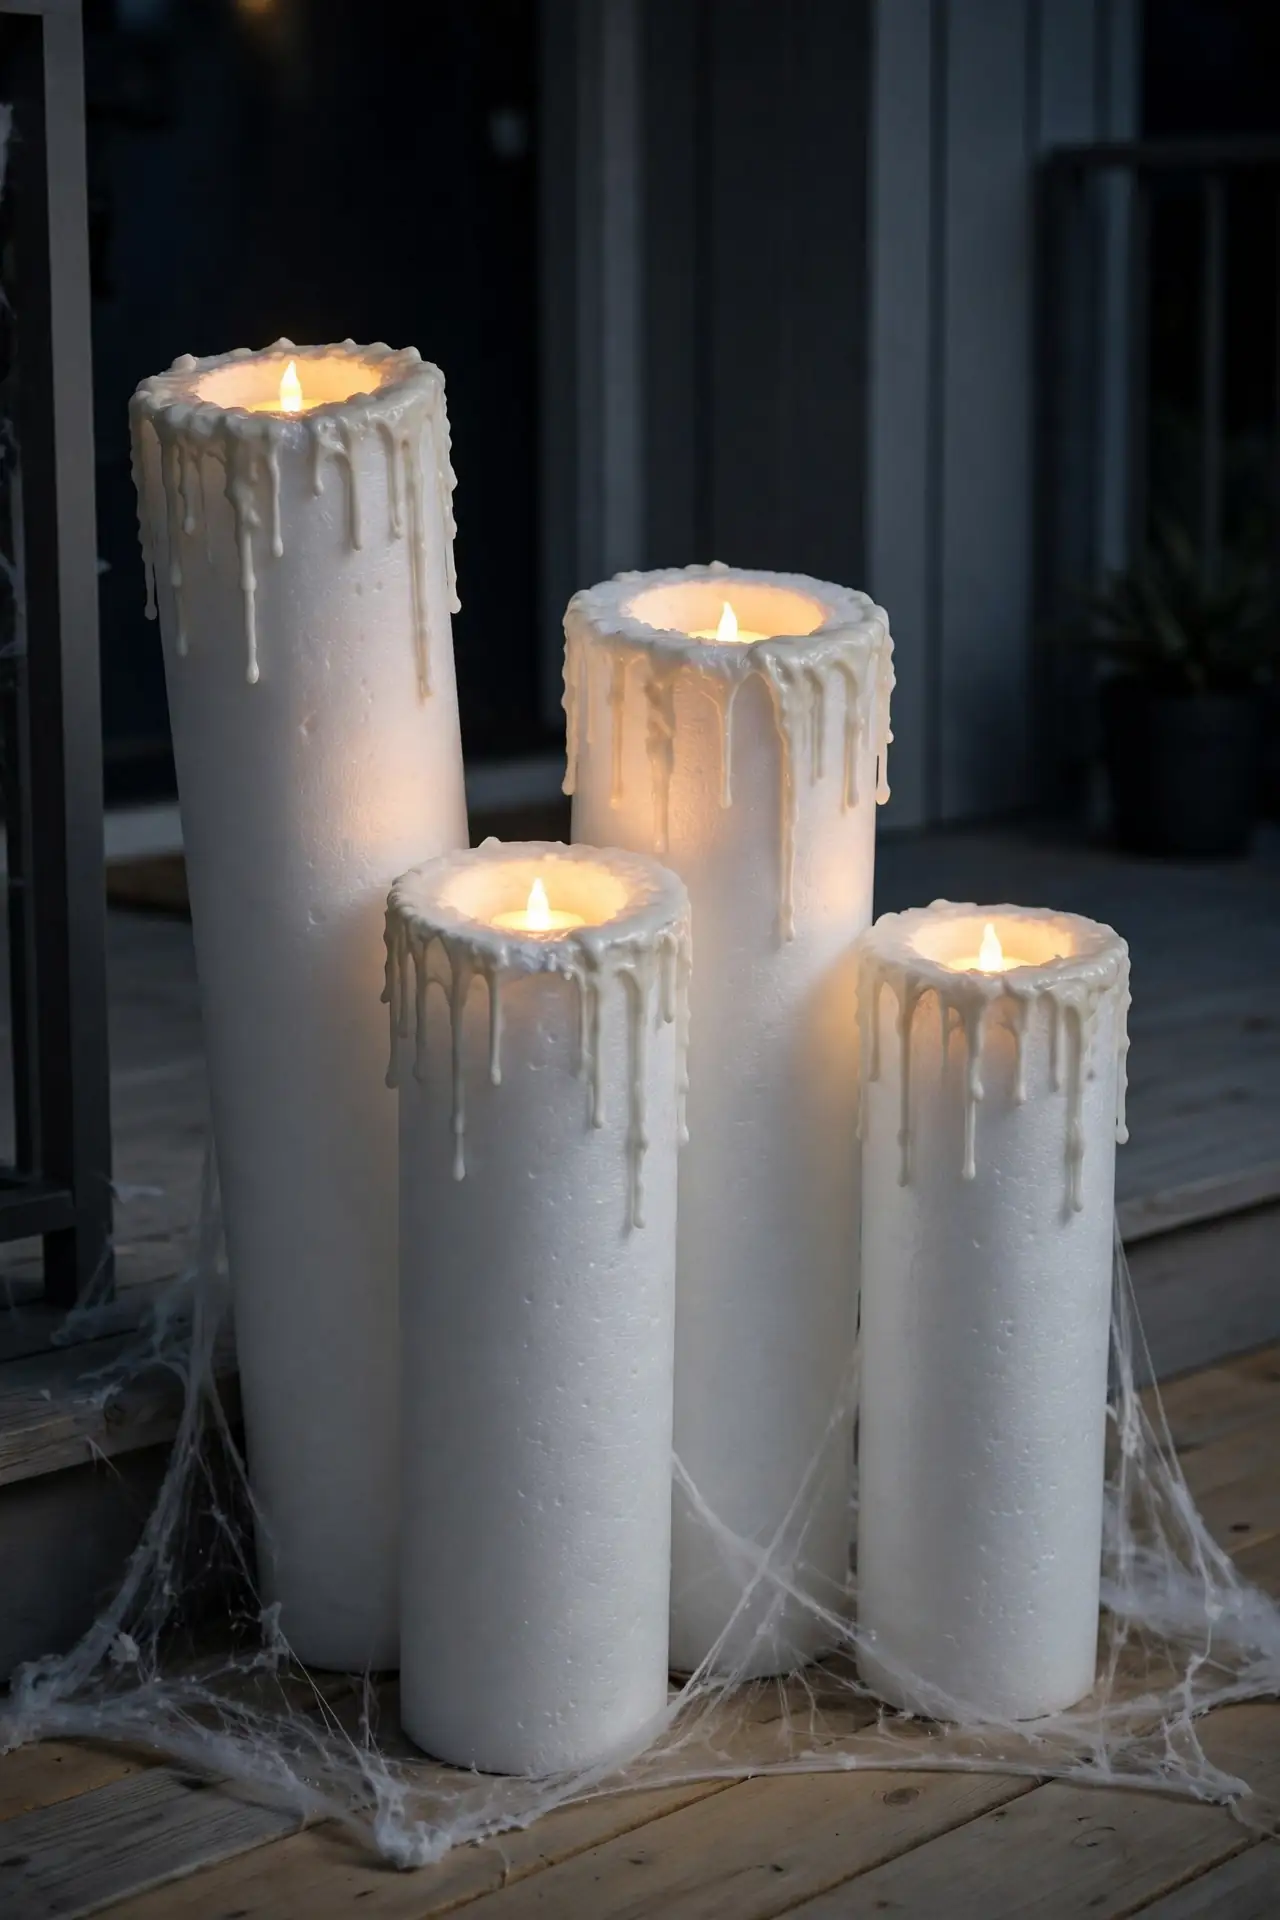
- Do cut pool noodles to staggered heights for a realistic cluster.
- Do paint dripping wax effects at the tops with acrylic paint.
- Do use LED tea lights at the top; never real flames near foam.
DON’T:
- Don’t place them near heat sources, since noodles melt easily.
- Don’t skip the wax detail; it’s what sells the illusion.
- Don’t use them in high wind without weighting the bases.
These oversized candles look like they belong in a haunted mansion, yet cost less than five dollars. Pool noodles are feather-light, so clustering a dramatic group on the porch is easy. The painted wax drips make guests do a double take. I’ve seen this work well when the group includes one very tall candle for drama.
Witch Leg Planters
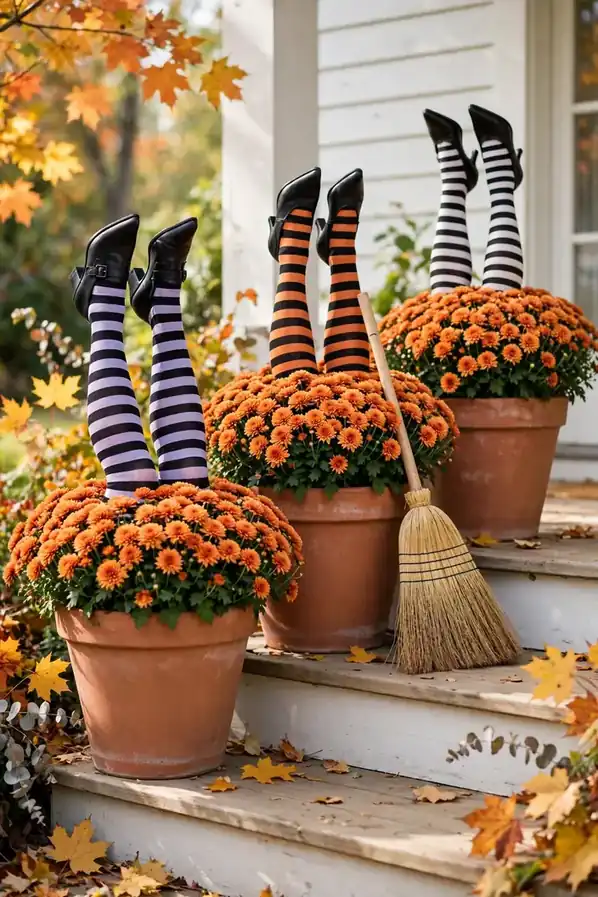
Cost: Very low | Time: Under one hour | Skill Level: Beginner | Best For: Playful, kid-friendly yards
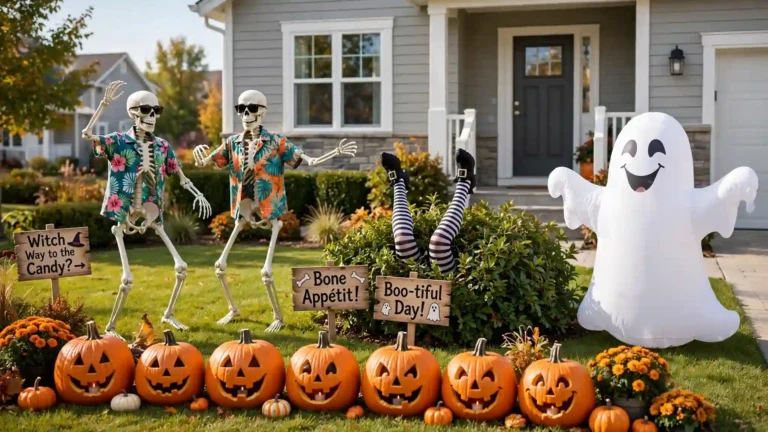
Stuff striped tights with newspaper, add black shoes at the ends, and plunge them upside down into your porch planters. The effect looks like a witch crash-landed headfirst into your mums, and kids find it absolutely hilarious. Top the planters with orange mums or black ornamental grass to complete the scene. This is pure whimsy for the price of a pair of novelty tights. That’s why many experts recommend one funny element per display: it balances the spooky and keeps young visitors smiling.
Floating Cheesecloth Ghosts
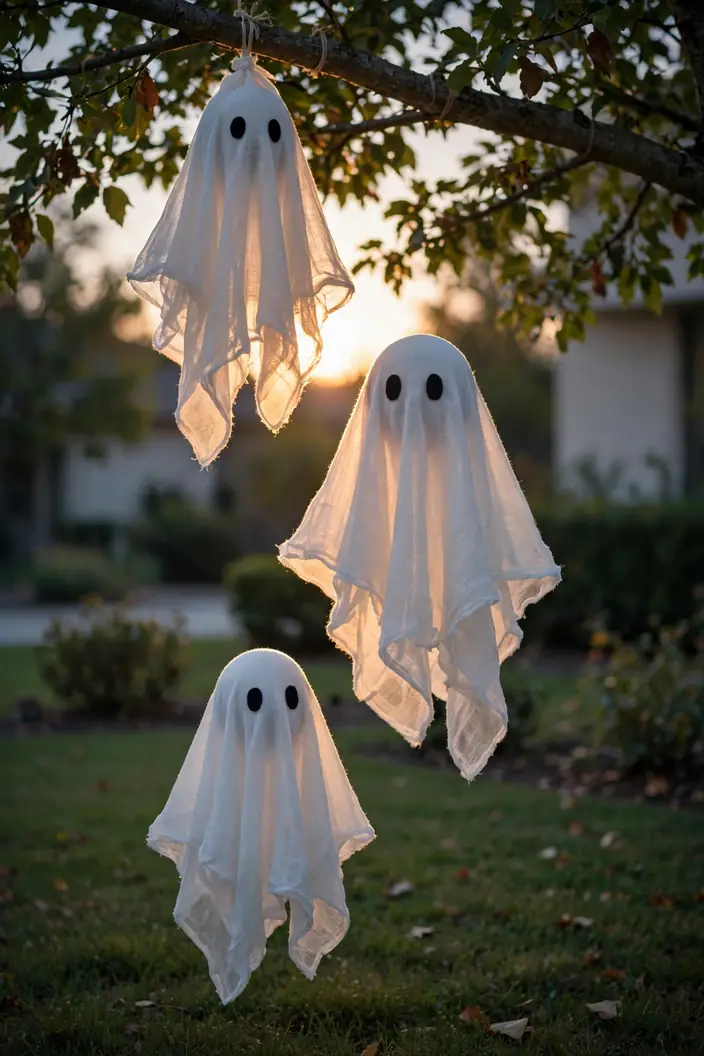
Suspend cheesecloth ghosts from a tree branch and they’ll hover over your lawn like real spirits. Drape stiffened cheesecloth over small inflated balloons to give each ghost a rounded head, then attach black felt eyes. Hang them at different heights with clear fishing line so they appear to float and drift. A spotlight aimed up from below makes them glow eerily after dark.
The floating effect stops every passerby in their tracks, because the ghosts genuinely look airborne. This works best hung from a single strong branch where the ghosts can sway independently in the breeze. In my experience, three ghosts at staggered heights create the perfect little family. Bring the balloons inside during heavy wind, since the fabric can tangle if the ghosts swing too wildly.
Cobwebbed Rock Garden
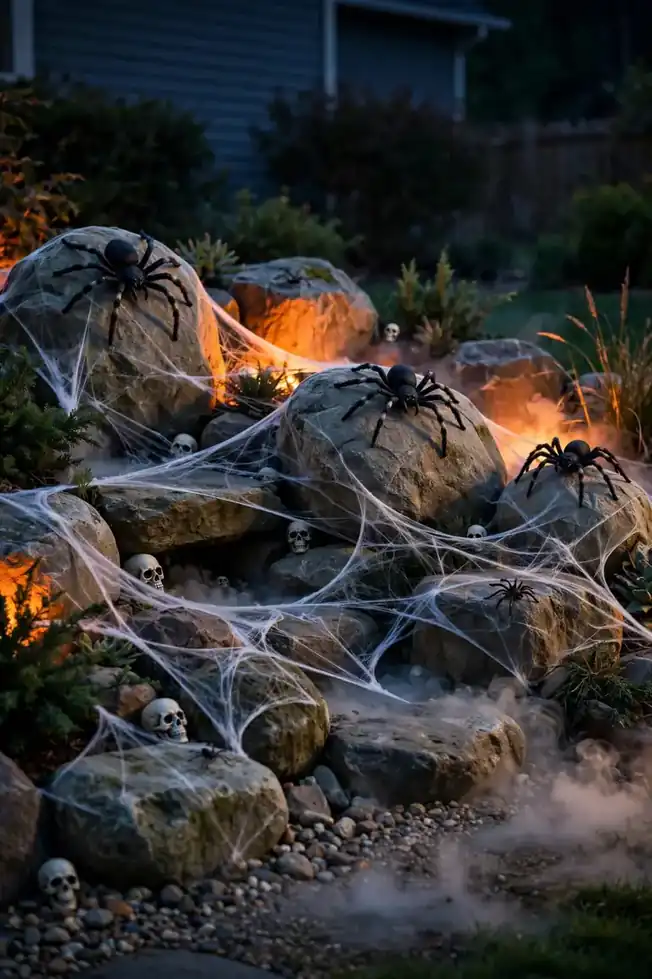
- Stretch bags of fake cobwebbing across your existing rock garden or stone border.
- Pull the webbing thin; sparse stretches look far more realistic than thick clumps.
- Perch large plastic spiders on the biggest rocks, varying their positions.
- Tuck small skulls and bones between the stones for hidden surprises.
- Add orange or purple uplighting behind the rocks for nighttime drama.
Your ordinary landscaping becomes a haunted rock garden with one bag of webbing and a handful of spiders. The trick is stretching the webs thin: less material looks more convincing. These funny halloween costumes for families pair perfectly with a yard this spooky for memorable group photos. The uplighting is what transforms it after dark, so don’t skip that five-dollar investment.
Painted Rock Pumpkins
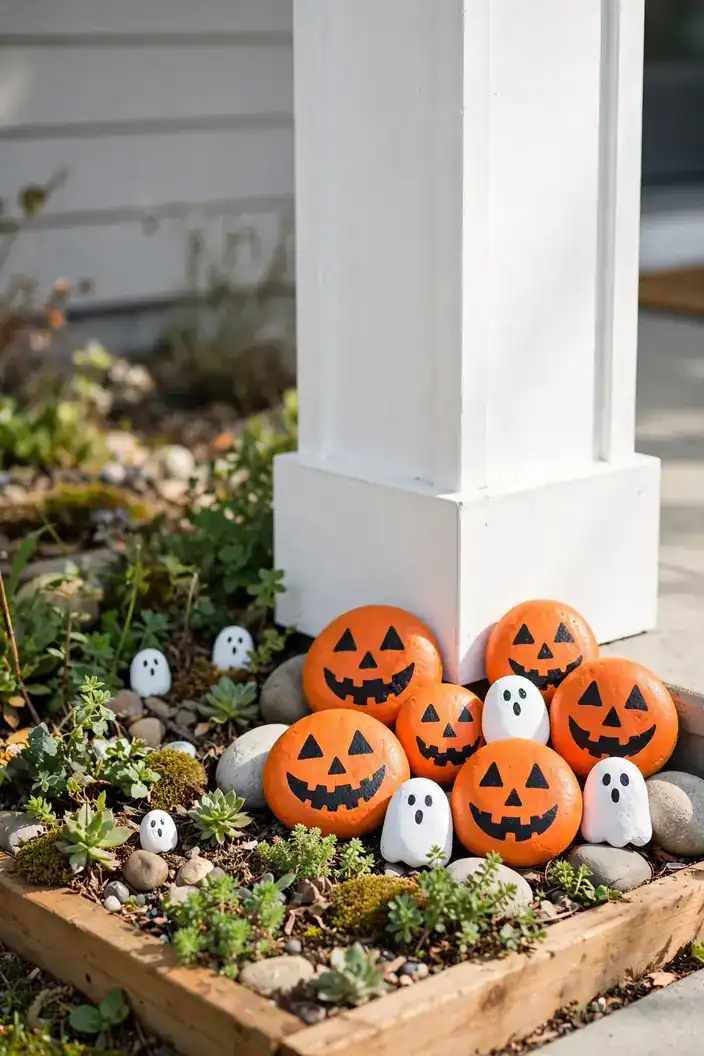
Quick Tip: Choose smooth, round rocks about the size of your fist for the most pumpkin-like shape. Wash and dry them first so the paint adheres properly. Paint the whole rock orange, let it dry, then add the jack-o-lantern face in black. A clear outdoor sealer on top protects your artwork through rain and frost, and the rocks will last for years in the garden.
These painted rock pumpkins never rot, never need carving, and cost nothing if you gather stones yourself. Scatter them through garden beds, line them on porch steps, or cluster them at pillar bases. Kids love painting their own, making this a perfect family craft afternoon. That’s why many experts recommend involving children: their proud little pumpkins become the most treasured part of the display.
DIY Bat Swarm
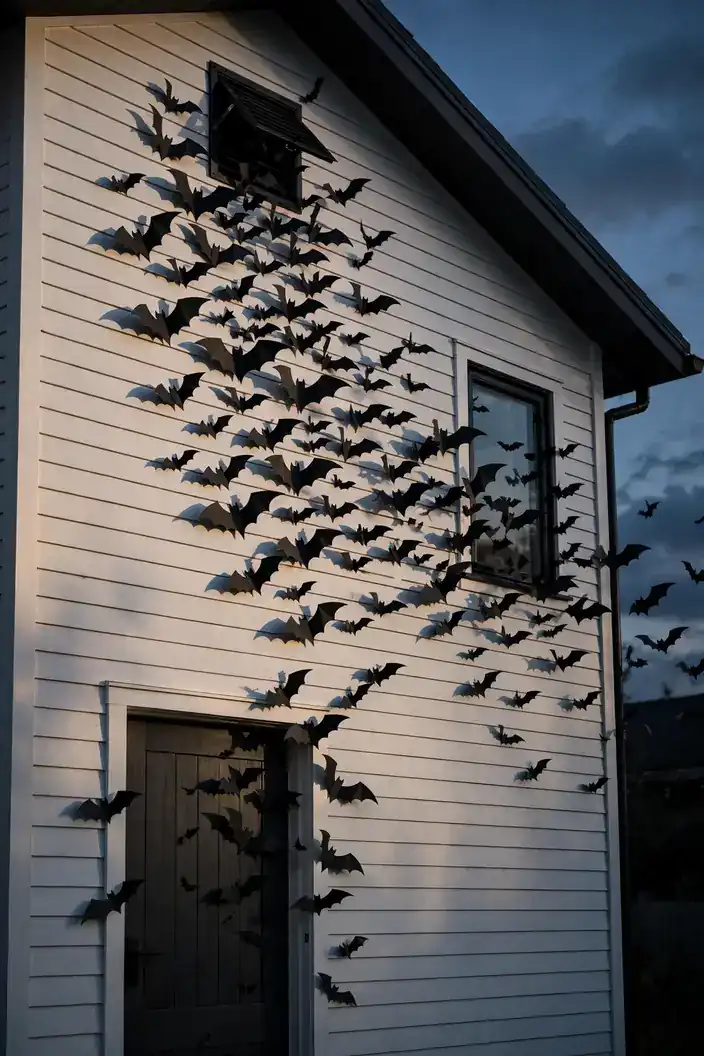
BEFORE: A blank house wall offers nothing for the eye, and your decorations sit only at ground level. The upper half of your home stays completely undecorated and forgettable.
AFTER: A swarm of black bats streams across the siding as if escaping from the attic, filling the vertical space with motion. The wall becomes the most dramatic part of the entire display.
Cut bat shapes from black cardstock in three sizes, fold wings slightly for dimension, and stick them to siding with removable adhesive dots. Start the swarm dense at one point, like a vent, and let it scatter outward. The 3D fold makes each bat cast a tiny shadow that brings it to life. This costs pennies, takes an hour, and removes cleanly after Halloween.
Creepy Cloth Table
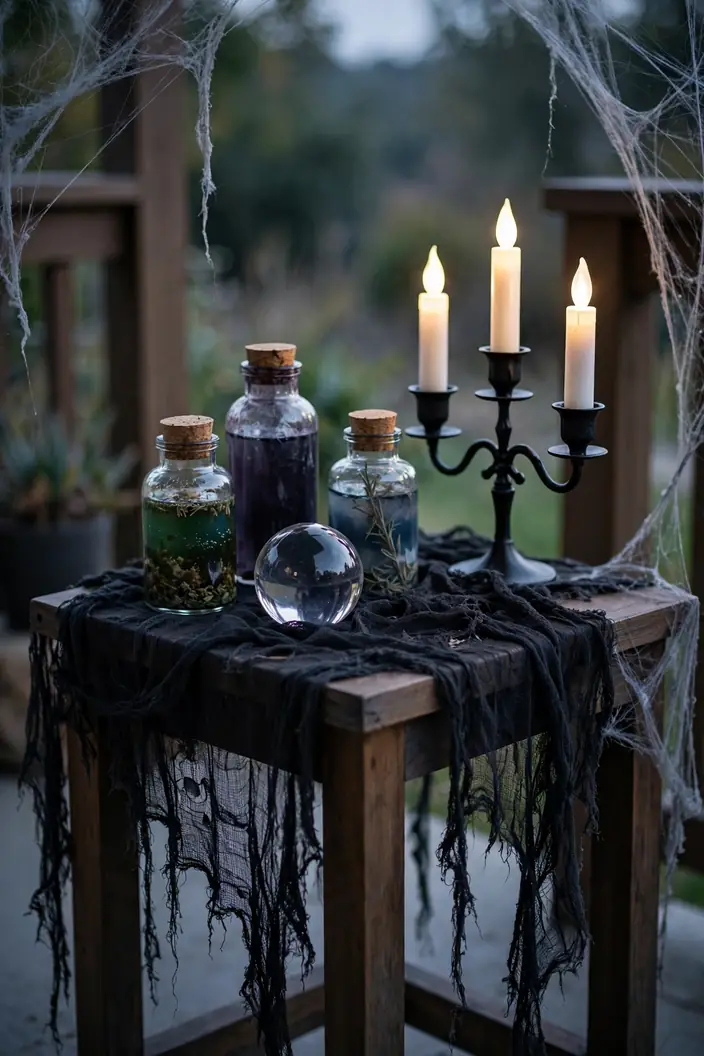
- Drape an old table with tattered black cheesecloth, letting it puddle on the ground.
- Fill old jars and bottles with colored water to create fake potion bottles.
- Add a crystal ball, plastic eyeballs, and other creepy curiosities on top.
- Place a candelabra with LED candles at the back for height and glow.
- Stretch cobwebs across the table corners to finish the vignette.
This little apothecary table becomes a storytelling corner that fascinates visitors of all ages. The colored water potions cost nothing and look incredibly convincing in the evening light. I’ve noticed that kids invent whole stories about the witch who owns the table, which makes it interactive without any effort. Tuck the table under a porch overhang to protect the paper labels from rain.
Harvest Moon Wreath
| Option | Look | Effort |
|---|---|---|
| Grapevine base wreath | Rustic natural | Low |
| Foam base wreath | Full and lush | Medium |
| Wire frame wreath | Modern minimal | Low |
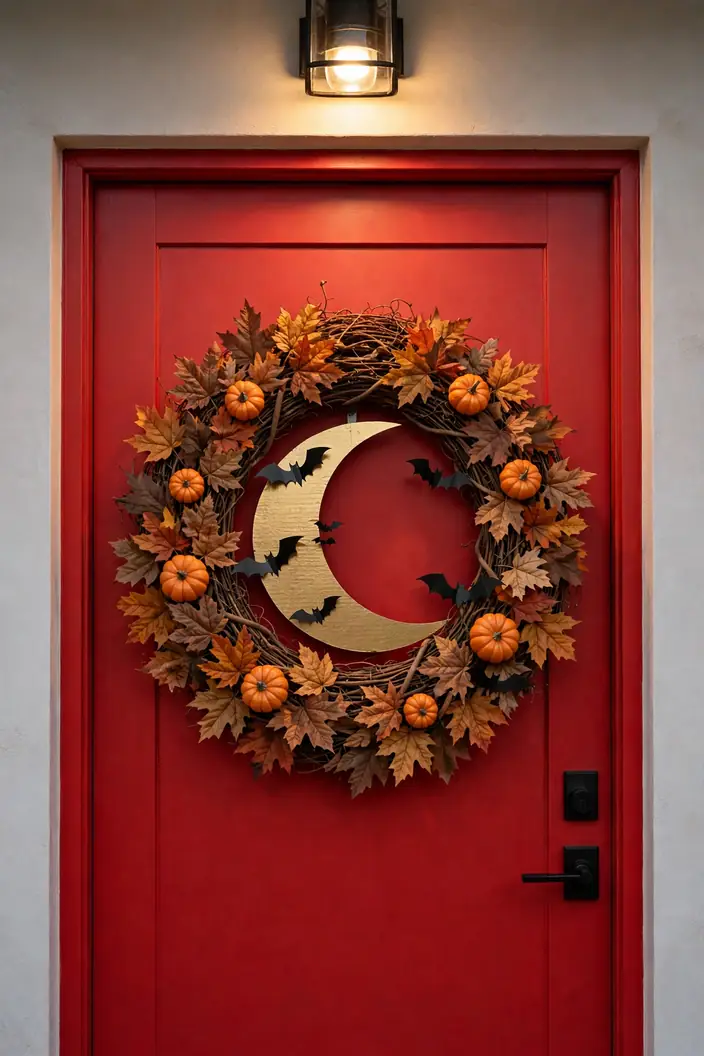
Wrap a grapevine wreath with faux autumn leaves and mini pumpkins, then add a gold cardboard crescent moon at the center. Tiny black bats circling the moon complete the harvest night scene. Hang it on your front door where every visitor sees it up close. This wreath bridges fall and Halloween beautifully, so it can go up in September and stay through October. Store it in a wreath box and it will look fresh for many seasons to come.
Skull Planter Trio
DO:
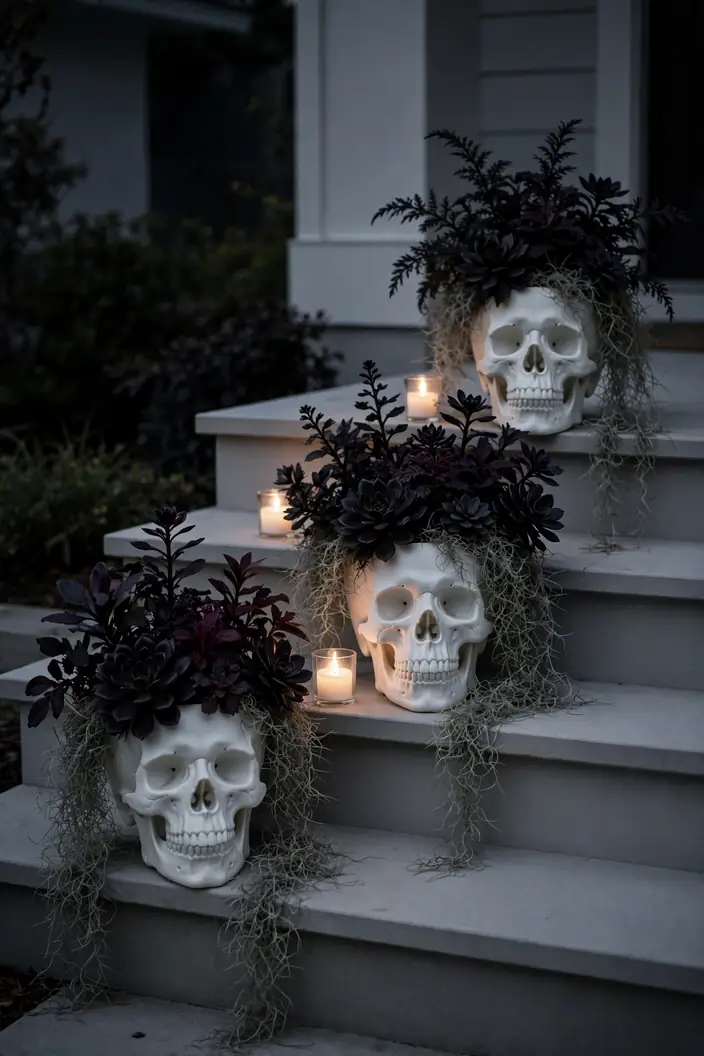
- Do pick dark plants like black mondo grass for contrast.
- Do vary skull sizes and step heights for a layered look.
- Do add Spanish moss spilling over the edges.
DON’T:
- Don’t use anything fragile that could break on the steps.
- Don’t overwater; skull planters dry out differently.
- Don’t place them where visitors might knock them over.
Skull planters mix spooky and stylish, especially with moody dark plants. They look far more expensive than the few dollars each skull costs. The Spanish moss is the detail that lifts the trio from simple craft to designer vignette. These transition beautifully into Day of the Dead displays in early November too.
Lantern Lit Walkway
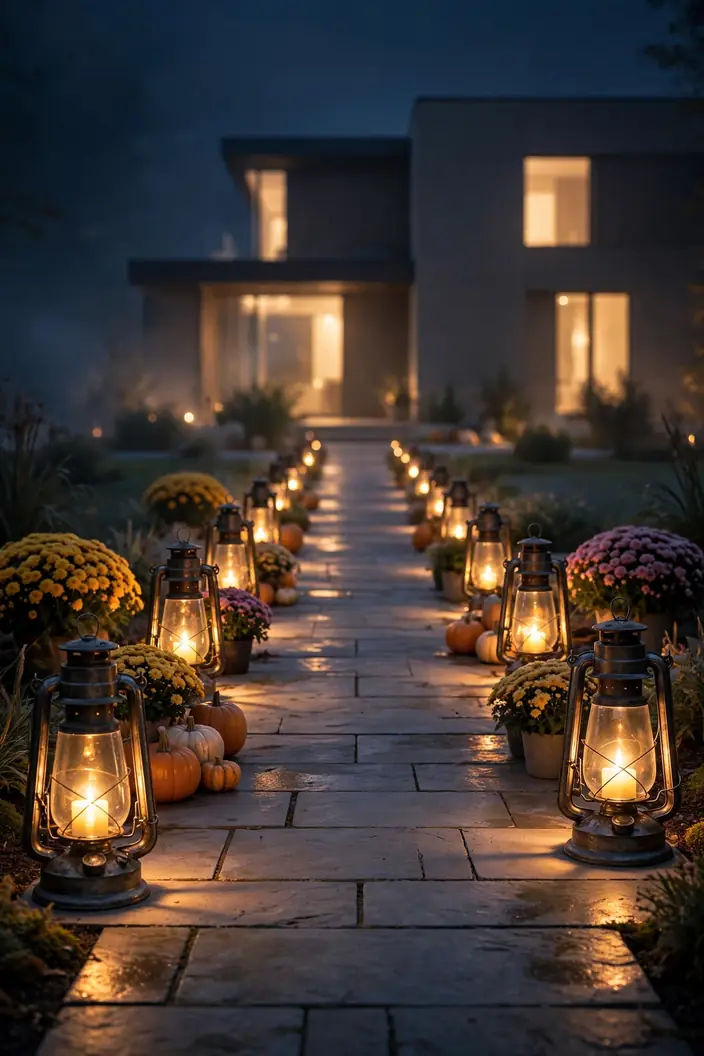
Cost: Low to medium | Time: One evening | Skill Level: Beginner | Best For: Elegant spooky entrances
Line your walkway with thrifted metal lanterns fitted with LED candles for the most elegant glow on this list. The warm light pooling on the pavement guides trick-or-treaters safely to your door while looking absolutely magical. Mix lantern heights and tuck small pumpkins between them for a styled, layered effect. Thrift stores sell these lanterns for a dollar or two, and the LEDs run all season on one set of batteries. This is the finishing touch that makes the whole yard feel intentional and complete.
Conclusion
Building a spooky yard on a budget is one of the most satisfying projects of the fall season, and now you have 24 ways to do it. The magic of homemade halloween decorations outdoor is that every piece carries your personal touch, which no store-bought prop can replicate. Start with two or three favorites this weekend, then add more each year as your collection grows. I’ve seen how small changes like these can completely shift the way a street feels on Halloween night. Save your favorite ideas on Pinterest, gather the family for a craft afternoon, and share photos of your finished display. Your yard is about to become the one everyone talks about.




One Comment