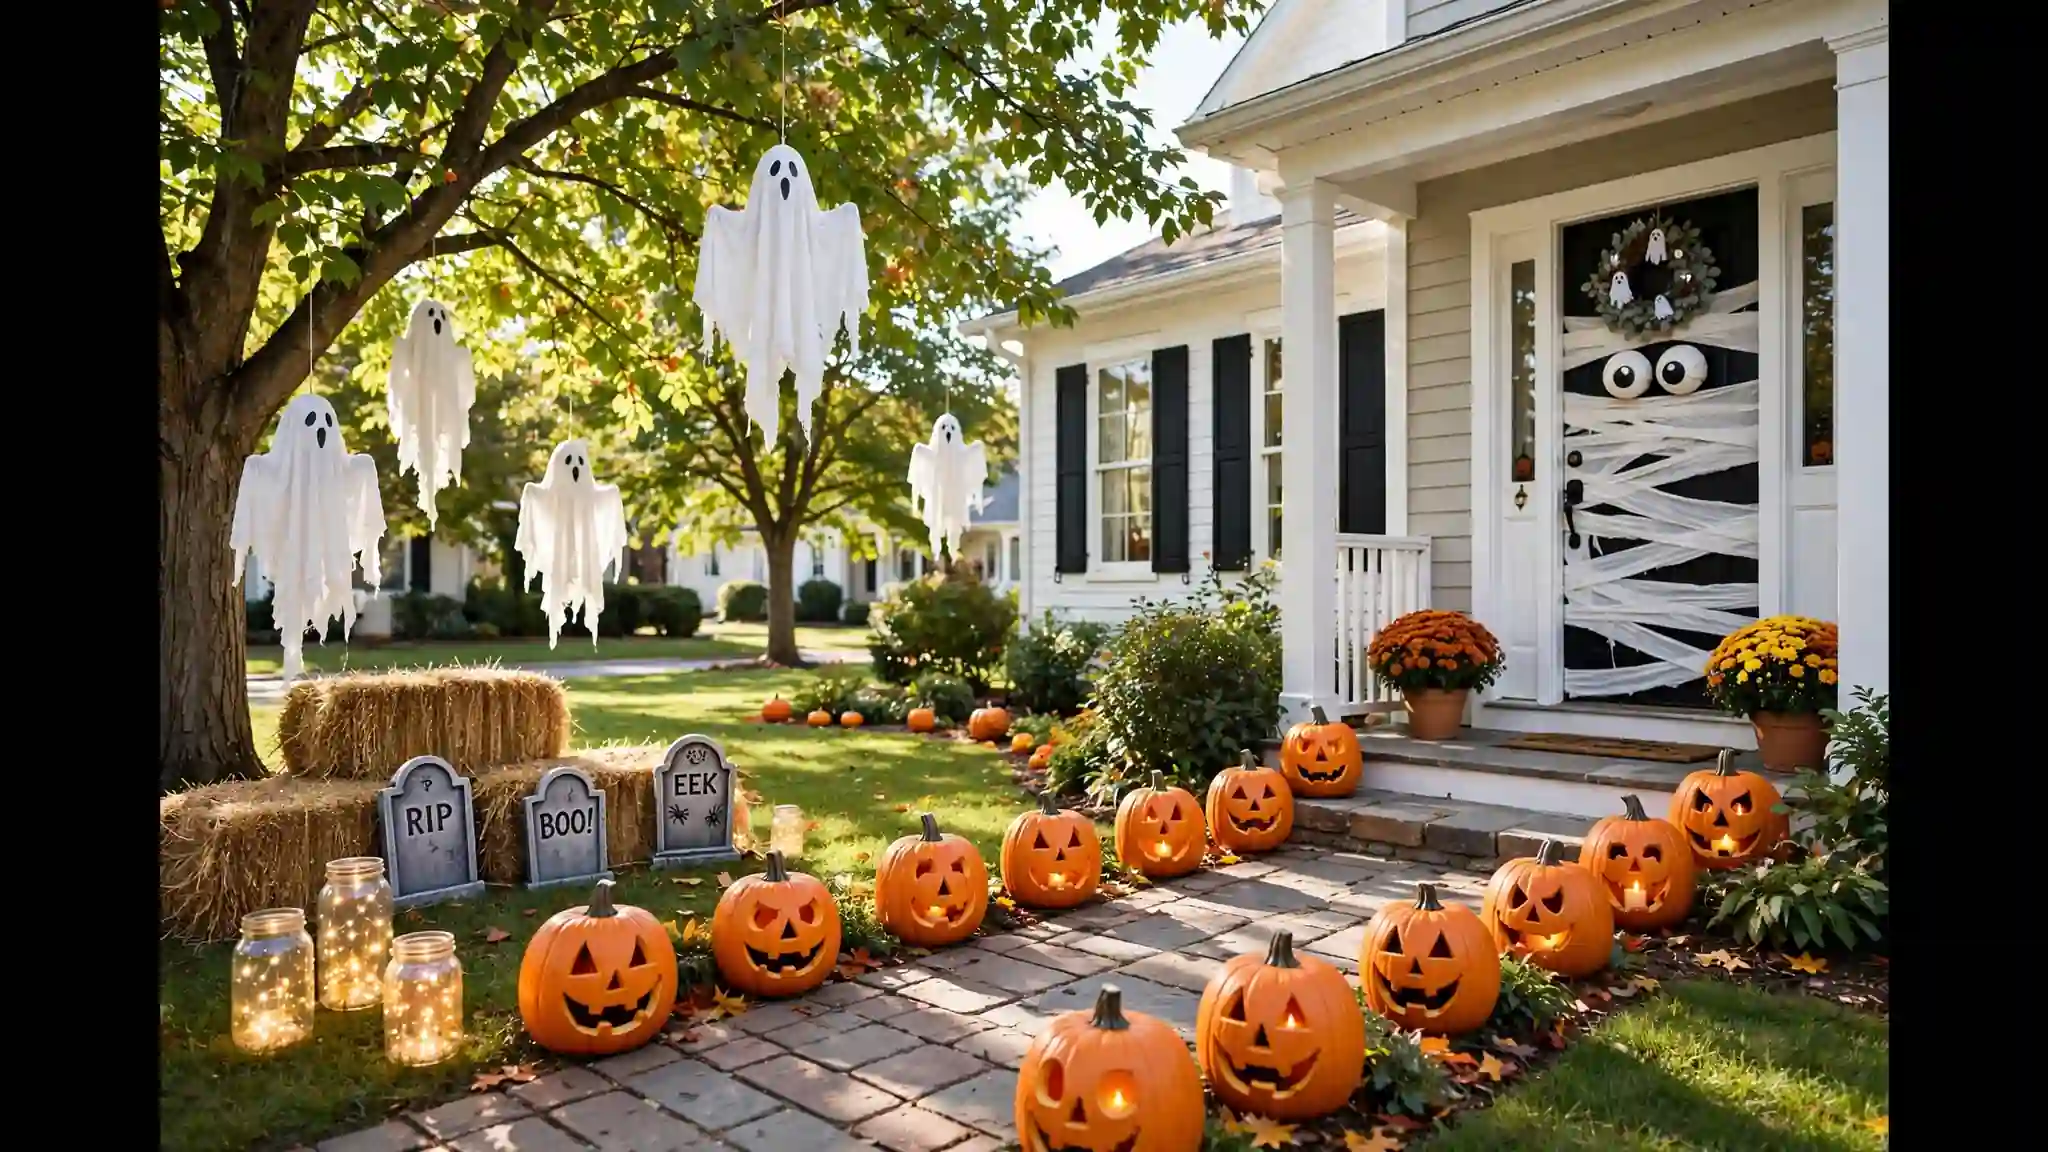
22 DIY Halloween Decor Outdoor Ideas for Spooky Curb Appeal
A haunted front yard does not require a big budget, and diy halloween decor outdoor projects prove that a few clever handmade touches can outshine store-bought sets. Cardboard, paint, string lights, and pumpkins become glowing ghosts, floating candles, and eerie pathways with just an afternoon of crafting. Trick-or-treaters remember the houses that feel personal, and neighbors slow down to admire the creativity. In my experience, the simplest builds get the most compliments. Every idea below costs little, sets up fast, and photographs beautifully for Pinterest.
Before you start building, peek at our funny outdoor halloween decorations roundup for lighter ideas that pair well with spooky ones. Mixing silly and scary keeps the display fun for toddlers while still thrilling older kids. Below you will find twenty-two step-by-step ideas, each with a clear build plan, a budget-friendly supply list, and styling tips that work for small porches and big yards alike.
Pumpkin Lantern Pathway
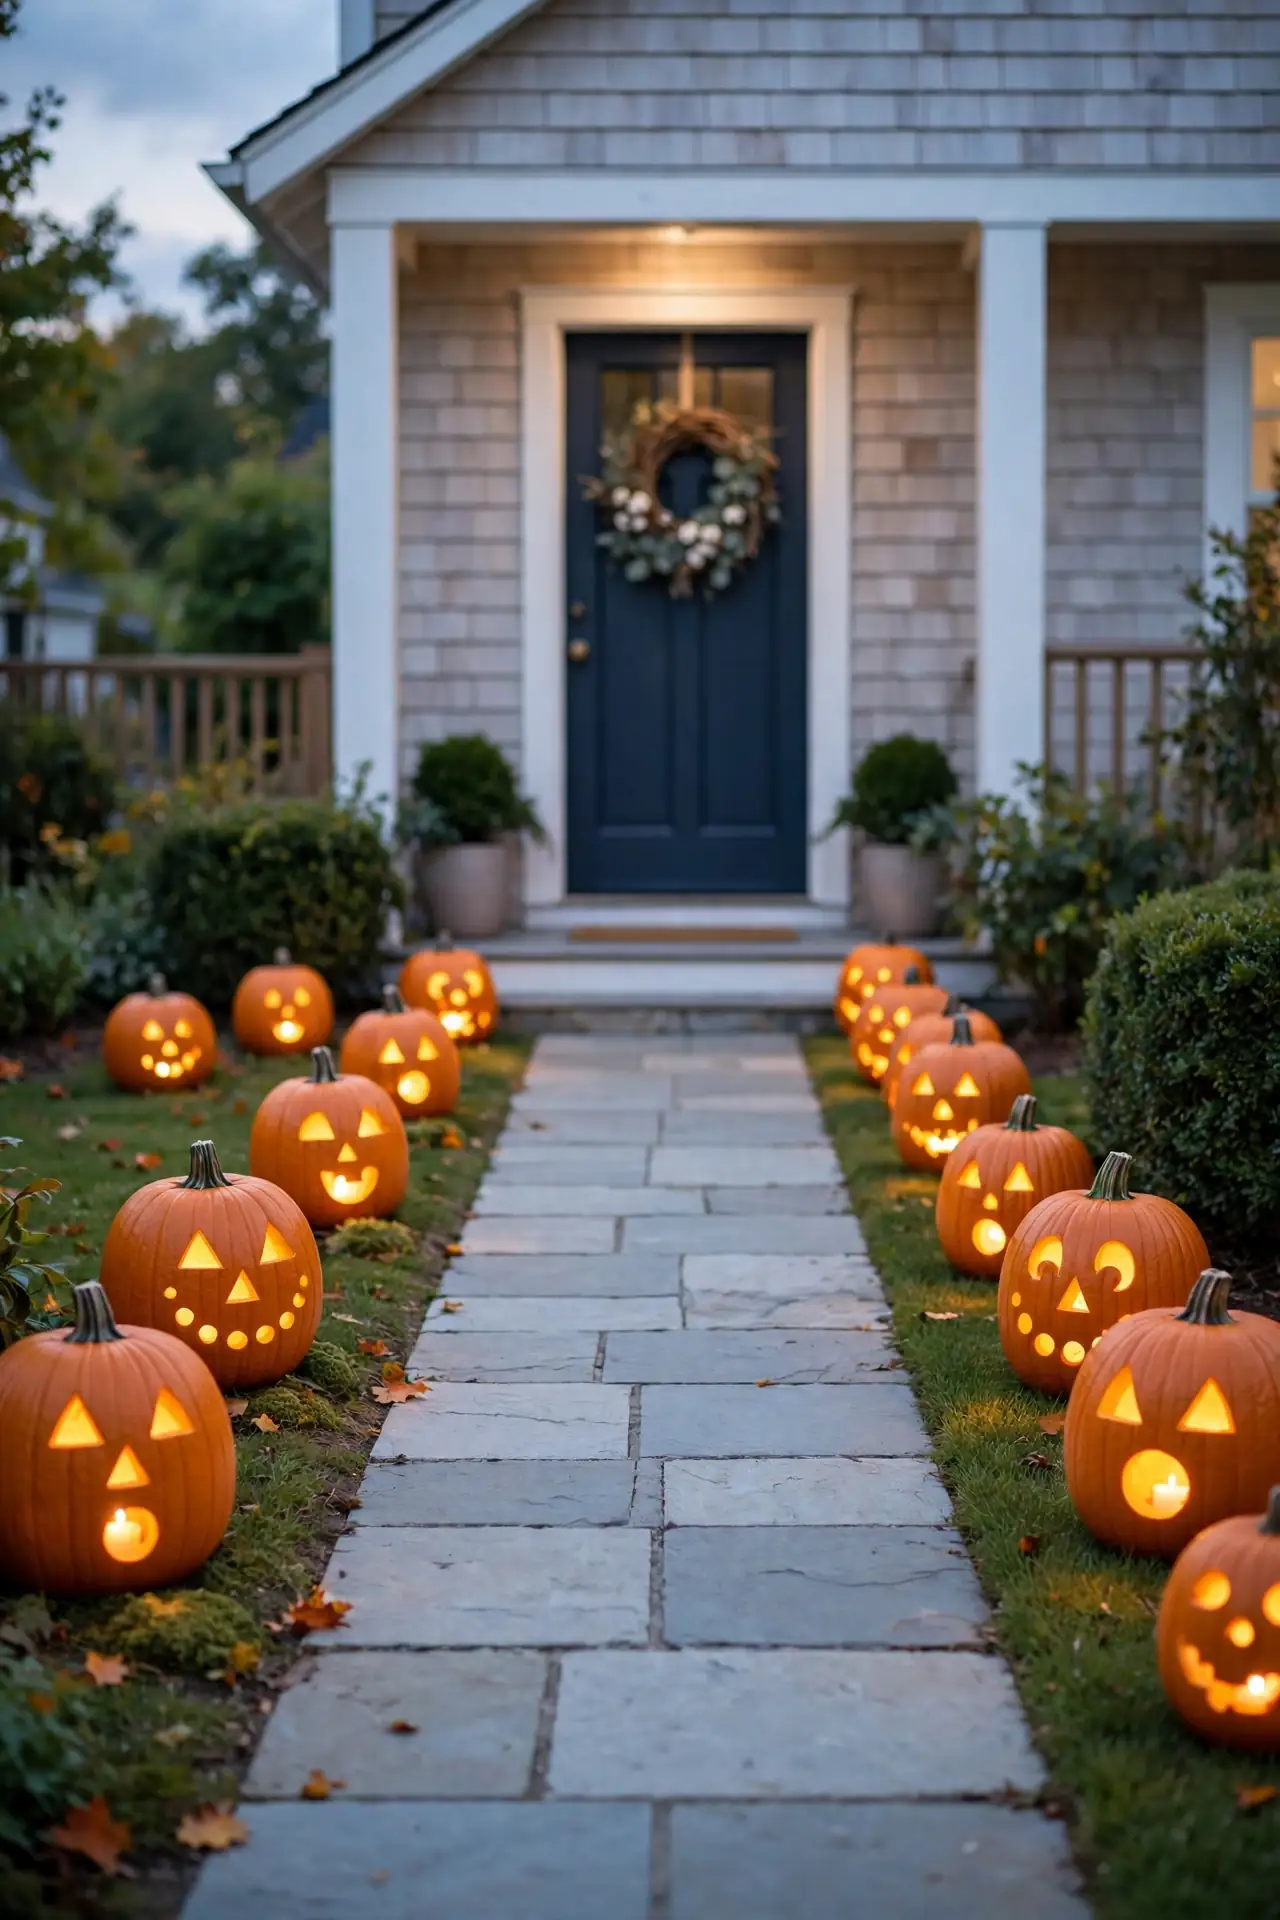
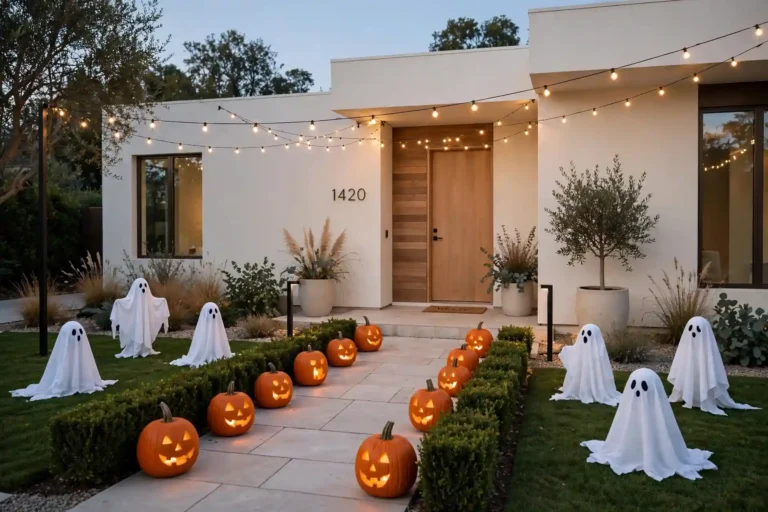
Nothing says Halloween like a glowing walkway, and carved pumpkin lanterns are the friendliest way to build one. Scoop each pumpkin clean, sketch a simple face or pattern with a marker, and cut with a sturdy serrated knife. Battery tea lights go inside each one, so there is no fire risk near dry leaves.
Line the pumpkins along both sides of your path, spacing them two to three feet apart for a balanced glow. Vary the sizes for a collected look, and tuck a few uncarved mini pumpkins between the lanterns. Light them at dusk and watch the whole street slow down. This classic never fails to delight every age group.
Ghostly Jug Lanterns
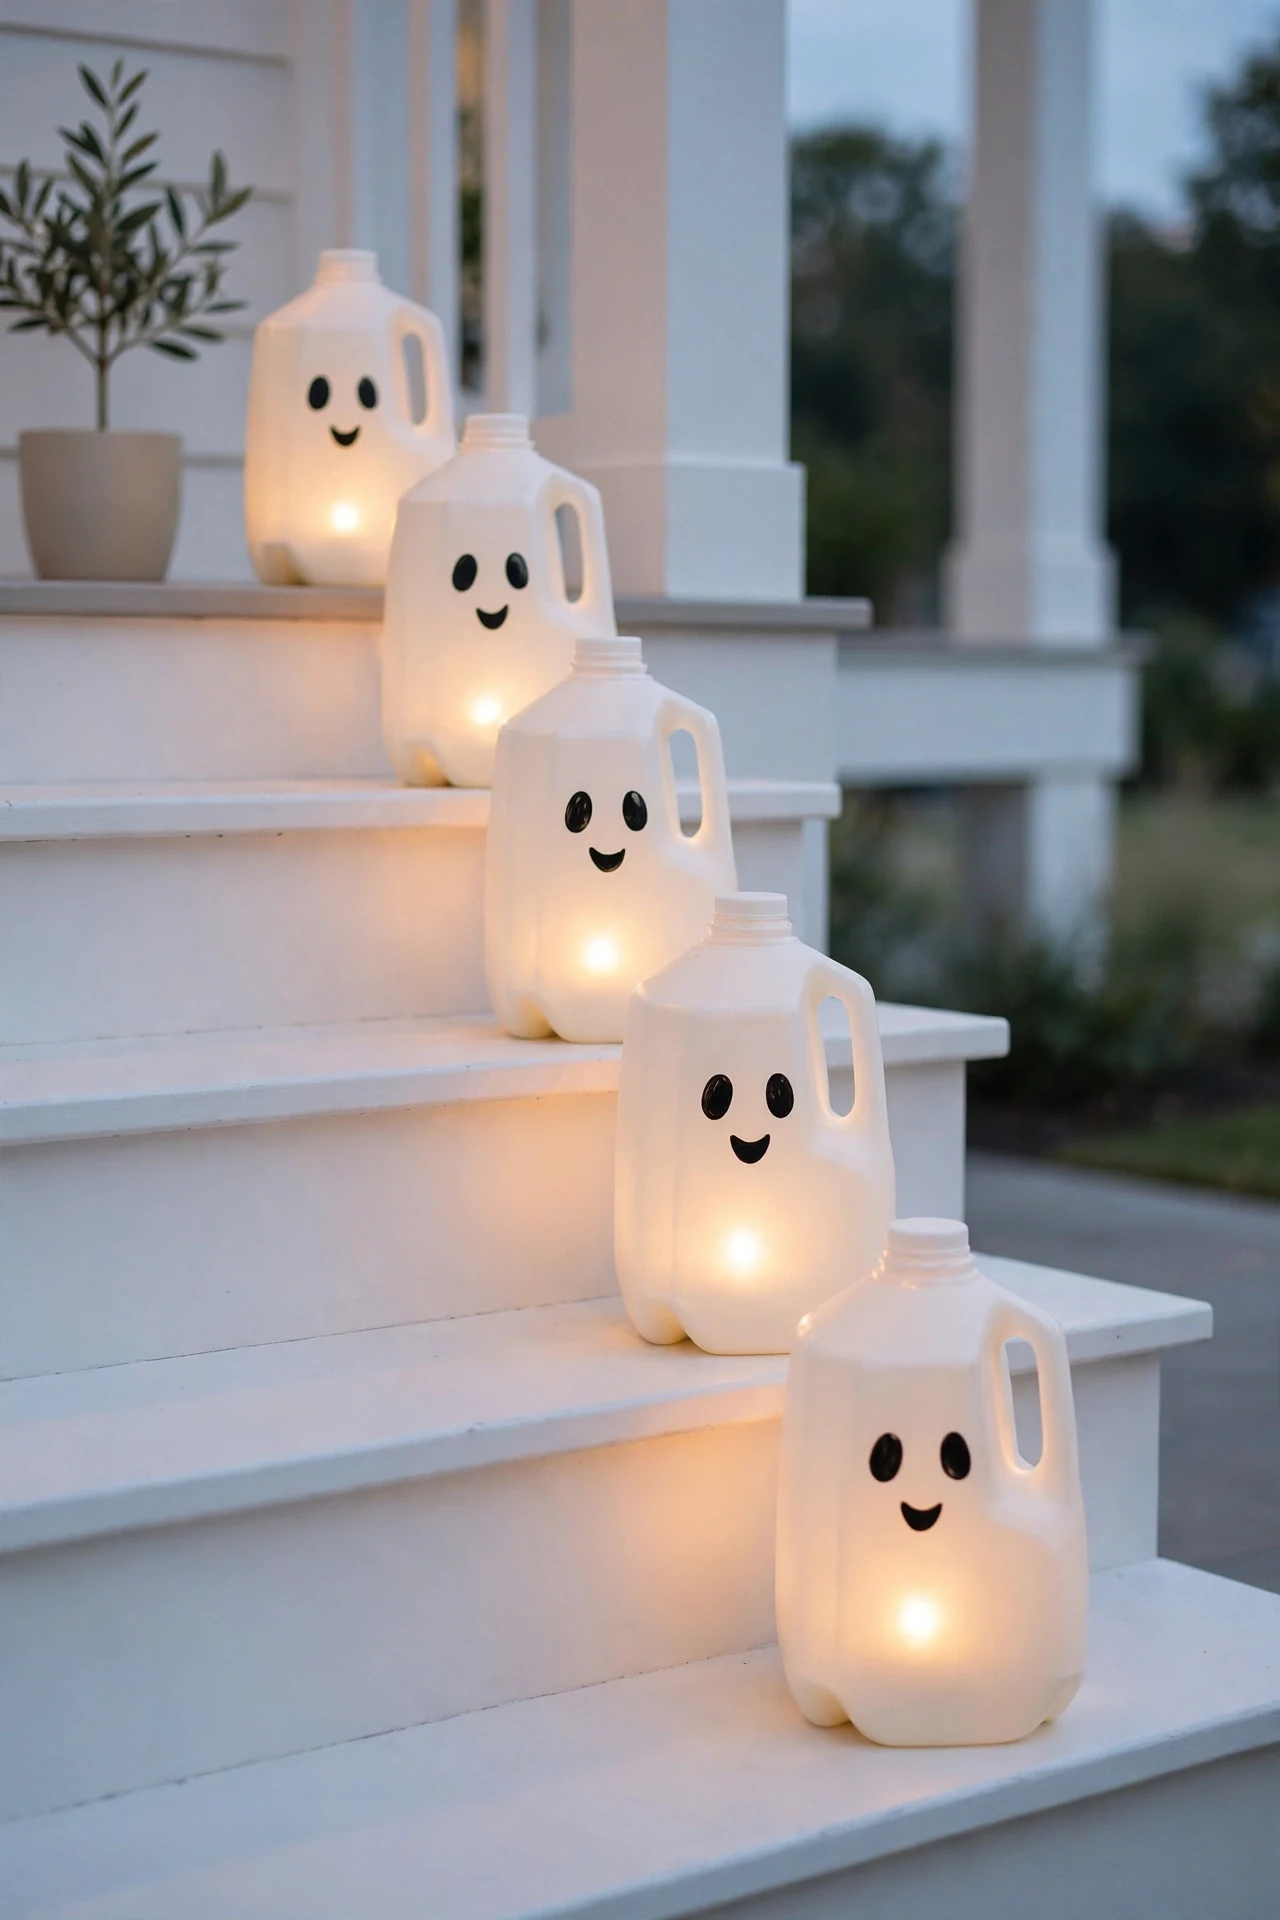
- Save empty gallon milk jugs, rinse them well, and let them dry completely so paint sticks.
- Draw simple ghost faces with a black permanent marker: two oval eyes and a wavy mouth.
- Drop a battery tea light into each jug before dusk for instant glow.
- Cluster three to five jugs on steps or along the path for a soft, spooky glow.
- Weigh the bottoms with a handful of sand if autumn wind knocks them over.
These jug ghosts cost almost nothing and take ten minutes apiece, which makes them perfect for last-minute decorating. Kids love drawing the faces, so turn it into a family craft night. I have noticed the milky plastic diffuses light beautifully, giving each ghost a soft, friendly glow that never looks cheap.
Spooky Entry Steps
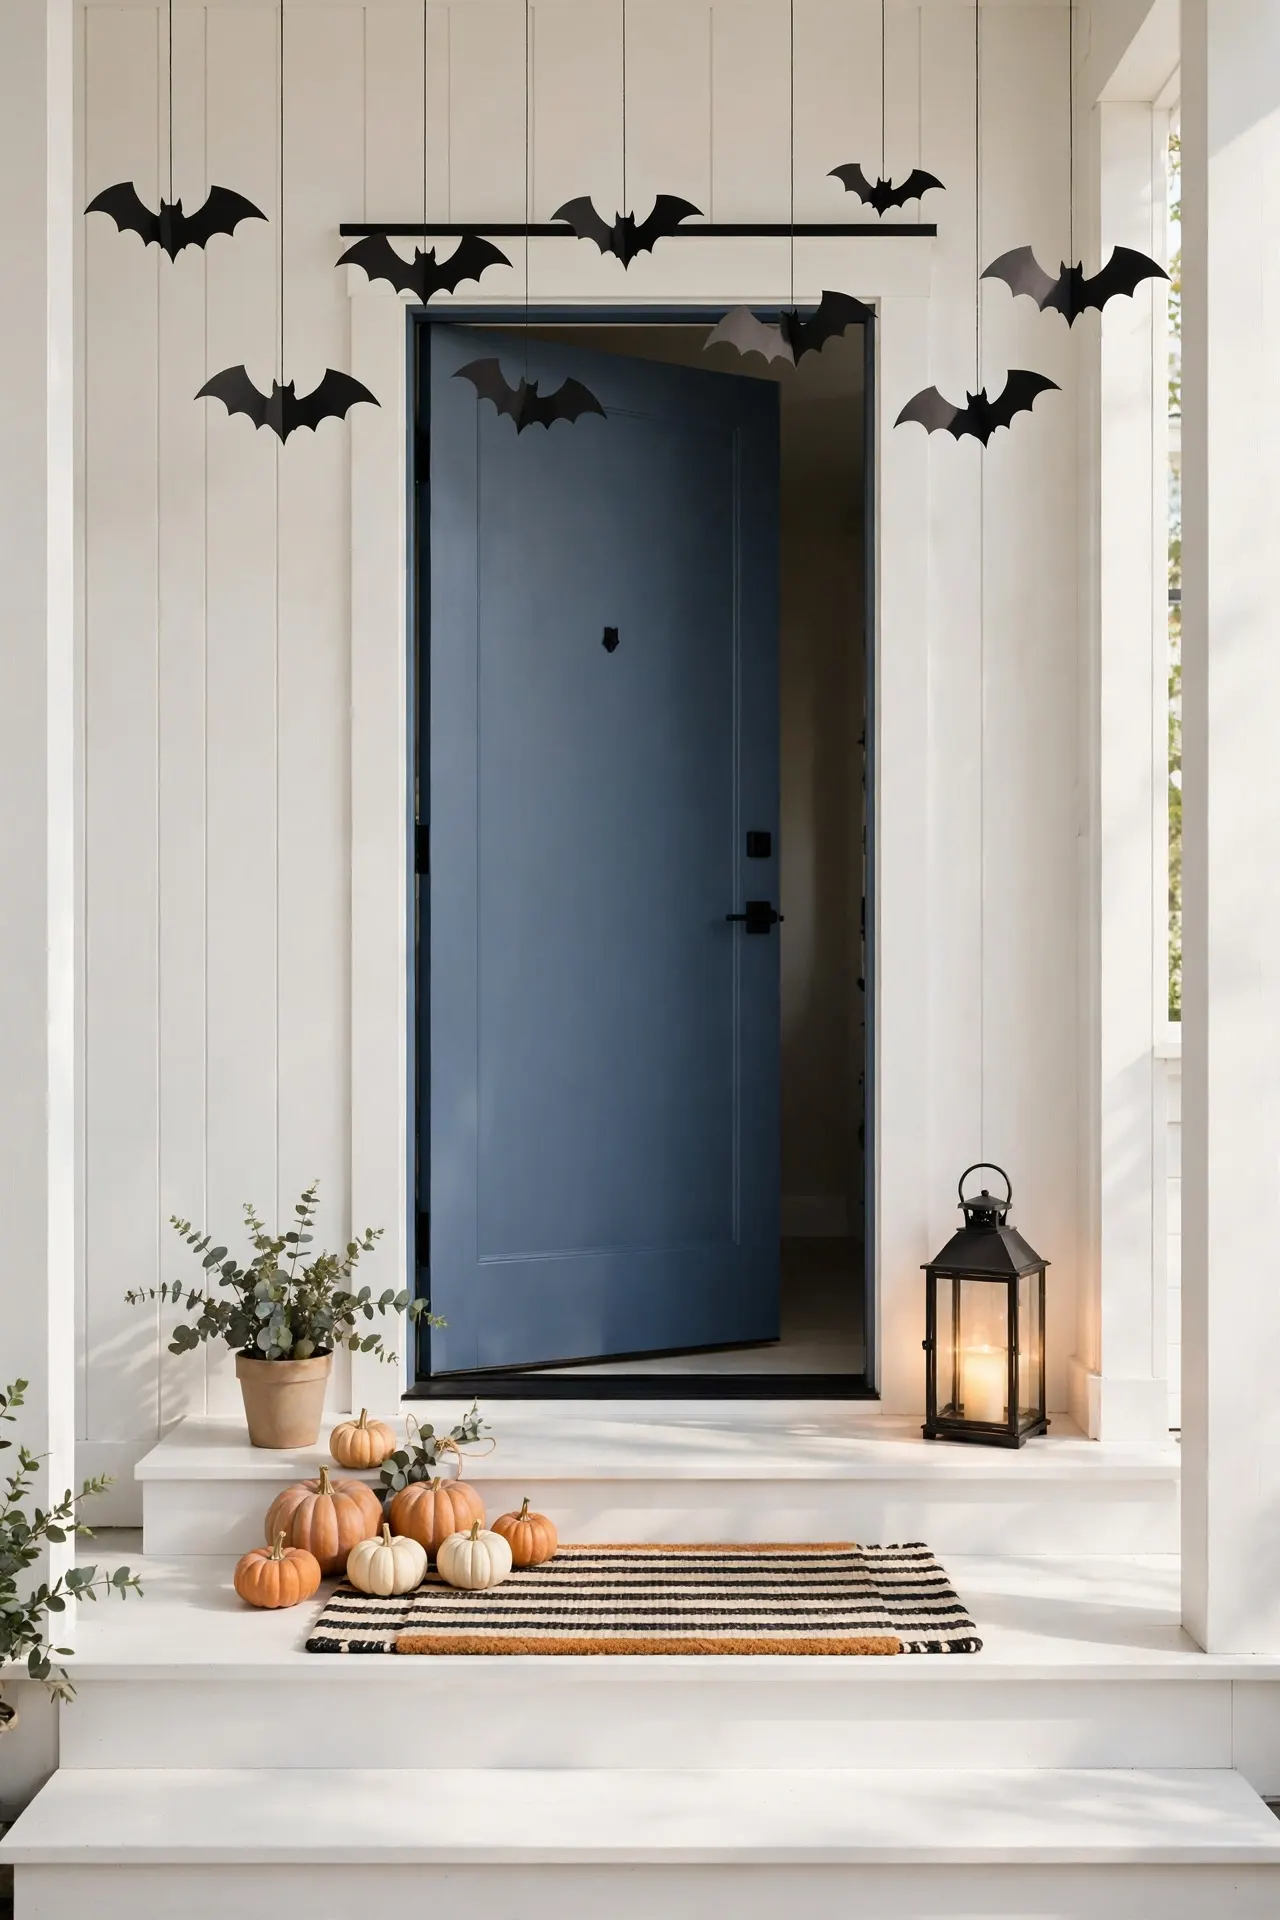
Quick Tip: Style your steps in layers from the ground up: lanterns and large pumpkins at the base, medium pots in the middle, and a wreath plus bats above the door. Stick to two accent colors, like black and orange, so the entry feels styled rather than scattered. Step back to the sidewalk to check the full view.
Steps are the first thing guests see, so treat them like a stage. Odd numbers of pumpkins photograph better than even ones, and a striped mat ties the whole scene together. Swap real candles for battery ones on windy nights. This one-evening project refreshes your whole entry for the season.
Hay Bale Graveyard
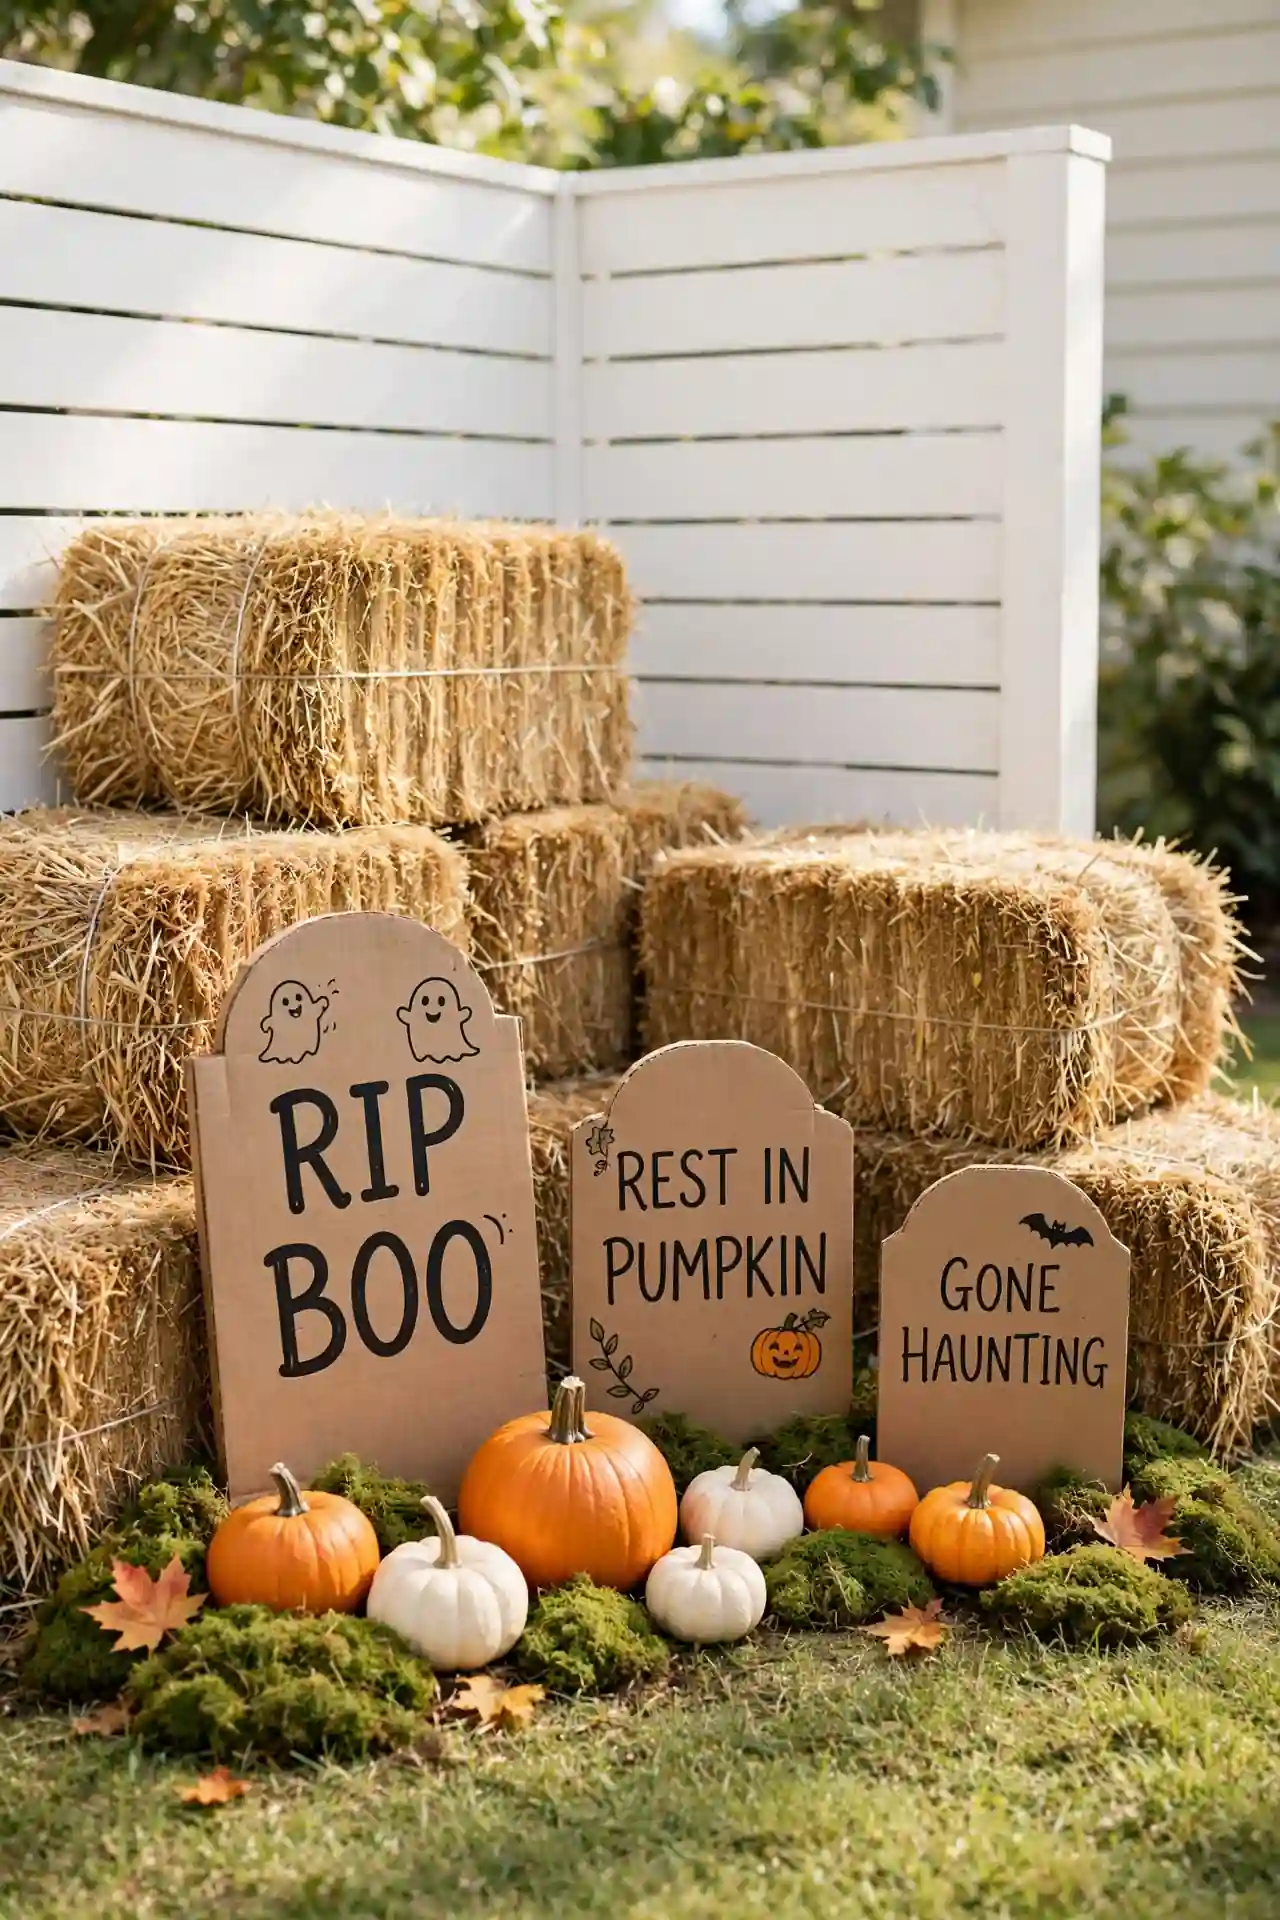
BEFORE: Your side yard sits empty all October, a flat patch of grass no one notices. The front of the house feels unfinished, and trick-or-treaters hurry past without a second glance.
AFTER: Two stacked hay bales anchor the corner, with gray cardboard tombstones leaning at playful angles. Faux moss and mini pumpkins fill the gaps, and the whole scene glows under a porch light. Passersby stop to read the funny epitaphs.
Cut tombstone shapes from sturdy cardboard boxes and paint them stone gray with black lettering. Seal them with clear spray so October rain never ruins the work. Push a wooden stake behind each one for support. This build takes one afternoon and stores flat for next year.
Floating Candle Illusions
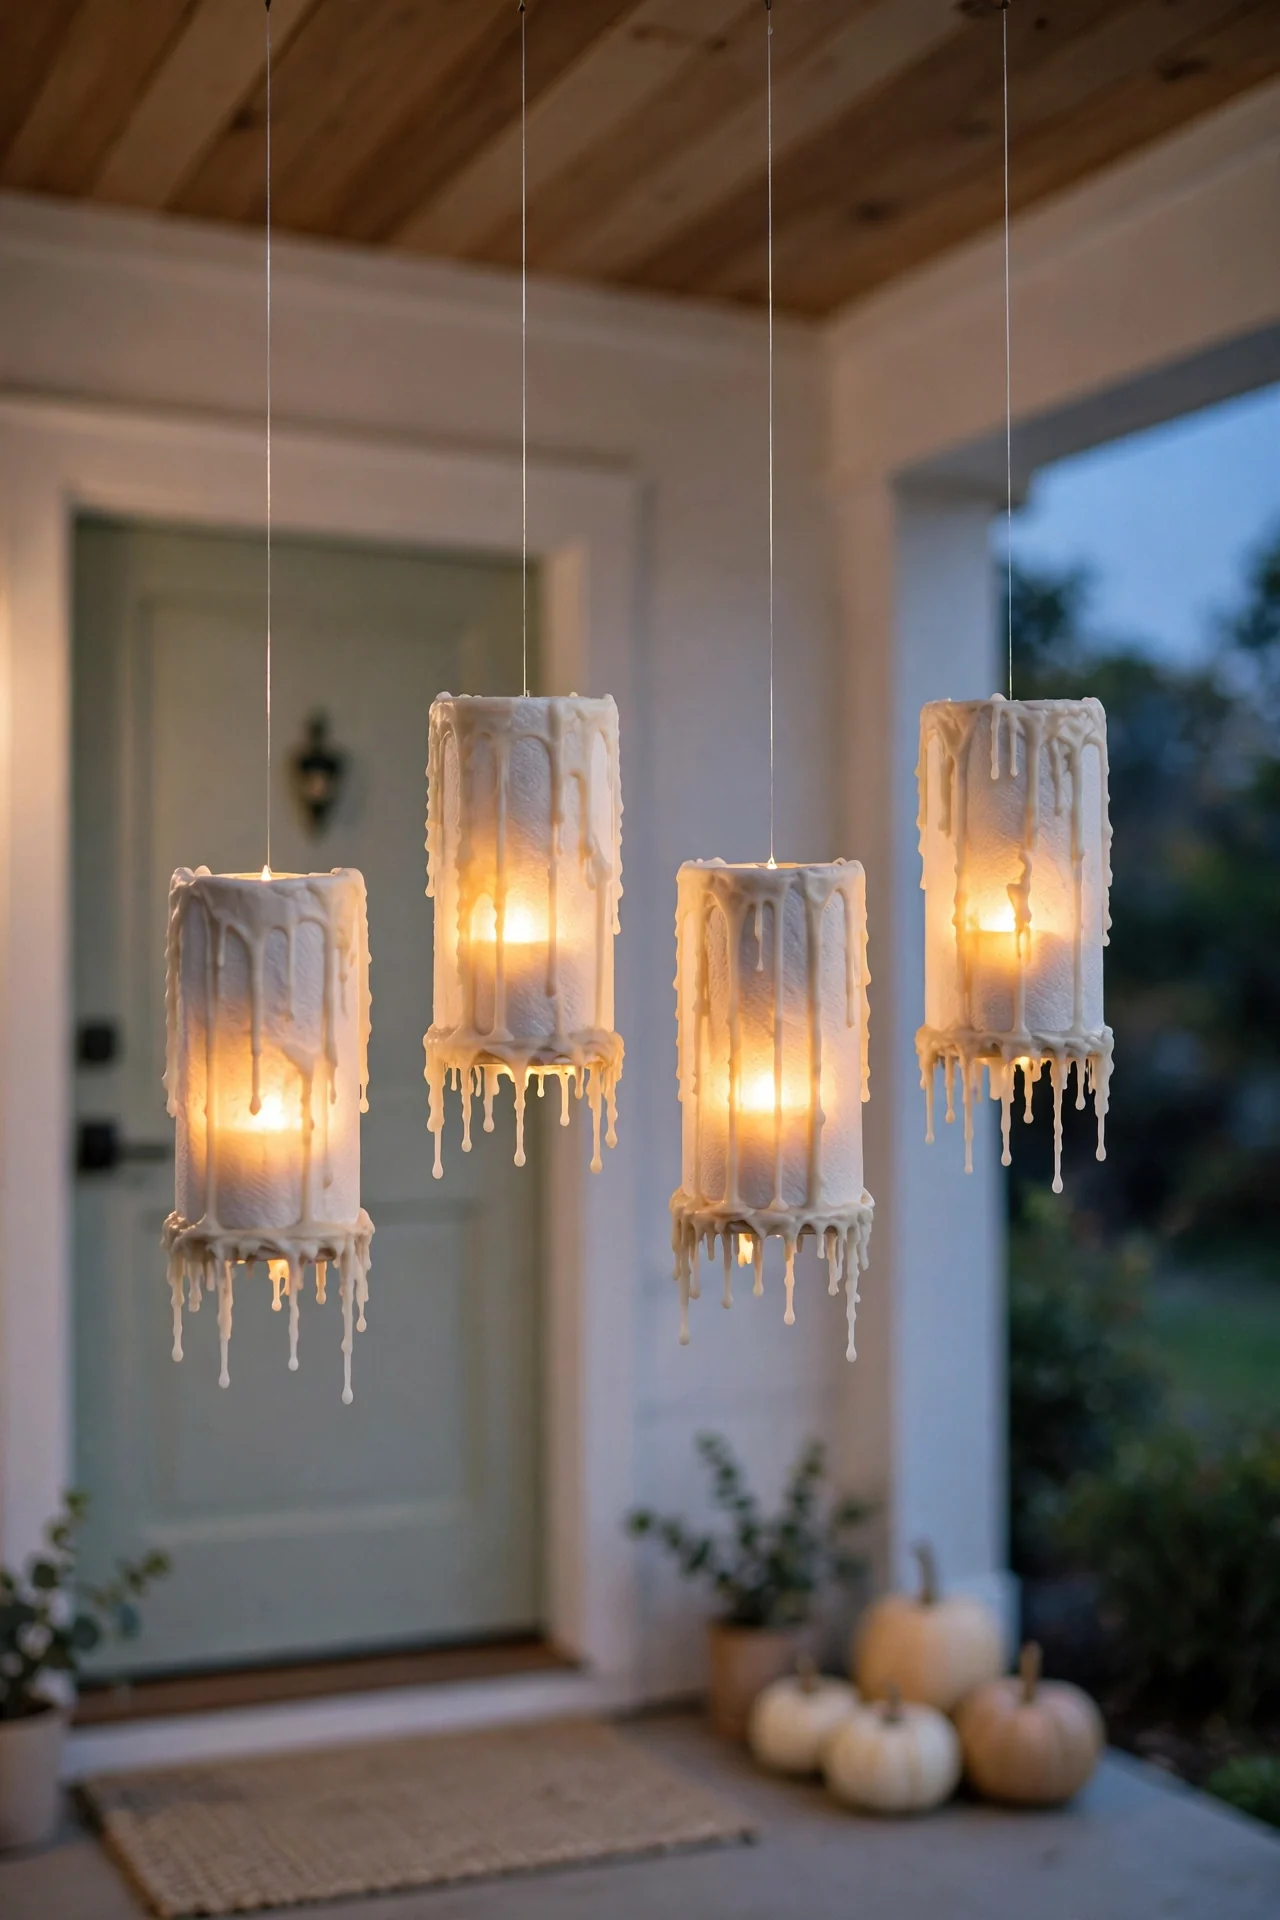
- Cut empty paper towel rolls to varied heights and paint them ivory with drips of hot glue for wax.
- Push a battery tea light into the top of each roll and tie fishing line around the middle.
- Hang the candles from porch beams or tree branches at staggered heights with small tacks.
- Wait for dusk, switch the lights on, and adjust any lines that catch the light.
Fishing line nearly disappears after dark, so the candles look truly suspended in midair. This trick borrows its magic from movie sets, yet costs under ten dollars. Keep the candles sheltered under the porch roof during rain. Guests will ask how you did it all night long.
Witch Hat Luminaries
| Feature | Paper Witch Hats | Felt Witch Hats |
|---|---|---|
| Cost | Pennies, made from black craft paper | A few dollars each at craft stores |
| Durability | One season, must stay dry | Lasts for years, handles damp air |
| Glow Effect | Bright, light shines through the paper | Moody, light pools beneath the brim |
| Setup Time | Thirty minutes for a whole row | Ten minutes, just add lights |
| Best For | Covered porches and doorways | Open yards and windy spots |
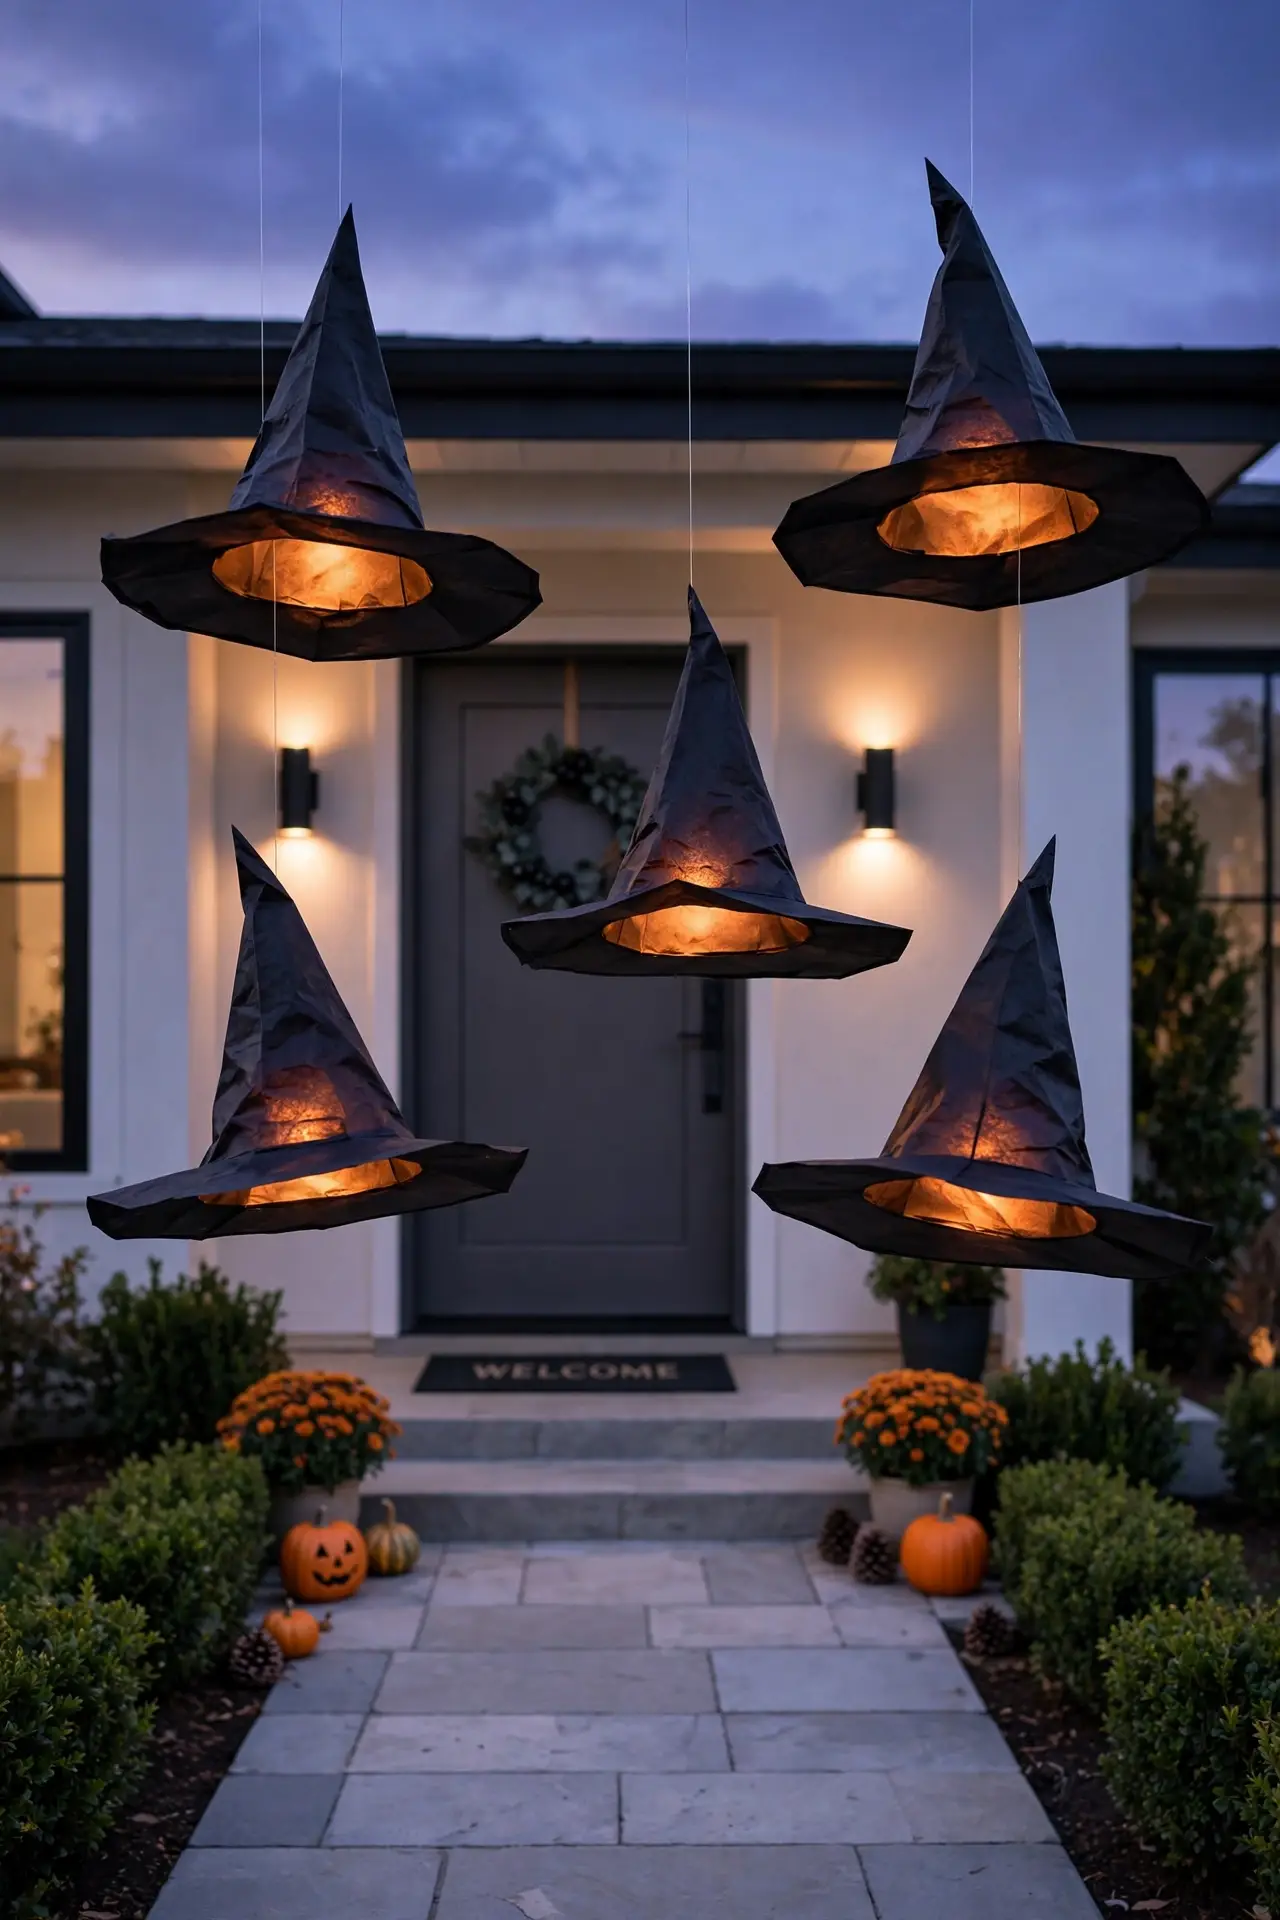
Roll black paper into cones, add a round brim, and tuck a string light inside each hat. Hang them in a loose row above the walkway with fishing line. The hats bob gently in the breeze, which makes the whole display feel alive. I have seen this work well in many cases on covered porches.
Mummified Front Door
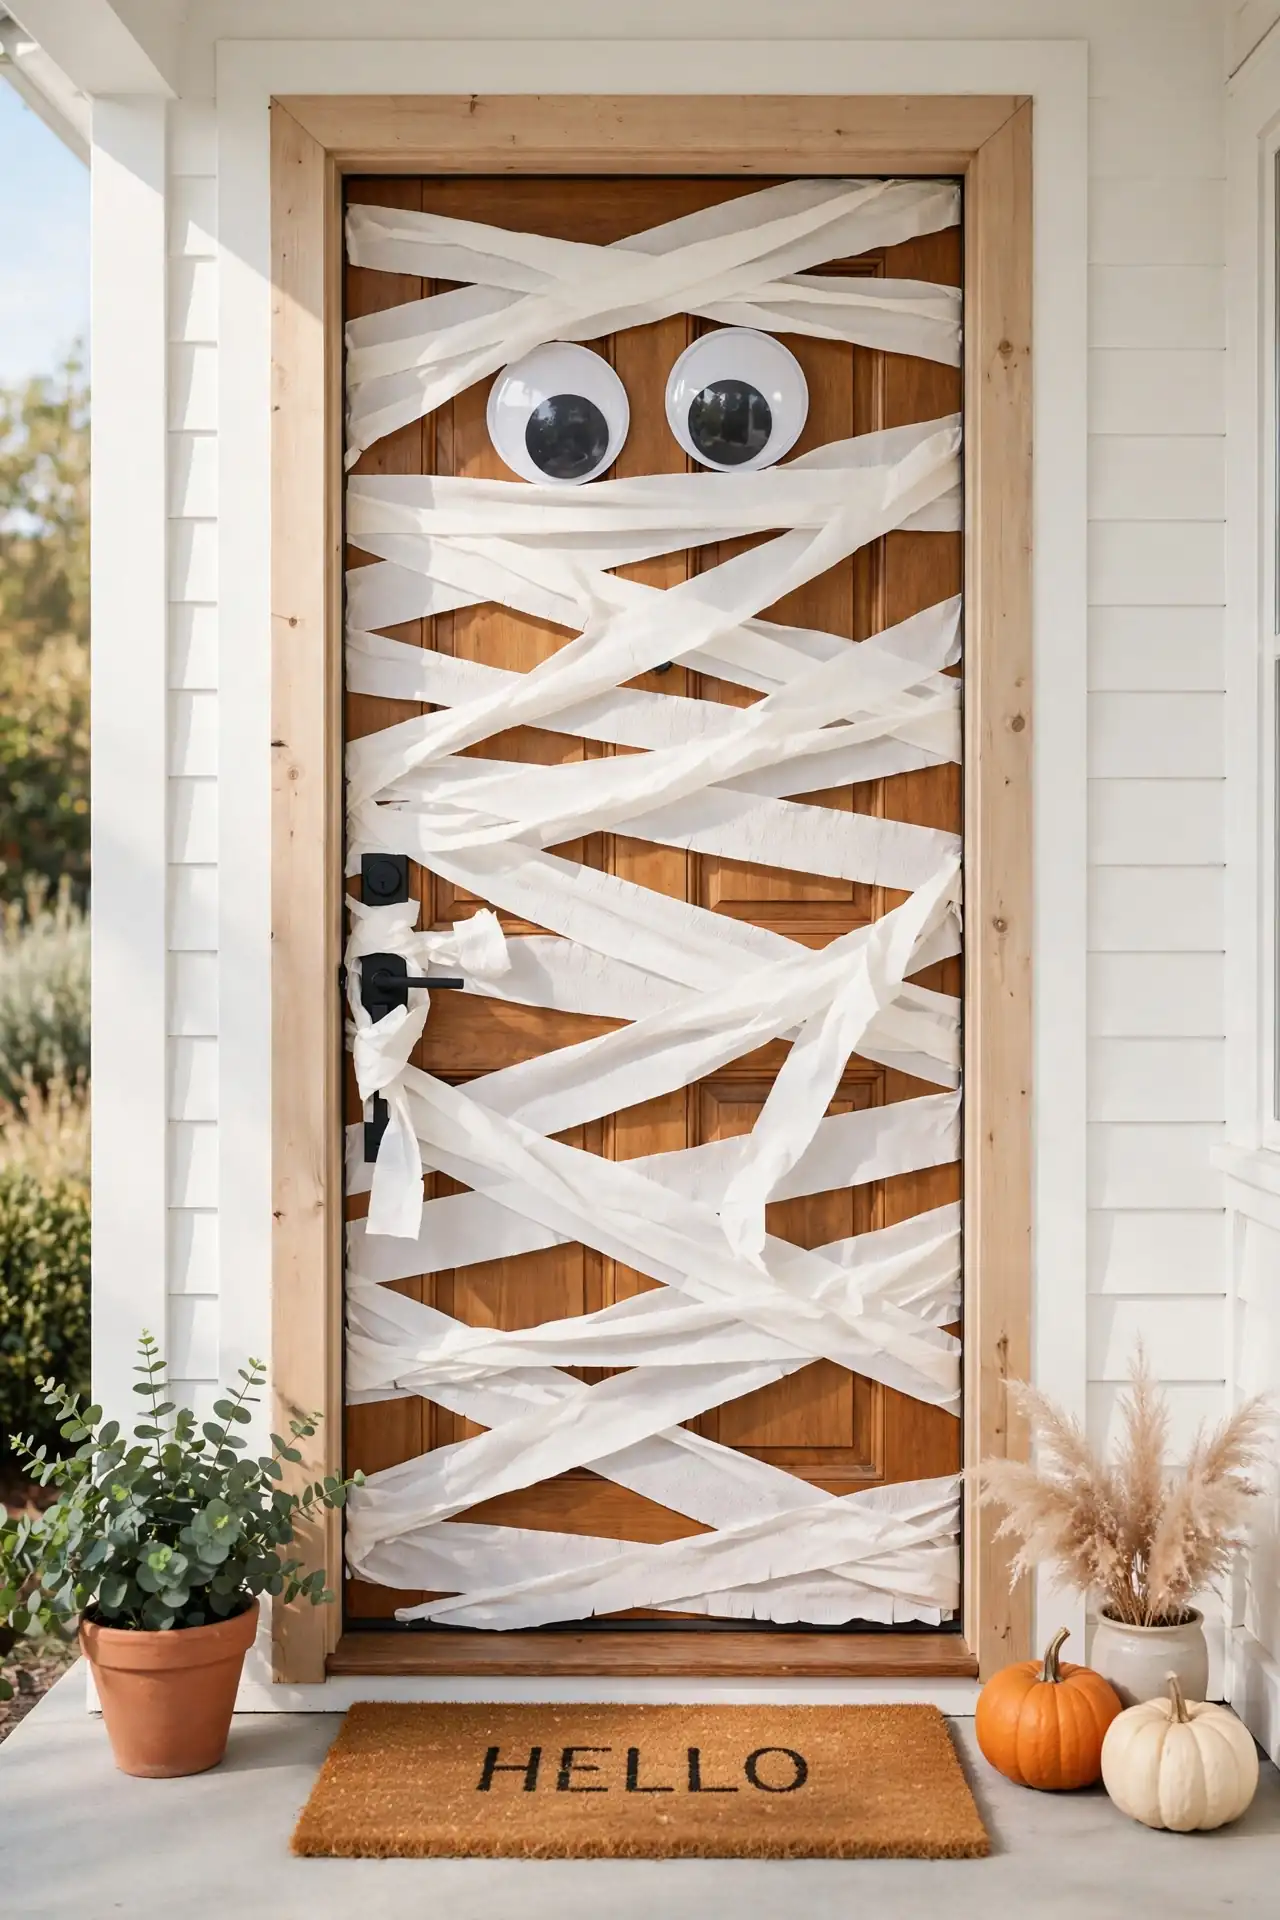
DO:
- Wrap with white crepe streamers, taped loosely at the edges.
- Leave the handle and lock clear so the door opens easily.
- Add two giant googly eyes for instant friendly personality.
DON’T:
- Do not use packing tape on painted doors; it peels the finish.
- Do not cover the peephole or doorbell for guests.
- Do not let streamers drag on wet ground.
Crisscross the streamers from corner to corner, letting a few ends hang loose for texture. The mummy door takes twenty minutes and delights every trick-or-treater. Pull everything down with painter’s tape tabs for zero damage. This simple wrap turns a plain door into the street’s favorite photo spot.
Giant Spider Webs
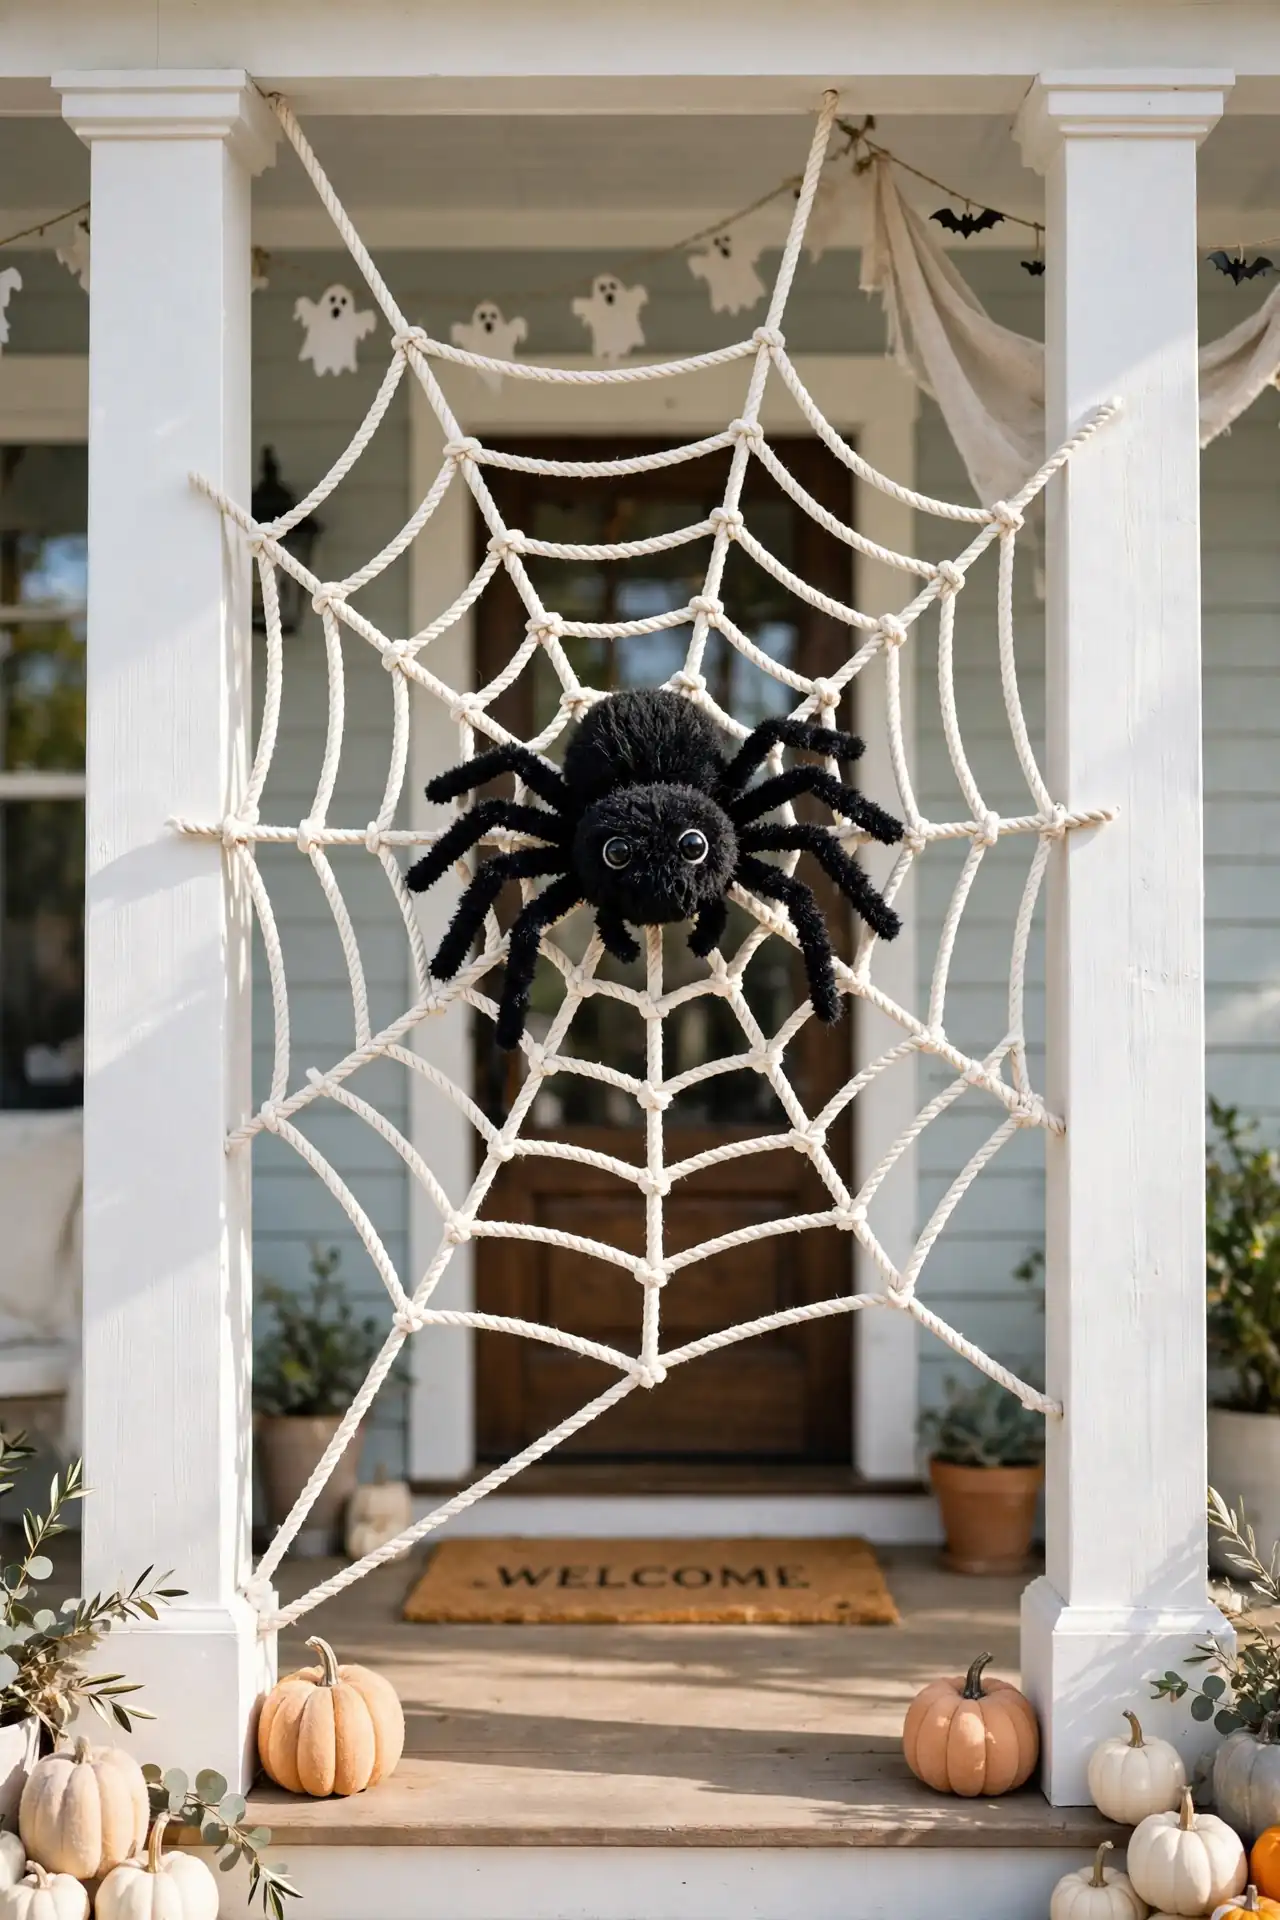
Cost: Under $10 for white rope and a big fuzzy craft spider | Time: About 30 minutes to weave a full web | Skill Level: Beginner, no tools needed | Best For: Porch corners, tall columns, and wide bushes | Tip: Mist the web with water at night for a dewy morning look
Anchor the web by tying rope to two sturdy points, then weave concentric circles with a simple over-under pattern. The giant spider goes last, clipped right in the center. This build survives wind and rain for weeks. Kids will dare each other to touch it, which is exactly the reaction you want.
Glowing Bush Eyes
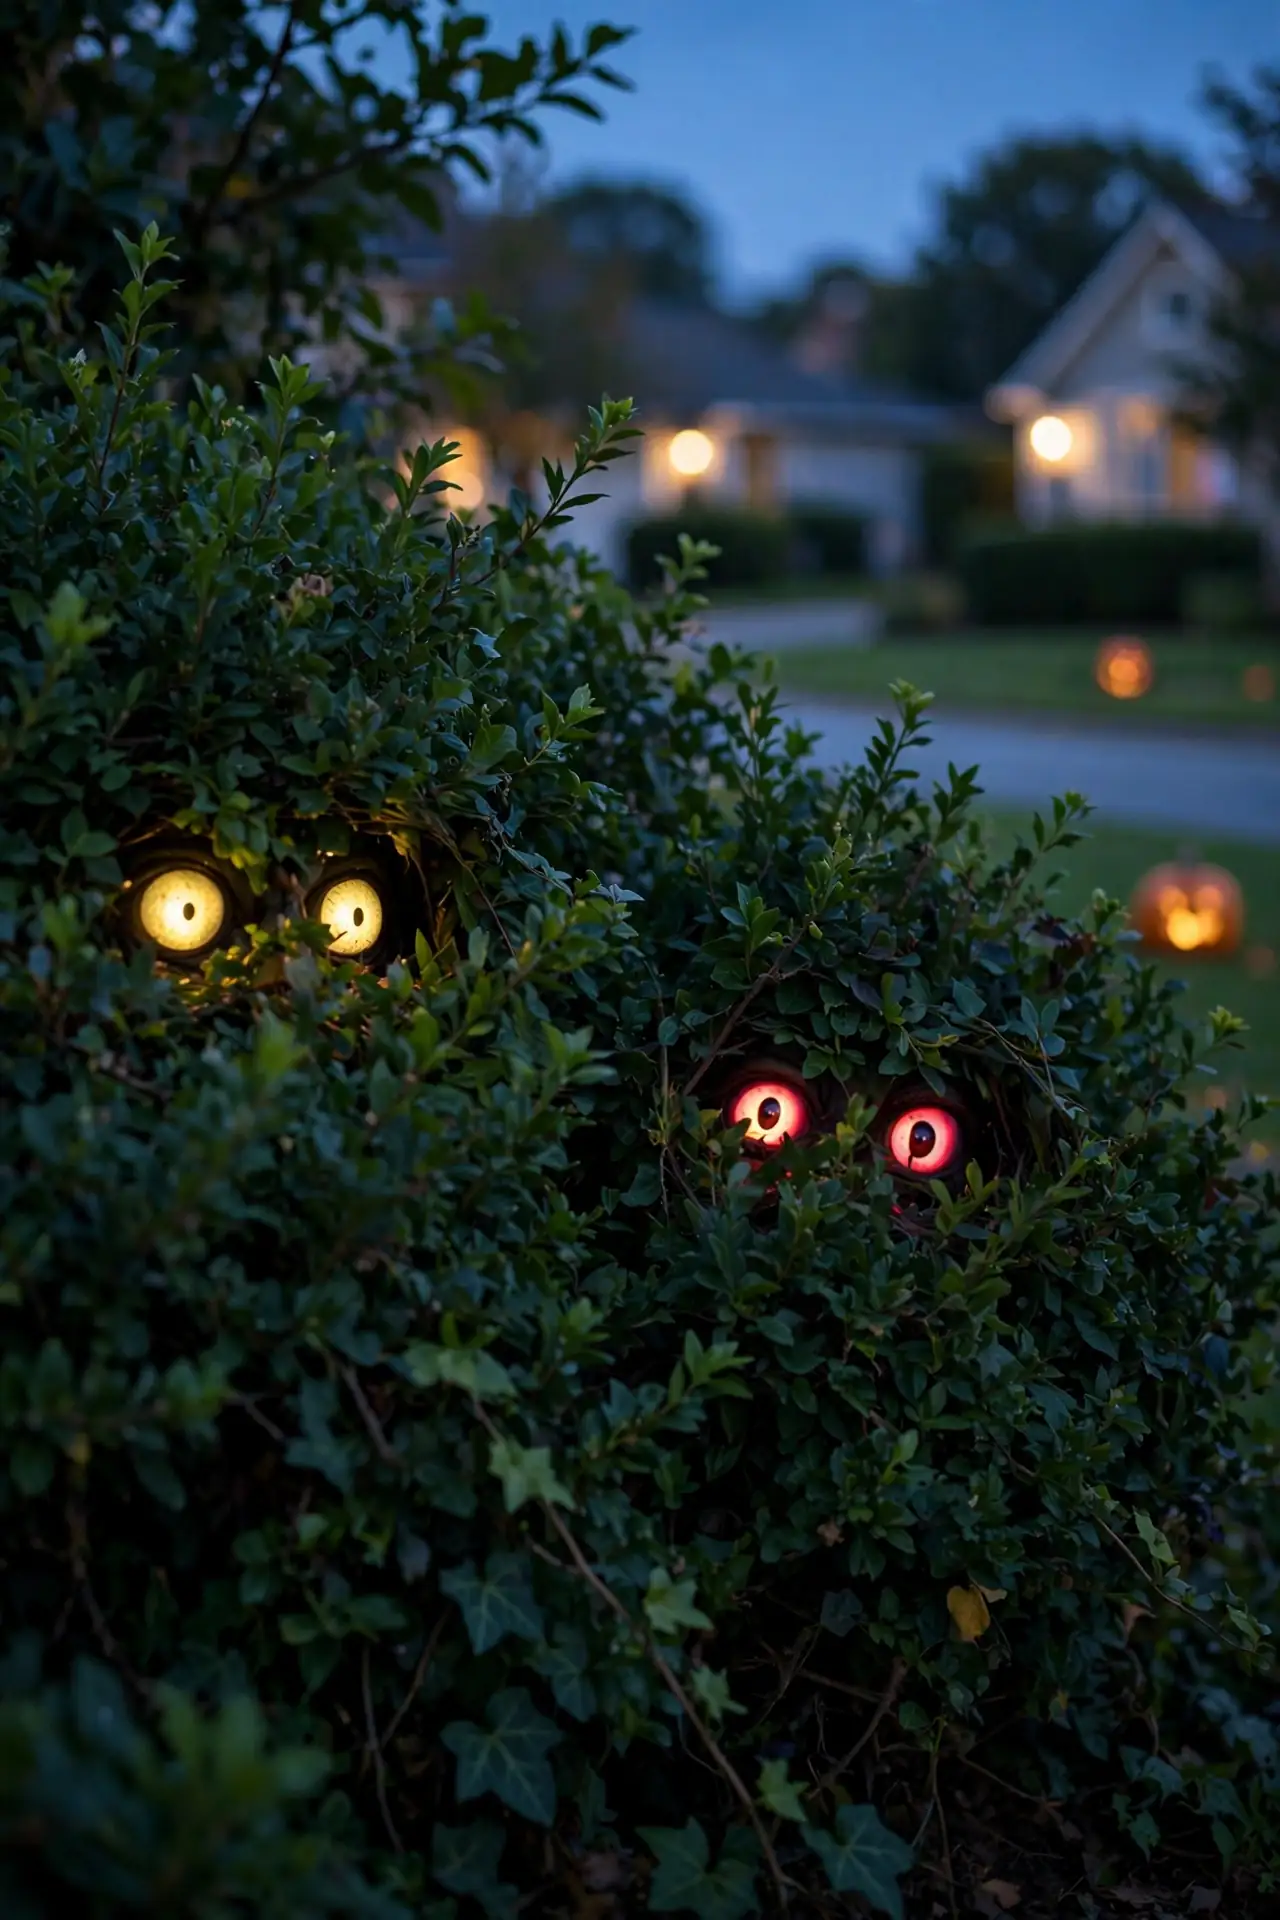
Bushes turn into watching monsters with nothing more than cardboard and glow sticks. Cut pairs of spooky eye shapes from cardboard, tape a cracked glow stick behind each pair, and nestle them deep inside your shrubs. From the street, the bushes appear to stare back at every passerby.
Use red and green glow sticks for an eerie effect, or yellow for a friendlier monster. This project costs a few dollars and takes fifteen minutes, yet it gets the biggest screams on the block. Replace the sticks nightly during Halloween week. Tuck two pairs per bush so the eyes seem to blink from different angles. Simple builds like this earn the best reactions.
Pallet Wood Signs
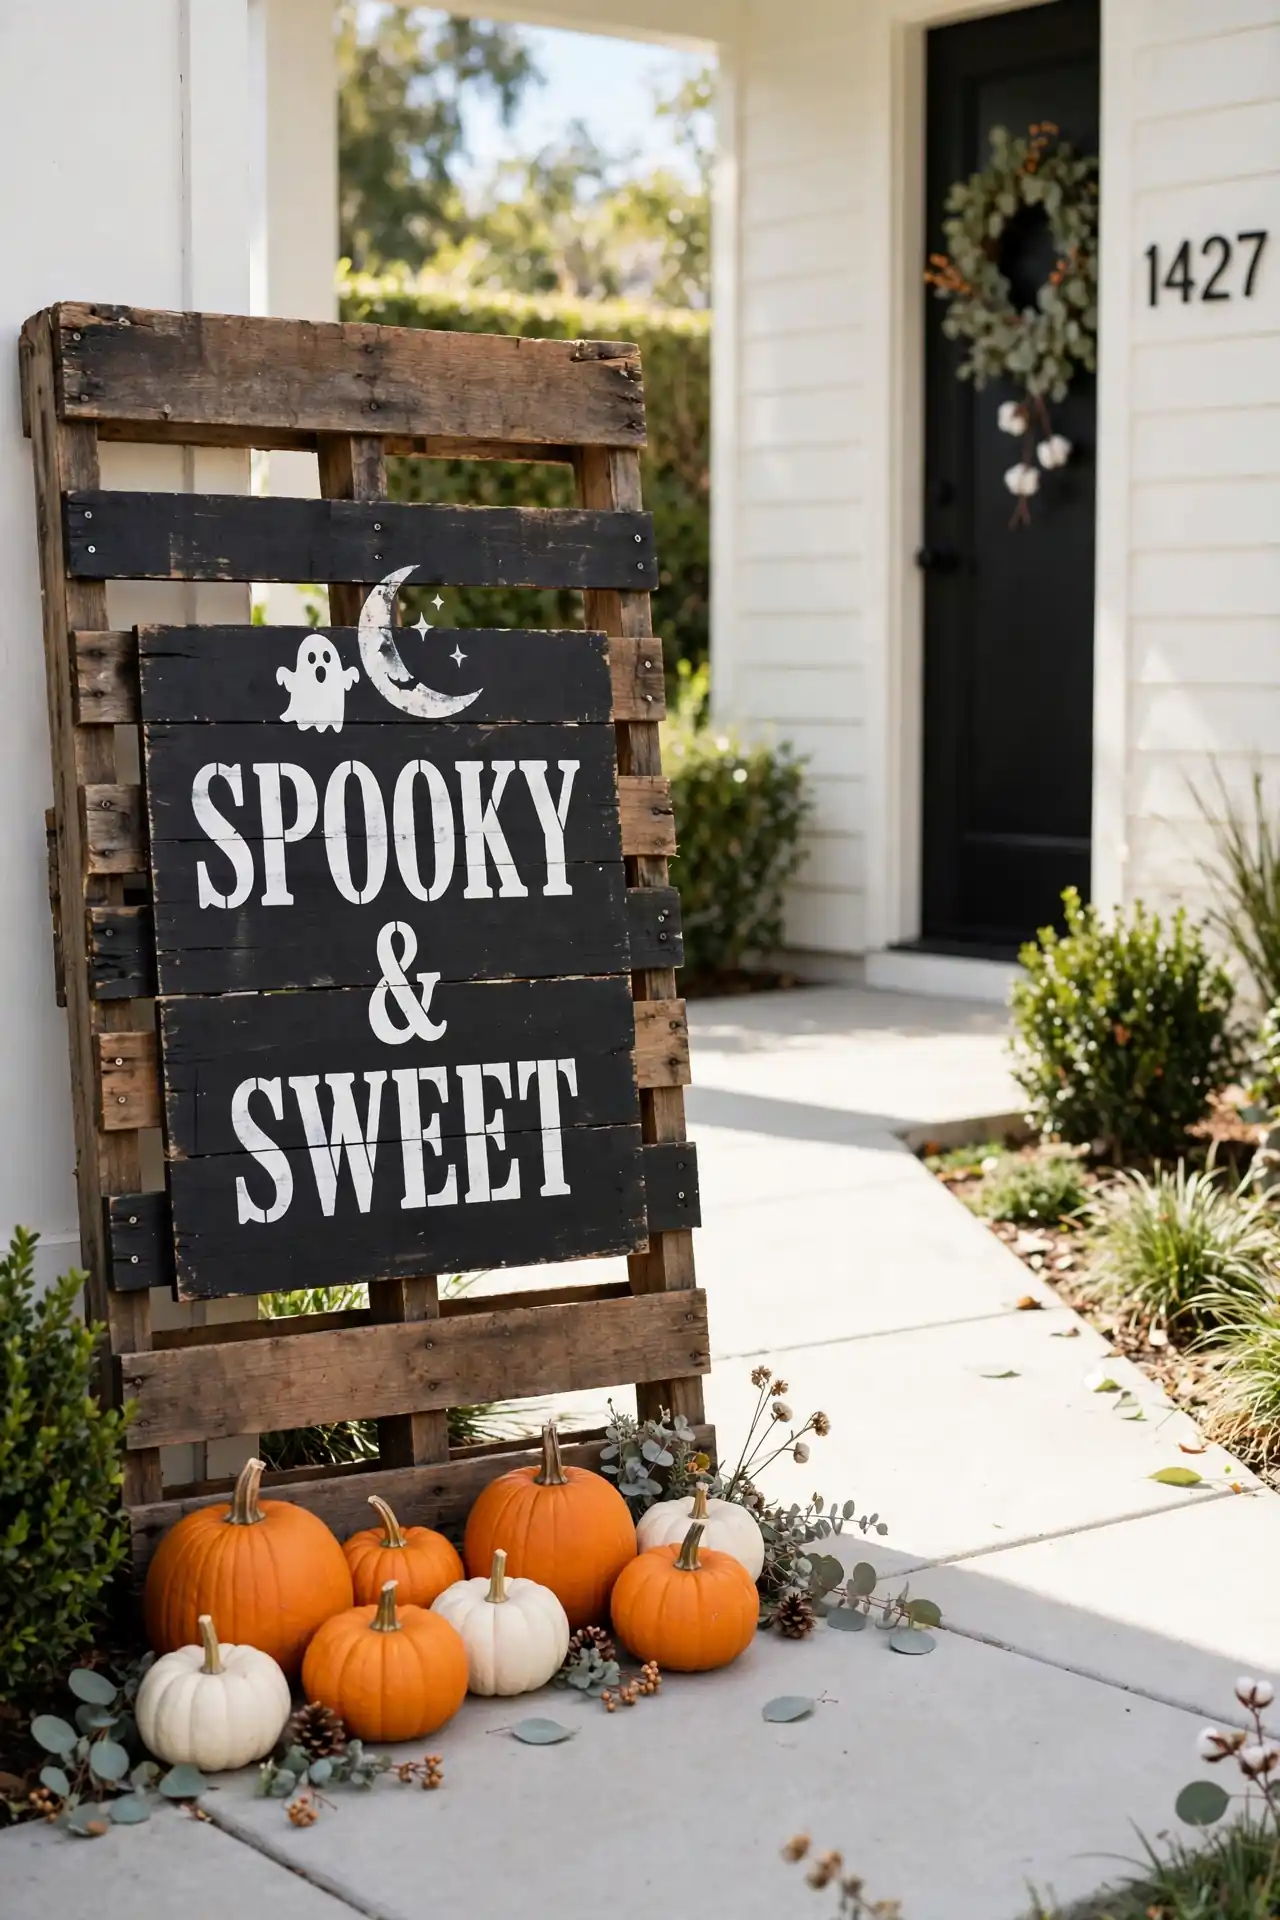
- Ask hardware stores for free scrap pallets, or buy a single new one for a few dollars.
- Sand the rough edges lightly, then paint the boards black, white, or weathered gray.
- Stencil spooky words like BEWARE, ENTER IF YOU DARE, or WITCH WAY with craft paint.
- Prop the sign by your walkway or hang it from the porch with sturdy rope.
Pallet signs look expensive but cost almost nothing, which is why I keep making them every year. Distress the edges with sandpaper for a haunted, aged finish. Seal with clear spray so rain never smudges the letters. One sign by the path sets the tone for the whole display.
Bat Swarm Decals
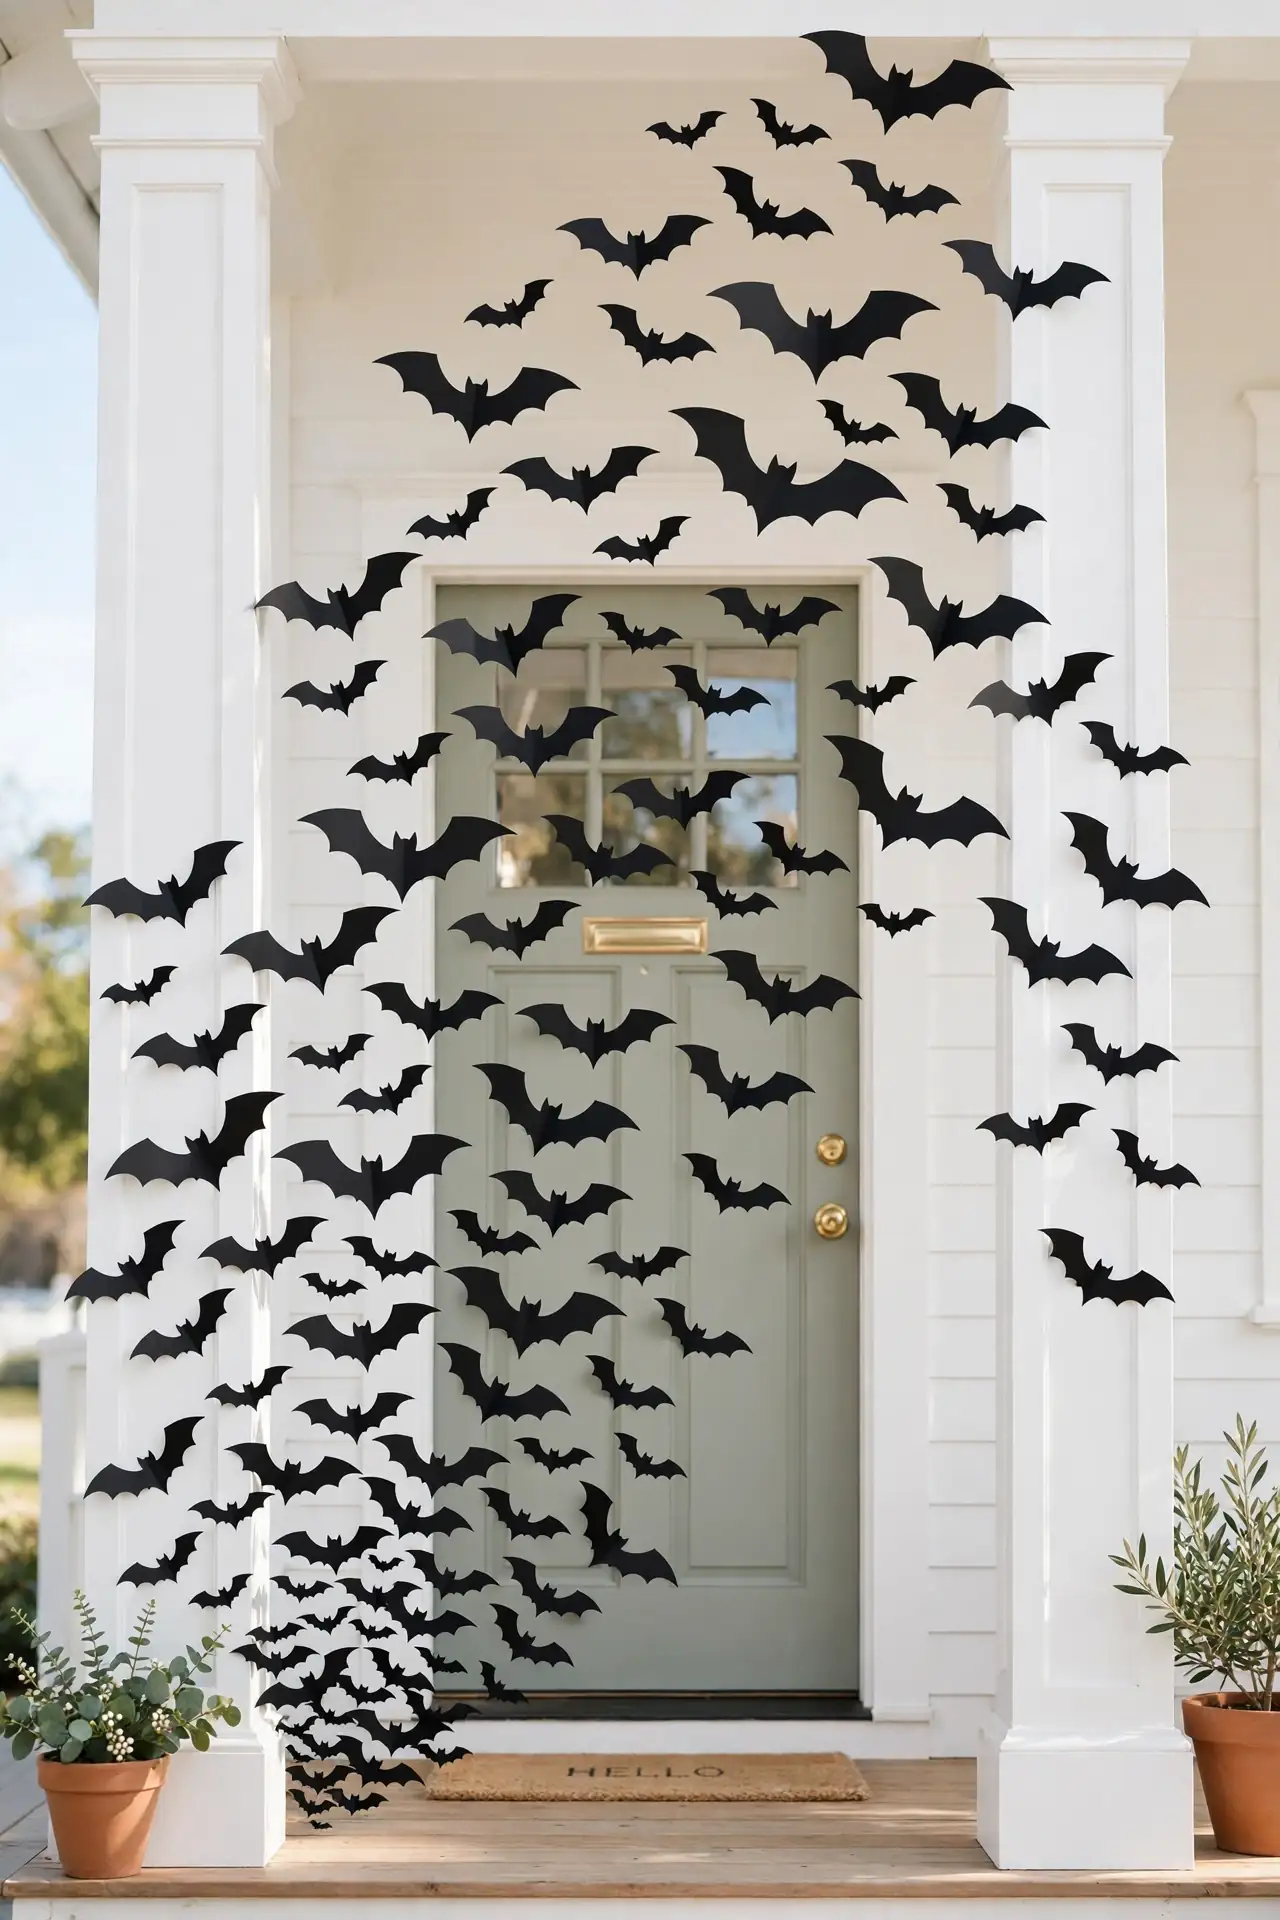
Quick Tip: Cut bat silhouettes from black cardstock using a free printed template, folding each one slightly down the middle so the wings look ready to flap. Stick them with removable putty up the porch columns, across the front door, and along the eaves in a rising swarm pattern. Step back to the street and add more where the flow looks thin.
Bats flying upward create motion on a still wall, which makes the whole entry feel alive. Use three sizes for depth, with the largest bats near the ground. Removable putty peels off cleanly in November. This ten-minute project adds drama that every single visitor notices.
Skeleton Dog Greeter
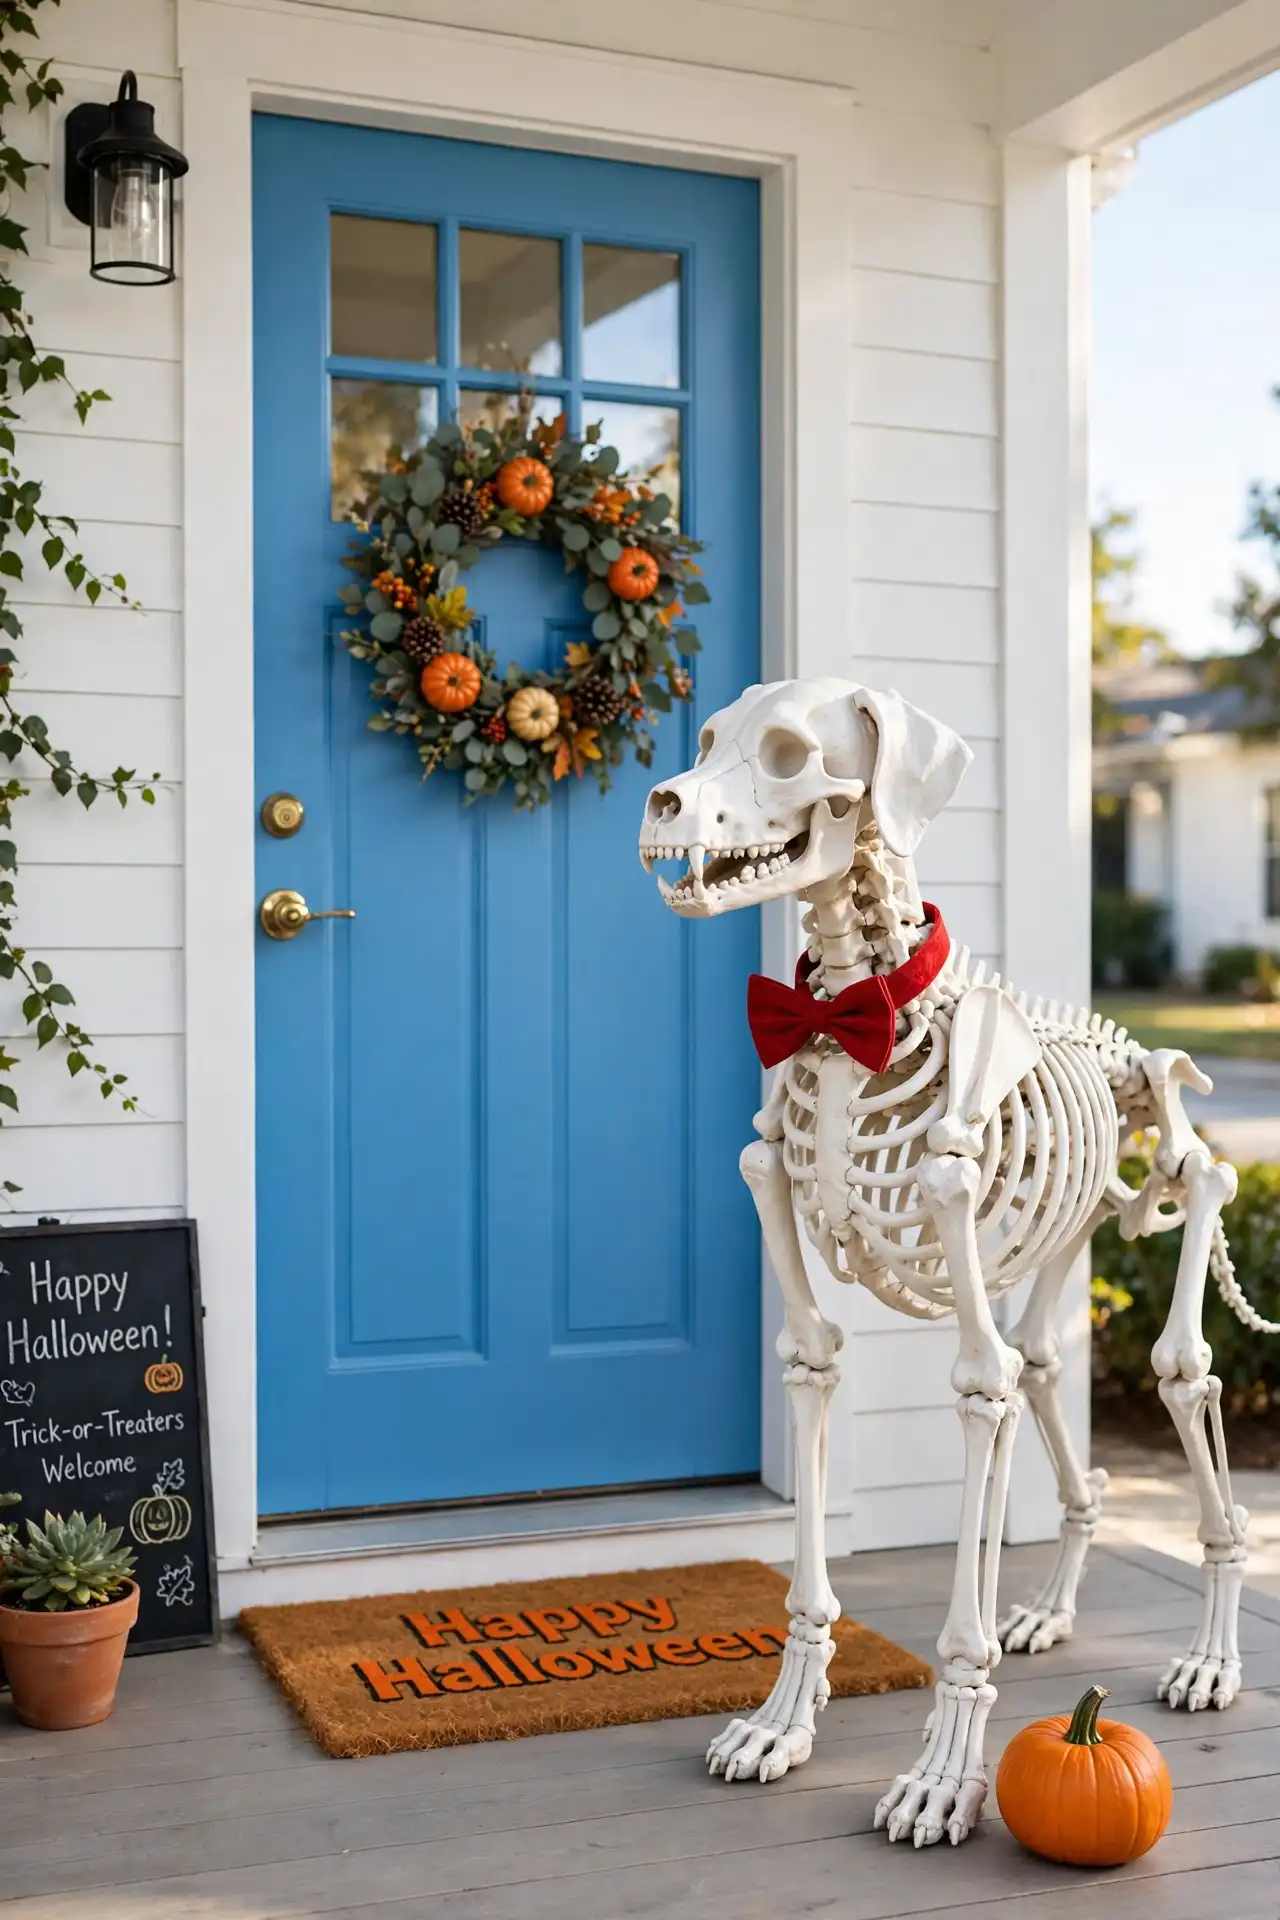
BEFORE: Your porch sits dark and quiet while neighboring houses glow with Halloween spirit. Guests walk up an empty entry, and the whole house feels like it skipped the season entirely.
AFTER: A life-size skeleton dog stands guard by the door, its bony tail raised in a permanent welcome. A red bow tie around its neck keeps the look playful instead of grim. Kids pose for photos beside it, and the porch finally feels part of the neighborhood fun.
Poseable skeleton dogs appear at craft stores every fall for under twenty dollars. Set yours by the door with a small pumpkin at its paws. Bring it inside during storms to protect the joints. This one purchase becomes a yearly tradition the whole street expects.
Tin Can Lanterns
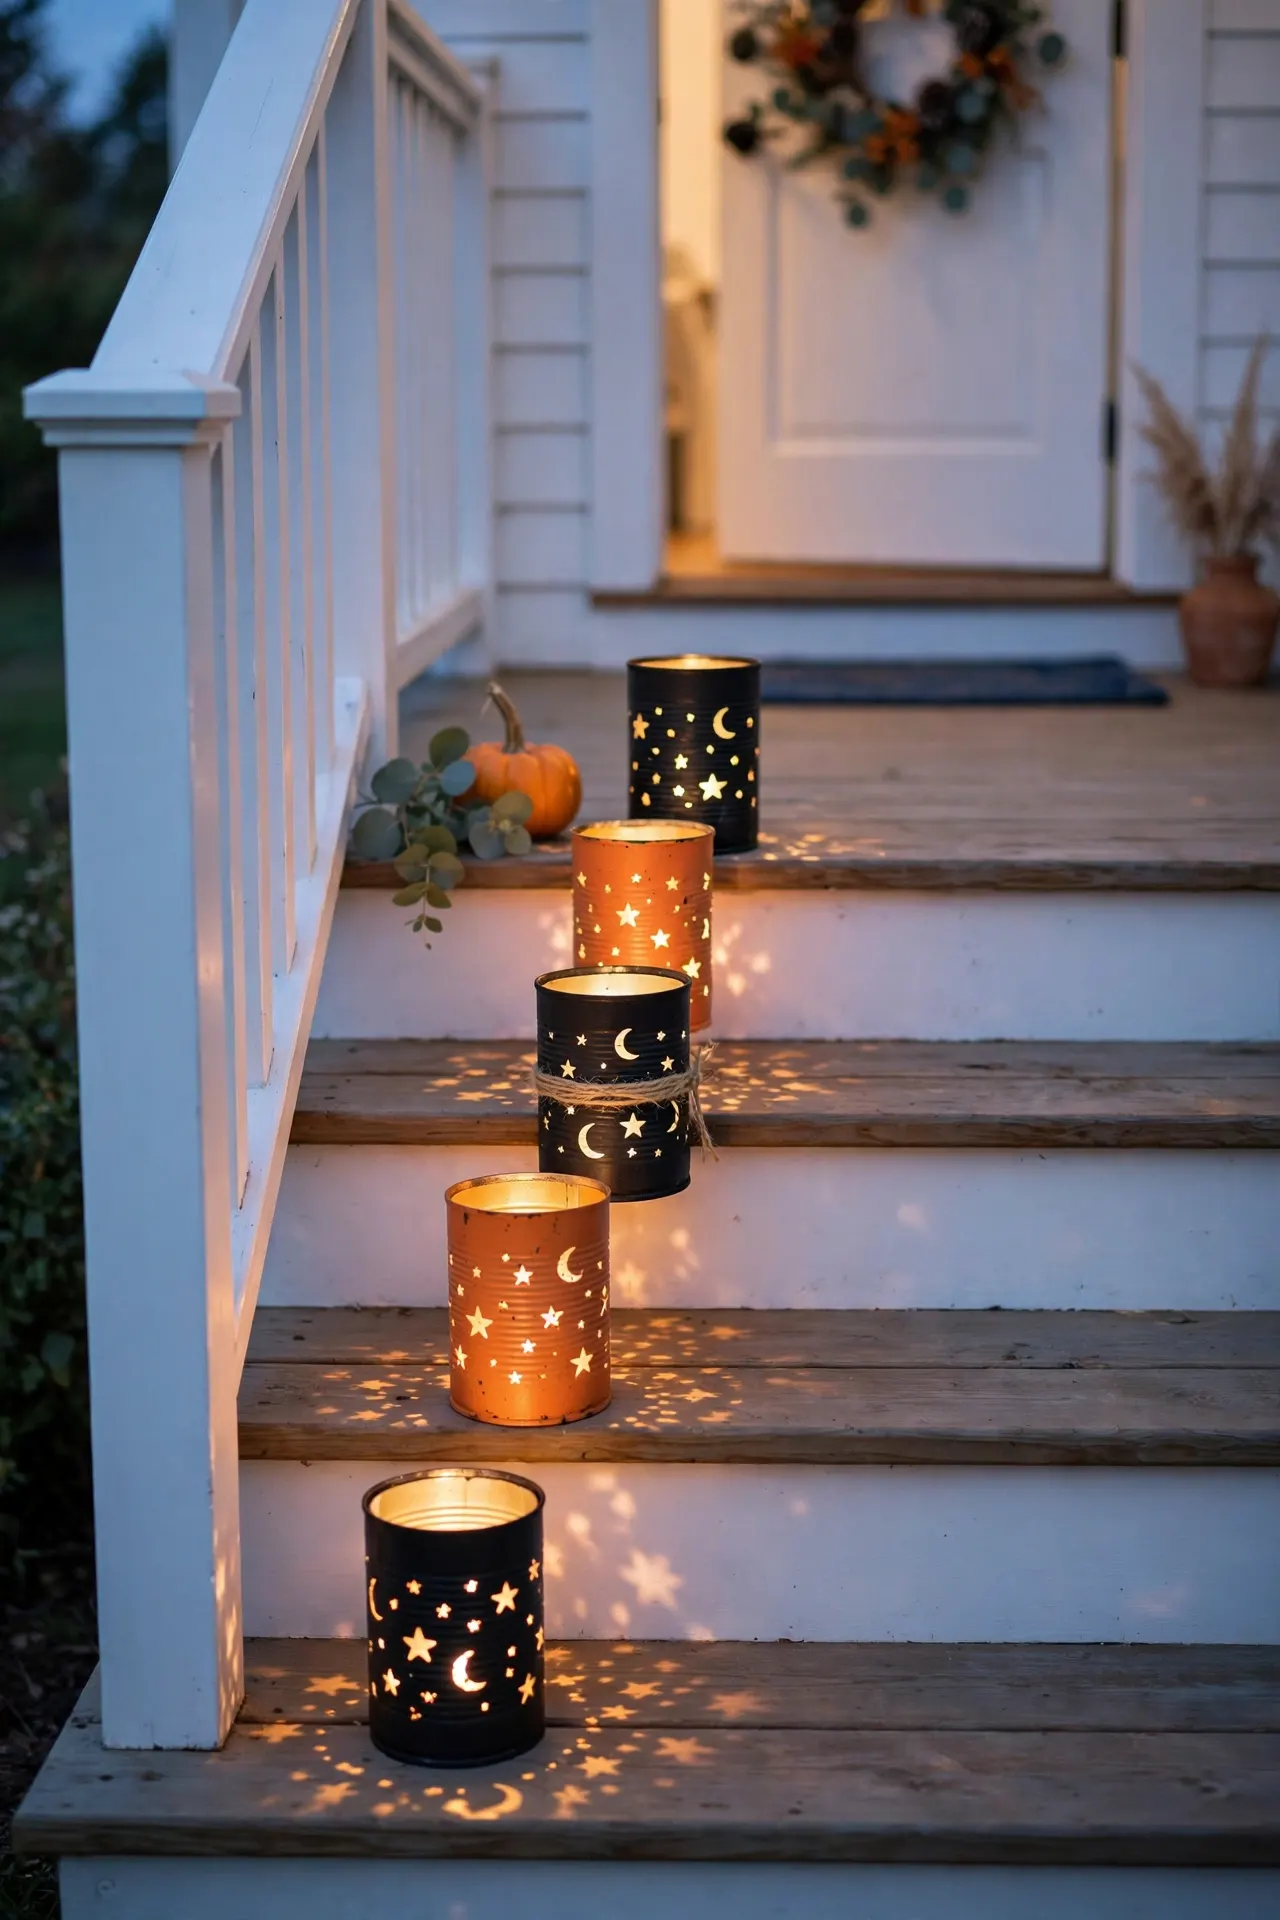
- Soak empty tin cans overnight, peel the labels, and fill each with water to freeze solid.
- Hammer spooky patterns of holes with a nail: stars, moons, or simple jack-o-lantern faces.
- Let the ice melt, dry the cans, and spray them black, orange, or metallic silver.
- Set a battery tea light inside each can and line them along steps or walls.
The frozen water stops the cans from denting while you hammer, which is the clever part of this classic craft. Punched holes throw patterned light across walls and paths. These lanterns cost nothing if you already save cans. Make a dozen and the effect multiplies beautifully.
Cloth Ghost Figures
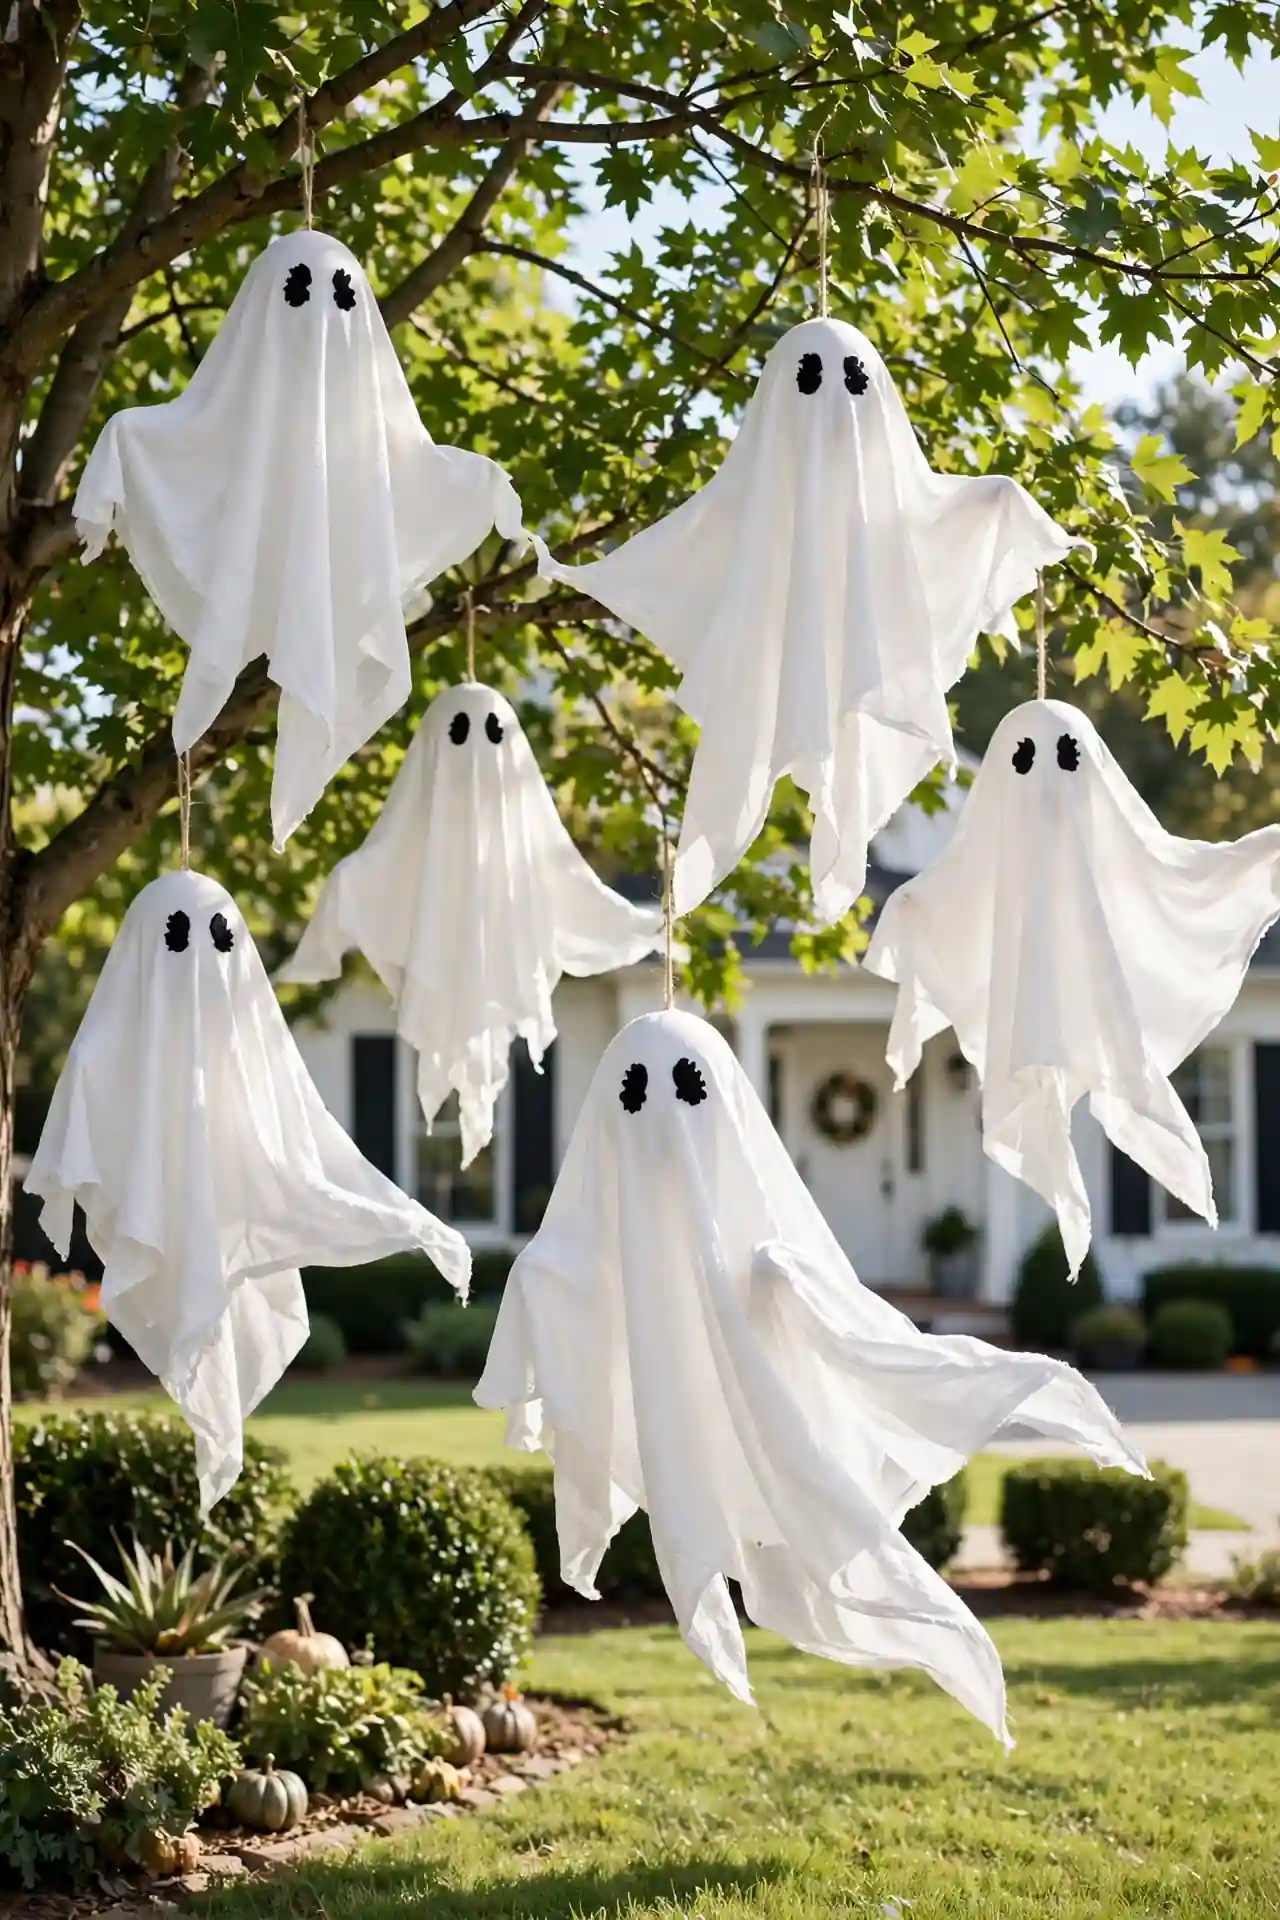
| Feature | Cheesecloth Ghosts | Sheet Ghosts |
|---|---|---|
| Look | Wispy and translucent, floats in breeze | Solid and classic, bold silhouette |
| Build | Drape over a balloon form, stiffen with glue | Drape over a tomato cage, tie at neck |
| Cost | A few dollars per ghost | Free with old white sheets |
| Durability | Fragile, best on covered porches | Sturdy, handles wind and rain |
| Best For | Spooky elegant entries | Kid-friendly front yards |
Hang the finished ghosts from tree branches or porch beams with fishing line so they sway. Black felt eyes glued on each face give them instant character. If your kids want to join in, our halloween crafts for children roundup has simpler ghost projects sized for little hands. This classic never gets old.
Pumpkin Topiary Tower
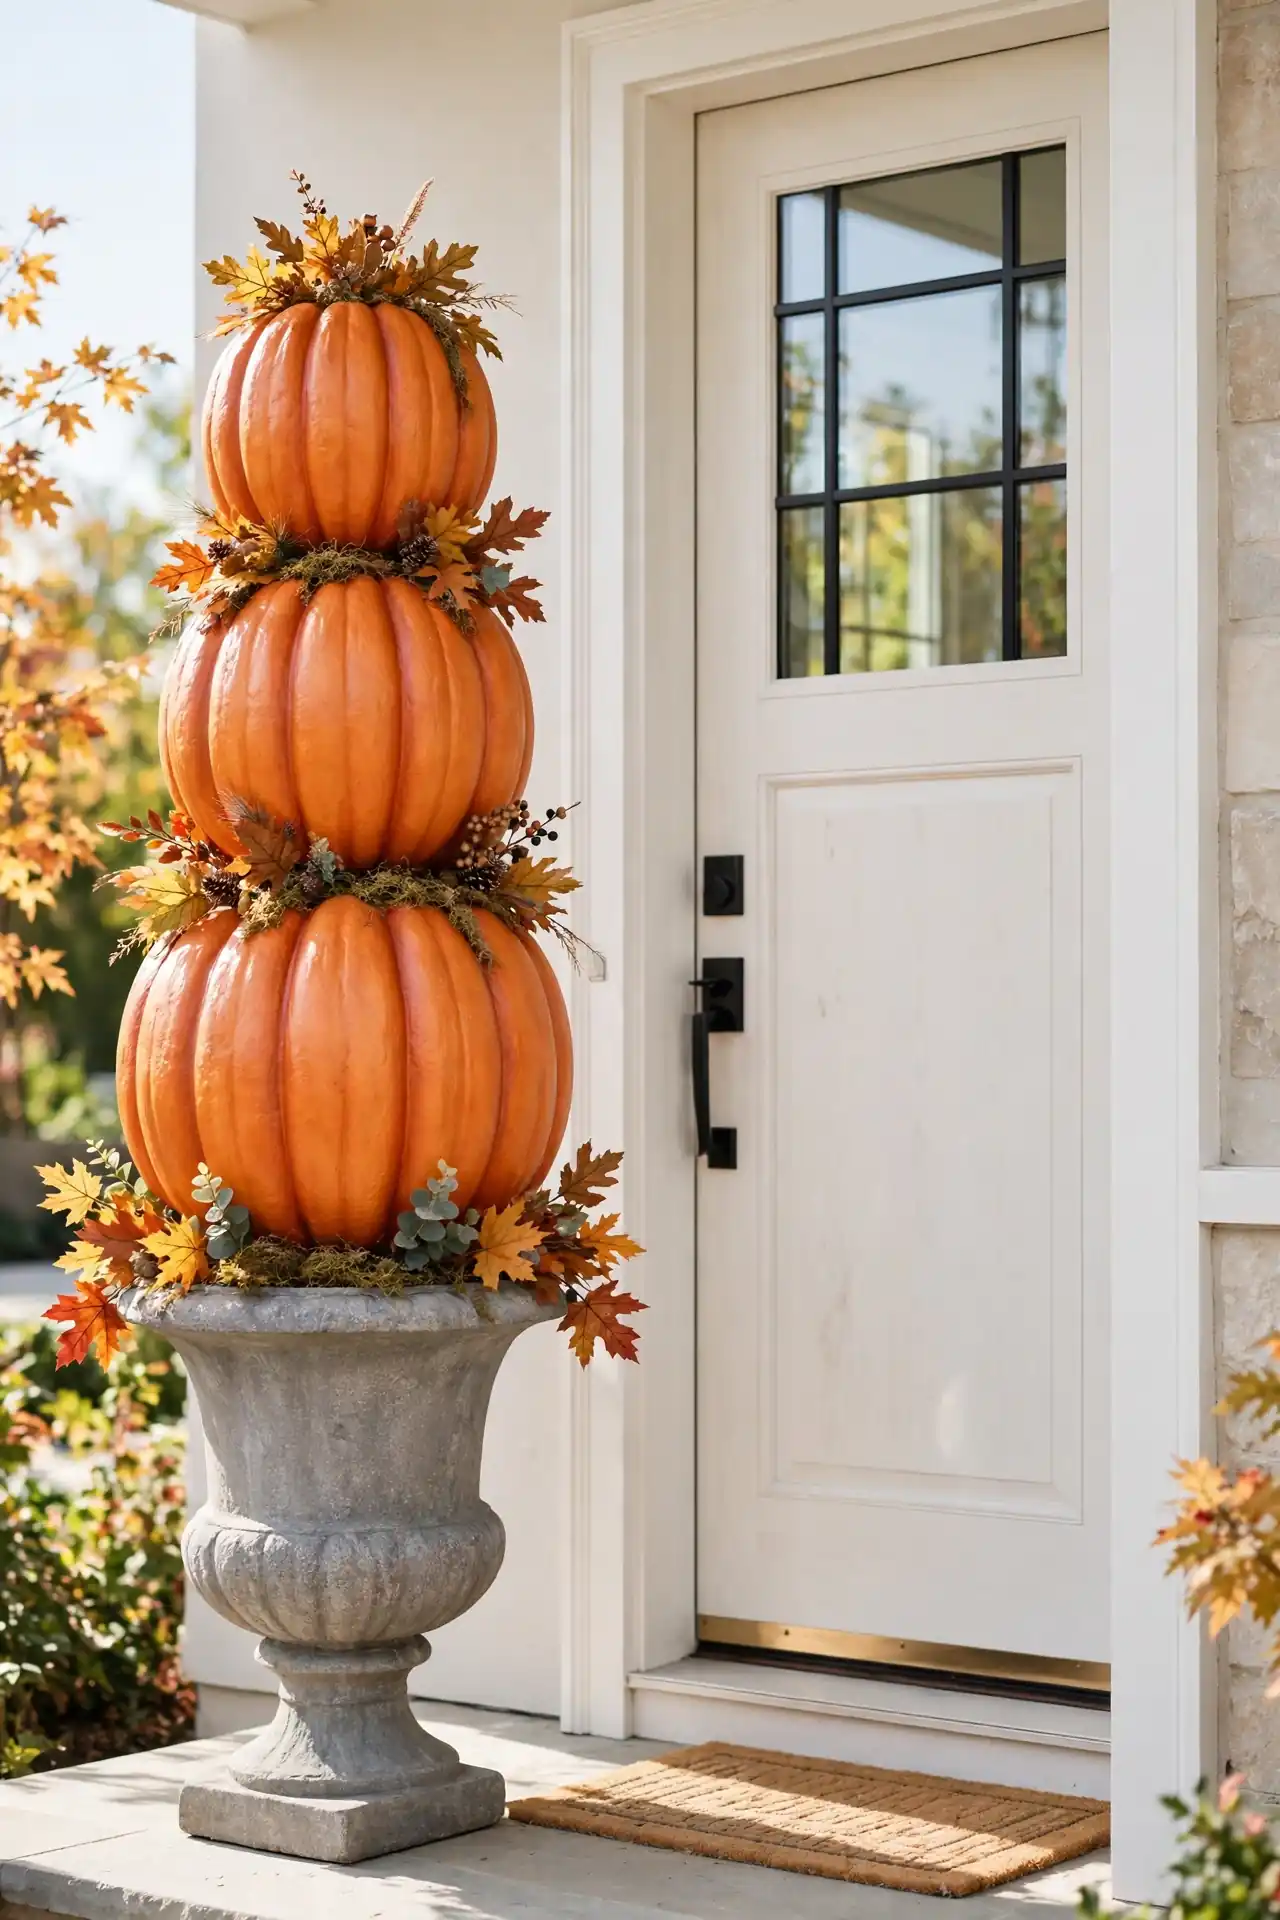
DO:
- Stack three faux pumpkins, largest at the bottom, on a sturdy urn or planter.
- Secure each layer with a wooden dowel pushed through the centers.
- Tuck faux fall leaves and berries around the seams to hide the joins.
DON’T:
- Do not use real pumpkins; they rot and the tower collapses within weeks.
- Do not skip the dowel, or wind will topple your hard work.
- Do not place the tower where sprinklers soak it daily.
Faux pumpkins from craft stores look real enough at dusk and last for years. This tower gives your entry the height it needs without a single carving tool. Build it once and reuse it every October. Guests always assume it cost far more than it did.
Monster Eye Wreath
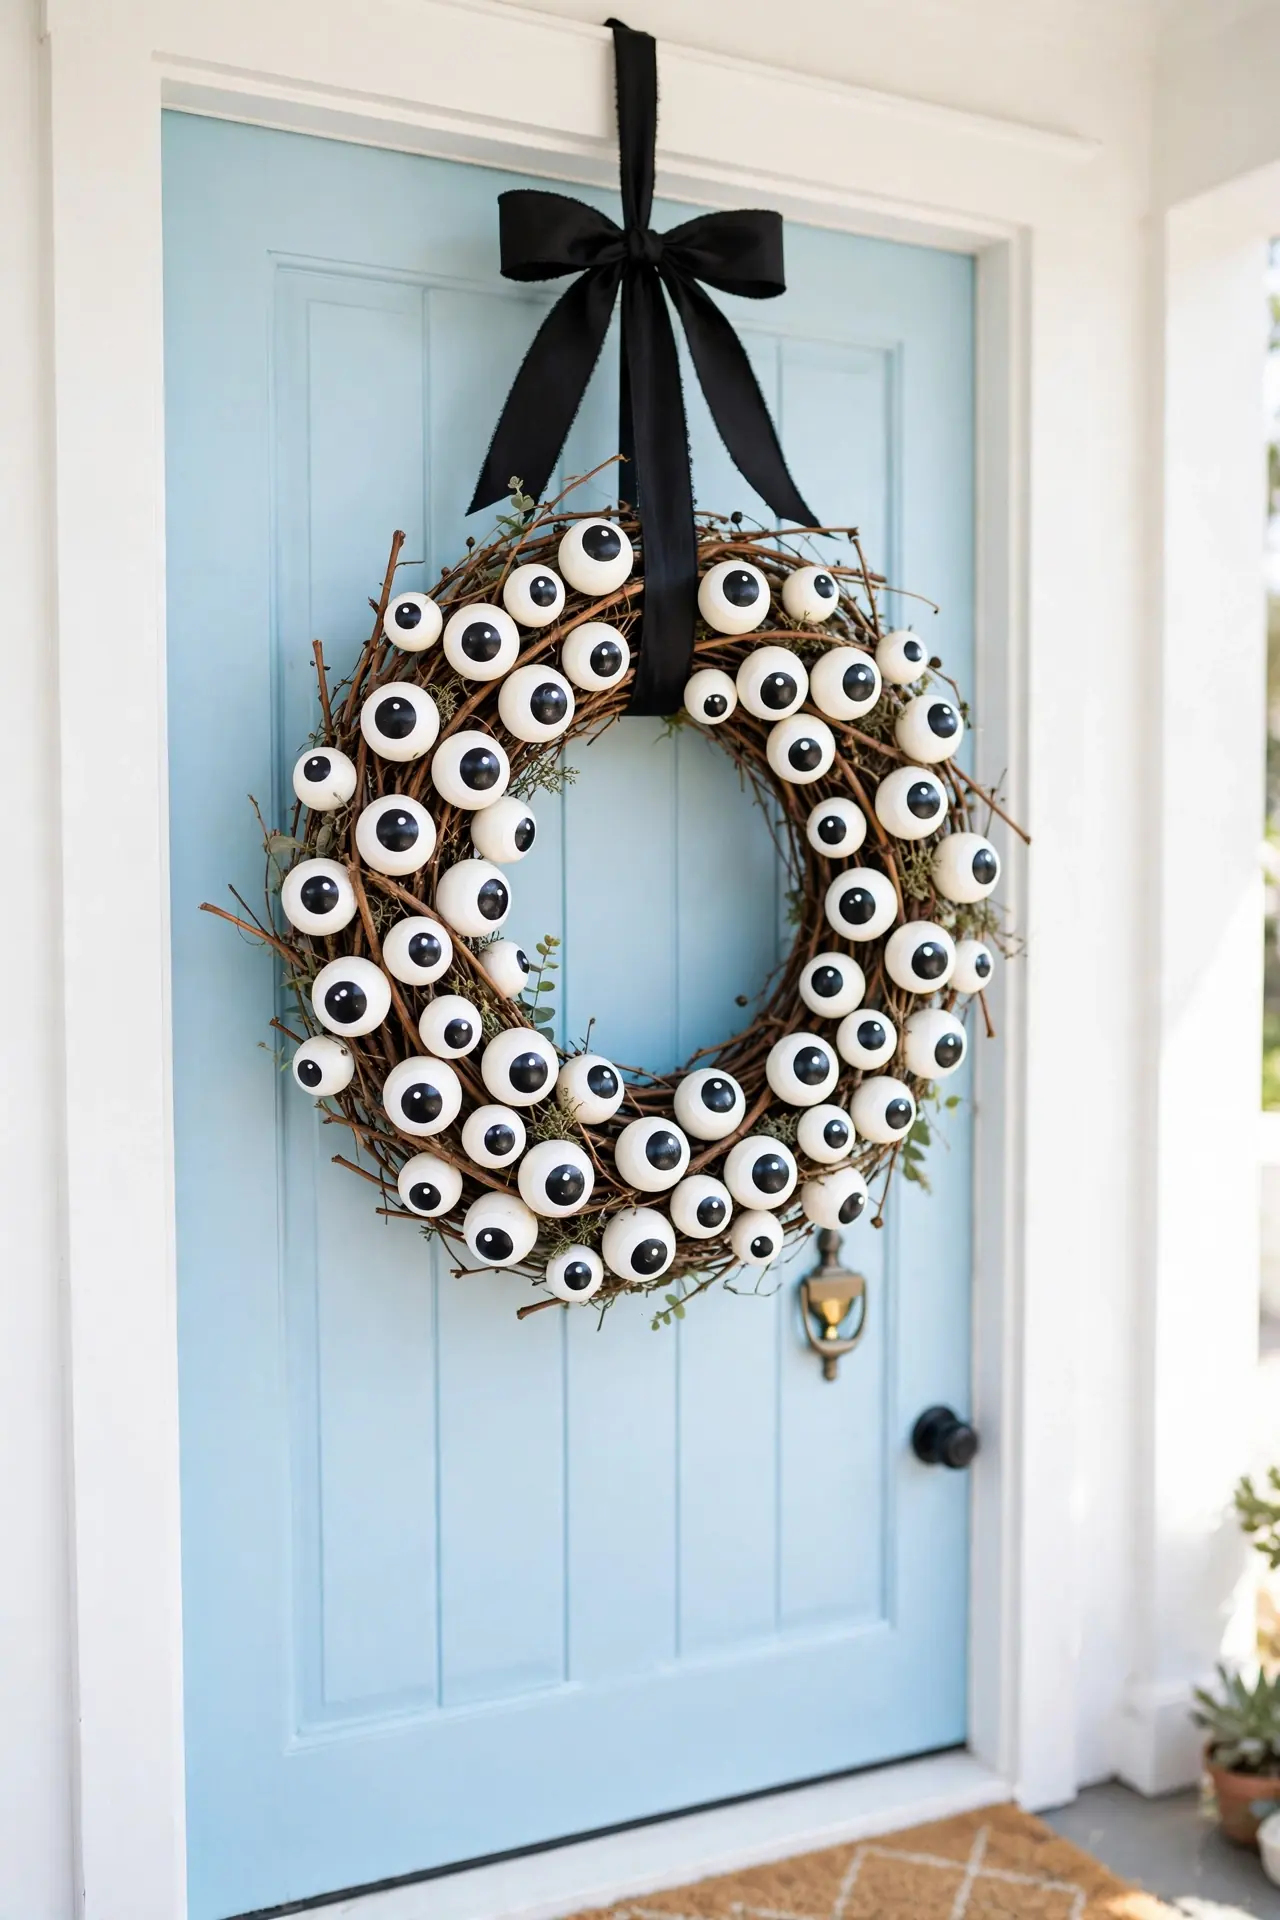
Cost: Under $15 for a grapevine wreath base and a bag of ping pong balls | Time: About 45 minutes of gluing, painting, and drying | Skill Level: Beginner, only paint and hot glue required | Best For: Front doors that need a playful scare | Glow: Tuck red LED tea lights behind the eyes for nighttime
Paint the ping pong balls white with big black pupils, then hot-glue them all over the wreath in a dense cluster. The googly chaos reads instantly from the street. Hang it with a wide black ribbon for contrast. This wreath stores flat and comes back out every year.
Bloody Handprint Windows
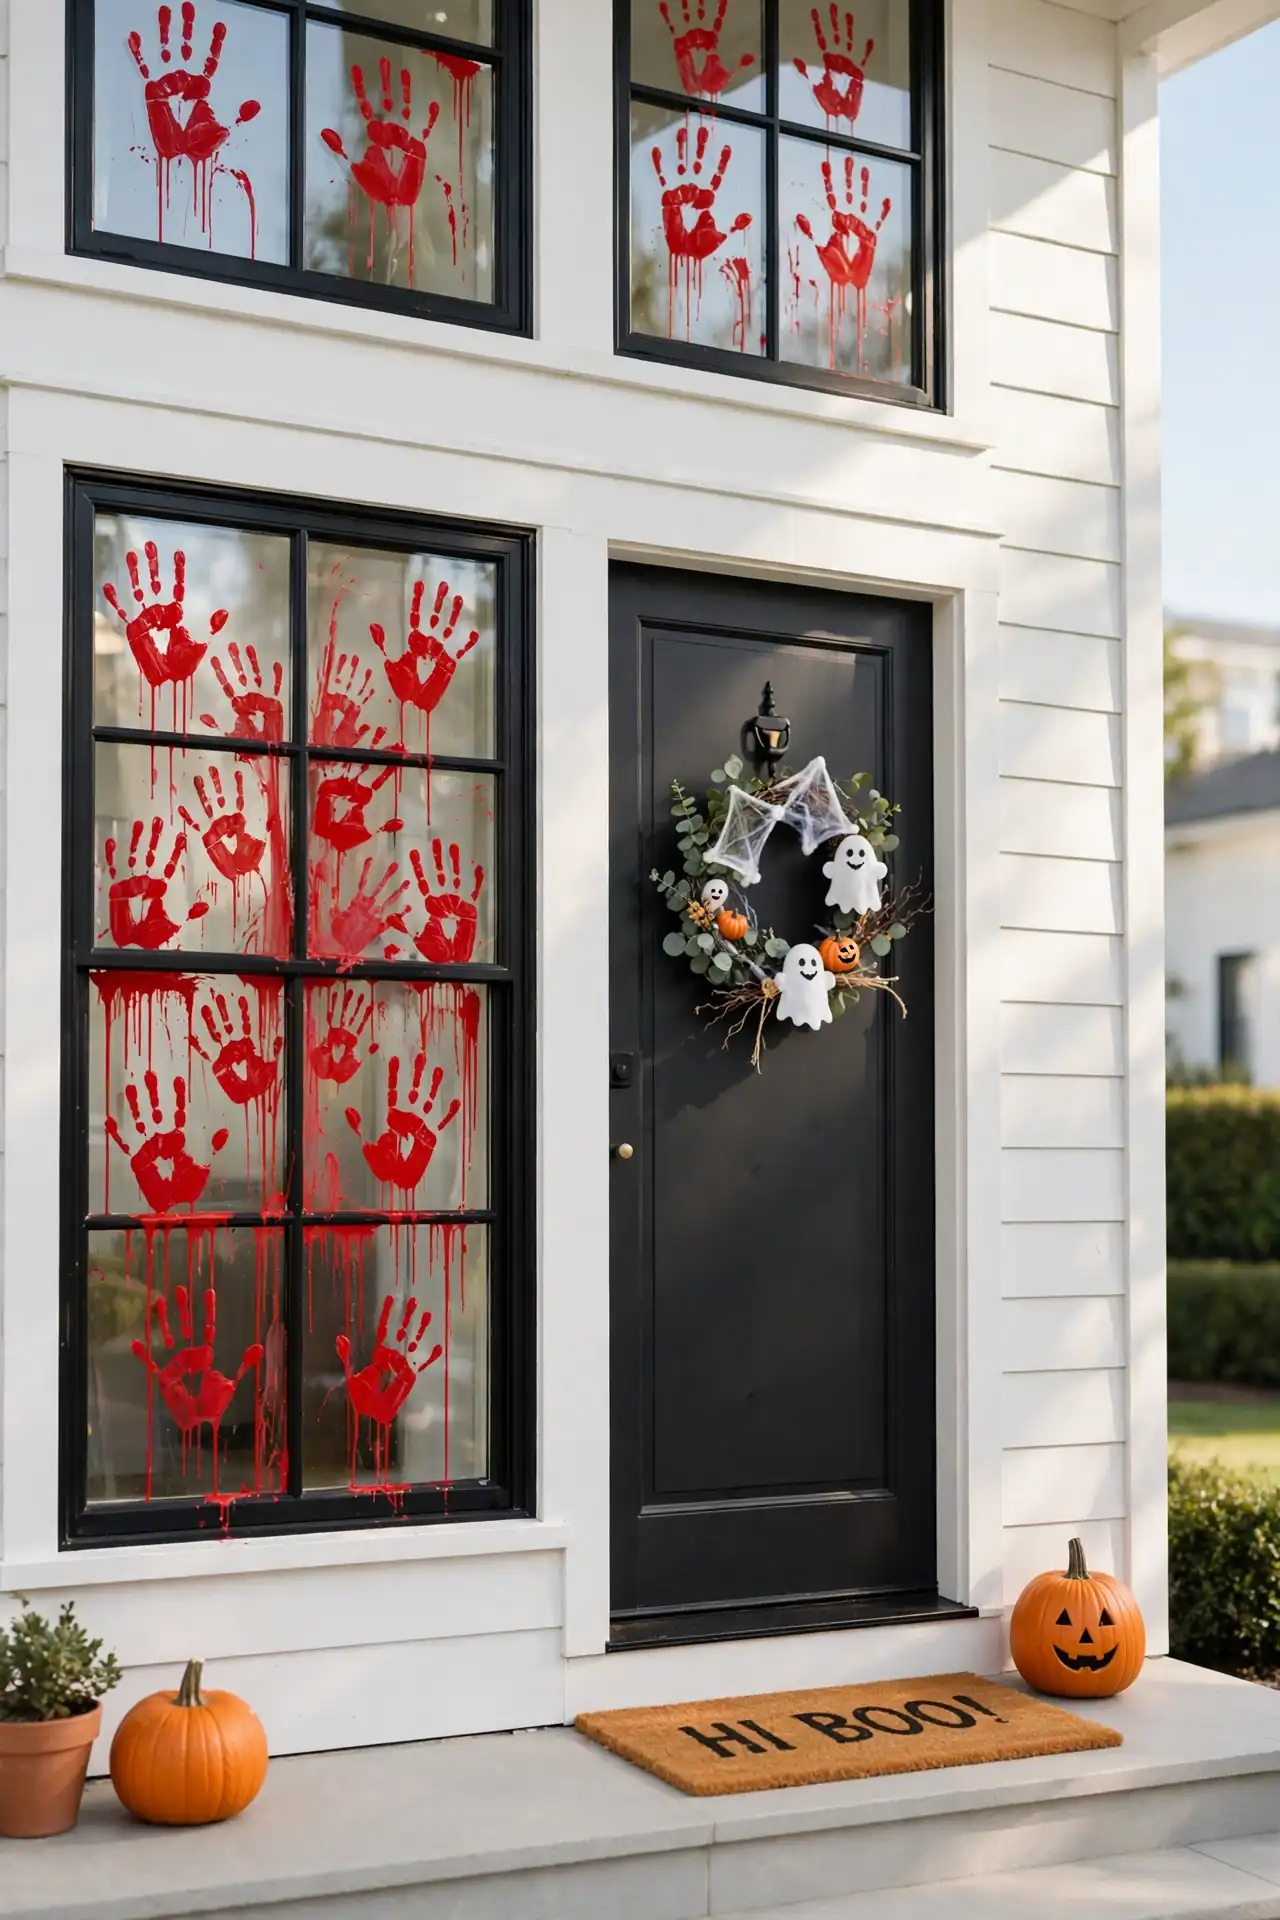
Washable red paint turns plain windows into a crime scene that washes away in November. Press little hands into the paint and stamp them across the glass, adding a few drips for drama. From the sidewalk, the effect is deliciously creepy. Layer prints at different heights so the scene looks like a frantic escape.
Use only washable tempera paint, never acrylic, so cleanup takes minutes with a hose. Let kids make the prints while you add the drips with a brush. This idea costs pennies and delivers maximum shock value. Wipe one corner clean to prove to nervous toddlers that it all comes off. Neighbors will talk about your windows for weeks.
Scarecrow Porch Guard
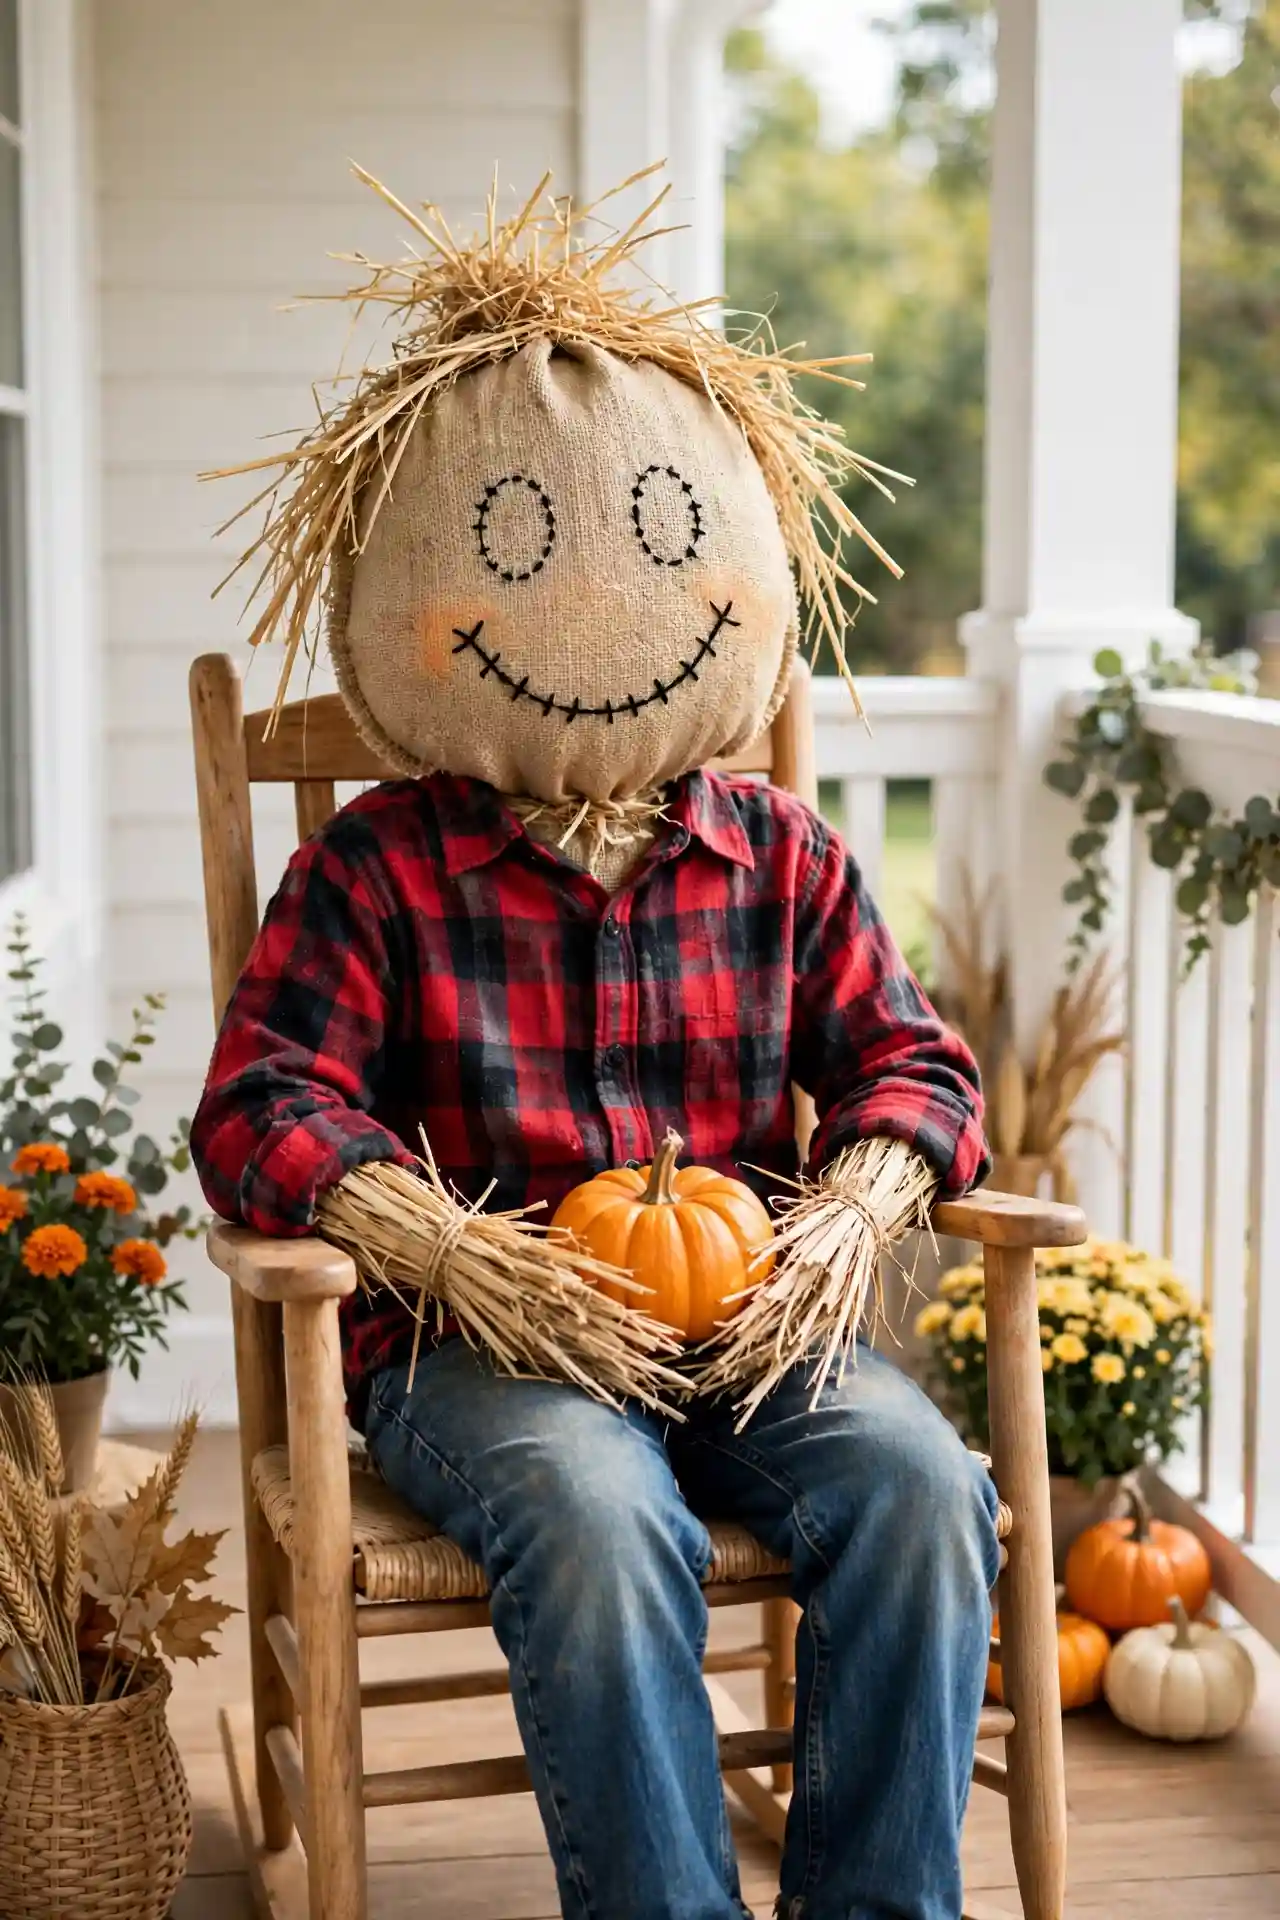
- Stuff old jeans and a flannel shirt with straw or crumpled newspaper for the body.
- Tie the sleeves and pant legs closed with twine so nothing spills out.
- Draw a friendly stitched smile on a burlap sack for the head.
- Prop him in a porch chair with a mini pumpkin on his lap.
A scarecrow guard brings old-fashioned harvest charm that store displays never match. In my experience, thrifted clothes work best because they already look weathered. Swap the head sack yearly since sun fades it fast. Give him a straw hat for extra personality. Kids will name him within the hour, that is guaranteed.
Potion Bottle Display
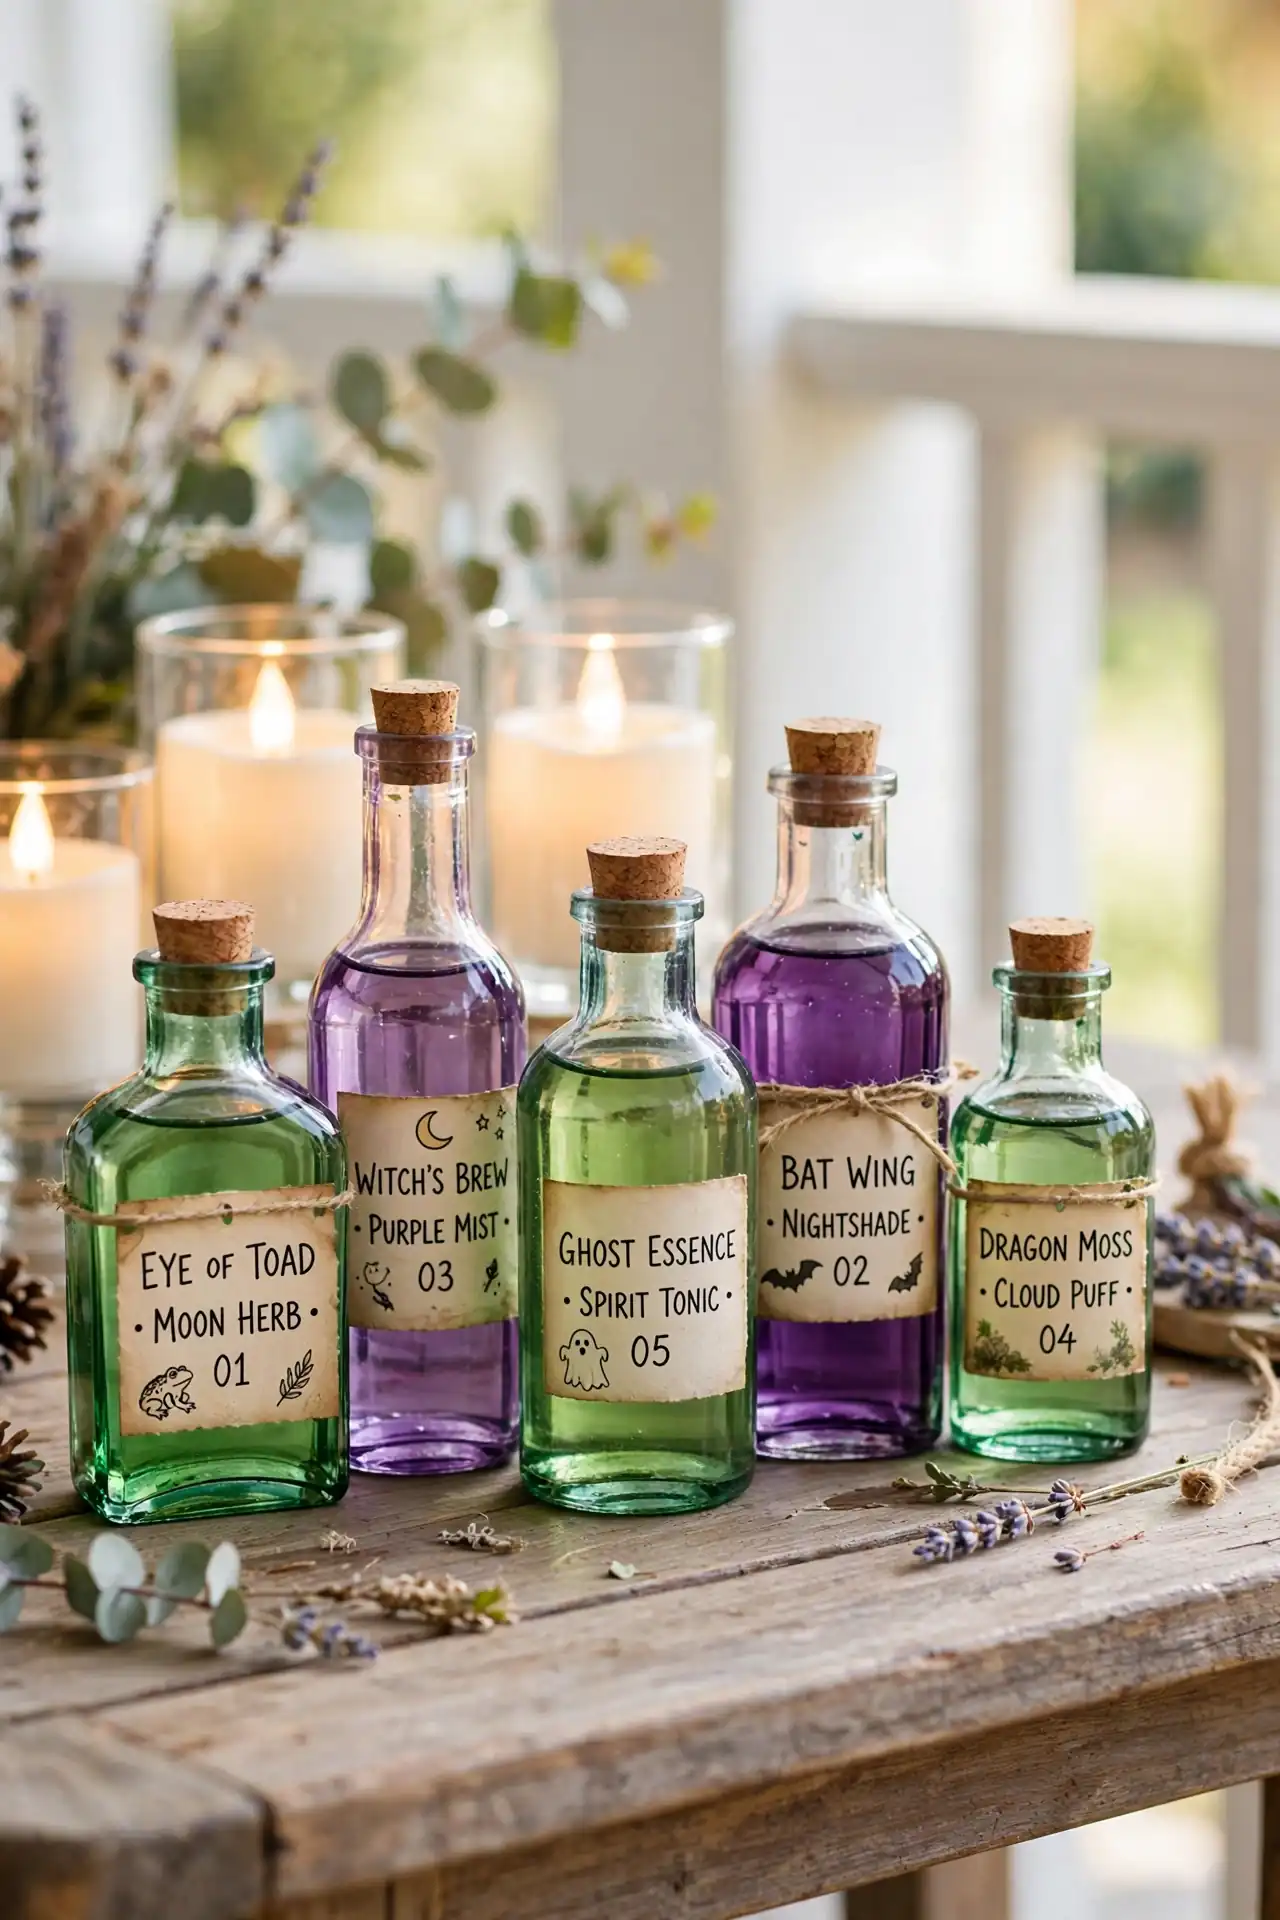
Quick Tip: Save interesting glass bottles all year, then fill them with water tinted by food coloring in toxic greens and purples. Print creepy labels like WITCHES BREW and EYE OF NEWT on aged paper, then cluster the bottles on your porch table with a few LED candles behind them. Tea-stain the paper labels for an authentically aged look.
Bottles grouped in odd numbers look like a real apothecary shelf, especially with labels curling at the edges. Keep the liquids shallow so nothing spills in the wind. This display costs nothing if you save bottles ahead. It photographs beautifully at dusk with the candles lit.
Lantern Post Cobwebs
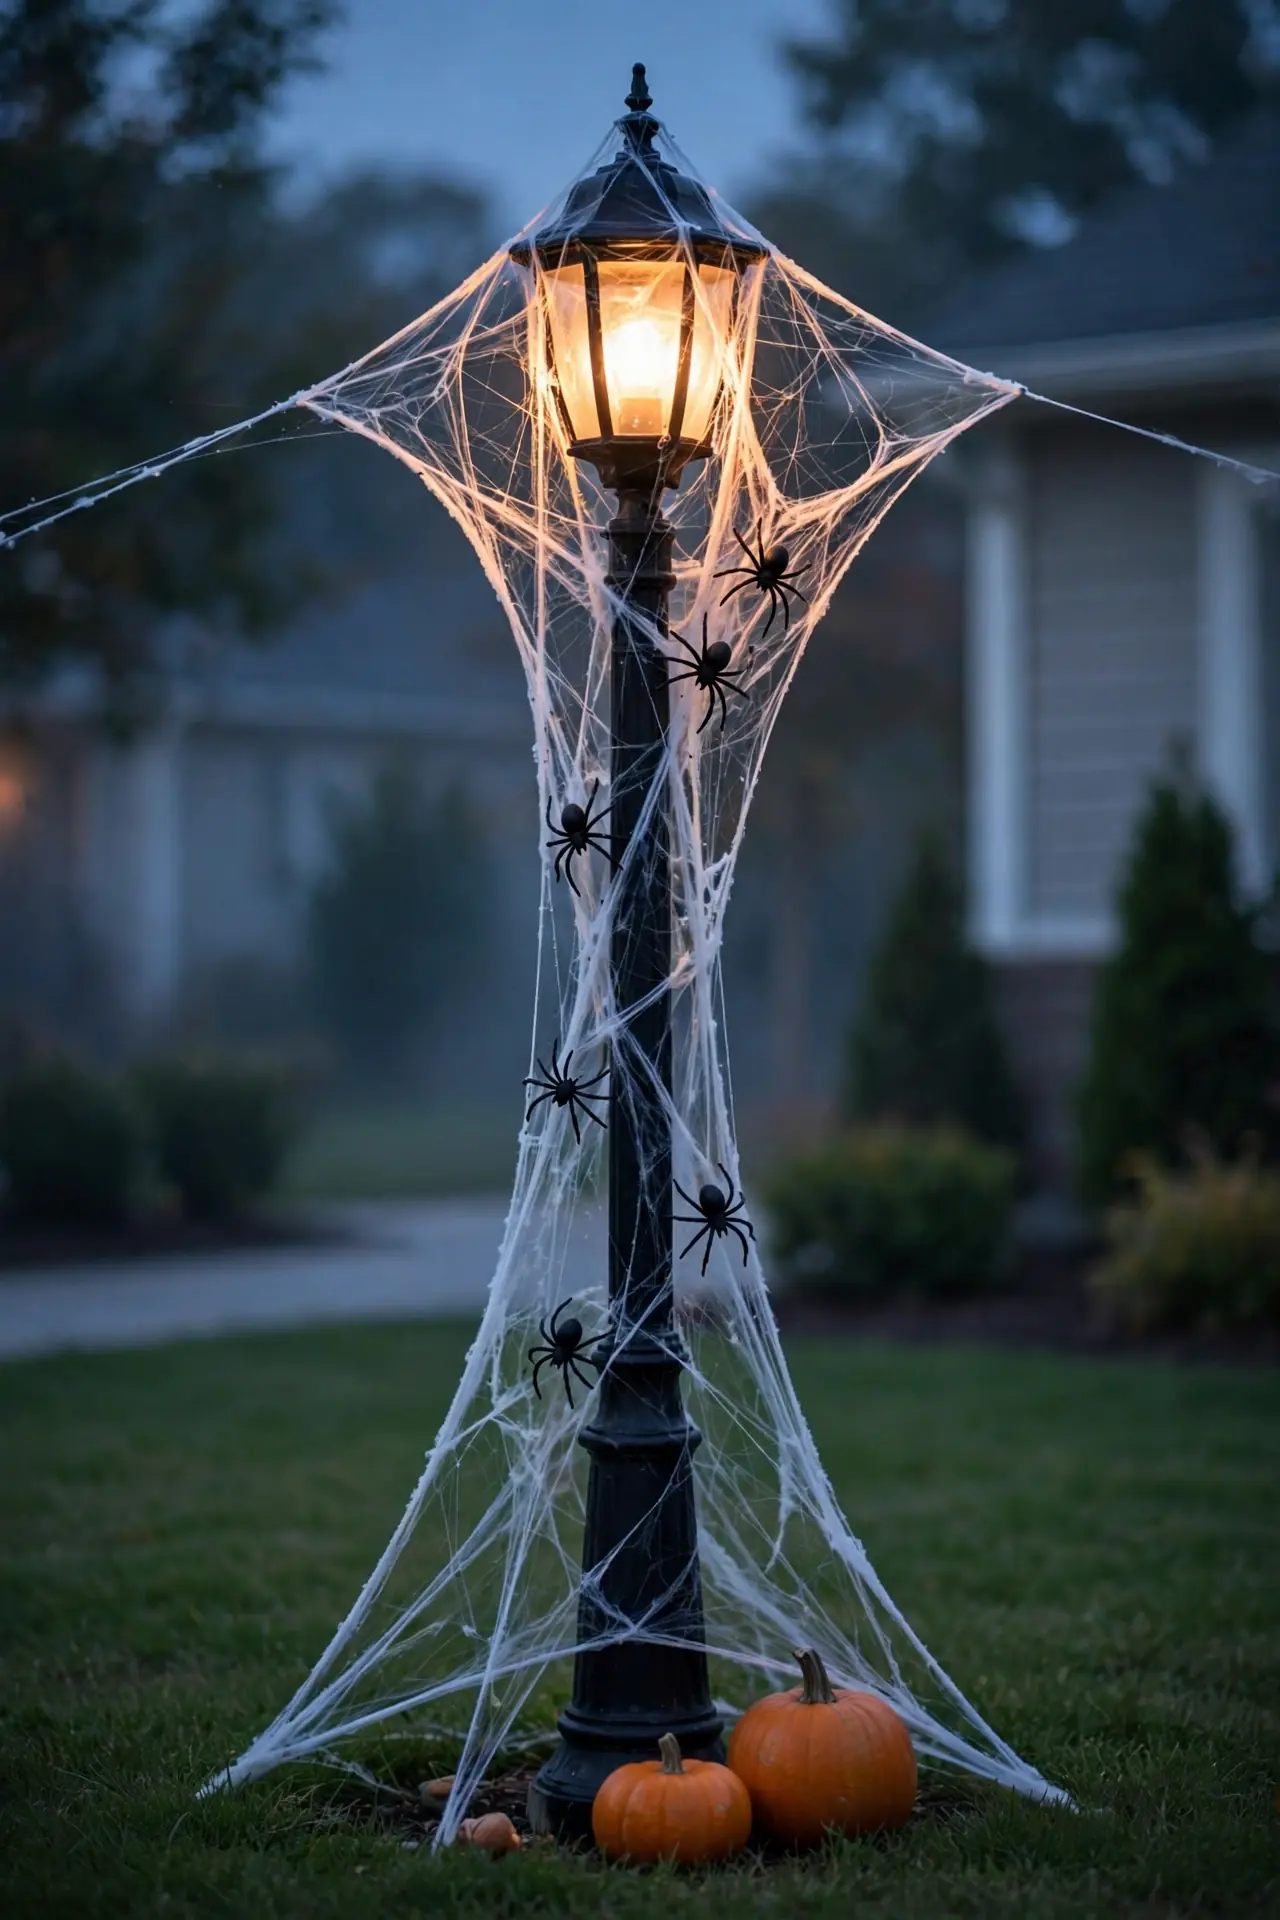
BEFORE: Your lamp post stands bare and boring, doing nothing for Halloween except holding a light. The front yard feels half-decorated, and the post looks like an afterthought.
AFTER: Stretchy white webbing wraps the post from top to bottom, with black plastic spiders climbing toward the lamp. The light glows through the webbing like a haunted beacon. The whole yard suddenly feels intentional and spooky.
Bagged spider webbing stretches incredibly far, so one bag covers a whole post. Pull it thin for a realistic look, then press the spiders in firmly. Replace the webbing yearly since it yellows in the sun. Five minutes of work transforms the most ignored spot in your yard.
Tombstone Walkway Markers
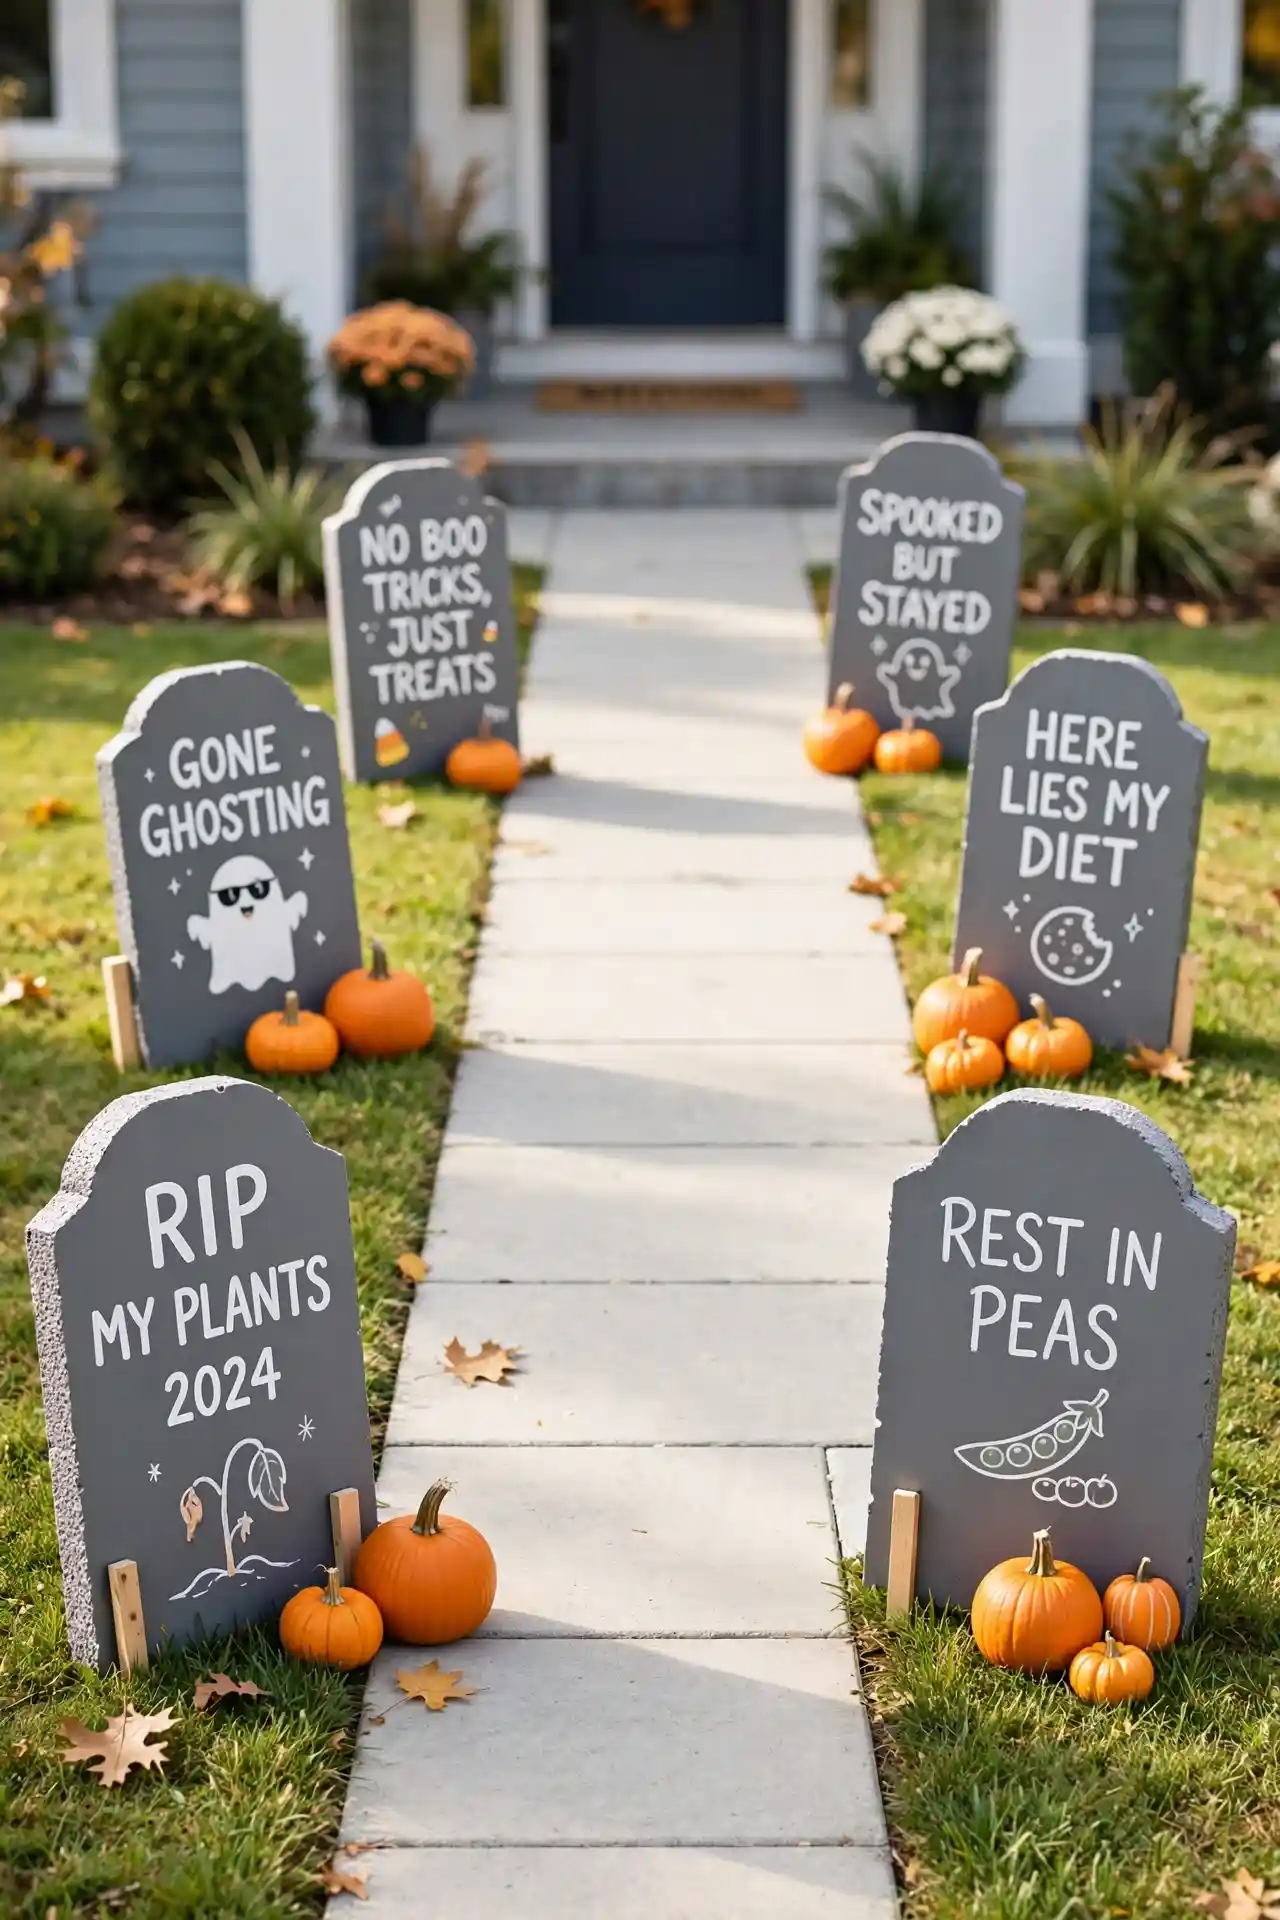
- Cut tombstone shapes from foam board with a craft knife, rounding the tops for a classic look.
- Paint each stone gray, then sponge on darker patches for an aged, weathered finish.
- Write funny epitaphs with black permanent marker: HERE LIES MY DIET and REST IN PIECES.
- Tape a wooden stake to the back of each stone and push them along the walkway.
Foam board survives October rain far better than cardboard, which is why I switched years ago. Space the stones unevenly for a real graveyard feel. Bring them in during heavy storms to extend their life. Funny epitaphs get more laughs than scary ones every time.
Flickering Jar Lights
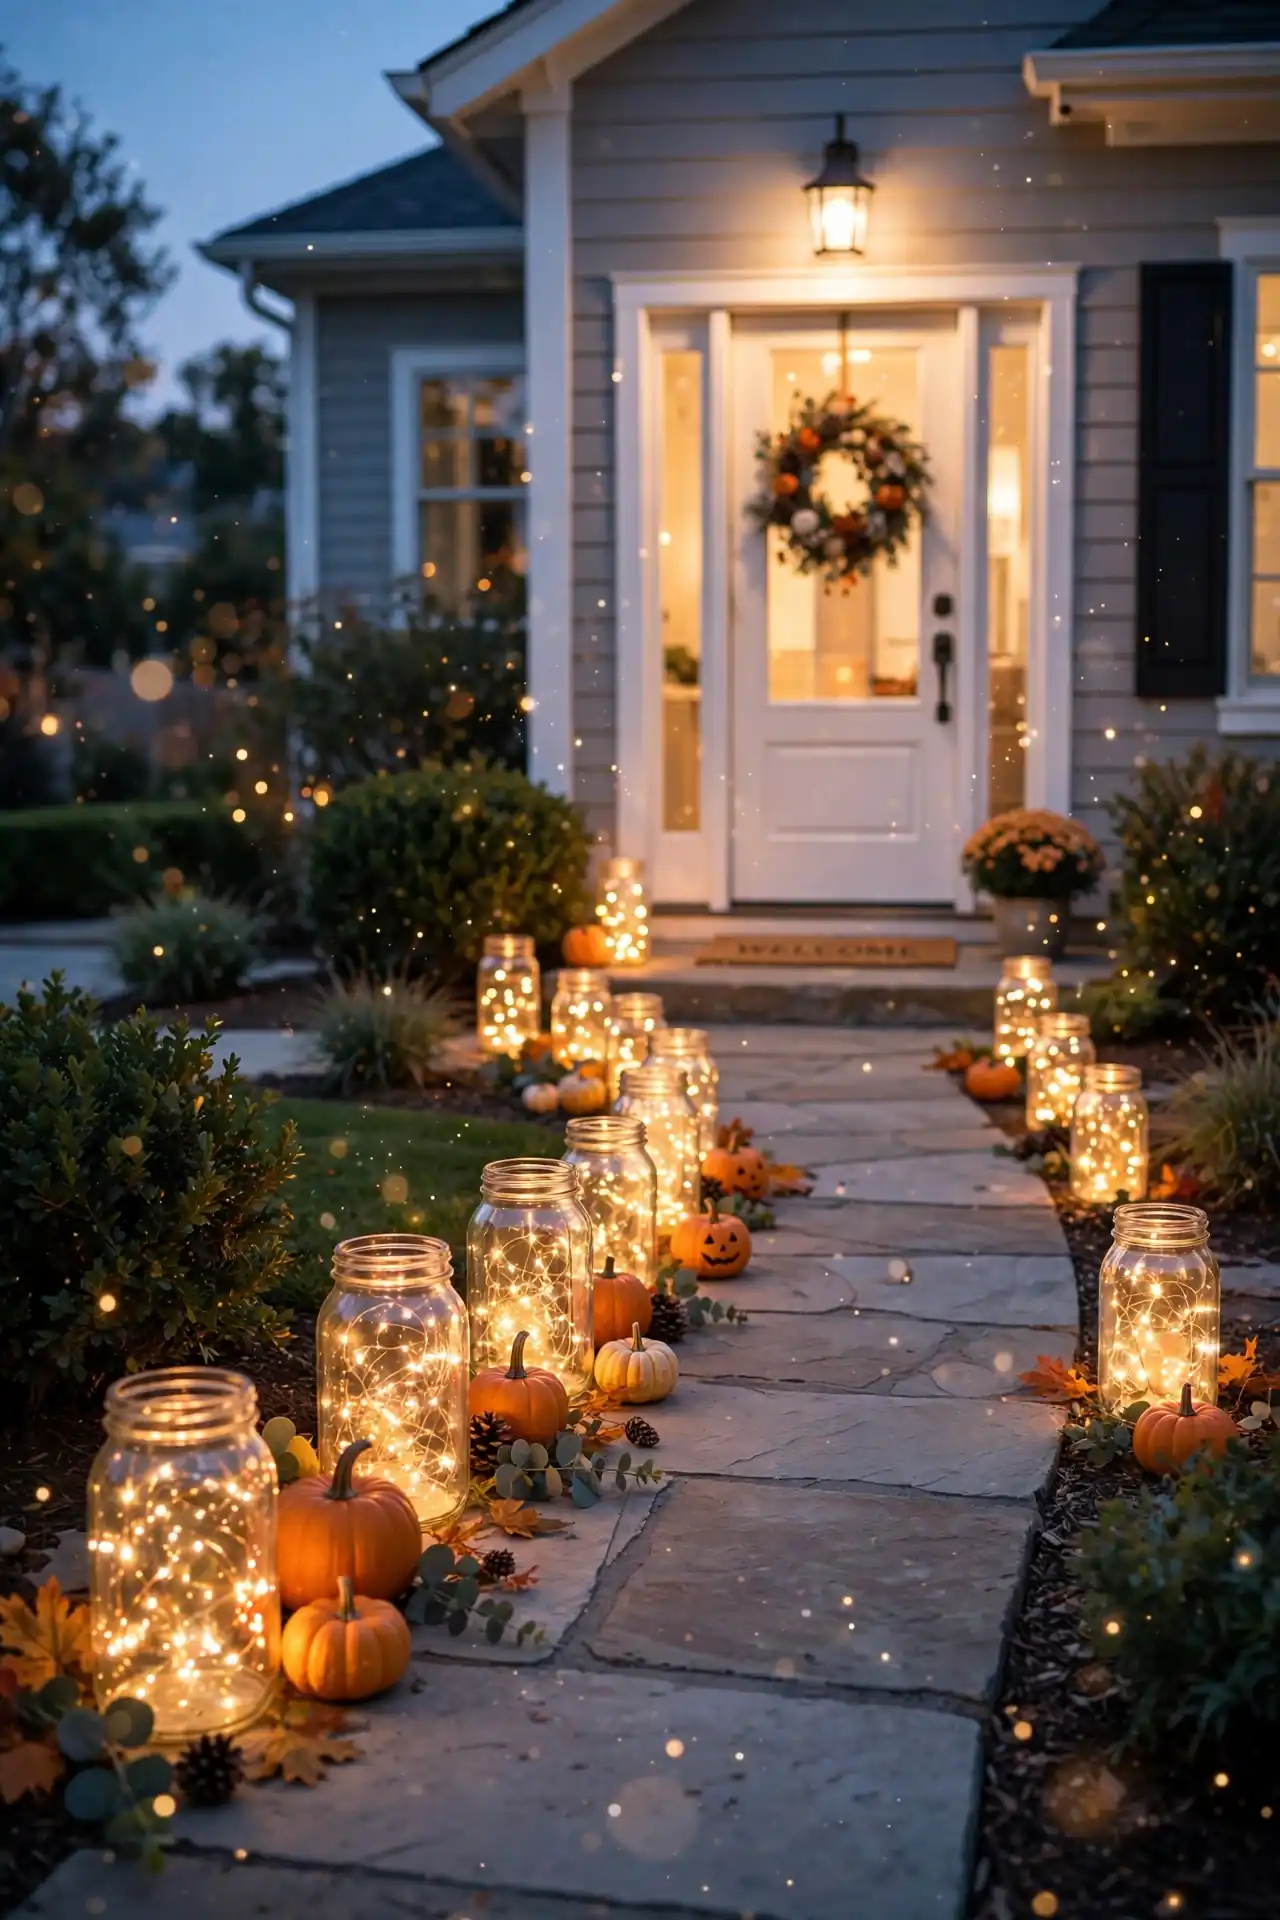
| Feature | Mason Jar Lights | Plastic Jar Lights |
|---|---|---|
| Glow | Warm and bright through clear glass | Softer, diffused through frosted plastic |
| Safety | Glass breaks if knocked over | Kid and pet friendly, no shatter risk |
| Cost | Free with saved jars | A dollar each at craft stores |
| Weather | Heavy enough to resist wind | Weigh down with sand or stones |
| Best For | Sheltered porches and steps | Busy walkways with foot traffic |
Fill each jar with a string of warm fairy lights and set the battery pack under the lid. Line them along the walkway for a flickering path that guides trick-or-treaters to your door. This idea reuses jars you already own. The soft glow feels magical without a single scary element.
Conclusion
Your front yard is ready for its spookiest season yet. These diy halloween decor outdoor ideas prove that handmade touches beat store-bought displays every time, from glowing jar paths to mummified doors. Pick three favorites this weekend and build them with whatever you have on hand. I have seen how small handmade details make a house the talk of the street. Start tonight with the glowing bush eyes; they take fifteen minutes and thrill every passerby. Save your favorites to Pinterest, try one new idea each October, and share your haunted yard photos with us. Happy haunting, and may your candy bowl never run empty.




2 Comments