23 Texas Outdoor Kitchen Ideas for a Legendary Backyard
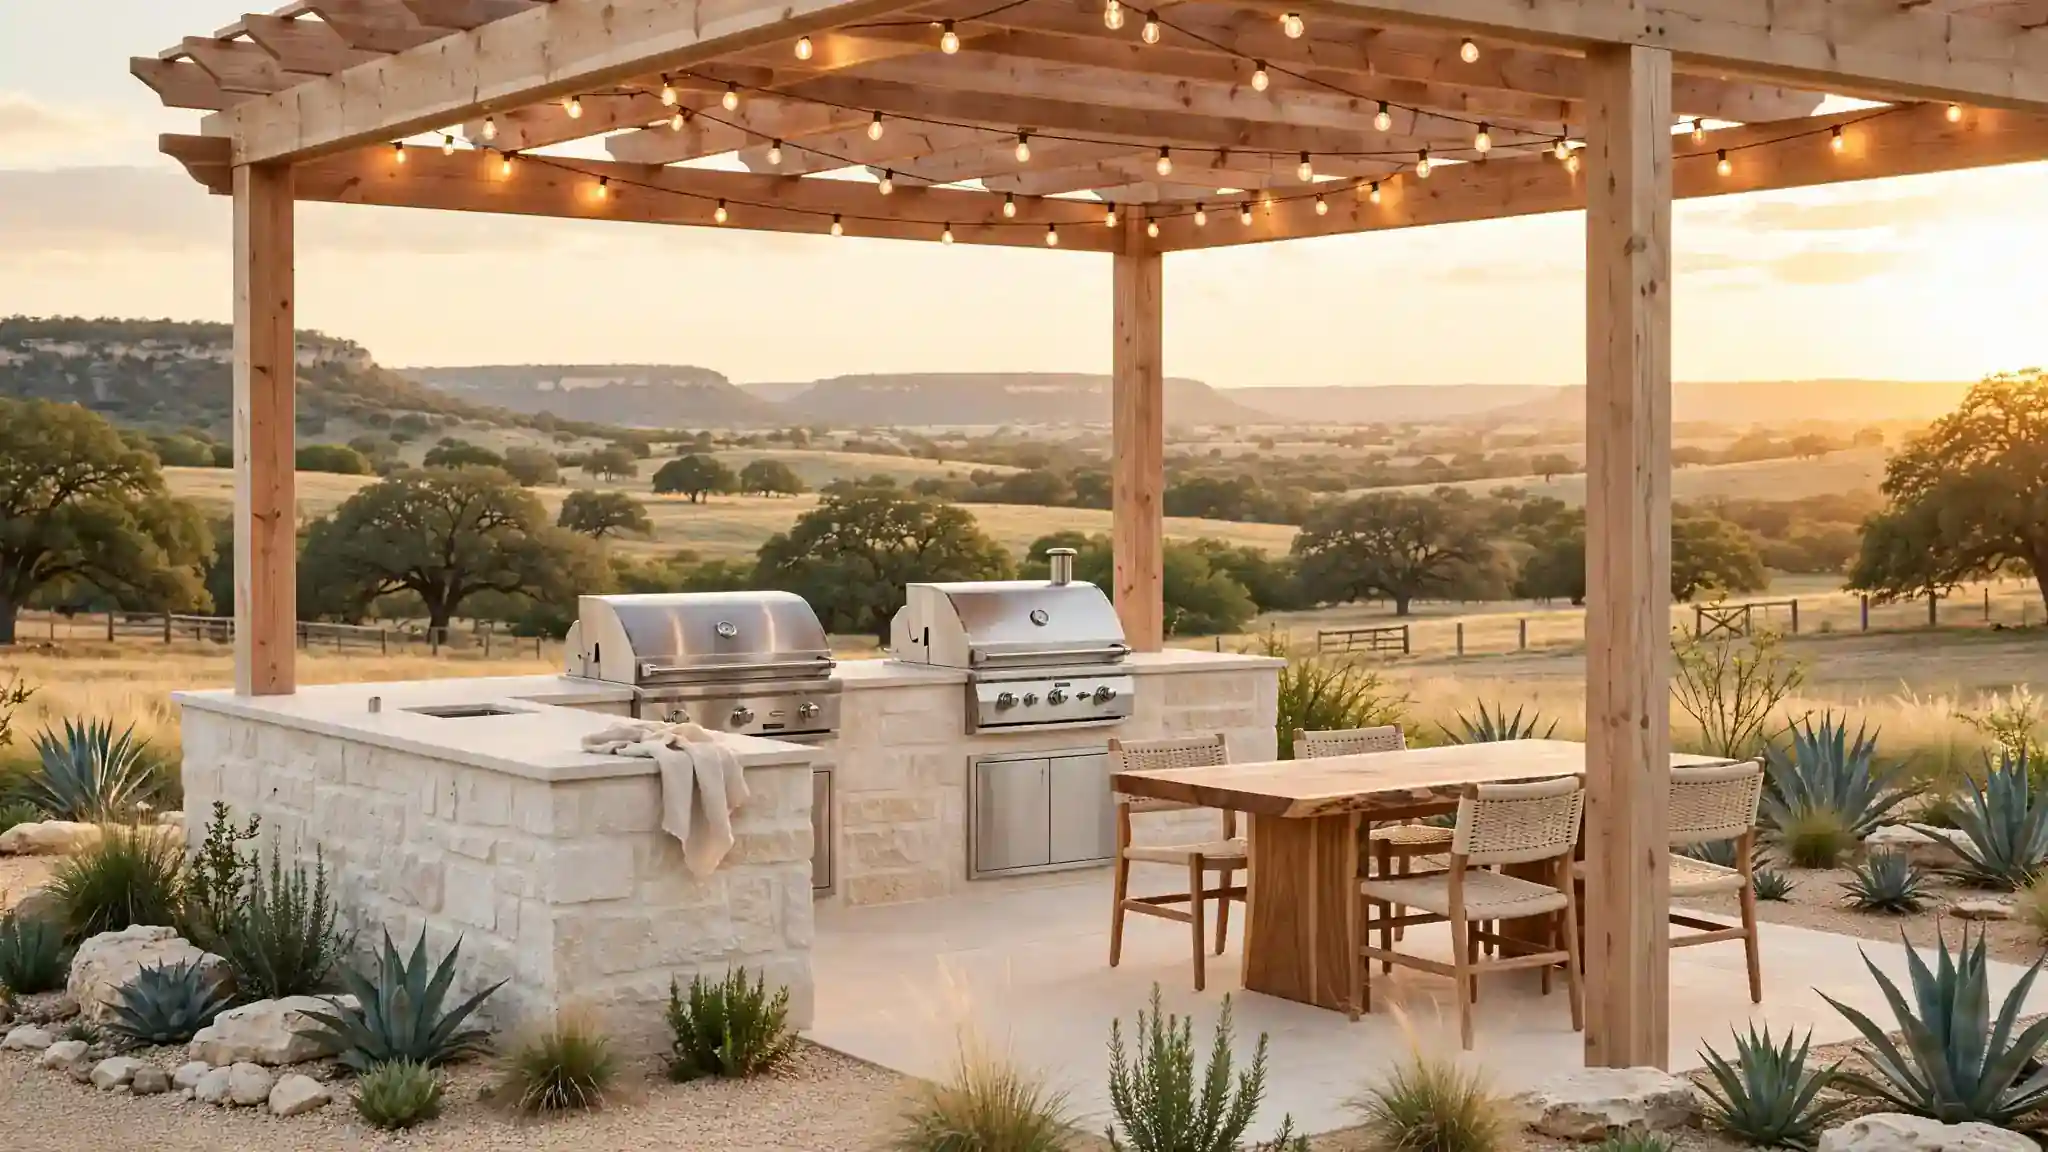
These texas outdoor kitchen ideas prove that the best room in a Texas home has no ceiling at all. From smoky brisket stations to breezy cedar pergolas, an outdoor kitchen here is part workshop, part gathering place, and built for long evenings under big skies. I have noticed that Texas cooks take their grills seriously, so every idea below respects that pride with real working setups, not decoration alone.
Whether you are working with a sprawling ranch yard or a compact patio, these setups scale to fit, using stone, cedar, and steel that laugh at summer heat. For the cozy side of the yard, these diy small backyard fire pit ideas pair beautifully with a cookout setup. Let us fire up the grill and dig into twenty-three ways to build your legendary backyard.
Hill Country Stone
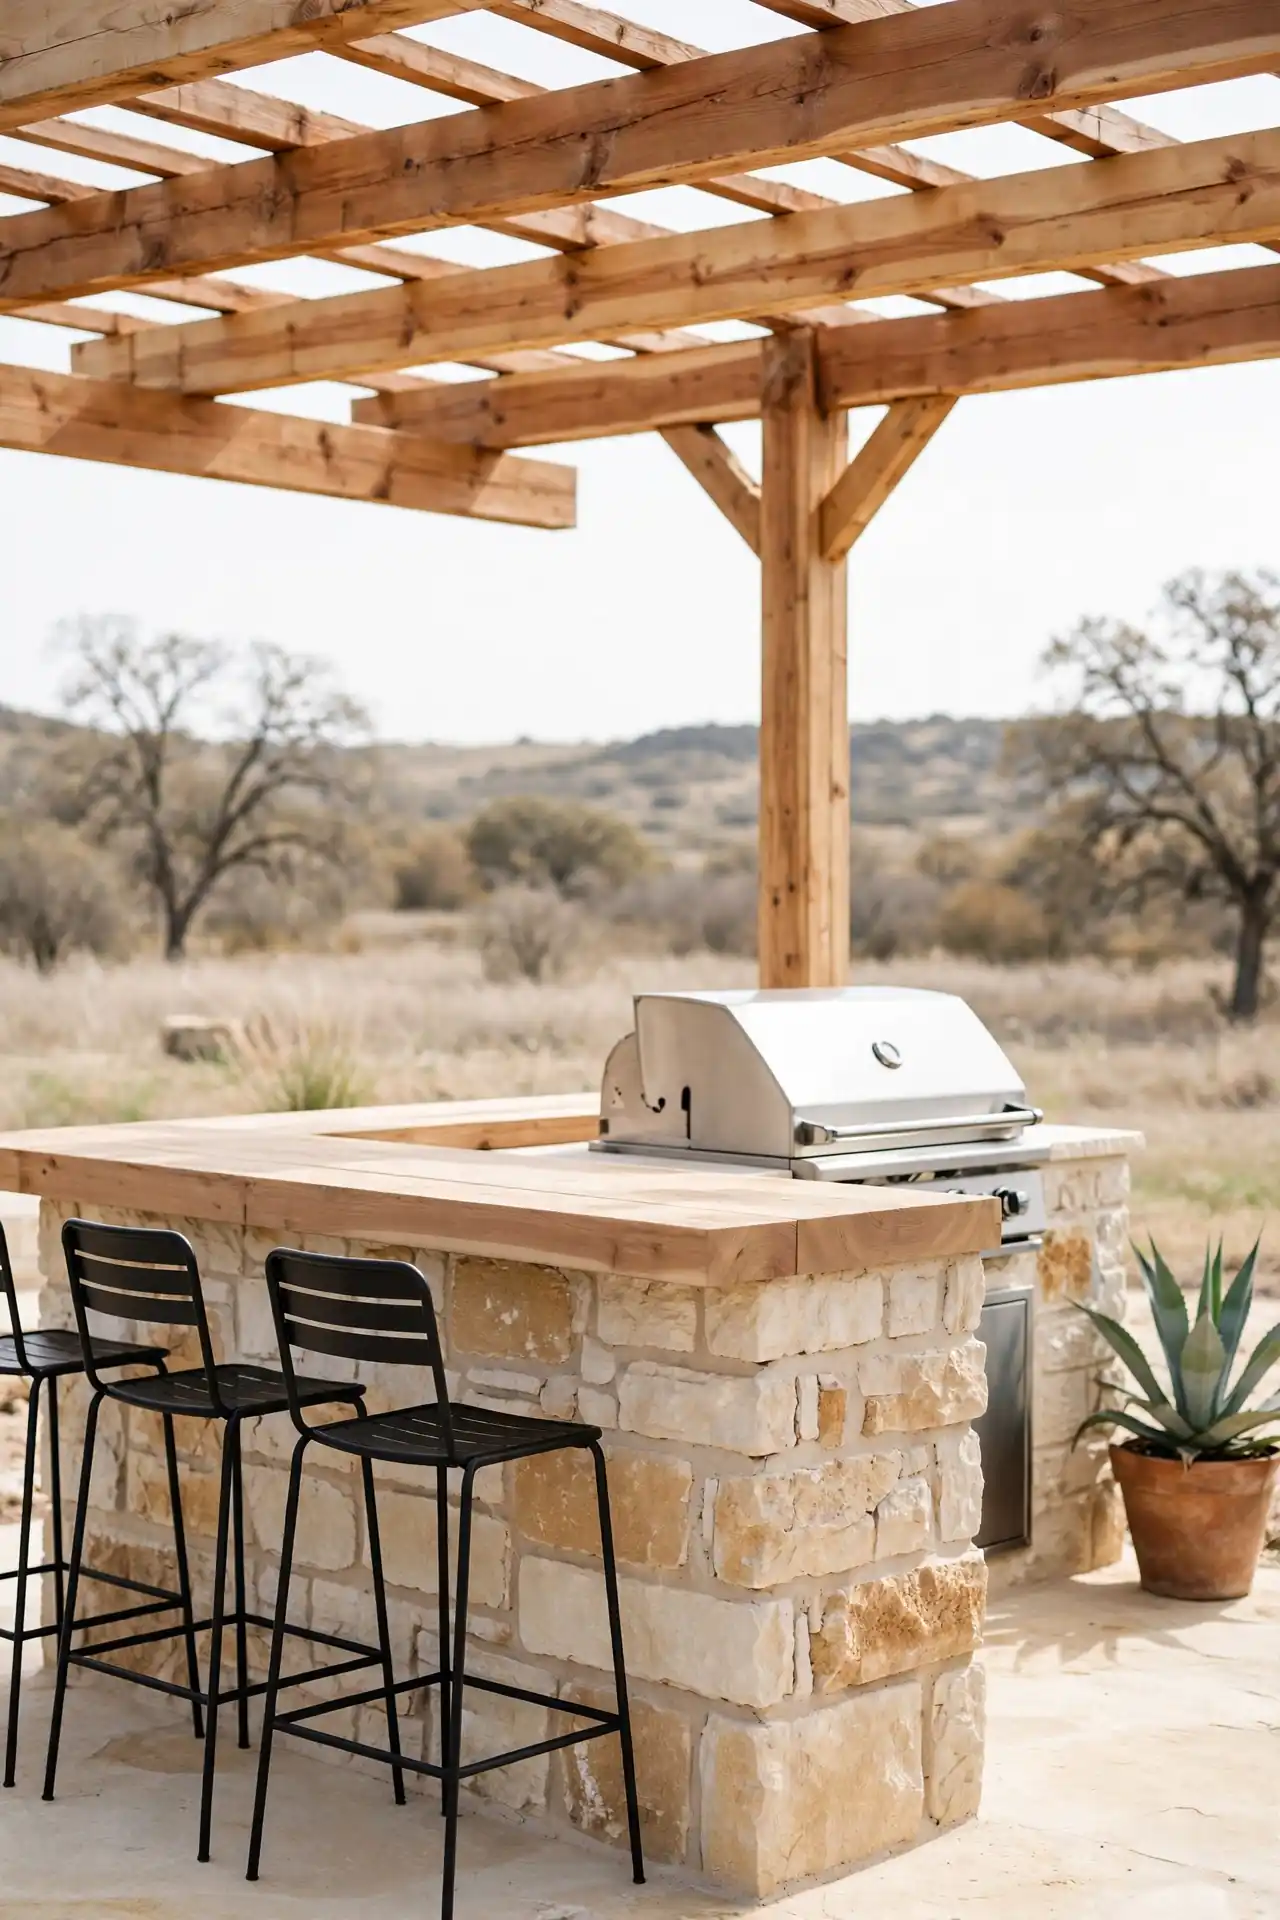
Limestone anchors an outdoor kitchen the way nothing else can. A stacked stone island base or a full veneer wall pulls in that Hill Country look that feels rooted and permanent. It shrugs off summer heat, hides grill splatter, and only looks better as it weathers year after year.
Pair the stone with warm cedar beams overhead and simple black metal stools for contrast. Keep the palette sandy and neutral so the limestone stays the star of the show. In my experience, stone bases also swallow utility hookups whole, which means no visible gas lines or cords photobombing your cookout.
Cedar Pergola Cover
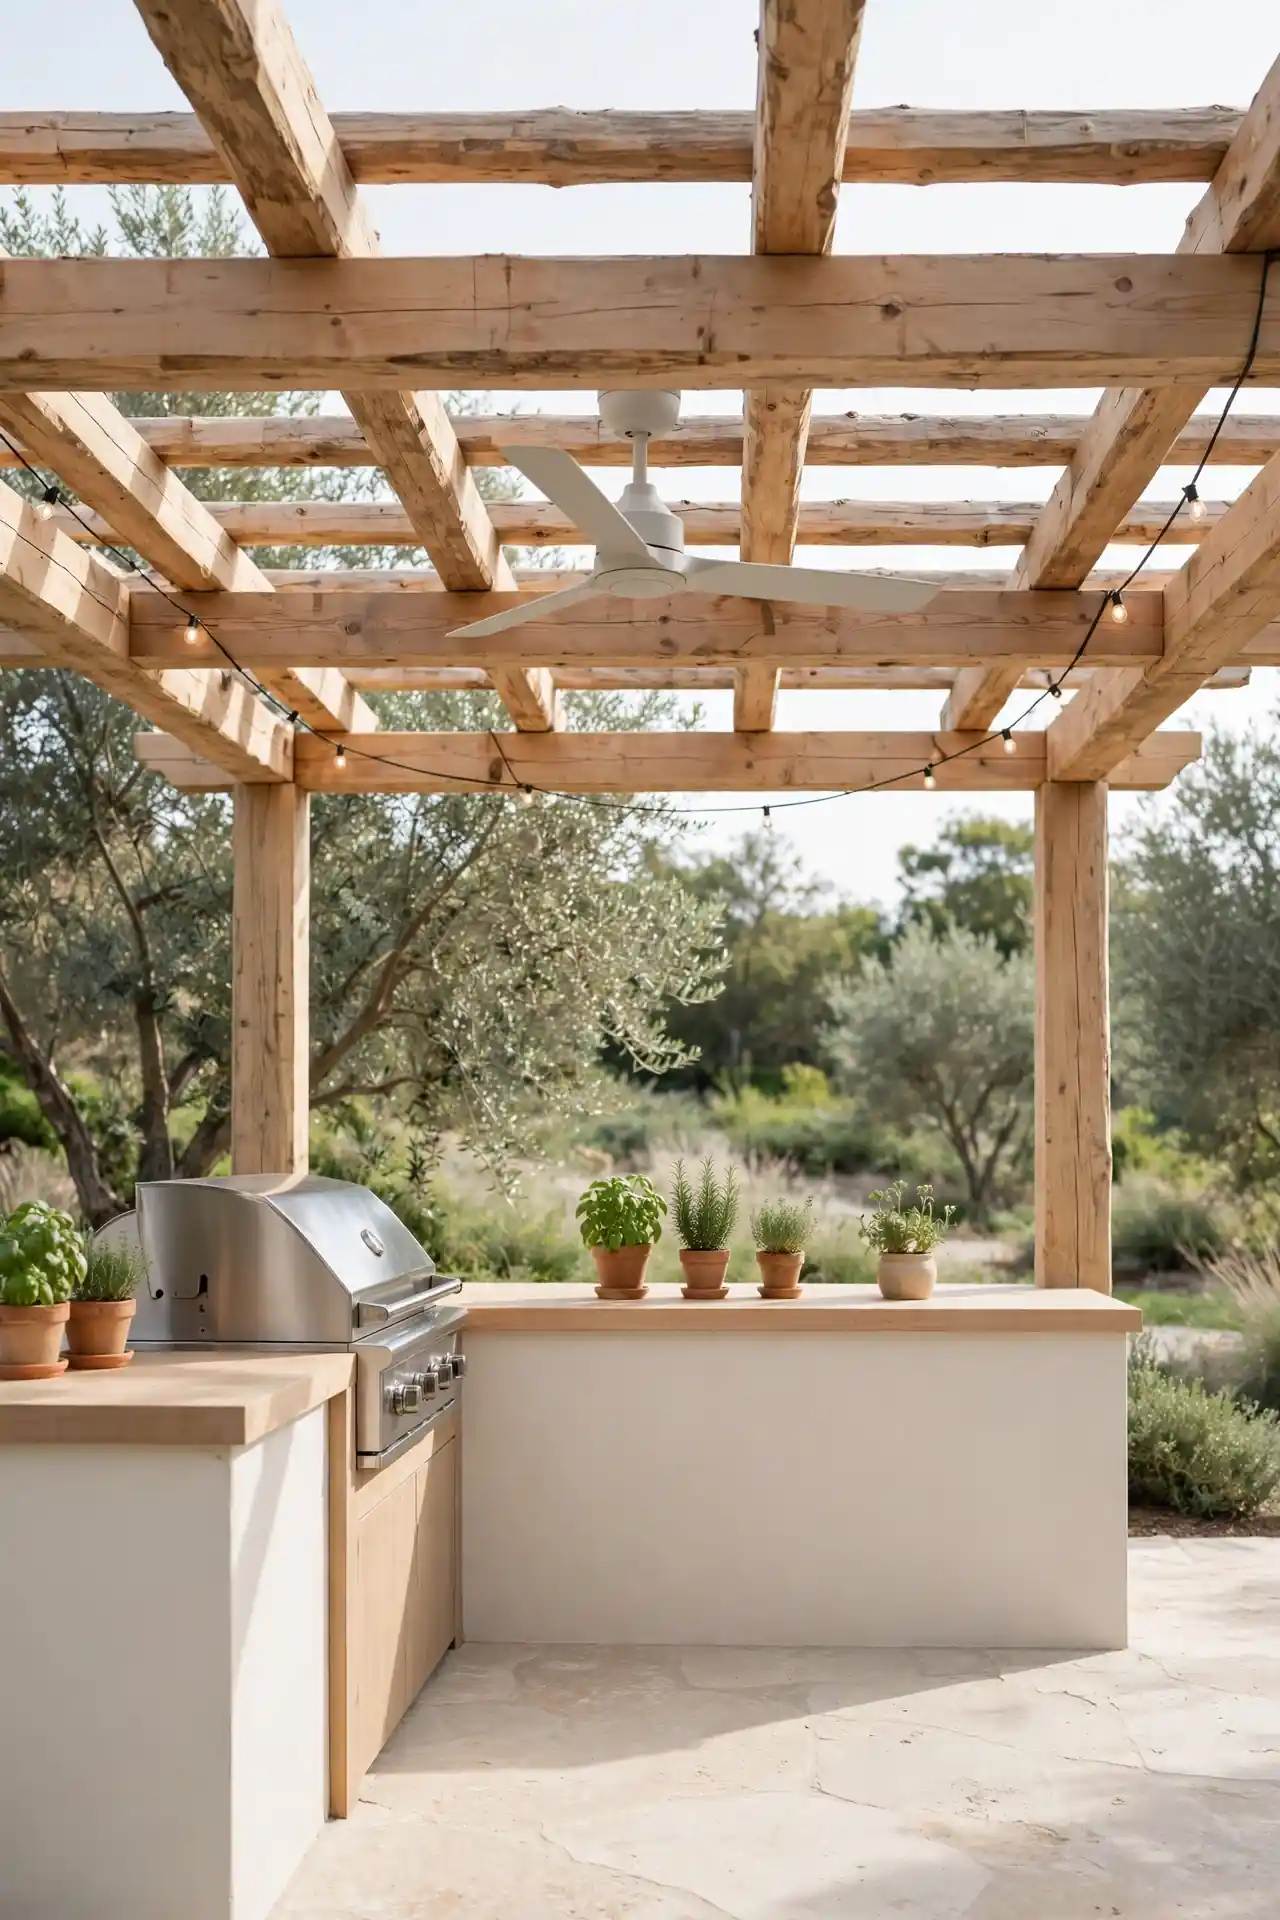
- Frame it from rough-sawn cedar, which stands up to Texas sun and sudden storms without twisting.
- Size it to shelter the grill and prep counter while the dining table claims the open sky.
- Mount one outdoor ceiling fan on the center beam to push hot air down and outward.
- Run string light wiring through the rafters before you furnish, so every cord stays hidden.
A pergola gives structure without walls, which is exactly what a big Texas yard needs. It marks the kitchen zone, filters the harshest midday sun, and still welcomes every breeze. I have noticed that cooks linger longer under partial shade, and guests always drift toward wherever the shadow line falls.
Smoker Station Setup
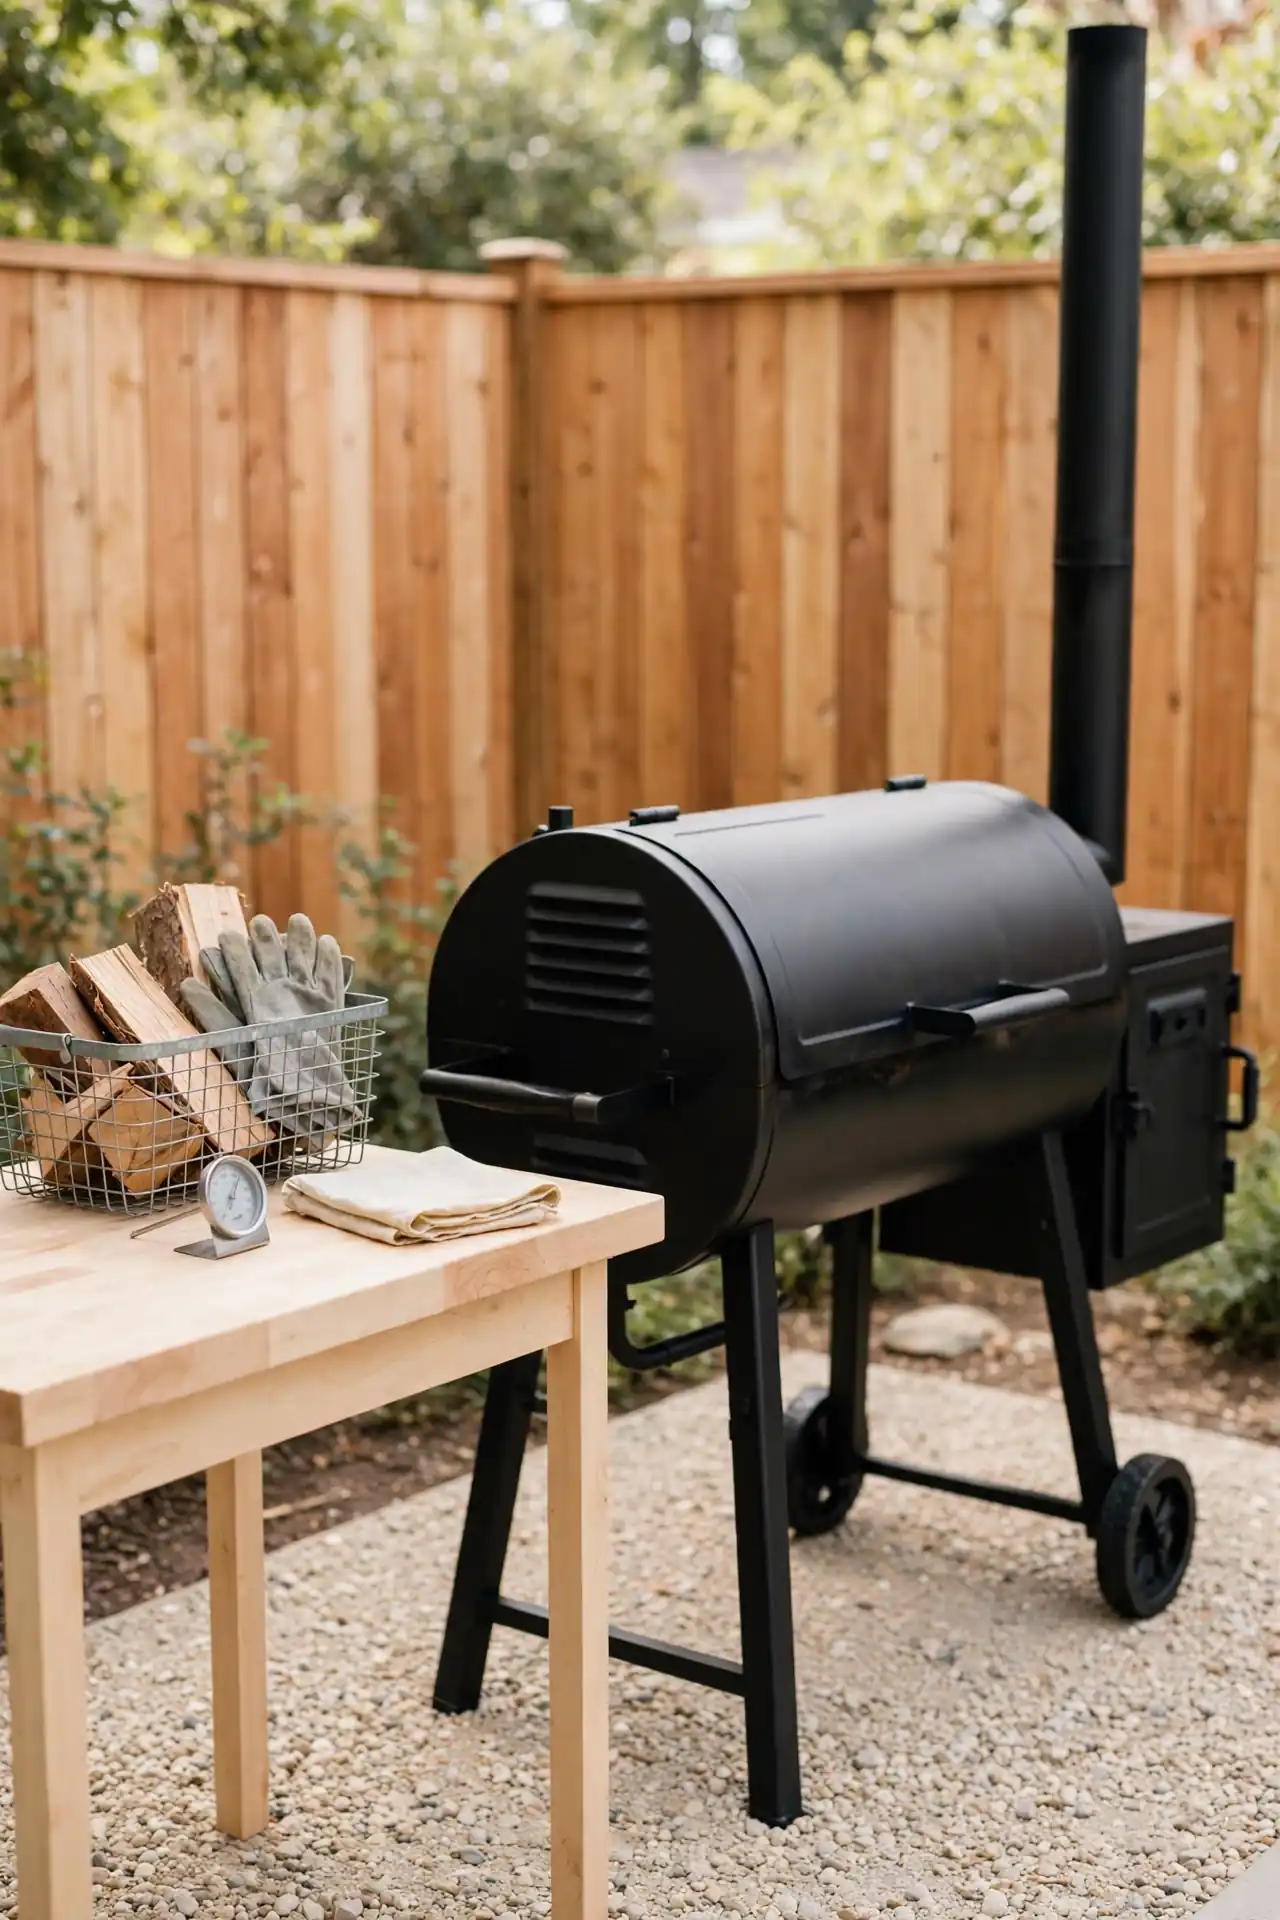
Quick Tip: Park your smoker on a gravel pad at least three feet from any wall, with the chimney pointed away from the seating zone so grease smoke never drifts over guests. A metal drip tray under the firebox catches renderings, and a small covered caddy nearby holds wood chunks, gloves, and a thermometer. Close the lid between checks to hold steady heat.
Texas barbecue culture starts at the smoker, so give yours a real station instead of a corner of the patio. A dedicated pad keeps grease off the deck, and a nearby prep table means brisket never travels far. That is why many experts recommend treating the smoker as an appliance, not an afterthought.
Lone Star Bar
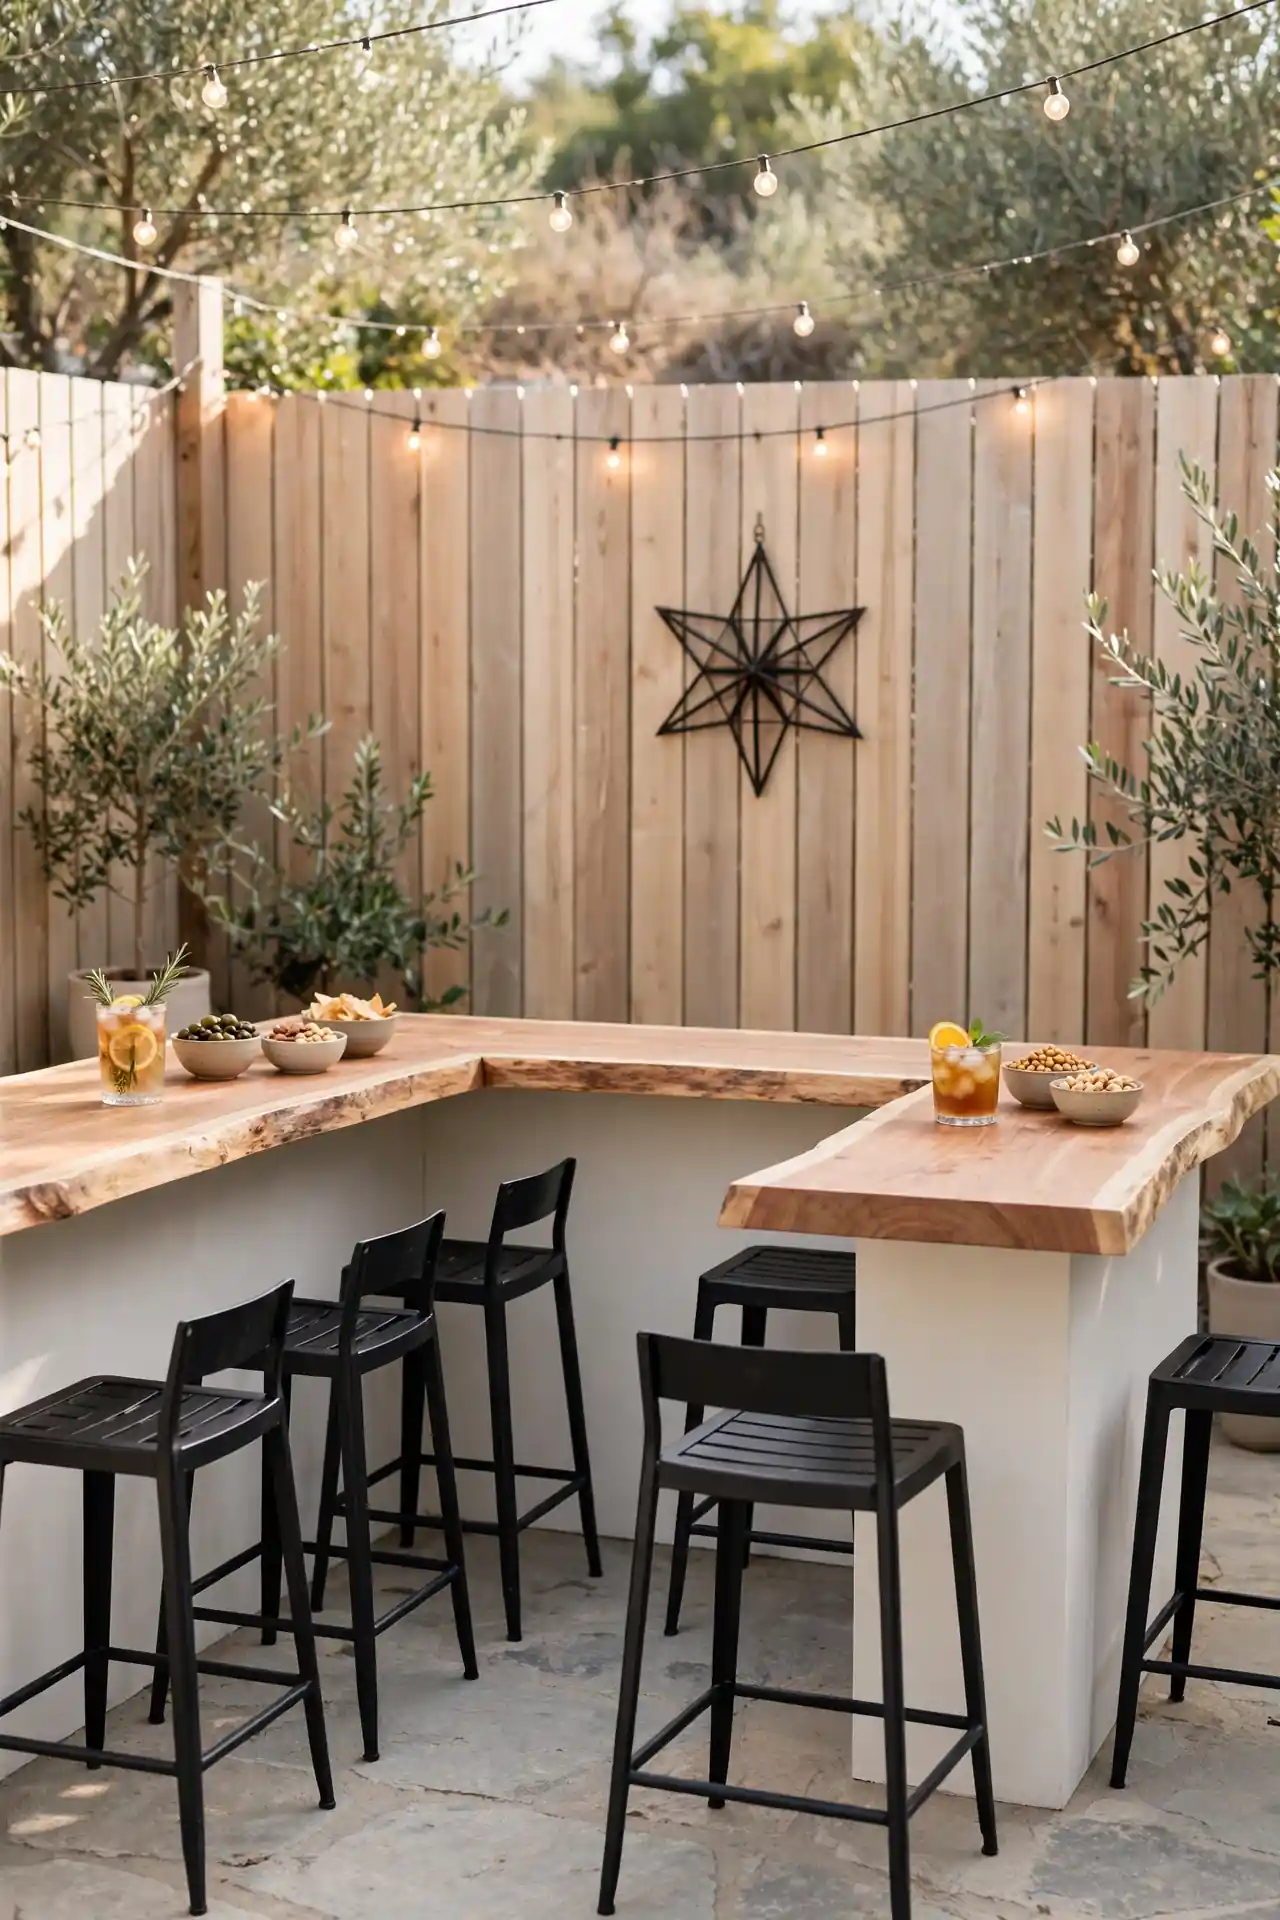
BEFORE: The patio edge sat empty, just a grill against the house wall and a folding table for sides. Every cookout turned into a traffic jam around one small surface.
AFTER: A simple L-shaped bar with a live-edge cedar top now anchors the whole space, with five stools pulled up on the far side. Drinks, chips, and fixings each get their own zone. Cookouts flow now, with the cook behind the bar like the host of their own show.
A bar changes the social math of a cookout completely. People gather around a counter the way they gather around a kitchen island, facing the action instead of standing in its way. Keep the top at standing height and the stools casual, and your backyard starts running itself.
Brisket Prep Zone
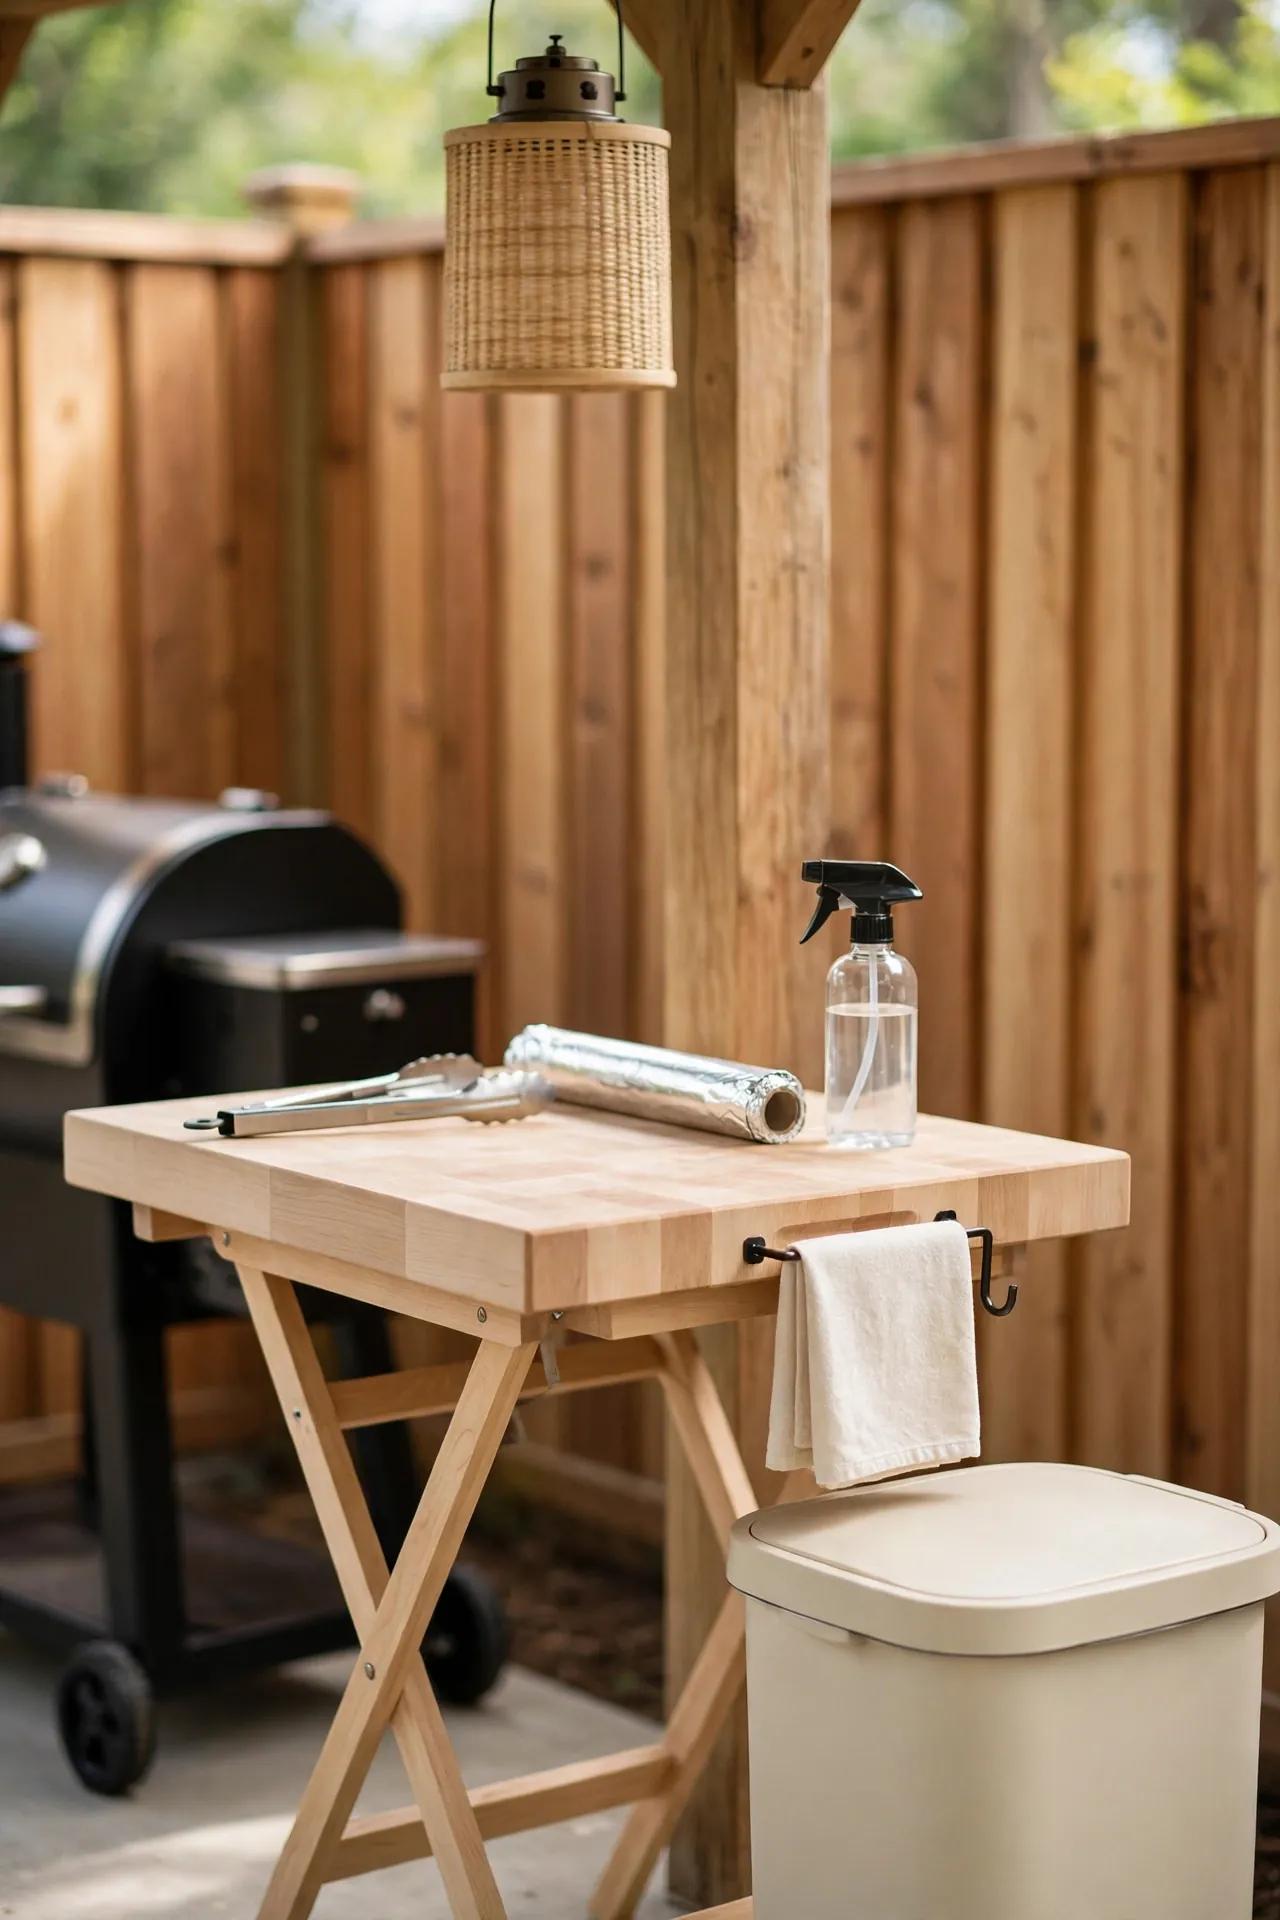
- Claim a shaded corner near the smoker so raw meat never travels through full sun. A small folding table works while you plan something permanent.
- Top it with a food-safe butcher block board, sealed against weather, and keep it stocked with tongs, foil, and a spray bottle.
- Add a lidded trash bin and a towel hook right at elbow height, because brisket prep is messy by nature.
- Finish with a battery lantern overhead so midnight wrap sessions have real light, not phone flashlight.
Brisket deserves a staging area, not a balancing act on the smoker’s side shelf. A dedicated prep zone keeps raw and cooked meat separated, which matters for food safety. Set it up once and every long smoke runs smoother from trimming to slicing.
Grill Fuel Face-Off
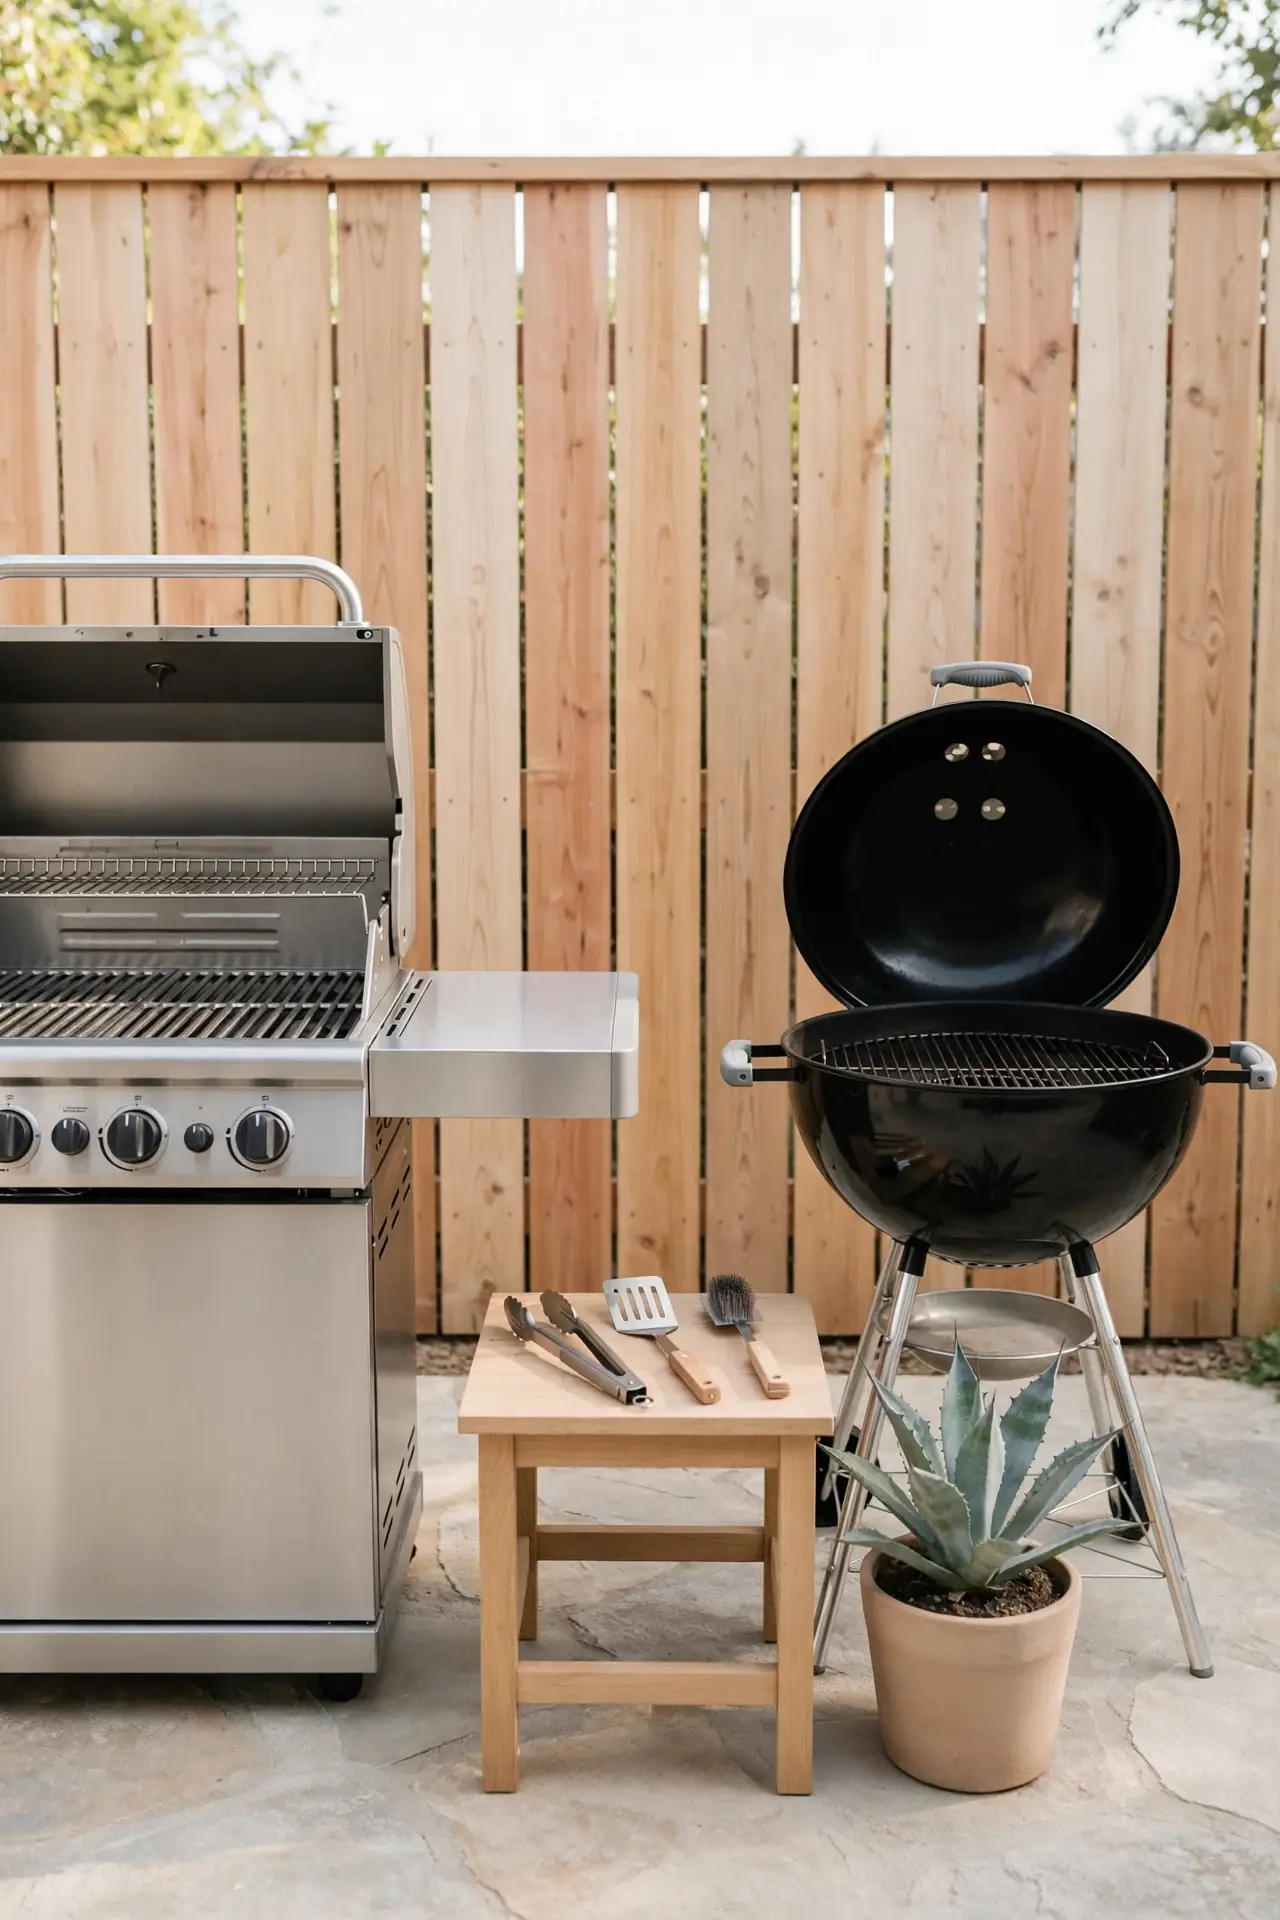
| Gas Grill | Charcoal Kettle | |
| Flavor | Clean, consistent taste | Deep smoky flavor |
| Startup | Ready in ten minutes | Needs twenty to thirty minutes |
| Heat control | Precise knob adjustment | Vent fiddling and patience |
| Cost | Higher upfront, cheap fuel | Low buy-in, steady charcoal cost |
| Cleanup | Quick grate brushing | Ash disposal after every cook |
| Best for | Busy weeknight grilling | Slow weekend barbecue sessions |
The fuel debate splits Texas backyards like nothing else, so pick the side that fits your real life. Gas wins on busy weeknights when dinner needs to happen fast. Charcoal wins on slow weekends when the smoke itself is the whole point.
Poolside Cook Corner
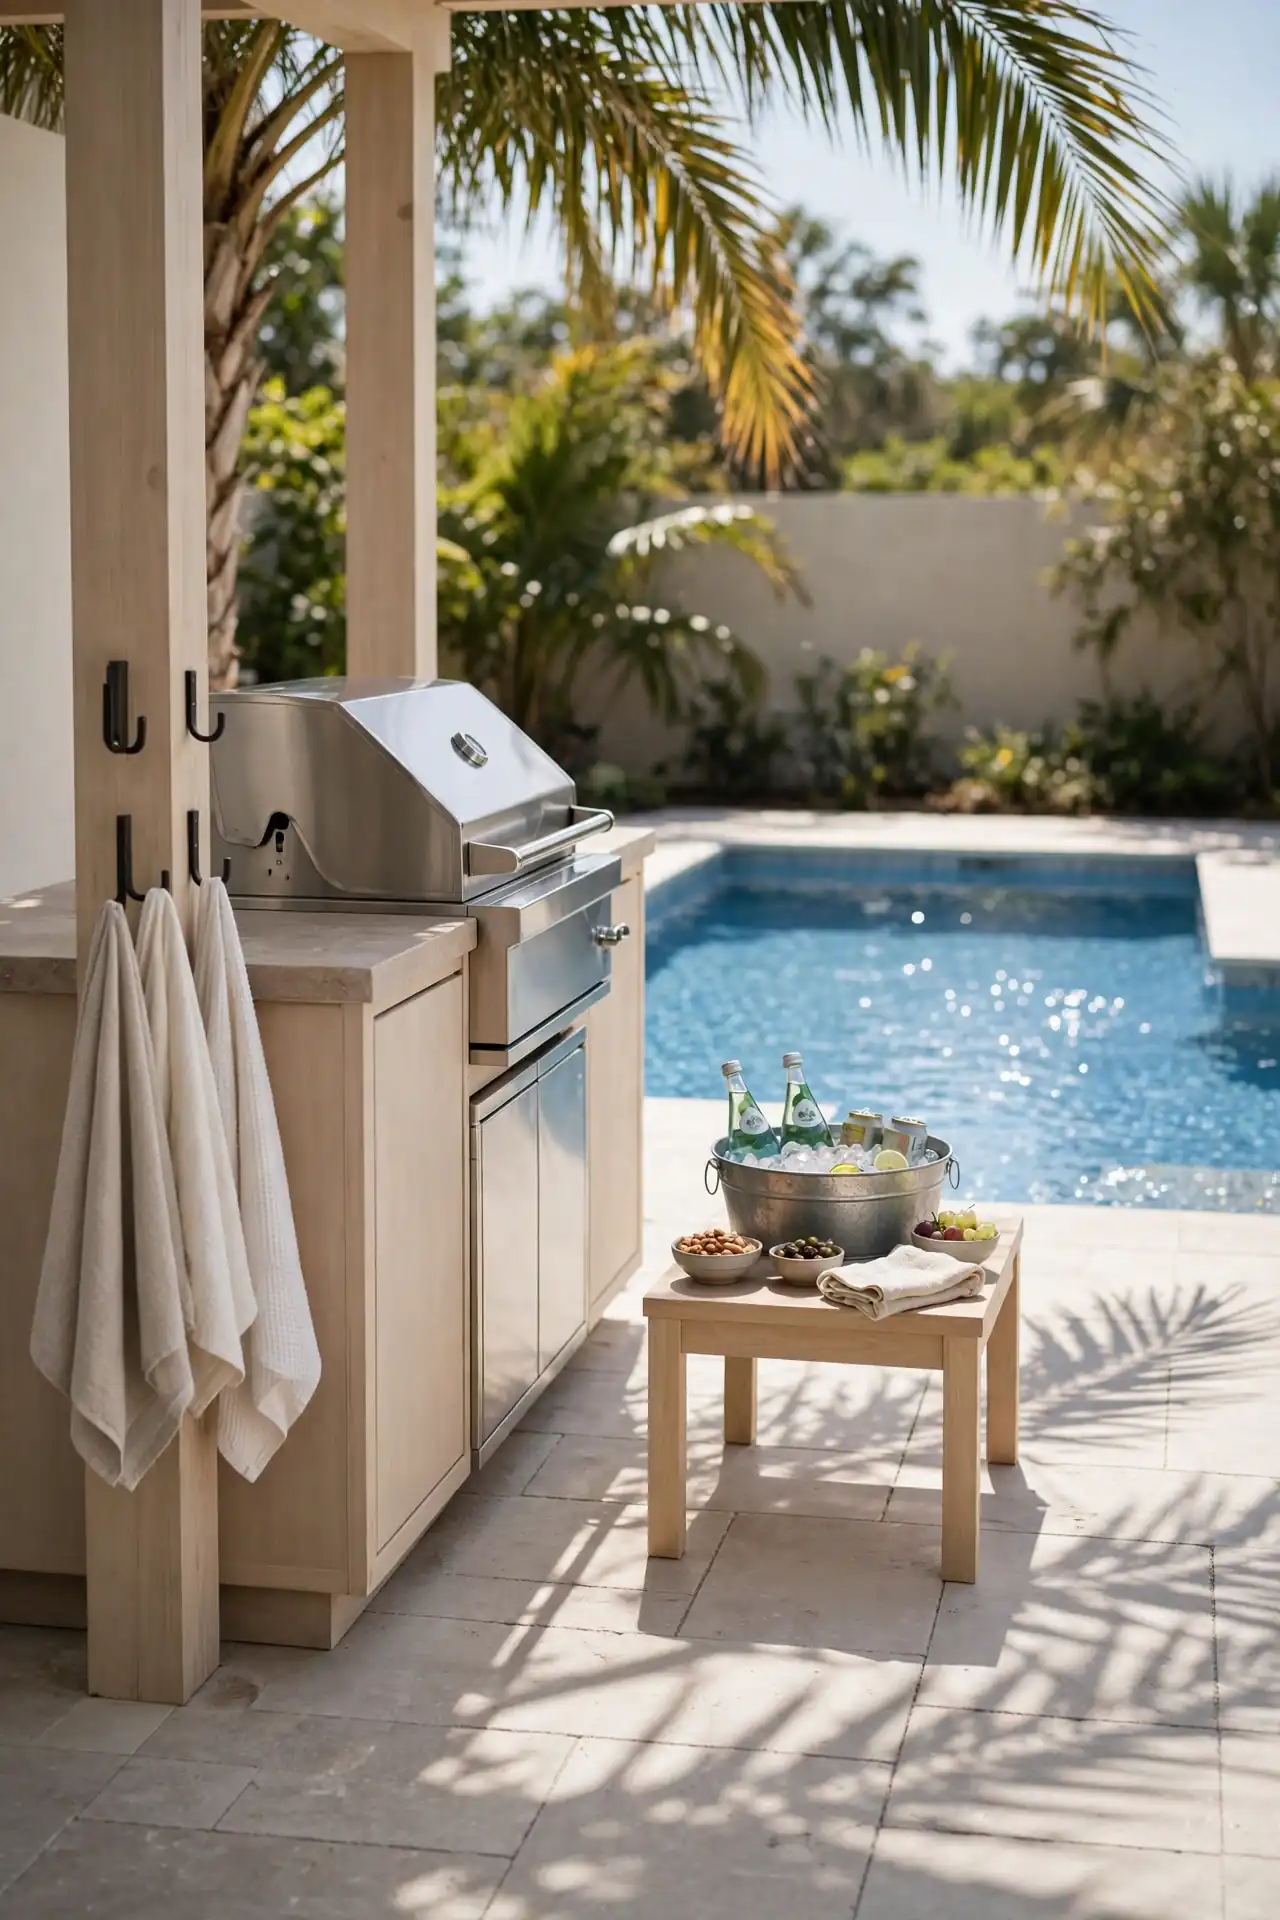
DO:
- Do keep the grill ten feet from the pool edge to dodge splashes.
- Do choose non-slip flooring underfoot, because wet feet and smooth tile never mix.
- Do add a towel station with hooks so dripping swimmers stay out of the cook zone.
DON’T:
- Do not place paper plates where pool wind can launch them into the water.
- Do not let glass bottles anywhere near the pool deck; cans and plastic only.
- Do not skip shade for the cook, because pool decks reflect brutal midday heat.
A poolside kitchen turns swim days into full events instead of interruptions. Keep the cooking zone separated from the splash zone, and every part of the day flows. In my experience, the grill ends up running all afternoon once the pool is open.
Mesquite Shade Dining
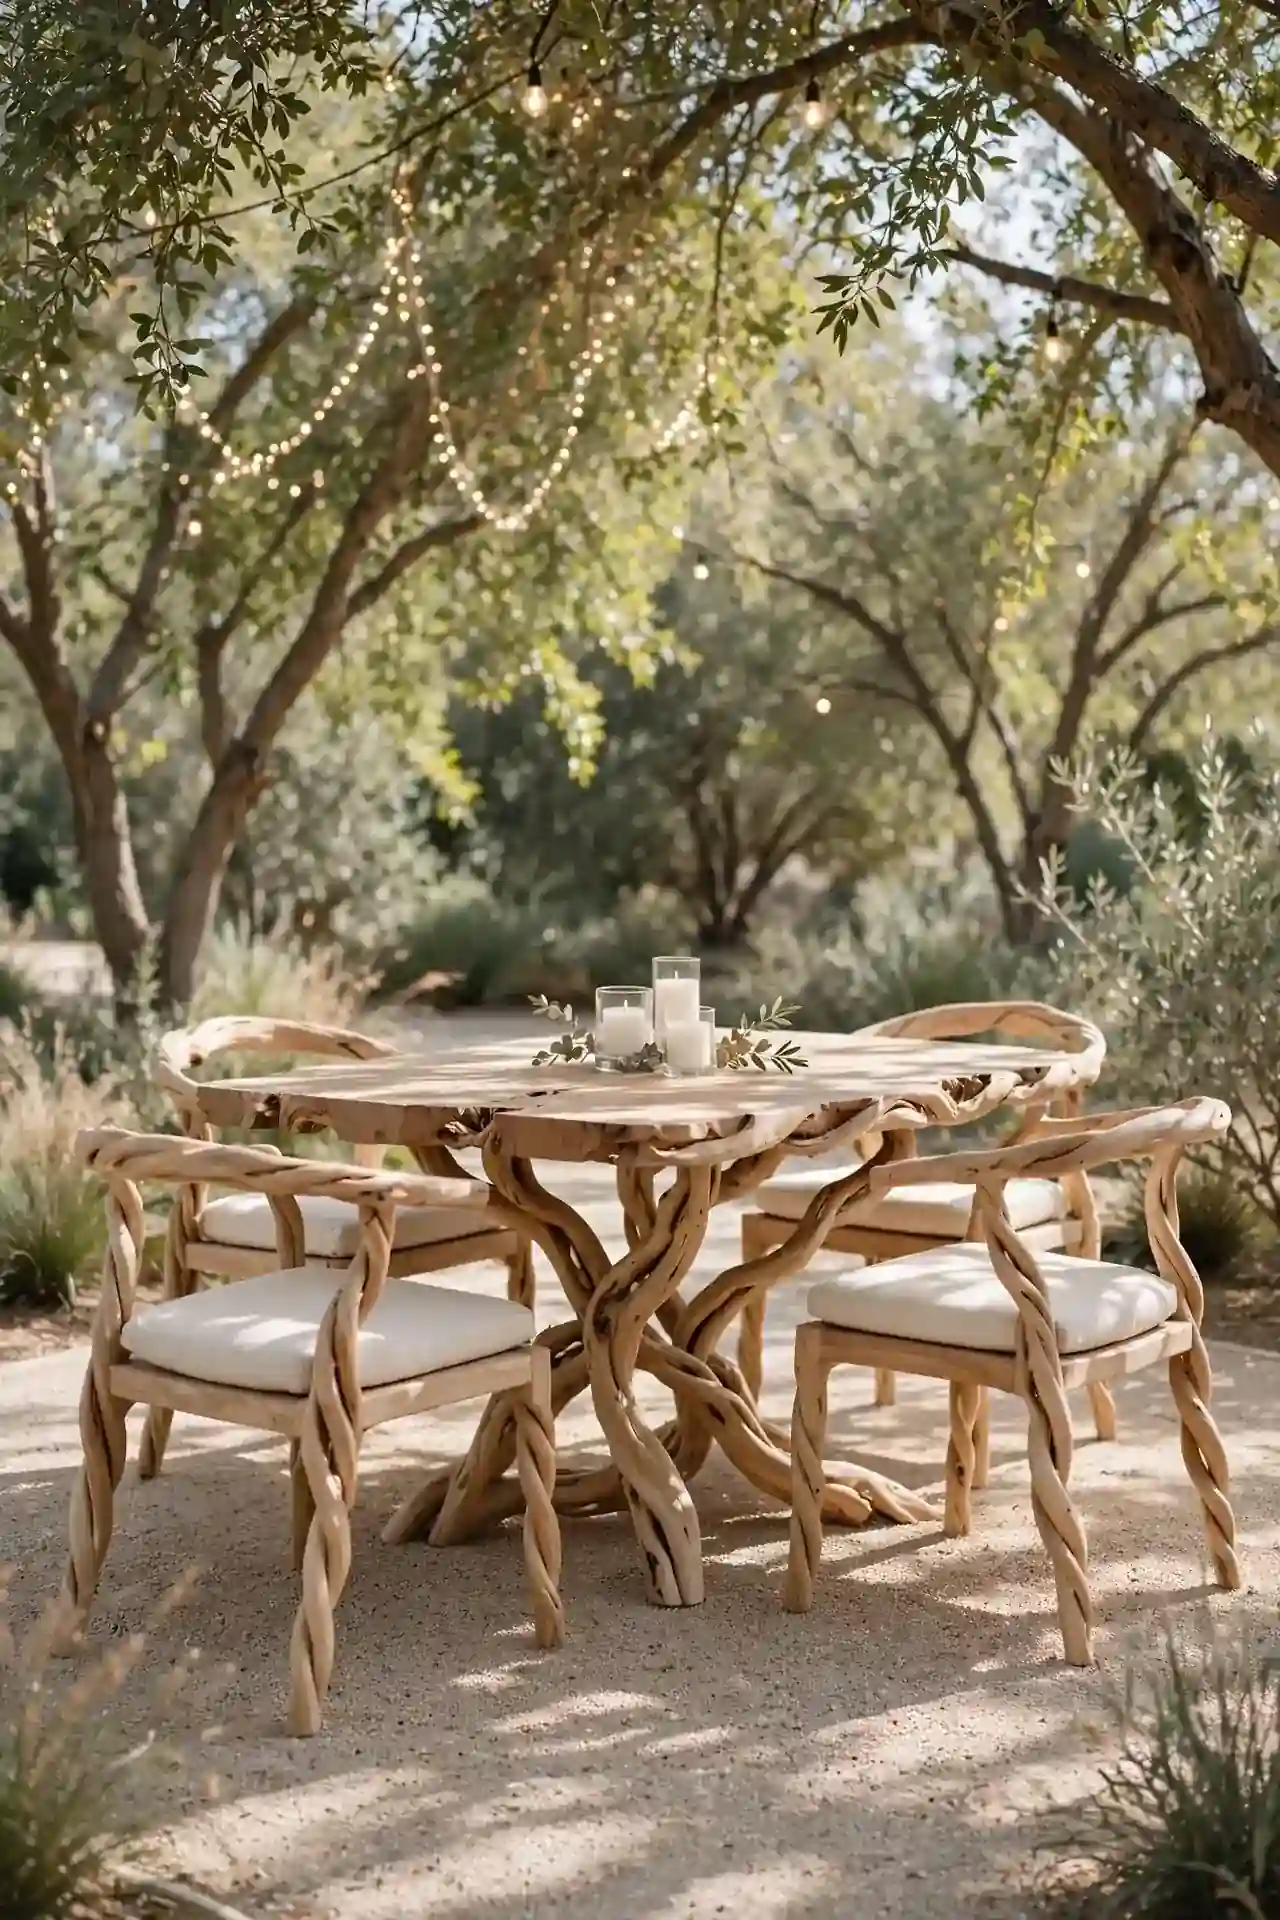
Cost: Medium, since a mesquite-look dining set runs less than real mesquite but still needs weatherproof sealant. Time: One weekend to assemble, arrange, and style the whole dining corner. Skill Level: Beginner friendly, mostly furniture assembly and placement. Best For: Big family dinners and long holiday weekends under dappled shade. Works In: Covered patios and open yards with established trees. Result: A warm, inviting dining spot with true Texas character.
Mesquite brings instant Texas character to any outdoor dining spot. Its twisted grain and warm tones look like they were pulled from a ranch, and it pairs beautifully with simple cream cushions. Position the table where afternoon shade lands, and dinner practically serves itself. For more shade inspiration, these covered porch ideas show how a roof changes everything.
Stock Tank Coolers
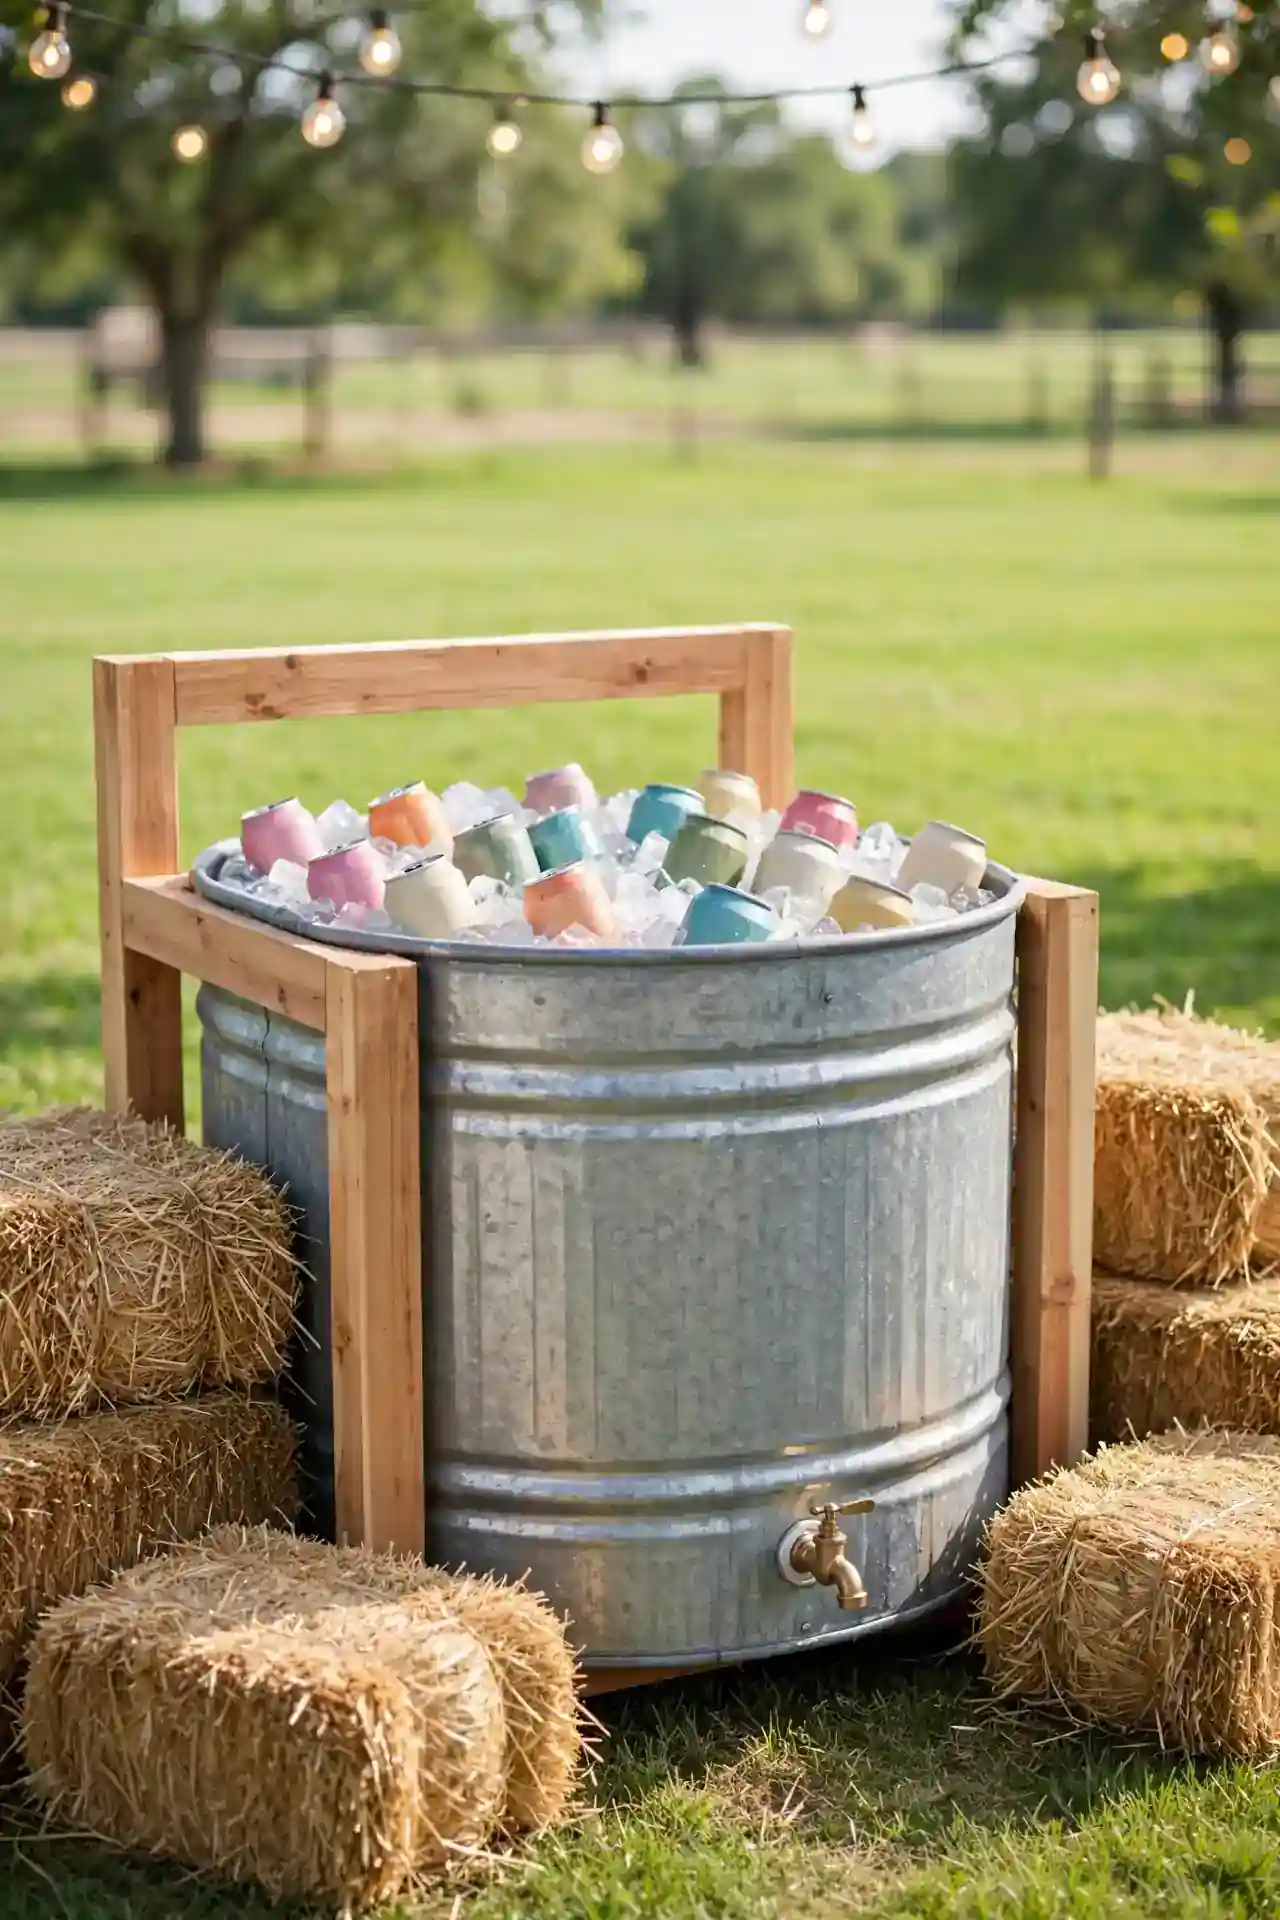
Galvanized stock tanks make the most Texas-cool coolers you will ever own. Fill one with ice, sink in the bottles and cans, and let the metal sweat in the heat like it was born for exactly this. They cost a fraction of a built-in cooler and move wherever the party goes.
Drill a small drain hole near the bottom and fit it with a spigot for easy meltwater release. Surround the tank with hay bales or a cedar frame so it reads styled, not barnyard. I have seen guests crowd around a stock tank cooler longer than the actual bar.
Taco Truck Counter
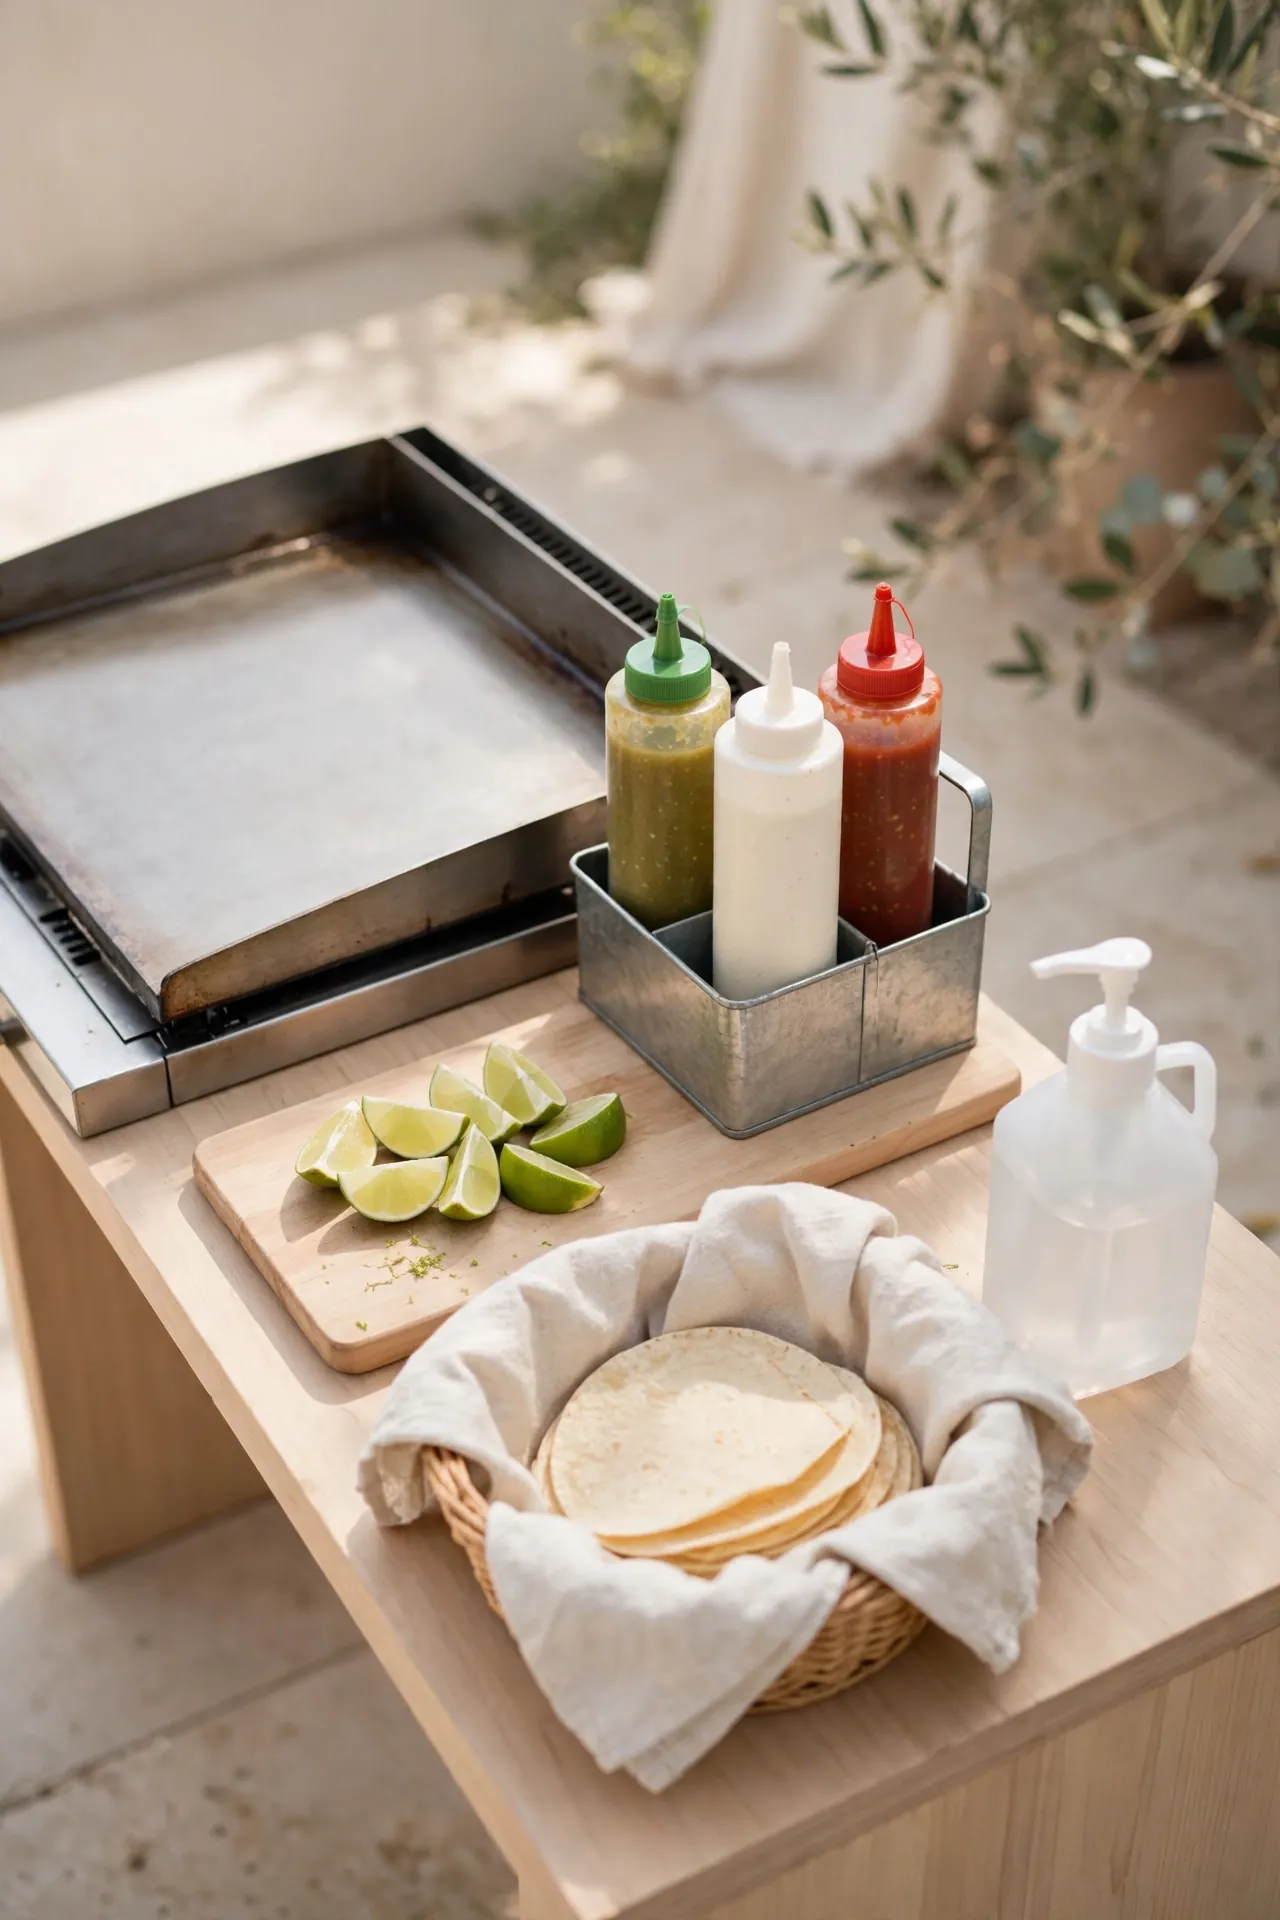
- A narrow counter with a flat-top griddle feeds tacos to a crowd faster than any plated dinner.
- Stock squeeze bottles with salsas, crema, and lime wedges in a metal caddy for easy grabbing.
- Warm tortillas on the griddle edge and stack them in a towel-lined basket nearby.
- Add a small hand-washing station with a jug and basin, since taco nights get gloriously messy.
A taco counter turns any cookout into a build-your-own fiesta that guests genuinely love. It runs on one griddle and a few smart condiments, so the cost stays low and the fun stays high. That is why many experts recommend interactive food stations for big backyard parties.
Outdoor Fridge Trick
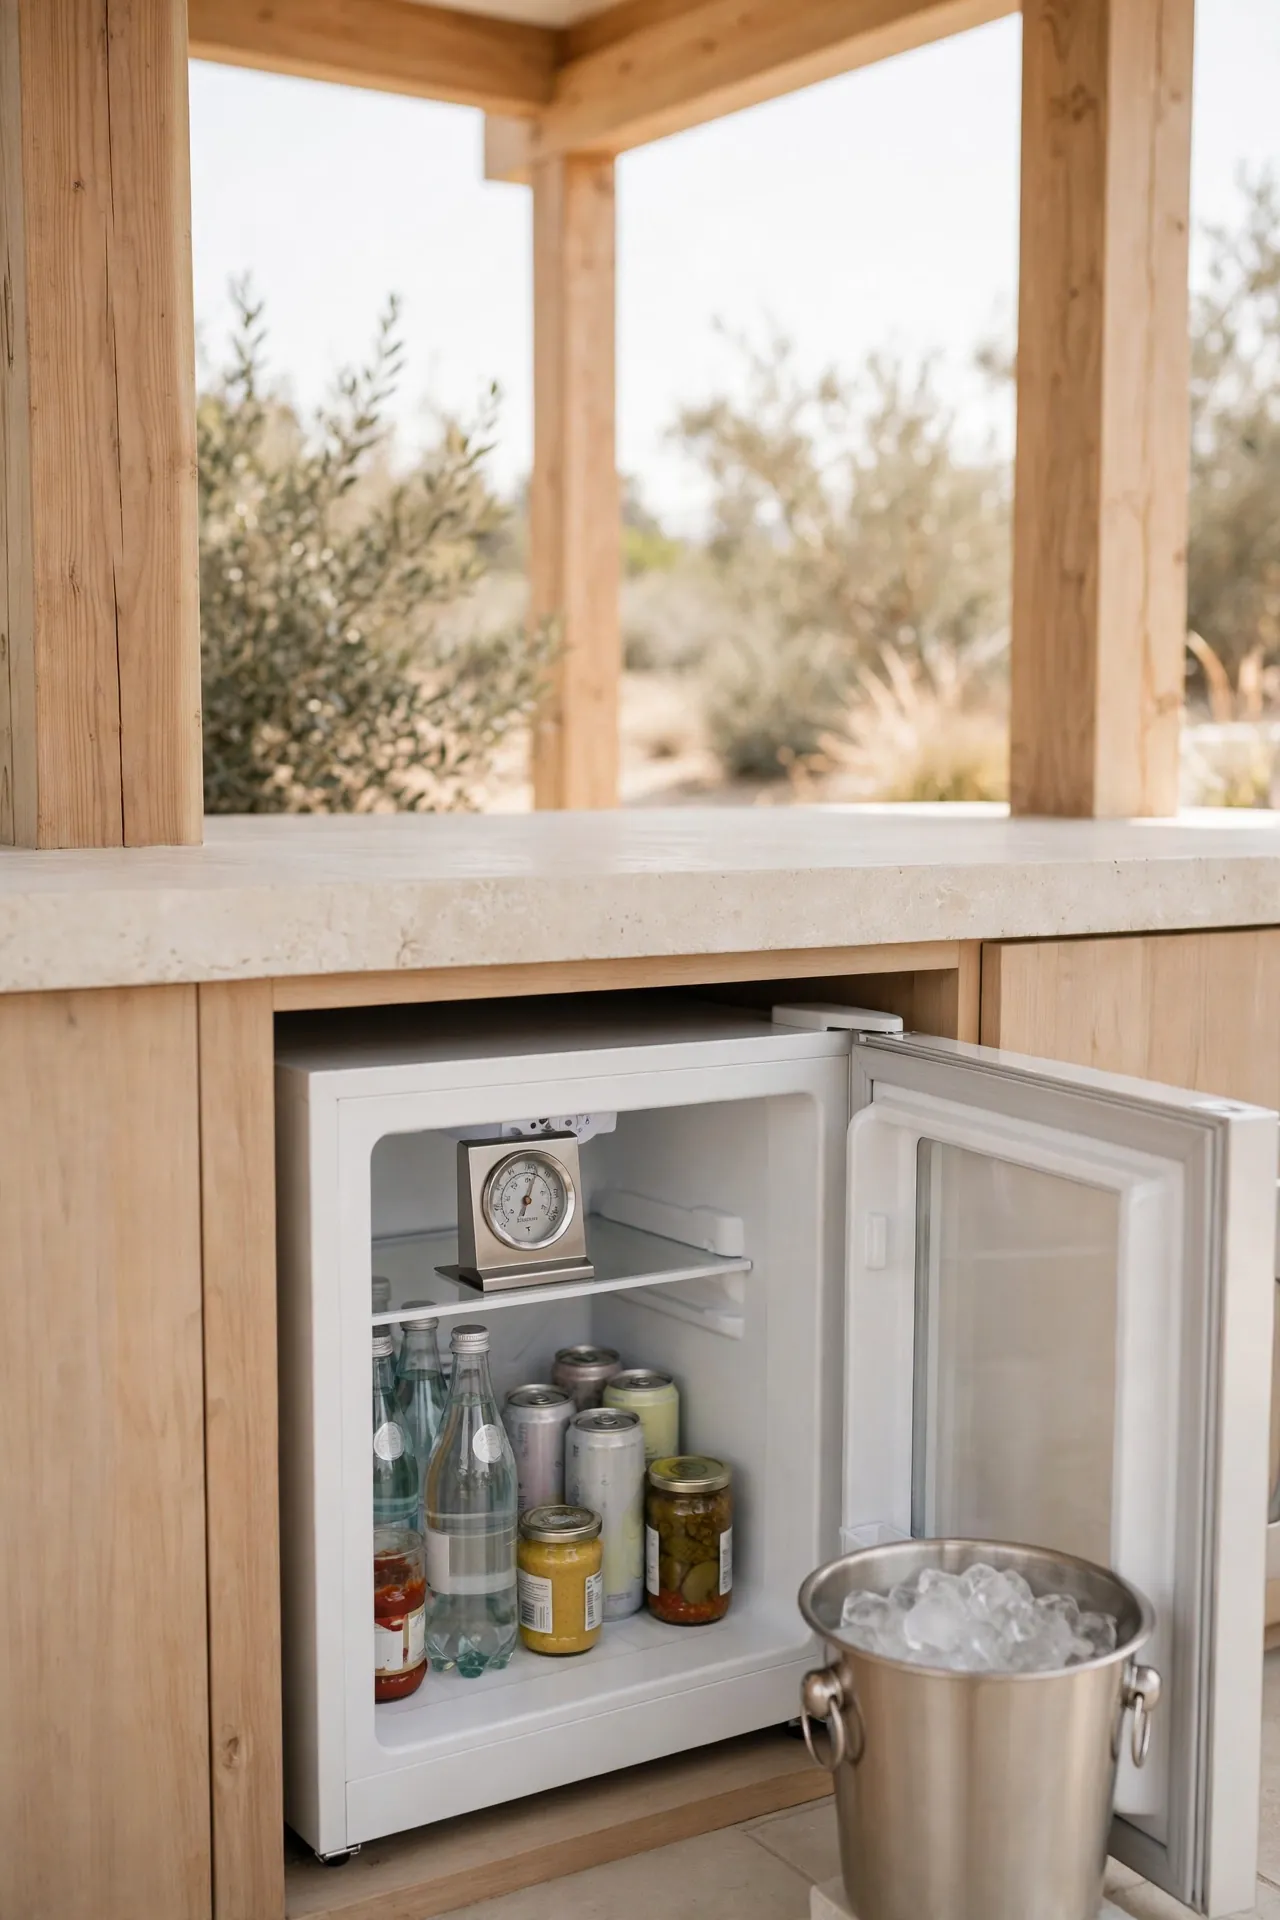
Quick Tip: Plug a mini fridge into a GFCI outlet under a covered counter and dedicate it to drinks and condiments only. Keep raw meat in the indoor fridge to avoid temperature swings every time the door opens. A fridge thermometer inside the outdoor unit tells you at a glance whether the Texas heat is winning.
An outdoor fridge sounds like a luxury until your first triple-digit cookout. Then it becomes the hardest-working appliance in the yard, saving endless trips through the sliding door. Cold drinks within arm’s reach keep the cook at the grill instead of running inside. Stock it before guests arrive and it practically hosts itself.
Fire Pit Gathering
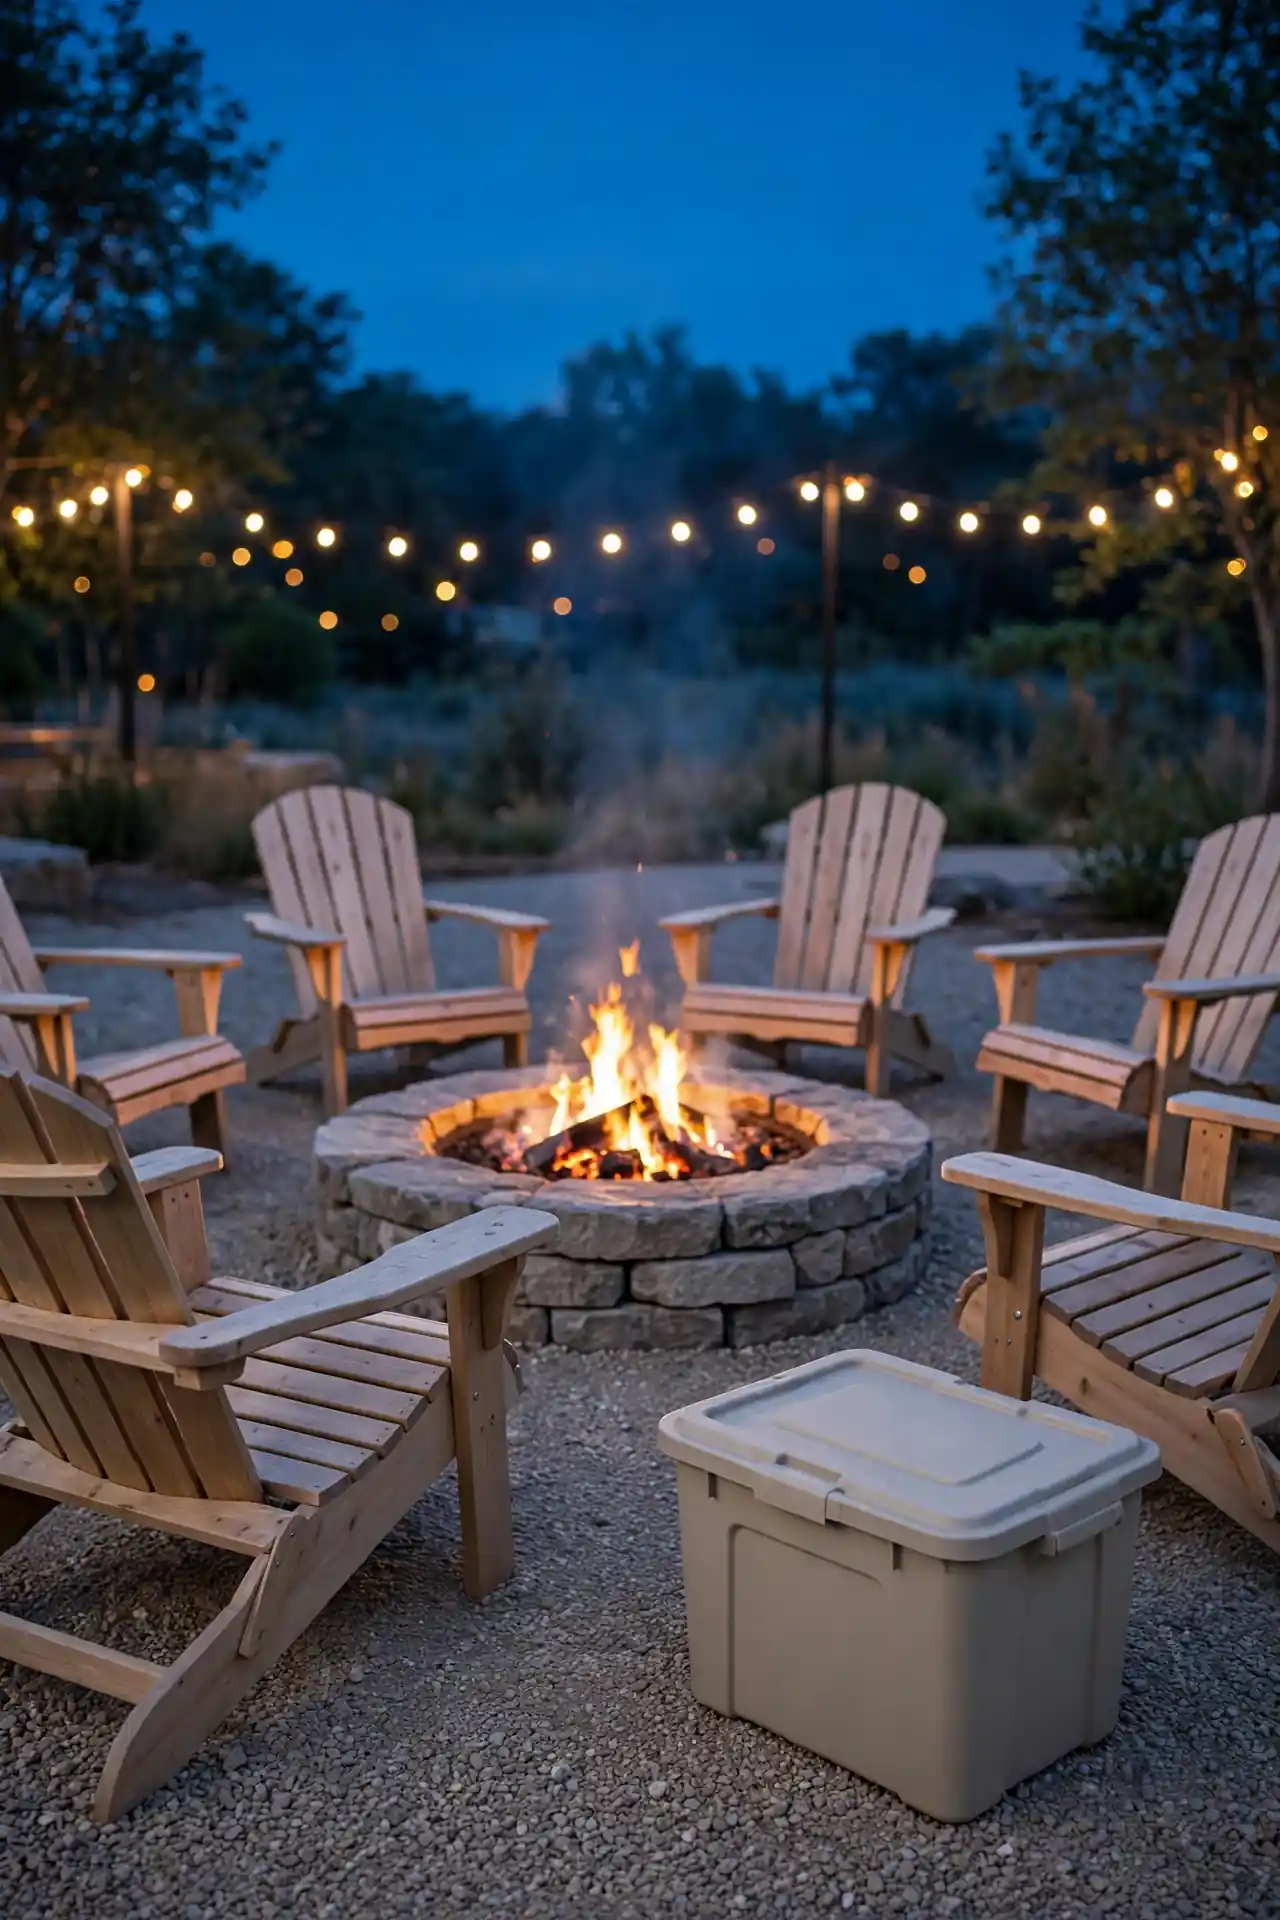
BEFORE: The yard went quiet the moment the grill cooled, and guests drifted back inside by nine. Evenings ended early no matter how perfect the weather stayed. All that Texas night sky went completely to waste.
AFTER: A low stone fire pit now anchors a ring of Adirondack chairs a few steps from the kitchen. Smoke from the grill hands off to firelight, and conversations stretch past midnight. S’mores supplies live in a sealed bin by the chairs, ready for every night.
A fire pit buys you three extra hours of backyard every night. Place it close enough to the kitchen for easy snack runs but far enough that smoke never reaches the food. Gravel underneath keeps sparks honest, and a lid means sudden rain never ruins the plan.
String Light Canopy
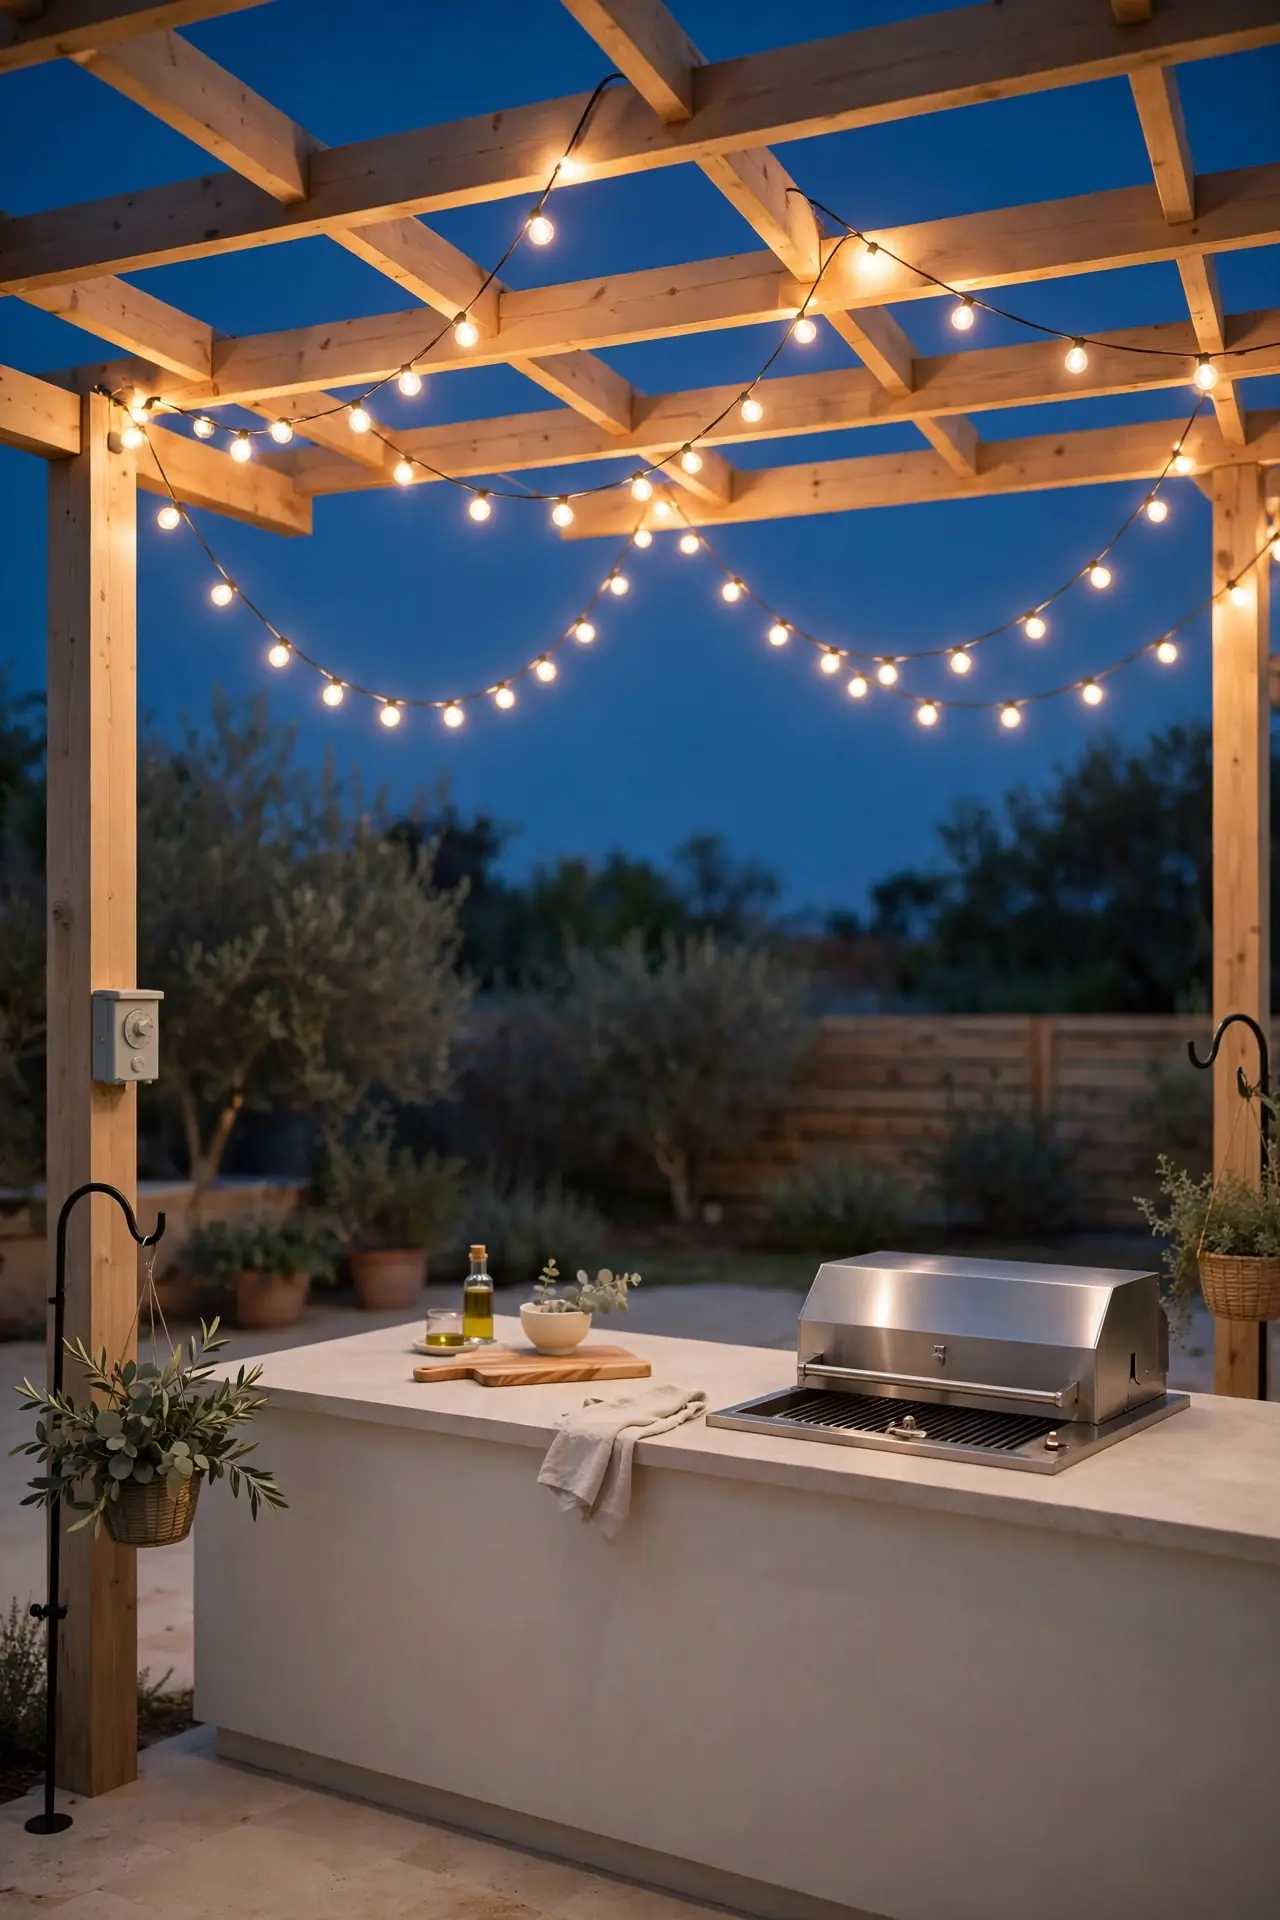
- Your anchor points come first: pergola beams, fence posts, or tall shepherd’s hooks set in concrete.
- Hang the first strand as a center spine, then drape secondary strands outward like a spider web.
- Keep every swag dipping at least eight feet overhead so tall guests never duck.
- Plug everything into one outdoor timer so the canopy glows on automatically at dusk.
String lights are the fastest way to make a backyard feel like a venue. They soften hard edges, flatter every face, and turn weeknight burgers into an occasion. Warm white bulbs only; cool white reads like a parking lot. I have noticed that guests always photograph a lit canopy, which means your cookout markets itself.
Bar Top Battle
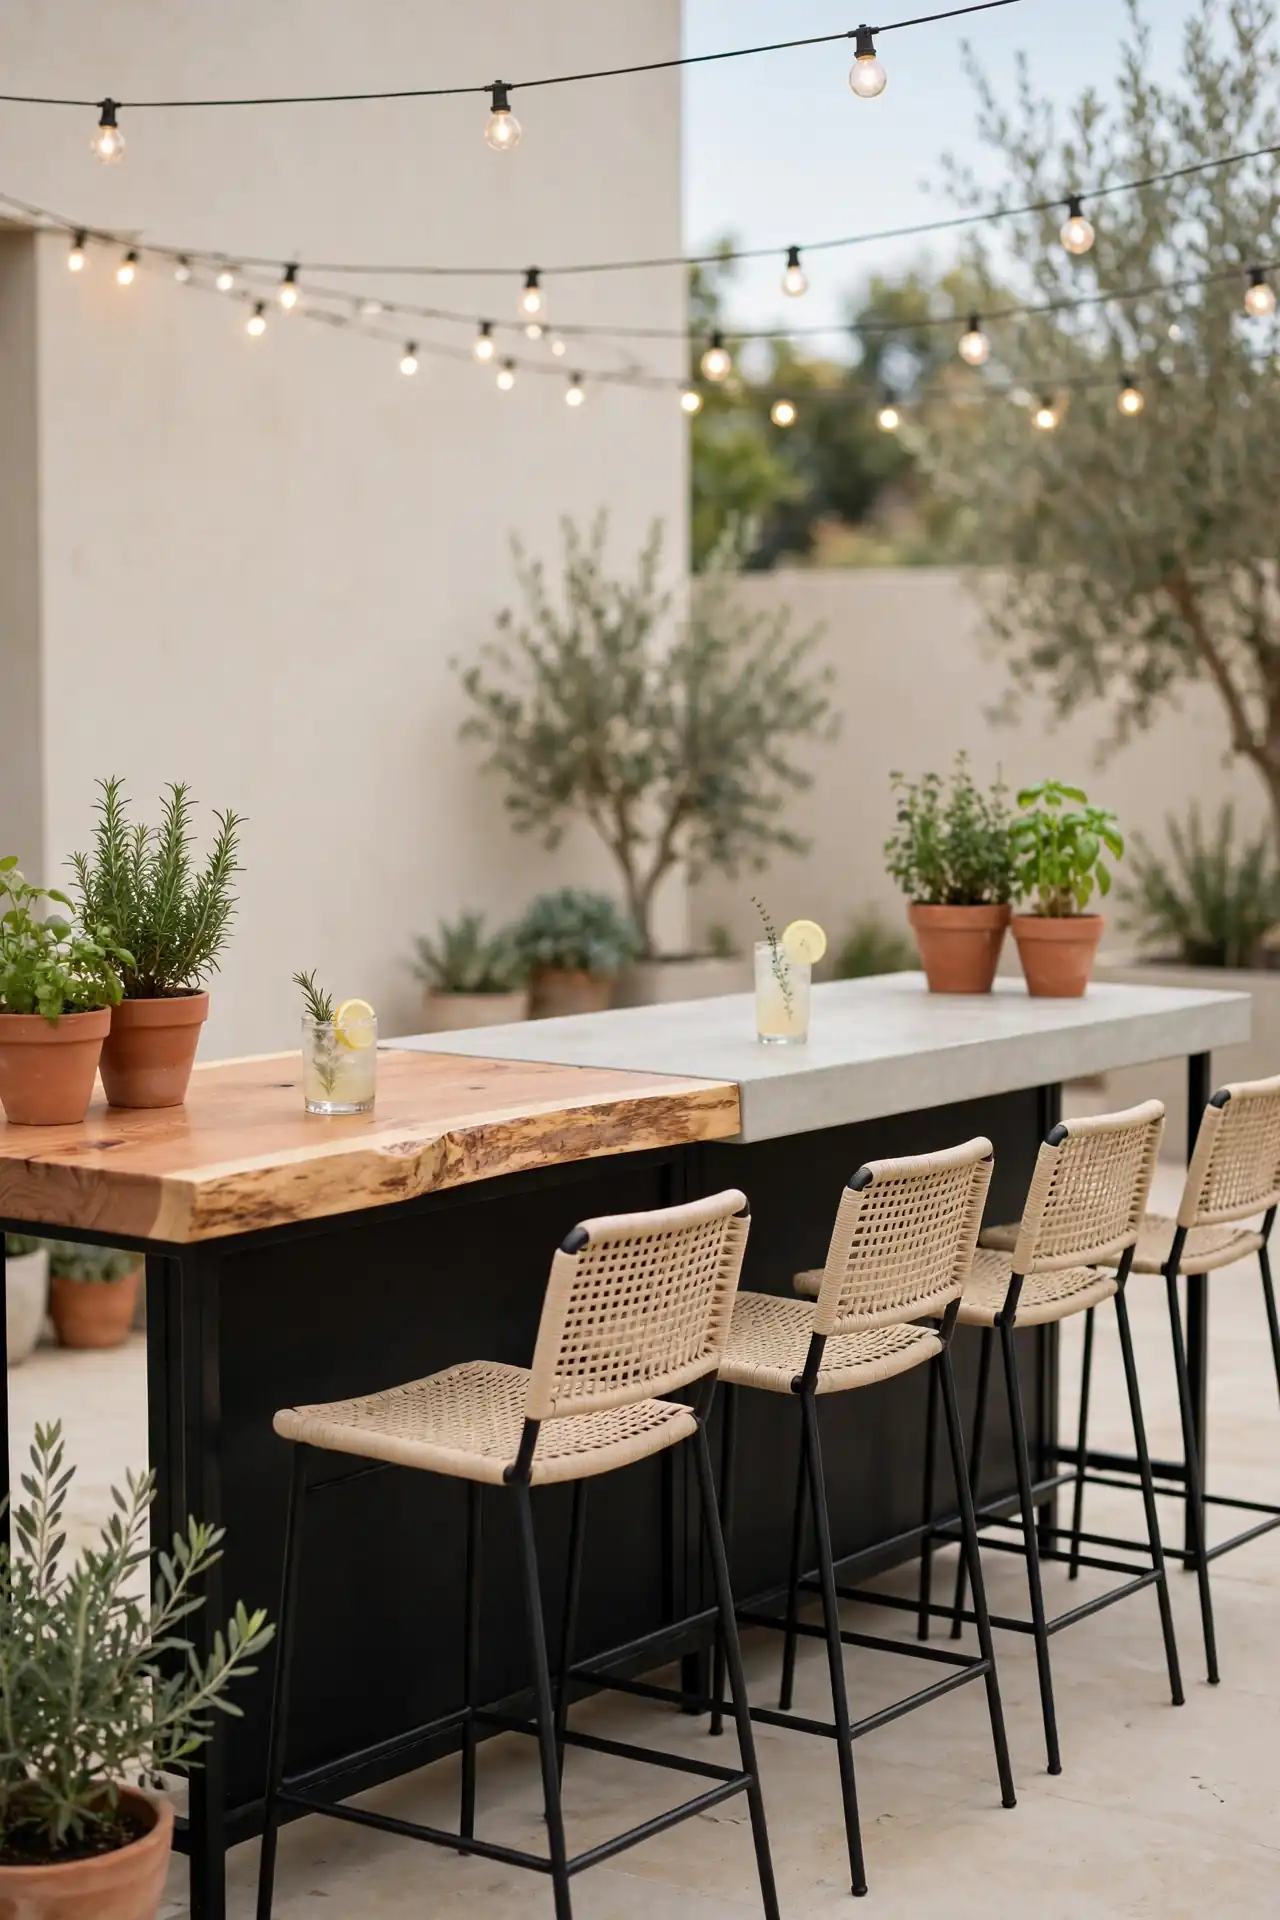
| Live-Edge Cedar | Sealed Concrete | |
| Look | Warm, rustic, one of a kind | Cool, modern, industrial edge |
| Durability | Needs yearly resealing | Shrugs off heat and spills |
| Cost | Mid range, local mills | Higher, poured in place |
| Upkeep | Oil it every season | Wipe and reseal occasionally |
| Heat proof | Use trivets always | Hot pans welcome |
| Best for | Casual ranch style | Modern Texas minimalism |
| Stain hiding | Shows every ring | Hides most marks |
Your bar top takes more abuse than any surface in the house, so choose with heat and weather in mind. Cedar wins on warmth and character; concrete wins on pure toughness. Either way, seal it well and your counter will outlast the grill.
Cast Iron Corner
DO:
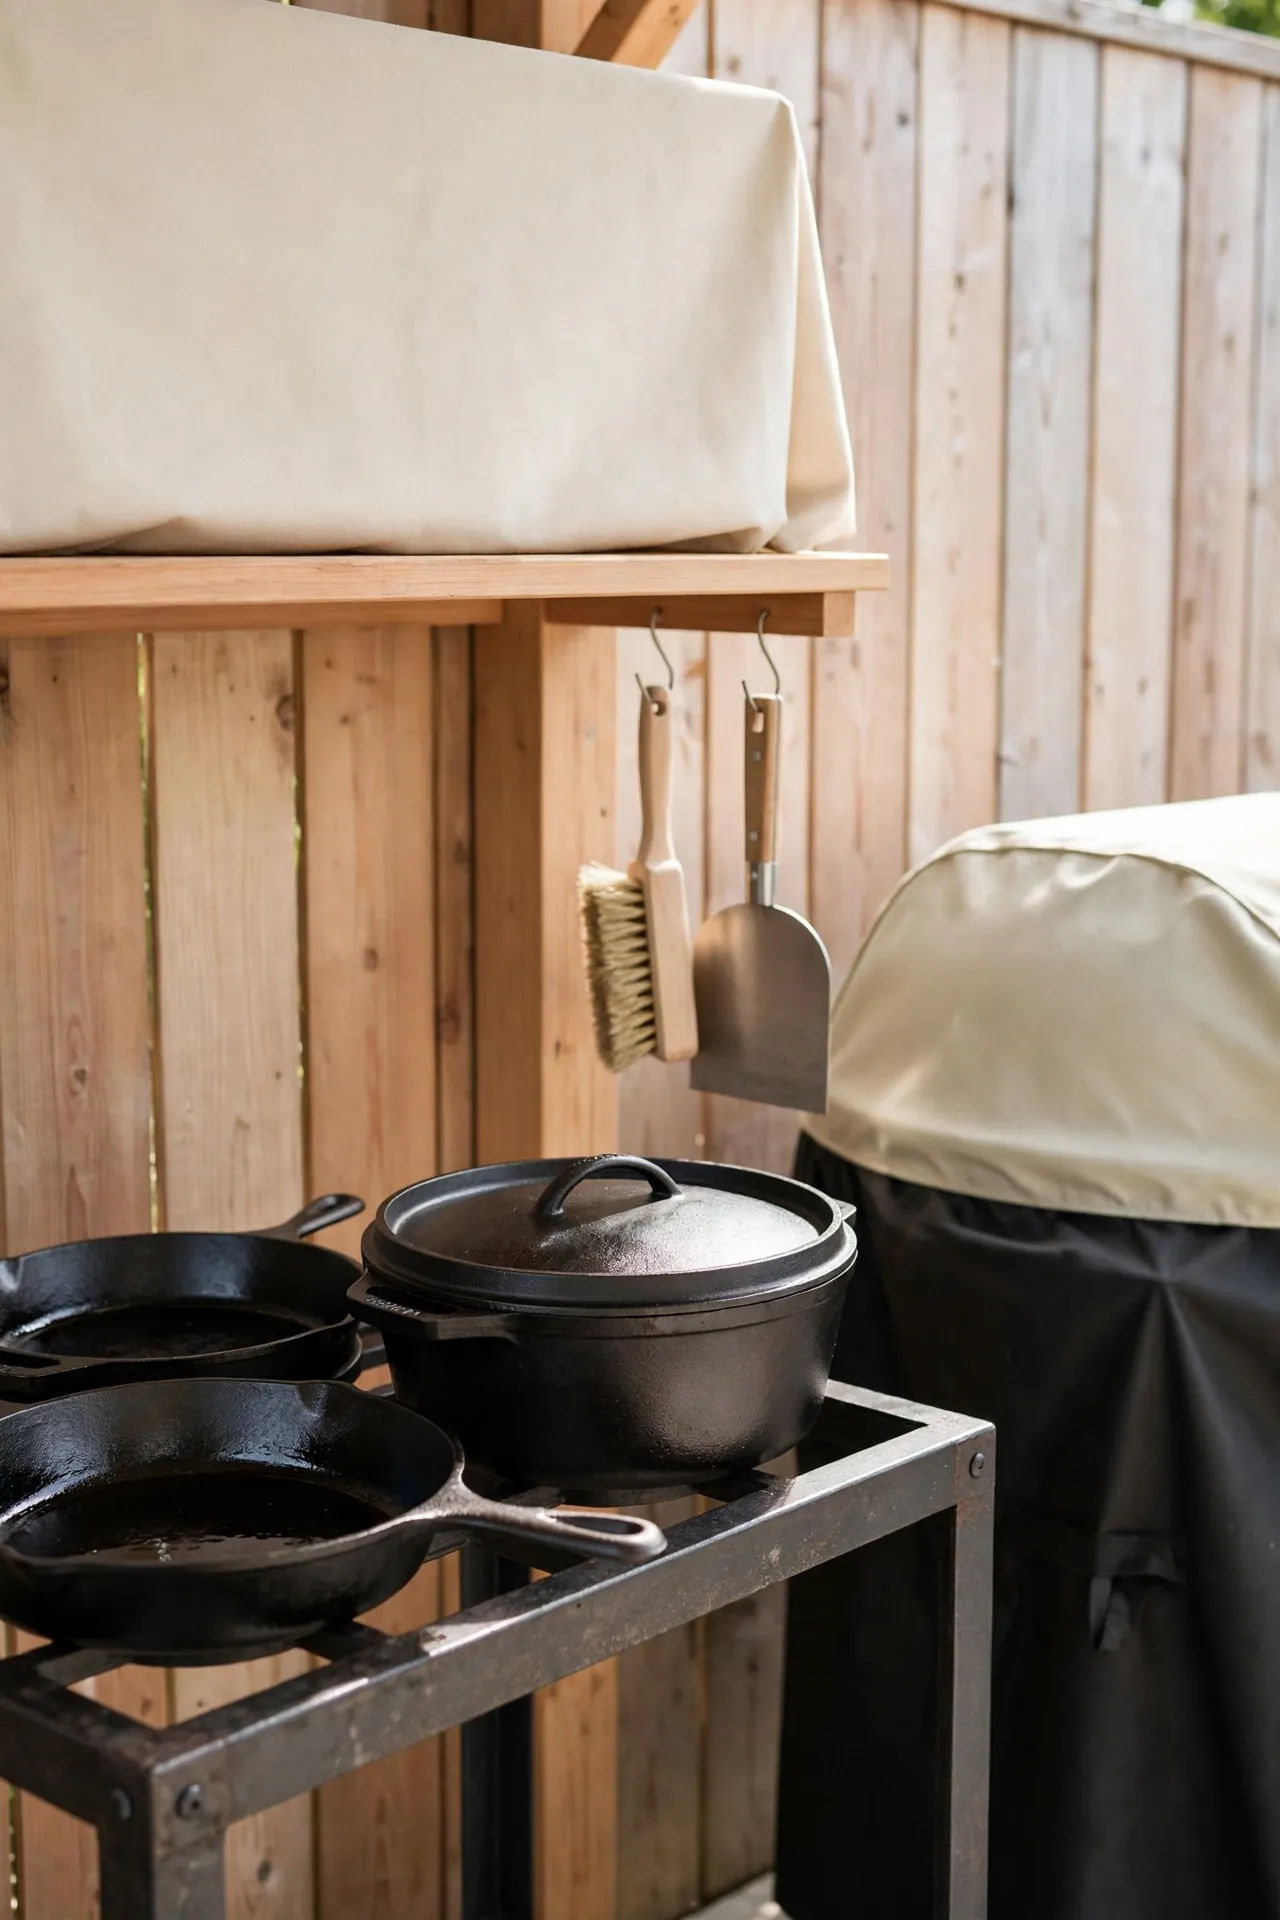
- Do season grates and skillets after every cook while the metal still holds warmth.
- Do store cast iron under cover with a light oil wipe to stop flash rust.
- Do keep a stiff brush and a dedicated scraper right at the station.
DON’T:
- Do not soak cast iron in the outdoor sink; standing water is its worst enemy.
- Do not use soap on a well-seasoned skillet unless you plan to reseason it.
- Do not leave hot skillets where kids or bare feet might find them.
Cast iron and Texas cooking go together like smoke and brisket. It holds heat forever, sears beautifully, and only improves with use. Give it a dedicated corner near the grill, and your grandkids will be cooking on the same skillets.
Sink Station Essentials
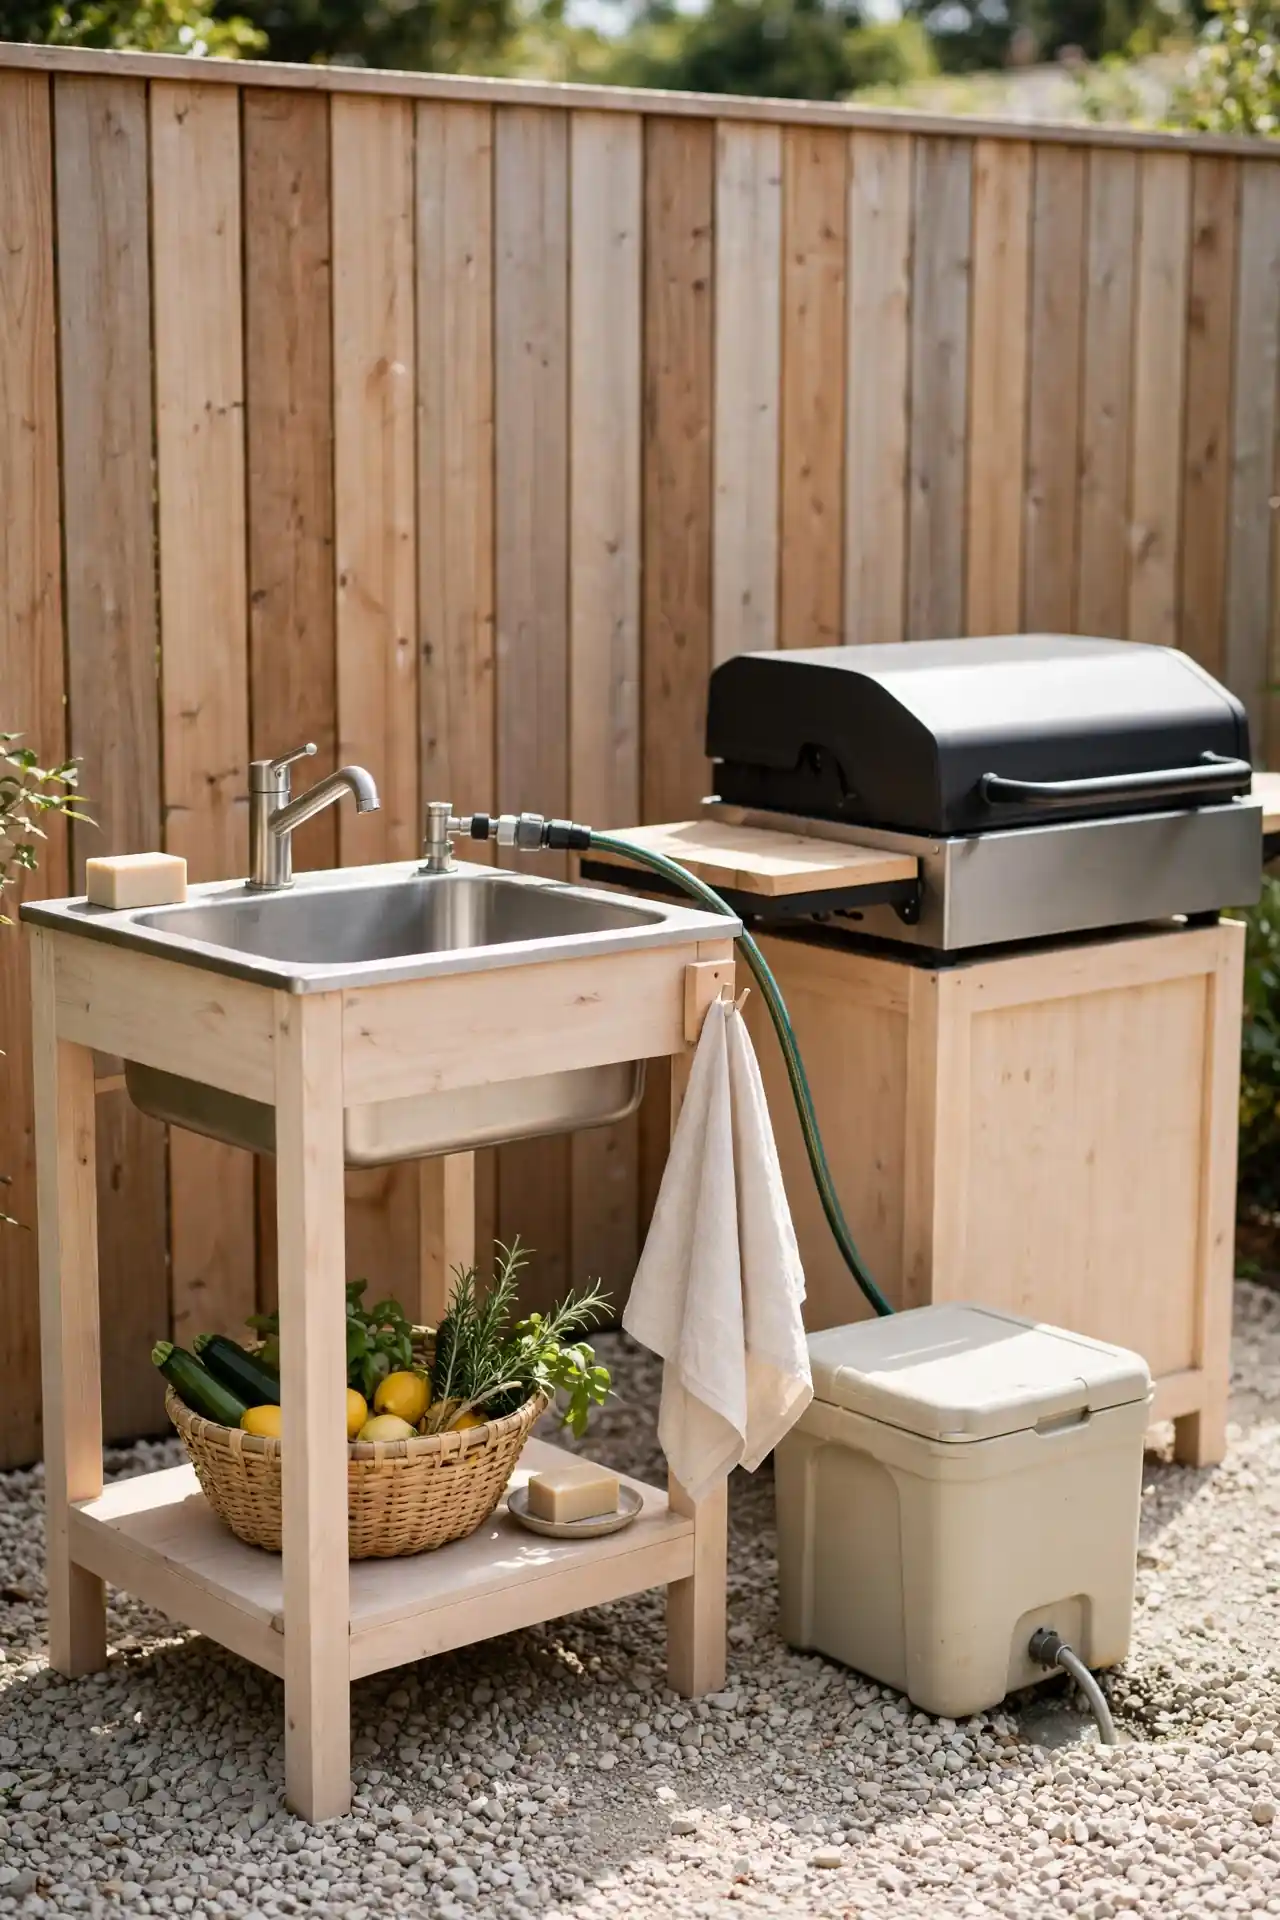
Cost: Low to medium, since a simple utility sink with a garden hose hookup costs far less than full plumbing. Time: One afternoon for a basic setup, longer if you run a real water line. Skill Level: Beginner for hose-fed, intermediate for plumbed. Best For: Messy prep, hand washing, and quick cooler drains. Works In: Covered patios, open yards, and anywhere a hose reaches. Result: A cleaner, faster cookout with zero indoor mess.
A sink near the grill ends the indoor-outdoor shuffle for good. Rinse produce, wash hands, and drain coolers without tracking water through the house. Even a simple hose-fed basin changes the whole rhythm of a cookout day.
Agave Border Planting
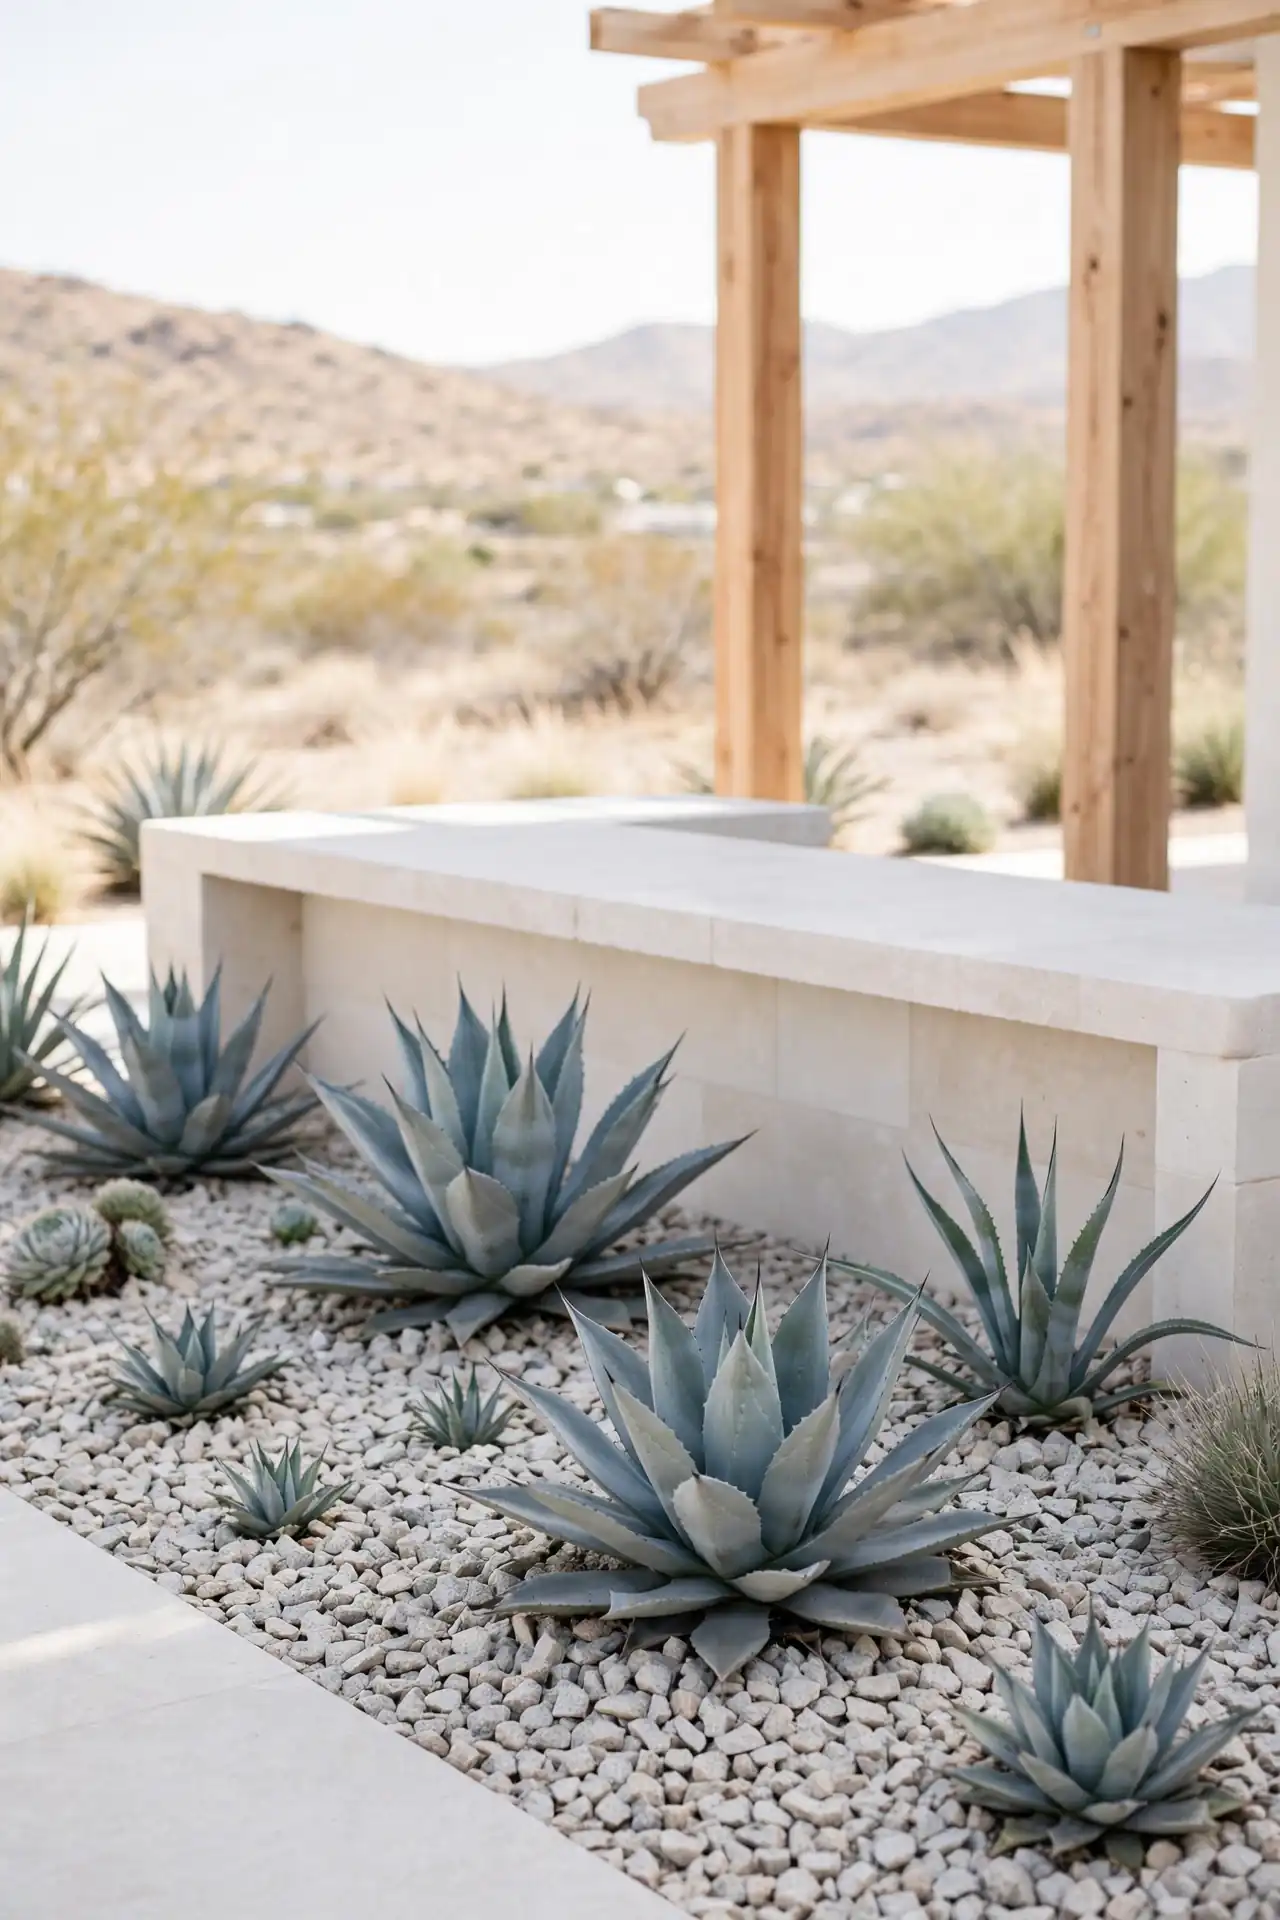
Agaves frame an outdoor kitchen like living sculpture. Their blue-gray rosettes thrive on neglect, shrug off drought, and need almost no water once established. Plant them in a gravel bed along the kitchen edge for a border that never asks for attention. They look sharp against both limestone and cedar.
Space the plants three feet apart and mulch with crushed granite, not bark, so the bed stays crisp. Keep the sharp-tipped varieties away from walkways where guests brush past. Give each plant a full sun spot, since shade makes them stretch and flop. In my experience, one bold agave cluster does more for a yard than a dozen fussy flowers.
Game Day Grill
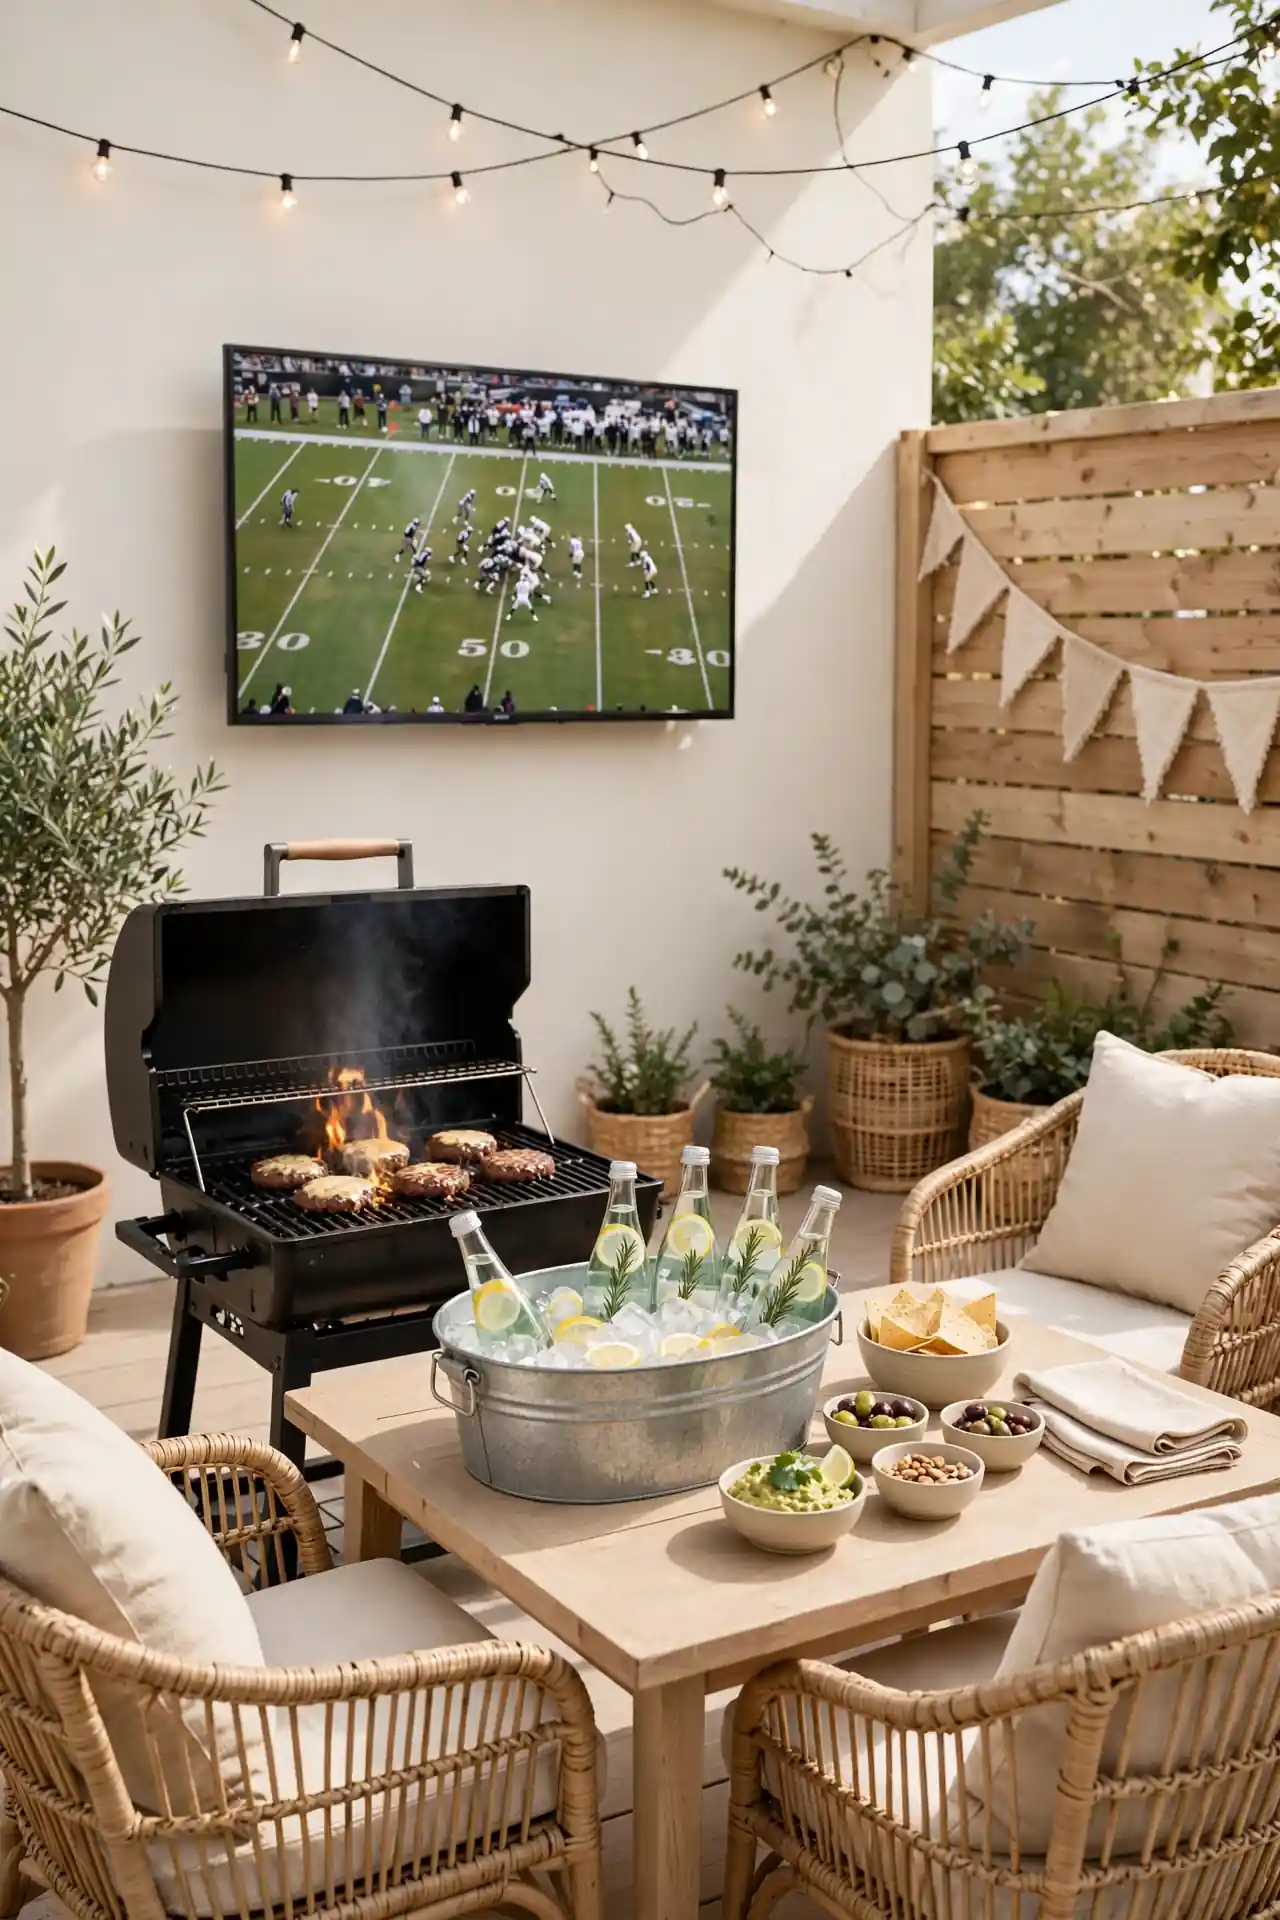
- An outdoor TV aimed at the seating area lets the cook catch every play without leaving the grill.
- Set up a drink tub and a snack table within arm’s reach of the chairs.
- Prep burgers and wings ahead so halftime becomes serving time, not cooking time.
- Keep a small trash can behind the grill for wrappers and bones.
- Mount a small shelf under the TV for remotes and a Bluetooth speaker.
Fall Saturdays in Texas revolve around football, and your outdoor kitchen should too. A grill aimed at the screen keeps the cook in the action instead of exiled to the patio. That is why many experts recommend planning game day setups around sightlines first, menus second.
Windproof Layout Moves
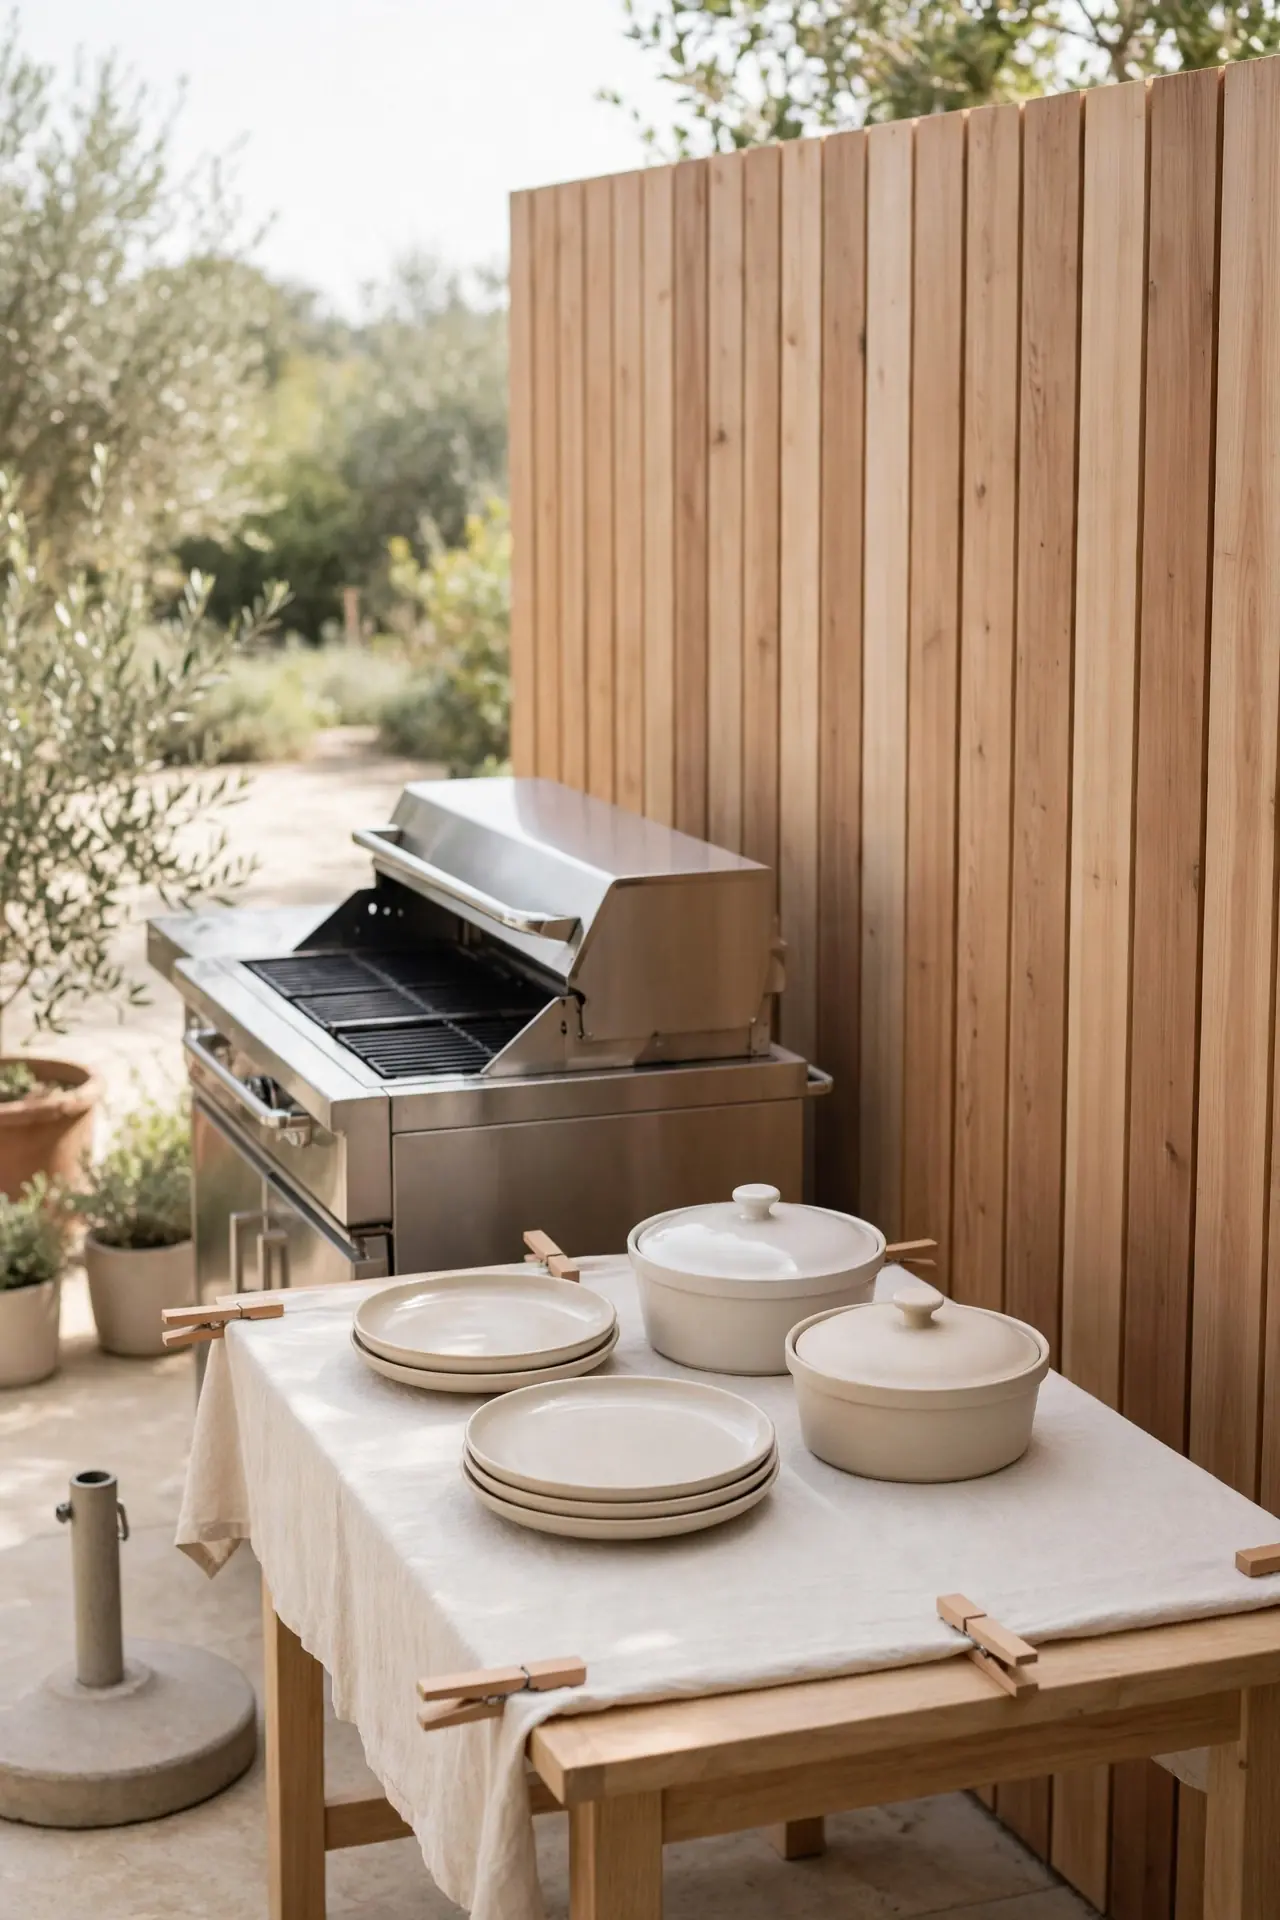
Quick Tip: Study your yard’s wind for one week before placing anything permanent. Texas gusts love to steal grill heat and scatter napkins, so set the grill perpendicular to the prevailing wind with a solid fence or wall as a windbreak. Heavy ceramic plates and lidded serving dishes finish the job. Clip tablecloths with heavy-duty clamps so sudden gusts never redecorate.
Wind is the quiet enemy of every Texas cookout. It cools the grill, blows out burners, and sends lightweight decor flying. A layout that respects the breeze keeps flames steady and tables calm, which means dinner lands on time and upright. Anchor umbrellas in weighted bases, not just tables.
Covered Patio Kitchen
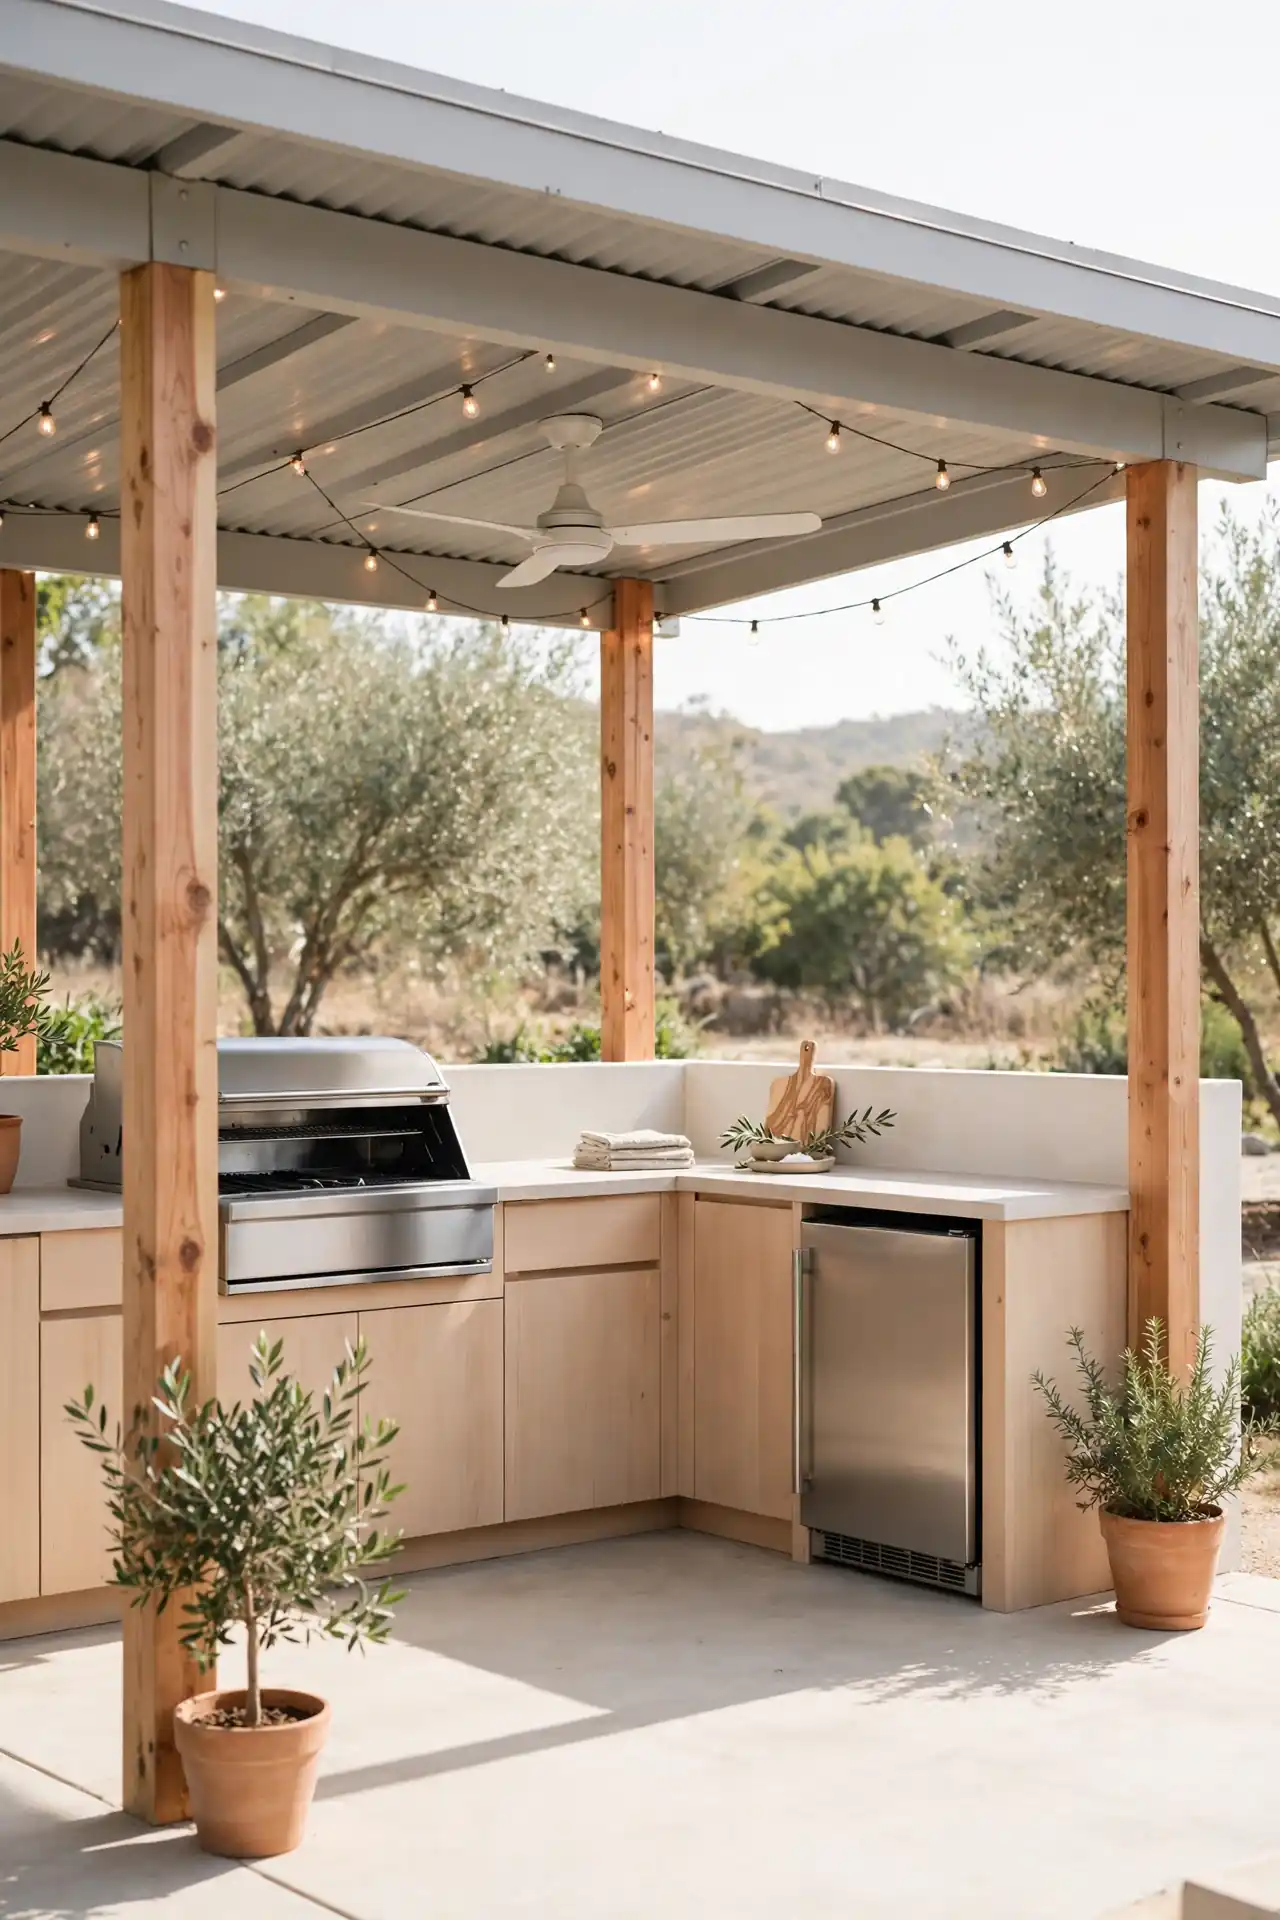
BEFORE: Rain and brutal sun dictated the cooking schedule, and the grill sat unused for weeks at a time. Expensive equipment weathered fast with no real shelter overhead. Every storm meant hauling everything into the garage.
AFTER: A simple metal roof over the patio now shelters the grill, counters, and fridge year-round. Cooking happens in any weather, and the gear stays clean between weekends. The roof also holds lights and a fan, which makes summer nights genuinely comfortable.
A roof turns an outdoor kitchen from a fair-weather hobby into a daily habit. It protects your investment, extends your season to all twelve months, and creates the best seat in the house. In my experience, covered kitchens get used three times more than open ones.
Cedar Fence Backdrop
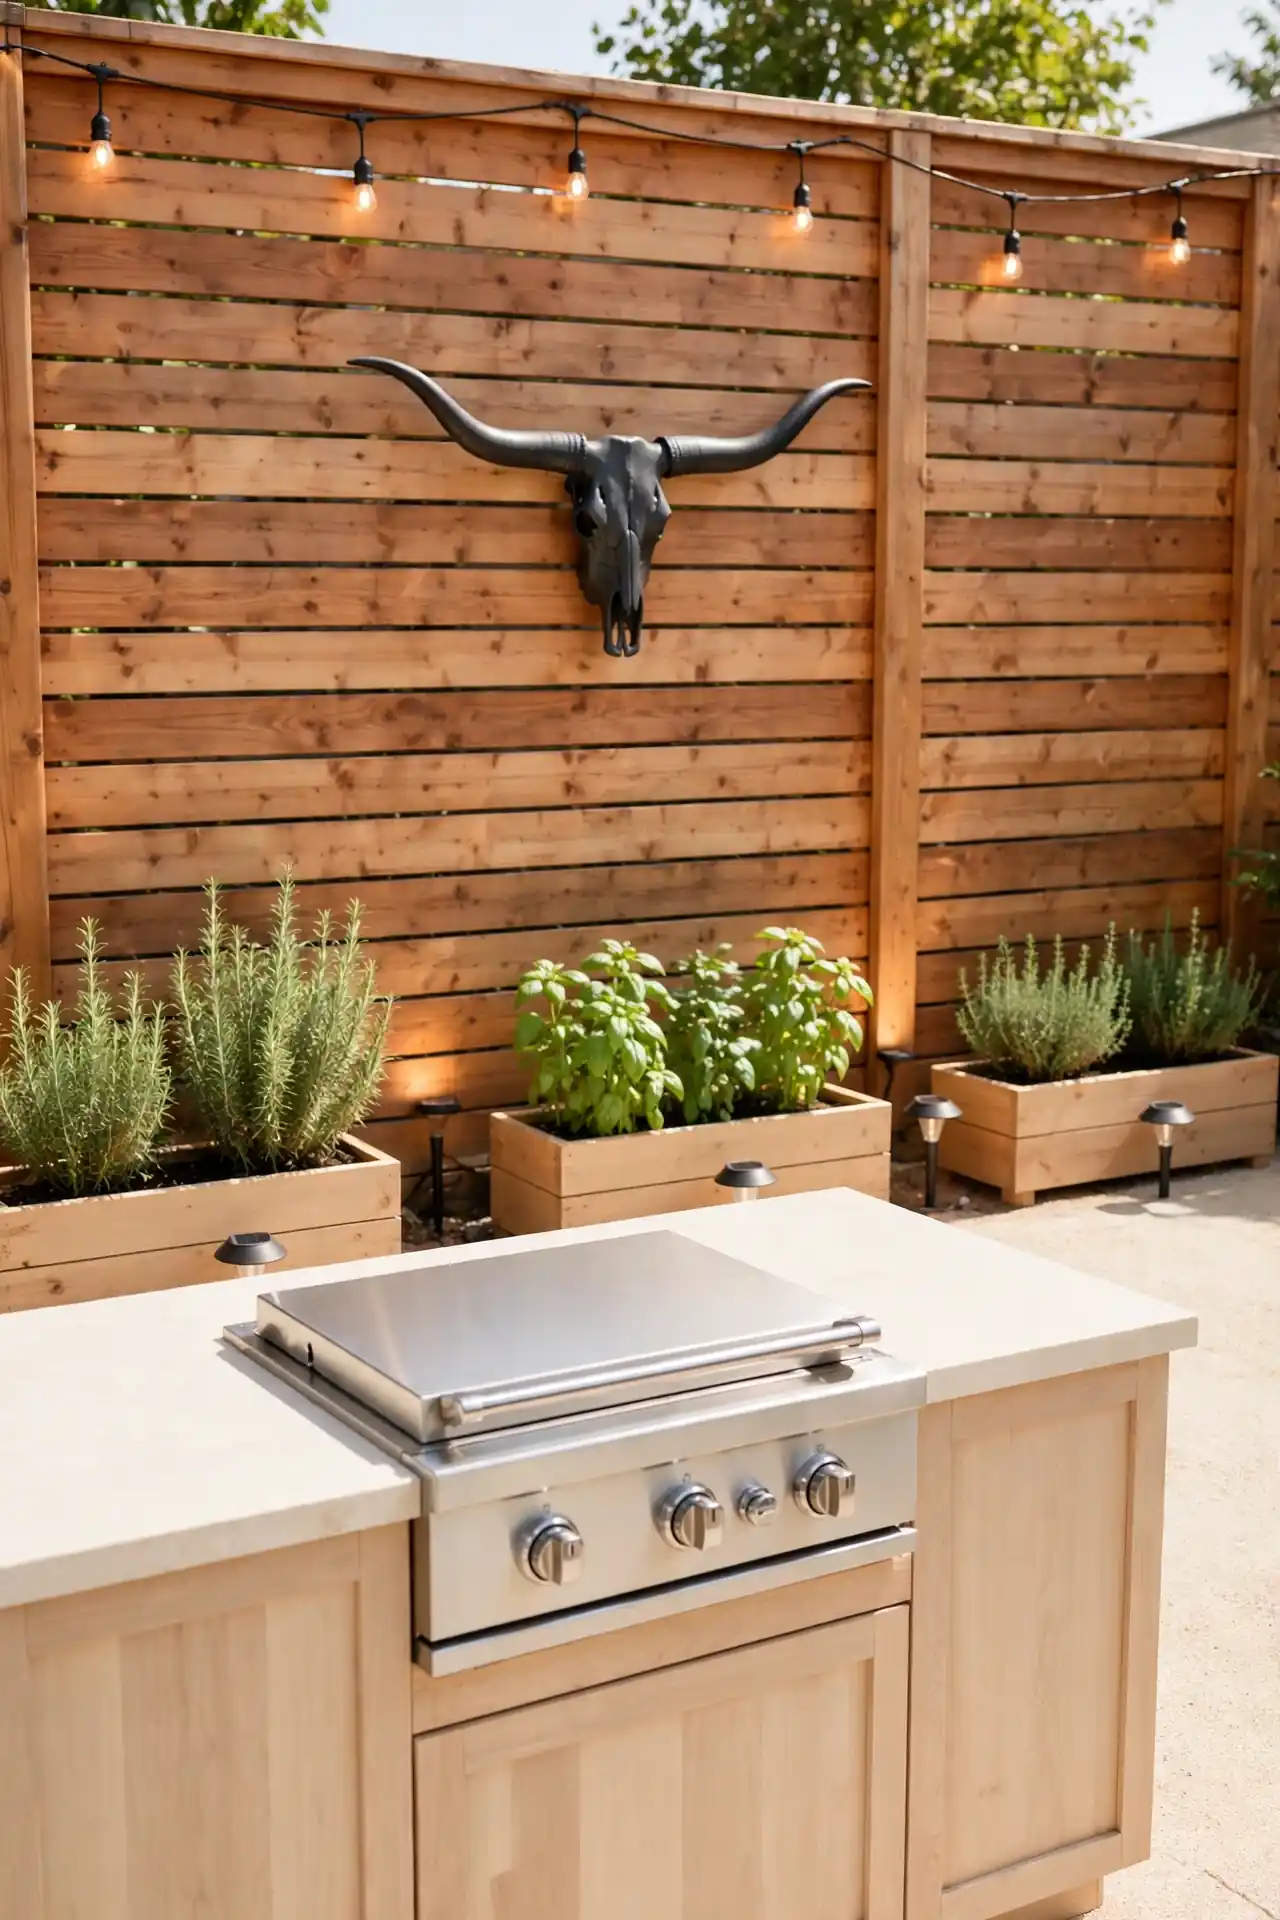
- A warm natural cedar stain keeps the fence glowing instead of fading gray.
- Mount horizontal planter boxes on the inside face for herbs you can grab mid-cook.
- String cafe lights along the top rail to outline the whole kitchen zone after dark.
- Add one piece of metal wall art, like a longhorn or star, as a bold focal point.
- Finish with solar spotlights at the base to wash the fence in warm light.
Your fence is the biggest blank wall your outdoor kitchen has, so put it to work. A styled backdrop makes even a simple grill setup photograph beautifully for Pinterest. Keep the decor flat against the boards so it never interferes with cooking space.
Countertop Material Match
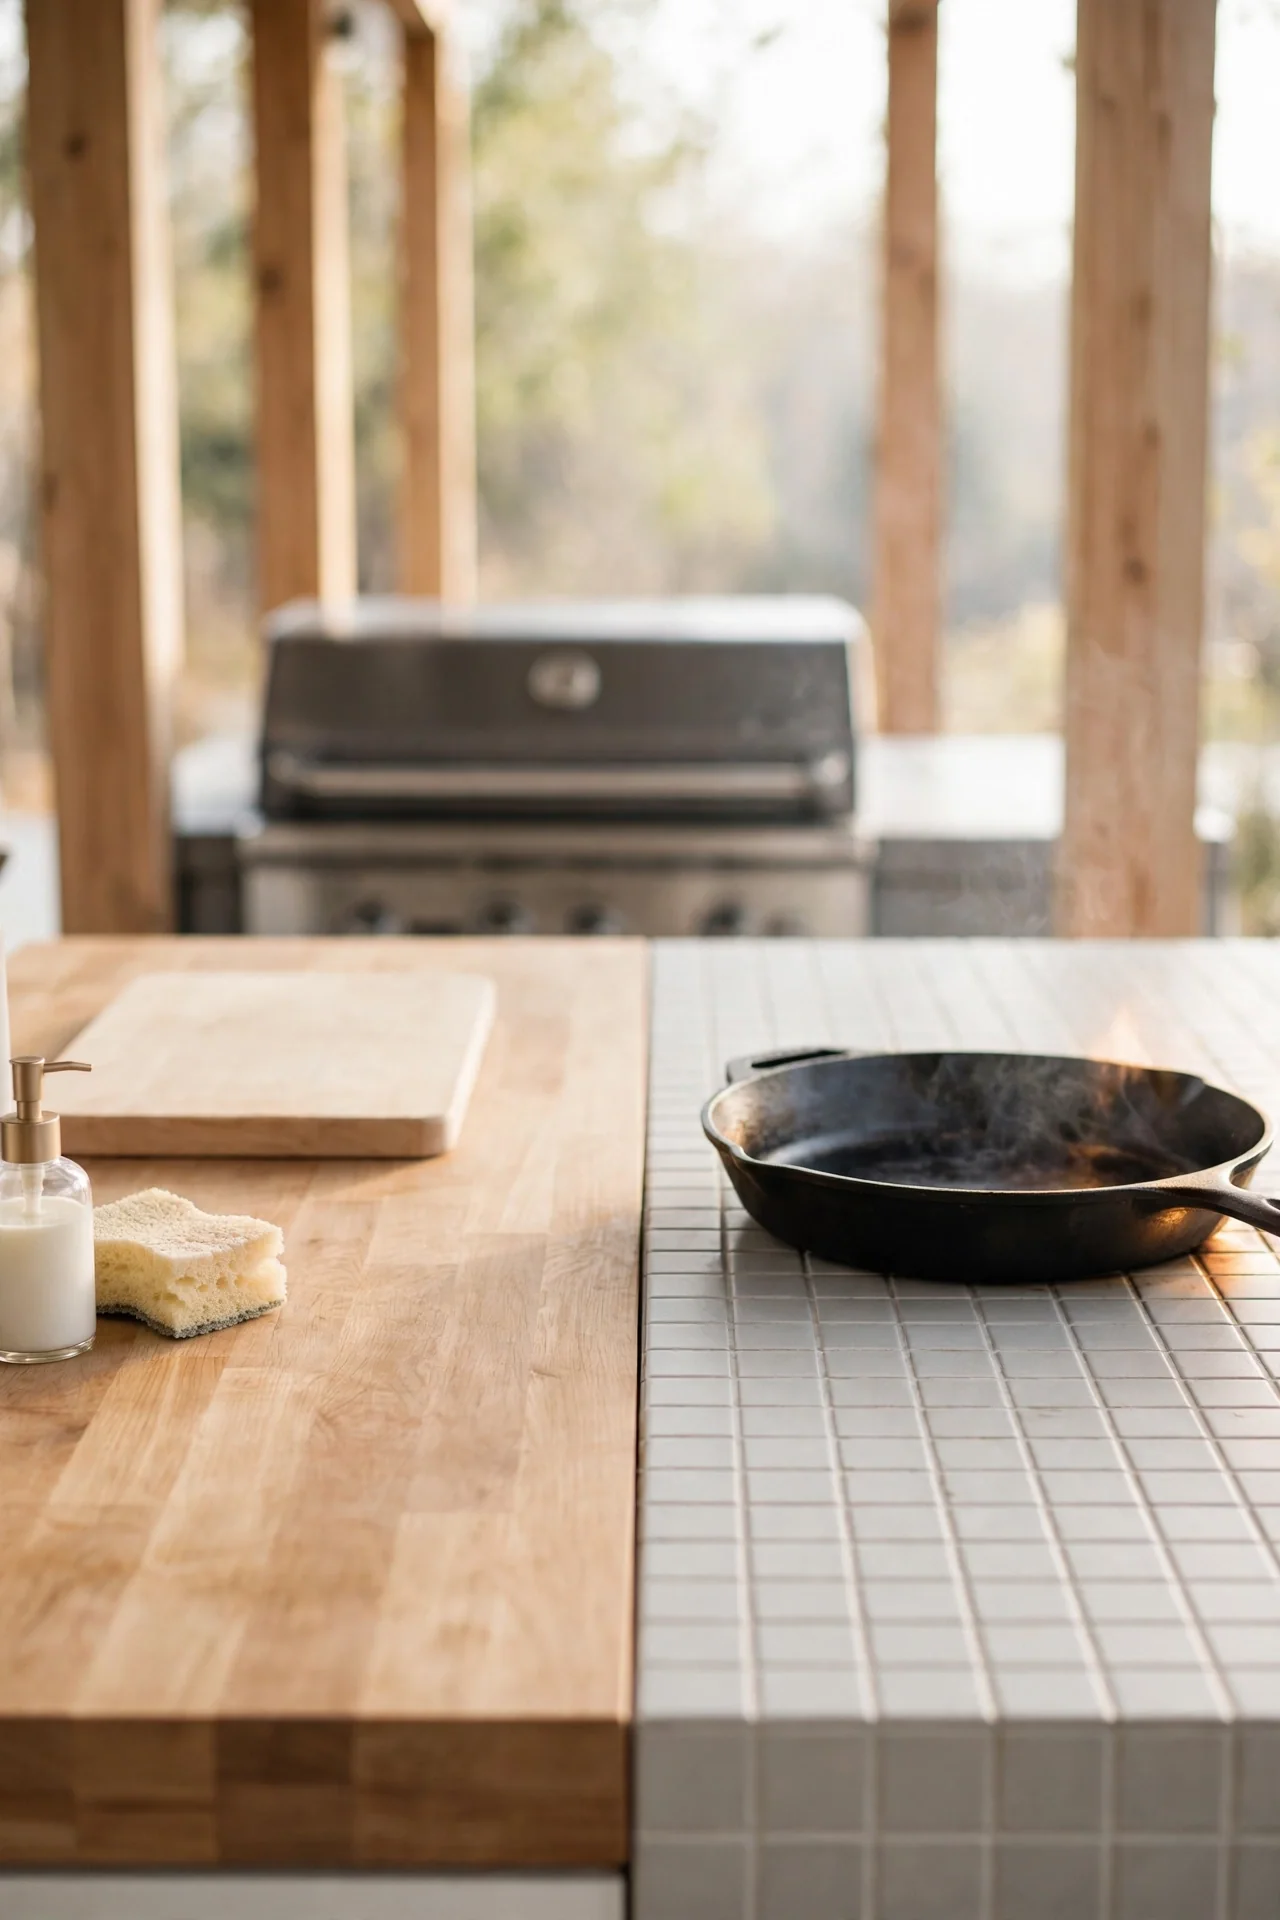
| Butcher Block | Outdoor Tile | |
| Feel | Warm and inviting | Cool and crisp |
| Heat handling | Trivets required always | Handles hot pans easily |
| Weather life | Needs yearly resealing | Lasts decades with grout care |
| Cost | Budget friendly build | Mid range installed |
| Style fit | Rustic ranch kitchens | Modern patio designs |
| Cleaning | Soap, water, quick dry | Hose it down freely |
| Best for | DIY weekend builds | Pro-installed projects |
Match the counter to how you actually cook, not just how it photographs. Heavy grillers need heat-proof surfaces, while casual hosts can prioritize warmth and looks. Choose honestly and the counter will serve you well for years. I have seen beautiful counters ruined in one season by the wrong choice.
Hanging Herb Wall
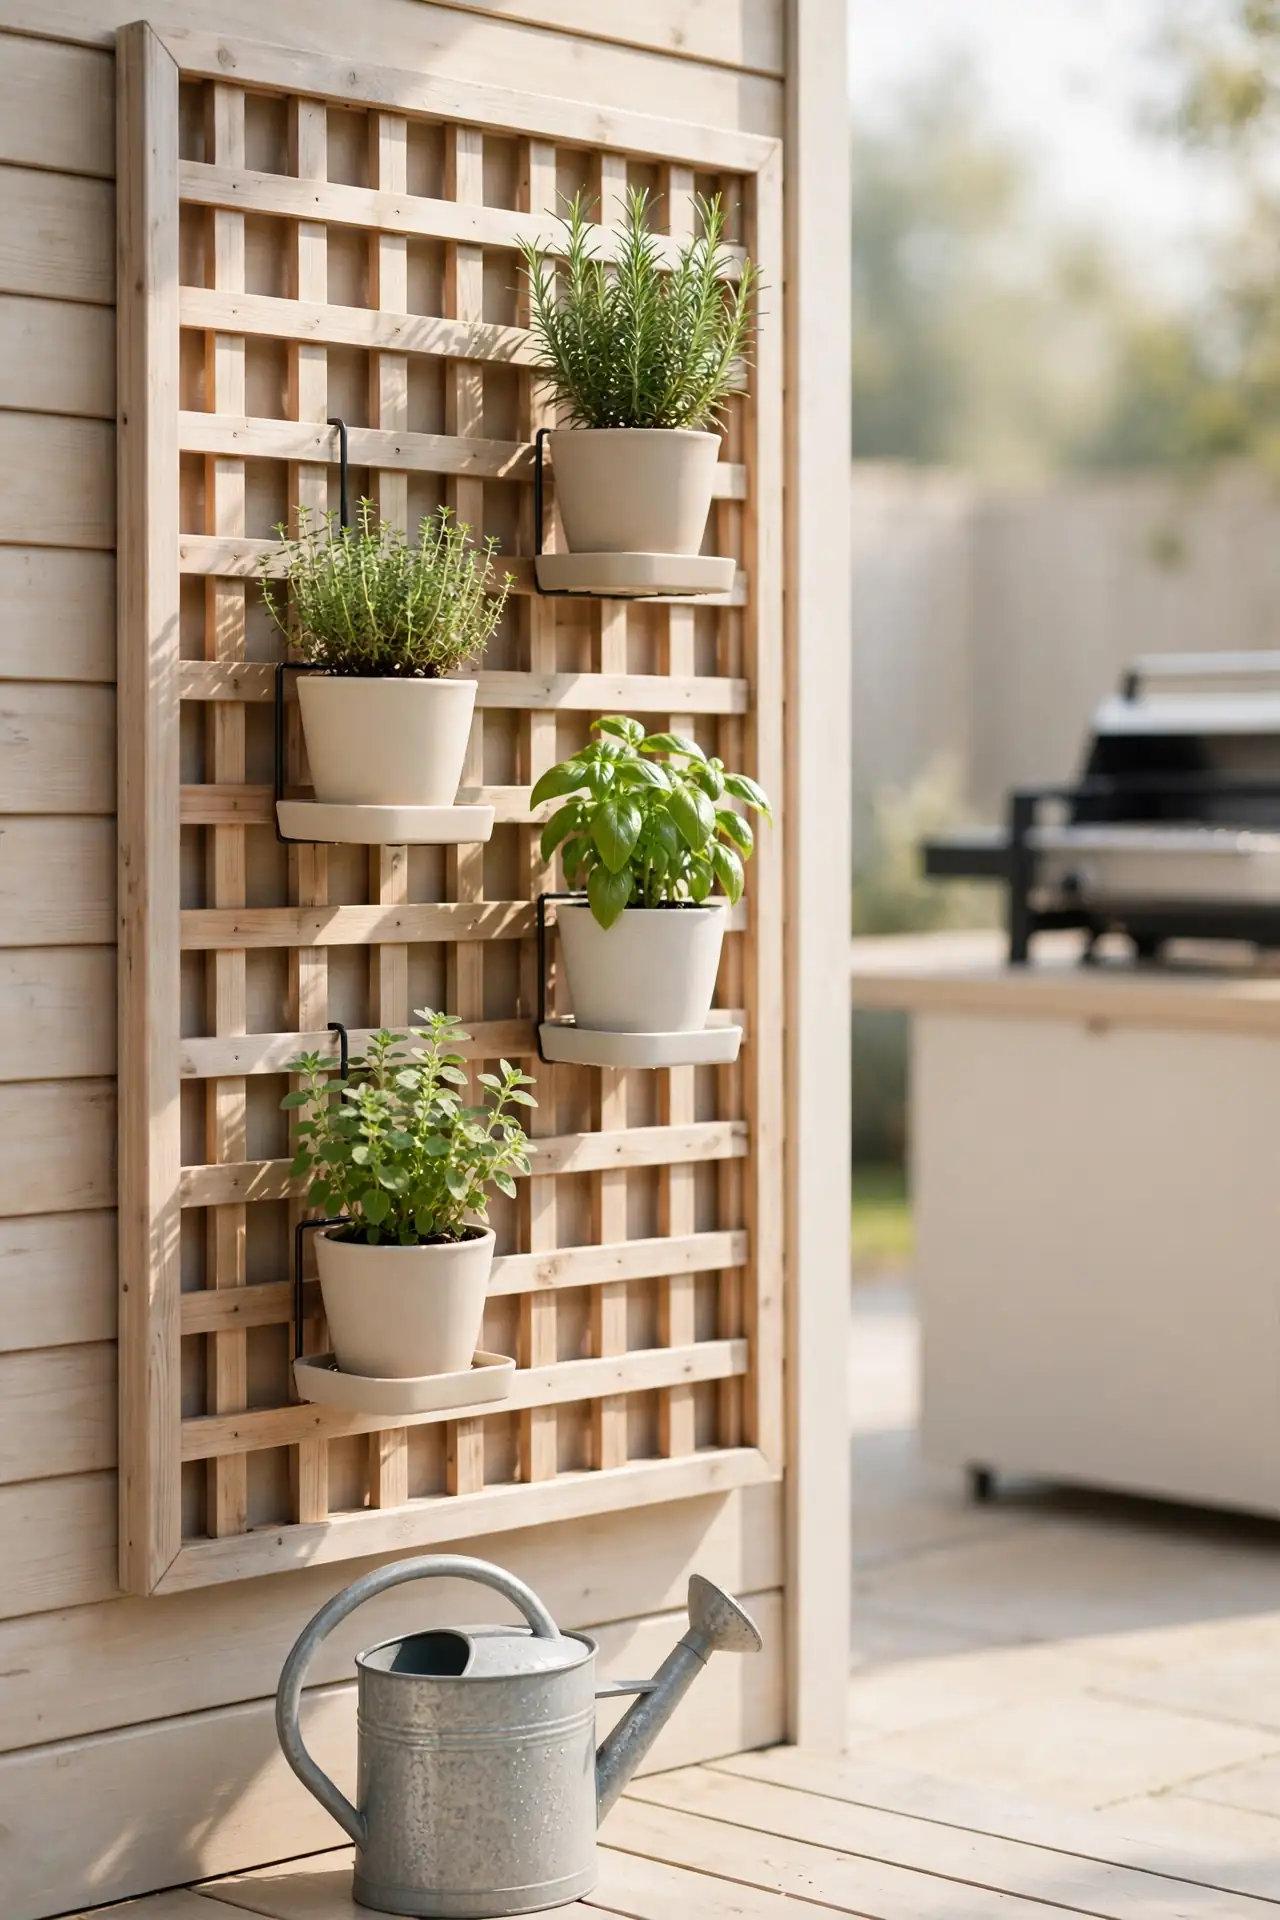
DO:
- Do mount planters on a cedar lattice panel so air flows behind every pot.
- Do plant what you actually grill with: rosemary, thyme, oregano, and basil.
- Do water in the morning so leaves dry before the Texas sun peaks.
DON’T:
- Do not hang the wall where grill smoke blows straight through the leaves.
- Do not use tiny pots that dry out by noon; go one size bigger.
- Do not forget drainage holes, because soggy roots kill herbs fast.
Fresh herbs steps from the grill change how dinner tastes with almost no extra work. Snip rosemary over steaks and basil over grilled peaches, all without leaving the patio. A living wall also softens hard surfaces and smells incredible every time the breeze moves.
Conclusion
Your backyard already has the hardest part done: Texas-sized sky, long warm evenings, and a grill waiting for its moment. These texas outdoor kitchen ideas simply give that space the structure it deserves, from a smoky brisket corner to a cedar pergola strung with lights. I have seen how small changes like these can completely shift the way a space feels. Start with one station this weekend, whether that means a gravel smoker pad or a fresh coat of stain on the bar top, and let the rest follow naturally. Save this guide on Pinterest so your next cookout plan is always one click away.
One Comment