25 Easy Halloween DIY Decorations for Spooky Budget-Friendly Fun
Playful tombstones line your walkway with humor, not horror, when you write silly epitaphs like Here Lies My Diet. Cut stone shapes from cardboard or foam board, paint them grey, and add funny names with a black marker. Stake them along the path with wooden skewers. I’ve noticed kids love reading each one on their way to the door, and the whole project costs less than a pumpkin spice latte. Save the funniest ones to reuse every October.
Mummy Wrapped Vases
DO:
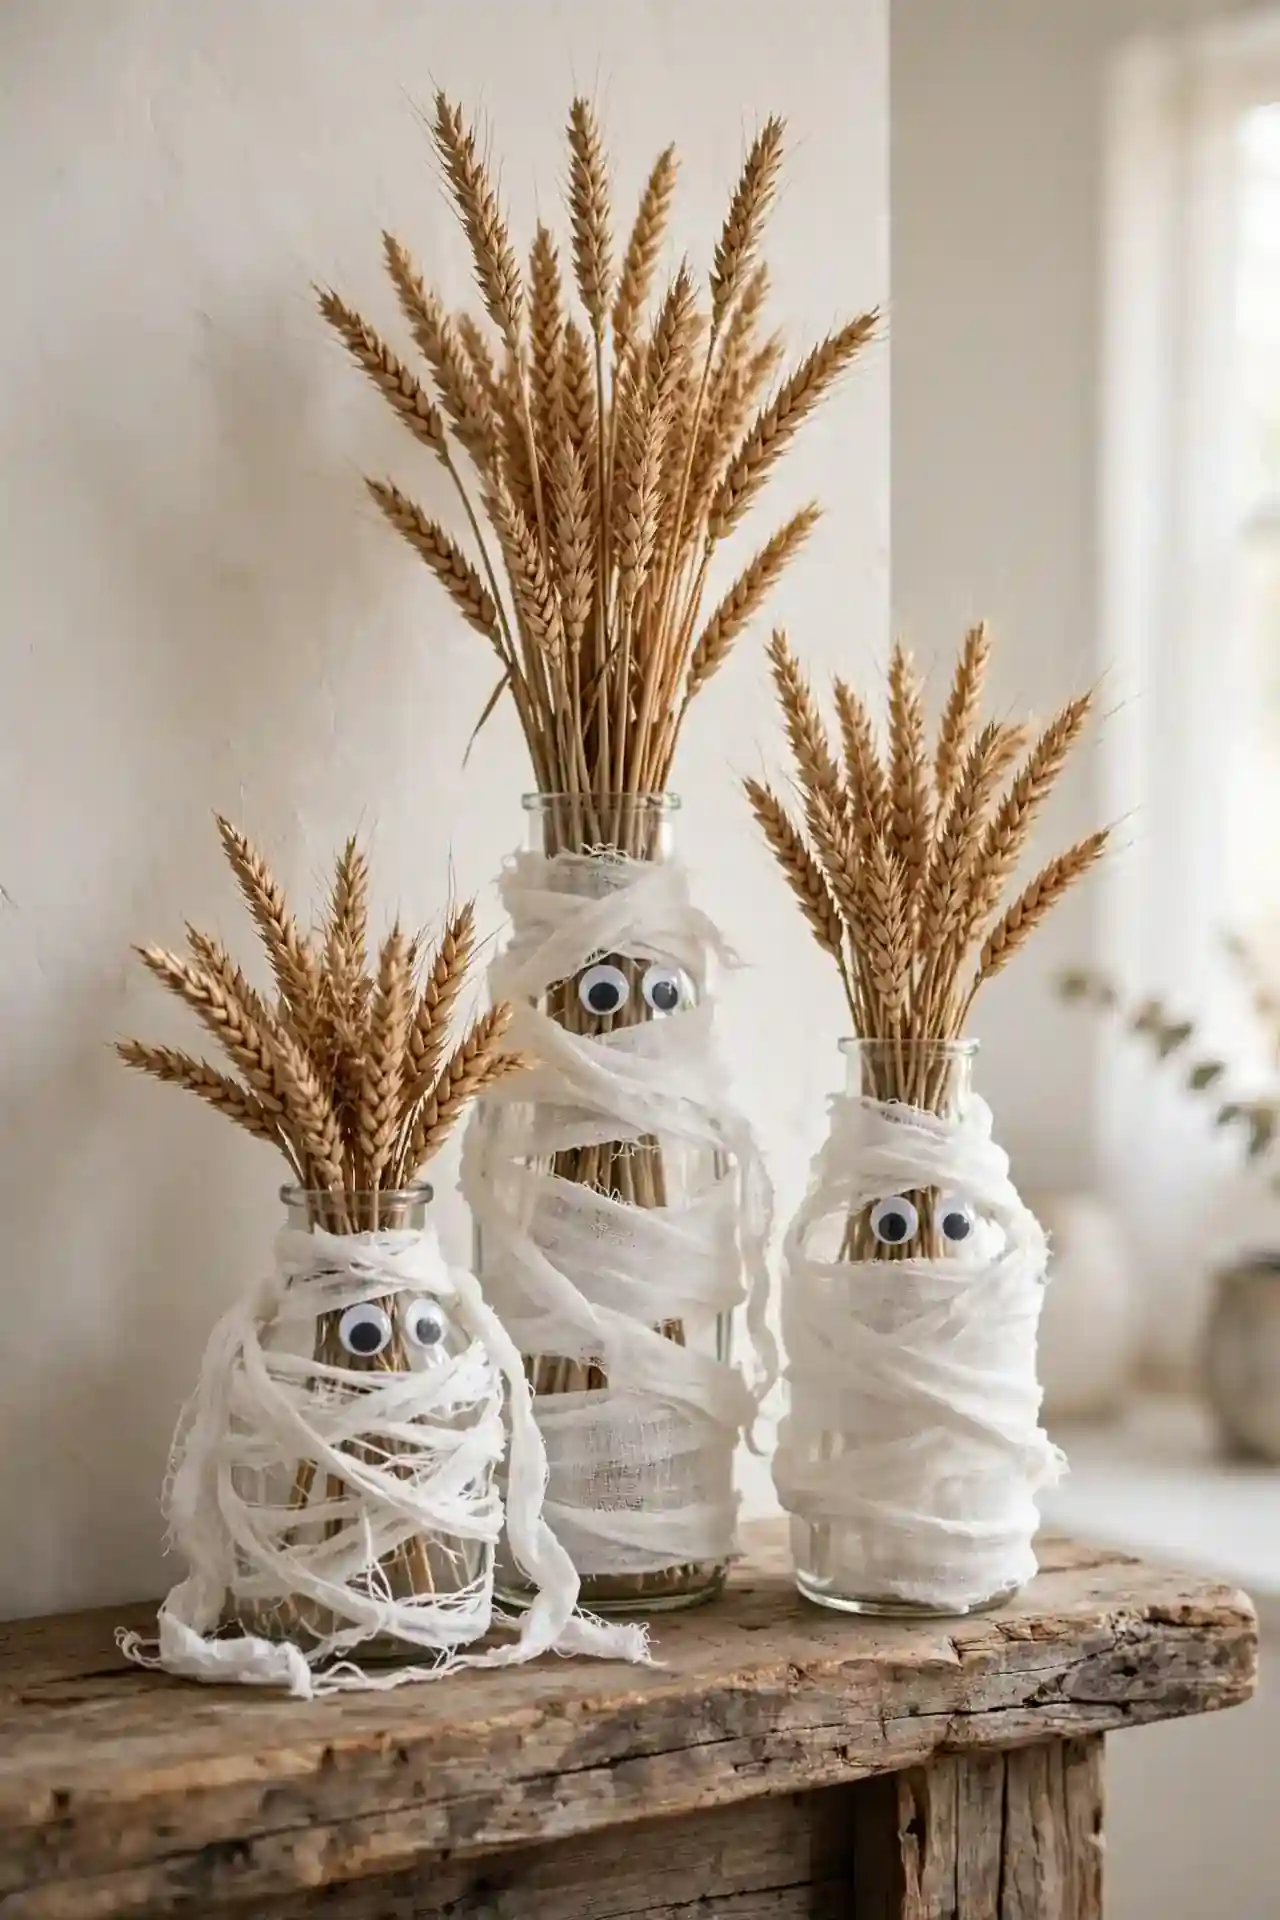
- Wrap vases loosely with white gauze, leaving small gaps for a true mummy texture.
- Stick on googly eyes at different heights for a playful monster family.
- Fill with dried wheat or bare branches for an autumn harvest look.
DON’T:
- Don’t wrap too tightly, the gauze tears and looks messy instead of spooky.
- Don’t use real candles inside, the fabric is flammable.
- Don’t skip the eyes, they are what make these vases charming.
These mummy vases take ten minutes each and look adorable grouped on a mantel. In my experience, varying the vase heights creates the cutest little monster family. They work with any flowers you have, though dried stems keep the Halloween mood perfectly.
Spider Web Doormat
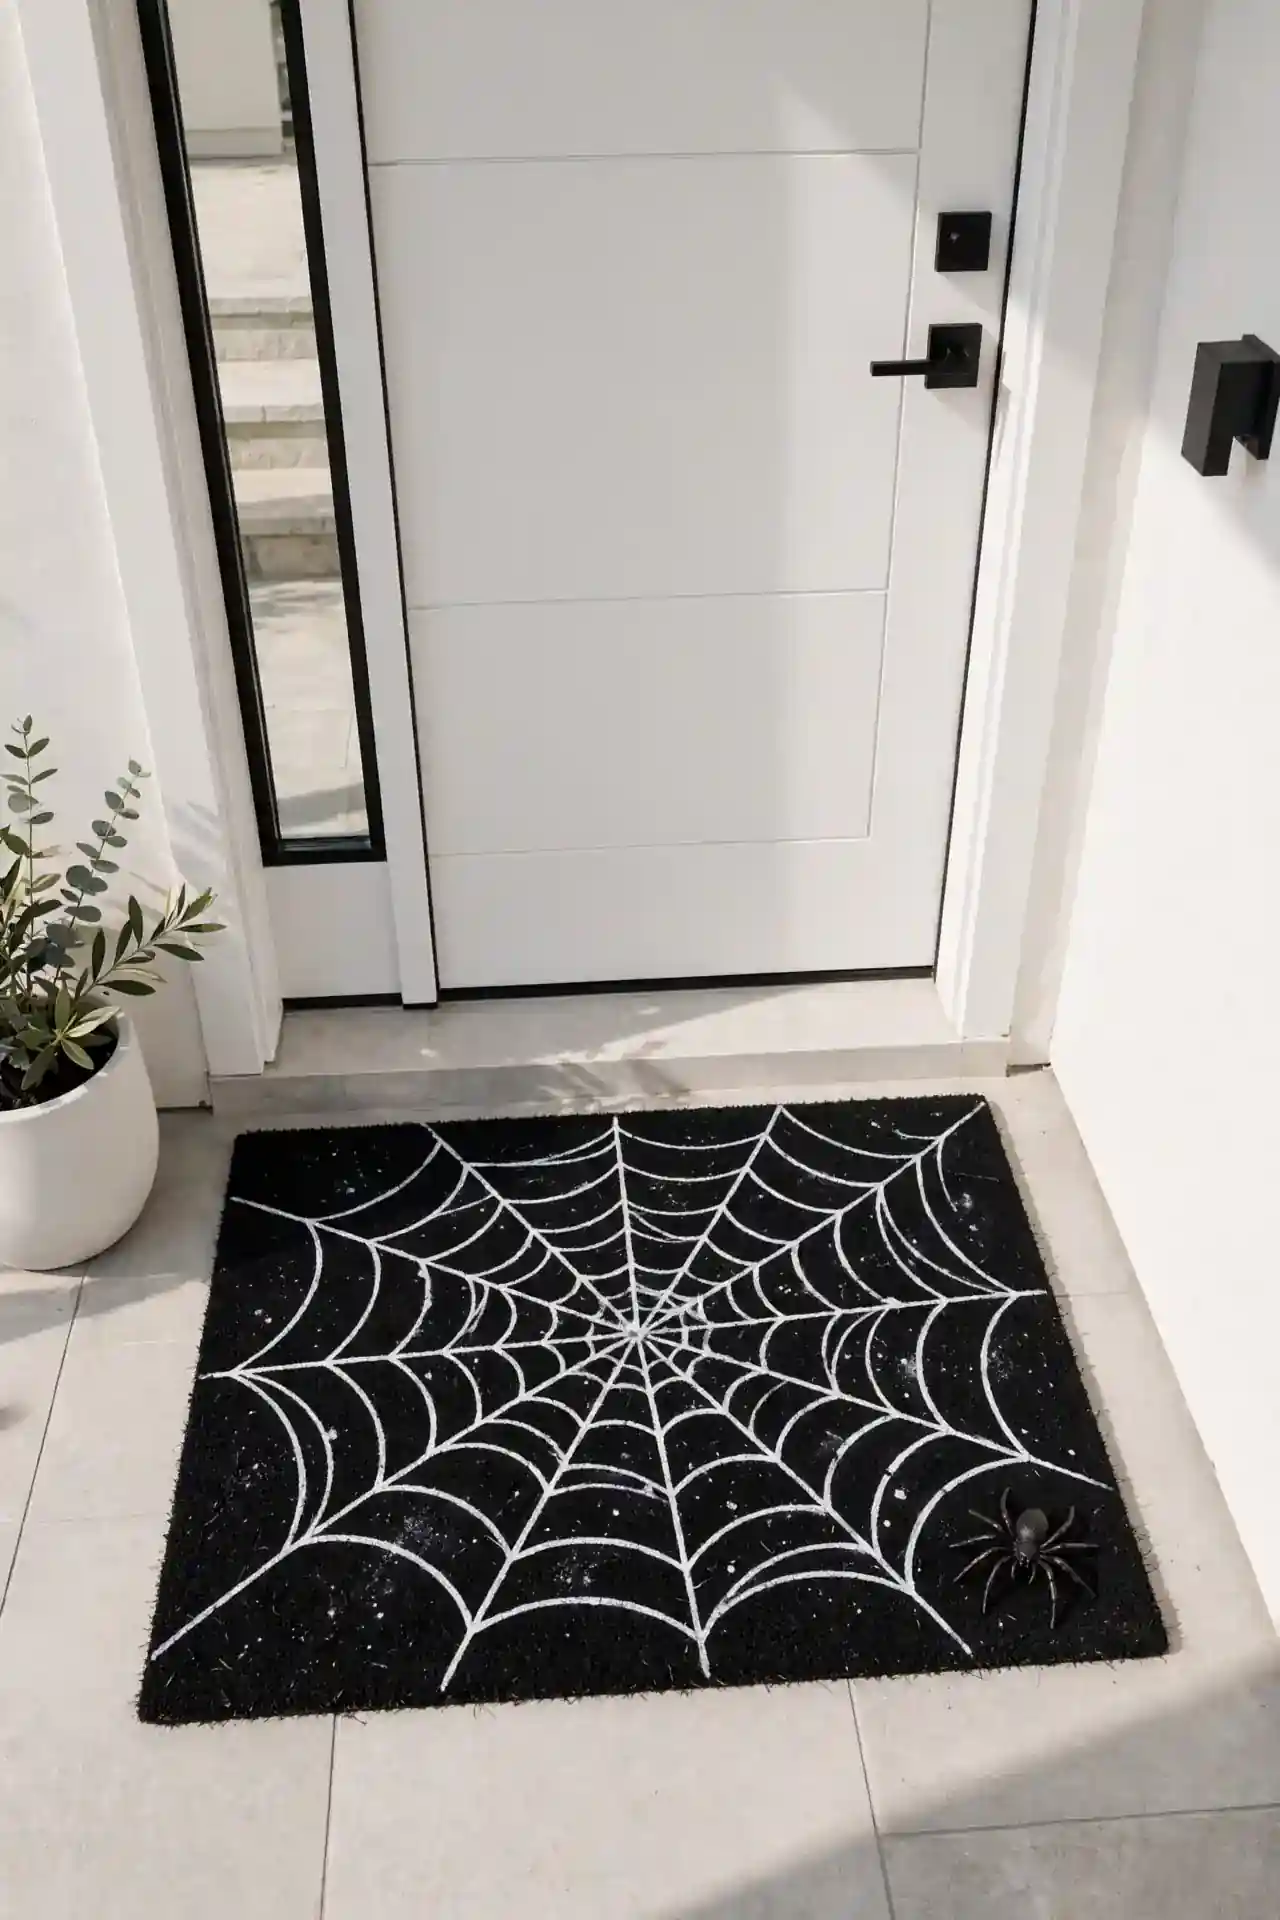
Cost: Low | Time: Thirty minutes | Skill Level: Beginner | Best For: Front door welcome
A plain black doormat becomes a spider web masterpiece with nothing but white fabric paint. Lay the mat flat, paint straight lines radiating from the center, then connect them with curved arcs to form the web. Add a plastic spider in one corner for the finishing touch. Use outdoor fabric paint so rain never ruins your work. I’ve noticed this simple upgrade gets more compliments than expensive store bought mats. It welcomes guests with playful spookiness and wipes clean all season. Let the paint cure overnight before putting it back by the door.
Ghost Garland Lights
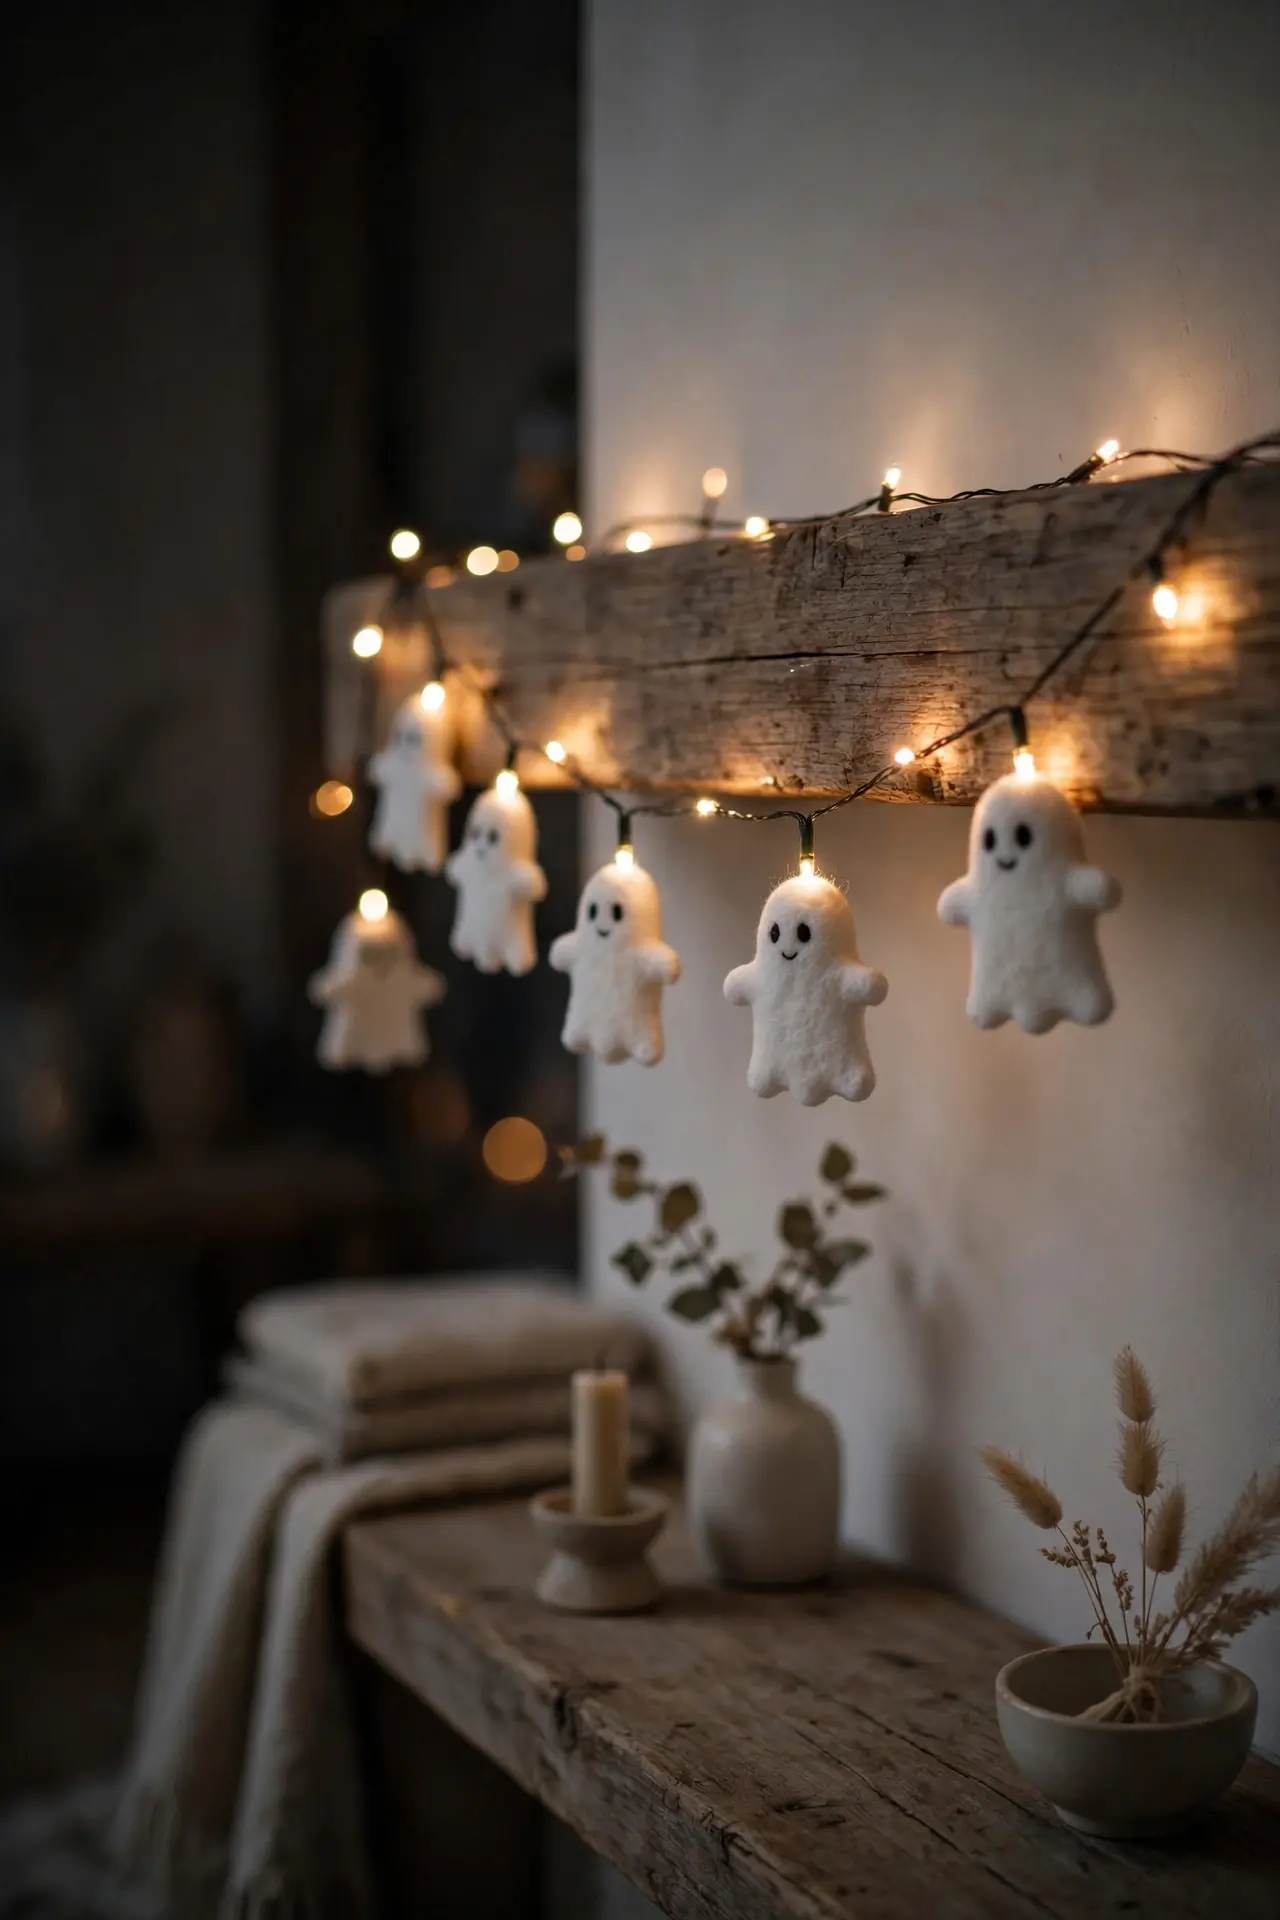
A plain string of white lights becomes a parade of happy ghosts with a little craft felt. Cut simple ghost shapes from white felt, poke a small hole at the top of each, and slip them over every other bulb. The lights shine through the fabric, giving each ghost a soft, friendly glow that looks magical after dark.
Drape the garland along a mantel, staircase railing, or headboard for instant Halloween warmth. I’ve noticed warm white bulbs look cozier than cool ones for this project. The felt ghosts store flat in an envelope, ready to glow again next year without any fuss.
Potion Bottle Labels
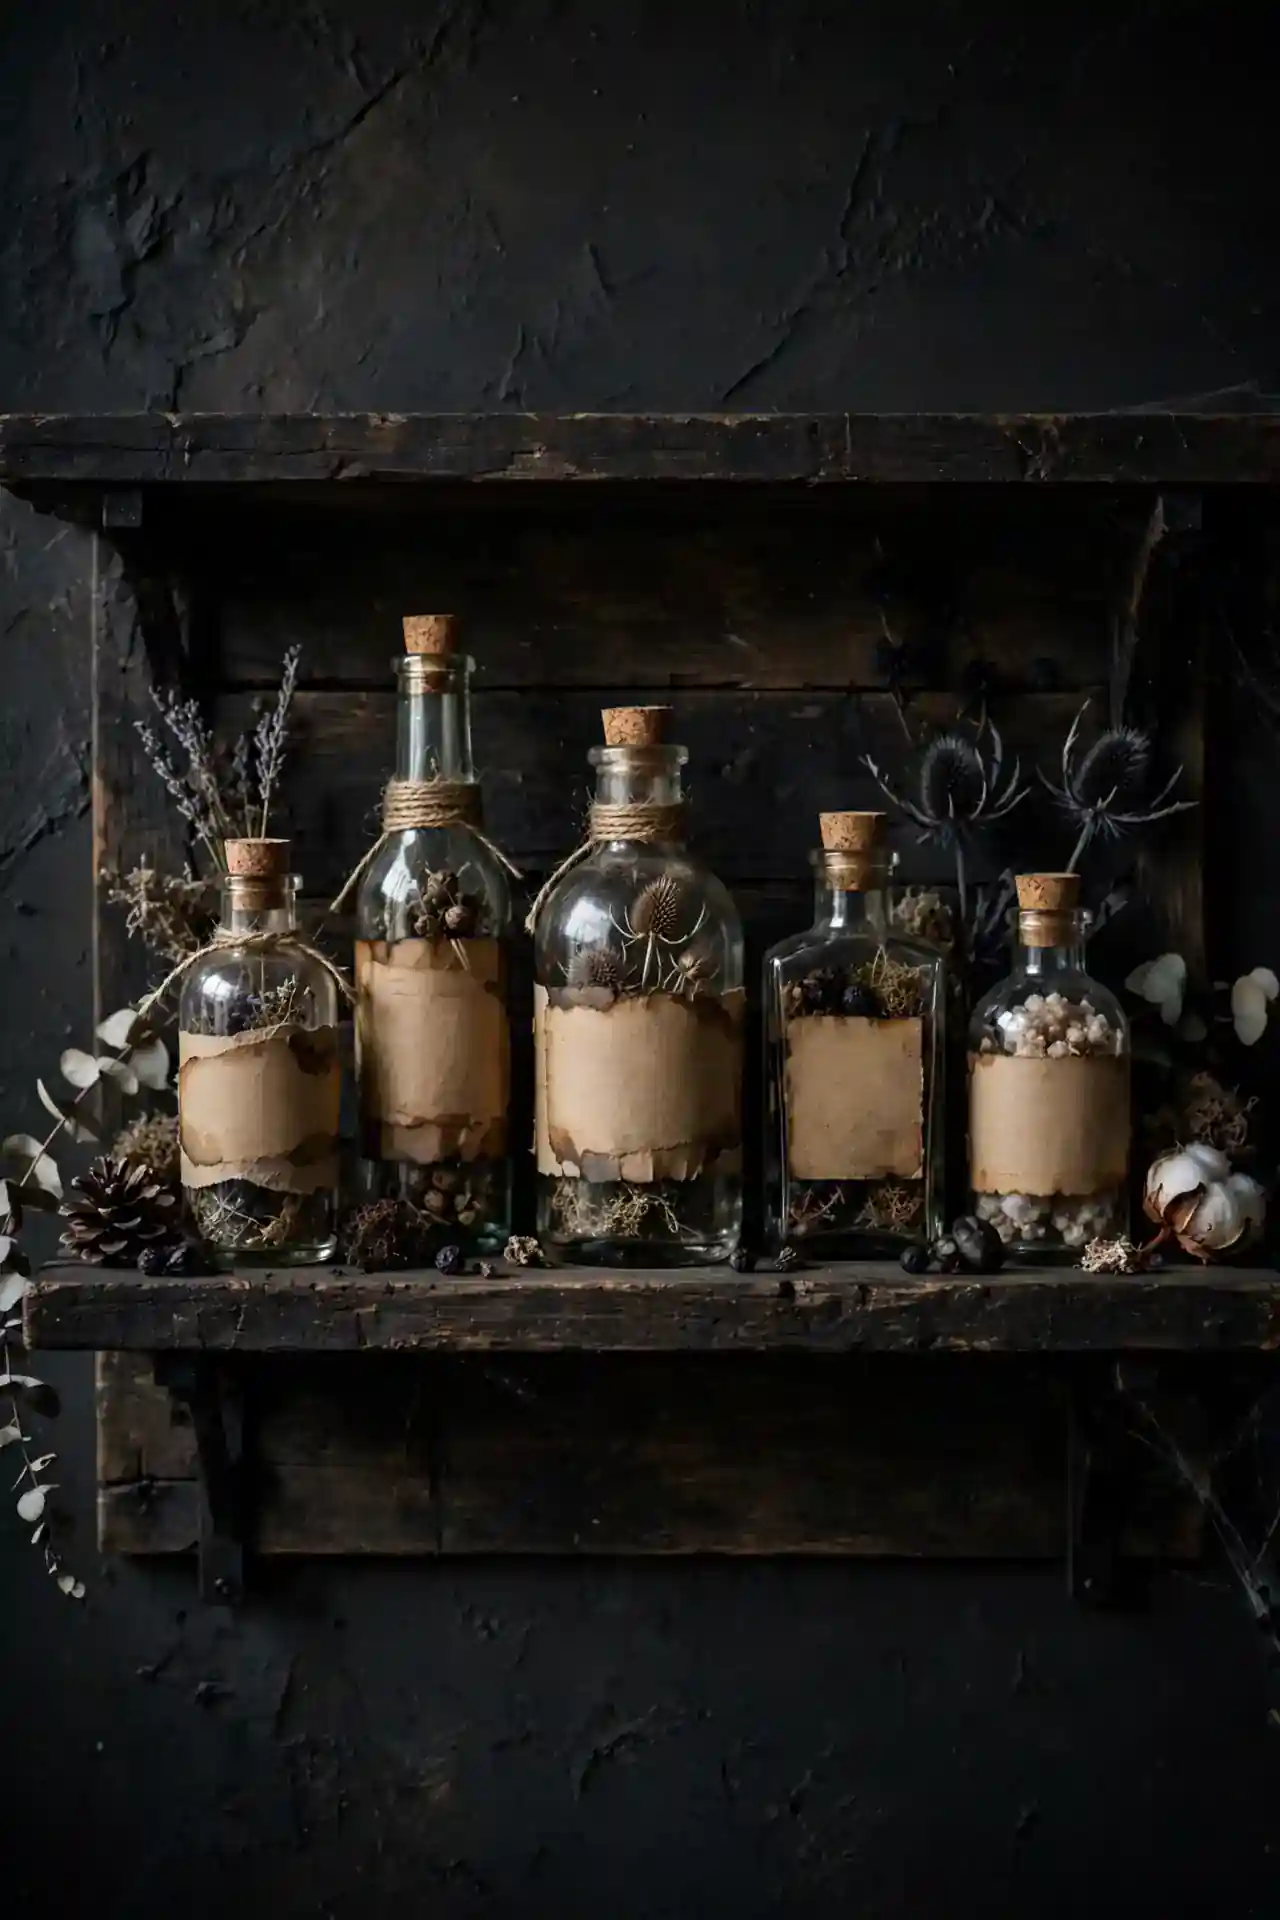
- Design spooky labels on your computer or hand letter them on kraft paper for a vintage apothecary look.
- Use playful names like Eye of Newt, Dragon Tears, or Midnight Mist to spark imagination.
- Age the paper with a light tea stain and singe the edges carefully for an antique effect.
- Stick labels on bottles with double sided tape so they peel off cleanly after Halloween.
Labels turn ordinary bottles into a witch’s pantry in minutes. I have seen this work well in many cases where crafters wanted big impact from items they already owned. Print a whole sheet at once and share extras with friends who love Halloween crafting too.
Haunted Mirror Notes
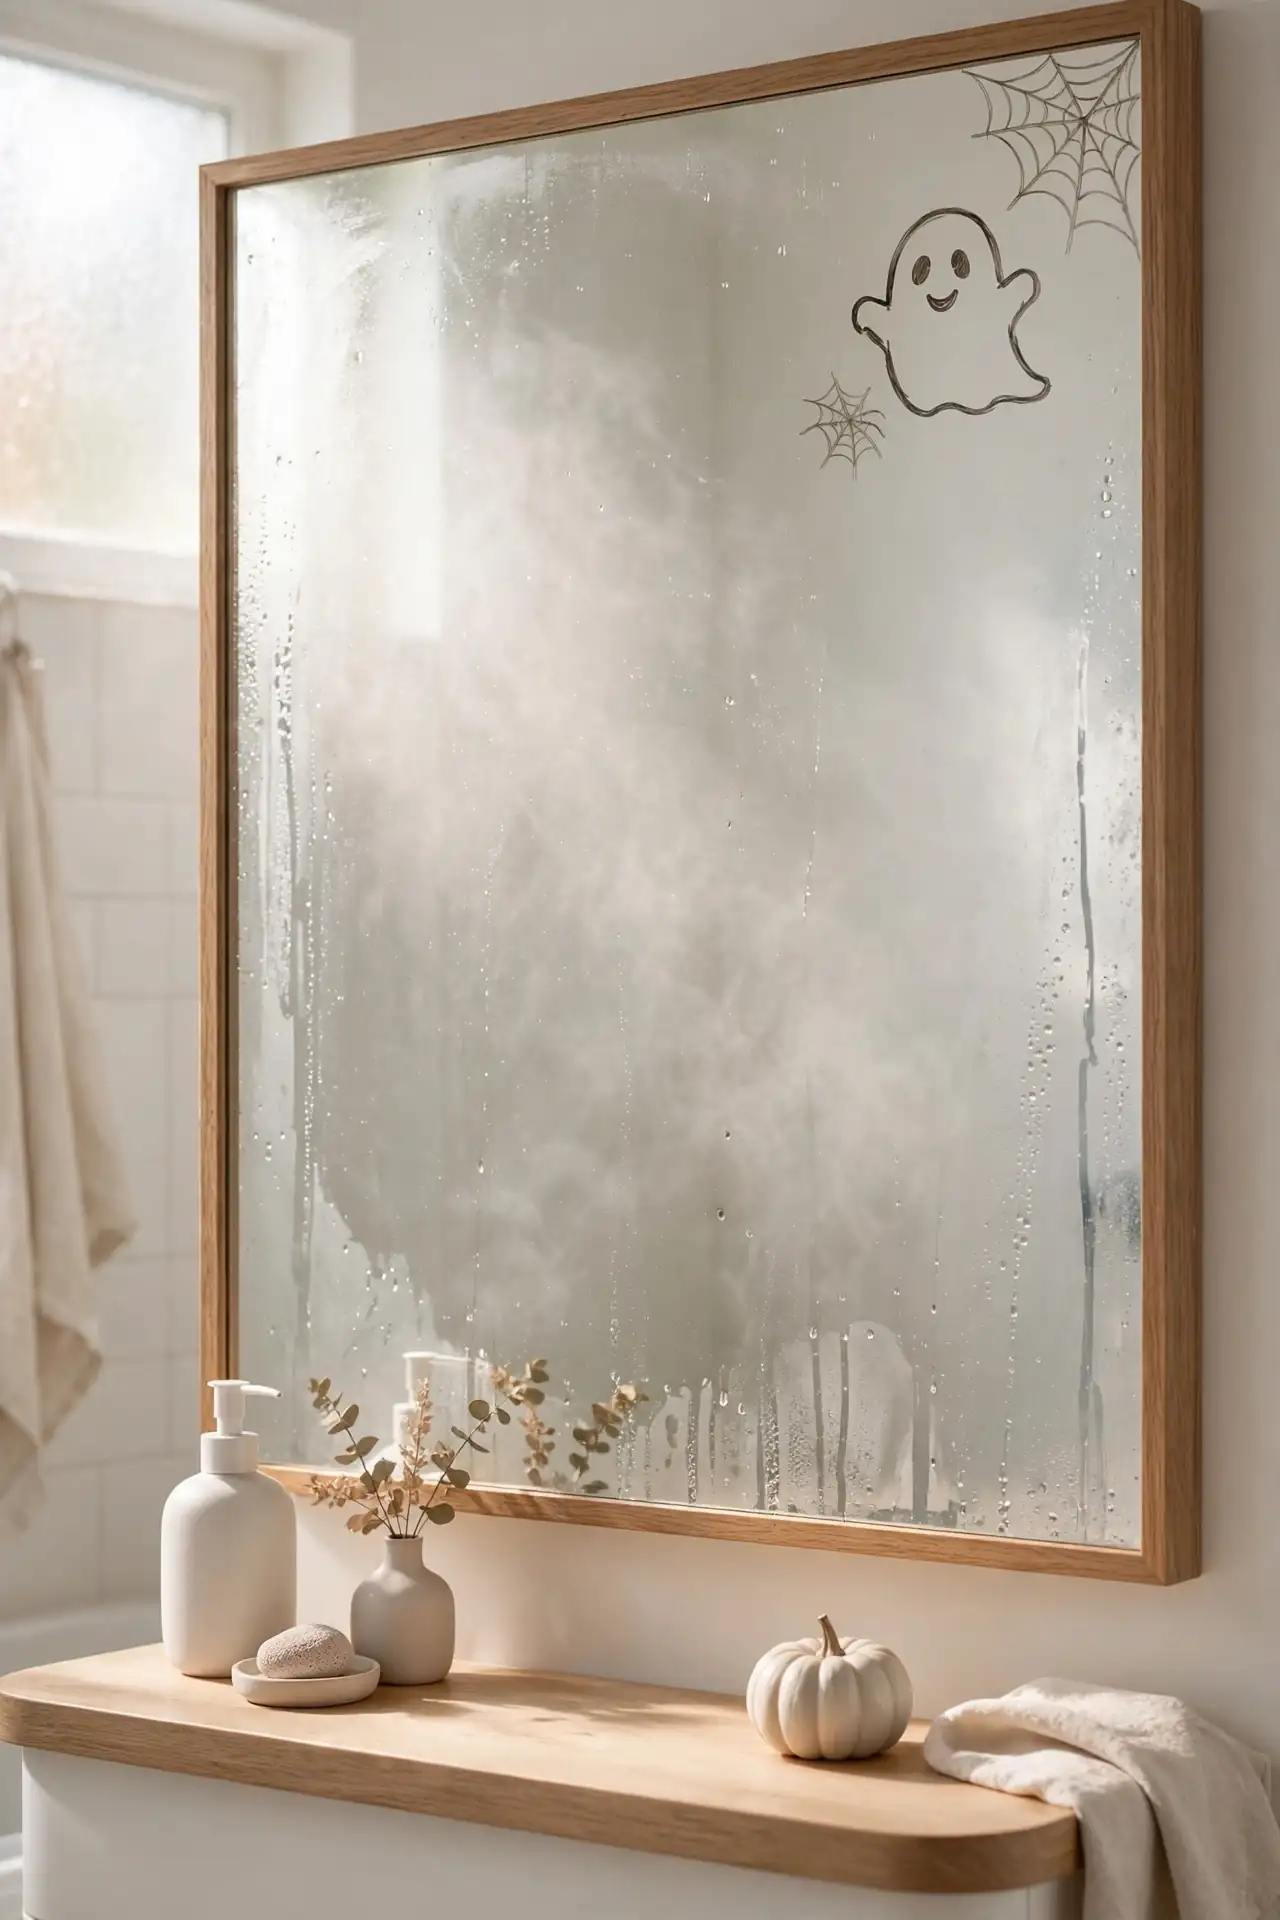
Quick Tip: Write spooky messages on your bathroom mirror with a dry erase marker for a surprise that appears in the morning steam. Simple phrases like BOO or I See You delight kids and wash off with one wipe.
This zero cost prank takes seconds and never fails to get a laugh. Draw a small ghost or spider web in the corner of the mirror too, so the message feels like part of a bigger haunting. I’ve noticed this works best on mirrors that fog up during hot showers. The reveal timing is perfect, and cleanup takes one swipe of a cloth.
Bat Branch Centerpiece

BEFORE: A bare branch in a vase looks unfinished, like you gave up halfway through decorating for the season.
AFTER: The same branch hung with paper bats and tiny lights becomes a dramatic Halloween tree that anchors your whole table.
Find a sturdy branch on your next walk, spray paint it black or white, and stand it in a heavy vase filled with stones. Clip on paper bats and wrap a short string of fairy lights around the limbs. I’ve noticed this centerpiece sparks more conversation than anything else on the table. It costs nothing and looks like a designer piece.
Pumpkin Stack Topiary
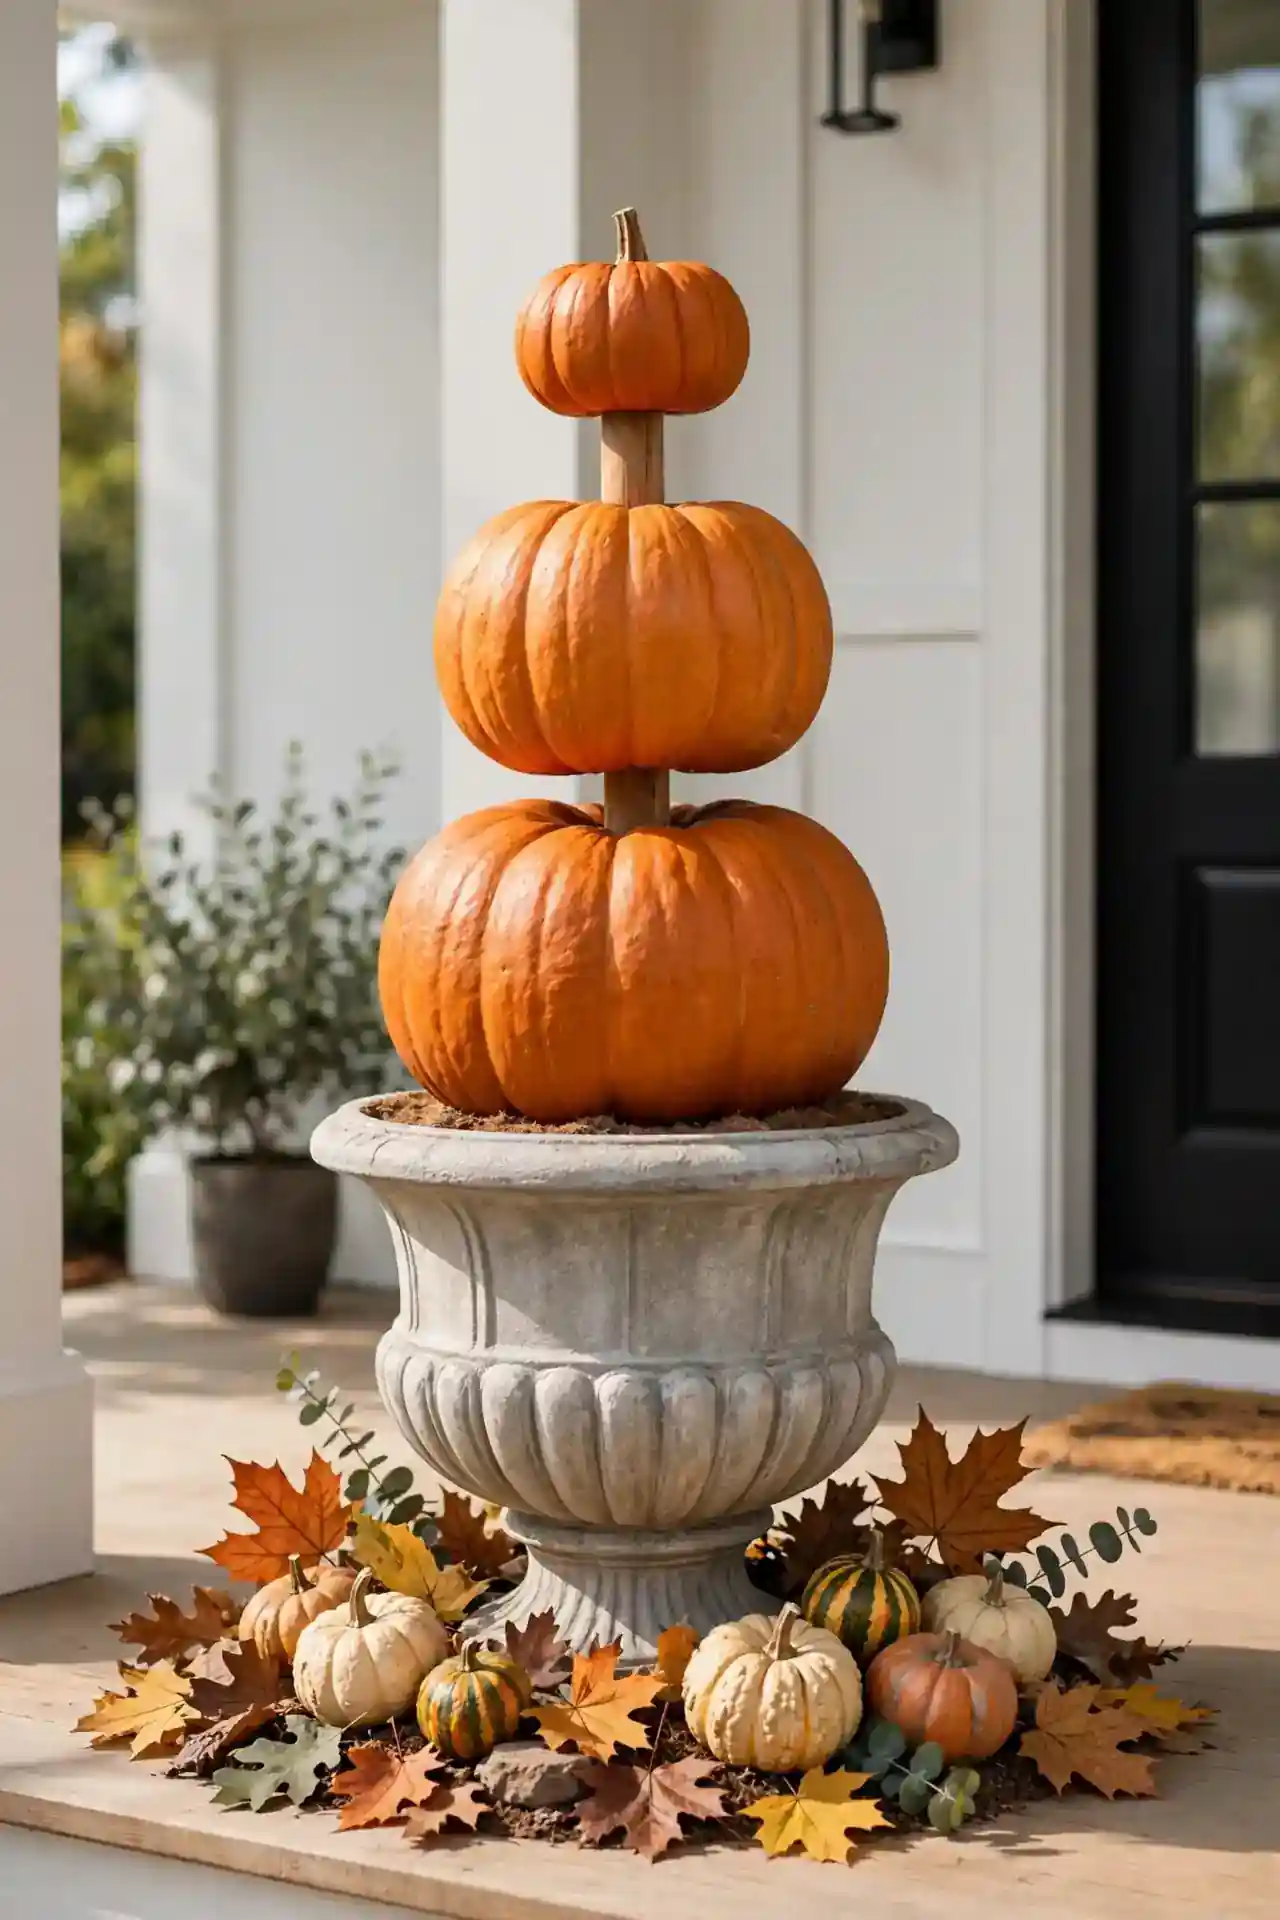
- Choose three pumpkins in descending sizes, real or faux, in matching or mixed colors.
- Thread a sturdy wooden dowel through their centers to hold the stack steady.
- Set the stack in a large urn or planter filled with soil for weight.
- Tuck fall leaves and small gourds around the base to hide the mechanics.
This topiary brings instant height to porches and entryways without any carving. In my experience, faux pumpkins make this a one time investment you will reuse for years. They survive rain, wind, and curious squirrels, and the whole project takes under an hour. Add a bow or a small crow on top for personality.
Skeleton Hand Candy Dish
| Plastic Hand Dish | DIY Poseable Hand | |
|---|---|---|
| Cost | Party store find | Pipe cleaners |
| Time | Zero minutes | One hour |
| Spook factor | Playful | Creepy realistic |
| Reusable | Every year | Every year |
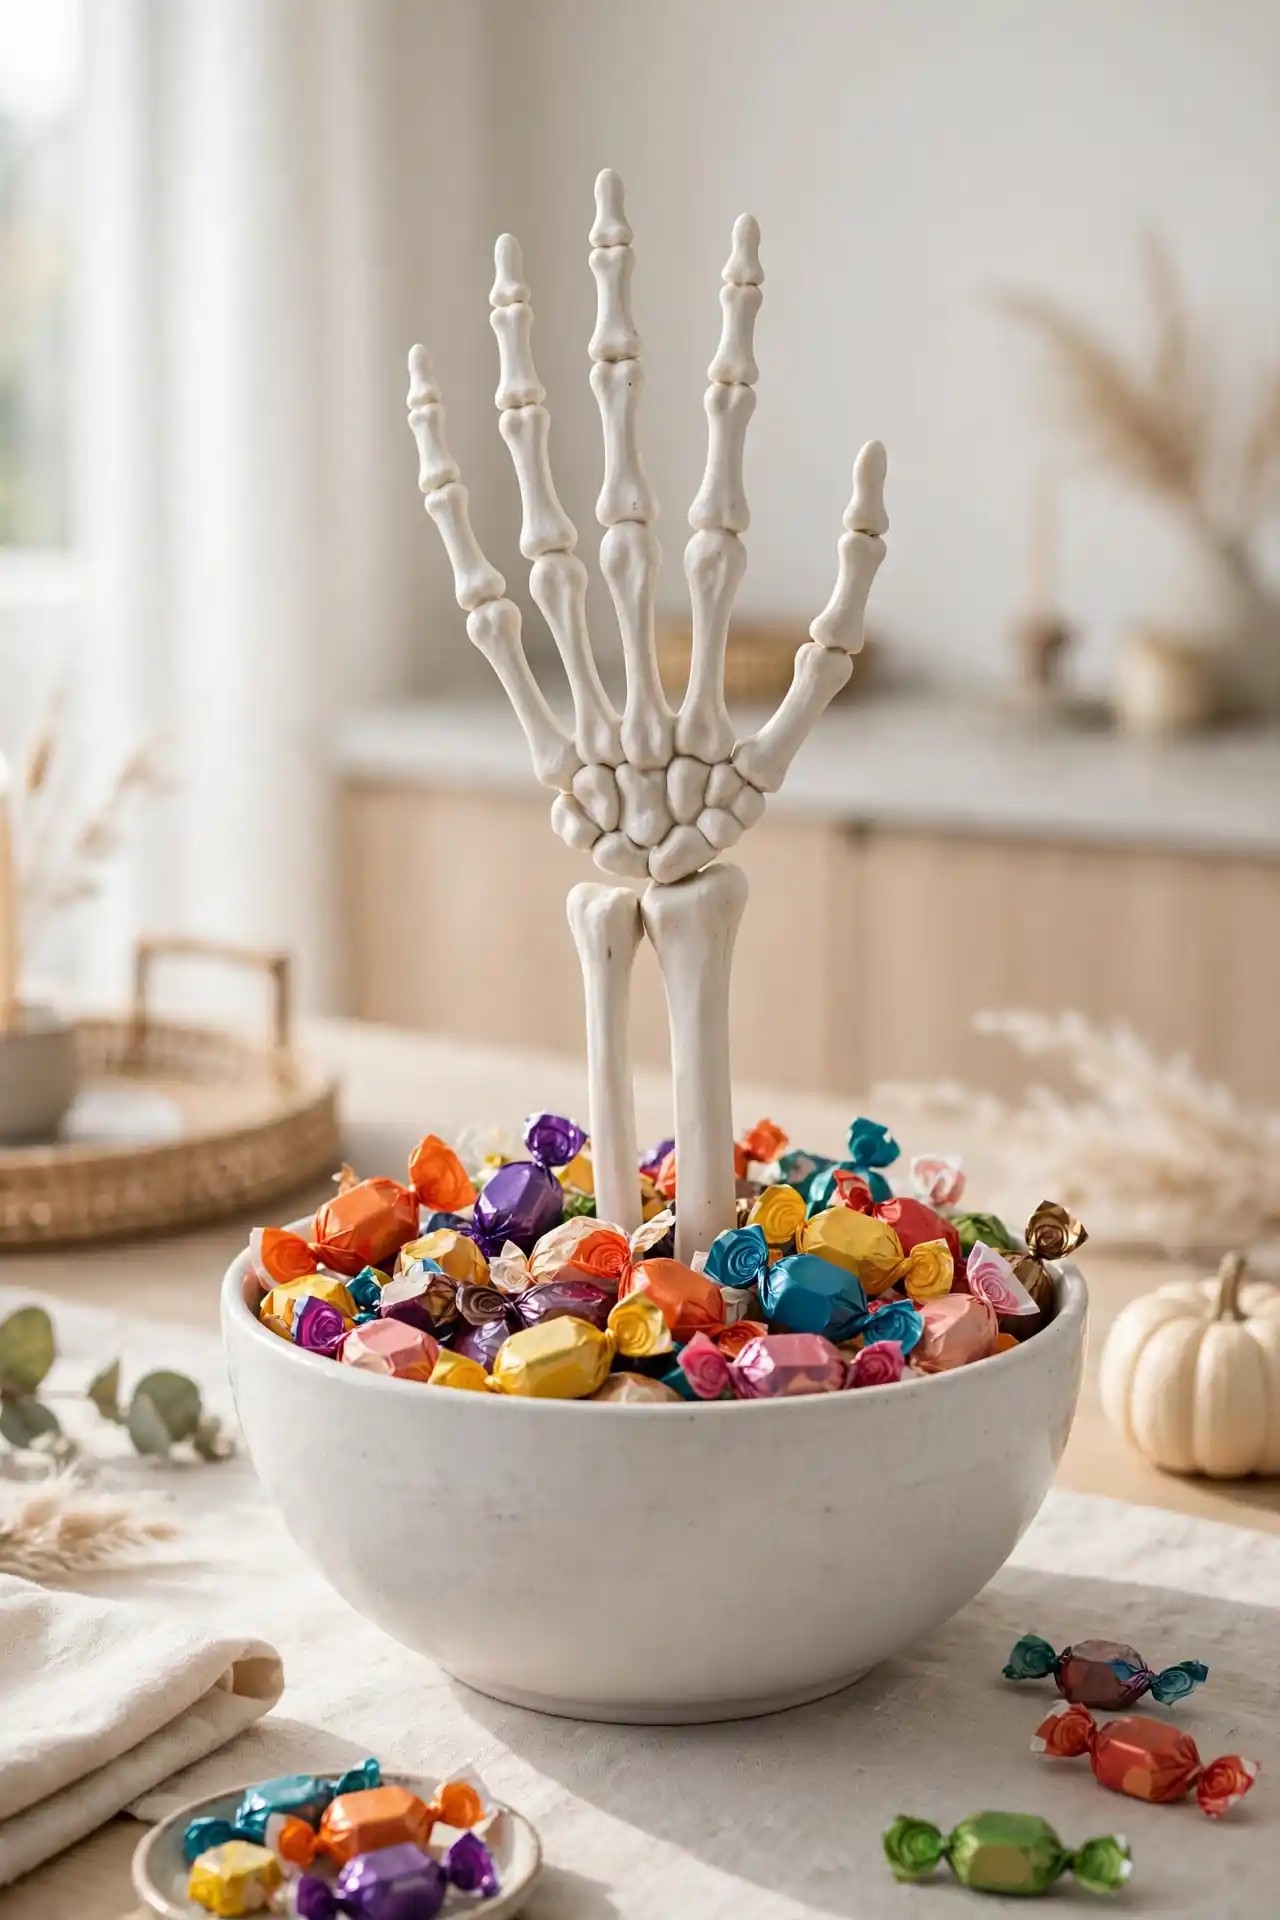
A skeleton hand rising from a candy bowl makes trick or treaters hesitate before grabbing a treat, which is half the fun. Set a plastic skeleton hand in a deep bowl so it looks like it is climbing out, then fill around it with wrapped candy. That’s why many experts recommend placing it at kid height for maximum giggles. It is spooky enough to thrill but friendly enough for toddlers, and it becomes a yearly tradition.
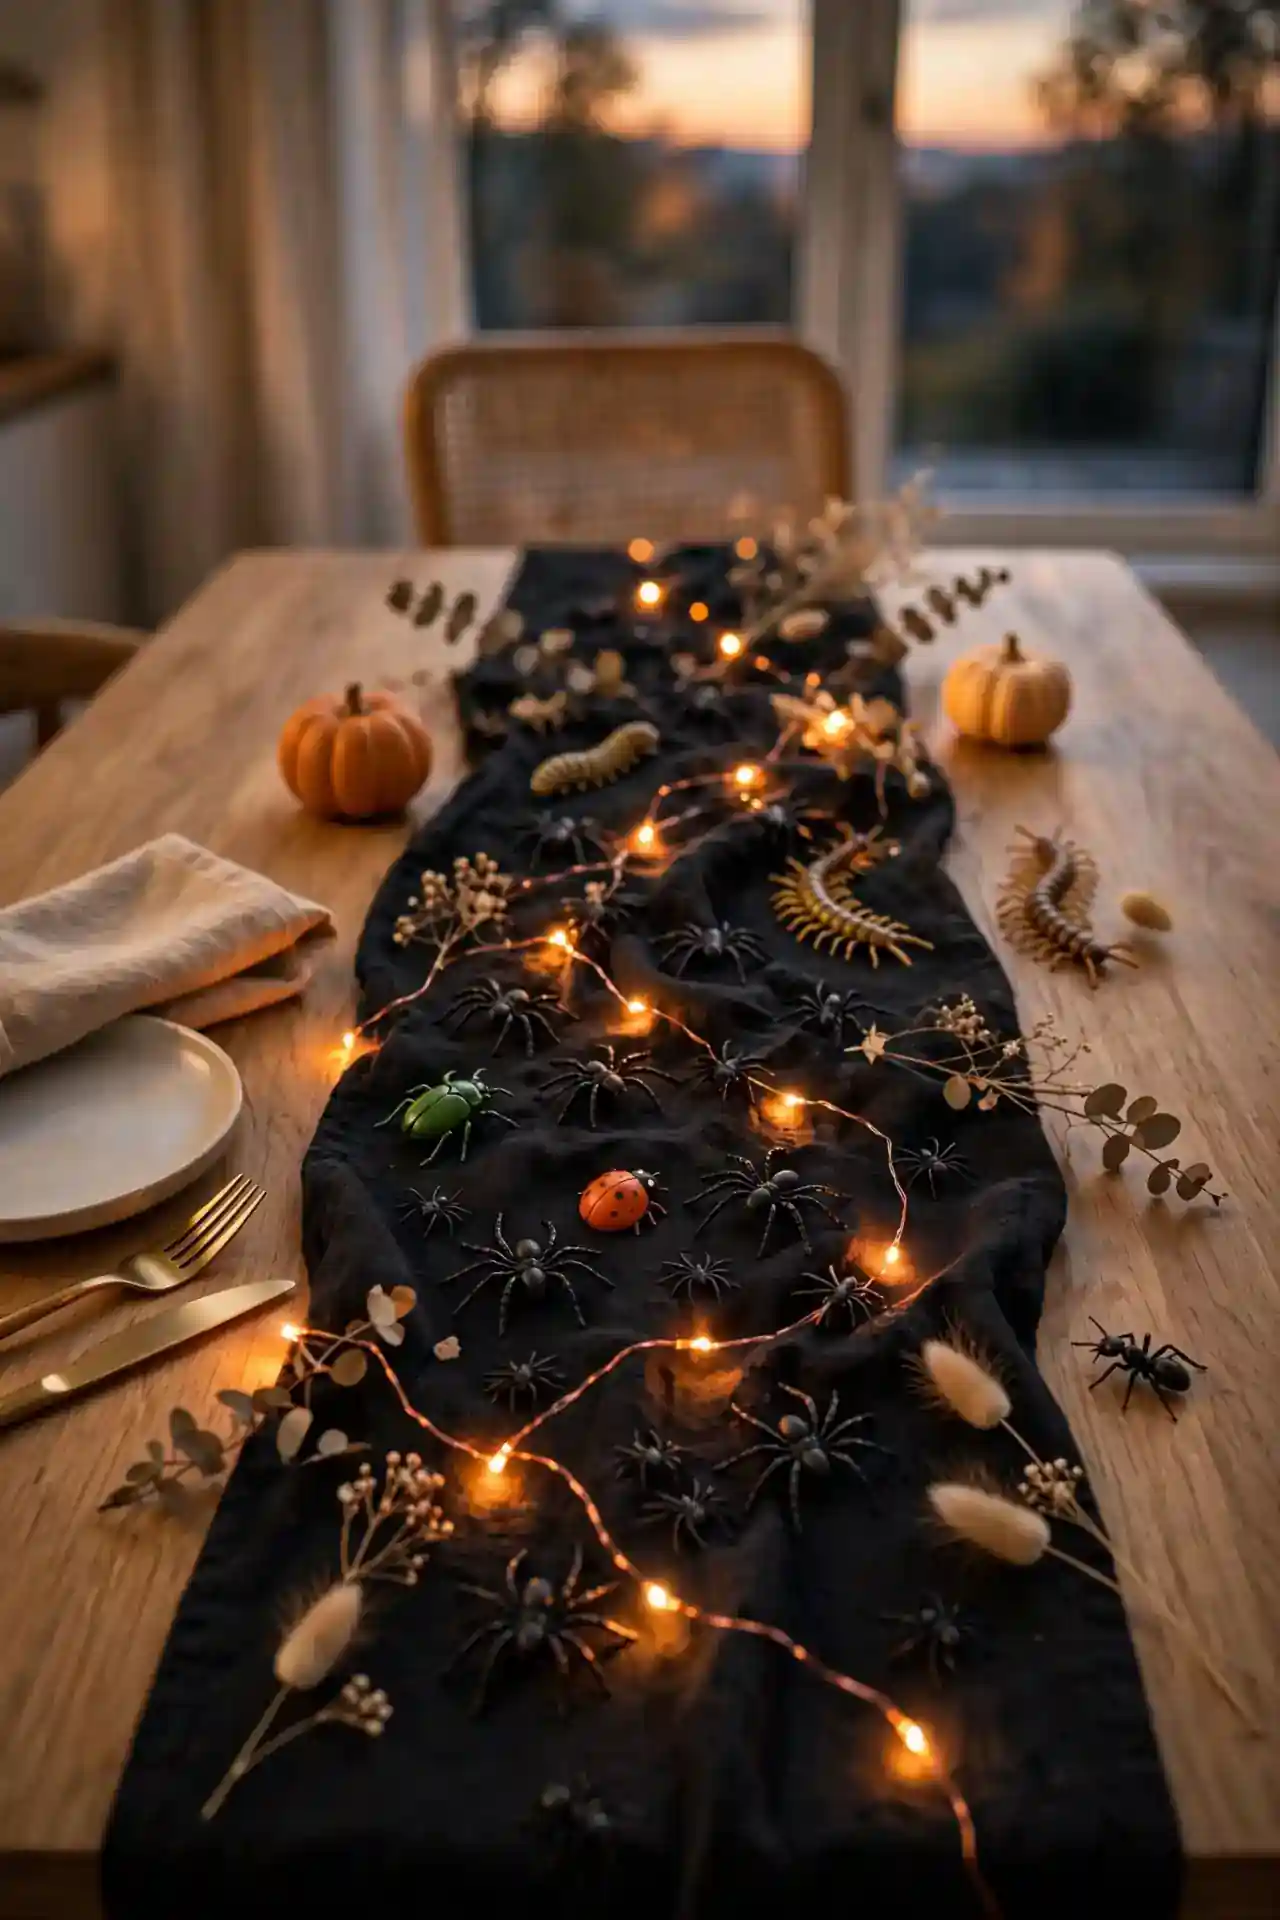
Creepy Crawly Table Runner
DO:
- Lay a black or orange runner down the center of your table as the base.
- Scatter plastic spiders, bugs, and centipedes along its length for creepy texture.
- Weave in a string of tiny orange lights for evening glow.
DON’T:
- Don’t use real looking insects near food, guests may lose their appetite.
- Don’t overload the runner, leave space for plates and dishes.
- Don’t forget to remove the bugs before washing the runner.
This runner turns an ordinary dinner into a Halloween feast in minutes. In my experience, kids love rearranging the bugs, so expect the layout to change all evening. It packs away in seconds and works for every spooky dinner party you host.
Monster Eye Wreath
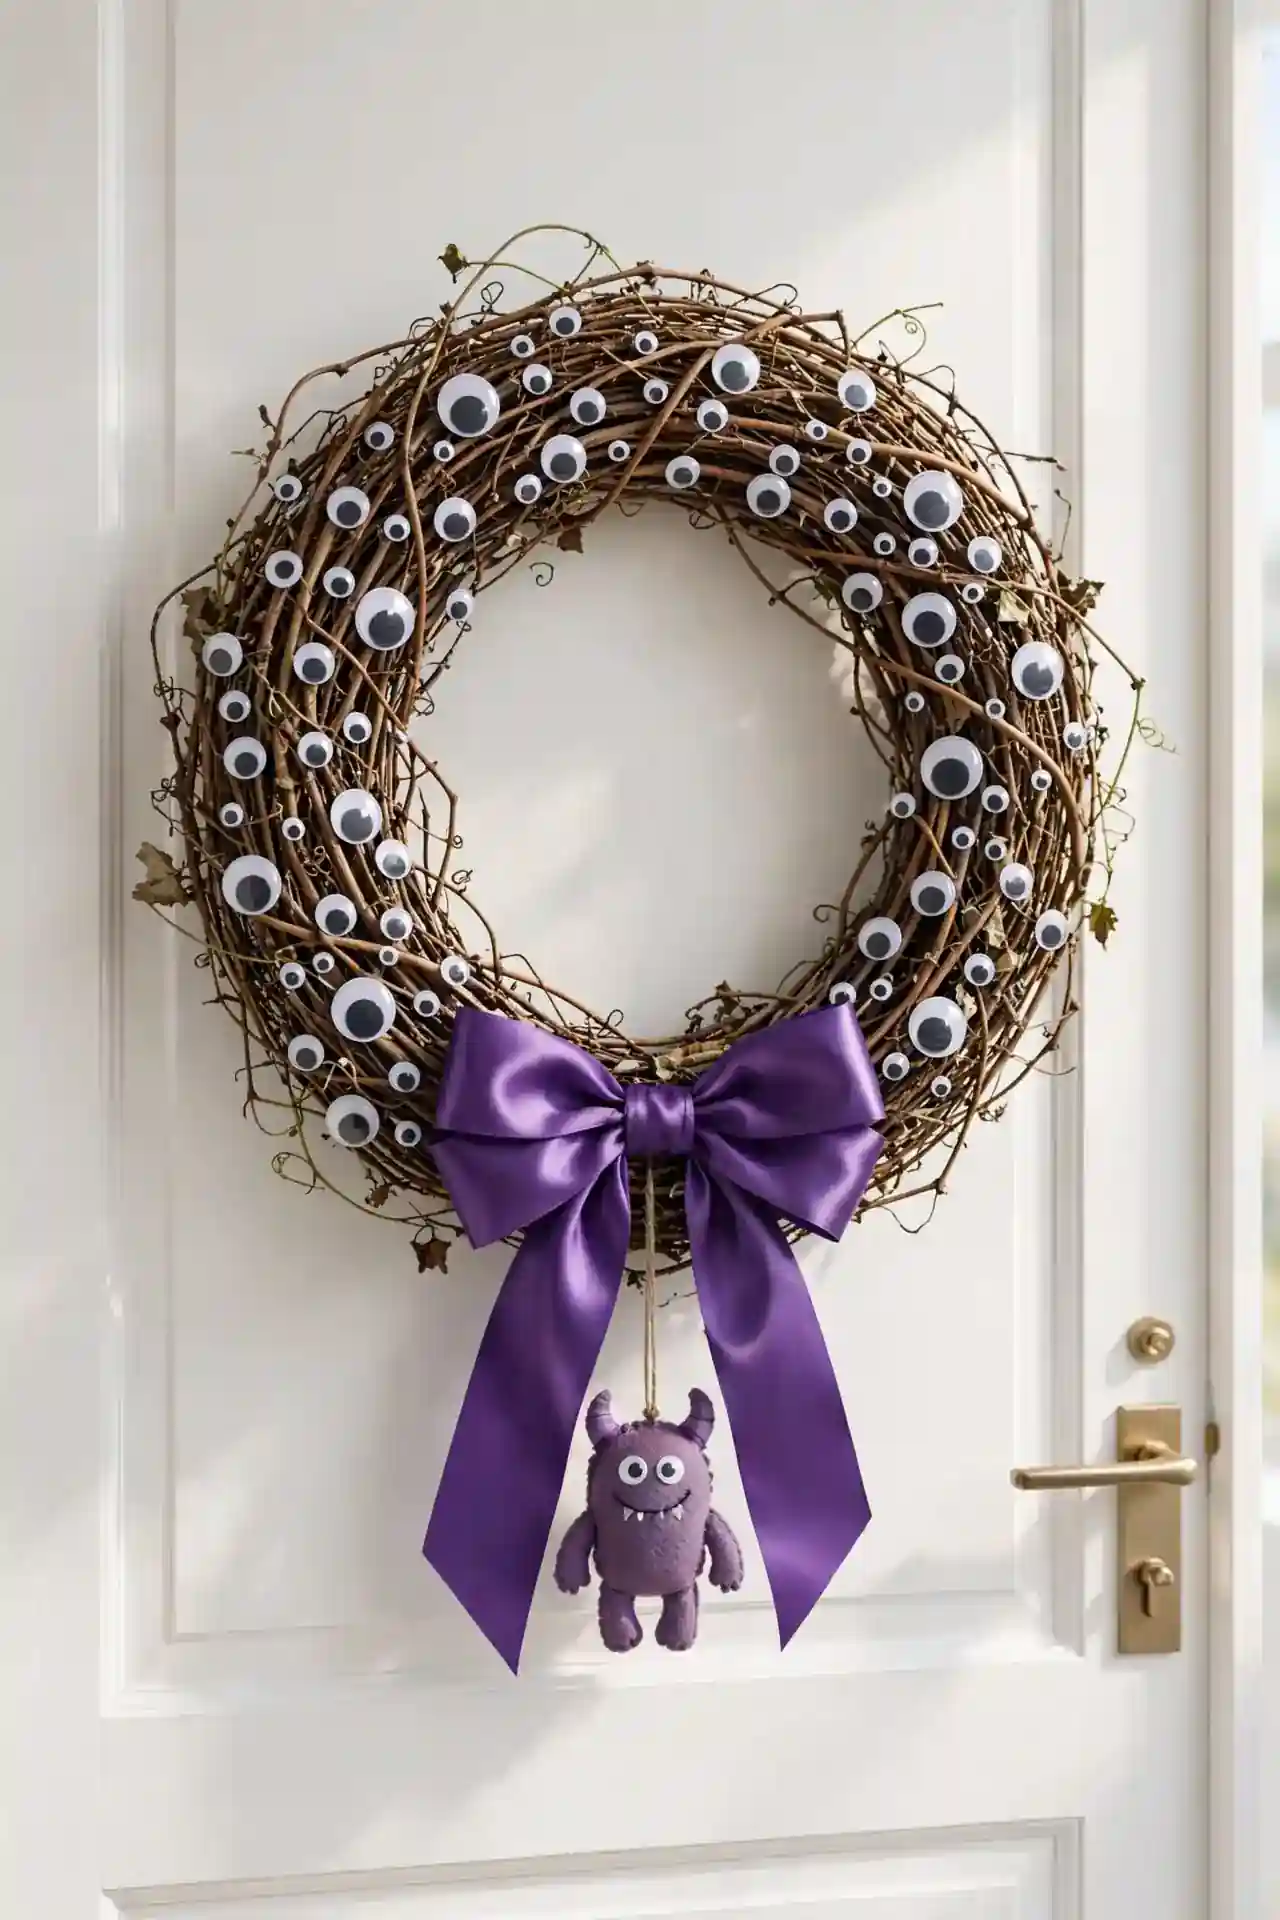
Cost: Low | Time: One afternoon | Skill Level: Beginner | Best For: Front door statement
A grapevine wreath covered in googly eyes greets visitors with silly monster charm. Hot glue large and small googly eyes all over the wreath, mixing sizes for a chaotic cute look. Add a purple bow at the top for extra personality. I’ve noticed this wreath makes delivery drivers smile, which tells you it works. It hangs with a simple hook, survives the whole season outdoors, and the eyes never fade. Make one for your door in an afternoon and a mini version for a bedroom door too. They store easily.
Floating Candle Pathway
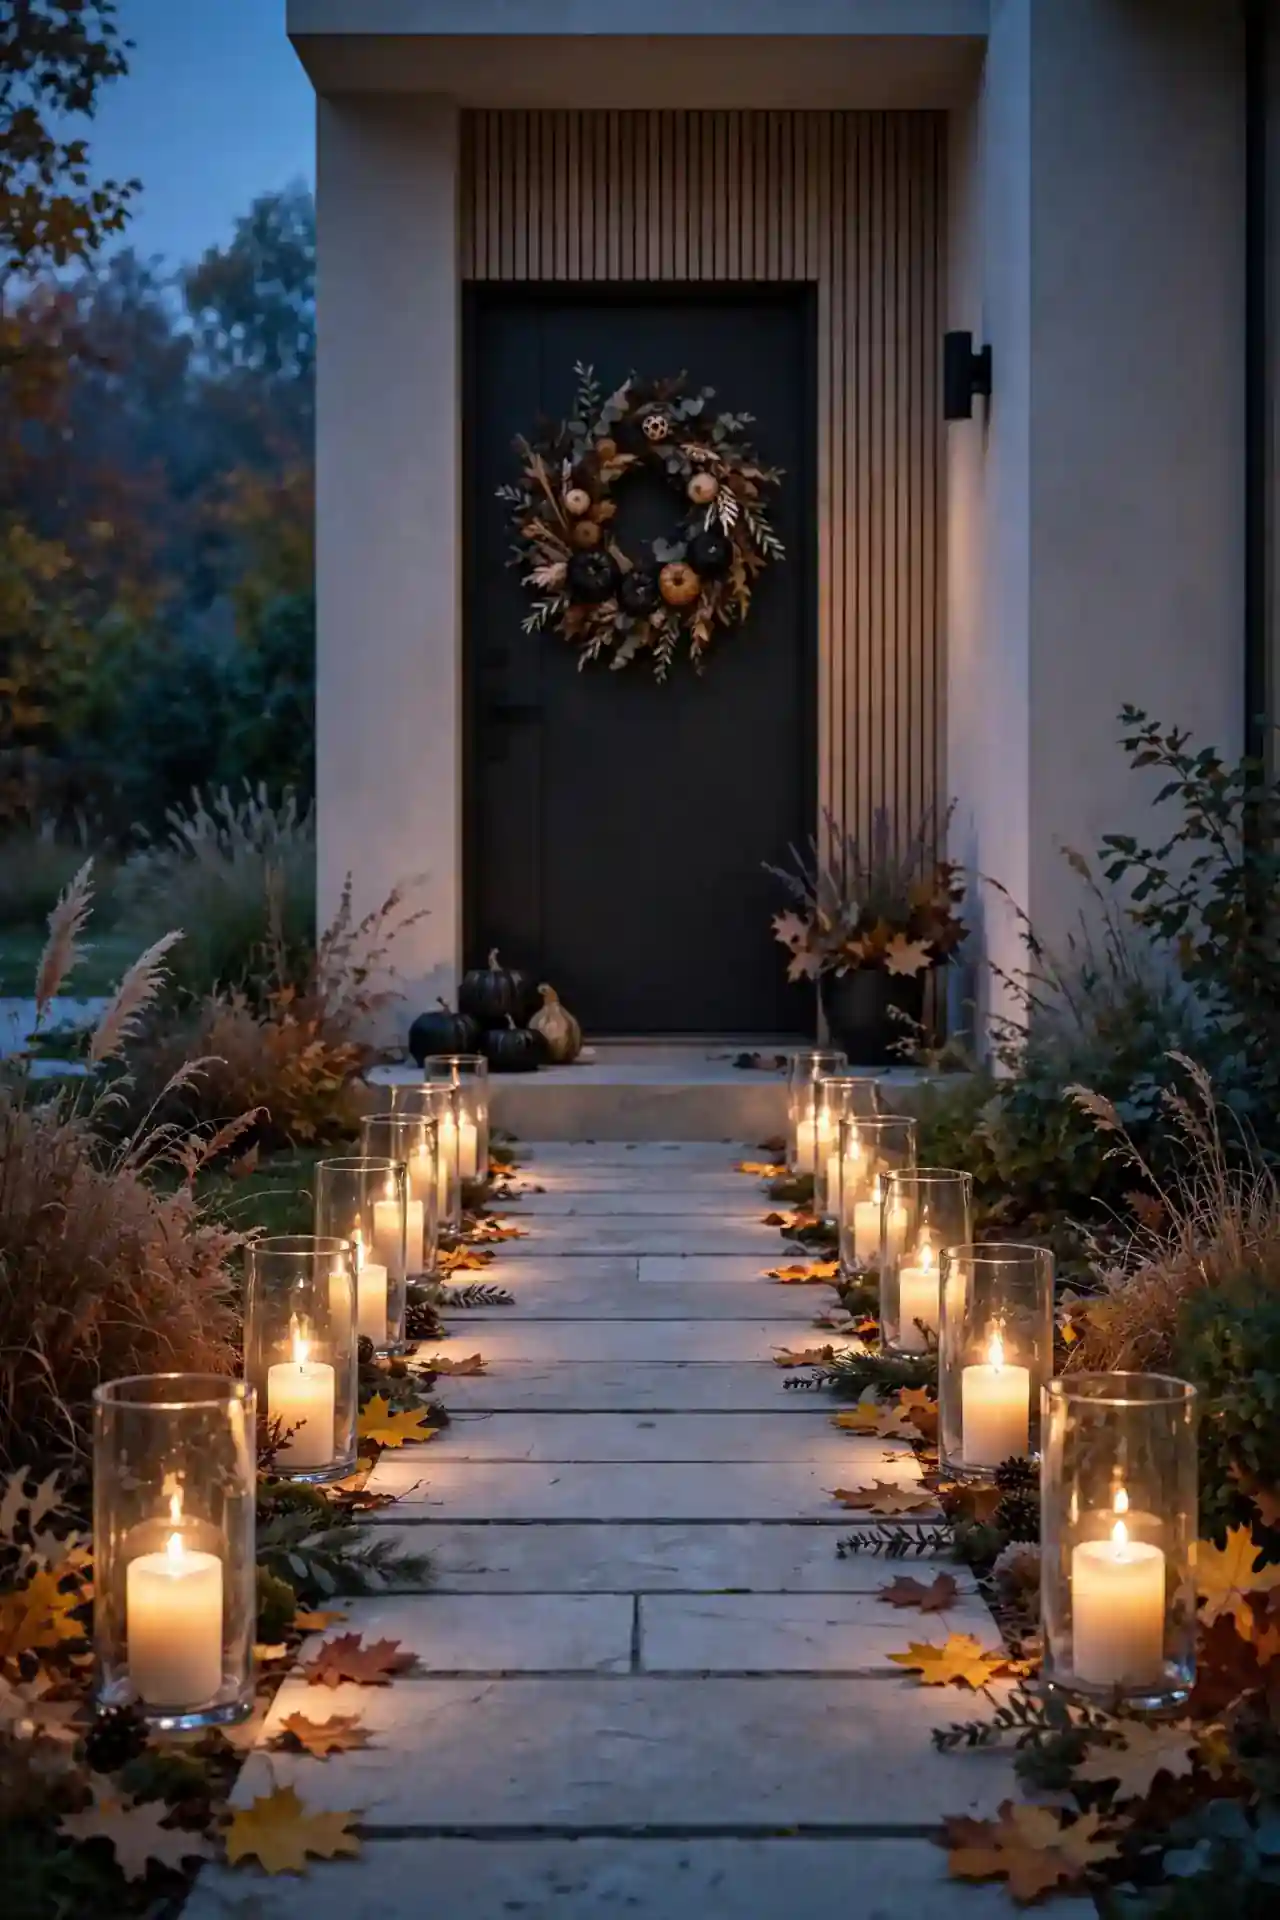
Battery candles in glass hurricanes line your walkway with flickering light that guides guests safely to your door. No flames mean no worry about costumes brushing past or autumn leaves blowing through. Space them evenly on both sides of the path, mixing tall and short hurricanes for a professional landscape look.
Turn them on at dusk with a single remote and enjoy the magic all evening. I’ve noticed warm white flames look most realistic, while orange adds extra Halloween drama. Collect them in a bin after the holiday and they are ready to glow again next year with zero effort.
Conclusion
These 25 easy halloween diy decorations prove that the spookiest season shines brightest when it is handmade. From paper bats to glowing pathways, every project here costs little, takes an afternoon at most, and fills your home with personality no store can match. I’ve seen how small changes like these can completely shift the way a space feels. Save your favorites to Pinterest, gather your supplies this weekend, and enjoy every giggle these crafts bring. Happy haunting, and happy crafting. Pick three ideas to start, and let each finished project inspire the next one on your list.
| Cardboard Cutouts | Chalkboard Cats | |
|---|---|---|
| Cost | Under five dollars | One chalkboard sign |
| Time | One hour | Thirty minutes |
| Best spot | Windows and fences | Entryway table |
| Reusable | Yes, for years | Wipe and redraw |
Black cat silhouettes bring classic Halloween charm without a hint of fright, perfect for homes with small children. Trace a simple arched back cat shape onto black cardstock or cardboard, cut a few in different sizes, and tape them inside windows so their shapes glow against the evening light. I have seen this work well in many cases where families wanted festive but friendly decor. Save your templates in a folder and reuse them every October.
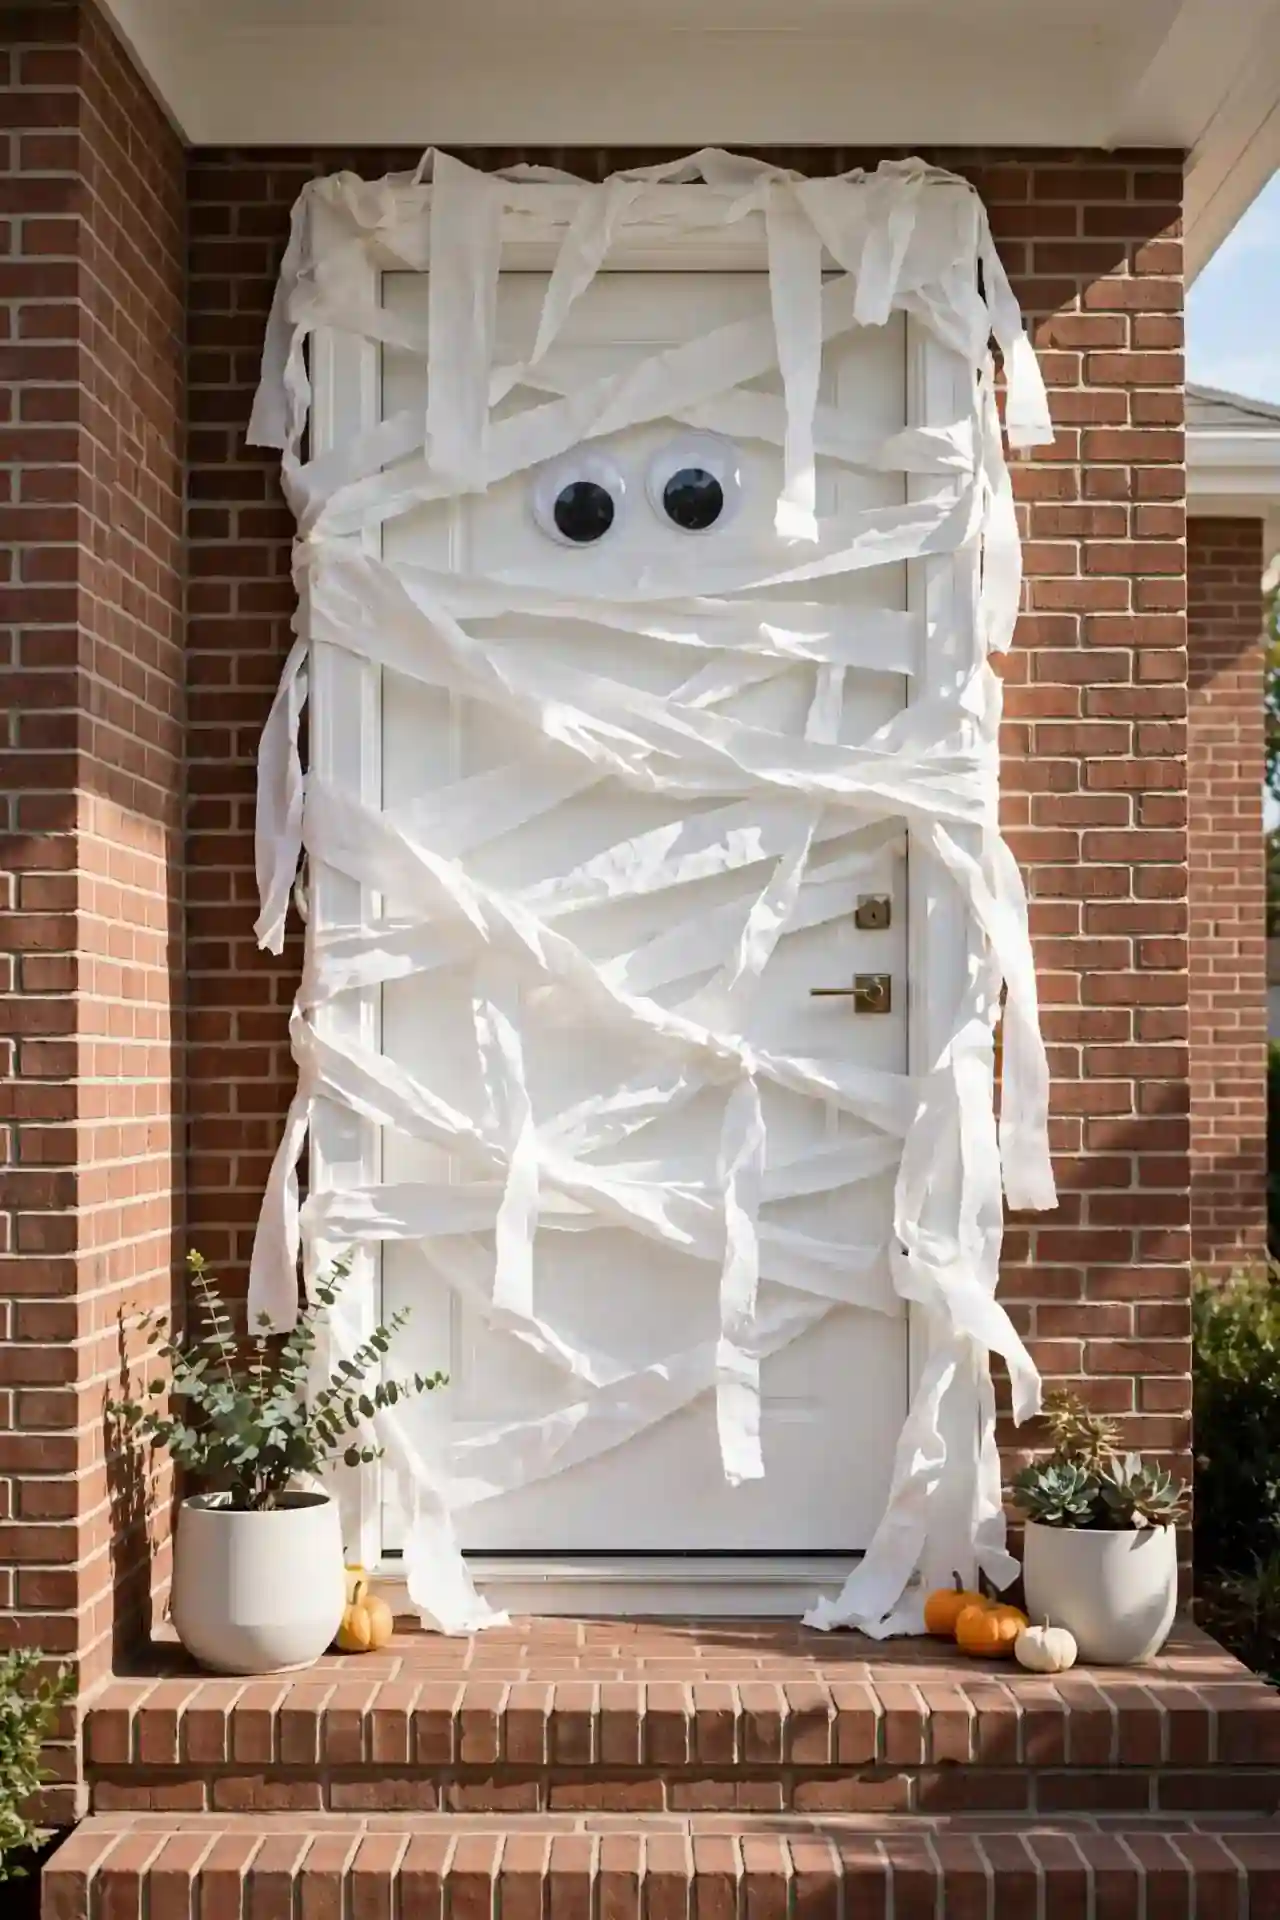
Spooky Front Door Mummy
DO:
- Wrap white crepe paper streamers loosely around the door, leaving gaps for a mummy look.
- Add two large googly eyes near the top so the door has a friendly face.
- Secure streamers with painter’s tape to protect your paint.
DON’T:
- Don’t wrap the handle or lock, guests still need to open the door.
- Don’t use regular tape, it can peel paint on removal.
- Don’t block the peephole, safety comes first on busy trick or treat night.
A mummy door greets trick or treaters with humor instead of horror, and it takes twenty minutes tops. In my experience, this is the decoration neighbors photograph most. Take it down the morning after so the streamers never get soggy in November rain.
Glowing Eyeball Bushes
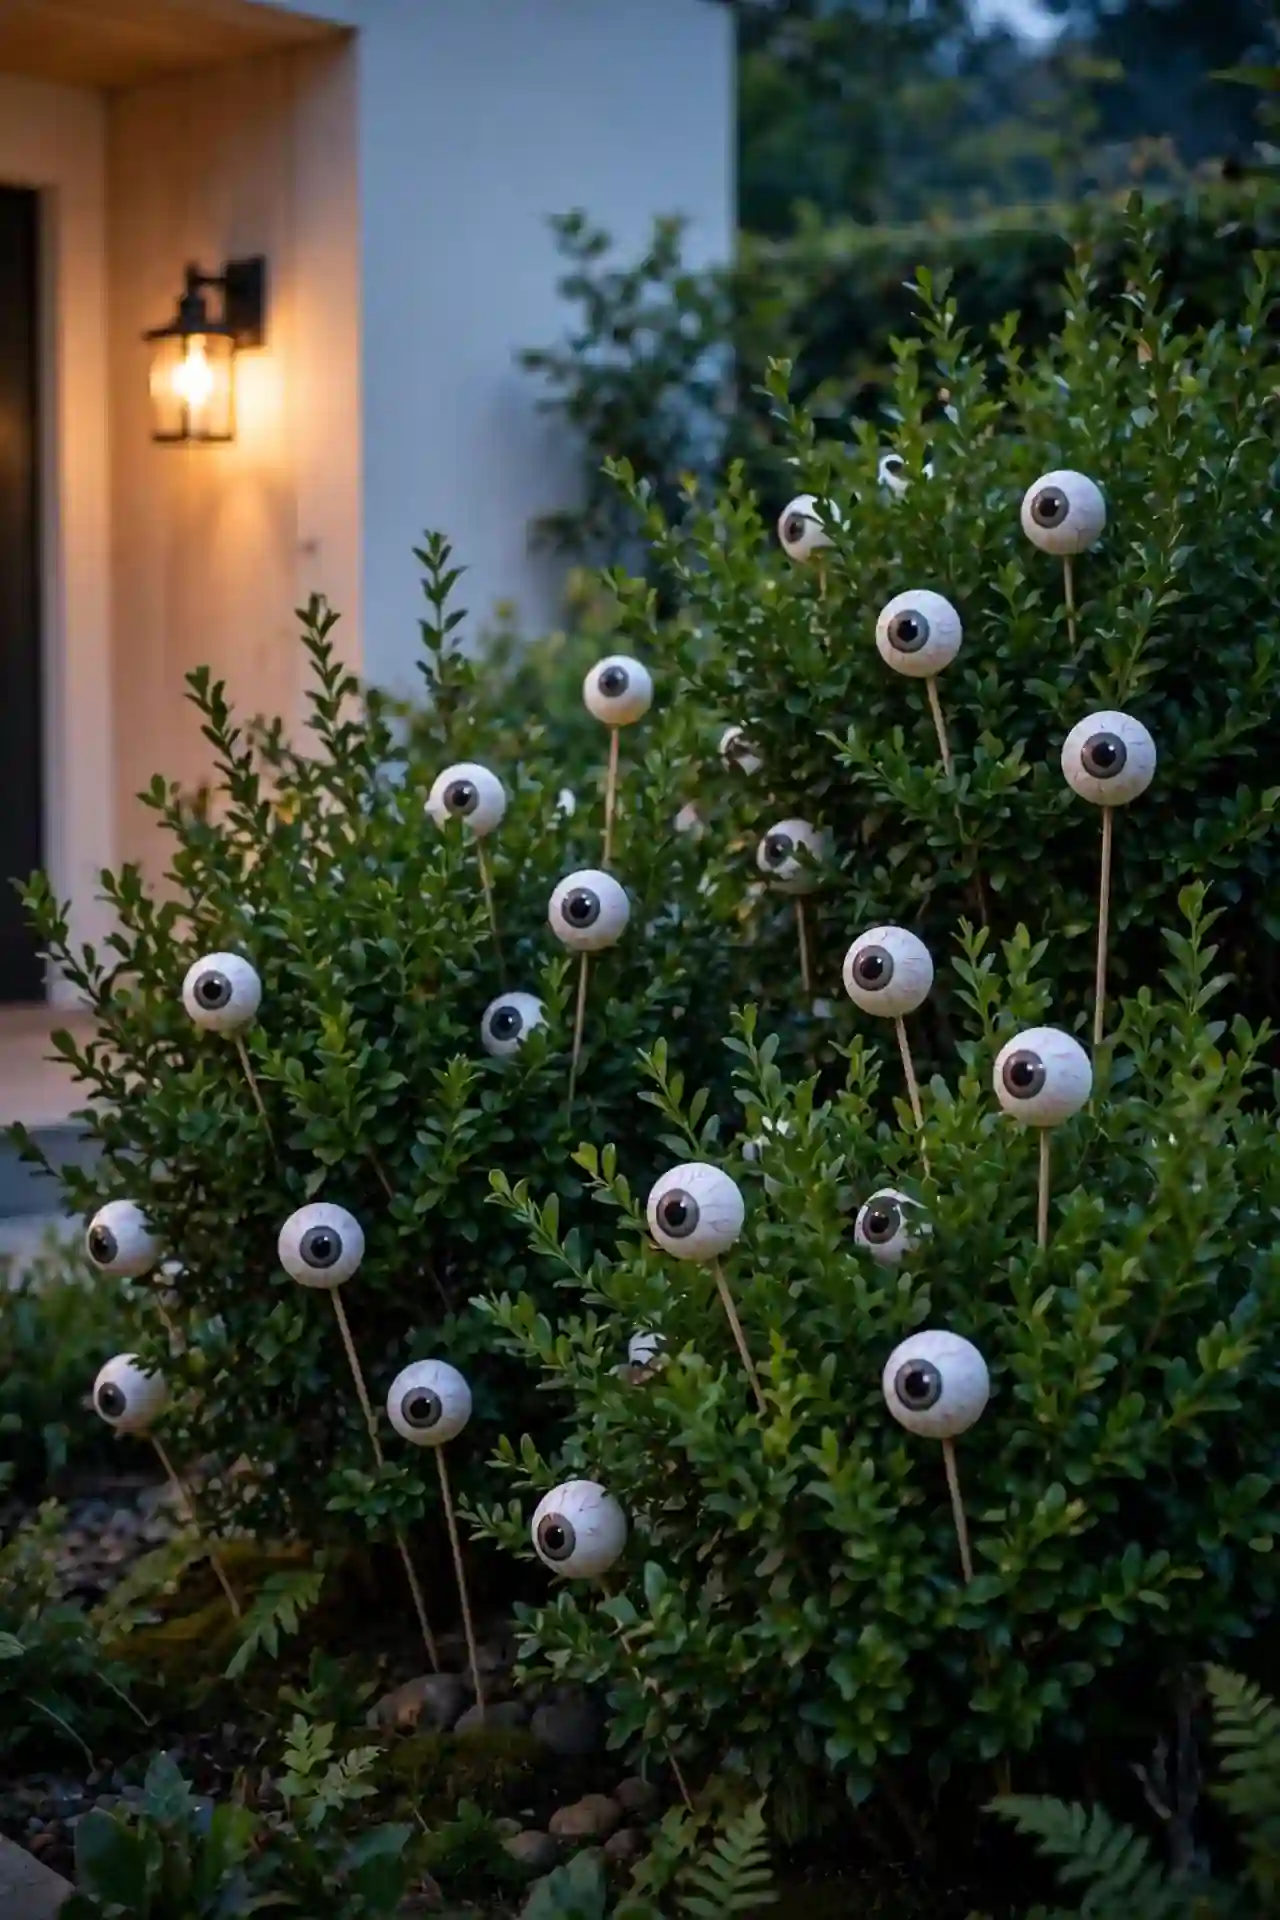
Cost: Low | Time: One hour | Skill Level: Beginner | Best For: Front yard bushes
Ping pong balls turn ordinary bushes into watchful creatures after dark, and the effect delights kids without scaring them. Paint large pupils on white ping pong balls with a black marker, push each ball onto a thin garden stake, and nestle the stakes deep among your shrubs so only the eyes peek out. When porch lights catch them, the whole bush seems alive and watching the sidewalk. That’s why many experts recommend this trick for maximum curb appeal on a minimum budget. Pull the stakes after Halloween and reuse the eyeballs for party games.
Painted Mini Pumpkins
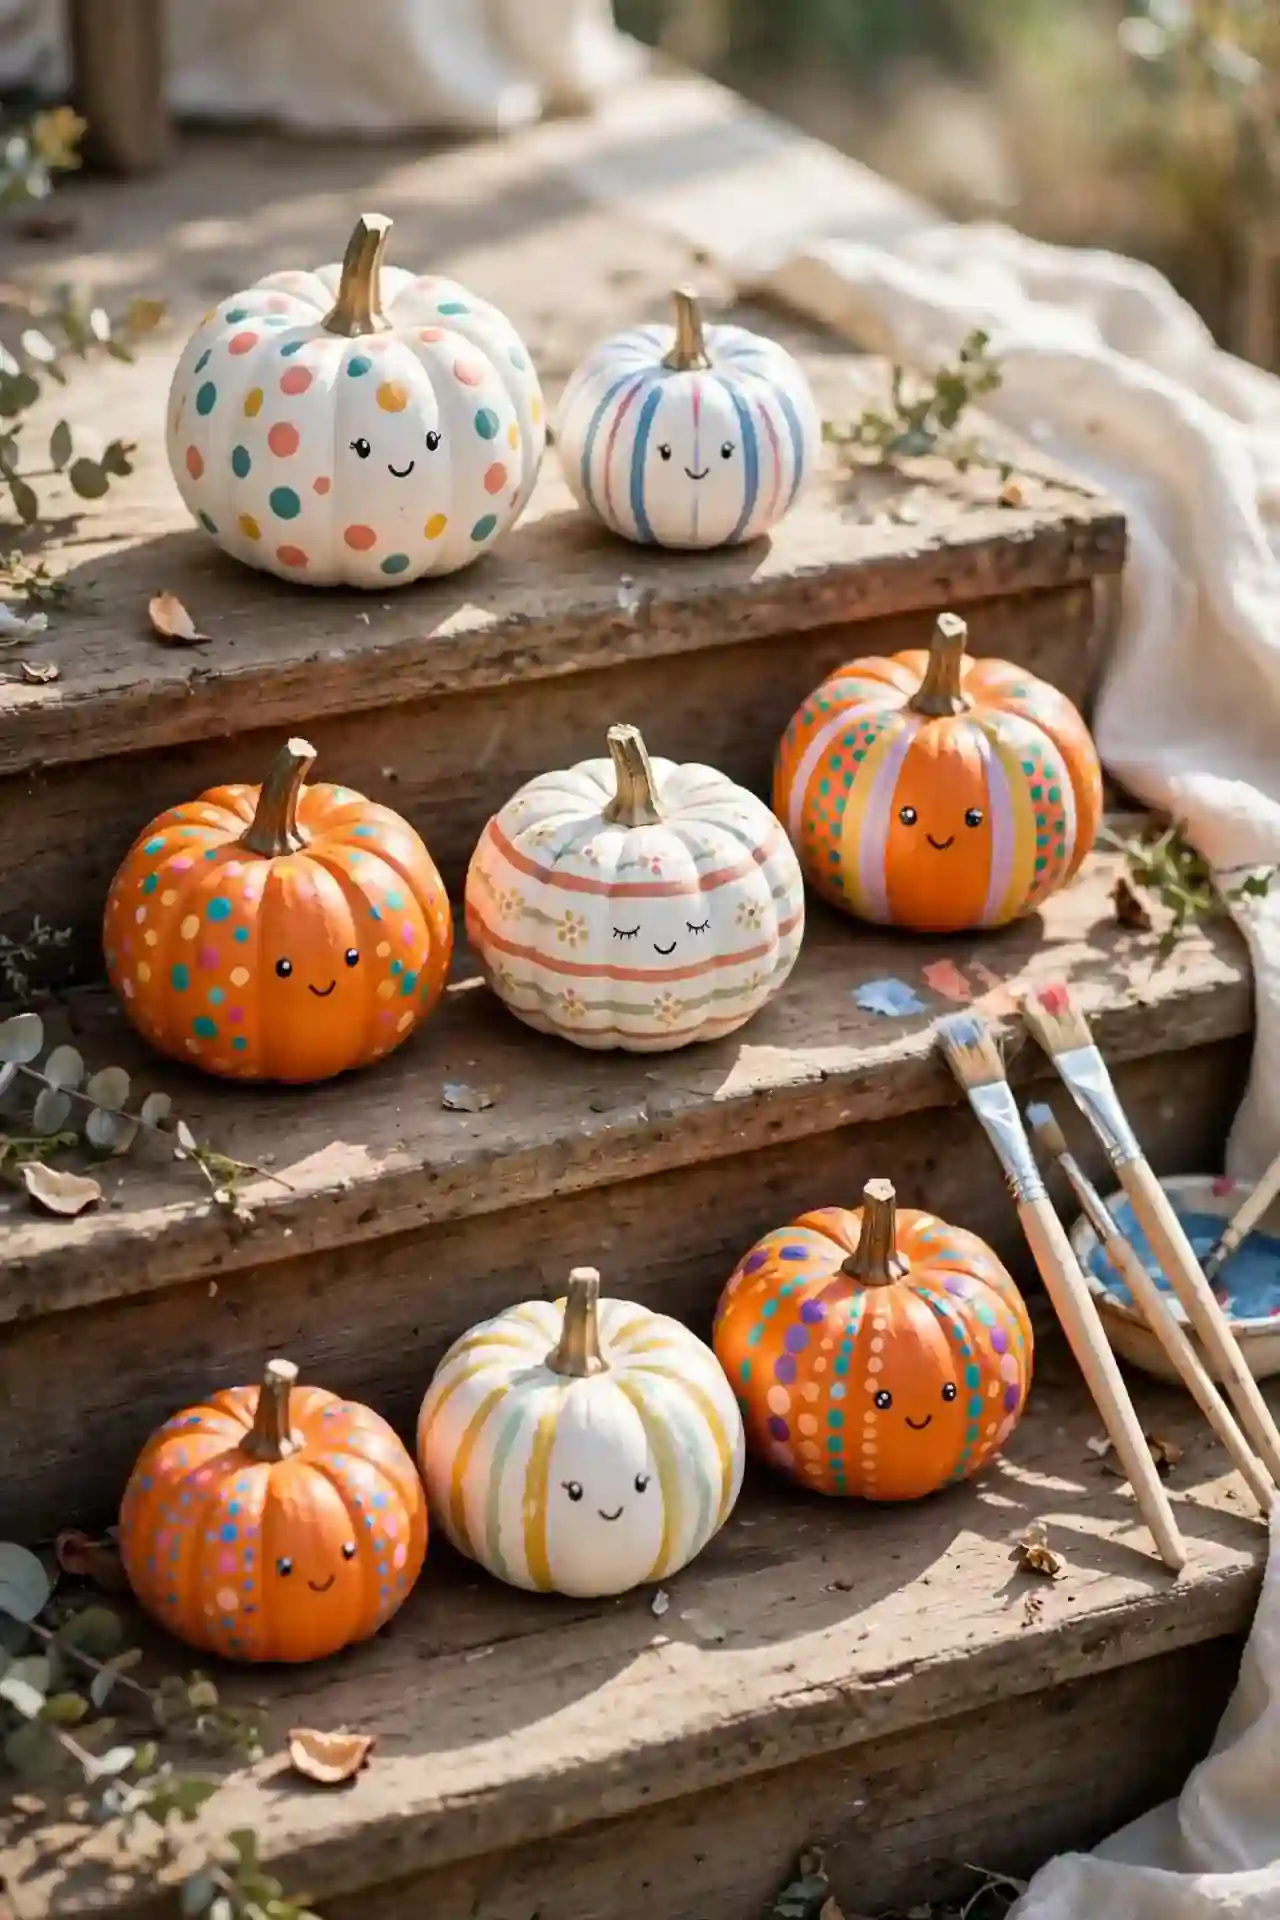
Mini pumpkins are nature’s perfect canvas, and painting them beats carving in every way. No sharp tools, no slimy scooping, and the results last for weeks instead of days. Set out acrylic paints, brushes, and a stack of tiny pumpkins, then let everyone decorate their own. Dots, stripes, faces, and messages all look adorable at this scale.
I’ve noticed white pumpkins show paint colors most vividly, while orange ones glow with classic charm. Seal finished pumpkins with a clear matte spray so the paint survives porch weather. Group them in odd numbers on steps or tables for a display that looks professionally styled.
Witch Hat Table Toppers
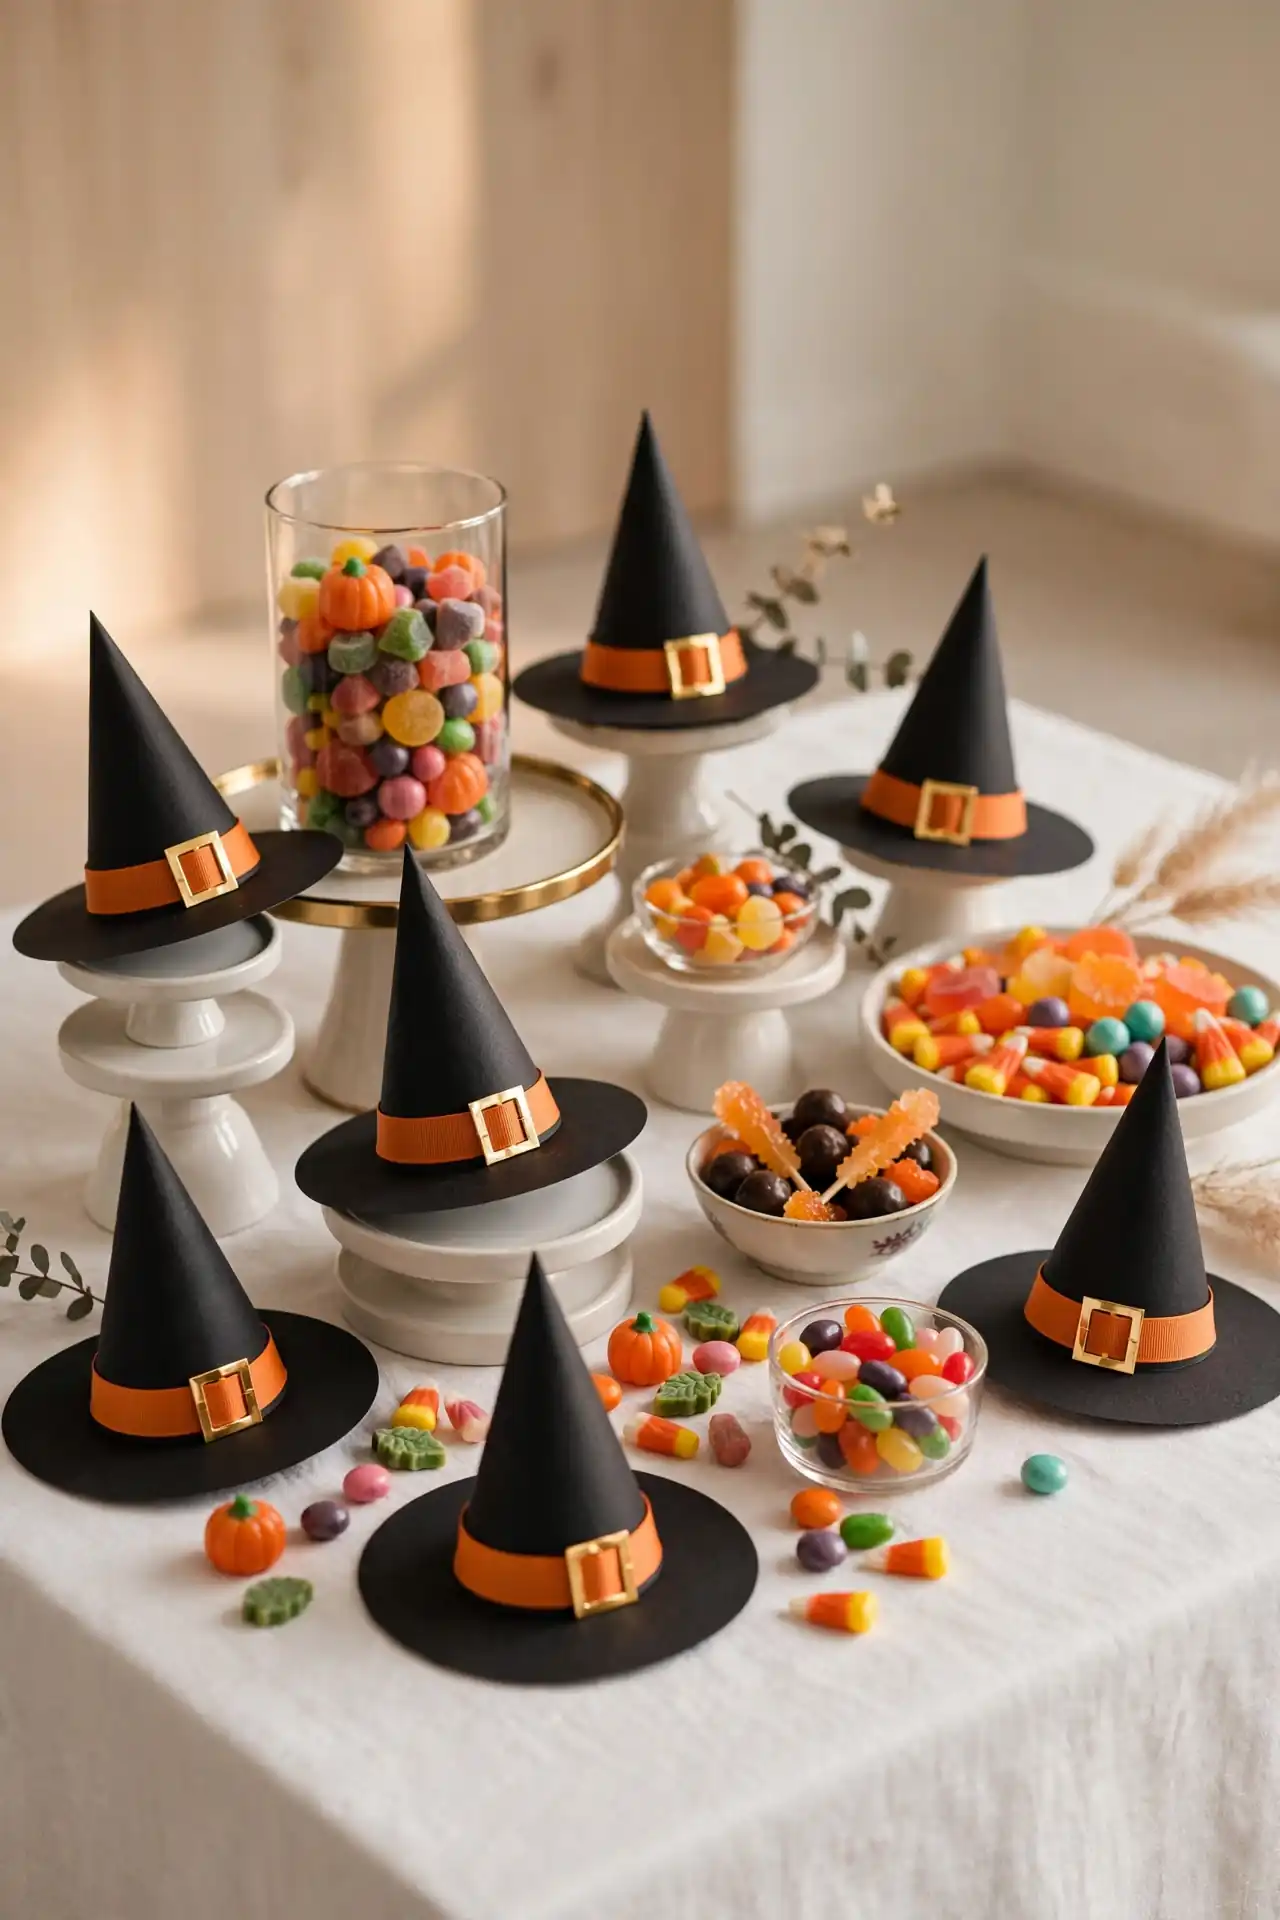
- Roll black cardstock into simple cones and glue the seam, then cut a wide brim circle for each hat.
- Add a ribbon band in orange, purple, or green, and top with a small buckle cut from gold paper.
- Fill the cones with candy or small succulents for a topper that doubles as a party favor.
- Scatter a few across the dessert table at different heights for a playful witchy skyline.
These little hats cost almost nothing but steal the show on any Halloween table. I have seen this work well in many cases where hosts wanted centerpieces kids could take home. Make a dozen in an afternoon while watching a favorite spooky movie, and watch them disappear by night’s end.
Candy Corn Vase Filler
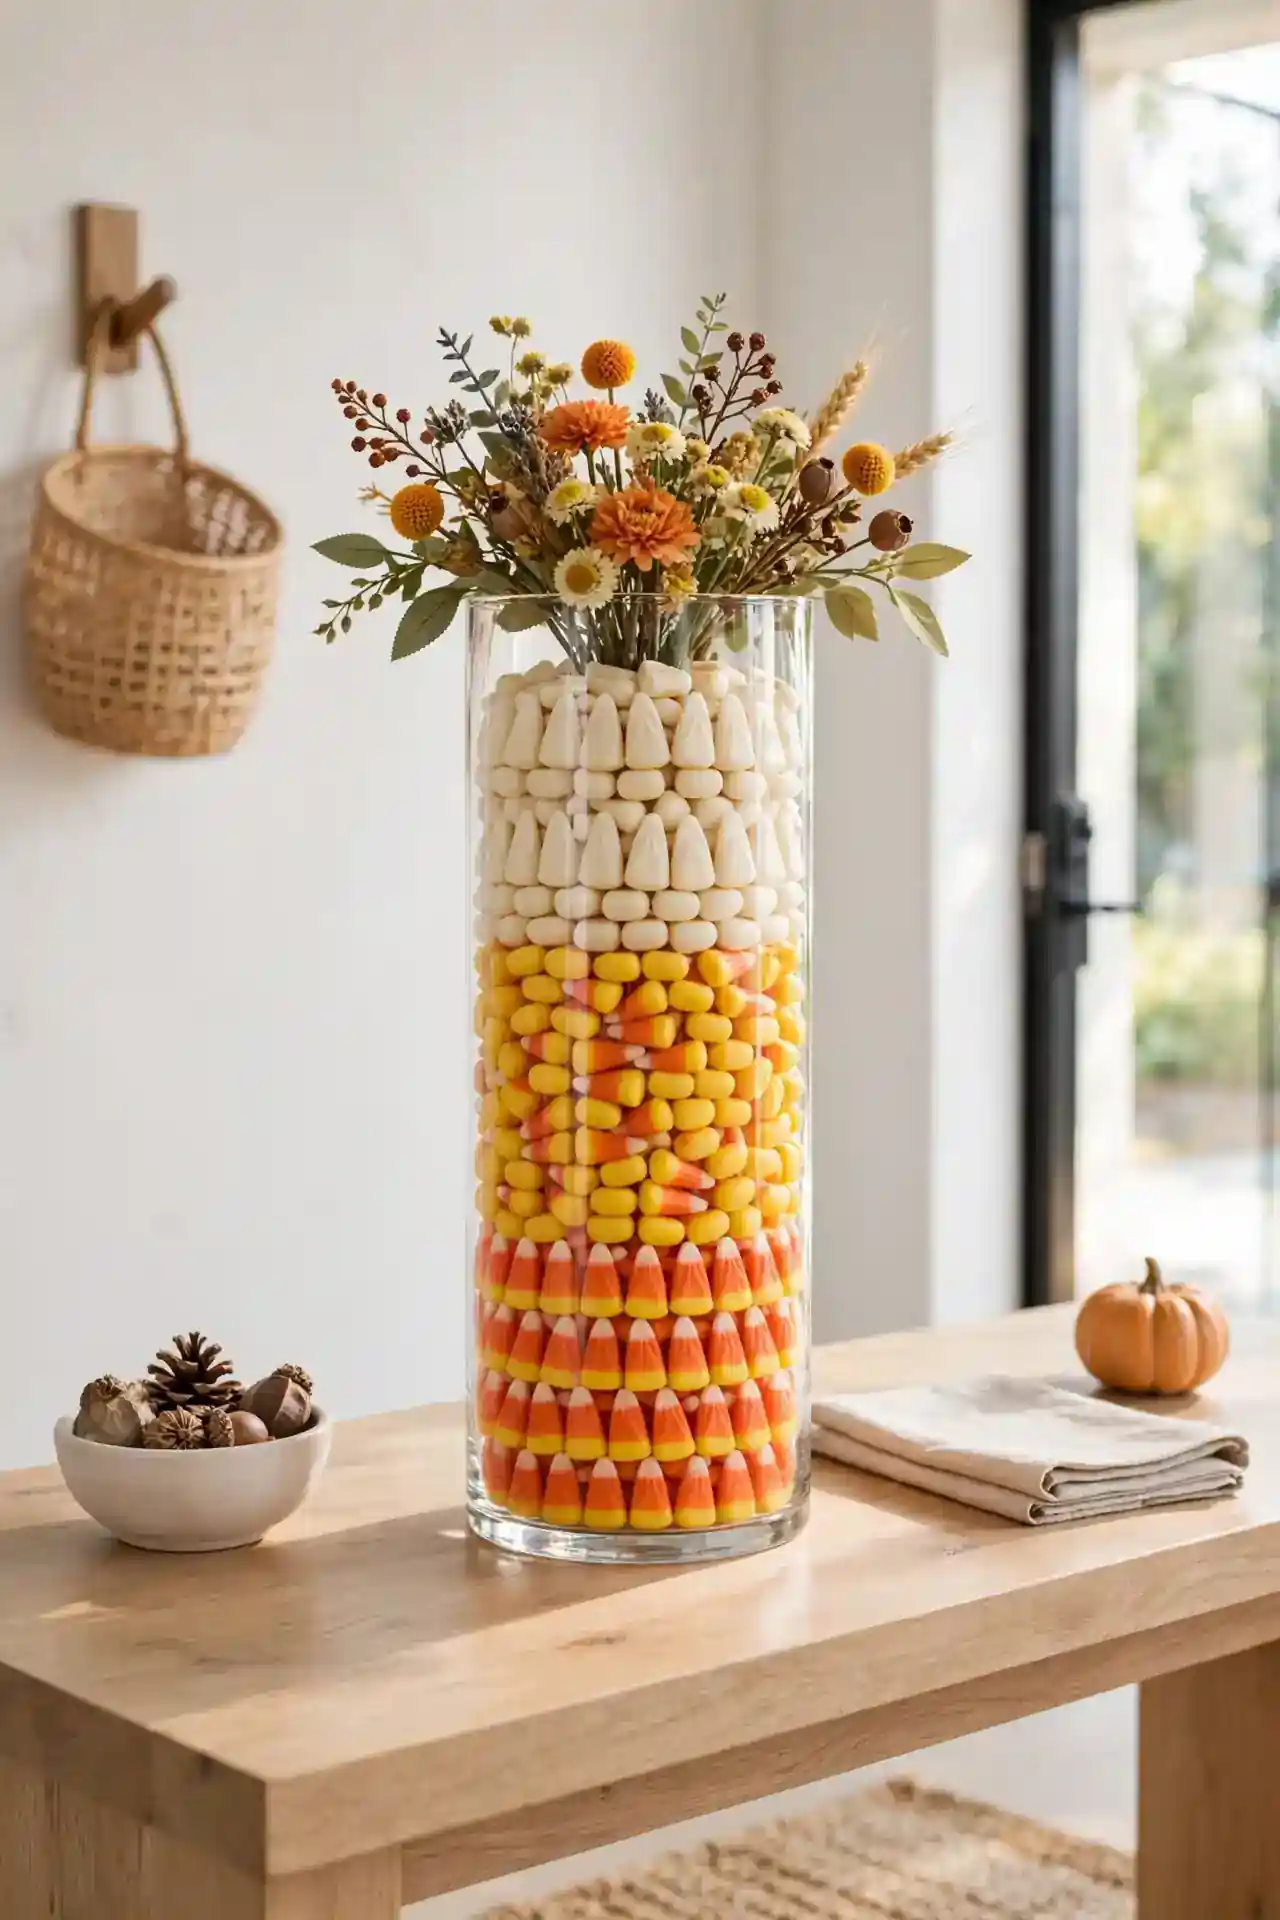
Quick Tip: Layer candy corn in a clear glass vase with the points facing outward for a perfect striped effect. Pour each color slowly and tap the vase gently so the layers settle evenly without mixing.
This five minute filler looks like a giant candy corn and costs less than a coffee. Use a tall cylinder vase on your entryway table or as a dining centerpiece, and top with a small candle or fall flowers. I’ve noticed guests always comment on this simple trick, and it works with any tri color candy you have on hand. When the season ends, the candy becomes movie night snacks, so nothing goes to waste.
Cobweb Corner Drape
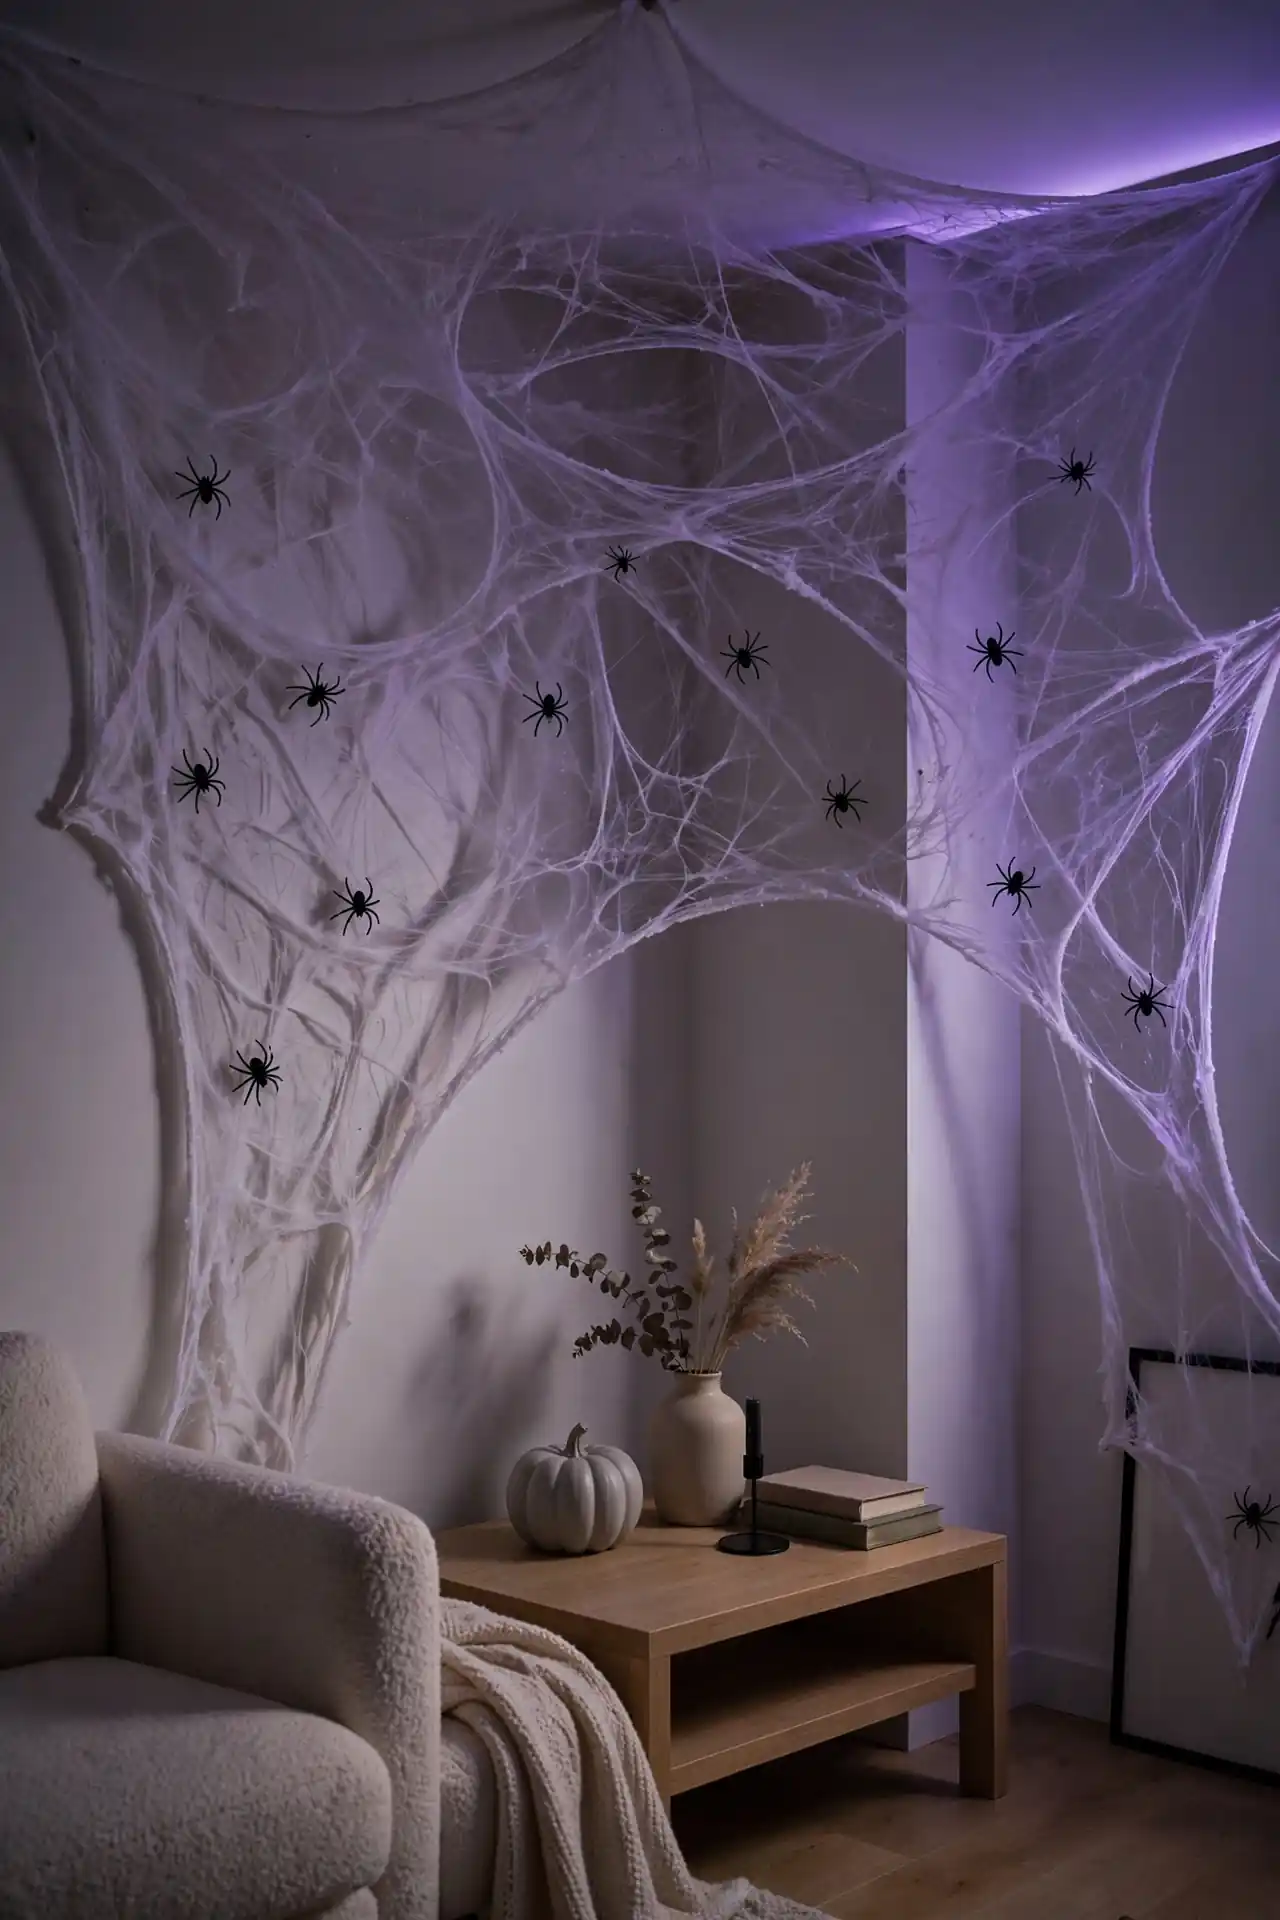
BEFORE: Empty room corners feel forgotten in October, collecting dust while the rest of the house gets all the festive attention.
AFTER: Stretchy cobweb fabric draped across the corner, dotted with plastic spiders, turns dead space into the spookiest spot in the room.
Stretch a bag of webbing from the ceiling to both walls, pulling thin spots for a natural look. If you are planning costumes too, these funny halloween costumes for families complete the spooky scene. I’ve noticed one bag covers two full corners, so this is the cheapest big impact decor you can buy. Add a black light nearby and the whole corner glows eerily after dark.
Floating Witch Hats
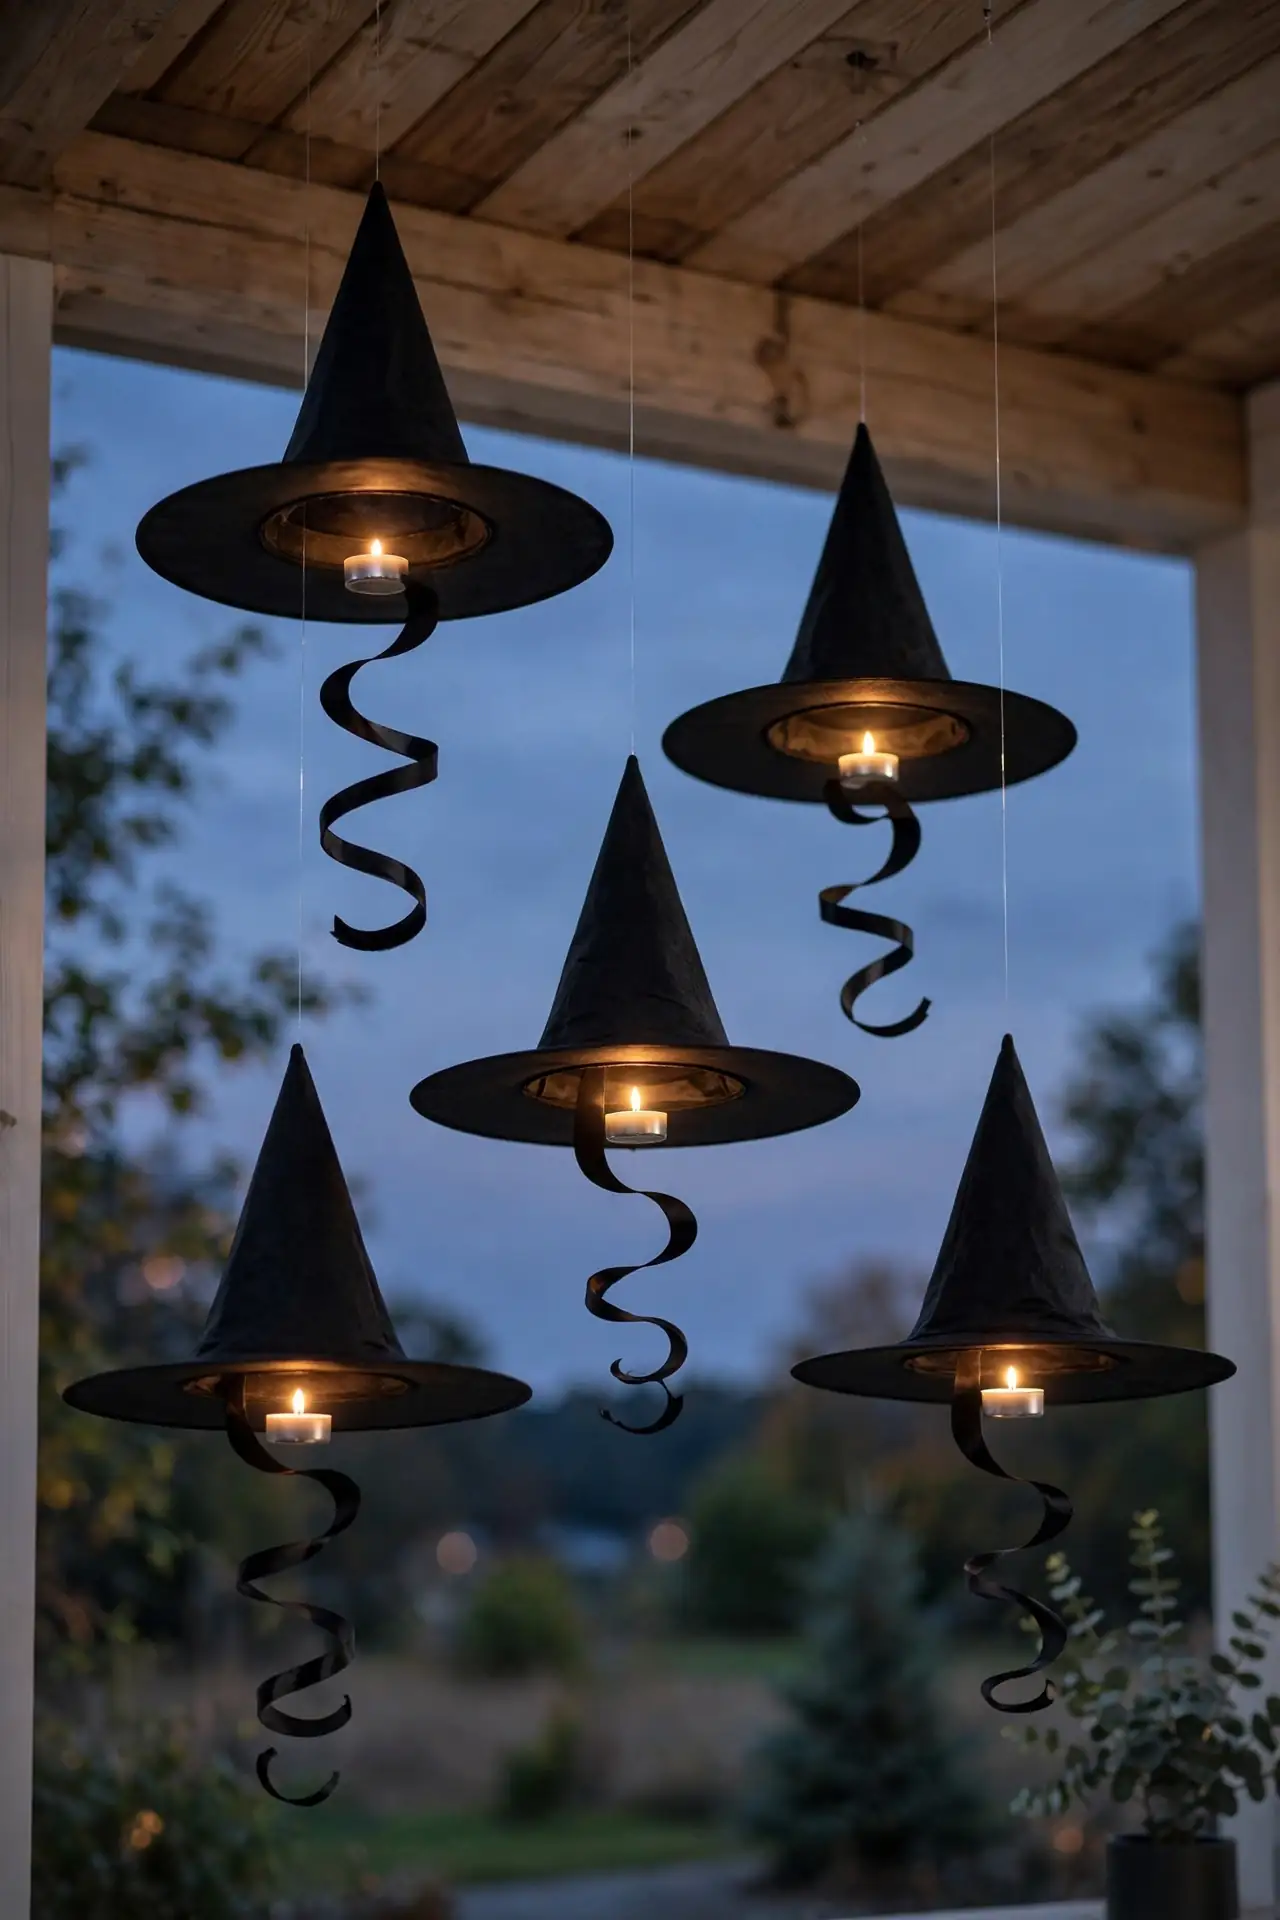
- Tie clear fishing line to the tip of lightweight witch hats from the party store.
- Hang them at different heights from your porch ceiling or a tree branch.
- Tuck a battery tea light inside each hat for a magical floating glow.
- Add curling ribbon streamers so they twirl gently in the evening breeze.
Guests will swear these hats hover by magic, and the illusion takes minutes to create. In my experience, hanging them along a walkway guides trick or treaters to your door beautifully. Use warm white lights for an elegant look or green for full witchy drama. They store flat and last for years.
Tombstone Walkway Signs
| Cardboard Tombstones | Foam Board Markers | |
|---|---|---|
| Cost | Free from boxes | A few dollars |
| Time | One afternoon | Two hours |
| Weatherproof | Bring in rain | Sealed with spray |
| Reusable | One season | Many years |
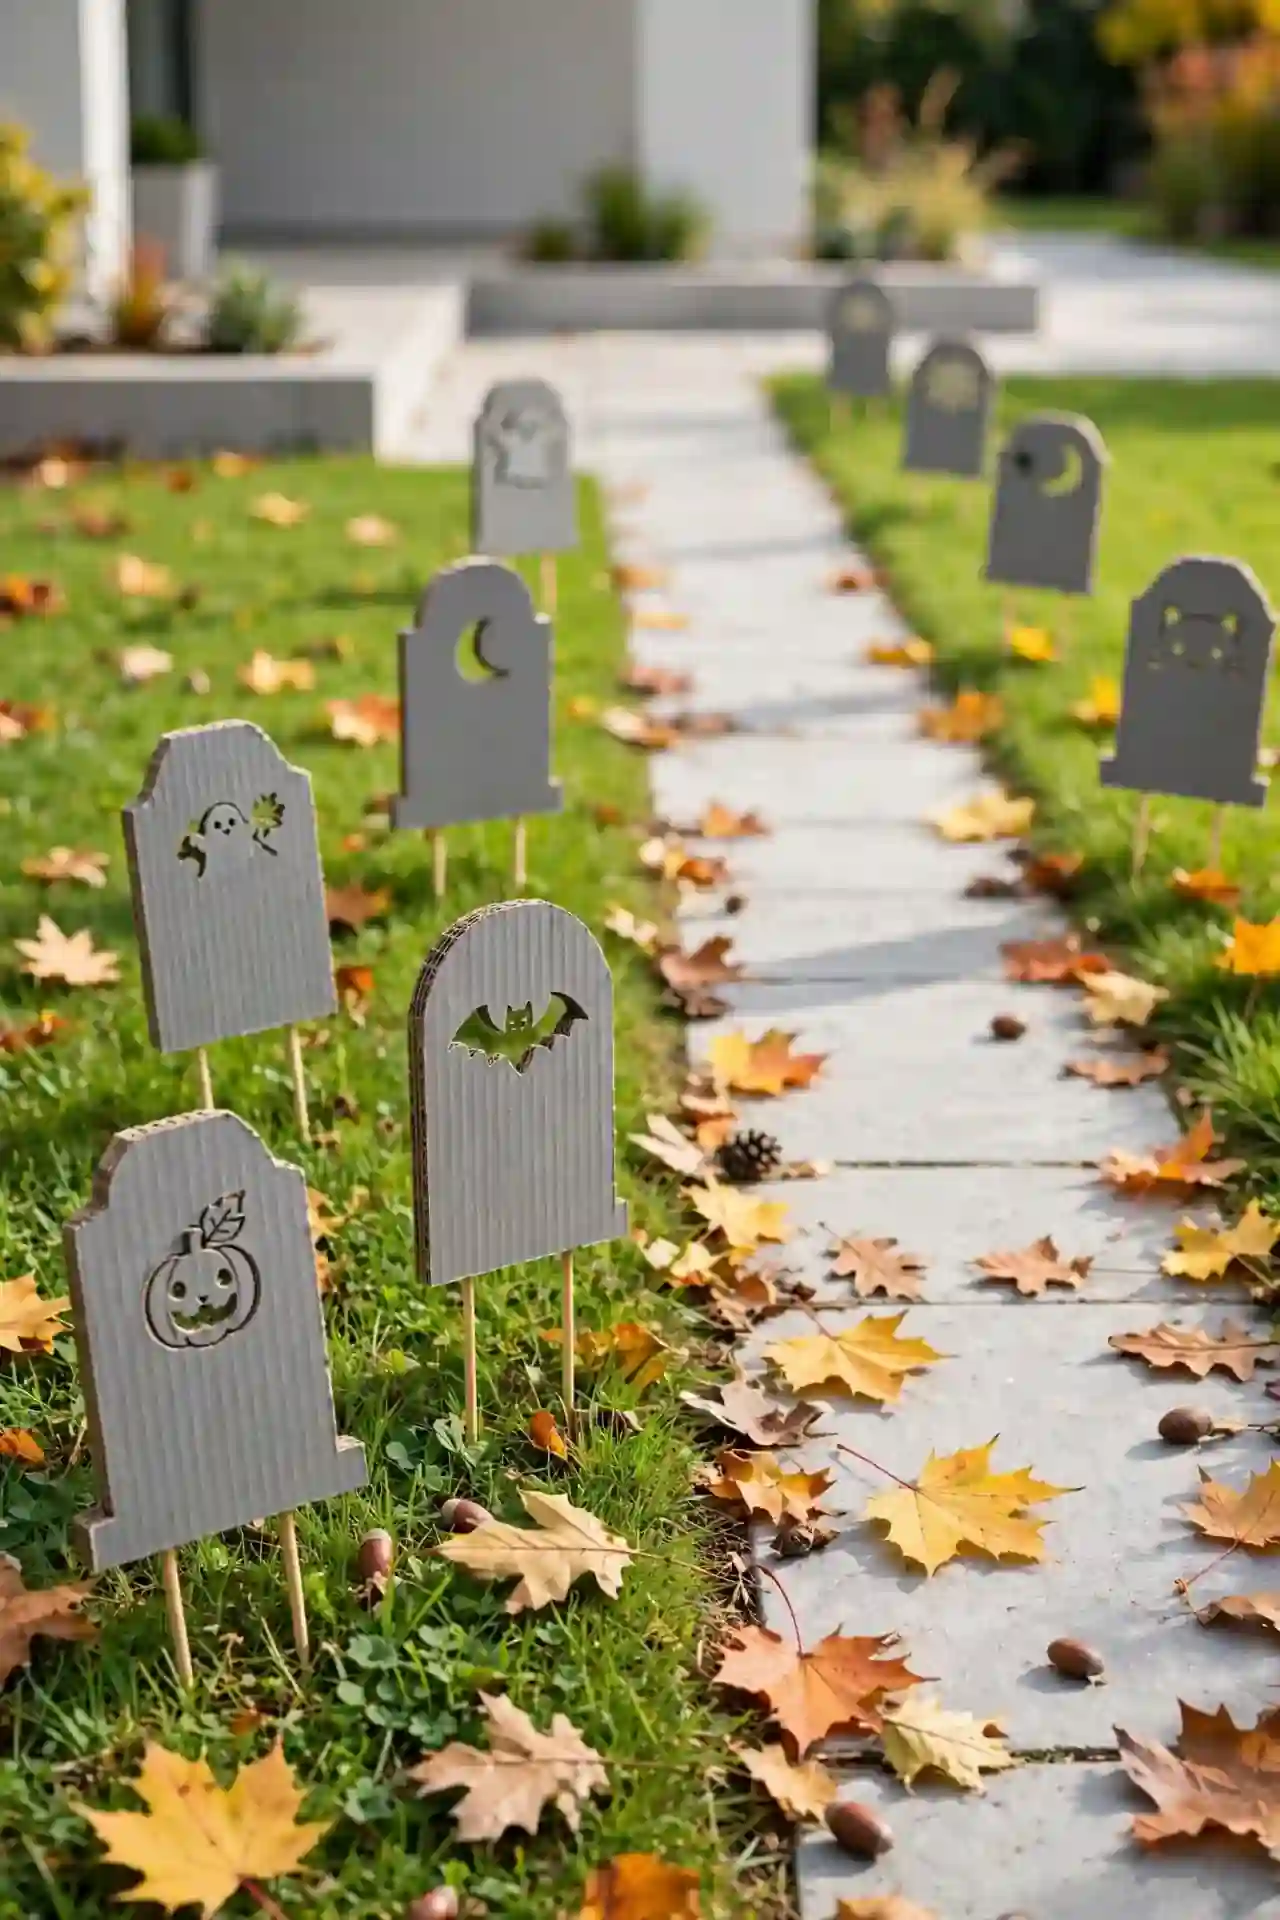
Playful tombstones line your walkway with humor, not horror, when you write silly epitaphs like Here Lies My Diet. Cut stone shapes from cardboard or foam board, paint them grey, and add funny names with a black marker. Stake them along the path with wooden skewers. I’ve noticed kids love reading each one on their way to the door, and the whole project costs less than a pumpkin spice latte. Save the funniest ones to reuse every October.
Mummy Wrapped Vases
DO:
- Wrap vases loosely with white gauze, leaving small gaps for a true mummy texture.
- Stick on googly eyes at different heights for a playful monster family.
- Fill with dried wheat or bare branches for an autumn harvest look.
DON’T:
- Don’t wrap too tightly, the gauze tears and looks messy instead of spooky.
- Don’t use real candles inside, the fabric is flammable.
- Don’t skip the eyes, they are what make these vases charming.
These mummy vases take ten minutes each and look adorable grouped on a mantel. In my experience, varying the vase heights creates the cutest little monster family. They work with any flowers you have, though dried stems keep the Halloween mood perfectly.
Spider Web Doormat
Cost: Low | Time: Thirty minutes | Skill Level: Beginner | Best For: Front door welcome
A plain black doormat becomes a spider web masterpiece with nothing but white fabric paint. Lay the mat flat, paint straight lines radiating from the center, then connect them with curved arcs to form the web. Add a plastic spider in one corner for the finishing touch. Use outdoor fabric paint so rain never ruins your work. I’ve noticed this simple upgrade gets more compliments than expensive store bought mats. It welcomes guests with playful spookiness and wipes clean all season. Let the paint cure overnight before putting it back by the door.
Ghost Garland Lights
A plain string of white lights becomes a parade of happy ghosts with a little craft felt. Cut simple ghost shapes from white felt, poke a small hole at the top of each, and slip them over every other bulb. The lights shine through the fabric, giving each ghost a soft, friendly glow that looks magical after dark.
Drape the garland along a mantel, staircase railing, or headboard for instant Halloween warmth. I’ve noticed warm white bulbs look cozier than cool ones for this project. The felt ghosts store flat in an envelope, ready to glow again next year without any fuss.
Potion Bottle Labels
- Design spooky labels on your computer or hand letter them on kraft paper for a vintage apothecary look.
- Use playful names like Eye of Newt, Dragon Tears, or Midnight Mist to spark imagination.
- Age the paper with a light tea stain and singe the edges carefully for an antique effect.
- Stick labels on bottles with double sided tape so they peel off cleanly after Halloween.
Labels turn ordinary bottles into a witch’s pantry in minutes. I have seen this work well in many cases where crafters wanted big impact from items they already owned. Print a whole sheet at once and share extras with friends who love Halloween crafting too.
Haunted Mirror Notes
Quick Tip: Write spooky messages on your bathroom mirror with a dry erase marker for a surprise that appears in the morning steam. Simple phrases like BOO or I See You delight kids and wash off with one wipe.
This zero cost prank takes seconds and never fails to get a laugh. Draw a small ghost or spider web in the corner of the mirror too, so the message feels like part of a bigger haunting. I’ve noticed this works best on mirrors that fog up during hot showers. The reveal timing is perfect, and cleanup takes one swipe of a cloth.
Bat Branch Centerpiece
BEFORE: A bare branch in a vase looks unfinished, like you gave up halfway through decorating for the season.
AFTER: The same branch hung with paper bats and tiny lights becomes a dramatic Halloween tree that anchors your whole table.
Find a sturdy branch on your next walk, spray paint it black or white, and stand it in a heavy vase filled with stones. Clip on paper bats and wrap a short string of fairy lights around the limbs. I’ve noticed this centerpiece sparks more conversation than anything else on the table. It costs nothing and looks like a designer piece.
Pumpkin Stack Topiary
- Choose three pumpkins in descending sizes, real or faux, in matching or mixed colors.
- Thread a sturdy wooden dowel through their centers to hold the stack steady.
- Set the stack in a large urn or planter filled with soil for weight.
- Tuck fall leaves and small gourds around the base to hide the mechanics.
This topiary brings instant height to porches and entryways without any carving. In my experience, faux pumpkins make this a one time investment you will reuse for years. They survive rain, wind, and curious squirrels, and the whole project takes under an hour. Add a bow or a small crow on top for personality.
Skeleton Hand Candy Dish
| Plastic Hand Dish | DIY Poseable Hand | |
|---|---|---|
| Cost | Party store find | Pipe cleaners |
| Time | Zero minutes | One hour |
| Spook factor | Playful | Creepy realistic |
| Reusable | Every year | Every year |
A skeleton hand rising from a candy bowl makes trick or treaters hesitate before grabbing a treat, which is half the fun. Set a plastic skeleton hand in a deep bowl so it looks like it is climbing out, then fill around it with wrapped candy. That’s why many experts recommend placing it at kid height for maximum giggles. It is spooky enough to thrill but friendly enough for toddlers, and it becomes a yearly tradition.
Creepy Crawly Table Runner
DO:
- Lay a black or orange runner down the center of your table as the base.
- Scatter plastic spiders, bugs, and centipedes along its length for creepy texture.
- Weave in a string of tiny orange lights for evening glow.
DON’T:
- Don’t use real looking insects near food, guests may lose their appetite.
- Don’t overload the runner, leave space for plates and dishes.
- Don’t forget to remove the bugs before washing the runner.
This runner turns an ordinary dinner into a Halloween feast in minutes. In my experience, kids love rearranging the bugs, so expect the layout to change all evening. It packs away in seconds and works for every spooky dinner party you host.
Monster Eye Wreath
Cost: Low | Time: One afternoon | Skill Level: Beginner | Best For: Front door statement
A grapevine wreath covered in googly eyes greets visitors with silly monster charm. Hot glue large and small googly eyes all over the wreath, mixing sizes for a chaotic cute look. Add a purple bow at the top for extra personality. I’ve noticed this wreath makes delivery drivers smile, which tells you it works. It hangs with a simple hook, survives the whole season outdoors, and the eyes never fade. Make one for your door in an afternoon and a mini version for a bedroom door too. They store easily.
Floating Candle Pathway
Battery candles in glass hurricanes line your walkway with flickering light that guides guests safely to your door. No flames mean no worry about costumes brushing past or autumn leaves blowing through. Space them evenly on both sides of the path, mixing tall and short hurricanes for a professional landscape look.
Turn them on at dusk with a single remote and enjoy the magic all evening. I’ve noticed warm white flames look most realistic, while orange adds extra Halloween drama. Collect them in a bin after the holiday and they are ready to glow again next year with zero effort.
Conclusion
These 25 easy halloween diy decorations prove that the spookiest season shines brightest when it is handmade. From paper bats to glowing pathways, every project here costs little, takes an afternoon at most, and fills your home with personality no store can match. I’ve seen how small changes like these can completely shift the way a space feels. Save your favorites to Pinterest, gather your supplies this weekend, and enjoy every giggle these crafts bring. Happy haunting, and happy crafting. Pick three ideas to start, and let each finished project inspire the next one on your list.
Store bought Halloween decor drains your wallet fast, but easy halloween diy decorations prove that spooky style costs almost nothing. With paper, paint, mason jars, and a free afternoon, you can fill your home with handmade charm that looks straight out of a boutique. In my experience, guests always ask where you bought these pieces, and the reveal that you made them is the best part.
Below are 25 weekend friendly projects, from floating ghosts to glowing pathways, each with simple steps and budget tips. If you enjoy dressing up your ceilings too, these fabric ceiling ideas pair beautifully with hanging Halloween pieces. Pick your favorites, gather the kids, and let the crafting begin.
Paper Bat Wall Swarm
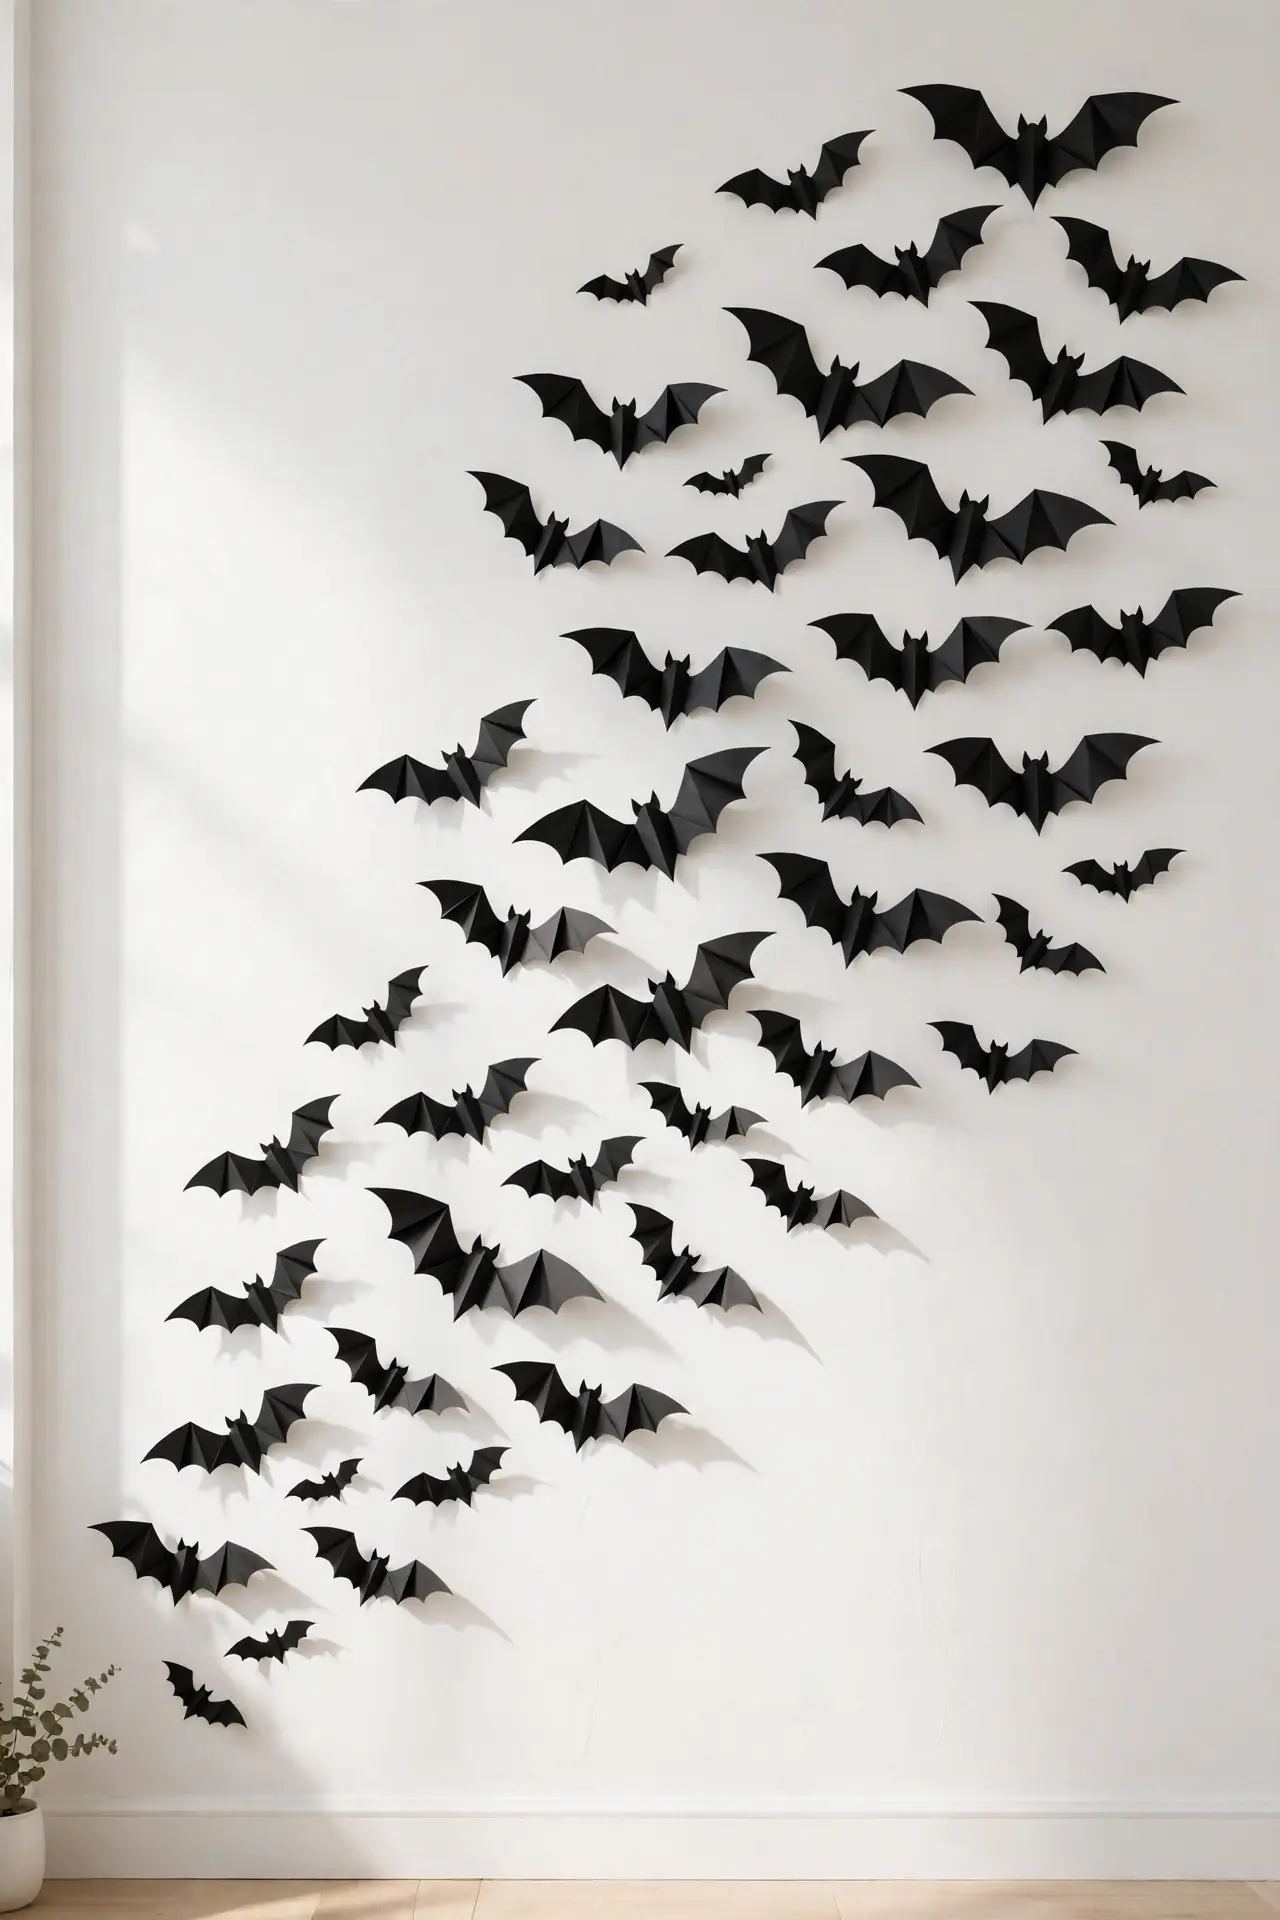
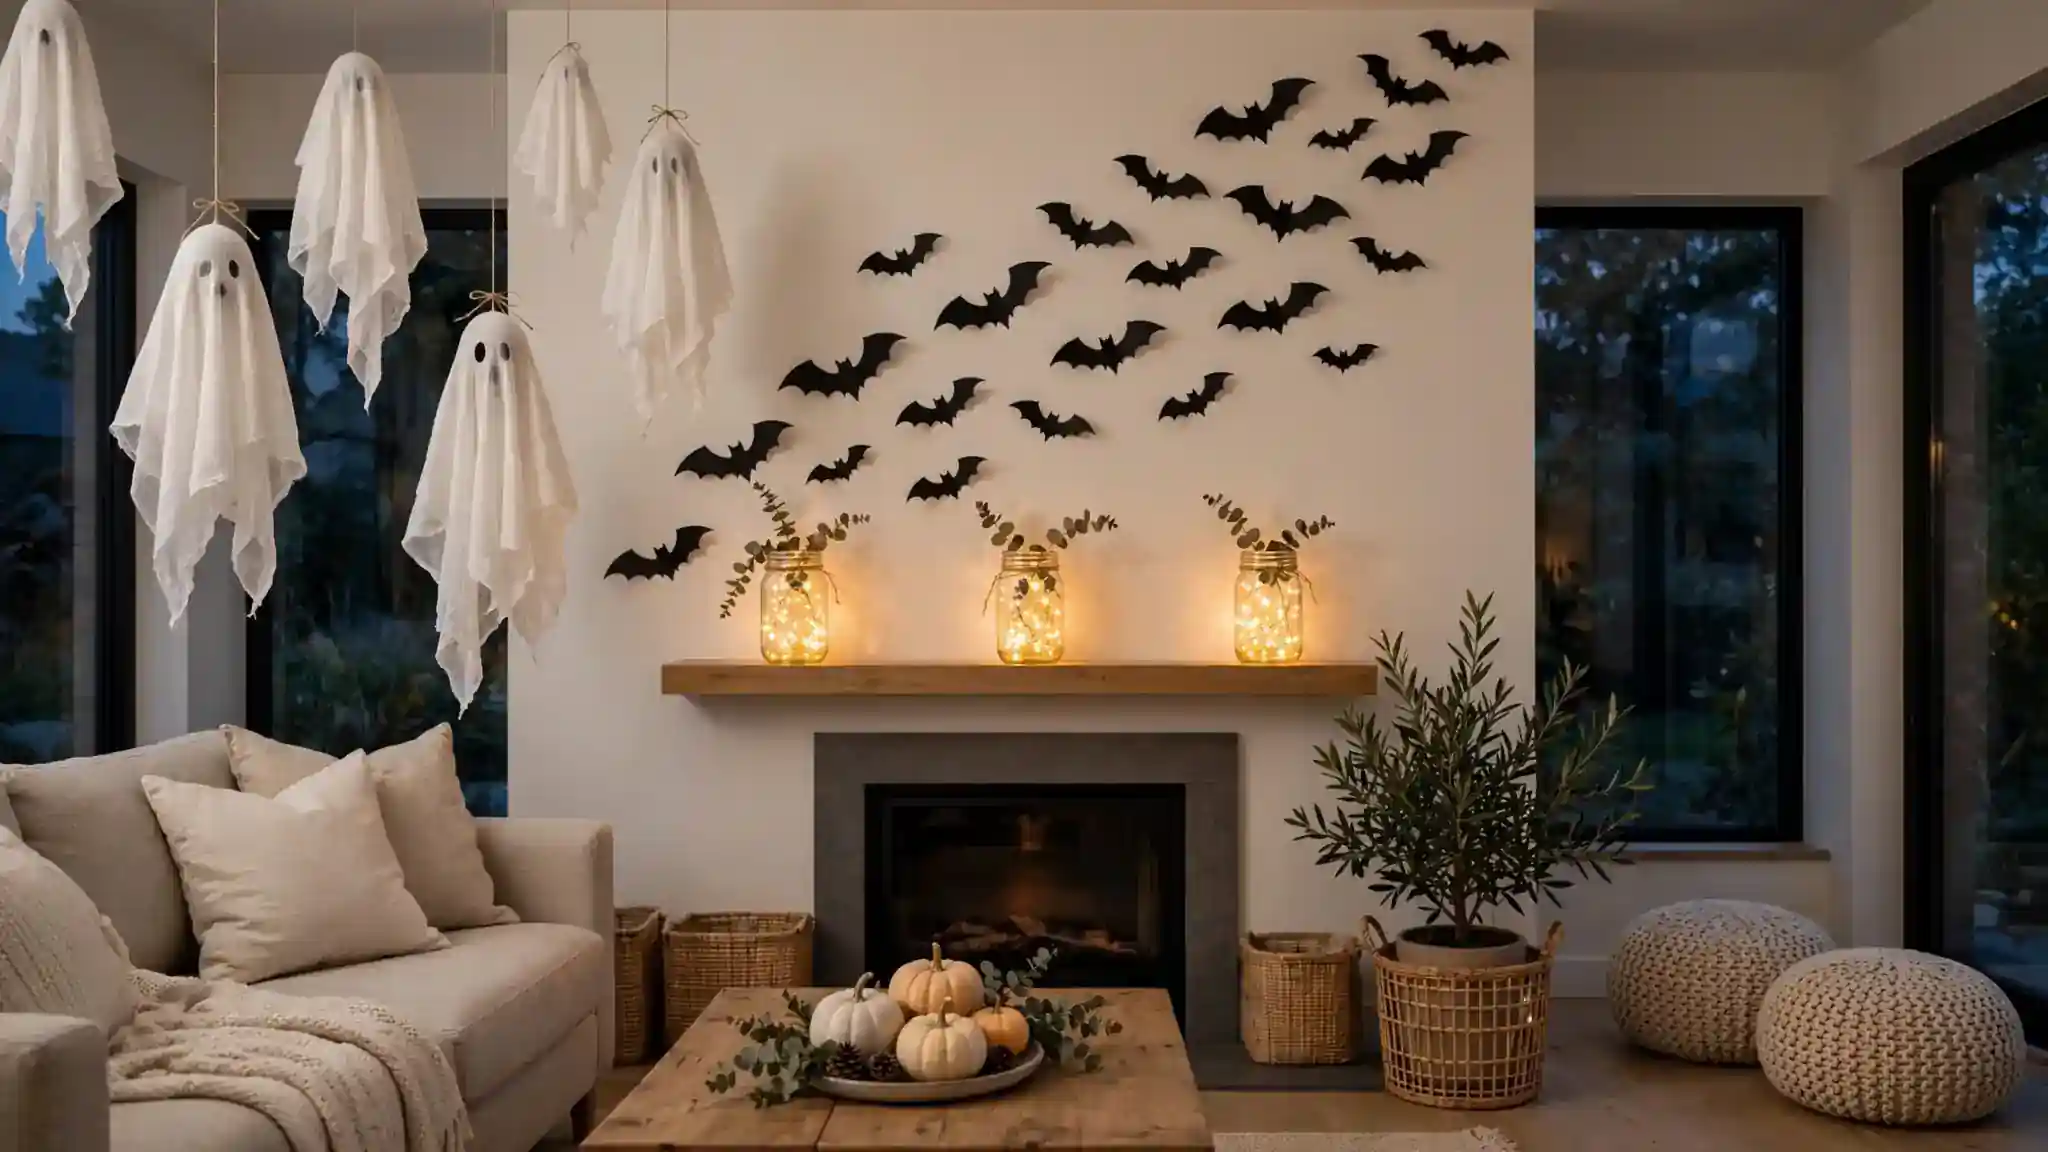
A bare wall turns into a haunted sky when dozens of paper bats take flight across it. Cut bat shapes from black cardstock in three sizes, fold each one down the middle for dimension, and stick them up with removable mounting squares. Arrange them in a loose swooping trail from a corner, as if the whole colony just lifted off at dusk.
I’ve noticed this works best above a mantel or along a staircase wall where the trail can climb. Keep the biggest bats near the start of the flight path and shrink them as they rise, which creates a lovely sense of motion. Peel them down after the season and save them flat for next year.
Mason Jar Glow Lanterns
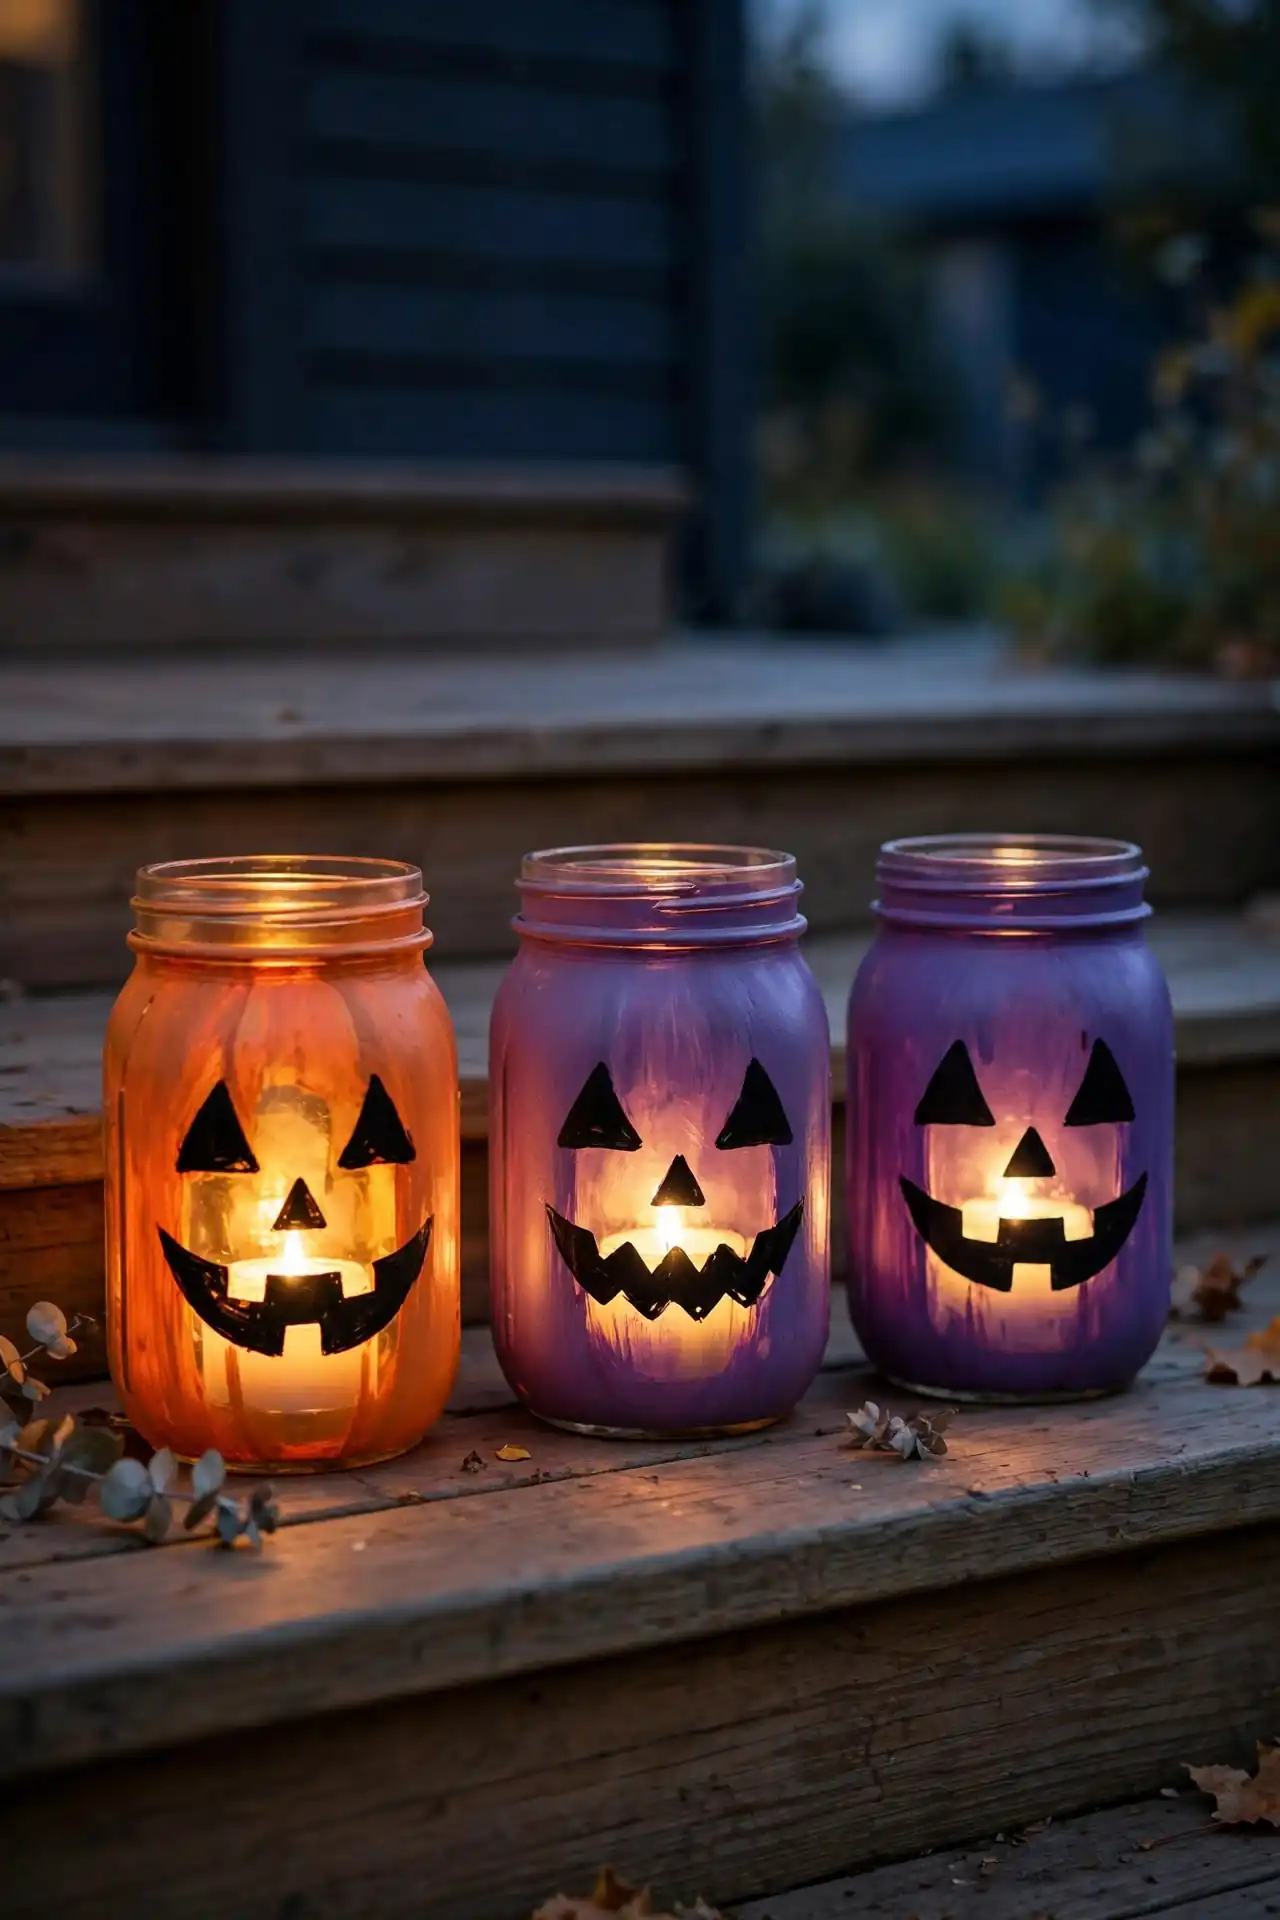
- Paint the inside of clean mason jars with orange or purple craft paint, leaving the outside untouched for a smooth glow.
- Stick on black paper cutouts of jack o lantern faces, witches, or cats before the paint dries.
- Drop in a battery tea light rather than a real candle for safety around kids and curtains.
- Cluster three jars of different heights on your porch steps or windowsill for instant atmosphere.
These lanterns cost pennies and take less than an hour, yet they look like something from a fall market stall. I have seen this work well in many cases where renters wanted big impact without damaging anything. Line a whole walkway with them on Halloween night and watch trick or treaters slow down to admire the glow.
Cheesecloth Hanging Ghosts
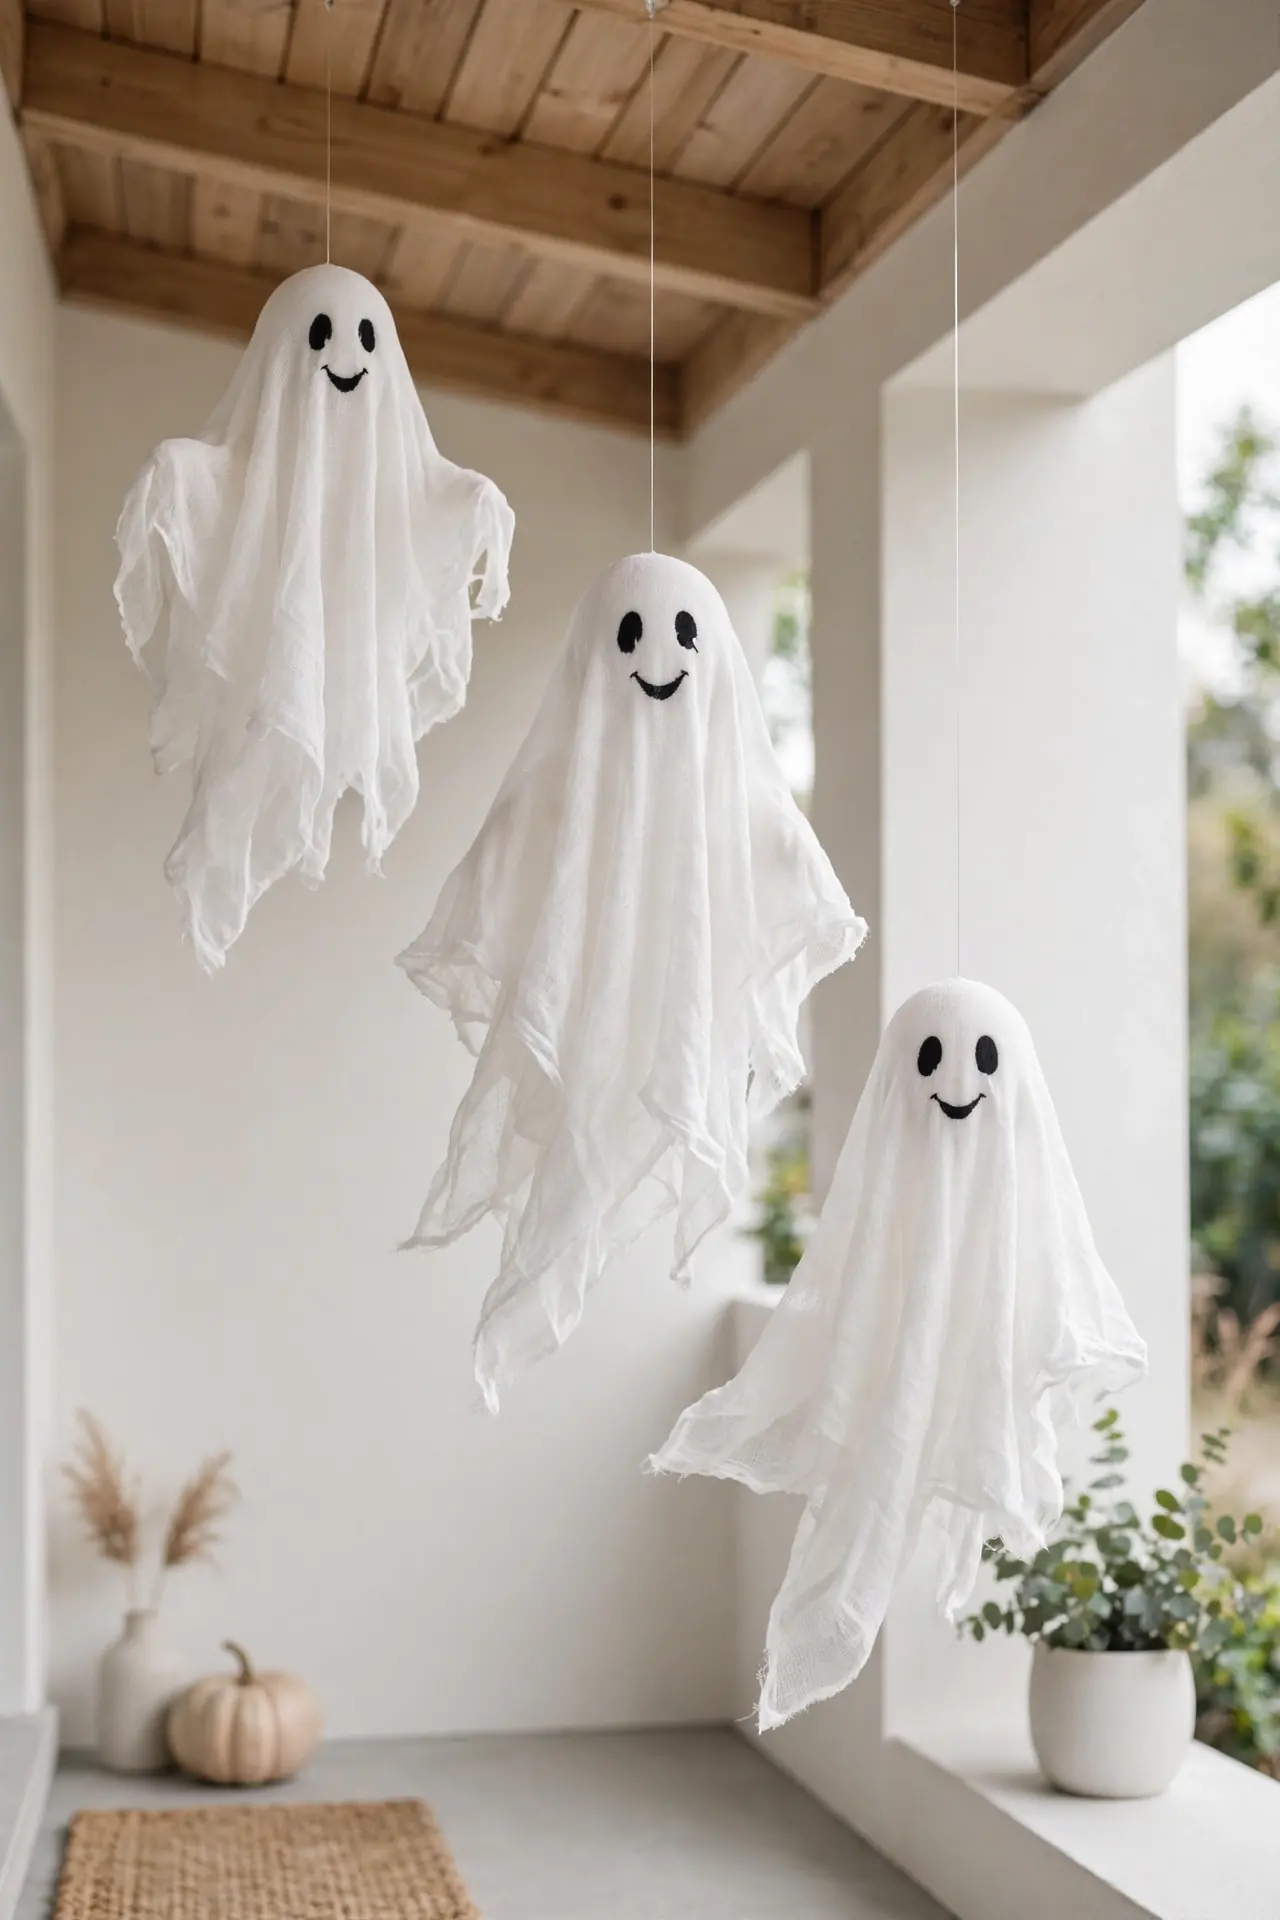
Quick Tip: Dip cheesecloth in liquid starch instead of glue for ghosts that hold their shape but stay soft and reusable. Drape the damp cloth over an inflated balloon set on a cup, let it dry overnight, then pop the balloon and draw a sweet or spooky face with a marker.
Hang these airy ghosts from porch ceilings, tree branches, or curtain rods with clear fishing line so they drift in the breeze. In my experience, clustering them at different heights looks far more magical than a single row. They pack flat when the season ends, ready to haunt again next October.
Pumpkin Balloon Garland
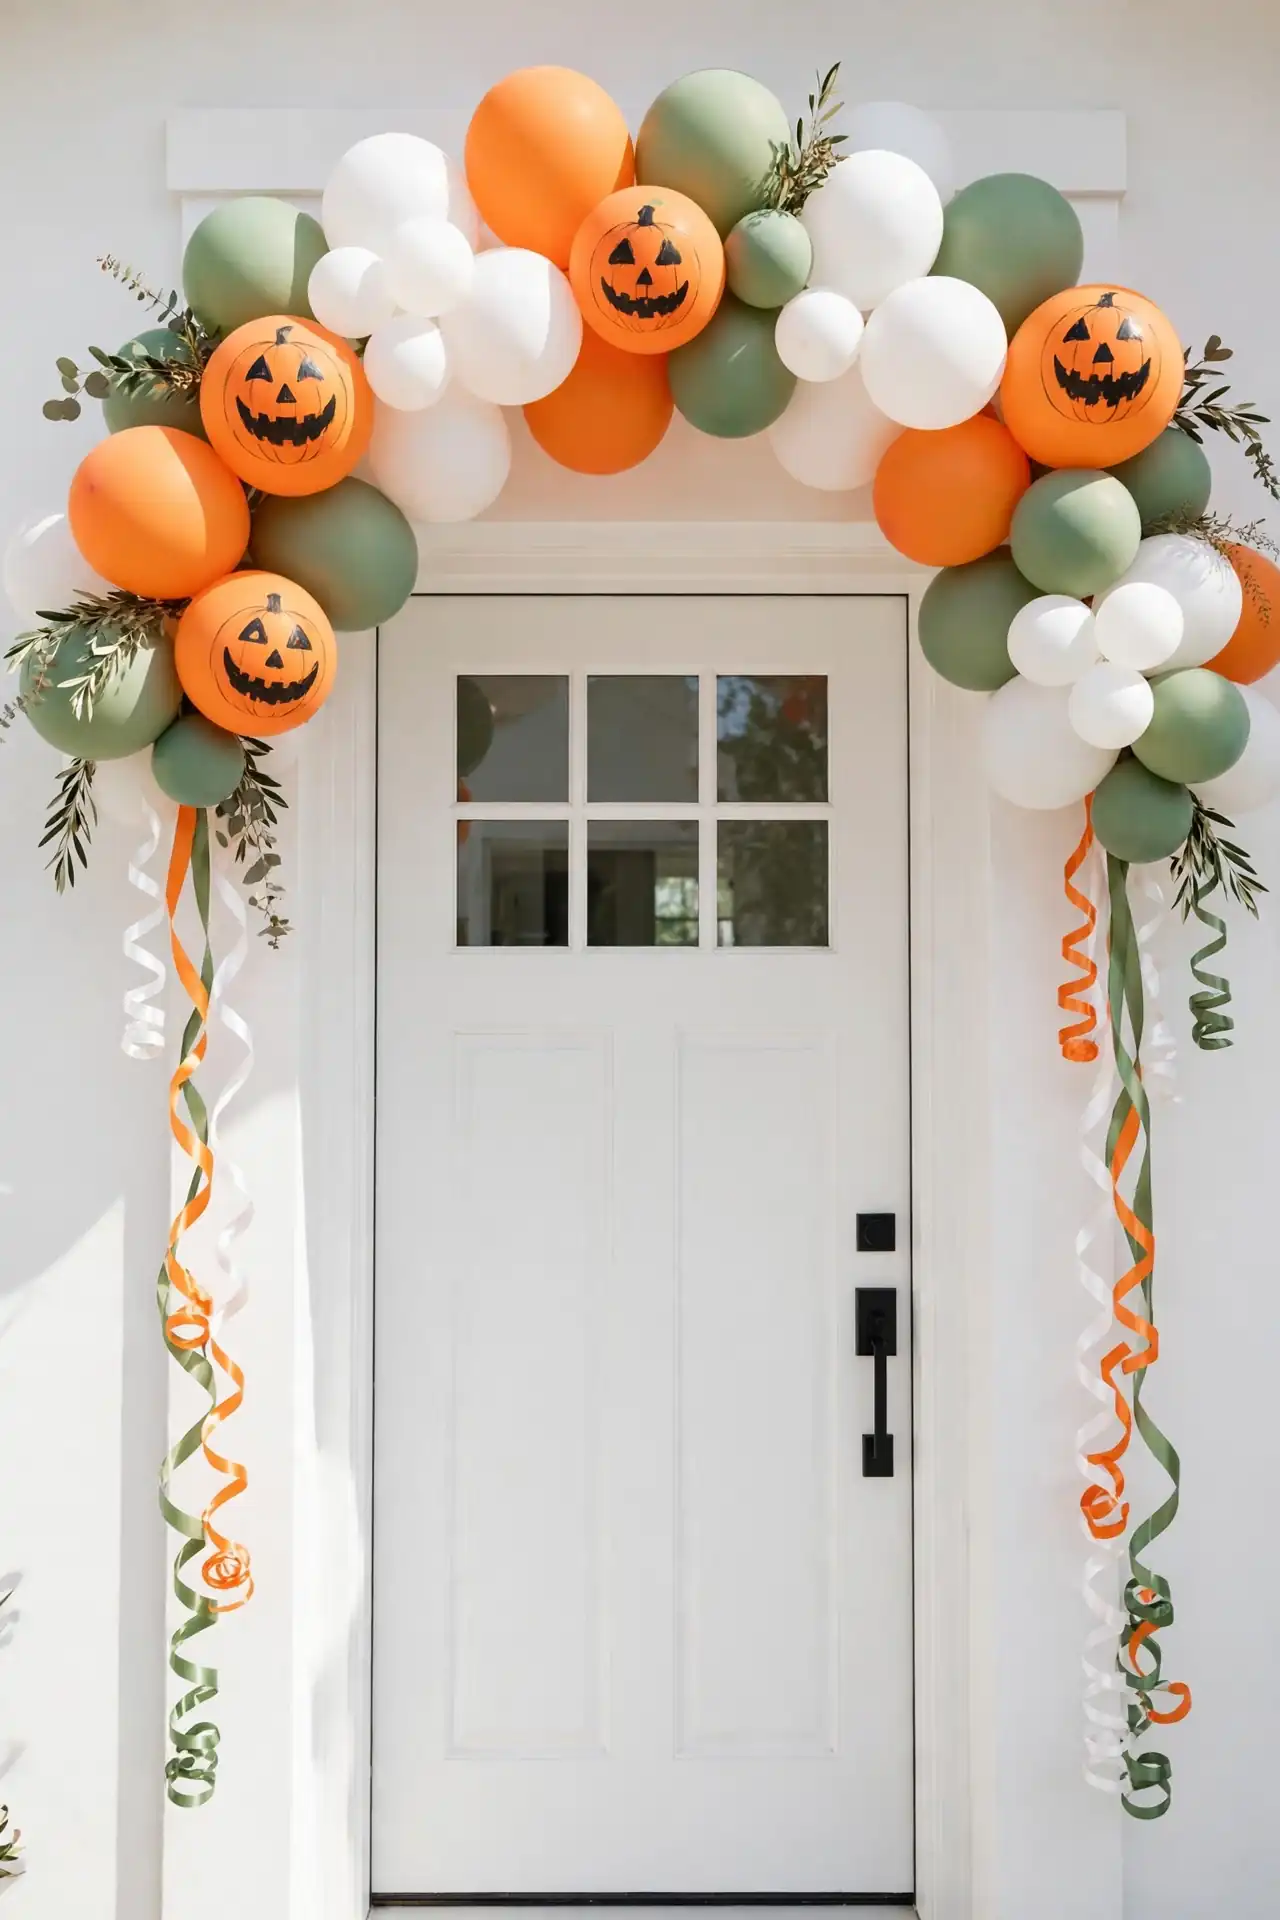
BEFORE: A plain doorway or mantel looks bare in October, and real pumpkins are heavy, pricey, and rot within days on a warm porch.
AFTER: A garland of orange, white, and green balloons painted like pumpkins arches overhead, festive for weeks and light enough to hang with simple tape.
Blow up balloons in varied sizes, paint simple jack o lantern faces or leafy stems on a few, and string them along curling ribbon. I’ve noticed kids love helping with this one, and the whole project costs less than a bag of candy. Hang it a day before the party so the paint fully sets. It photographs beautifully for party invitations too.
Apothecary Jar Potions
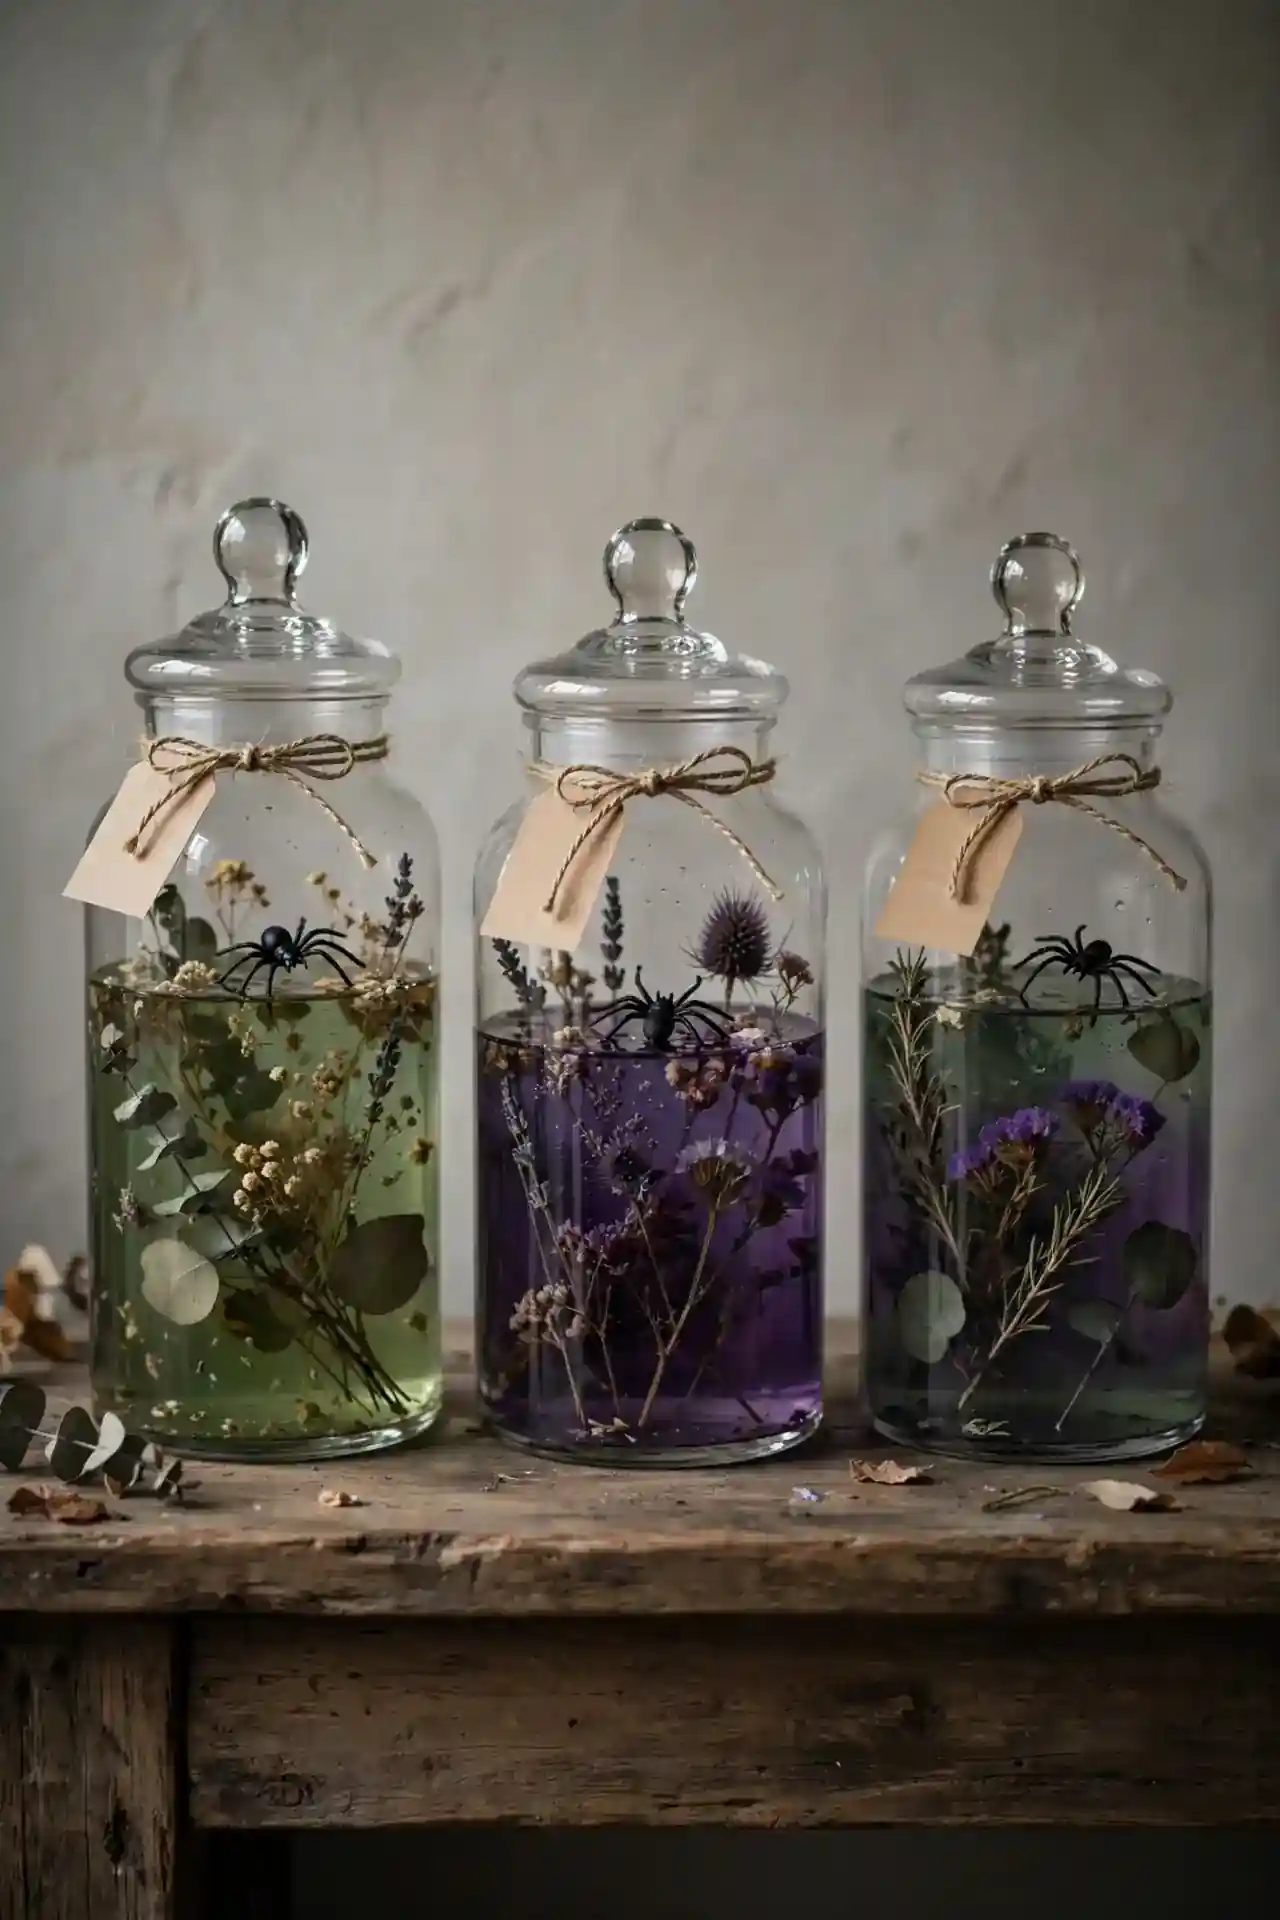
- Collect empty glass jars and bottles in different shapes, then remove labels with warm soapy water.
- Fill each with colored water using a few drops of food coloring, green for slime, purple for mystery.
- Add floating props like plastic spiders, gummy eyeballs, or dried flowers for a creepy specimen look.
- Tie on kraft paper tags labeled with playful names like Witch Hazel or Bat Wing Brew.
Line these potion bottles along a mantel or bathroom shelf for instant mad scientist charm. In my experience, dim lighting makes the colors glow beautifully, so add a small lamp nearby. They cost almost nothing, store easily, and kids love inventing new potion names every year.
Black Cat Silhouettes
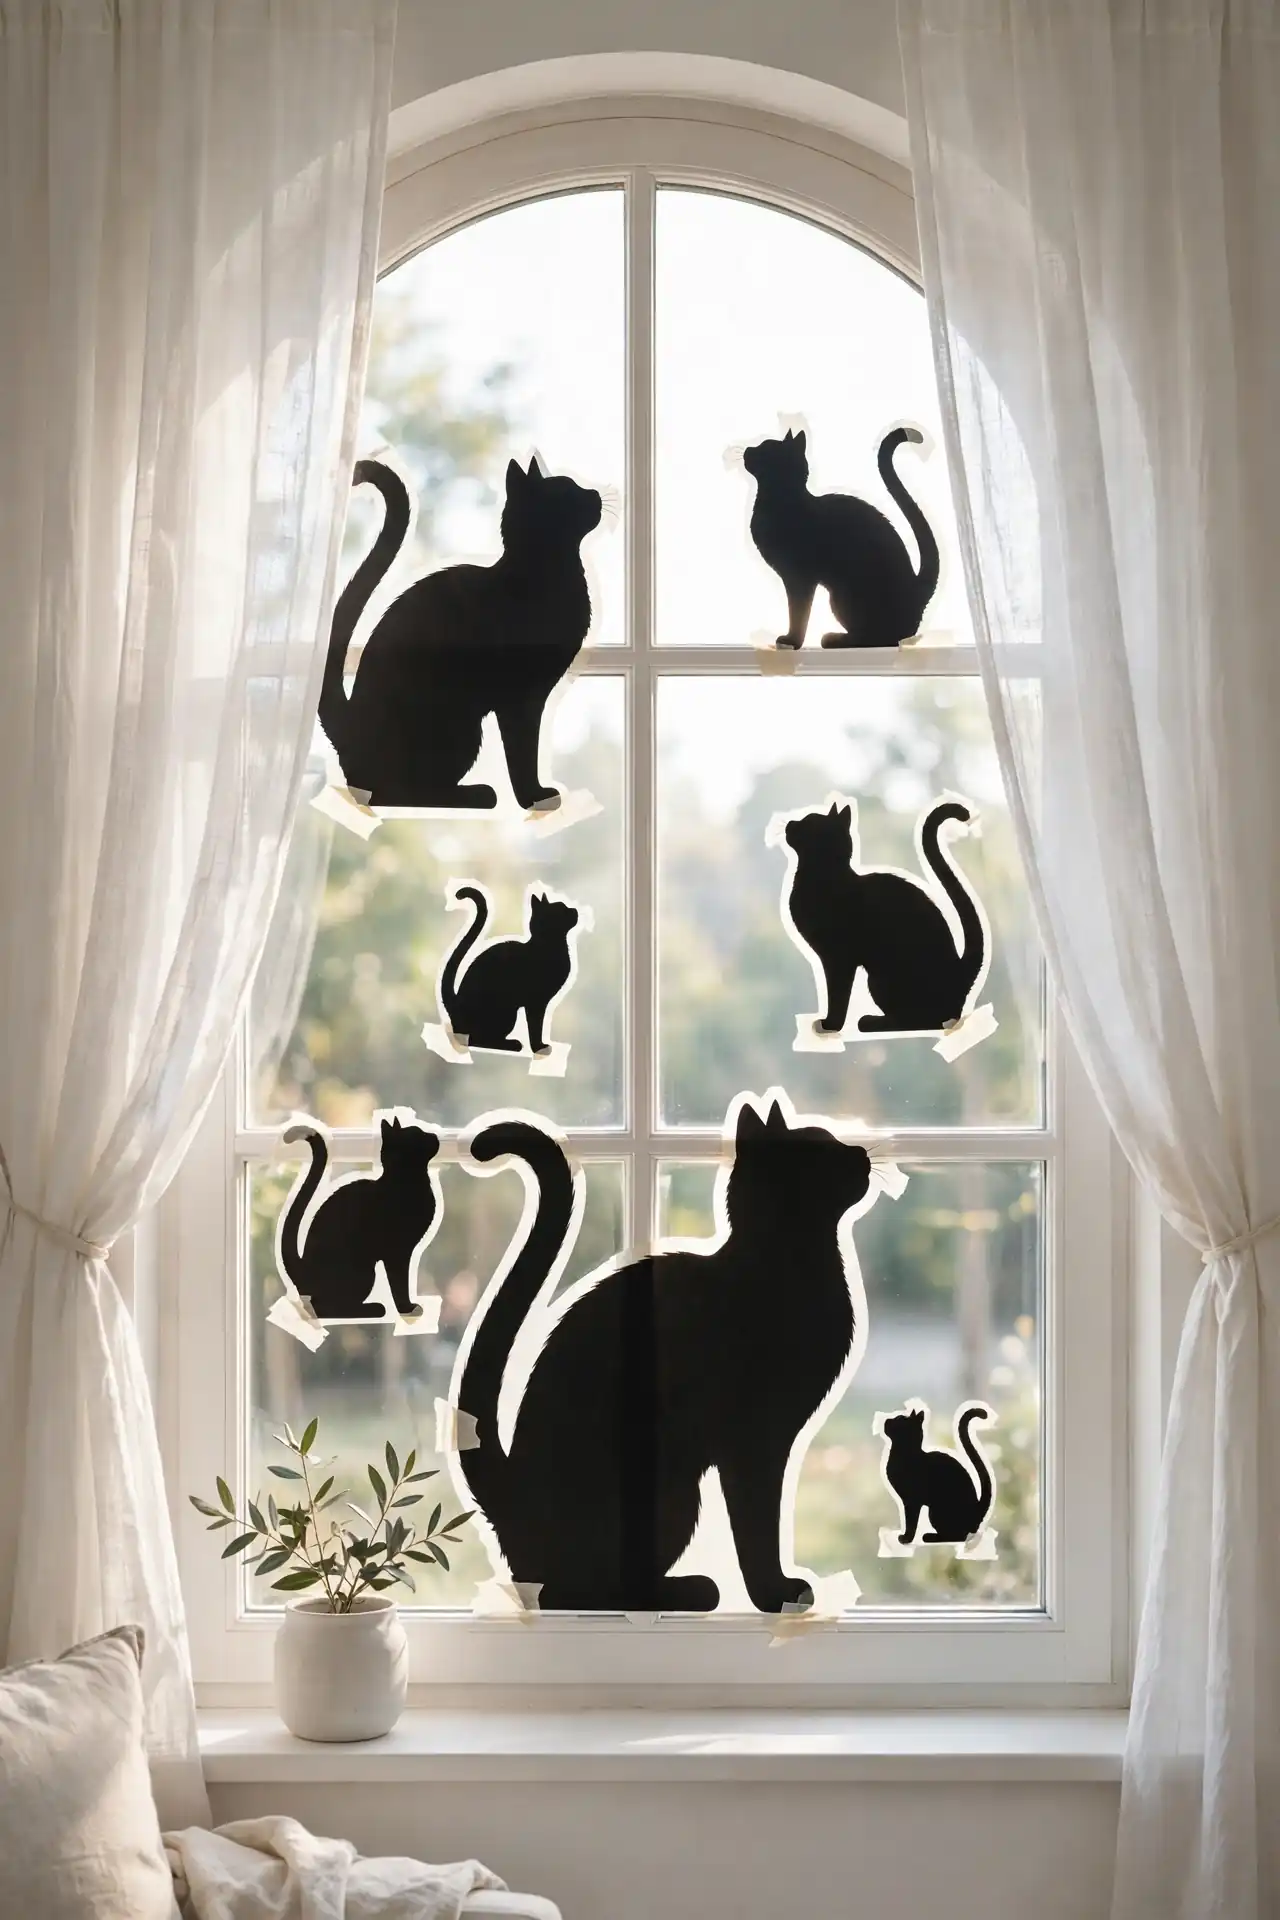
| Cardboard Cutouts | Chalkboard Cats | |
|---|---|---|
| Cost | Under five dollars | One chalkboard sign |
| Time | One hour | Thirty minutes |
| Best spot | Windows and fences | Entryway table |
| Reusable | Yes, for years | Wipe and redraw |
Black cat silhouettes bring classic Halloween charm without a hint of fright, perfect for homes with small children. Trace a simple arched back cat shape onto black cardstock or cardboard, cut a few in different sizes, and tape them inside windows so their shapes glow against the evening light. I have seen this work well in many cases where families wanted festive but friendly decor. Save your templates in a folder and reuse them every October.
Spooky Front Door Mummy
DO:
- Wrap white crepe paper streamers loosely around the door, leaving gaps for a mummy look.
- Add two large googly eyes near the top so the door has a friendly face.
- Secure streamers with painter’s tape to protect your paint.
DON’T:
- Don’t wrap the handle or lock, guests still need to open the door.
- Don’t use regular tape, it can peel paint on removal.
- Don’t block the peephole, safety comes first on busy trick or treat night.
A mummy door greets trick or treaters with humor instead of horror, and it takes twenty minutes tops. In my experience, this is the decoration neighbors photograph most. Take it down the morning after so the streamers never get soggy in November rain.
Glowing Eyeball Bushes
Cost: Low | Time: One hour | Skill Level: Beginner | Best For: Front yard bushes
Ping pong balls turn ordinary bushes into watchful creatures after dark, and the effect delights kids without scaring them. Paint large pupils on white ping pong balls with a black marker, push each ball onto a thin garden stake, and nestle the stakes deep among your shrubs so only the eyes peek out. When porch lights catch them, the whole bush seems alive and watching the sidewalk. That’s why many experts recommend this trick for maximum curb appeal on a minimum budget. Pull the stakes after Halloween and reuse the eyeballs for party games.
Painted Mini Pumpkins
Mini pumpkins are nature’s perfect canvas, and painting them beats carving in every way. No sharp tools, no slimy scooping, and the results last for weeks instead of days. Set out acrylic paints, brushes, and a stack of tiny pumpkins, then let everyone decorate their own. Dots, stripes, faces, and messages all look adorable at this scale.
I’ve noticed white pumpkins show paint colors most vividly, while orange ones glow with classic charm. Seal finished pumpkins with a clear matte spray so the paint survives porch weather. Group them in odd numbers on steps or tables for a display that looks professionally styled.
Witch Hat Table Toppers
- Roll black cardstock into simple cones and glue the seam, then cut a wide brim circle for each hat.
- Add a ribbon band in orange, purple, or green, and top with a small buckle cut from gold paper.
- Fill the cones with candy or small succulents for a topper that doubles as a party favor.
- Scatter a few across the dessert table at different heights for a playful witchy skyline.
These little hats cost almost nothing but steal the show on any Halloween table. I have seen this work well in many cases where hosts wanted centerpieces kids could take home. Make a dozen in an afternoon while watching a favorite spooky movie, and watch them disappear by night’s end.
Candy Corn Vase Filler
Quick Tip: Layer candy corn in a clear glass vase with the points facing outward for a perfect striped effect. Pour each color slowly and tap the vase gently so the layers settle evenly without mixing.
This five minute filler looks like a giant candy corn and costs less than a coffee. Use a tall cylinder vase on your entryway table or as a dining centerpiece, and top with a small candle or fall flowers. I’ve noticed guests always comment on this simple trick, and it works with any tri color candy you have on hand. When the season ends, the candy becomes movie night snacks, so nothing goes to waste.
Cobweb Corner Drape
BEFORE: Empty room corners feel forgotten in October, collecting dust while the rest of the house gets all the festive attention.
AFTER: Stretchy cobweb fabric draped across the corner, dotted with plastic spiders, turns dead space into the spookiest spot in the room.
Stretch a bag of webbing from the ceiling to both walls, pulling thin spots for a natural look. If you are planning costumes too, these funny halloween costumes for families complete the spooky scene. I’ve noticed one bag covers two full corners, so this is the cheapest big impact decor you can buy. Add a black light nearby and the whole corner glows eerily after dark.
Floating Witch Hats
- Tie clear fishing line to the tip of lightweight witch hats from the party store.
- Hang them at different heights from your porch ceiling or a tree branch.
- Tuck a battery tea light inside each hat for a magical floating glow.
- Add curling ribbon streamers so they twirl gently in the evening breeze.
Guests will swear these hats hover by magic, and the illusion takes minutes to create. In my experience, hanging them along a walkway guides trick or treaters to your door beautifully. Use warm white lights for an elegant look or green for full witchy drama. They store flat and last for years.
Tombstone Walkway Signs
| Cardboard Tombstones | Foam Board Markers | |
|---|---|---|
| Cost | Free from boxes | A few dollars |
| Time | One afternoon | Two hours |
| Weatherproof | Bring in rain | Sealed with spray |
| Reusable | One season | Many years |
Playful tombstones line your walkway with humor, not horror, when you write silly epitaphs like Here Lies My Diet. Cut stone shapes from cardboard or foam board, paint them grey, and add funny names with a black marker. Stake them along the path with wooden skewers. I’ve noticed kids love reading each one on their way to the door, and the whole project costs less than a pumpkin spice latte. Save the funniest ones to reuse every October.
Mummy Wrapped Vases
DO:
- Wrap vases loosely with white gauze, leaving small gaps for a true mummy texture.
- Stick on googly eyes at different heights for a playful monster family.
- Fill with dried wheat or bare branches for an autumn harvest look.
DON’T:
- Don’t wrap too tightly, the gauze tears and looks messy instead of spooky.
- Don’t use real candles inside, the fabric is flammable.
- Don’t skip the eyes, they are what make these vases charming.
These mummy vases take ten minutes each and look adorable grouped on a mantel. In my experience, varying the vase heights creates the cutest little monster family. They work with any flowers you have, though dried stems keep the Halloween mood perfectly.
Spider Web Doormat
Cost: Low | Time: Thirty minutes | Skill Level: Beginner | Best For: Front door welcome
A plain black doormat becomes a spider web masterpiece with nothing but white fabric paint. Lay the mat flat, paint straight lines radiating from the center, then connect them with curved arcs to form the web. Add a plastic spider in one corner for the finishing touch. Use outdoor fabric paint so rain never ruins your work. I’ve noticed this simple upgrade gets more compliments than expensive store bought mats. It welcomes guests with playful spookiness and wipes clean all season. Let the paint cure overnight before putting it back by the door.
Ghost Garland Lights
A plain string of white lights becomes a parade of happy ghosts with a little craft felt. Cut simple ghost shapes from white felt, poke a small hole at the top of each, and slip them over every other bulb. The lights shine through the fabric, giving each ghost a soft, friendly glow that looks magical after dark.
Drape the garland along a mantel, staircase railing, or headboard for instant Halloween warmth. I’ve noticed warm white bulbs look cozier than cool ones for this project. The felt ghosts store flat in an envelope, ready to glow again next year without any fuss.
Potion Bottle Labels
- Design spooky labels on your computer or hand letter them on kraft paper for a vintage apothecary look.
- Use playful names like Eye of Newt, Dragon Tears, or Midnight Mist to spark imagination.
- Age the paper with a light tea stain and singe the edges carefully for an antique effect.
- Stick labels on bottles with double sided tape so they peel off cleanly after Halloween.
Labels turn ordinary bottles into a witch’s pantry in minutes. I have seen this work well in many cases where crafters wanted big impact from items they already owned. Print a whole sheet at once and share extras with friends who love Halloween crafting too.
Haunted Mirror Notes
Quick Tip: Write spooky messages on your bathroom mirror with a dry erase marker for a surprise that appears in the morning steam. Simple phrases like BOO or I See You delight kids and wash off with one wipe.
This zero cost prank takes seconds and never fails to get a laugh. Draw a small ghost or spider web in the corner of the mirror too, so the message feels like part of a bigger haunting. I’ve noticed this works best on mirrors that fog up during hot showers. The reveal timing is perfect, and cleanup takes one swipe of a cloth.
Bat Branch Centerpiece
BEFORE: A bare branch in a vase looks unfinished, like you gave up halfway through decorating for the season.
AFTER: The same branch hung with paper bats and tiny lights becomes a dramatic Halloween tree that anchors your whole table.
Find a sturdy branch on your next walk, spray paint it black or white, and stand it in a heavy vase filled with stones. Clip on paper bats and wrap a short string of fairy lights around the limbs. I’ve noticed this centerpiece sparks more conversation than anything else on the table. It costs nothing and looks like a designer piece.
Pumpkin Stack Topiary
- Choose three pumpkins in descending sizes, real or faux, in matching or mixed colors.
- Thread a sturdy wooden dowel through their centers to hold the stack steady.
- Set the stack in a large urn or planter filled with soil for weight.
- Tuck fall leaves and small gourds around the base to hide the mechanics.
This topiary brings instant height to porches and entryways without any carving. In my experience, faux pumpkins make this a one time investment you will reuse for years. They survive rain, wind, and curious squirrels, and the whole project takes under an hour. Add a bow or a small crow on top for personality.
Skeleton Hand Candy Dish
| Plastic Hand Dish | DIY Poseable Hand | |
|---|---|---|
| Cost | Party store find | Pipe cleaners |
| Time | Zero minutes | One hour |
| Spook factor | Playful | Creepy realistic |
| Reusable | Every year | Every year |
A skeleton hand rising from a candy bowl makes trick or treaters hesitate before grabbing a treat, which is half the fun. Set a plastic skeleton hand in a deep bowl so it looks like it is climbing out, then fill around it with wrapped candy. That’s why many experts recommend placing it at kid height for maximum giggles. It is spooky enough to thrill but friendly enough for toddlers, and it becomes a yearly tradition.
Creepy Crawly Table Runner
DO:
- Lay a black or orange runner down the center of your table as the base.
- Scatter plastic spiders, bugs, and centipedes along its length for creepy texture.
- Weave in a string of tiny orange lights for evening glow.
DON’T:
- Don’t use real looking insects near food, guests may lose their appetite.
- Don’t overload the runner, leave space for plates and dishes.
- Don’t forget to remove the bugs before washing the runner.
This runner turns an ordinary dinner into a Halloween feast in minutes. In my experience, kids love rearranging the bugs, so expect the layout to change all evening. It packs away in seconds and works for every spooky dinner party you host.
Monster Eye Wreath
Cost: Low | Time: One afternoon | Skill Level: Beginner | Best For: Front door statement
A grapevine wreath covered in googly eyes greets visitors with silly monster charm. Hot glue large and small googly eyes all over the wreath, mixing sizes for a chaotic cute look. Add a purple bow at the top for extra personality. I’ve noticed this wreath makes delivery drivers smile, which tells you it works. It hangs with a simple hook, survives the whole season outdoors, and the eyes never fade. Make one for your door in an afternoon and a mini version for a bedroom door too. They store easily.
Floating Candle Pathway
Battery candles in glass hurricanes line your walkway with flickering light that guides guests safely to your door. No flames mean no worry about costumes brushing past or autumn leaves blowing through. Space them evenly on both sides of the path, mixing tall and short hurricanes for a professional landscape look.
Turn them on at dusk with a single remote and enjoy the magic all evening. I’ve noticed warm white flames look most realistic, while orange adds extra Halloween drama. Collect them in a bin after the holiday and they are ready to glow again next year with zero effort.
Conclusion
These 25 easy halloween diy decorations prove that the spookiest season shines brightest when it is handmade. From paper bats to glowing pathways, every project here costs little, takes an afternoon at most, and fills your home with personality no store can match. I’ve seen how small changes like these can completely shift the way a space feels. Save your favorites to Pinterest, gather your supplies this weekend, and enjoy every giggle these crafts bring. Happy haunting, and happy crafting. Pick three ideas to start, and let each finished project inspire the next one on your list.
| Cardboard Cutouts | Chalkboard Cats | |
|---|---|---|
| Cost | Under five dollars | One chalkboard sign |
| Time | One hour | Thirty minutes |
| Best spot | Windows and fences | Entryway table |
| Reusable | Yes, for years | Wipe and redraw |
Black cat silhouettes bring classic Halloween charm without a hint of fright, perfect for homes with small children. Trace a simple arched back cat shape onto black cardstock or cardboard, cut a few in different sizes, and tape them inside windows so their shapes glow against the evening light. I have seen this work well in many cases where families wanted festive but friendly decor. Save your templates in a folder and reuse them every October.
Spooky Front Door Mummy
DO:
- Wrap white crepe paper streamers loosely around the door, leaving gaps for a mummy look.
- Add two large googly eyes near the top so the door has a friendly face.
- Secure streamers with painter’s tape to protect your paint.
DON’T:
- Don’t wrap the handle or lock, guests still need to open the door.
- Don’t use regular tape, it can peel paint on removal.
- Don’t block the peephole, safety comes first on busy trick or treat night.
A mummy door greets trick or treaters with humor instead of horror, and it takes twenty minutes tops. In my experience, this is the decoration neighbors photograph most. Take it down the morning after so the streamers never get soggy in November rain.
Glowing Eyeball Bushes
Cost: Low | Time: One hour | Skill Level: Beginner | Best For: Front yard bushes
Ping pong balls turn ordinary bushes into watchful creatures after dark, and the effect delights kids without scaring them. Paint large pupils on white ping pong balls with a black marker, push each ball onto a thin garden stake, and nestle the stakes deep among your shrubs so only the eyes peek out. When porch lights catch them, the whole bush seems alive and watching the sidewalk. That’s why many experts recommend this trick for maximum curb appeal on a minimum budget. Pull the stakes after Halloween and reuse the eyeballs for party games.
Painted Mini Pumpkins
Mini pumpkins are nature’s perfect canvas, and painting them beats carving in every way. No sharp tools, no slimy scooping, and the results last for weeks instead of days. Set out acrylic paints, brushes, and a stack of tiny pumpkins, then let everyone decorate their own. Dots, stripes, faces, and messages all look adorable at this scale.
I’ve noticed white pumpkins show paint colors most vividly, while orange ones glow with classic charm. Seal finished pumpkins with a clear matte spray so the paint survives porch weather. Group them in odd numbers on steps or tables for a display that looks professionally styled.
Witch Hat Table Toppers
- Roll black cardstock into simple cones and glue the seam, then cut a wide brim circle for each hat.
- Add a ribbon band in orange, purple, or green, and top with a small buckle cut from gold paper.
- Fill the cones with candy or small succulents for a topper that doubles as a party favor.
- Scatter a few across the dessert table at different heights for a playful witchy skyline.
These little hats cost almost nothing but steal the show on any Halloween table. I have seen this work well in many cases where hosts wanted centerpieces kids could take home. Make a dozen in an afternoon while watching a favorite spooky movie, and watch them disappear by night’s end.
Candy Corn Vase Filler
Quick Tip: Layer candy corn in a clear glass vase with the points facing outward for a perfect striped effect. Pour each color slowly and tap the vase gently so the layers settle evenly without mixing.
This five minute filler looks like a giant candy corn and costs less than a coffee. Use a tall cylinder vase on your entryway table or as a dining centerpiece, and top with a small candle or fall flowers. I’ve noticed guests always comment on this simple trick, and it works with any tri color candy you have on hand. When the season ends, the candy becomes movie night snacks, so nothing goes to waste.
Cobweb Corner Drape
BEFORE: Empty room corners feel forgotten in October, collecting dust while the rest of the house gets all the festive attention.
AFTER: Stretchy cobweb fabric draped across the corner, dotted with plastic spiders, turns dead space into the spookiest spot in the room.
Stretch a bag of webbing from the ceiling to both walls, pulling thin spots for a natural look. If you are planning costumes too, these funny halloween costumes for families complete the spooky scene. I’ve noticed one bag covers two full corners, so this is the cheapest big impact decor you can buy. Add a black light nearby and the whole corner glows eerily after dark.
Floating Witch Hats
- Tie clear fishing line to the tip of lightweight witch hats from the party store.
- Hang them at different heights from your porch ceiling or a tree branch.
- Tuck a battery tea light inside each hat for a magical floating glow.
- Add curling ribbon streamers so they twirl gently in the evening breeze.
Guests will swear these hats hover by magic, and the illusion takes minutes to create. In my experience, hanging them along a walkway guides trick or treaters to your door beautifully. Use warm white lights for an elegant look or green for full witchy drama. They store flat and last for years.
Tombstone Walkway Signs
| Cardboard Tombstones | Foam Board Markers | |
|---|---|---|
| Cost | Free from boxes | A few dollars |
| Time | One afternoon | Two hours |
| Weatherproof | Bring in rain | Sealed with spray |
| Reusable | One season | Many years |
Playful tombstones line your walkway with humor, not horror, when you write silly epitaphs like Here Lies My Diet. Cut stone shapes from cardboard or foam board, paint them grey, and add funny names with a black marker. Stake them along the path with wooden skewers. I’ve noticed kids love reading each one on their way to the door, and the whole project costs less than a pumpkin spice latte. Save the funniest ones to reuse every October.
Mummy Wrapped Vases
DO:
- Wrap vases loosely with white gauze, leaving small gaps for a true mummy texture.
- Stick on googly eyes at different heights for a playful monster family.
- Fill with dried wheat or bare branches for an autumn harvest look.
DON’T:
- Don’t wrap too tightly, the gauze tears and looks messy instead of spooky.
- Don’t use real candles inside, the fabric is flammable.
- Don’t skip the eyes, they are what make these vases charming.
These mummy vases take ten minutes each and look adorable grouped on a mantel. In my experience, varying the vase heights creates the cutest little monster family. They work with any flowers you have, though dried stems keep the Halloween mood perfectly.
Spider Web Doormat
Cost: Low | Time: Thirty minutes | Skill Level: Beginner | Best For: Front door welcome
A plain black doormat becomes a spider web masterpiece with nothing but white fabric paint. Lay the mat flat, paint straight lines radiating from the center, then connect them with curved arcs to form the web. Add a plastic spider in one corner for the finishing touch. Use outdoor fabric paint so rain never ruins your work. I’ve noticed this simple upgrade gets more compliments than expensive store bought mats. It welcomes guests with playful spookiness and wipes clean all season. Let the paint cure overnight before putting it back by the door.
Ghost Garland Lights
A plain string of white lights becomes a parade of happy ghosts with a little craft felt. Cut simple ghost shapes from white felt, poke a small hole at the top of each, and slip them over every other bulb. The lights shine through the fabric, giving each ghost a soft, friendly glow that looks magical after dark.
Drape the garland along a mantel, staircase railing, or headboard for instant Halloween warmth. I’ve noticed warm white bulbs look cozier than cool ones for this project. The felt ghosts store flat in an envelope, ready to glow again next year without any fuss.
Potion Bottle Labels
- Design spooky labels on your computer or hand letter them on kraft paper for a vintage apothecary look.
- Use playful names like Eye of Newt, Dragon Tears, or Midnight Mist to spark imagination.
- Age the paper with a light tea stain and singe the edges carefully for an antique effect.
- Stick labels on bottles with double sided tape so they peel off cleanly after Halloween.
Labels turn ordinary bottles into a witch’s pantry in minutes. I have seen this work well in many cases where crafters wanted big impact from items they already owned. Print a whole sheet at once and share extras with friends who love Halloween crafting too.
Haunted Mirror Notes
Quick Tip: Write spooky messages on your bathroom mirror with a dry erase marker for a surprise that appears in the morning steam. Simple phrases like BOO or I See You delight kids and wash off with one wipe.
This zero cost prank takes seconds and never fails to get a laugh. Draw a small ghost or spider web in the corner of the mirror too, so the message feels like part of a bigger haunting. I’ve noticed this works best on mirrors that fog up during hot showers. The reveal timing is perfect, and cleanup takes one swipe of a cloth.
Bat Branch Centerpiece
BEFORE: A bare branch in a vase looks unfinished, like you gave up halfway through decorating for the season.
AFTER: The same branch hung with paper bats and tiny lights becomes a dramatic Halloween tree that anchors your whole table.
Find a sturdy branch on your next walk, spray paint it black or white, and stand it in a heavy vase filled with stones. Clip on paper bats and wrap a short string of fairy lights around the limbs. I’ve noticed this centerpiece sparks more conversation than anything else on the table. It costs nothing and looks like a designer piece.
Pumpkin Stack Topiary
- Choose three pumpkins in descending sizes, real or faux, in matching or mixed colors.
- Thread a sturdy wooden dowel through their centers to hold the stack steady.
- Set the stack in a large urn or planter filled with soil for weight.
- Tuck fall leaves and small gourds around the base to hide the mechanics.
This topiary brings instant height to porches and entryways without any carving. In my experience, faux pumpkins make this a one time investment you will reuse for years. They survive rain, wind, and curious squirrels, and the whole project takes under an hour. Add a bow or a small crow on top for personality.
Skeleton Hand Candy Dish
| Plastic Hand Dish | DIY Poseable Hand | |
|---|---|---|
| Cost | Party store find | Pipe cleaners |
| Time | Zero minutes | One hour |
| Spook factor | Playful | Creepy realistic |
| Reusable | Every year | Every year |
A skeleton hand rising from a candy bowl makes trick or treaters hesitate before grabbing a treat, which is half the fun. Set a plastic skeleton hand in a deep bowl so it looks like it is climbing out, then fill around it with wrapped candy. That’s why many experts recommend placing it at kid height for maximum giggles. It is spooky enough to thrill but friendly enough for toddlers, and it becomes a yearly tradition.
Creepy Crawly Table Runner
DO:
- Lay a black or orange runner down the center of your table as the base.
- Scatter plastic spiders, bugs, and centipedes along its length for creepy texture.
- Weave in a string of tiny orange lights for evening glow.
DON’T:
- Don’t use real looking insects near food, guests may lose their appetite.
- Don’t overload the runner, leave space for plates and dishes.
- Don’t forget to remove the bugs before washing the runner.
This runner turns an ordinary dinner into a Halloween feast in minutes. In my experience, kids love rearranging the bugs, so expect the layout to change all evening. It packs away in seconds and works for every spooky dinner party you host.
Monster Eye Wreath
Cost: Low | Time: One afternoon | Skill Level: Beginner | Best For: Front door statement
A grapevine wreath covered in googly eyes greets visitors with silly monster charm. Hot glue large and small googly eyes all over the wreath, mixing sizes for a chaotic cute look. Add a purple bow at the top for extra personality. I’ve noticed this wreath makes delivery drivers smile, which tells you it works. It hangs with a simple hook, survives the whole season outdoors, and the eyes never fade. Make one for your door in an afternoon and a mini version for a bedroom door too. They store easily.
Floating Candle Pathway
Battery candles in glass hurricanes line your walkway with flickering light that guides guests safely to your door. No flames mean no worry about costumes brushing past or autumn leaves blowing through. Space them evenly on both sides of the path, mixing tall and short hurricanes for a professional landscape look.
Turn them on at dusk with a single remote and enjoy the magic all evening. I’ve noticed warm white flames look most realistic, while orange adds extra Halloween drama. Collect them in a bin after the holiday and they are ready to glow again next year with zero effort.
Conclusion
These 25 easy halloween diy decorations prove that the spookiest season shines brightest when it is handmade. From paper bats to glowing pathways, every project here costs little, takes an afternoon at most, and fills your home with personality no store can match. I’ve seen how small changes like these can completely shift the way a space feels. Save your favorites to Pinterest, gather your supplies this weekend, and enjoy every giggle these crafts bring. Happy haunting, and happy crafting. Pick three ideas to start, and let each finished project inspire the next one on your list.
Store bought Halloween decor drains your wallet fast, but easy halloween diy decorations prove that spooky style costs almost nothing. With paper, paint, mason jars, and a free afternoon, you can fill your home with handmade charm that looks straight out of a boutique. In my experience, guests always ask where you bought these pieces, and the reveal that you made them is the best part.
Below are 25 weekend friendly projects, from floating ghosts to glowing pathways, each with simple steps and budget tips. If you enjoy dressing up your ceilings too, these fabric ceiling ideas pair beautifully with hanging Halloween pieces. Pick your favorites, gather the kids, and let the crafting begin.
Paper Bat Wall Swarm
A bare wall turns into a haunted sky when dozens of paper bats take flight across it. Cut bat shapes from black cardstock in three sizes, fold each one down the middle for dimension, and stick them up with removable mounting squares. Arrange them in a loose swooping trail from a corner, as if the whole colony just lifted off at dusk.
I’ve noticed this works best above a mantel or along a staircase wall where the trail can climb. Keep the biggest bats near the start of the flight path and shrink them as they rise, which creates a lovely sense of motion. Peel them down after the season and save them flat for next year.
Mason Jar Glow Lanterns
- Paint the inside of clean mason jars with orange or purple craft paint, leaving the outside untouched for a smooth glow.
- Stick on black paper cutouts of jack o lantern faces, witches, or cats before the paint dries.
- Drop in a battery tea light rather than a real candle for safety around kids and curtains.
- Cluster three jars of different heights on your porch steps or windowsill for instant atmosphere.
These lanterns cost pennies and take less than an hour, yet they look like something from a fall market stall. I have seen this work well in many cases where renters wanted big impact without damaging anything. Line a whole walkway with them on Halloween night and watch trick or treaters slow down to admire the glow.
Cheesecloth Hanging Ghosts
Quick Tip: Dip cheesecloth in liquid starch instead of glue for ghosts that hold their shape but stay soft and reusable. Drape the damp cloth over an inflated balloon set on a cup, let it dry overnight, then pop the balloon and draw a sweet or spooky face with a marker.
Hang these airy ghosts from porch ceilings, tree branches, or curtain rods with clear fishing line so they drift in the breeze. In my experience, clustering them at different heights looks far more magical than a single row. They pack flat when the season ends, ready to haunt again next October.
Pumpkin Balloon Garland
BEFORE: A plain doorway or mantel looks bare in October, and real pumpkins are heavy, pricey, and rot within days on a warm porch.
AFTER: A garland of orange, white, and green balloons painted like pumpkins arches overhead, festive for weeks and light enough to hang with simple tape.
Blow up balloons in varied sizes, paint simple jack o lantern faces or leafy stems on a few, and string them along curling ribbon. I’ve noticed kids love helping with this one, and the whole project costs less than a bag of candy. Hang it a day before the party so the paint fully sets. It photographs beautifully for party invitations too.
Apothecary Jar Potions
- Collect empty glass jars and bottles in different shapes, then remove labels with warm soapy water.
- Fill each with colored water using a few drops of food coloring, green for slime, purple for mystery.
- Add floating props like plastic spiders, gummy eyeballs, or dried flowers for a creepy specimen look.
- Tie on kraft paper tags labeled with playful names like Witch Hazel or Bat Wing Brew.
Line these potion bottles along a mantel or bathroom shelf for instant mad scientist charm. In my experience, dim lighting makes the colors glow beautifully, so add a small lamp nearby. They cost almost nothing, store easily, and kids love inventing new potion names every year.
Black Cat Silhouettes
| Cardboard Cutouts | Chalkboard Cats | |
|---|---|---|
| Cost | Under five dollars | One chalkboard sign |
| Time | One hour | Thirty minutes |
| Best spot | Windows and fences | Entryway table |
| Reusable | Yes, for years | Wipe and redraw |
Black cat silhouettes bring classic Halloween charm without a hint of fright, perfect for homes with small children. Trace a simple arched back cat shape onto black cardstock or cardboard, cut a few in different sizes, and tape them inside windows so their shapes glow against the evening light. I have seen this work well in many cases where families wanted festive but friendly decor. Save your templates in a folder and reuse them every October.
Spooky Front Door Mummy
DO:
- Wrap white crepe paper streamers loosely around the door, leaving gaps for a mummy look.
- Add two large googly eyes near the top so the door has a friendly face.
- Secure streamers with painter’s tape to protect your paint.
DON’T:
- Don’t wrap the handle or lock, guests still need to open the door.
- Don’t use regular tape, it can peel paint on removal.
- Don’t block the peephole, safety comes first on busy trick or treat night.
A mummy door greets trick or treaters with humor instead of horror, and it takes twenty minutes tops. In my experience, this is the decoration neighbors photograph most. Take it down the morning after so the streamers never get soggy in November rain.
Glowing Eyeball Bushes
Cost: Low | Time: One hour | Skill Level: Beginner | Best For: Front yard bushes
Ping pong balls turn ordinary bushes into watchful creatures after dark, and the effect delights kids without scaring them. Paint large pupils on white ping pong balls with a black marker, push each ball onto a thin garden stake, and nestle the stakes deep among your shrubs so only the eyes peek out. When porch lights catch them, the whole bush seems alive and watching the sidewalk. That’s why many experts recommend this trick for maximum curb appeal on a minimum budget. Pull the stakes after Halloween and reuse the eyeballs for party games.
Painted Mini Pumpkins
Mini pumpkins are nature’s perfect canvas, and painting them beats carving in every way. No sharp tools, no slimy scooping, and the results last for weeks instead of days. Set out acrylic paints, brushes, and a stack of tiny pumpkins, then let everyone decorate their own. Dots, stripes, faces, and messages all look adorable at this scale.
I’ve noticed white pumpkins show paint colors most vividly, while orange ones glow with classic charm. Seal finished pumpkins with a clear matte spray so the paint survives porch weather. Group them in odd numbers on steps or tables for a display that looks professionally styled.
Witch Hat Table Toppers
- Roll black cardstock into simple cones and glue the seam, then cut a wide brim circle for each hat.
- Add a ribbon band in orange, purple, or green, and top with a small buckle cut from gold paper.
- Fill the cones with candy or small succulents for a topper that doubles as a party favor.
- Scatter a few across the dessert table at different heights for a playful witchy skyline.
These little hats cost almost nothing but steal the show on any Halloween table. I have seen this work well in many cases where hosts wanted centerpieces kids could take home. Make a dozen in an afternoon while watching a favorite spooky movie, and watch them disappear by night’s end.
Candy Corn Vase Filler
Quick Tip: Layer candy corn in a clear glass vase with the points facing outward for a perfect striped effect. Pour each color slowly and tap the vase gently so the layers settle evenly without mixing.
This five minute filler looks like a giant candy corn and costs less than a coffee. Use a tall cylinder vase on your entryway table or as a dining centerpiece, and top with a small candle or fall flowers. I’ve noticed guests always comment on this simple trick, and it works with any tri color candy you have on hand. When the season ends, the candy becomes movie night snacks, so nothing goes to waste.
Cobweb Corner Drape
BEFORE: Empty room corners feel forgotten in October, collecting dust while the rest of the house gets all the festive attention.
AFTER: Stretchy cobweb fabric draped across the corner, dotted with plastic spiders, turns dead space into the spookiest spot in the room.
Stretch a bag of webbing from the ceiling to both walls, pulling thin spots for a natural look. If you are planning costumes too, these funny halloween costumes for families complete the spooky scene. I’ve noticed one bag covers two full corners, so this is the cheapest big impact decor you can buy. Add a black light nearby and the whole corner glows eerily after dark.
Floating Witch Hats
- Tie clear fishing line to the tip of lightweight witch hats from the party store.
- Hang them at different heights from your porch ceiling or a tree branch.
- Tuck a battery tea light inside each hat for a magical floating glow.
- Add curling ribbon streamers so they twirl gently in the evening breeze.
Guests will swear these hats hover by magic, and the illusion takes minutes to create. In my experience, hanging them along a walkway guides trick or treaters to your door beautifully. Use warm white lights for an elegant look or green for full witchy drama. They store flat and last for years.
Tombstone Walkway Signs
| Cardboard Tombstones | Foam Board Markers | |
|---|---|---|
| Cost | Free from boxes | A few dollars |
| Time | One afternoon | Two hours |
| Weatherproof | Bring in rain | Sealed with spray |
| Reusable | One season | Many years |
Playful tombstones line your walkway with humor, not horror, when you write silly epitaphs like Here Lies My Diet. Cut stone shapes from cardboard or foam board, paint them grey, and add funny names with a black marker. Stake them along the path with wooden skewers. I’ve noticed kids love reading each one on their way to the door, and the whole project costs less than a pumpkin spice latte. Save the funniest ones to reuse every October.
Mummy Wrapped Vases
DO:
- Wrap vases loosely with white gauze, leaving small gaps for a true mummy texture.
- Stick on googly eyes at different heights for a playful monster family.
- Fill with dried wheat or bare branches for an autumn harvest look.
DON’T:
- Don’t wrap too tightly, the gauze tears and looks messy instead of spooky.
- Don’t use real candles inside, the fabric is flammable.
- Don’t skip the eyes, they are what make these vases charming.
These mummy vases take ten minutes each and look adorable grouped on a mantel. In my experience, varying the vase heights creates the cutest little monster family. They work with any flowers you have, though dried stems keep the Halloween mood perfectly.
Spider Web Doormat
Cost: Low | Time: Thirty minutes | Skill Level: Beginner | Best For: Front door welcome
A plain black doormat becomes a spider web masterpiece with nothing but white fabric paint. Lay the mat flat, paint straight lines radiating from the center, then connect them with curved arcs to form the web. Add a plastic spider in one corner for the finishing touch. Use outdoor fabric paint so rain never ruins your work. I’ve noticed this simple upgrade gets more compliments than expensive store bought mats. It welcomes guests with playful spookiness and wipes clean all season. Let the paint cure overnight before putting it back by the door.
Ghost Garland Lights
A plain string of white lights becomes a parade of happy ghosts with a little craft felt. Cut simple ghost shapes from white felt, poke a small hole at the top of each, and slip them over every other bulb. The lights shine through the fabric, giving each ghost a soft, friendly glow that looks magical after dark.
Drape the garland along a mantel, staircase railing, or headboard for instant Halloween warmth. I’ve noticed warm white bulbs look cozier than cool ones for this project. The felt ghosts store flat in an envelope, ready to glow again next year without any fuss.
Potion Bottle Labels
- Design spooky labels on your computer or hand letter them on kraft paper for a vintage apothecary look.
- Use playful names like Eye of Newt, Dragon Tears, or Midnight Mist to spark imagination.
- Age the paper with a light tea stain and singe the edges carefully for an antique effect.
- Stick labels on bottles with double sided tape so they peel off cleanly after Halloween.
Labels turn ordinary bottles into a witch’s pantry in minutes. I have seen this work well in many cases where crafters wanted big impact from items they already owned. Print a whole sheet at once and share extras with friends who love Halloween crafting too.
Haunted Mirror Notes
Quick Tip: Write spooky messages on your bathroom mirror with a dry erase marker for a surprise that appears in the morning steam. Simple phrases like BOO or I See You delight kids and wash off with one wipe.
This zero cost prank takes seconds and never fails to get a laugh. Draw a small ghost or spider web in the corner of the mirror too, so the message feels like part of a bigger haunting. I’ve noticed this works best on mirrors that fog up during hot showers. The reveal timing is perfect, and cleanup takes one swipe of a cloth.
Bat Branch Centerpiece
BEFORE: A bare branch in a vase looks unfinished, like you gave up halfway through decorating for the season.
AFTER: The same branch hung with paper bats and tiny lights becomes a dramatic Halloween tree that anchors your whole table.
Find a sturdy branch on your next walk, spray paint it black or white, and stand it in a heavy vase filled with stones. Clip on paper bats and wrap a short string of fairy lights around the limbs. I’ve noticed this centerpiece sparks more conversation than anything else on the table. It costs nothing and looks like a designer piece.
Pumpkin Stack Topiary
- Choose three pumpkins in descending sizes, real or faux, in matching or mixed colors.
- Thread a sturdy wooden dowel through their centers to hold the stack steady.
- Set the stack in a large urn or planter filled with soil for weight.
- Tuck fall leaves and small gourds around the base to hide the mechanics.
This topiary brings instant height to porches and entryways without any carving. In my experience, faux pumpkins make this a one time investment you will reuse for years. They survive rain, wind, and curious squirrels, and the whole project takes under an hour. Add a bow or a small crow on top for personality.
Skeleton Hand Candy Dish
| Plastic Hand Dish | DIY Poseable Hand | |
|---|---|---|
| Cost | Party store find | Pipe cleaners |
| Time | Zero minutes | One hour |
| Spook factor | Playful | Creepy realistic |
| Reusable | Every year | Every year |
A skeleton hand rising from a candy bowl makes trick or treaters hesitate before grabbing a treat, which is half the fun. Set a plastic skeleton hand in a deep bowl so it looks like it is climbing out, then fill around it with wrapped candy. That’s why many experts recommend placing it at kid height for maximum giggles. It is spooky enough to thrill but friendly enough for toddlers, and it becomes a yearly tradition.
Creepy Crawly Table Runner
DO:
- Lay a black or orange runner down the center of your table as the base.
- Scatter plastic spiders, bugs, and centipedes along its length for creepy texture.
- Weave in a string of tiny orange lights for evening glow.
DON’T:
- Don’t use real looking insects near food, guests may lose their appetite.
- Don’t overload the runner, leave space for plates and dishes.
- Don’t forget to remove the bugs before washing the runner.
This runner turns an ordinary dinner into a Halloween feast in minutes. In my experience, kids love rearranging the bugs, so expect the layout to change all evening. It packs away in seconds and works for every spooky dinner party you host.
Monster Eye Wreath
Cost: Low | Time: One afternoon | Skill Level: Beginner | Best For: Front door statement
A grapevine wreath covered in googly eyes greets visitors with silly monster charm. Hot glue large and small googly eyes all over the wreath, mixing sizes for a chaotic cute look. Add a purple bow at the top for extra personality. I’ve noticed this wreath makes delivery drivers smile, which tells you it works. It hangs with a simple hook, survives the whole season outdoors, and the eyes never fade. Make one for your door in an afternoon and a mini version for a bedroom door too. They store easily.
Floating Candle Pathway
Battery candles in glass hurricanes line your walkway with flickering light that guides guests safely to your door. No flames mean no worry about costumes brushing past or autumn leaves blowing through. Space them evenly on both sides of the path, mixing tall and short hurricanes for a professional landscape look.
Turn them on at dusk with a single remote and enjoy the magic all evening. I’ve noticed warm white flames look most realistic, while orange adds extra Halloween drama. Collect them in a bin after the holiday and they are ready to glow again next year with zero effort.
Conclusion
These 25 easy halloween diy decorations prove that the spookiest season shines brightest when it is handmade. From paper bats to glowing pathways, every project here costs little, takes an afternoon at most, and fills your home with personality no store can match. I’ve seen how small changes like these can completely shift the way a space feels. Save your favorites to Pinterest, gather your supplies this weekend, and enjoy every giggle these crafts bring. Happy haunting, and happy crafting. Pick three ideas to start, and let each finished project inspire the next one on your list.
Store bought Halloween decor drains your wallet fast, but easy halloween diy decorations prove that spooky style costs almost nothing. With paper, paint, mason jars, and a free afternoon, you can fill your home with handmade charm that looks straight out of a boutique. In my experience, guests always ask where you bought these pieces, and the reveal that you made them is the best part.
Below are 25 weekend friendly projects, from floating ghosts to glowing pathways, each with simple steps and budget tips. If you enjoy dressing up your ceilings too, these fabric ceiling ideas pair beautifully with hanging Halloween pieces. Pick your favorites, gather the kids, and let the crafting begin.
Paper Bat Wall Swarm
A bare wall turns into a haunted sky when dozens of paper bats take flight across it. Cut bat shapes from black cardstock in three sizes, fold each one down the middle for dimension, and stick them up with removable mounting squares. Arrange them in a loose swooping trail from a corner, as if the whole colony just lifted off at dusk.
I’ve noticed this works best above a mantel or along a staircase wall where the trail can climb. Keep the biggest bats near the start of the flight path and shrink them as they rise, which creates a lovely sense of motion. Peel them down after the season and save them flat for next year.
Mason Jar Glow Lanterns
- Paint the inside of clean mason jars with orange or purple craft paint, leaving the outside untouched for a smooth glow.
- Stick on black paper cutouts of jack o lantern faces, witches, or cats before the paint dries.
- Drop in a battery tea light rather than a real candle for safety around kids and curtains.
- Cluster three jars of different heights on your porch steps or windowsill for instant atmosphere.
These lanterns cost pennies and take less than an hour, yet they look like something from a fall market stall. I have seen this work well in many cases where renters wanted big impact without damaging anything. Line a whole walkway with them on Halloween night and watch trick or treaters slow down to admire the glow.
Cheesecloth Hanging Ghosts
Quick Tip: Dip cheesecloth in liquid starch instead of glue for ghosts that hold their shape but stay soft and reusable. Drape the damp cloth over an inflated balloon set on a cup, let it dry overnight, then pop the balloon and draw a sweet or spooky face with a marker.
Hang these airy ghosts from porch ceilings, tree branches, or curtain rods with clear fishing line so they drift in the breeze. In my experience, clustering them at different heights looks far more magical than a single row. They pack flat when the season ends, ready to haunt again next October.
Pumpkin Balloon Garland
BEFORE: A plain doorway or mantel looks bare in October, and real pumpkins are heavy, pricey, and rot within days on a warm porch.
AFTER: A garland of orange, white, and green balloons painted like pumpkins arches overhead, festive for weeks and light enough to hang with simple tape.
Blow up balloons in varied sizes, paint simple jack o lantern faces or leafy stems on a few, and string them along curling ribbon. I’ve noticed kids love helping with this one, and the whole project costs less than a bag of candy. Hang it a day before the party so the paint fully sets. It photographs beautifully for party invitations too.
Apothecary Jar Potions
- Collect empty glass jars and bottles in different shapes, then remove labels with warm soapy water.
- Fill each with colored water using a few drops of food coloring, green for slime, purple for mystery.
- Add floating props like plastic spiders, gummy eyeballs, or dried flowers for a creepy specimen look.
- Tie on kraft paper tags labeled with playful names like Witch Hazel or Bat Wing Brew.
Line these potion bottles along a mantel or bathroom shelf for instant mad scientist charm. In my experience, dim lighting makes the colors glow beautifully, so add a small lamp nearby. They cost almost nothing, store easily, and kids love inventing new potion names every year.
Black Cat Silhouettes
| Cardboard Cutouts | Chalkboard Cats | |
|---|---|---|
| Cost | Under five dollars | One chalkboard sign |
| Time | One hour | Thirty minutes |
| Best spot | Windows and fences | Entryway table |
| Reusable | Yes, for years | Wipe and redraw |
Black cat silhouettes bring classic Halloween charm without a hint of fright, perfect for homes with small children. Trace a simple arched back cat shape onto black cardstock or cardboard, cut a few in different sizes, and tape them inside windows so their shapes glow against the evening light. I have seen this work well in many cases where families wanted festive but friendly decor. Save your templates in a folder and reuse them every October.
Spooky Front Door Mummy
DO:
- Wrap white crepe paper streamers loosely around the door, leaving gaps for a mummy look.
- Add two large googly eyes near the top so the door has a friendly face.
- Secure streamers with painter’s tape to protect your paint.
DON’T:
- Don’t wrap the handle or lock, guests still need to open the door.
- Don’t use regular tape, it can peel paint on removal.
- Don’t block the peephole, safety comes first on busy trick or treat night.
A mummy door greets trick or treaters with humor instead of horror, and it takes twenty minutes tops. In my experience, this is the decoration neighbors photograph most. Take it down the morning after so the streamers never get soggy in November rain.
Glowing Eyeball Bushes
Cost: Low | Time: One hour | Skill Level: Beginner | Best For: Front yard bushes
Ping pong balls turn ordinary bushes into watchful creatures after dark, and the effect delights kids without scaring them. Paint large pupils on white ping pong balls with a black marker, push each ball onto a thin garden stake, and nestle the stakes deep among your shrubs so only the eyes peek out. When porch lights catch them, the whole bush seems alive and watching the sidewalk. That’s why many experts recommend this trick for maximum curb appeal on a minimum budget. Pull the stakes after Halloween and reuse the eyeballs for party games.
Painted Mini Pumpkins
Mini pumpkins are nature’s perfect canvas, and painting them beats carving in every way. No sharp tools, no slimy scooping, and the results last for weeks instead of days. Set out acrylic paints, brushes, and a stack of tiny pumpkins, then let everyone decorate their own. Dots, stripes, faces, and messages all look adorable at this scale.
I’ve noticed white pumpkins show paint colors most vividly, while orange ones glow with classic charm. Seal finished pumpkins with a clear matte spray so the paint survives porch weather. Group them in odd numbers on steps or tables for a display that looks professionally styled.
Witch Hat Table Toppers
- Roll black cardstock into simple cones and glue the seam, then cut a wide brim circle for each hat.
- Add a ribbon band in orange, purple, or green, and top with a small buckle cut from gold paper.
- Fill the cones with candy or small succulents for a topper that doubles as a party favor.
- Scatter a few across the dessert table at different heights for a playful witchy skyline.
These little hats cost almost nothing but steal the show on any Halloween table. I have seen this work well in many cases where hosts wanted centerpieces kids could take home. Make a dozen in an afternoon while watching a favorite spooky movie, and watch them disappear by night’s end.
Candy Corn Vase Filler
Quick Tip: Layer candy corn in a clear glass vase with the points facing outward for a perfect striped effect. Pour each color slowly and tap the vase gently so the layers settle evenly without mixing.
This five minute filler looks like a giant candy corn and costs less than a coffee. Use a tall cylinder vase on your entryway table or as a dining centerpiece, and top with a small candle or fall flowers. I’ve noticed guests always comment on this simple trick, and it works with any tri color candy you have on hand. When the season ends, the candy becomes movie night snacks, so nothing goes to waste.
Cobweb Corner Drape
BEFORE: Empty room corners feel forgotten in October, collecting dust while the rest of the house gets all the festive attention.
AFTER: Stretchy cobweb fabric draped across the corner, dotted with plastic spiders, turns dead space into the spookiest spot in the room.
Stretch a bag of webbing from the ceiling to both walls, pulling thin spots for a natural look. If you are planning costumes too, these funny halloween costumes for families complete the spooky scene. I’ve noticed one bag covers two full corners, so this is the cheapest big impact decor you can buy. Add a black light nearby and the whole corner glows eerily after dark.
Floating Witch Hats
- Tie clear fishing line to the tip of lightweight witch hats from the party store.
- Hang them at different heights from your porch ceiling or a tree branch.
- Tuck a battery tea light inside each hat for a magical floating glow.
- Add curling ribbon streamers so they twirl gently in the evening breeze.
Guests will swear these hats hover by magic, and the illusion takes minutes to create. In my experience, hanging them along a walkway guides trick or treaters to your door beautifully. Use warm white lights for an elegant look or green for full witchy drama. They store flat and last for years.
Tombstone Walkway Signs
| Cardboard Tombstones | Foam Board Markers | |
|---|---|---|
| Cost | Free from boxes | A few dollars |
| Time | One afternoon | Two hours |
| Weatherproof | Bring in rain | Sealed with spray |
| Reusable | One season | Many years |
Playful tombstones line your walkway with humor, not horror, when you write silly epitaphs like Here Lies My Diet. Cut stone shapes from cardboard or foam board, paint them grey, and add funny names with a black marker. Stake them along the path with wooden skewers. I’ve noticed kids love reading each one on their way to the door, and the whole project costs less than a pumpkin spice latte. Save the funniest ones to reuse every October.
Mummy Wrapped Vases
DO:
- Wrap vases loosely with white gauze, leaving small gaps for a true mummy texture.
- Stick on googly eyes at different heights for a playful monster family.
- Fill with dried wheat or bare branches for an autumn harvest look.
DON’T:
- Don’t wrap too tightly, the gauze tears and looks messy instead of spooky.
- Don’t use real candles inside, the fabric is flammable.
- Don’t skip the eyes, they are what make these vases charming.
These mummy vases take ten minutes each and look adorable grouped on a mantel. In my experience, varying the vase heights creates the cutest little monster family. They work with any flowers you have, though dried stems keep the Halloween mood perfectly.
Spider Web Doormat
Cost: Low | Time: Thirty minutes | Skill Level: Beginner | Best For: Front door welcome
A plain black doormat becomes a spider web masterpiece with nothing but white fabric paint. Lay the mat flat, paint straight lines radiating from the center, then connect them with curved arcs to form the web. Add a plastic spider in one corner for the finishing touch. Use outdoor fabric paint so rain never ruins your work. I’ve noticed this simple upgrade gets more compliments than expensive store bought mats. It welcomes guests with playful spookiness and wipes clean all season. Let the paint cure overnight before putting it back by the door.
Ghost Garland Lights
A plain string of white lights becomes a parade of happy ghosts with a little craft felt. Cut simple ghost shapes from white felt, poke a small hole at the top of each, and slip them over every other bulb. The lights shine through the fabric, giving each ghost a soft, friendly glow that looks magical after dark.
Drape the garland along a mantel, staircase railing, or headboard for instant Halloween warmth. I’ve noticed warm white bulbs look cozier than cool ones for this project. The felt ghosts store flat in an envelope, ready to glow again next year without any fuss.
Potion Bottle Labels
- Design spooky labels on your computer or hand letter them on kraft paper for a vintage apothecary look.
- Use playful names like Eye of Newt, Dragon Tears, or Midnight Mist to spark imagination.
- Age the paper with a light tea stain and singe the edges carefully for an antique effect.
- Stick labels on bottles with double sided tape so they peel off cleanly after Halloween.
Labels turn ordinary bottles into a witch’s pantry in minutes. I have seen this work well in many cases where crafters wanted big impact from items they already owned. Print a whole sheet at once and share extras with friends who love Halloween crafting too.
Haunted Mirror Notes
Quick Tip: Write spooky messages on your bathroom mirror with a dry erase marker for a surprise that appears in the morning steam. Simple phrases like BOO or I See You delight kids and wash off with one wipe.
This zero cost prank takes seconds and never fails to get a laugh. Draw a small ghost or spider web in the corner of the mirror too, so the message feels like part of a bigger haunting. I’ve noticed this works best on mirrors that fog up during hot showers. The reveal timing is perfect, and cleanup takes one swipe of a cloth.
Bat Branch Centerpiece
BEFORE: A bare branch in a vase looks unfinished, like you gave up halfway through decorating for the season.
AFTER: The same branch hung with paper bats and tiny lights becomes a dramatic Halloween tree that anchors your whole table.
Find a sturdy branch on your next walk, spray paint it black or white, and stand it in a heavy vase filled with stones. Clip on paper bats and wrap a short string of fairy lights around the limbs. I’ve noticed this centerpiece sparks more conversation than anything else on the table. It costs nothing and looks like a designer piece.
Pumpkin Stack Topiary
- Choose three pumpkins in descending sizes, real or faux, in matching or mixed colors.
- Thread a sturdy wooden dowel through their centers to hold the stack steady.
- Set the stack in a large urn or planter filled with soil for weight.
- Tuck fall leaves and small gourds around the base to hide the mechanics.
This topiary brings instant height to porches and entryways without any carving. In my experience, faux pumpkins make this a one time investment you will reuse for years. They survive rain, wind, and curious squirrels, and the whole project takes under an hour. Add a bow or a small crow on top for personality.
Skeleton Hand Candy Dish
| Plastic Hand Dish | DIY Poseable Hand | |
|---|---|---|
| Cost | Party store find | Pipe cleaners |
| Time | Zero minutes | One hour |
| Spook factor | Playful | Creepy realistic |
| Reusable | Every year | Every year |
A skeleton hand rising from a candy bowl makes trick or treaters hesitate before grabbing a treat, which is half the fun. Set a plastic skeleton hand in a deep bowl so it looks like it is climbing out, then fill around it with wrapped candy. That’s why many experts recommend placing it at kid height for maximum giggles. It is spooky enough to thrill but friendly enough for toddlers, and it becomes a yearly tradition.
Creepy Crawly Table Runner
DO:
- Lay a black or orange runner down the center of your table as the base.
- Scatter plastic spiders, bugs, and centipedes along its length for creepy texture.
- Weave in a string of tiny orange lights for evening glow.
DON’T:
- Don’t use real looking insects near food, guests may lose their appetite.
- Don’t overload the runner, leave space for plates and dishes.
- Don’t forget to remove the bugs before washing the runner.
This runner turns an ordinary dinner into a Halloween feast in minutes. In my experience, kids love rearranging the bugs, so expect the layout to change all evening. It packs away in seconds and works for every spooky dinner party you host.
Monster Eye Wreath
Cost: Low | Time: One afternoon | Skill Level: Beginner | Best For: Front door statement
A grapevine wreath covered in googly eyes greets visitors with silly monster charm. Hot glue large and small googly eyes all over the wreath, mixing sizes for a chaotic cute look. Add a purple bow at the top for extra personality. I’ve noticed this wreath makes delivery drivers smile, which tells you it works. It hangs with a simple hook, survives the whole season outdoors, and the eyes never fade. Make one for your door in an afternoon and a mini version for a bedroom door too. They store easily.
Floating Candle Pathway
Battery candles in glass hurricanes line your walkway with flickering light that guides guests safely to your door. No flames mean no worry about costumes brushing past or autumn leaves blowing through. Space them evenly on both sides of the path, mixing tall and short hurricanes for a professional landscape look.
Turn them on at dusk with a single remote and enjoy the magic all evening. I’ve noticed warm white flames look most realistic, while orange adds extra Halloween drama. Collect them in a bin after the holiday and they are ready to glow again next year with zero effort.
Conclusion
These 25 easy halloween diy decorations prove that the spookiest season shines brightest when it is handmade. From paper bats to glowing pathways, every project here costs little, takes an afternoon at most, and fills your home with personality no store can match. I’ve seen how small changes like these can completely shift the way a space feels. Save your favorites to Pinterest, gather your supplies this weekend, and enjoy every giggle these crafts bring. Happy haunting, and happy crafting. Pick three ideas to start, and let each finished project inspire the next one on your list.
| Cardboard Cutouts | Chalkboard Cats | |
|---|---|---|
| Cost | Under five dollars | One chalkboard sign |
| Time | One hour | Thirty minutes |
| Best spot | Windows and fences | Entryway table |
| Reusable | Yes, for years | Wipe and redraw |
Black cat silhouettes bring classic Halloween charm without a hint of fright, perfect for homes with small children. Trace a simple arched back cat shape onto black cardstock or cardboard, cut a few in different sizes, and tape them inside windows so their shapes glow against the evening light. I have seen this work well in many cases where families wanted festive but friendly decor. Save your templates in a folder and reuse them every October.
Spooky Front Door Mummy
DO:
- Wrap white crepe paper streamers loosely around the door, leaving gaps for a mummy look.
- Add two large googly eyes near the top so the door has a friendly face.
- Secure streamers with painter’s tape to protect your paint.
DON’T:
- Don’t wrap the handle or lock, guests still need to open the door.
- Don’t use regular tape, it can peel paint on removal.
- Don’t block the peephole, safety comes first on busy trick or treat night.
A mummy door greets trick or treaters with humor instead of horror, and it takes twenty minutes tops. In my experience, this is the decoration neighbors photograph most. Take it down the morning after so the streamers never get soggy in November rain.
Glowing Eyeball Bushes
Cost: Low | Time: One hour | Skill Level: Beginner | Best For: Front yard bushes
Ping pong balls turn ordinary bushes into watchful creatures after dark, and the effect delights kids without scaring them. Paint large pupils on white ping pong balls with a black marker, push each ball onto a thin garden stake, and nestle the stakes deep among your shrubs so only the eyes peek out. When porch lights catch them, the whole bush seems alive and watching the sidewalk. That’s why many experts recommend this trick for maximum curb appeal on a minimum budget. Pull the stakes after Halloween and reuse the eyeballs for party games.
Painted Mini Pumpkins
Mini pumpkins are nature’s perfect canvas, and painting them beats carving in every way. No sharp tools, no slimy scooping, and the results last for weeks instead of days. Set out acrylic paints, brushes, and a stack of tiny pumpkins, then let everyone decorate their own. Dots, stripes, faces, and messages all look adorable at this scale.
I’ve noticed white pumpkins show paint colors most vividly, while orange ones glow with classic charm. Seal finished pumpkins with a clear matte spray so the paint survives porch weather. Group them in odd numbers on steps or tables for a display that looks professionally styled.
Witch Hat Table Toppers
- Roll black cardstock into simple cones and glue the seam, then cut a wide brim circle for each hat.
- Add a ribbon band in orange, purple, or green, and top with a small buckle cut from gold paper.
- Fill the cones with candy or small succulents for a topper that doubles as a party favor.
- Scatter a few across the dessert table at different heights for a playful witchy skyline.
These little hats cost almost nothing but steal the show on any Halloween table. I have seen this work well in many cases where hosts wanted centerpieces kids could take home. Make a dozen in an afternoon while watching a favorite spooky movie, and watch them disappear by night’s end.
Candy Corn Vase Filler
Quick Tip: Layer candy corn in a clear glass vase with the points facing outward for a perfect striped effect. Pour each color slowly and tap the vase gently so the layers settle evenly without mixing.
This five minute filler looks like a giant candy corn and costs less than a coffee. Use a tall cylinder vase on your entryway table or as a dining centerpiece, and top with a small candle or fall flowers. I’ve noticed guests always comment on this simple trick, and it works with any tri color candy you have on hand. When the season ends, the candy becomes movie night snacks, so nothing goes to waste.
Cobweb Corner Drape
BEFORE: Empty room corners feel forgotten in October, collecting dust while the rest of the house gets all the festive attention.
AFTER: Stretchy cobweb fabric draped across the corner, dotted with plastic spiders, turns dead space into the spookiest spot in the room.
Stretch a bag of webbing from the ceiling to both walls, pulling thin spots for a natural look. If you are planning costumes too, these funny halloween costumes for families complete the spooky scene. I’ve noticed one bag covers two full corners, so this is the cheapest big impact decor you can buy. Add a black light nearby and the whole corner glows eerily after dark.
Floating Witch Hats
- Tie clear fishing line to the tip of lightweight witch hats from the party store.
- Hang them at different heights from your porch ceiling or a tree branch.
- Tuck a battery tea light inside each hat for a magical floating glow.
- Add curling ribbon streamers so they twirl gently in the evening breeze.
Guests will swear these hats hover by magic, and the illusion takes minutes to create. In my experience, hanging them along a walkway guides trick or treaters to your door beautifully. Use warm white lights for an elegant look or green for full witchy drama. They store flat and last for years.
Tombstone Walkway Signs
| Cardboard Tombstones | Foam Board Markers | |
|---|---|---|
| Cost | Free from boxes | A few dollars |
| Time | One afternoon | Two hours |
| Weatherproof | Bring in rain | Sealed with spray |
| Reusable | One season | Many years |
Playful tombstones line your walkway with humor, not horror, when you write silly epitaphs like Here Lies My Diet. Cut stone shapes from cardboard or foam board, paint them grey, and add funny names with a black marker. Stake them along the path with wooden skewers. I’ve noticed kids love reading each one on their way to the door, and the whole project costs less than a pumpkin spice latte. Save the funniest ones to reuse every October.
Mummy Wrapped Vases
DO:
- Wrap vases loosely with white gauze, leaving small gaps for a true mummy texture.
- Stick on googly eyes at different heights for a playful monster family.
- Fill with dried wheat or bare branches for an autumn harvest look.
DON’T:
- Don’t wrap too tightly, the gauze tears and looks messy instead of spooky.
- Don’t use real candles inside, the fabric is flammable.
- Don’t skip the eyes, they are what make these vases charming.
These mummy vases take ten minutes each and look adorable grouped on a mantel. In my experience, varying the vase heights creates the cutest little monster family. They work with any flowers you have, though dried stems keep the Halloween mood perfectly.
Spider Web Doormat
Cost: Low | Time: Thirty minutes | Skill Level: Beginner | Best For: Front door welcome
A plain black doormat becomes a spider web masterpiece with nothing but white fabric paint. Lay the mat flat, paint straight lines radiating from the center, then connect them with curved arcs to form the web. Add a plastic spider in one corner for the finishing touch. Use outdoor fabric paint so rain never ruins your work. I’ve noticed this simple upgrade gets more compliments than expensive store bought mats. It welcomes guests with playful spookiness and wipes clean all season. Let the paint cure overnight before putting it back by the door.
Ghost Garland Lights
A plain string of white lights becomes a parade of happy ghosts with a little craft felt. Cut simple ghost shapes from white felt, poke a small hole at the top of each, and slip them over every other bulb. The lights shine through the fabric, giving each ghost a soft, friendly glow that looks magical after dark.
Drape the garland along a mantel, staircase railing, or headboard for instant Halloween warmth. I’ve noticed warm white bulbs look cozier than cool ones for this project. The felt ghosts store flat in an envelope, ready to glow again next year without any fuss.
Potion Bottle Labels
- Design spooky labels on your computer or hand letter them on kraft paper for a vintage apothecary look.
- Use playful names like Eye of Newt, Dragon Tears, or Midnight Mist to spark imagination.
- Age the paper with a light tea stain and singe the edges carefully for an antique effect.
- Stick labels on bottles with double sided tape so they peel off cleanly after Halloween.
Labels turn ordinary bottles into a witch’s pantry in minutes. I have seen this work well in many cases where crafters wanted big impact from items they already owned. Print a whole sheet at once and share extras with friends who love Halloween crafting too.
Haunted Mirror Notes
Quick Tip: Write spooky messages on your bathroom mirror with a dry erase marker for a surprise that appears in the morning steam. Simple phrases like BOO or I See You delight kids and wash off with one wipe.
This zero cost prank takes seconds and never fails to get a laugh. Draw a small ghost or spider web in the corner of the mirror too, so the message feels like part of a bigger haunting. I’ve noticed this works best on mirrors that fog up during hot showers. The reveal timing is perfect, and cleanup takes one swipe of a cloth.
Bat Branch Centerpiece
BEFORE: A bare branch in a vase looks unfinished, like you gave up halfway through decorating for the season.
AFTER: The same branch hung with paper bats and tiny lights becomes a dramatic Halloween tree that anchors your whole table.
Find a sturdy branch on your next walk, spray paint it black or white, and stand it in a heavy vase filled with stones. Clip on paper bats and wrap a short string of fairy lights around the limbs. I’ve noticed this centerpiece sparks more conversation than anything else on the table. It costs nothing and looks like a designer piece.
Pumpkin Stack Topiary
- Choose three pumpkins in descending sizes, real or faux, in matching or mixed colors.
- Thread a sturdy wooden dowel through their centers to hold the stack steady.
- Set the stack in a large urn or planter filled with soil for weight.
- Tuck fall leaves and small gourds around the base to hide the mechanics.
This topiary brings instant height to porches and entryways without any carving. In my experience, faux pumpkins make this a one time investment you will reuse for years. They survive rain, wind, and curious squirrels, and the whole project takes under an hour. Add a bow or a small crow on top for personality.
Skeleton Hand Candy Dish
| Plastic Hand Dish | DIY Poseable Hand | |
|---|---|---|
| Cost | Party store find | Pipe cleaners |
| Time | Zero minutes | One hour |
| Spook factor | Playful | Creepy realistic |
| Reusable | Every year | Every year |
A skeleton hand rising from a candy bowl makes trick or treaters hesitate before grabbing a treat, which is half the fun. Set a plastic skeleton hand in a deep bowl so it looks like it is climbing out, then fill around it with wrapped candy. That’s why many experts recommend placing it at kid height for maximum giggles. It is spooky enough to thrill but friendly enough for toddlers, and it becomes a yearly tradition.
Creepy Crawly Table Runner
DO:
- Lay a black or orange runner down the center of your table as the base.
- Scatter plastic spiders, bugs, and centipedes along its length for creepy texture.
- Weave in a string of tiny orange lights for evening glow.
DON’T:
- Don’t use real looking insects near food, guests may lose their appetite.
- Don’t overload the runner, leave space for plates and dishes.
- Don’t forget to remove the bugs before washing the runner.
This runner turns an ordinary dinner into a Halloween feast in minutes. In my experience, kids love rearranging the bugs, so expect the layout to change all evening. It packs away in seconds and works for every spooky dinner party you host.
Monster Eye Wreath
Cost: Low | Time: One afternoon | Skill Level: Beginner | Best For: Front door statement
A grapevine wreath covered in googly eyes greets visitors with silly monster charm. Hot glue large and small googly eyes all over the wreath, mixing sizes for a chaotic cute look. Add a purple bow at the top for extra personality. I’ve noticed this wreath makes delivery drivers smile, which tells you it works. It hangs with a simple hook, survives the whole season outdoors, and the eyes never fade. Make one for your door in an afternoon and a mini version for a bedroom door too. They store easily.
Floating Candle Pathway
Battery candles in glass hurricanes line your walkway with flickering light that guides guests safely to your door. No flames mean no worry about costumes brushing past or autumn leaves blowing through. Space them evenly on both sides of the path, mixing tall and short hurricanes for a professional landscape look.
Turn them on at dusk with a single remote and enjoy the magic all evening. I’ve noticed warm white flames look most realistic, while orange adds extra Halloween drama. Collect them in a bin after the holiday and they are ready to glow again next year with zero effort.
Conclusion
These 25 easy halloween diy decorations prove that the spookiest season shines brightest when it is handmade. From paper bats to glowing pathways, every project here costs little, takes an afternoon at most, and fills your home with personality no store can match. I’ve seen how small changes like these can completely shift the way a space feels. Save your favorites to Pinterest, gather your supplies this weekend, and enjoy every giggle these crafts bring. Happy haunting, and happy crafting. Pick three ideas to start, and let each finished project inspire the next one on your list.
Store bought Halloween decor drains your wallet fast, but easy halloween diy decorations prove that spooky style costs almost nothing. With paper, paint, mason jars, and a free afternoon, you can fill your home with handmade charm that looks straight out of a boutique. In my experience, guests always ask where you bought these pieces, and the reveal that you made them is the best part.
Below are 25 weekend friendly projects, from floating ghosts to glowing pathways, each with simple steps and budget tips. If you enjoy dressing up your ceilings too, these fabric ceiling ideas pair beautifully with hanging Halloween pieces. Pick your favorites, gather the kids, and let the crafting begin.
Paper Bat Wall Swarm
A bare wall turns into a haunted sky when dozens of paper bats take flight across it. Cut bat shapes from black cardstock in three sizes, fold each one down the middle for dimension, and stick them up with removable mounting squares. Arrange them in a loose swooping trail from a corner, as if the whole colony just lifted off at dusk.
I’ve noticed this works best above a mantel or along a staircase wall where the trail can climb. Keep the biggest bats near the start of the flight path and shrink them as they rise, which creates a lovely sense of motion. Peel them down after the season and save them flat for next year.
Mason Jar Glow Lanterns
- Paint the inside of clean mason jars with orange or purple craft paint, leaving the outside untouched for a smooth glow.
- Stick on black paper cutouts of jack o lantern faces, witches, or cats before the paint dries.
- Drop in a battery tea light rather than a real candle for safety around kids and curtains.
- Cluster three jars of different heights on your porch steps or windowsill for instant atmosphere.
These lanterns cost pennies and take less than an hour, yet they look like something from a fall market stall. I have seen this work well in many cases where renters wanted big impact without damaging anything. Line a whole walkway with them on Halloween night and watch trick or treaters slow down to admire the glow.
Cheesecloth Hanging Ghosts
Quick Tip: Dip cheesecloth in liquid starch instead of glue for ghosts that hold their shape but stay soft and reusable. Drape the damp cloth over an inflated balloon set on a cup, let it dry overnight, then pop the balloon and draw a sweet or spooky face with a marker.
Hang these airy ghosts from porch ceilings, tree branches, or curtain rods with clear fishing line so they drift in the breeze. In my experience, clustering them at different heights looks far more magical than a single row. They pack flat when the season ends, ready to haunt again next October.
Pumpkin Balloon Garland
BEFORE: A plain doorway or mantel looks bare in October, and real pumpkins are heavy, pricey, and rot within days on a warm porch.
AFTER: A garland of orange, white, and green balloons painted like pumpkins arches overhead, festive for weeks and light enough to hang with simple tape.
Blow up balloons in varied sizes, paint simple jack o lantern faces or leafy stems on a few, and string them along curling ribbon. I’ve noticed kids love helping with this one, and the whole project costs less than a bag of candy. Hang it a day before the party so the paint fully sets. It photographs beautifully for party invitations too.
Apothecary Jar Potions
- Collect empty glass jars and bottles in different shapes, then remove labels with warm soapy water.
- Fill each with colored water using a few drops of food coloring, green for slime, purple for mystery.
- Add floating props like plastic spiders, gummy eyeballs, or dried flowers for a creepy specimen look.
- Tie on kraft paper tags labeled with playful names like Witch Hazel or Bat Wing Brew.
Line these potion bottles along a mantel or bathroom shelf for instant mad scientist charm. In my experience, dim lighting makes the colors glow beautifully, so add a small lamp nearby. They cost almost nothing, store easily, and kids love inventing new potion names every year.
Black Cat Silhouettes
| Cardboard Cutouts | Chalkboard Cats | |
|---|---|---|
| Cost | Under five dollars | One chalkboard sign |
| Time | One hour | Thirty minutes |
| Best spot | Windows and fences | Entryway table |
| Reusable | Yes, for years | Wipe and redraw |
Black cat silhouettes bring classic Halloween charm without a hint of fright, perfect for homes with small children. Trace a simple arched back cat shape onto black cardstock or cardboard, cut a few in different sizes, and tape them inside windows so their shapes glow against the evening light. I have seen this work well in many cases where families wanted festive but friendly decor. Save your templates in a folder and reuse them every October.
Spooky Front Door Mummy
DO:
- Wrap white crepe paper streamers loosely around the door, leaving gaps for a mummy look.
- Add two large googly eyes near the top so the door has a friendly face.
- Secure streamers with painter’s tape to protect your paint.
DON’T:
- Don’t wrap the handle or lock, guests still need to open the door.
- Don’t use regular tape, it can peel paint on removal.
- Don’t block the peephole, safety comes first on busy trick or treat night.
A mummy door greets trick or treaters with humor instead of horror, and it takes twenty minutes tops. In my experience, this is the decoration neighbors photograph most. Take it down the morning after so the streamers never get soggy in November rain.
Glowing Eyeball Bushes
Cost: Low | Time: One hour | Skill Level: Beginner | Best For: Front yard bushes
Ping pong balls turn ordinary bushes into watchful creatures after dark, and the effect delights kids without scaring them. Paint large pupils on white ping pong balls with a black marker, push each ball onto a thin garden stake, and nestle the stakes deep among your shrubs so only the eyes peek out. When porch lights catch them, the whole bush seems alive and watching the sidewalk. That’s why many experts recommend this trick for maximum curb appeal on a minimum budget. Pull the stakes after Halloween and reuse the eyeballs for party games.
Painted Mini Pumpkins
Mini pumpkins are nature’s perfect canvas, and painting them beats carving in every way. No sharp tools, no slimy scooping, and the results last for weeks instead of days. Set out acrylic paints, brushes, and a stack of tiny pumpkins, then let everyone decorate their own. Dots, stripes, faces, and messages all look adorable at this scale.
I’ve noticed white pumpkins show paint colors most vividly, while orange ones glow with classic charm. Seal finished pumpkins with a clear matte spray so the paint survives porch weather. Group them in odd numbers on steps or tables for a display that looks professionally styled.
Witch Hat Table Toppers
- Roll black cardstock into simple cones and glue the seam, then cut a wide brim circle for each hat.
- Add a ribbon band in orange, purple, or green, and top with a small buckle cut from gold paper.
- Fill the cones with candy or small succulents for a topper that doubles as a party favor.
- Scatter a few across the dessert table at different heights for a playful witchy skyline.
These little hats cost almost nothing but steal the show on any Halloween table. I have seen this work well in many cases where hosts wanted centerpieces kids could take home. Make a dozen in an afternoon while watching a favorite spooky movie, and watch them disappear by night’s end.
Candy Corn Vase Filler
Quick Tip: Layer candy corn in a clear glass vase with the points facing outward for a perfect striped effect. Pour each color slowly and tap the vase gently so the layers settle evenly without mixing.
This five minute filler looks like a giant candy corn and costs less than a coffee. Use a tall cylinder vase on your entryway table or as a dining centerpiece, and top with a small candle or fall flowers. I’ve noticed guests always comment on this simple trick, and it works with any tri color candy you have on hand. When the season ends, the candy becomes movie night snacks, so nothing goes to waste.
Cobweb Corner Drape
BEFORE: Empty room corners feel forgotten in October, collecting dust while the rest of the house gets all the festive attention.
AFTER: Stretchy cobweb fabric draped across the corner, dotted with plastic spiders, turns dead space into the spookiest spot in the room.
Stretch a bag of webbing from the ceiling to both walls, pulling thin spots for a natural look. If you are planning costumes too, these funny halloween costumes for families complete the spooky scene. I’ve noticed one bag covers two full corners, so this is the cheapest big impact decor you can buy. Add a black light nearby and the whole corner glows eerily after dark.
Floating Witch Hats
- Tie clear fishing line to the tip of lightweight witch hats from the party store.
- Hang them at different heights from your porch ceiling or a tree branch.
- Tuck a battery tea light inside each hat for a magical floating glow.
- Add curling ribbon streamers so they twirl gently in the evening breeze.
Guests will swear these hats hover by magic, and the illusion takes minutes to create. In my experience, hanging them along a walkway guides trick or treaters to your door beautifully. Use warm white lights for an elegant look or green for full witchy drama. They store flat and last for years.
Tombstone Walkway Signs
| Cardboard Tombstones | Foam Board Markers | |
|---|---|---|
| Cost | Free from boxes | A few dollars |
| Time | One afternoon | Two hours |
| Weatherproof | Bring in rain | Sealed with spray |
| Reusable | One season | Many years |
Playful tombstones line your walkway with humor, not horror, when you write silly epitaphs like Here Lies My Diet. Cut stone shapes from cardboard or foam board, paint them grey, and add funny names with a black marker. Stake them along the path with wooden skewers. I’ve noticed kids love reading each one on their way to the door, and the whole project costs less than a pumpkin spice latte. Save the funniest ones to reuse every October.
Mummy Wrapped Vases
DO:
- Wrap vases loosely with white gauze, leaving small gaps for a true mummy texture.
- Stick on googly eyes at different heights for a playful monster family.
- Fill with dried wheat or bare branches for an autumn harvest look.
DON’T:
- Don’t wrap too tightly, the gauze tears and looks messy instead of spooky.
- Don’t use real candles inside, the fabric is flammable.
- Don’t skip the eyes, they are what make these vases charming.
These mummy vases take ten minutes each and look adorable grouped on a mantel. In my experience, varying the vase heights creates the cutest little monster family. They work with any flowers you have, though dried stems keep the Halloween mood perfectly.
Spider Web Doormat
Cost: Low | Time: Thirty minutes | Skill Level: Beginner | Best For: Front door welcome
A plain black doormat becomes a spider web masterpiece with nothing but white fabric paint. Lay the mat flat, paint straight lines radiating from the center, then connect them with curved arcs to form the web. Add a plastic spider in one corner for the finishing touch. Use outdoor fabric paint so rain never ruins your work. I’ve noticed this simple upgrade gets more compliments than expensive store bought mats. It welcomes guests with playful spookiness and wipes clean all season. Let the paint cure overnight before putting it back by the door.
Ghost Garland Lights
A plain string of white lights becomes a parade of happy ghosts with a little craft felt. Cut simple ghost shapes from white felt, poke a small hole at the top of each, and slip them over every other bulb. The lights shine through the fabric, giving each ghost a soft, friendly glow that looks magical after dark.
Drape the garland along a mantel, staircase railing, or headboard for instant Halloween warmth. I’ve noticed warm white bulbs look cozier than cool ones for this project. The felt ghosts store flat in an envelope, ready to glow again next year without any fuss.
Potion Bottle Labels
- Design spooky labels on your computer or hand letter them on kraft paper for a vintage apothecary look.
- Use playful names like Eye of Newt, Dragon Tears, or Midnight Mist to spark imagination.
- Age the paper with a light tea stain and singe the edges carefully for an antique effect.
- Stick labels on bottles with double sided tape so they peel off cleanly after Halloween.
Labels turn ordinary bottles into a witch’s pantry in minutes. I have seen this work well in many cases where crafters wanted big impact from items they already owned. Print a whole sheet at once and share extras with friends who love Halloween crafting too.
Haunted Mirror Notes
Quick Tip: Write spooky messages on your bathroom mirror with a dry erase marker for a surprise that appears in the morning steam. Simple phrases like BOO or I See You delight kids and wash off with one wipe.
This zero cost prank takes seconds and never fails to get a laugh. Draw a small ghost or spider web in the corner of the mirror too, so the message feels like part of a bigger haunting. I’ve noticed this works best on mirrors that fog up during hot showers. The reveal timing is perfect, and cleanup takes one swipe of a cloth.
Bat Branch Centerpiece
BEFORE: A bare branch in a vase looks unfinished, like you gave up halfway through decorating for the season.
AFTER: The same branch hung with paper bats and tiny lights becomes a dramatic Halloween tree that anchors your whole table.
Find a sturdy branch on your next walk, spray paint it black or white, and stand it in a heavy vase filled with stones. Clip on paper bats and wrap a short string of fairy lights around the limbs. I’ve noticed this centerpiece sparks more conversation than anything else on the table. It costs nothing and looks like a designer piece.
Pumpkin Stack Topiary
- Choose three pumpkins in descending sizes, real or faux, in matching or mixed colors.
- Thread a sturdy wooden dowel through their centers to hold the stack steady.
- Set the stack in a large urn or planter filled with soil for weight.
- Tuck fall leaves and small gourds around the base to hide the mechanics.
This topiary brings instant height to porches and entryways without any carving. In my experience, faux pumpkins make this a one time investment you will reuse for years. They survive rain, wind, and curious squirrels, and the whole project takes under an hour. Add a bow or a small crow on top for personality.
Skeleton Hand Candy Dish
| Plastic Hand Dish | DIY Poseable Hand | |
|---|---|---|
| Cost | Party store find | Pipe cleaners |
| Time | Zero minutes | One hour |
| Spook factor | Playful | Creepy realistic |
| Reusable | Every year | Every year |
A skeleton hand rising from a candy bowl makes trick or treaters hesitate before grabbing a treat, which is half the fun. Set a plastic skeleton hand in a deep bowl so it looks like it is climbing out, then fill around it with wrapped candy. That’s why many experts recommend placing it at kid height for maximum giggles. It is spooky enough to thrill but friendly enough for toddlers, and it becomes a yearly tradition.
Creepy Crawly Table Runner
DO:
- Lay a black or orange runner down the center of your table as the base.
- Scatter plastic spiders, bugs, and centipedes along its length for creepy texture.
- Weave in a string of tiny orange lights for evening glow.
DON’T:
- Don’t use real looking insects near food, guests may lose their appetite.
- Don’t overload the runner, leave space for plates and dishes.
- Don’t forget to remove the bugs before washing the runner.
This runner turns an ordinary dinner into a Halloween feast in minutes. In my experience, kids love rearranging the bugs, so expect the layout to change all evening. It packs away in seconds and works for every spooky dinner party you host.
Monster Eye Wreath
Cost: Low | Time: One afternoon | Skill Level: Beginner | Best For: Front door statement
A grapevine wreath covered in googly eyes greets visitors with silly monster charm. Hot glue large and small googly eyes all over the wreath, mixing sizes for a chaotic cute look. Add a purple bow at the top for extra personality. I’ve noticed this wreath makes delivery drivers smile, which tells you it works. It hangs with a simple hook, survives the whole season outdoors, and the eyes never fade. Make one for your door in an afternoon and a mini version for a bedroom door too. They store easily.
Floating Candle Pathway
Battery candles in glass hurricanes line your walkway with flickering light that guides guests safely to your door. No flames mean no worry about costumes brushing past or autumn leaves blowing through. Space them evenly on both sides of the path, mixing tall and short hurricanes for a professional landscape look.
Turn them on at dusk with a single remote and enjoy the magic all evening. I’ve noticed warm white flames look most realistic, while orange adds extra Halloween drama. Collect them in a bin after the holiday and they are ready to glow again next year with zero effort.
Conclusion
These 25 easy halloween diy decorations prove that the spookiest season shines brightest when it is handmade. From paper bats to glowing pathways, every project here costs little, takes an afternoon at most, and fills your home with personality no store can match. I’ve seen how small changes like these can completely shift the way a space feels. Save your favorites to Pinterest, gather your supplies this weekend, and enjoy every giggle these crafts bring. Happy haunting, and happy crafting. Pick three ideas to start, and let each finished project inspire the next one on your list.
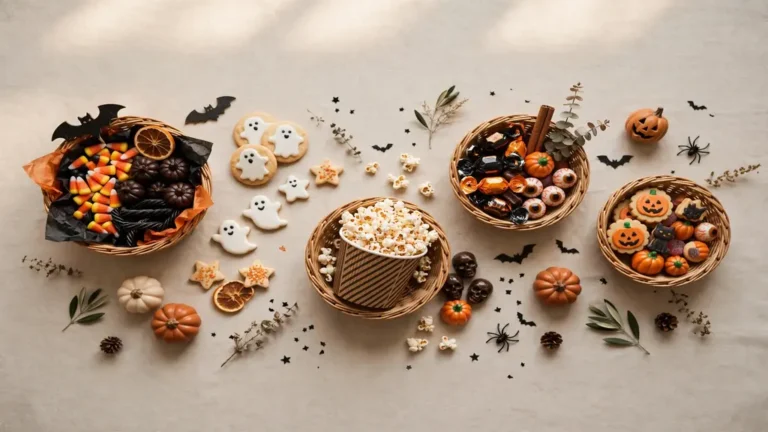
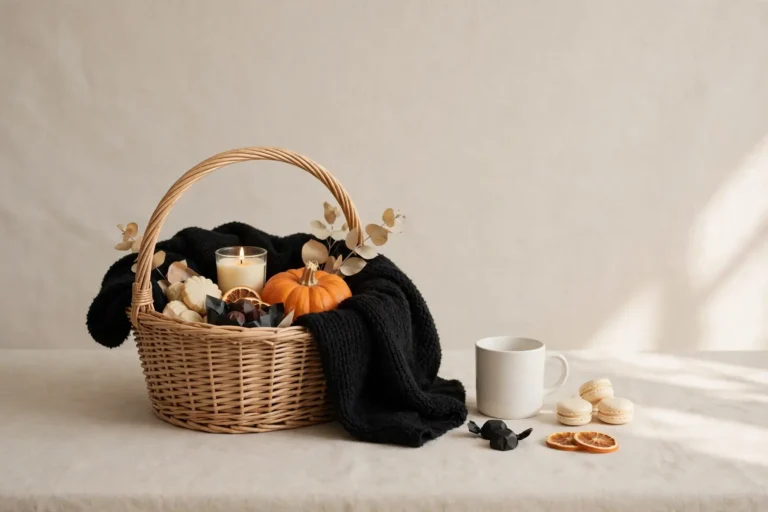
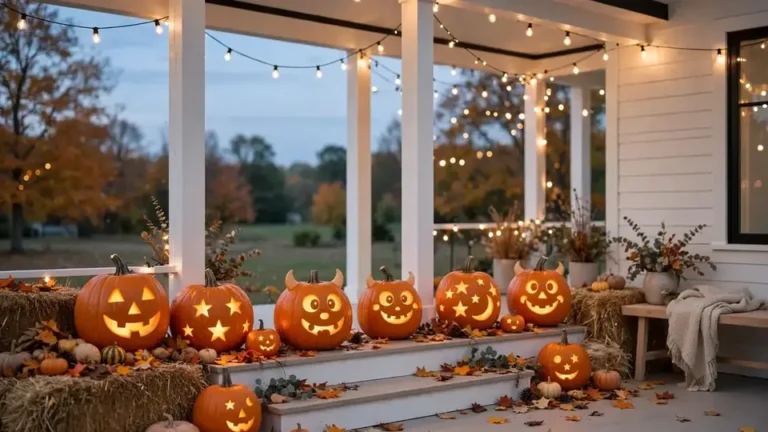
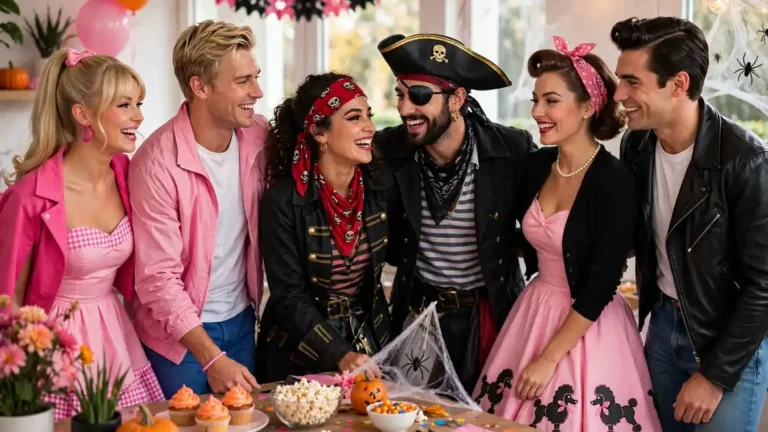

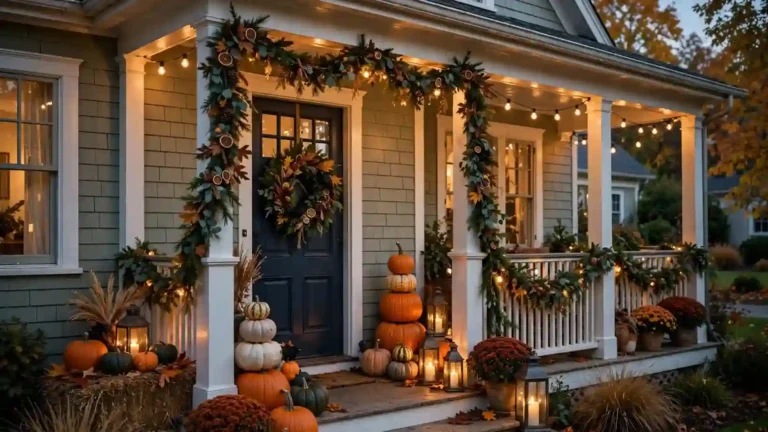
One Comment