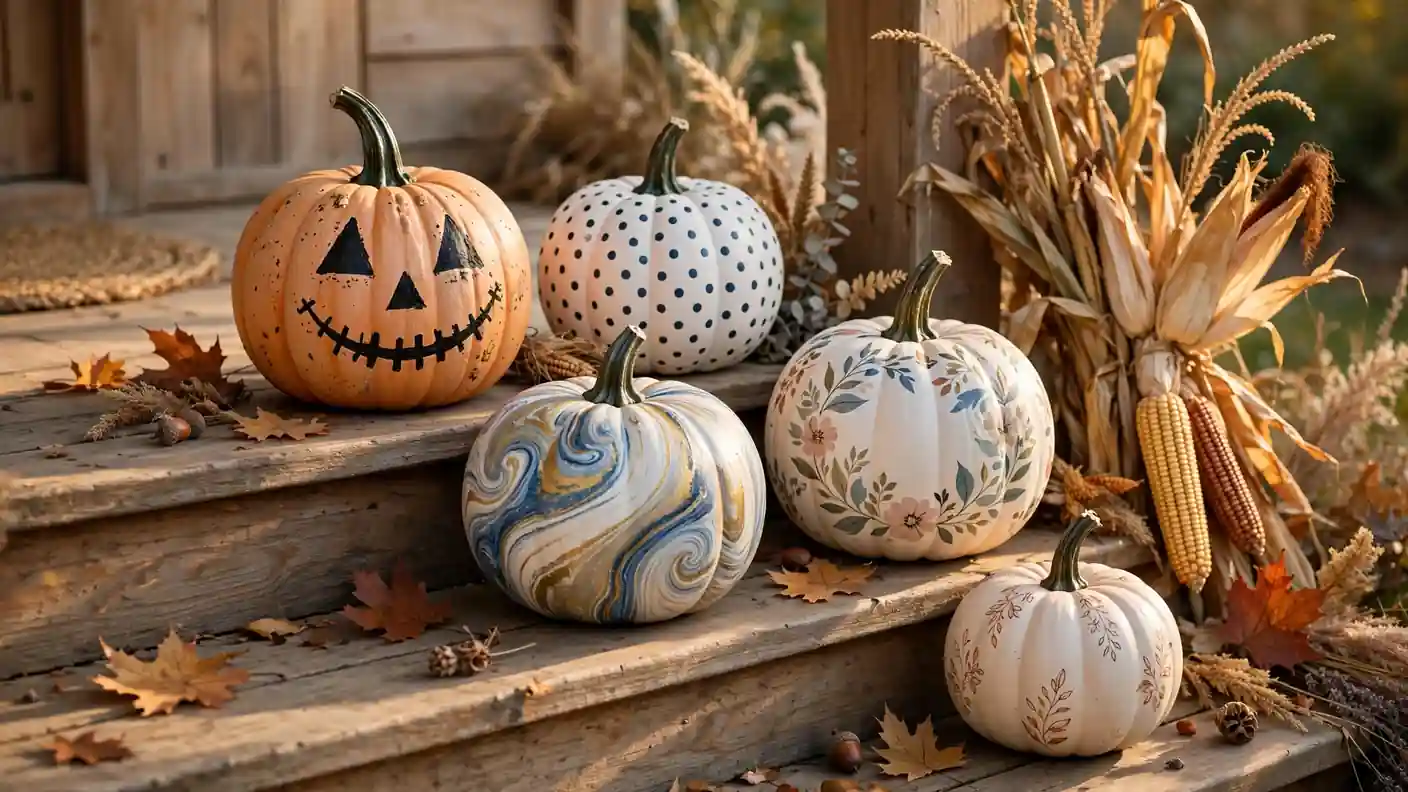
23 Paint Pumpkins With Creative Designs for Fall Fun
Nothing says autumn quite like a porch lined with hand-painted gourds, and paint pumpkins projects have become the favorite fall craft for families who want festive decor without the mess of carving. A few brushes, some acrylic paint, and one relaxed afternoon are all it takes to turn plain pumpkins into personalized art that lasts for weeks. Kids love the creative freedom, adults appreciate the easy cleanup, and everyone enjoys decorations that look intentional instead of store-bought. From spooky faces to elegant patterns, there is a design here for every style and skill level.
Before you pick up a brush, gather inspiration and the right supplies so your designs turn out crisp and vibrant. Pair your pumpkin painting session with halloween door ideas for a coordinated entryway that welcomes every trick-or-treater in style. The ideas below range from beginner-friendly dots and stripes to advanced marbling and decoupage, each explained in clear steps you can follow at your own pace. Grab real or faux pumpkins and explore 23 creative designs that make fall decorating genuinely fun.
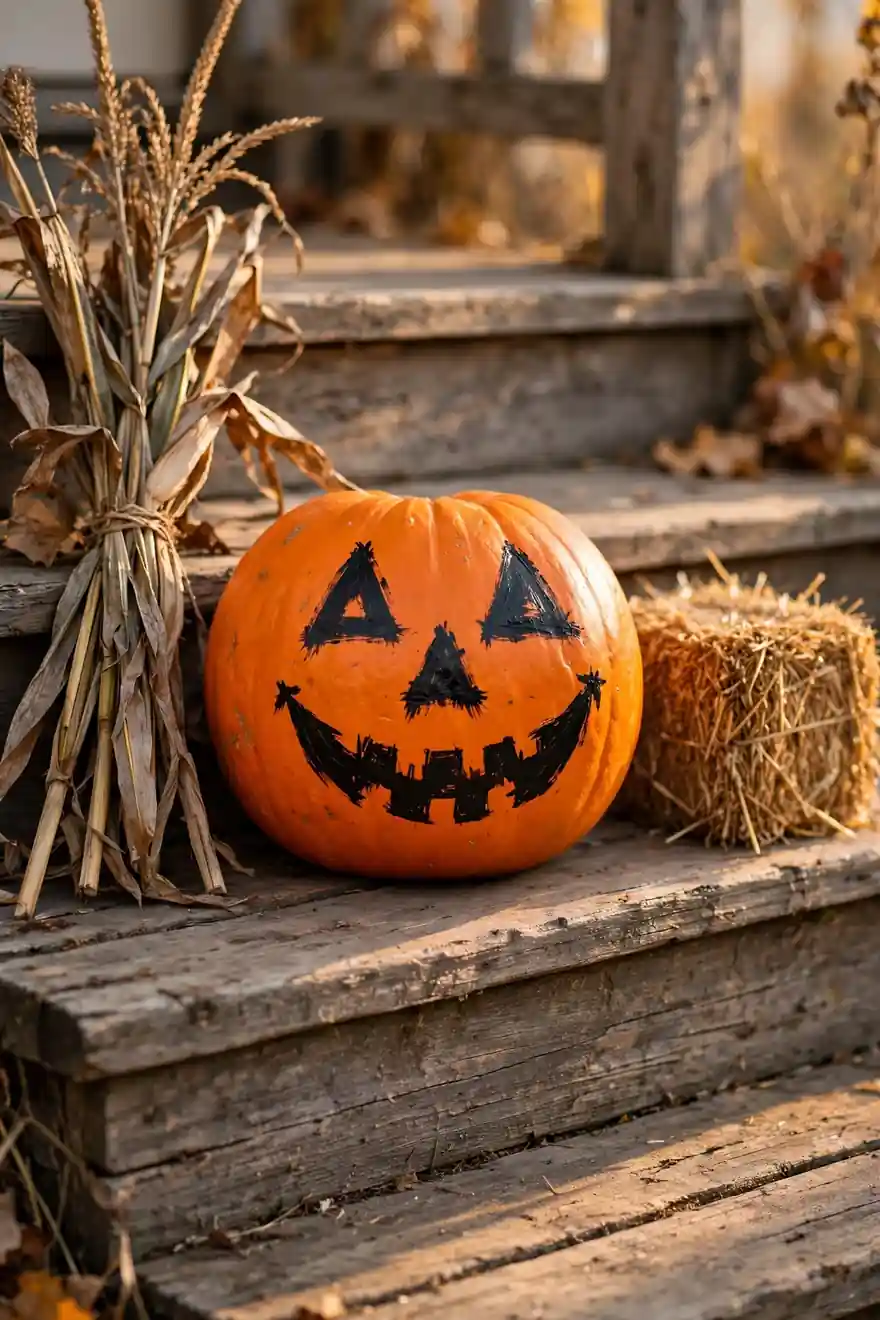
Classic Jack Faces
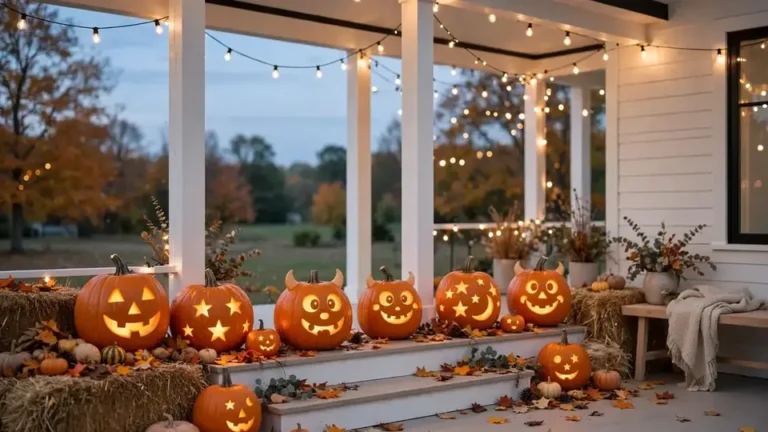
Some traditions never fade, and the classic grinning jack face remains the most requested pumpkin design each October. Painting triangle eyes, a jagged nose, and a toothy grin delivers the spooky look without sharp carving tools, ideal for households with small children. Black acrylic over bright orange creates bold contrast that reads clearly from the sidewalk, especially after dark when porch lights catch it. Keep the expression friendly with rounded shapes for a welcoming look.
A steady hand matters more than artistic talent, so sketch the face lightly in pencil before committing to paint. Two thin coats cover better than one thick layer and dry faster. Seal the finished pumpkin with clear matte spray to guard against autumn rain. Group three pumpkins with different expressions for a playful cluster.
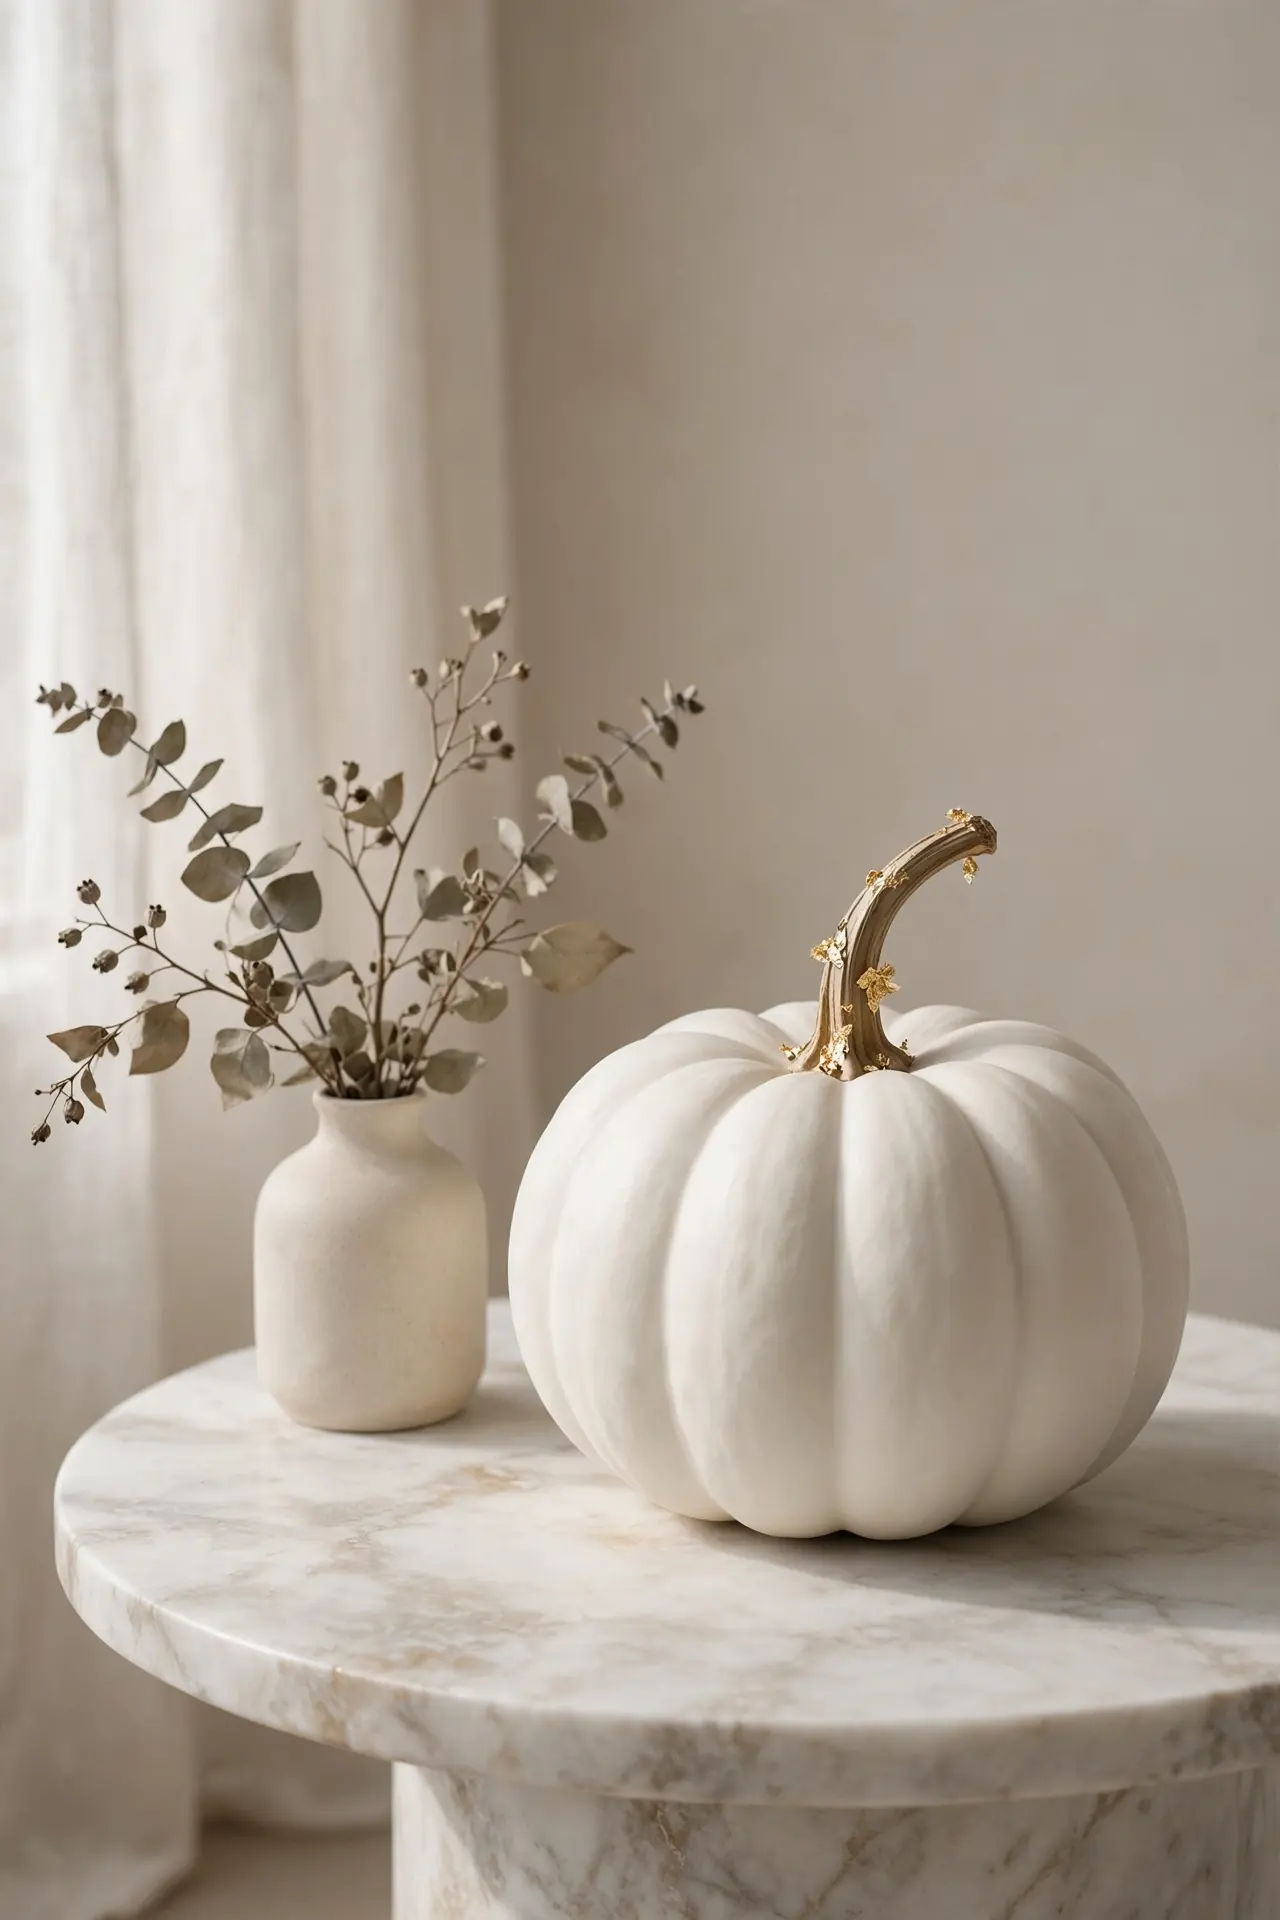
White Pumpkin Elegance
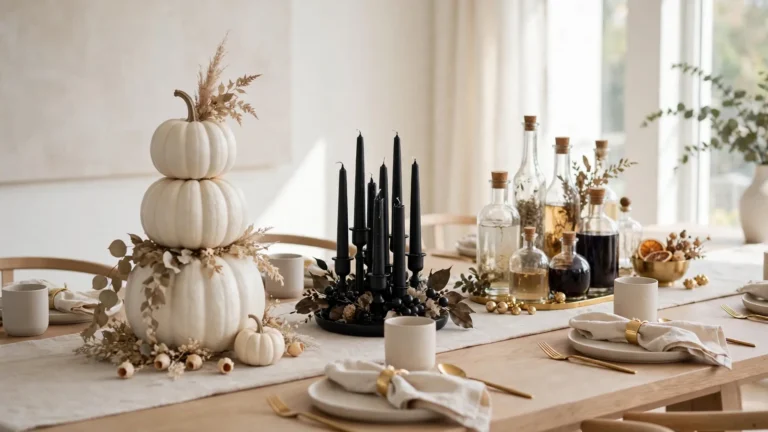
For a sophisticated twist, start with white pumpkins as your canvas. Their pale surface makes every color pop, from blush pinks to deep forest greens, and they blend beautifully with modern neutral decor. This approach suits anyone who loves fall but prefers calm, refined seasonal styling over bright orange.
- Choose smooth, blemish-free white pumpkins for the cleanest finish
- Use chalk paint for a velvety matte texture that hides imperfections
- Add metallic gold or copper details on stems for quiet luxury
- Style in odd-numbered groups for a designer look
- Pair with linen runners and dried grasses for full effect
White pumpkins photograph beautifully, so they are perfect for entryway displays you will want to share. Their understated look carries from early fall straight through Thanksgiving without feeling tied to Halloween alone.
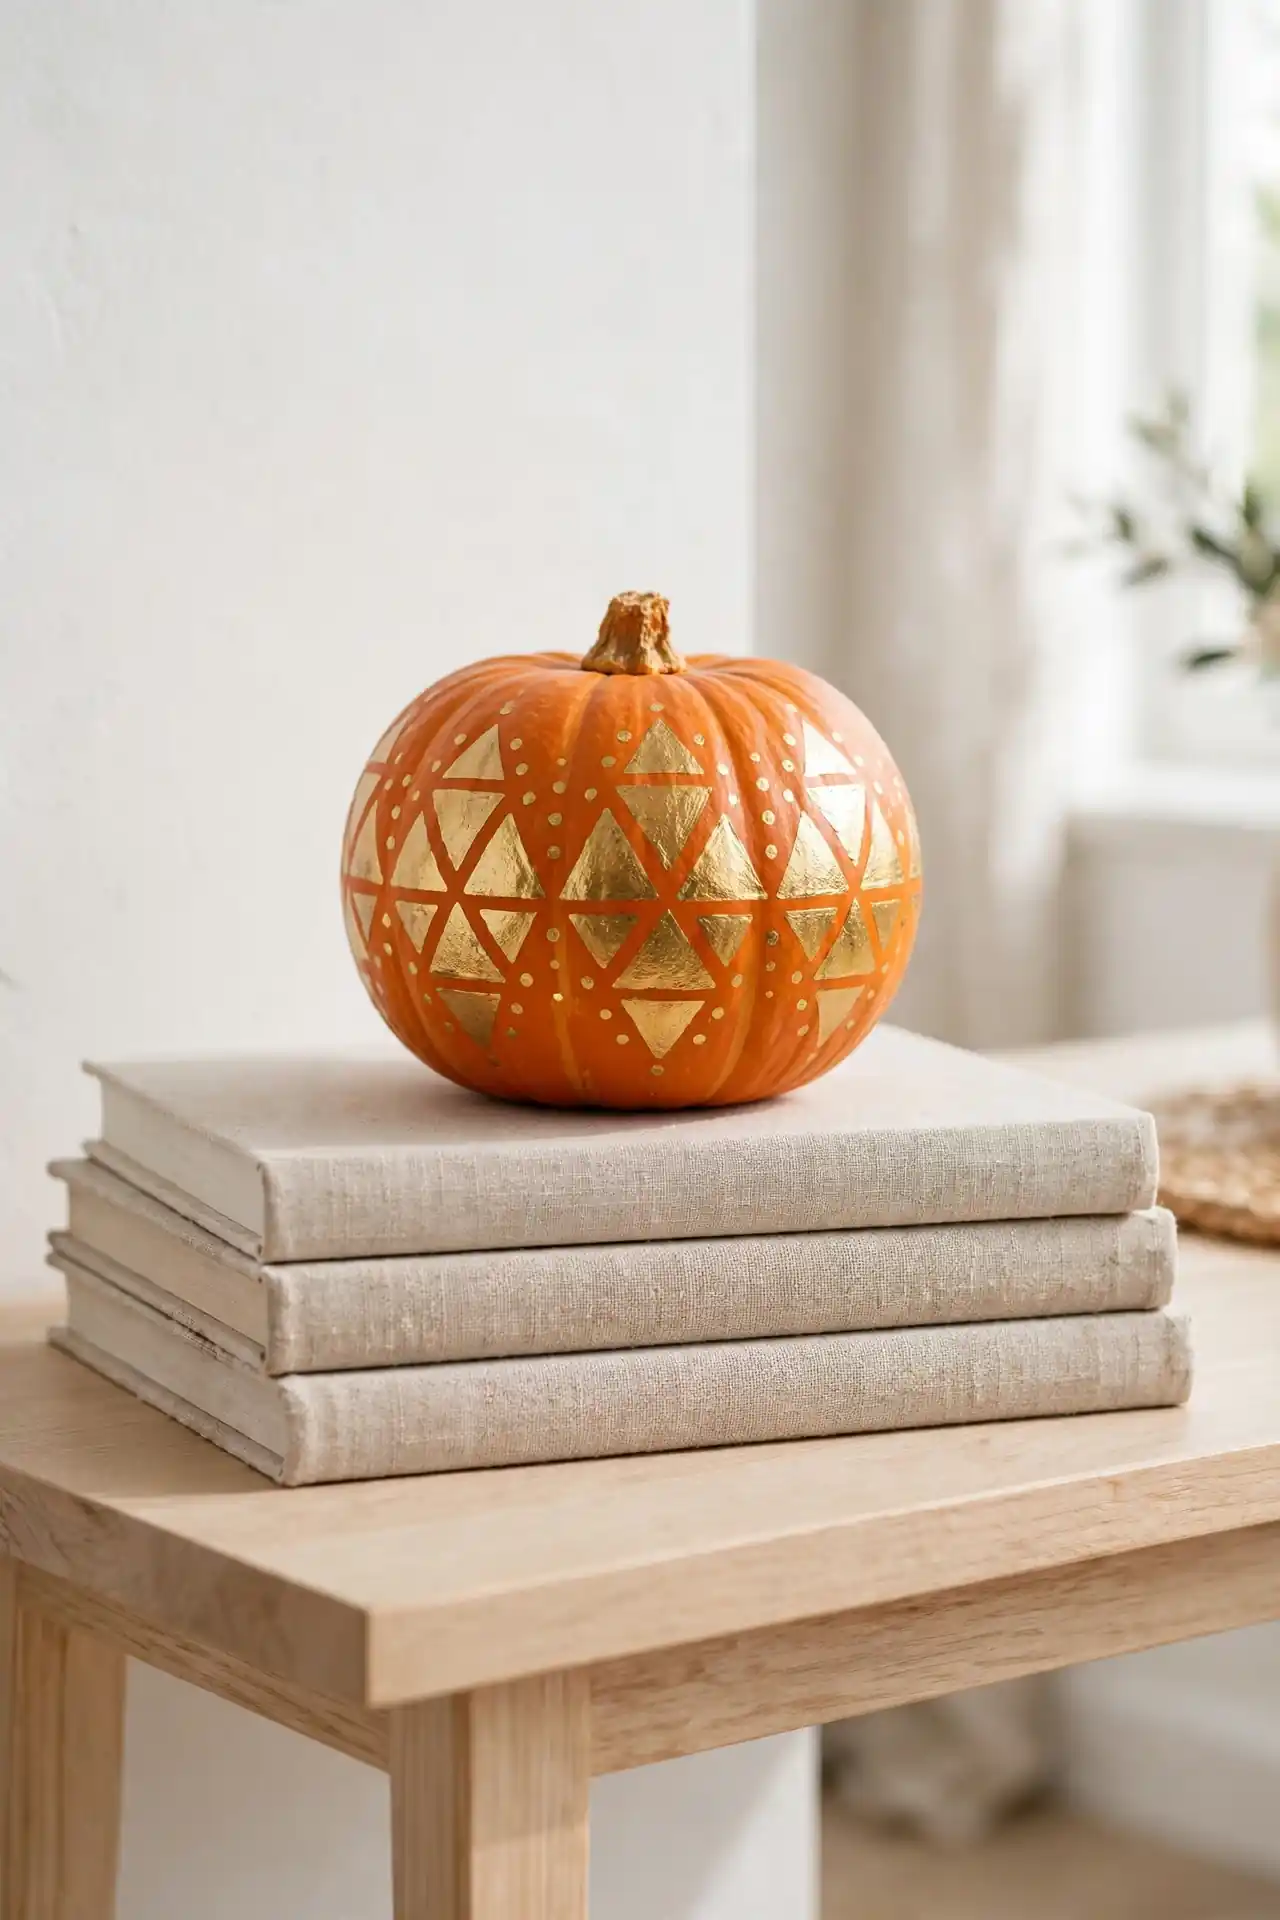
Metallic Gold Accents
A little shimmer goes a long way when you want pumpkins that feel festive yet grown-up. Metallic gold paint catches candlelight beautifully and turns even a humble grocery store pumpkin into something special.
Focus the gold on one area, like the stem and top third, rather than covering the whole pumpkin. This restraint keeps the look elegant instead of gaudy. Faux pumpkins work wonderfully here since the metallic finish hides their plastic sheen completely.
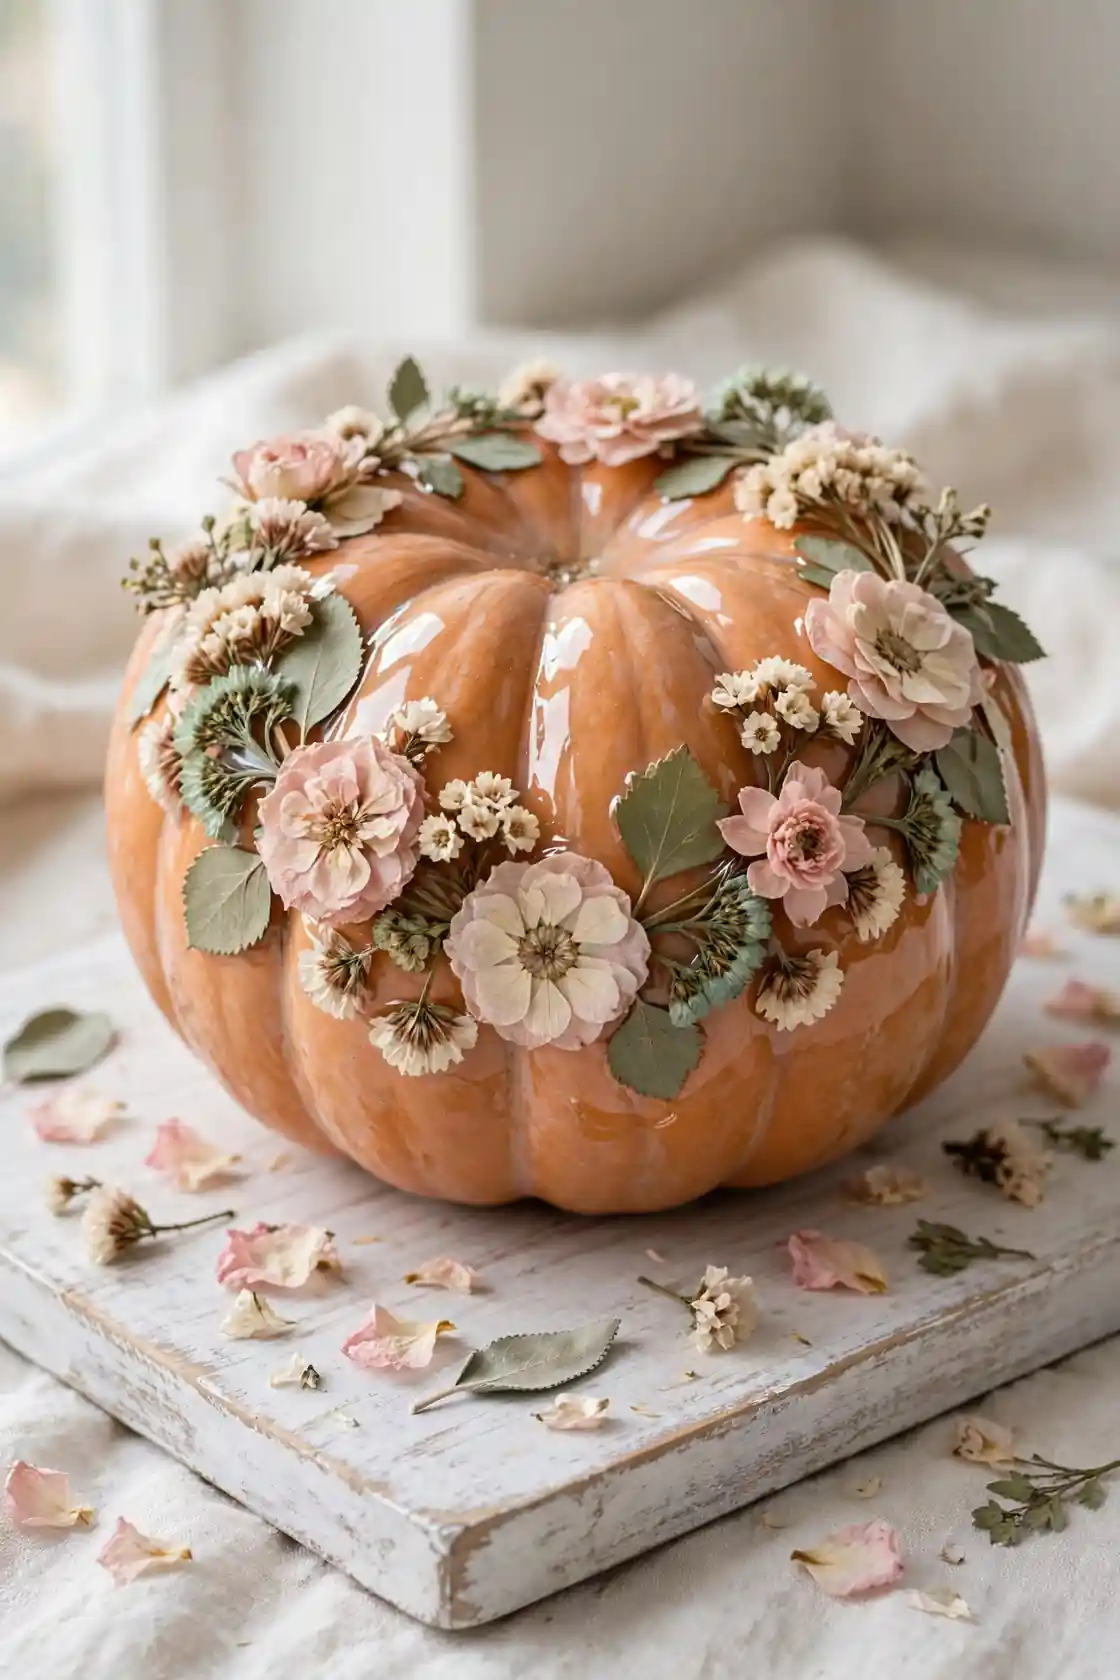
Floral Decoupage Pumpkins
Before: A plain orange pumpkin that clashes with your soft, romantic fall decor and feels too bold for the dining table.
After: A delicate floral masterpiece where pressed blossoms in blush, cream, and sage melt into the surface under glossy decoupage medium, looking like fine china you can display all season.
Press real flowers between heavy books for a week, or buy pre-pressed blooms to skip the wait. Brush decoupage medium onto small sections, lay each flower flat, then seal with two top coats. Work slowly around the curves to avoid wrinkles. The result looks intricate but requires zero painting skill, which makes this a lovely gift idea for friends who admire handmade decor.
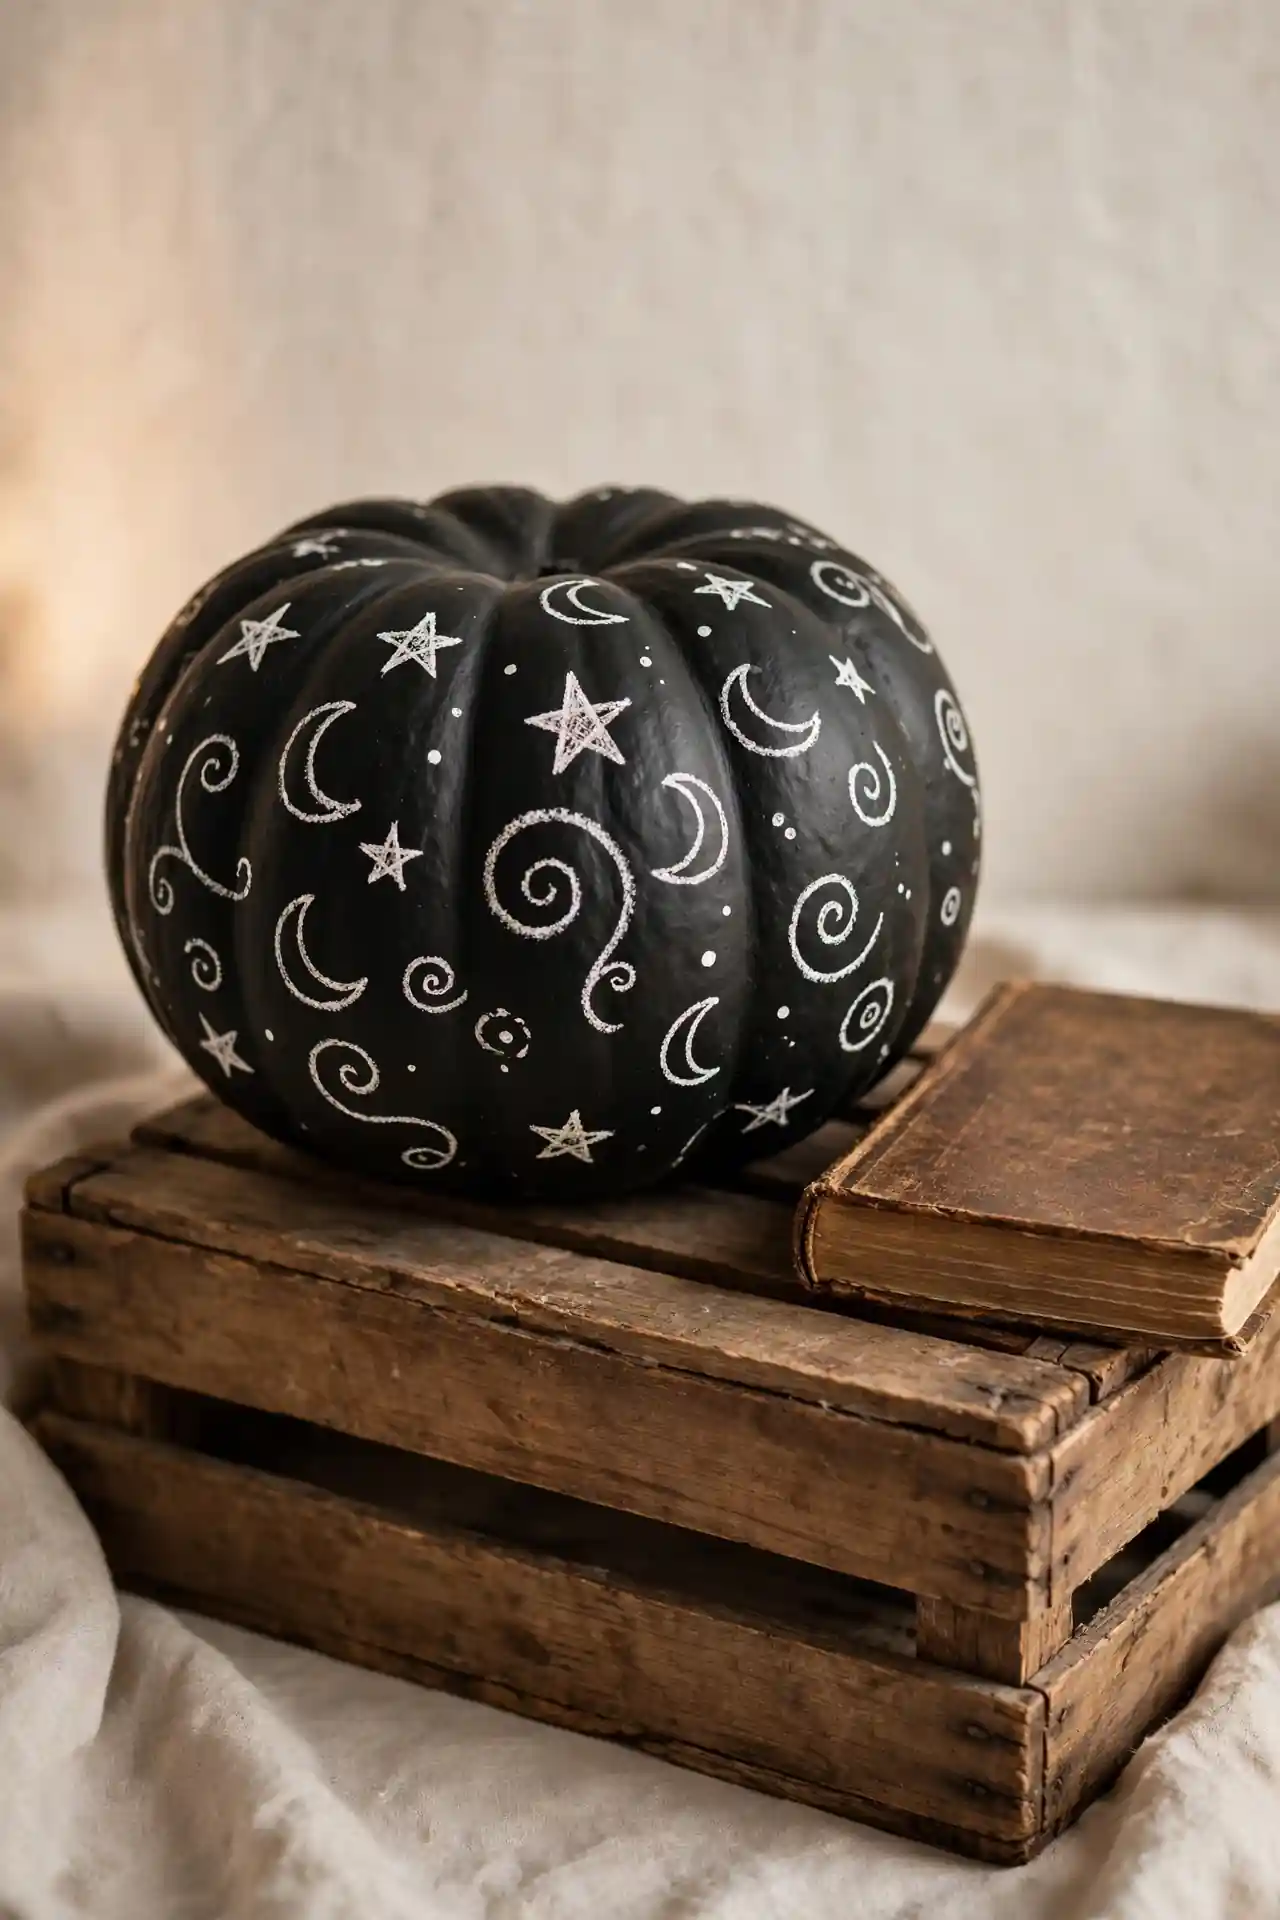
Chalkboard Message Pumpkins
Chalkboard paint turns any pumpkin into a reusable message board you can update all season long. Paint the whole pumpkin in matte black chalkboard paint, let it cure for 24 hours, then decorate with chalk markers or real chalk. Doodles of moons, stars, and vines look charming, and you can wipe the surface clean to start fresh whenever inspiration strikes.
- Apply two coats of chalkboard paint, drying fully between coats
- Condition the surface by rubbing chalk over it, then wiping off
- Sketch your design lightly before committing to bold lines
- Seal only the bottom so the top stays writable
This interactive design is a hit at parties, since guests can add their own doodles. Keep a cup of chalk sticks nearby and watch your pumpkin become a collaborative art piece.
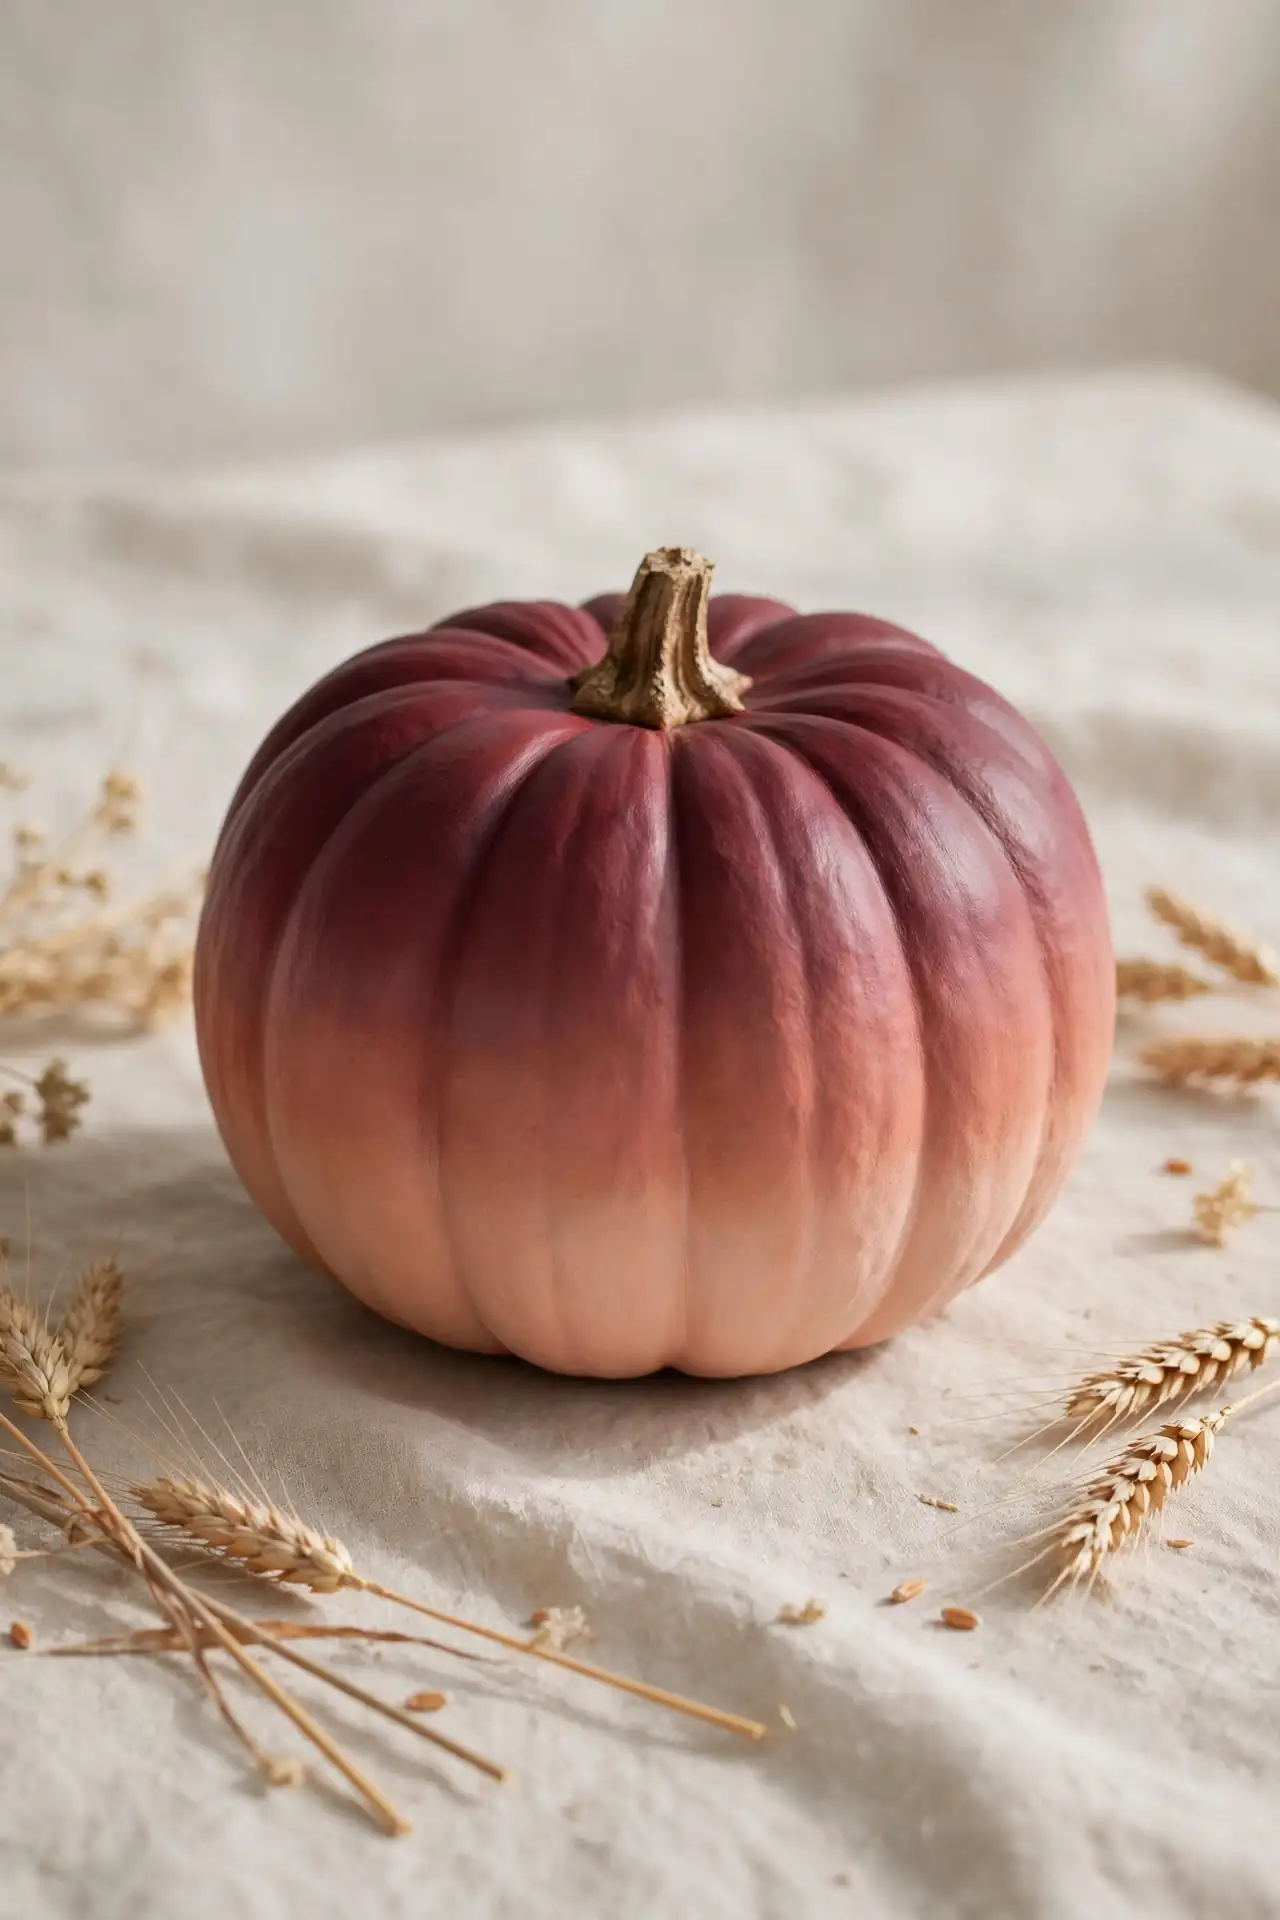
Ombre Sunset Pumpkins
Ombre effects look impressively professional yet require nothing more than two paint colors and a sponge. The gradual blend from deep burgundy to soft peach mimics an autumn sunset and adds instant warmth to mantels and tablescapes.
| Option | Colors | Vibe |
|---|---|---|
| Sunset Glow | Burgundy to peach | Warm and cozy |
| Ocean Mist | Navy to pale blue | Cool and modern |
| Forest Fade | Emerald to sage | Earthy and calm |
Blend while the paint is still wet, using a dry sponge to soften the line where colors meet. Work in small sections around the pumpkin so nothing dries before you blend it. Two light passes beat one heavy pass every time.
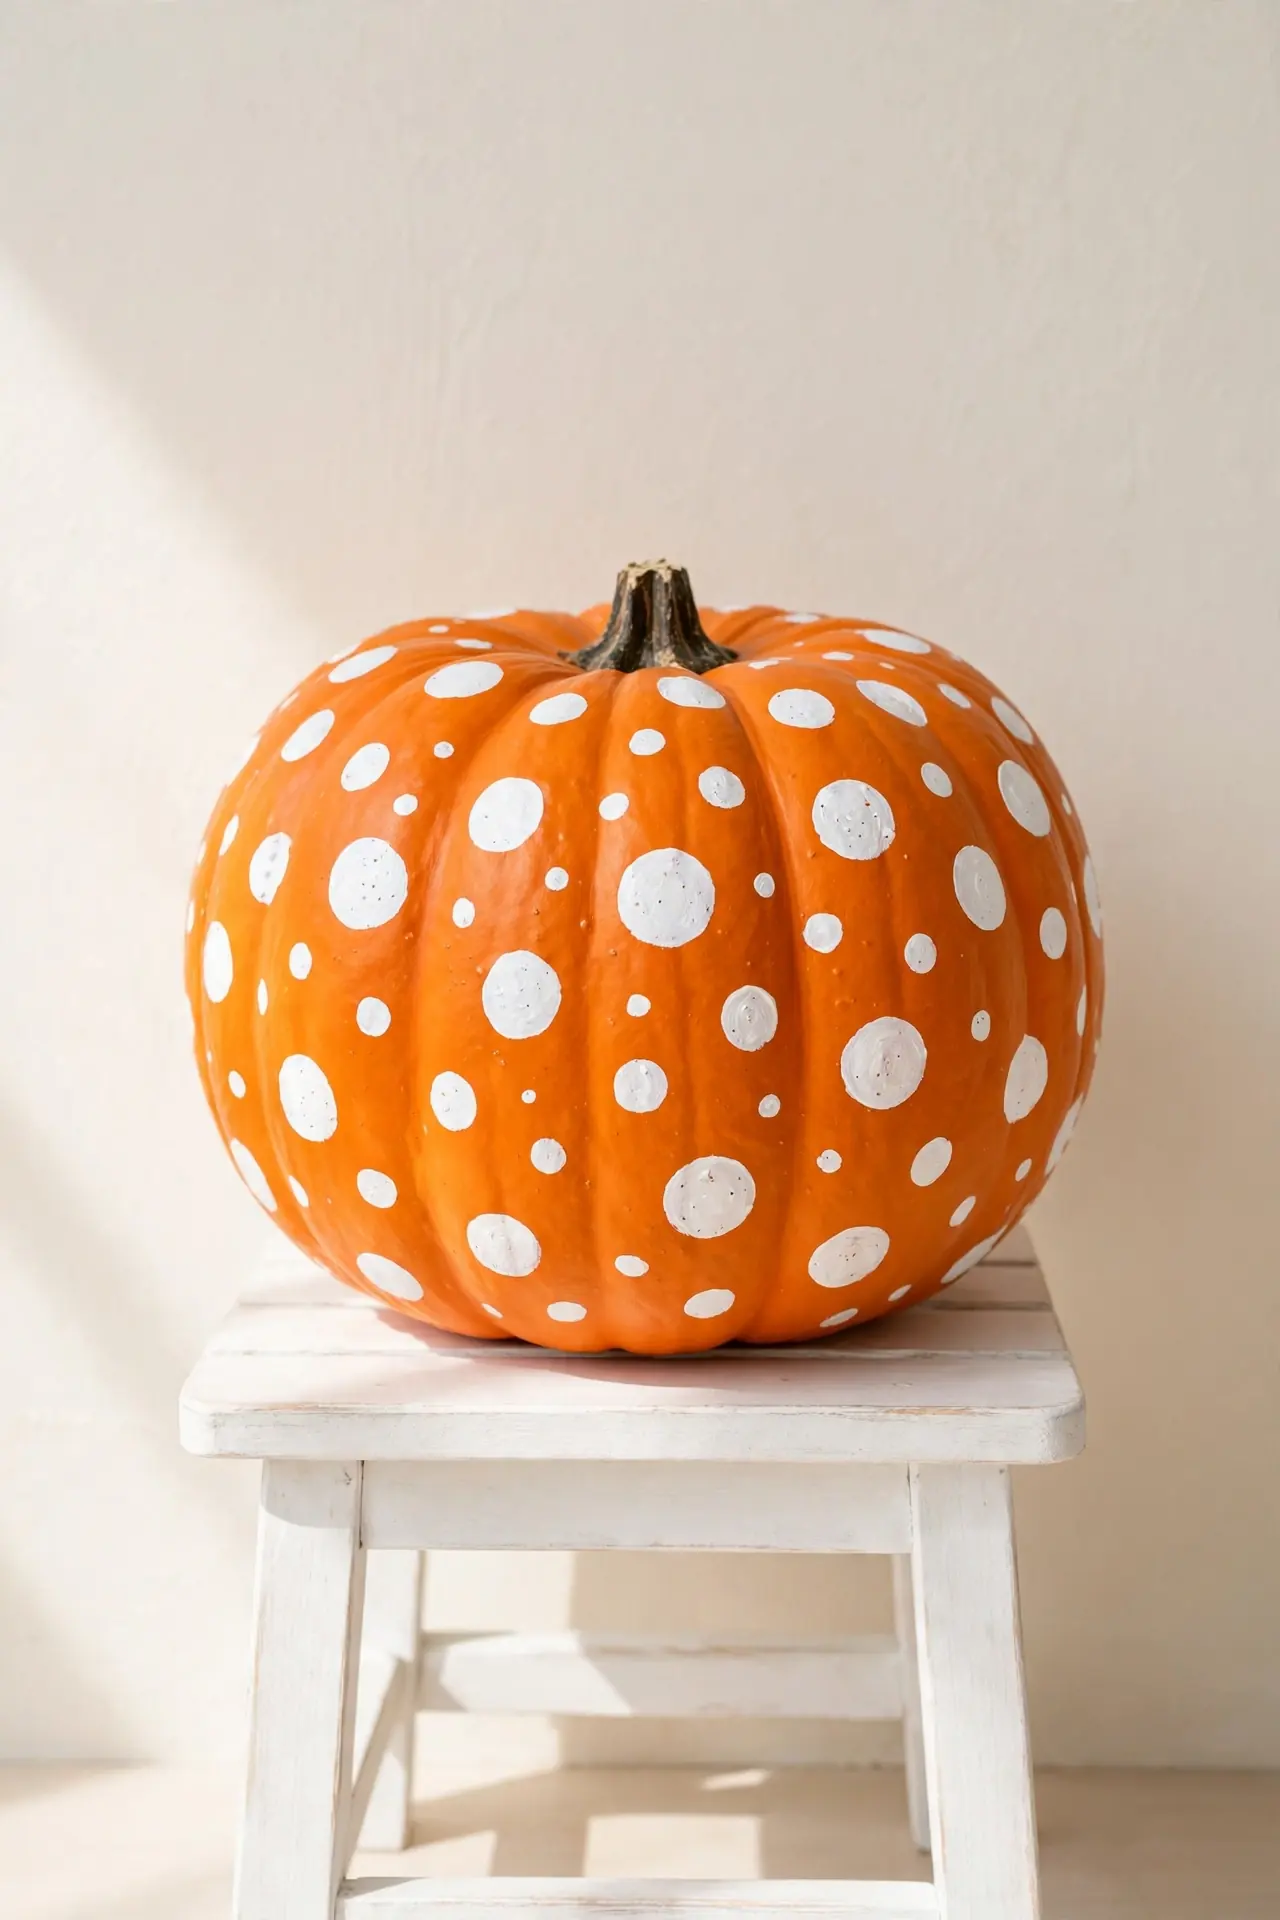
Polka Dot Parade
Polka dots are pure joy, and they could not be simpler to paint. Use a pencil eraser end dipped in white acrylic to stamp perfect circles all over an orange pumpkin. Vary dot sizes for a playful confetti feel that kids adore.
Do:
- Let each color dry before adding the next layer
- Use a stencil for evenly spaced rows if you prefer order
- Try metallic dots on a matte pumpkin for contrast
Don’t:
- Overload the brush, which causes drips and blobs
- Rush the spacing, since uneven dots still look charming
- Forget to seal, because unsealed dots can smudge in rain
This forgiving design hides every wobble, making it the perfect first project for beginners. Make a whole parade in different colors and line them along your walkway.
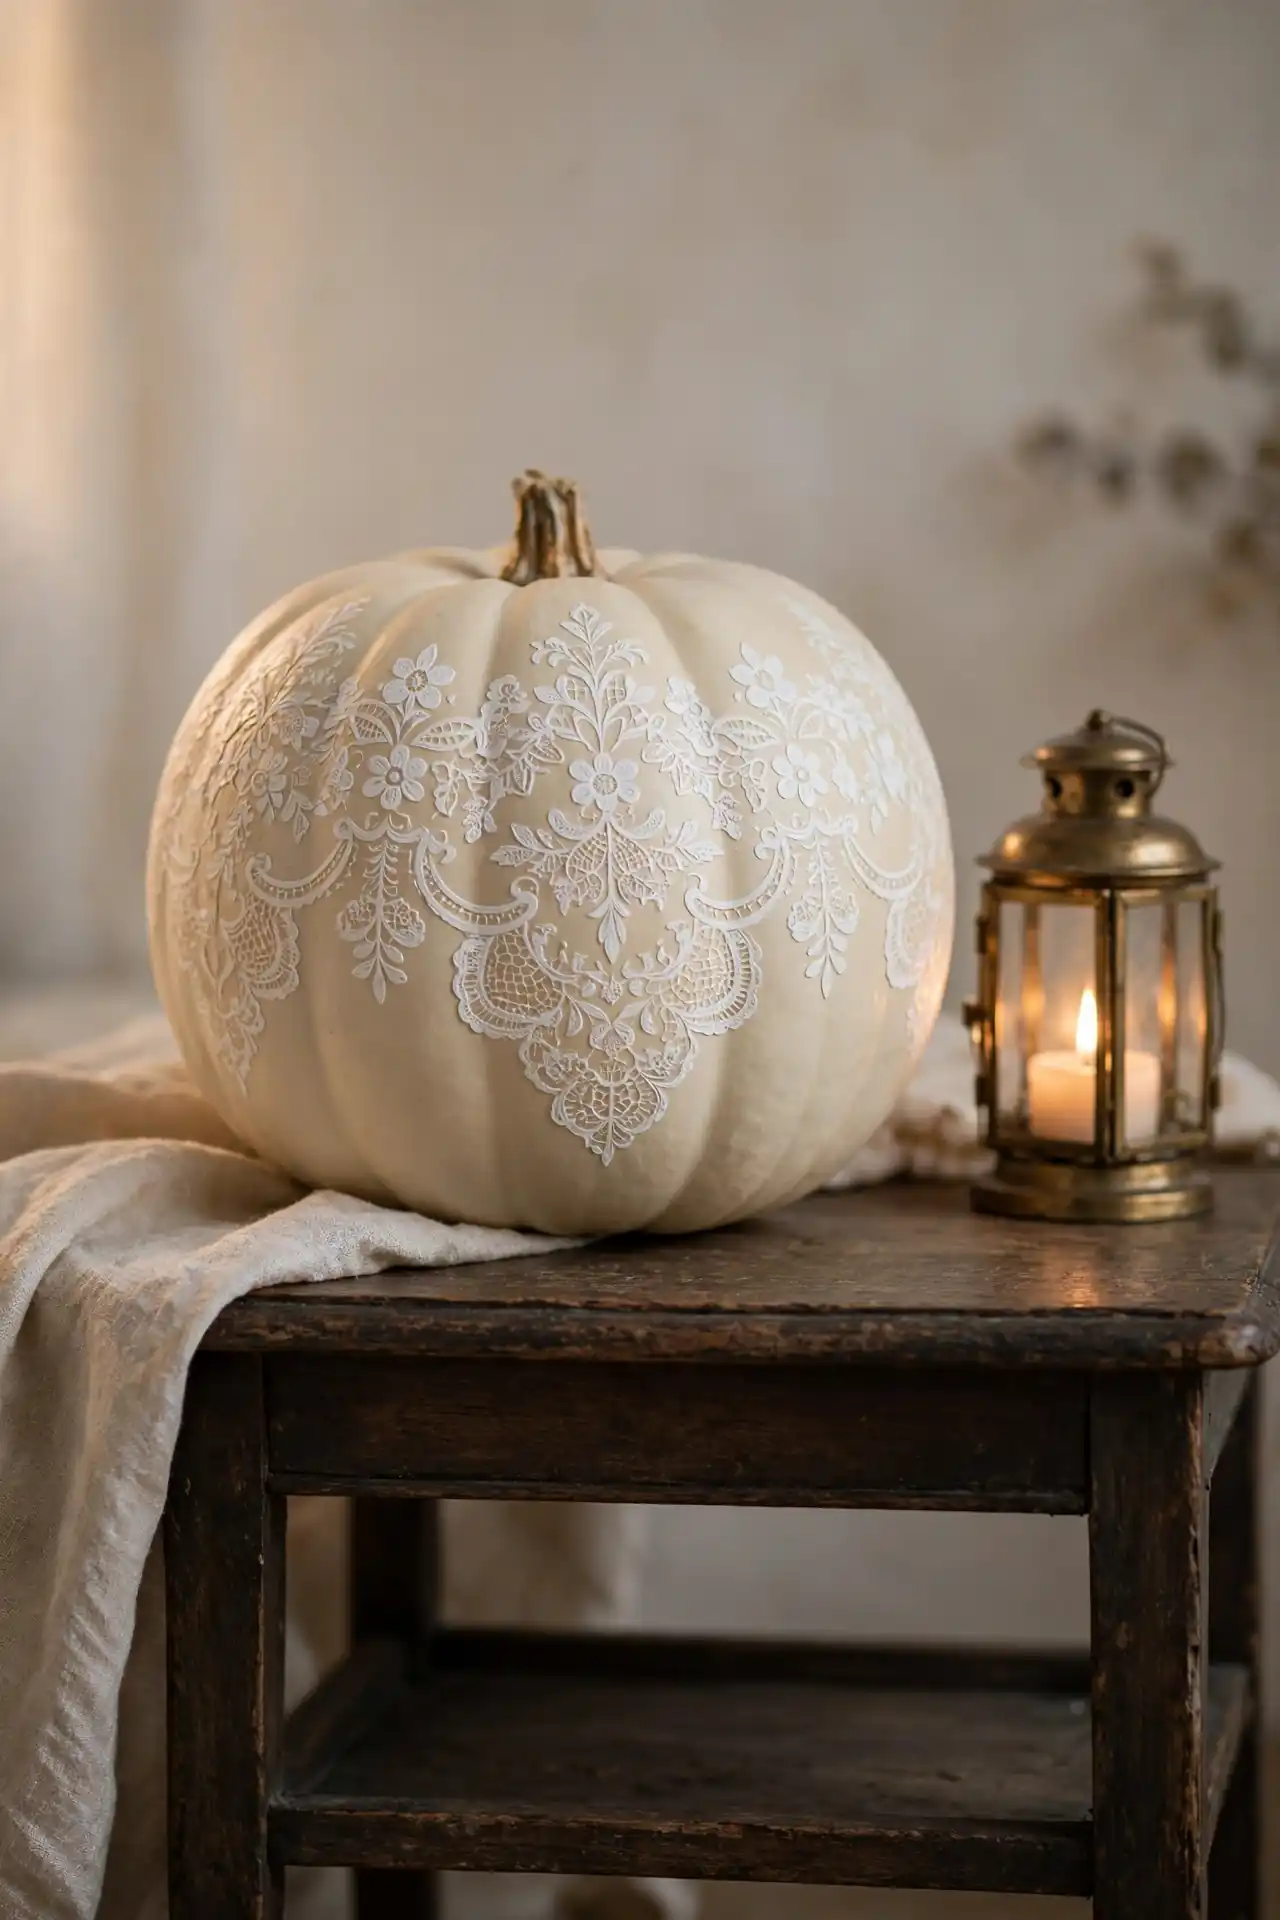
Lace Pattern Stencils
Shade: Warm ivory base with crisp white lace overlay
Technique: Adhesive lace stencil pressed firmly, then paint dabbed through the openings
Best pumpkin: Smooth-skinned white or pale orange varieties
Sealant: Clear matte spray to protect the delicate lines
Lace stencils deliver bridal-shower elegance with almost no effort. The secret is pressing the stencil flat against the curves and using barely any paint on your dabber, since excess paint bleeds under the edges. Peel the stencil away while the paint is slightly tacky for the crispest lines. One statement pumpkin styled with candles creates a centerpiece that looks far more expensive than it was.
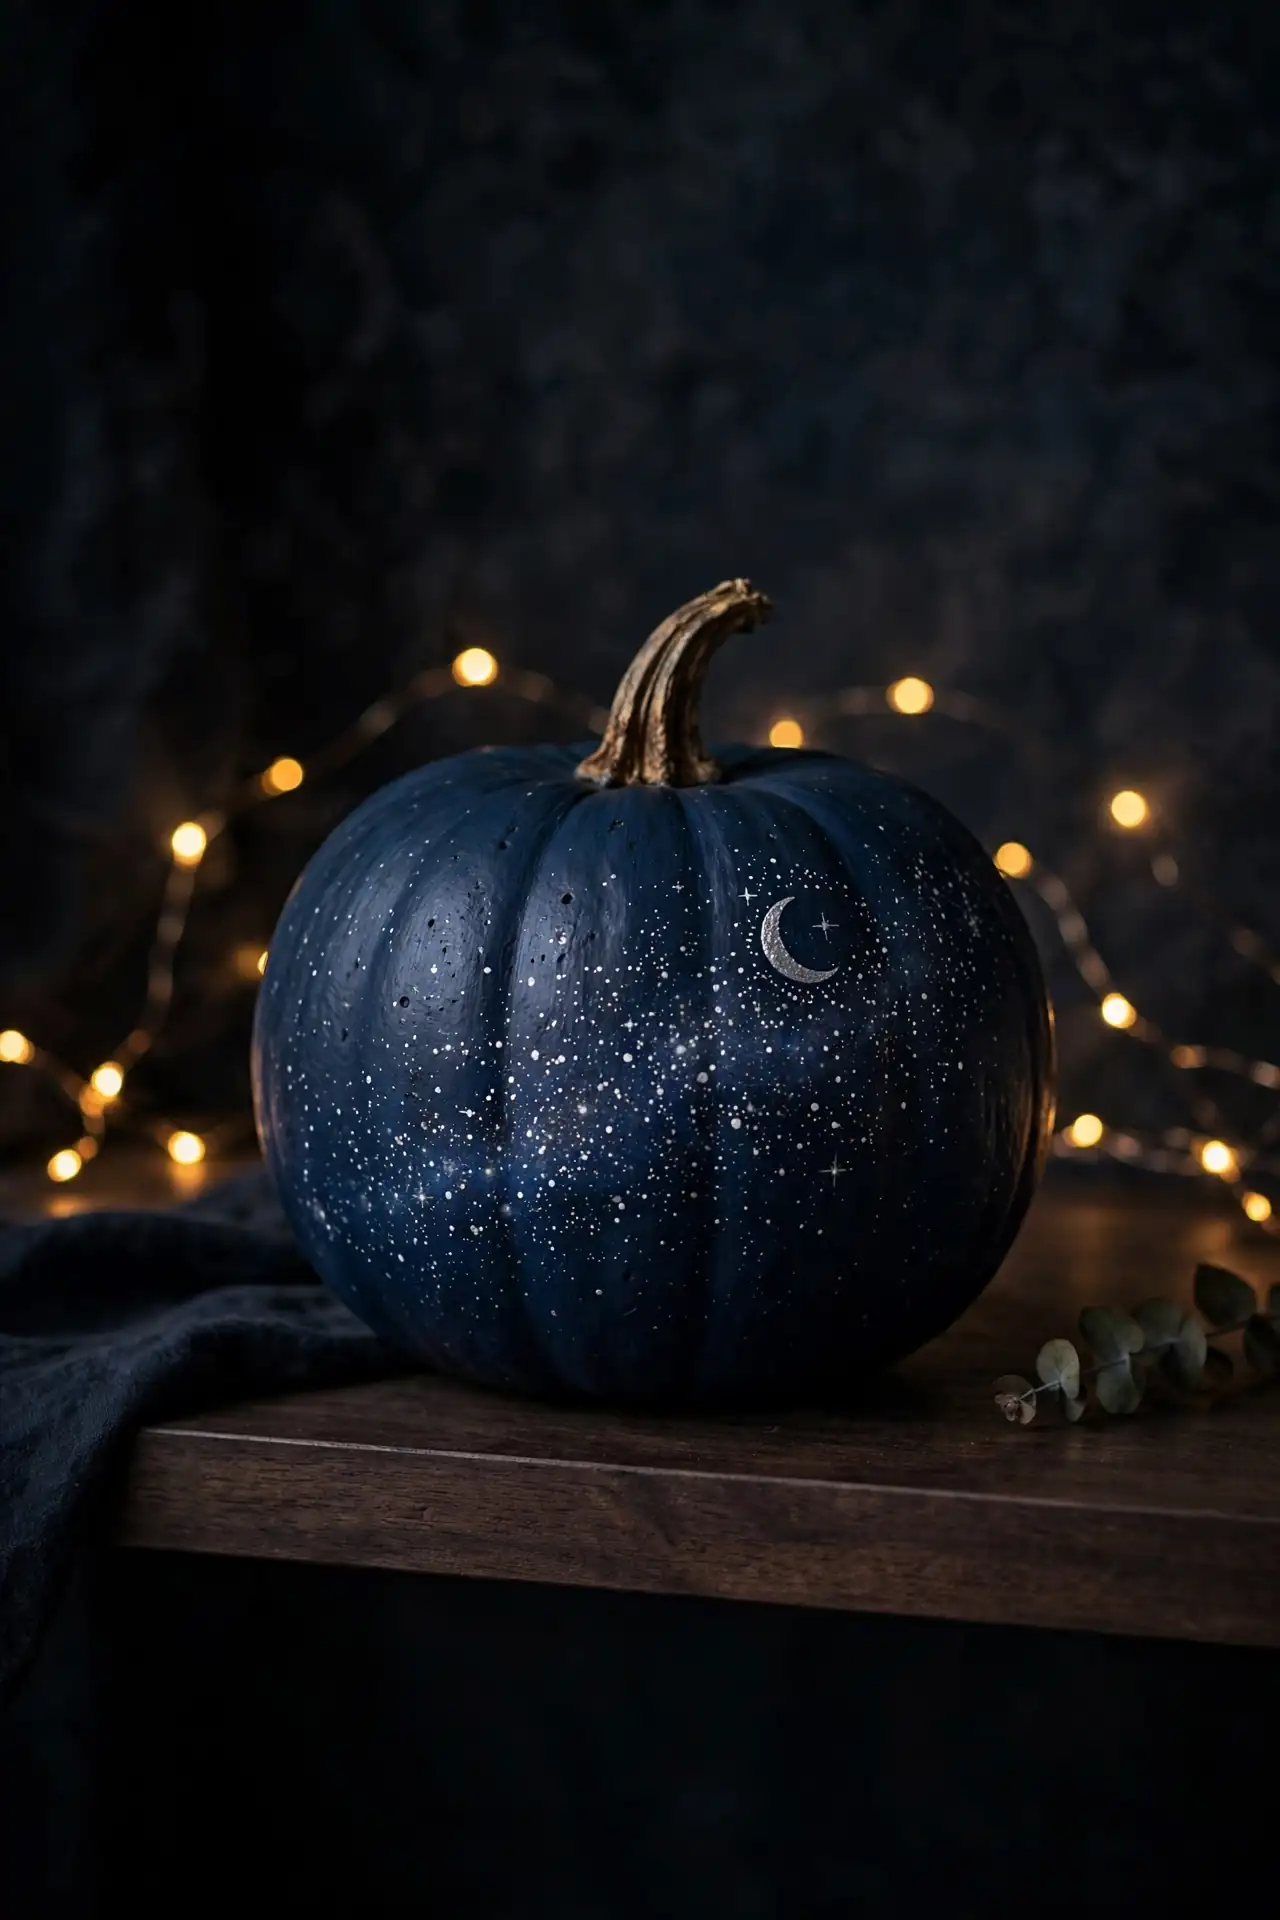
Galaxy Night Sky
Transform a pumpkin into a swirling cosmos with deep navy, purple, and black blended into a night-sky base. Once dry, flick white paint from a toothbrush to scatter stars, then add a crescent moon and a few silver dots for constellations. The dark background makes this design glow dramatically under porch lights.
Blending the base colors while wet is the key step, so work quickly in small sections. A sponge creates softer nebula clouds than a brush ever could. This design looks stunning on faux pumpkins you can reuse year after year, and it pairs beautifully with string lights for a truly magical Halloween display.
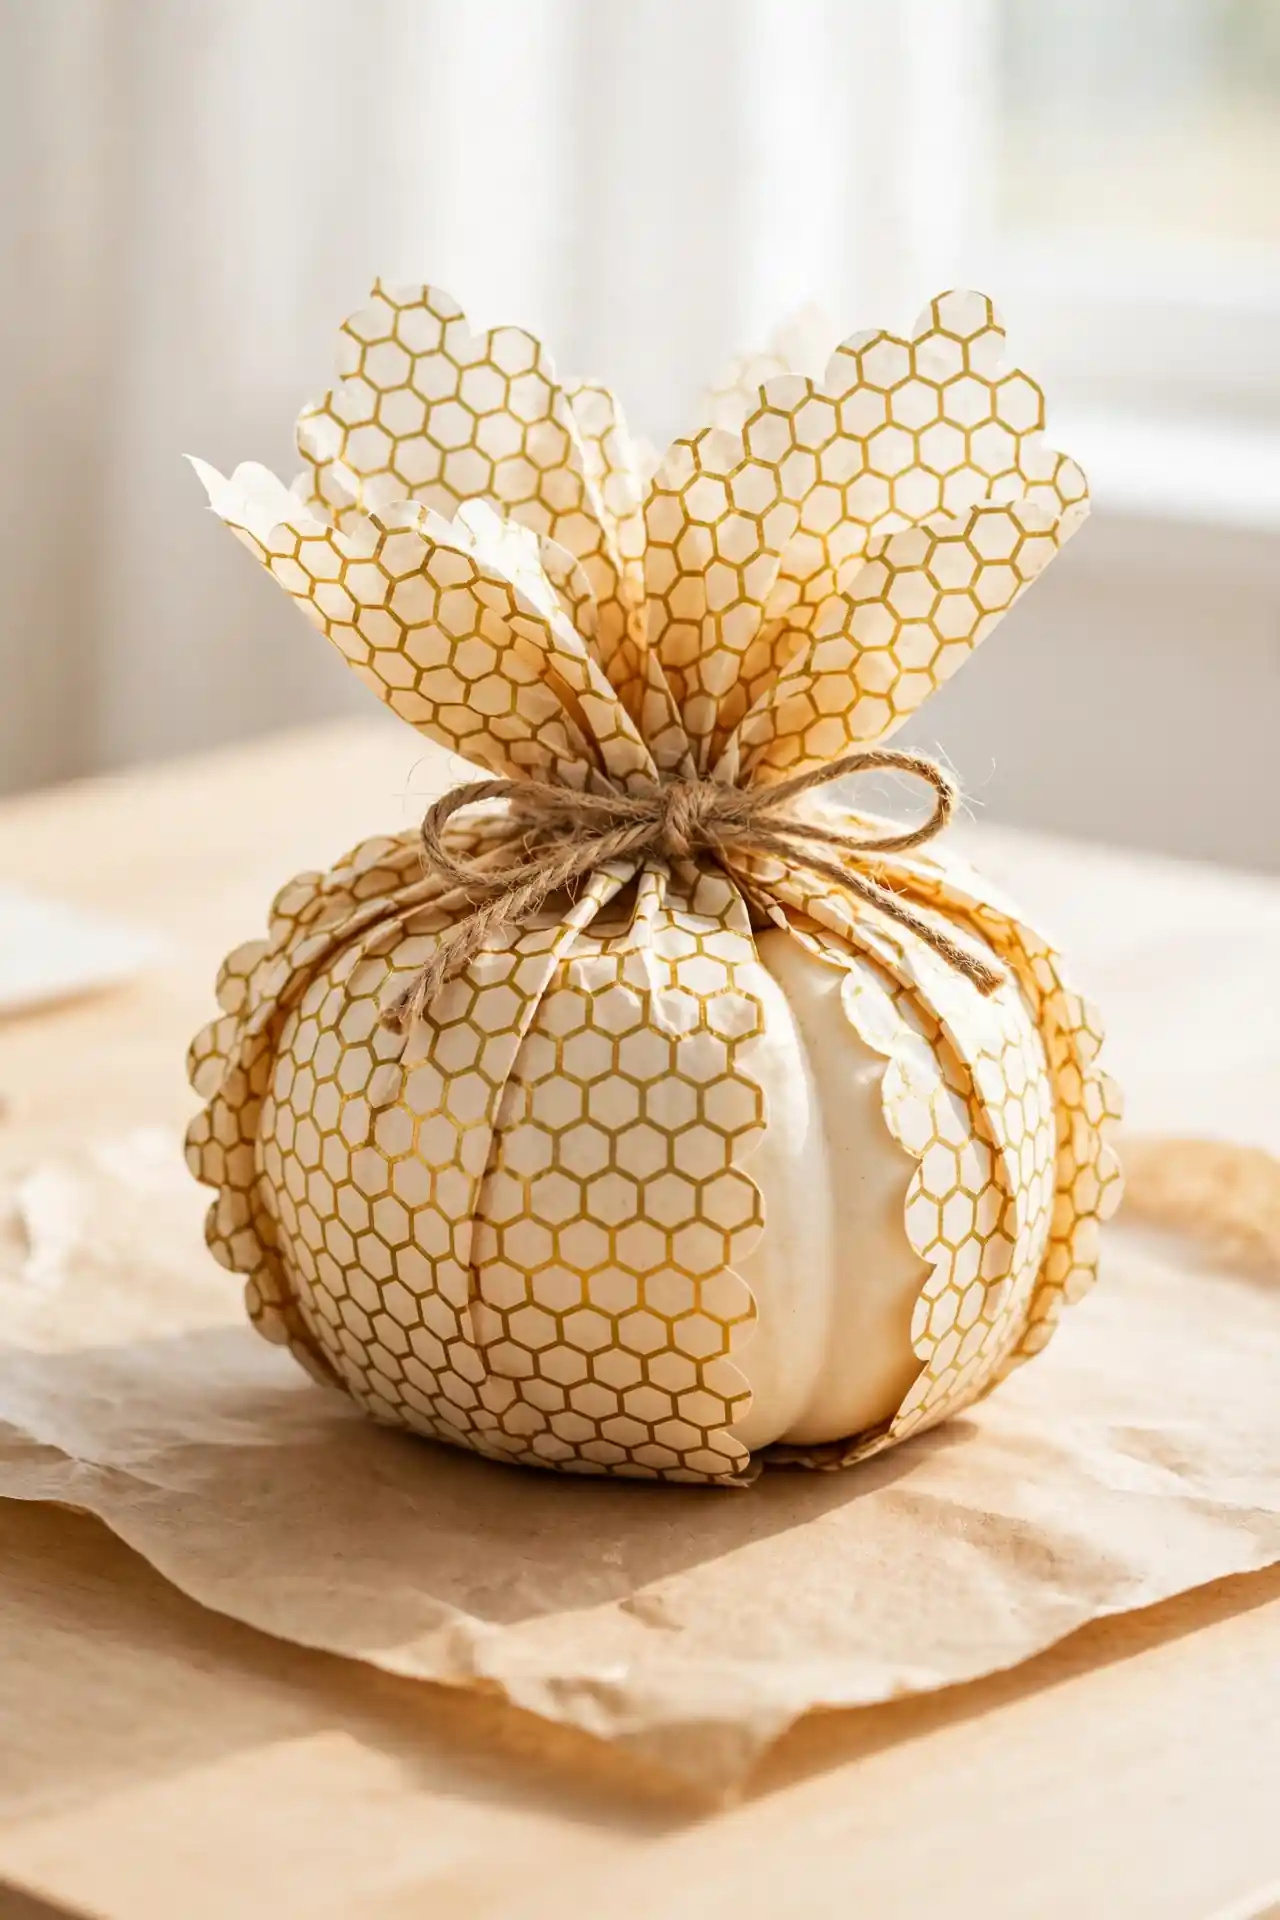
Honeycomb Tissue Pumpkins
Honeycomb tissue adds delightful texture and dimension without any painting at all. Wrap sections of the pumpkin in scalloped tissue paper, securing each piece with craft glue as you work around the curves.
- Choose tissue in harvest tones like amber, rust, and gold
- Cut scalloped strips about two inches wide for easy handling
- Overlap strips slightly so no pumpkin shows through
- Finish with twine around the stem for a rustic touch
This no-paint technique is wonderful for crafters who love texture. The finished pumpkin looks like a paper sculpture and weighs almost nothing, so it is safe for high shelves and mantels where heavier decor might wobble.
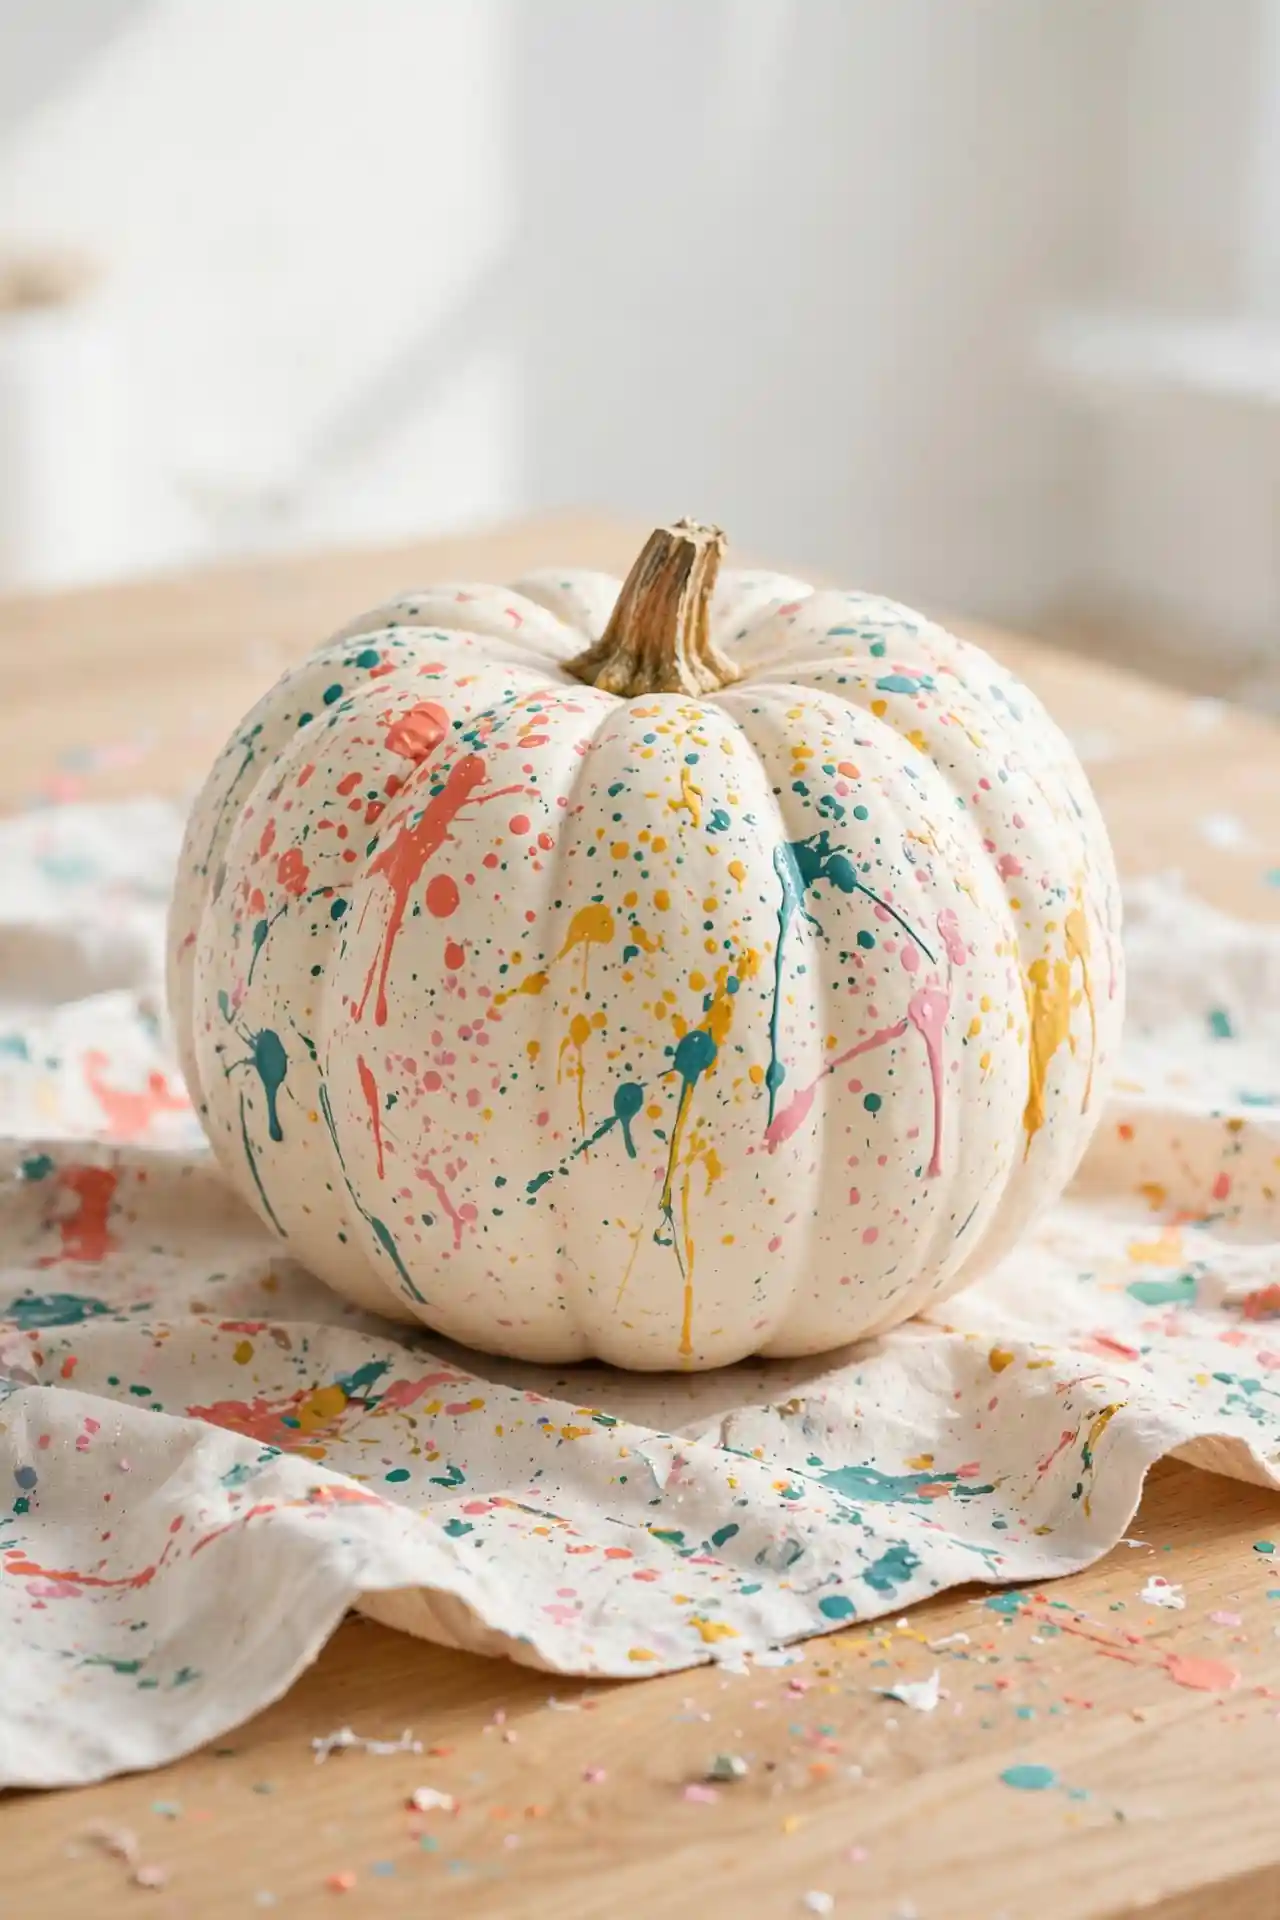
Confetti Splash Pumpkins
For maximum fun with minimum skill, load a brush with thinned acrylic and flick it at a white pumpkin to create a confetti explosion. Layer coral, teal, mustard, and blush for a festive look that feels like a celebration frozen in time.
Protect your workspace with a drop cloth, because this technique is gloriously messy. Let each color dry before adding the next so the shades stay bright instead of muddying. These cheerful pumpkins bring instant energy to kids’ party tables.
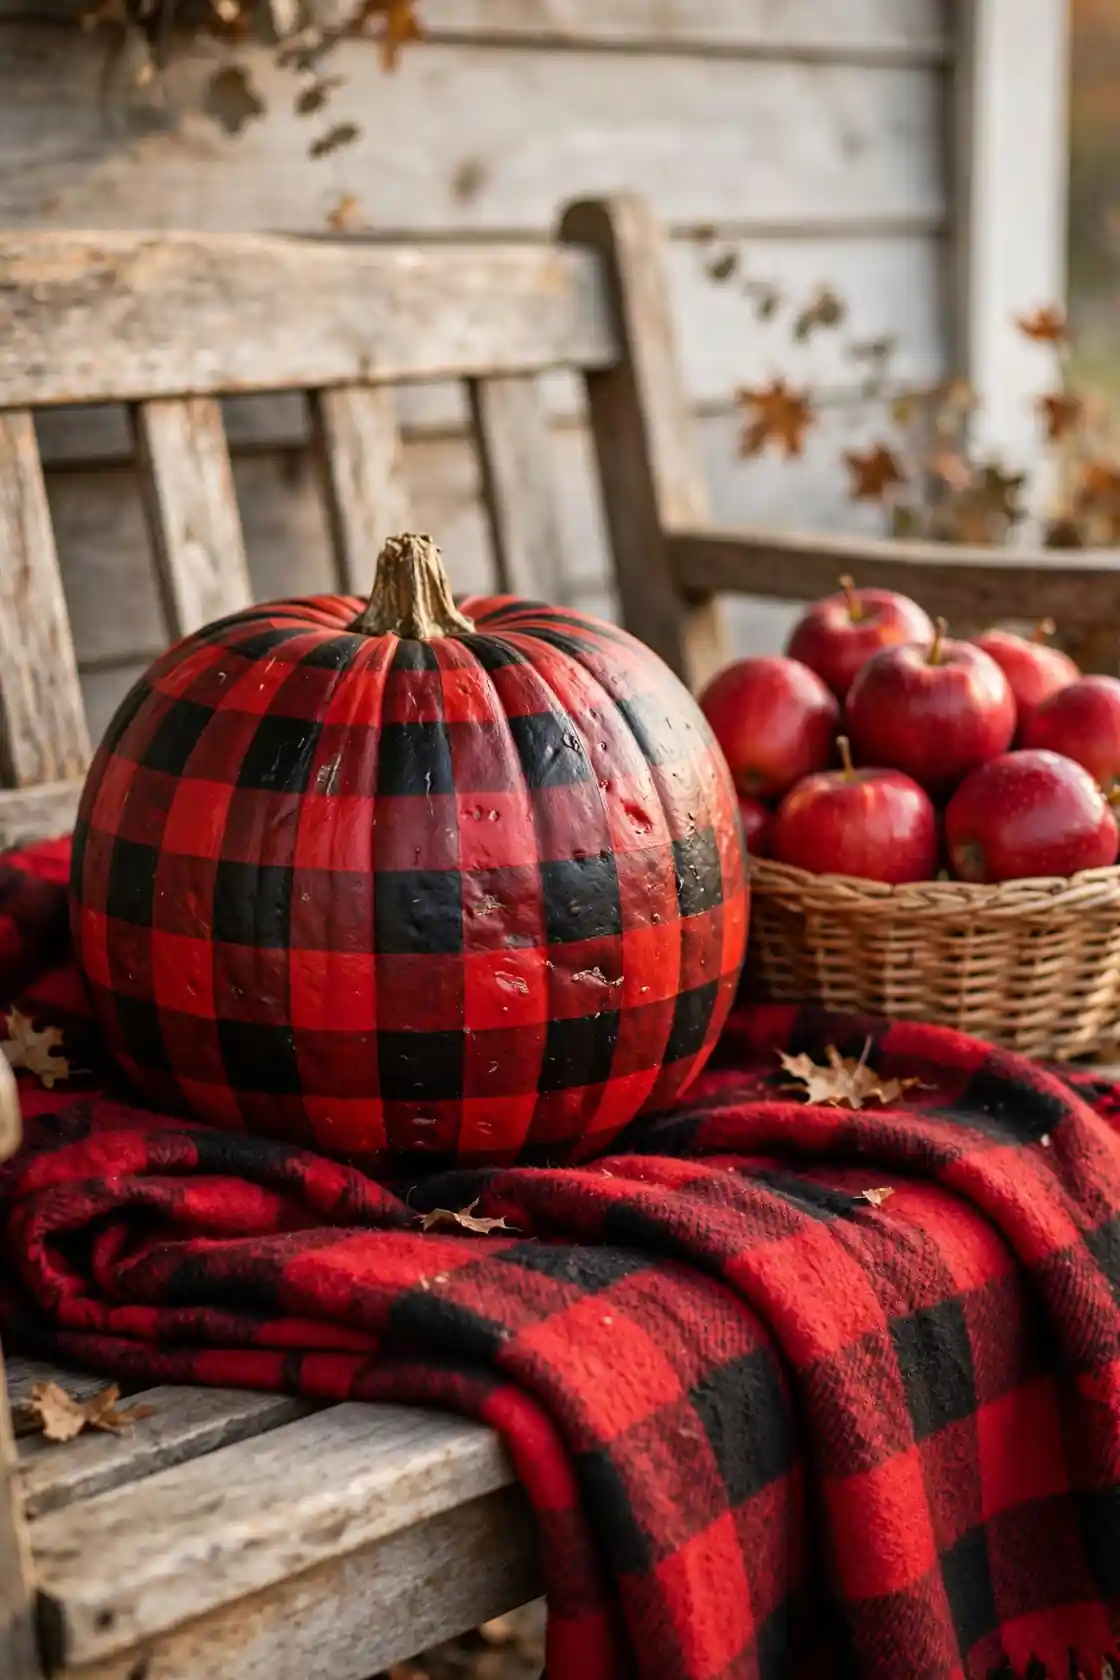
Buffalo Check Plaid
Before: A plain pumpkin that disappears against your farmhouse porch decor and adds nothing to the cozy plaid-and-flannel scene you have styled.
After: A bold buffalo check showpiece in classic red and black that ties the whole porch together, looking like it came straight from a country living magazine shoot.
Start with a red base coat, then paint black vertical stripes followed by horizontal stripes, letting the overlapping squares create the check naturally. Use painter’s tape for razor-sharp lines if painting freehand feels intimidating. This timeless pattern suits cabins, farmhouses, and anyone who loves that warm and cozy lumberjack-inspired fall aesthetic.
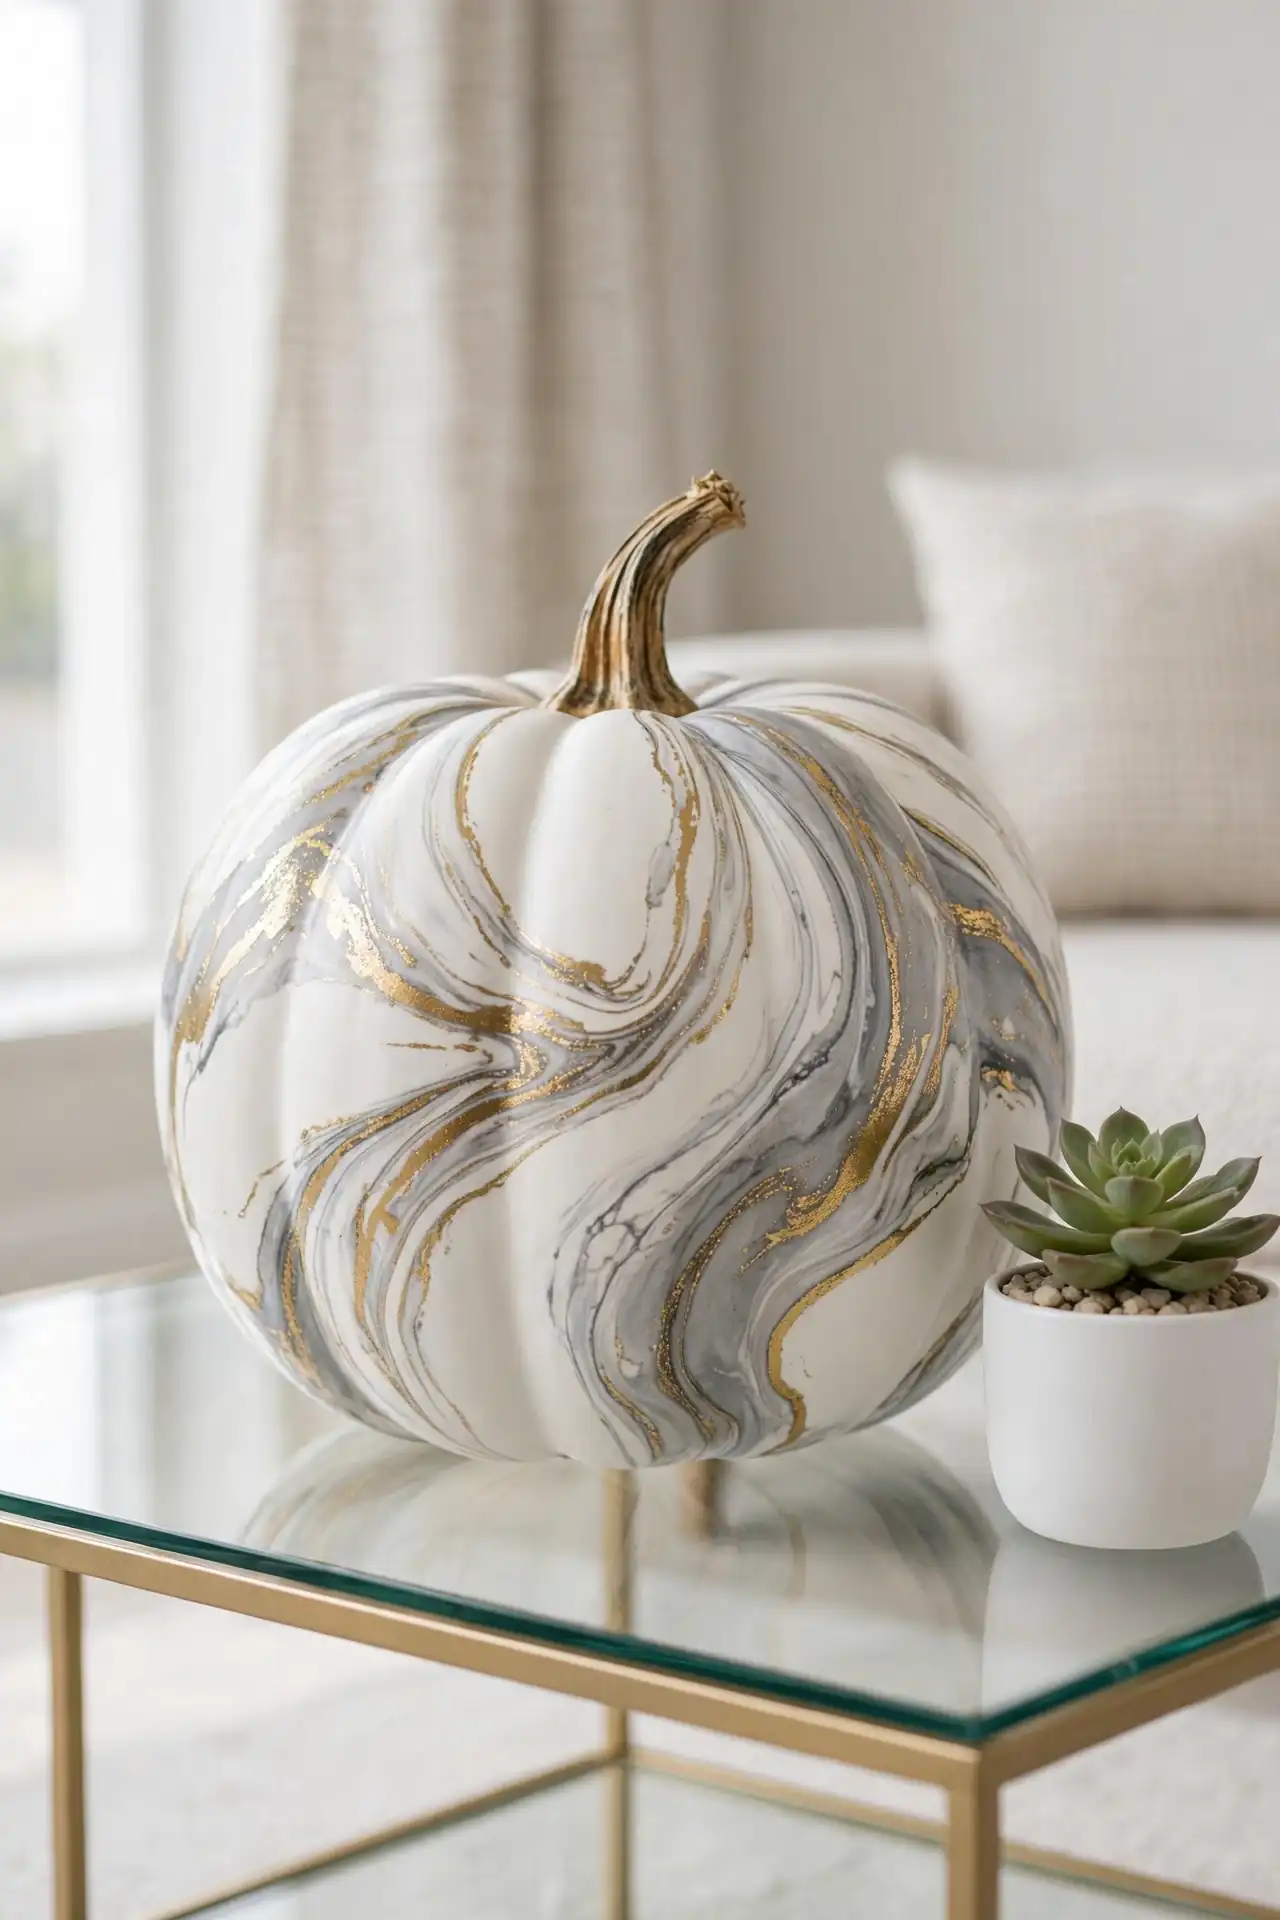
Marble Swirl Effect
Marbled pumpkins look like luxury home decor, yet the technique is surprisingly simple. Fill a disposable container with water, drip in two or three nail polish colors, swirl gently with a toothpick, then dip the pumpkin through the surface. The polish clings in gorgeous organic veins.
- Work in a ventilated area since nail polish fumes are strong
- Drip polish close to the water surface for better control
- Dip quickly and lift straight up without twisting
- Let dry on wax paper for at least two hours
Each dip produces a one-of-a-kind pattern, so no two pumpkins ever match. Gray, white, and gold is a sophisticated combination, while teal and copper feels boldly modern. Display these beauties indoors where their detail can be admired up close.
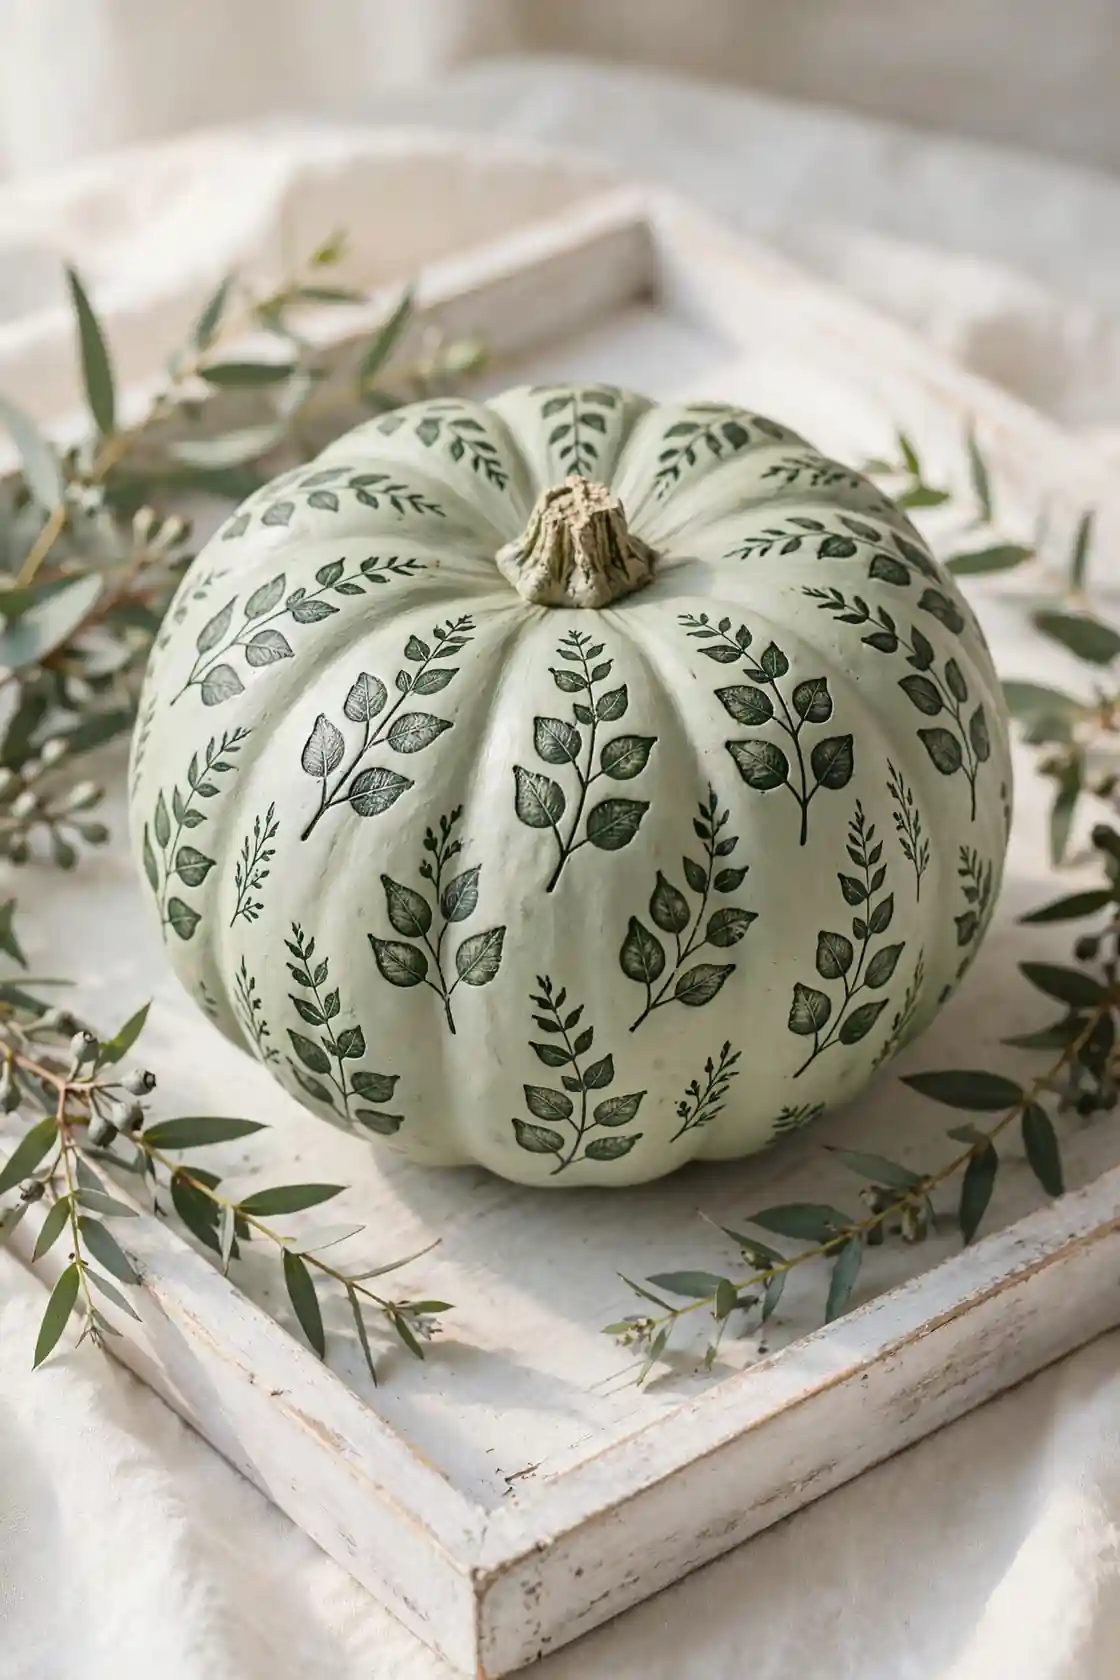
Botanical Leaf Prints
Nature provides the prettiest stencils when you press real leaves into paint. Coat a eucalyptus or fern leaf lightly with dark green acrylic, press it onto a sage-painted pumpkin, and lift carefully to reveal a crisp botanical print.
| Leaf Type | Print Style | Best Base Color |
|---|---|---|
| Eucalyptus | Round and soft | Sage or cream |
| Fern | Feathery and fine | White or pale gray |
| Oak | Bold and graphic | Mustard or terracotta |
Practice on paper first to learn how much paint each leaf needs. Too much paint blurs the veins, while too little leaves gaps. This earthy design suits gardeners and nature lovers, and it transitions beautifully from Halloween into Thanksgiving.
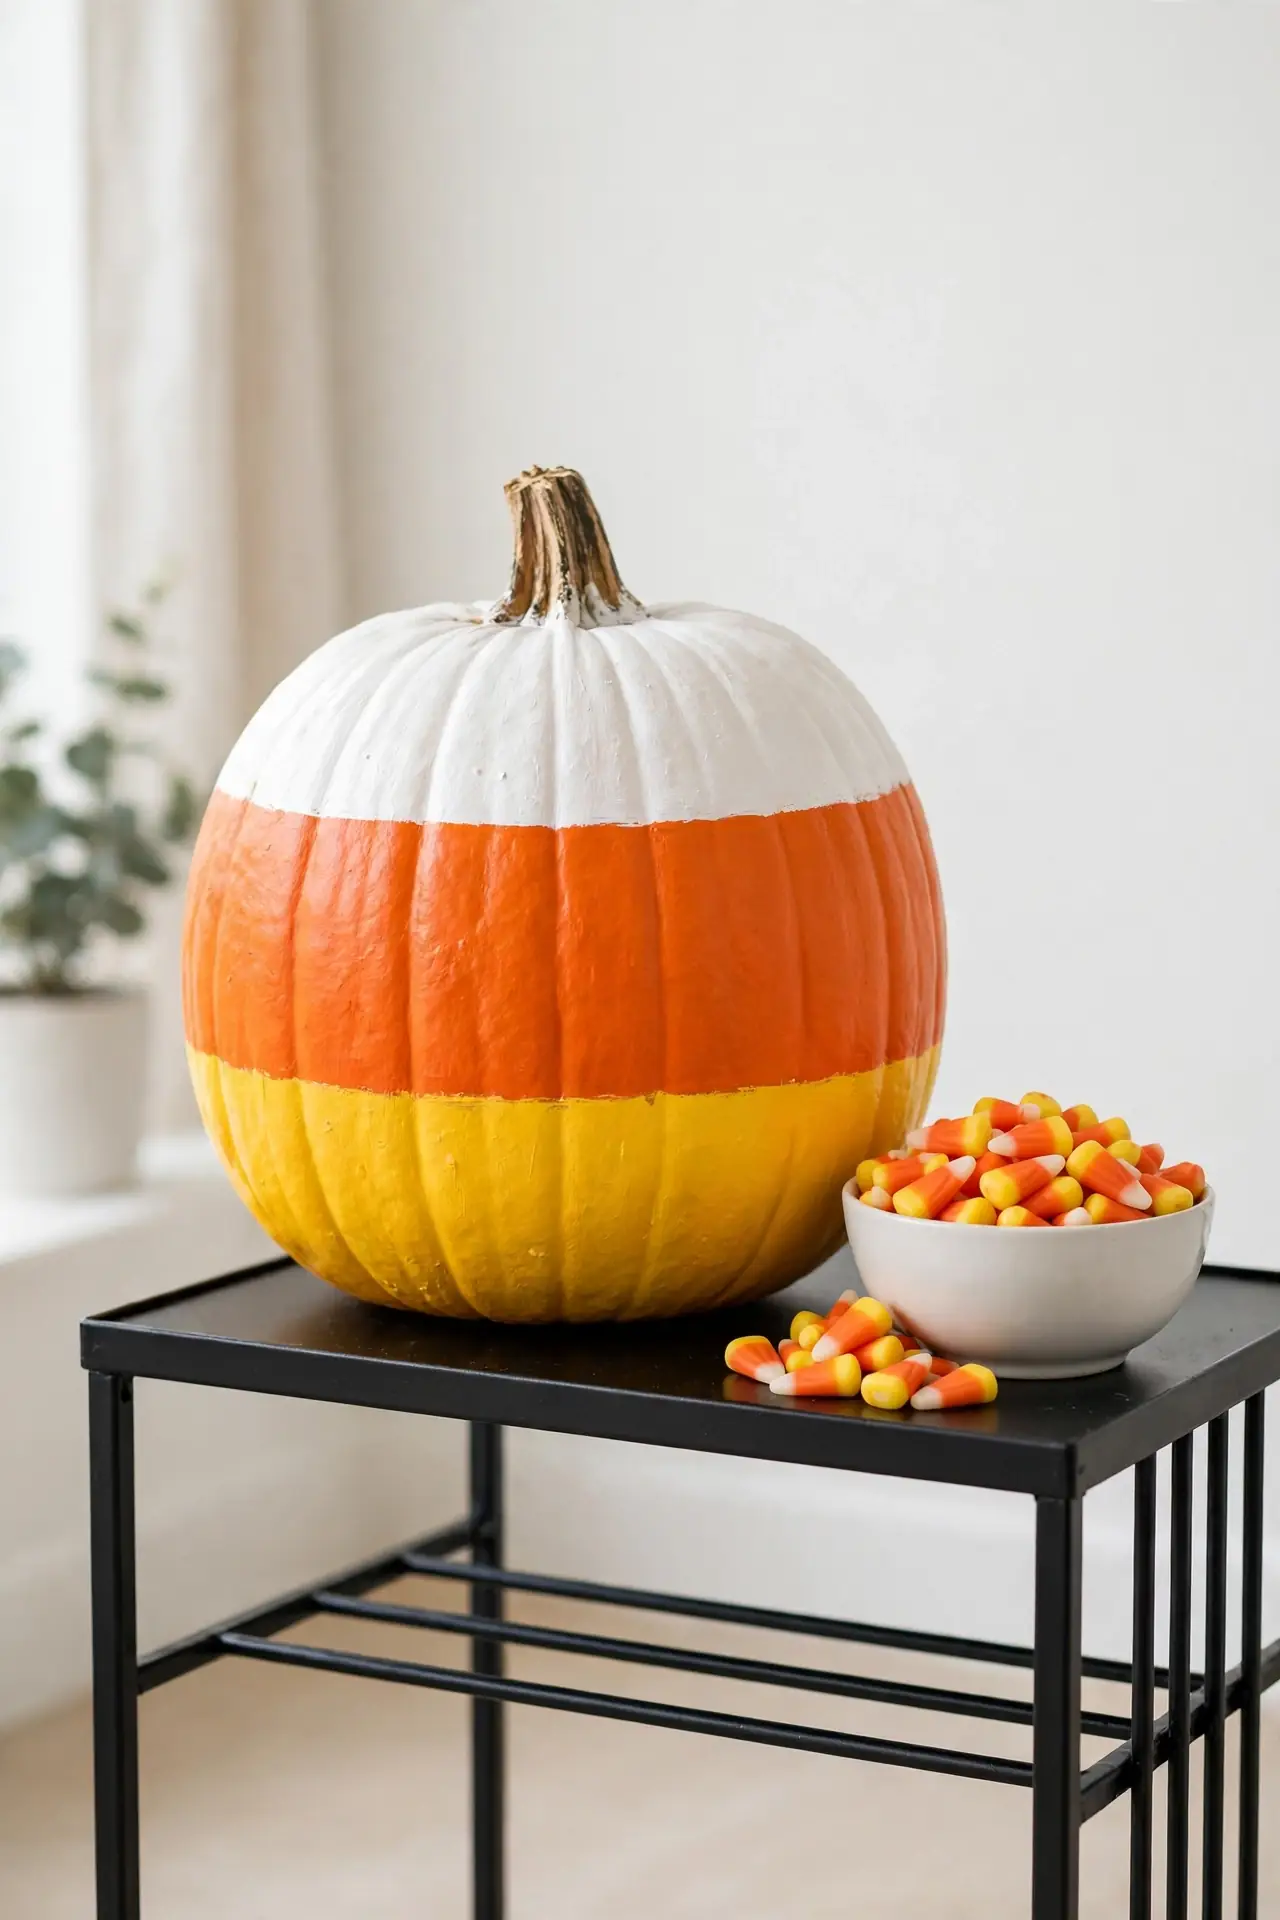
Striped Candy Corn
Nothing captures Halloween nostalgia like candy corn stripes. Divide your pumpkin into three horizontal bands with painter’s tape, then fill them in with white, orange, and yellow from top to bottom for an instantly recognizable treat-inspired design.
Do:
- Remove tape while paint is slightly tacky for clean edges
- Use two coats on the white band since it covers the least
- Pick a tall pumpkin shape for the most candy-like proportions
Don’t:
- Skip the tape, because freehand stripes rarely stay even
- Mix the stripe order, since candy corn always goes white on top
- Forget the sealant, which keeps colors vivid outdoors
Line up three candy corn pumpkins in graduated sizes for a sweet family portrait on your steps.
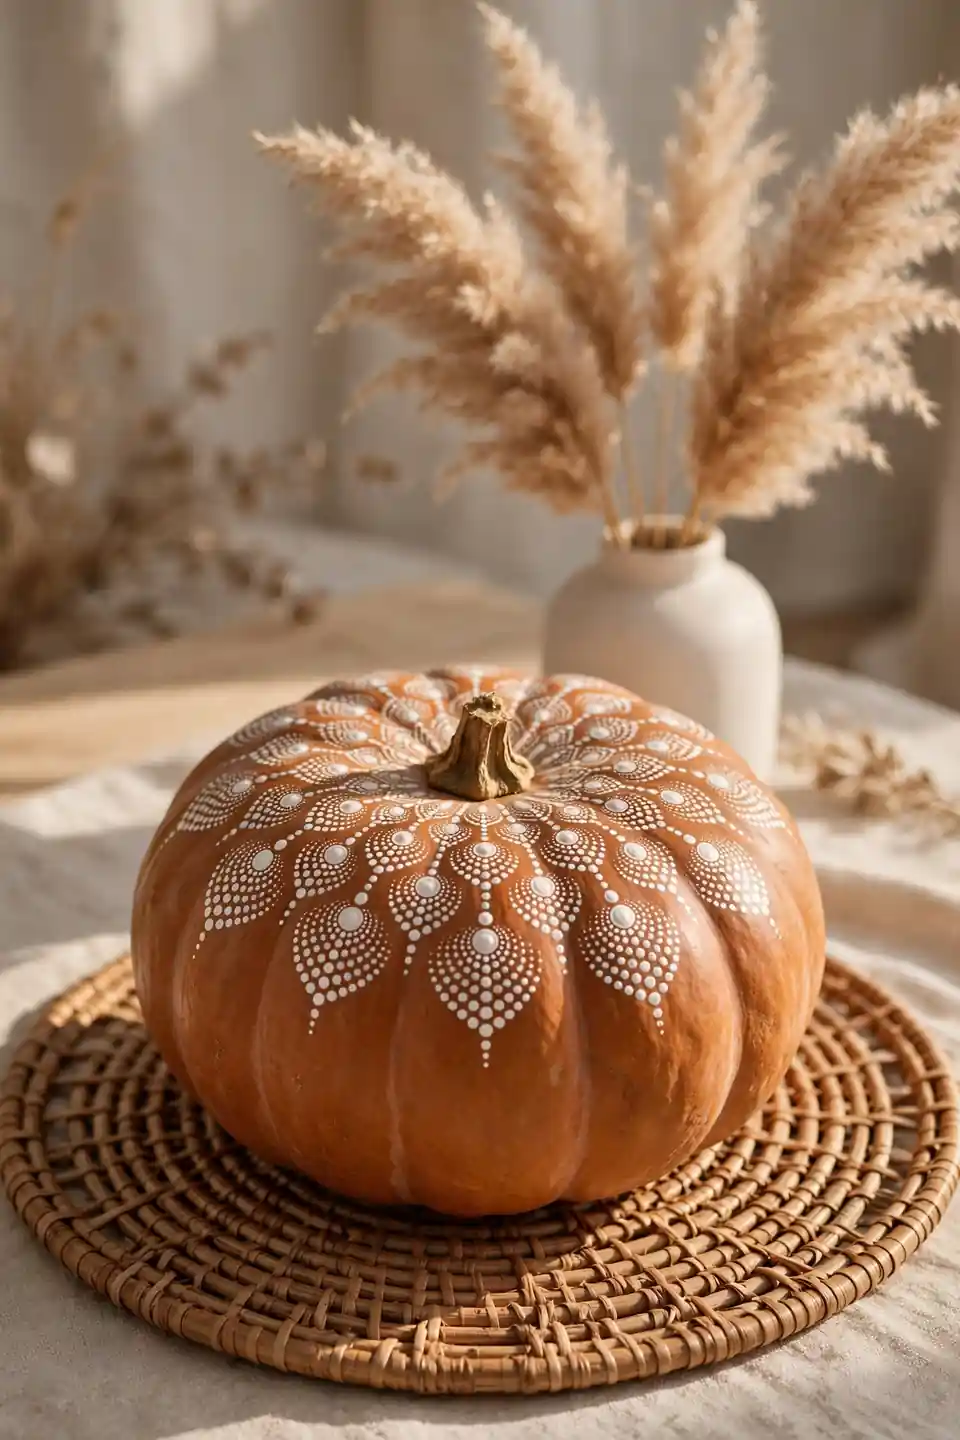
Boho Mandala Dots
Center: Start with a single dot at the very top of the pumpkin
Rings: Build concentric circles of dots, growing larger outward
Tools: Dotting tools or pencil erasers in three sizes
Palette: White and gold on terracotta for earthy boho warmth
Mandala dotting is wonderfully meditative and relaxing, and the symmetrical finished result always impresses guests. There is no wrong way to arrange the dots, so let your intuition guide each ring as you work outward. This design appeals to the free-spirited decorator and looks absolutely gorgeous grouped with macrame hangings and pampas grass in a cozy boho fall corner.
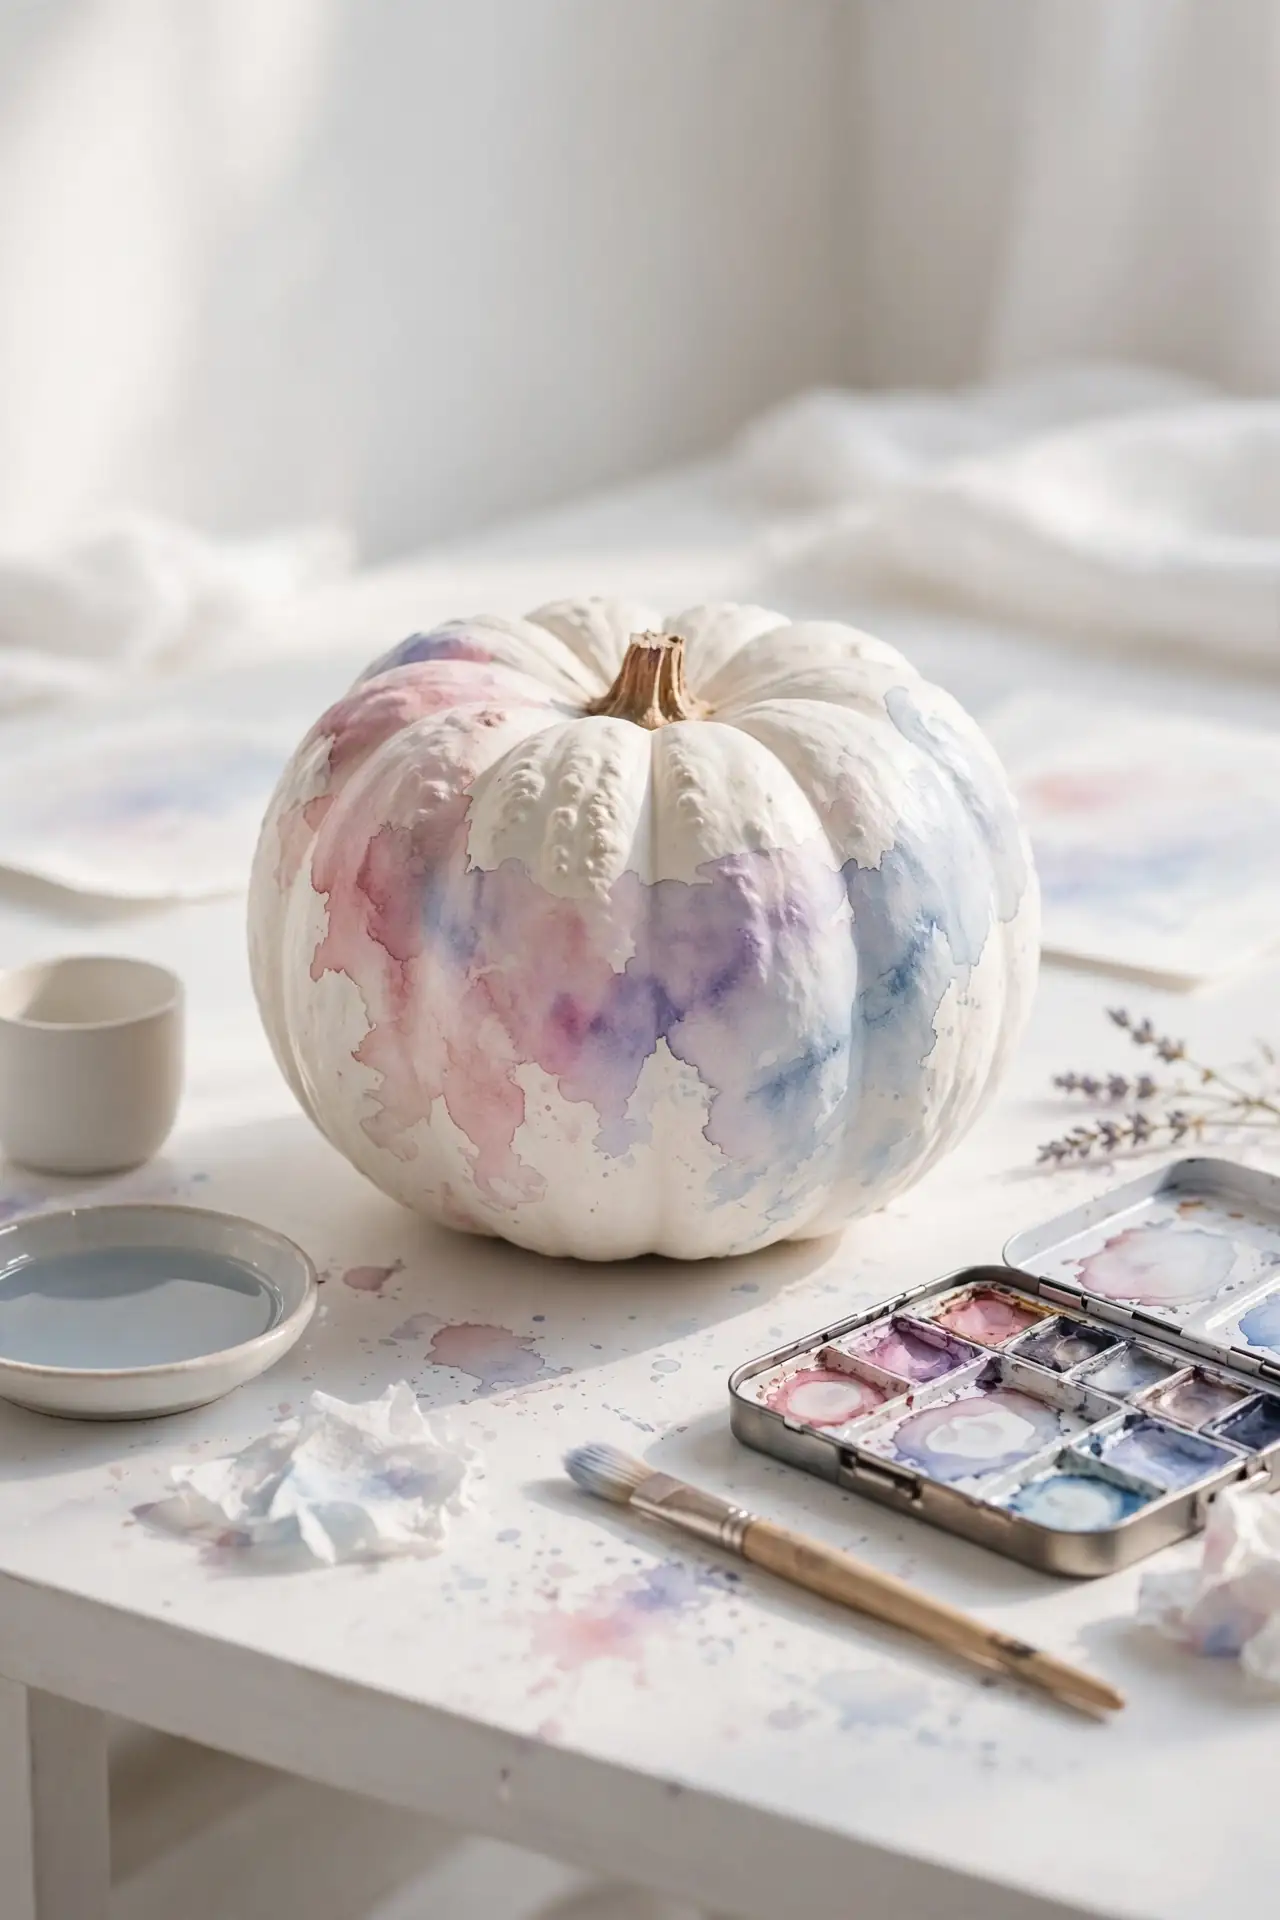
Watercolor Wash Pumpkins
Watercolor washes bring dreamy softness to fall decorating. Thin acrylic paint with plenty of water and brush loose washes of dusty rose, lavender, and pale blue across a white pumpkin, letting the colors bleed gently into each other. The translucent layers create depth that opaque paint cannot match.
Work wet-on-wet for the softest blends, gently adding color into damp washes so edges melt together naturally. Less is more with this technique, so step back often to check the overall balance. These ethereal pumpkins suit shabby chic interiors beautifully and make lovely hostess gifts when placed in a basket with tissue paper.
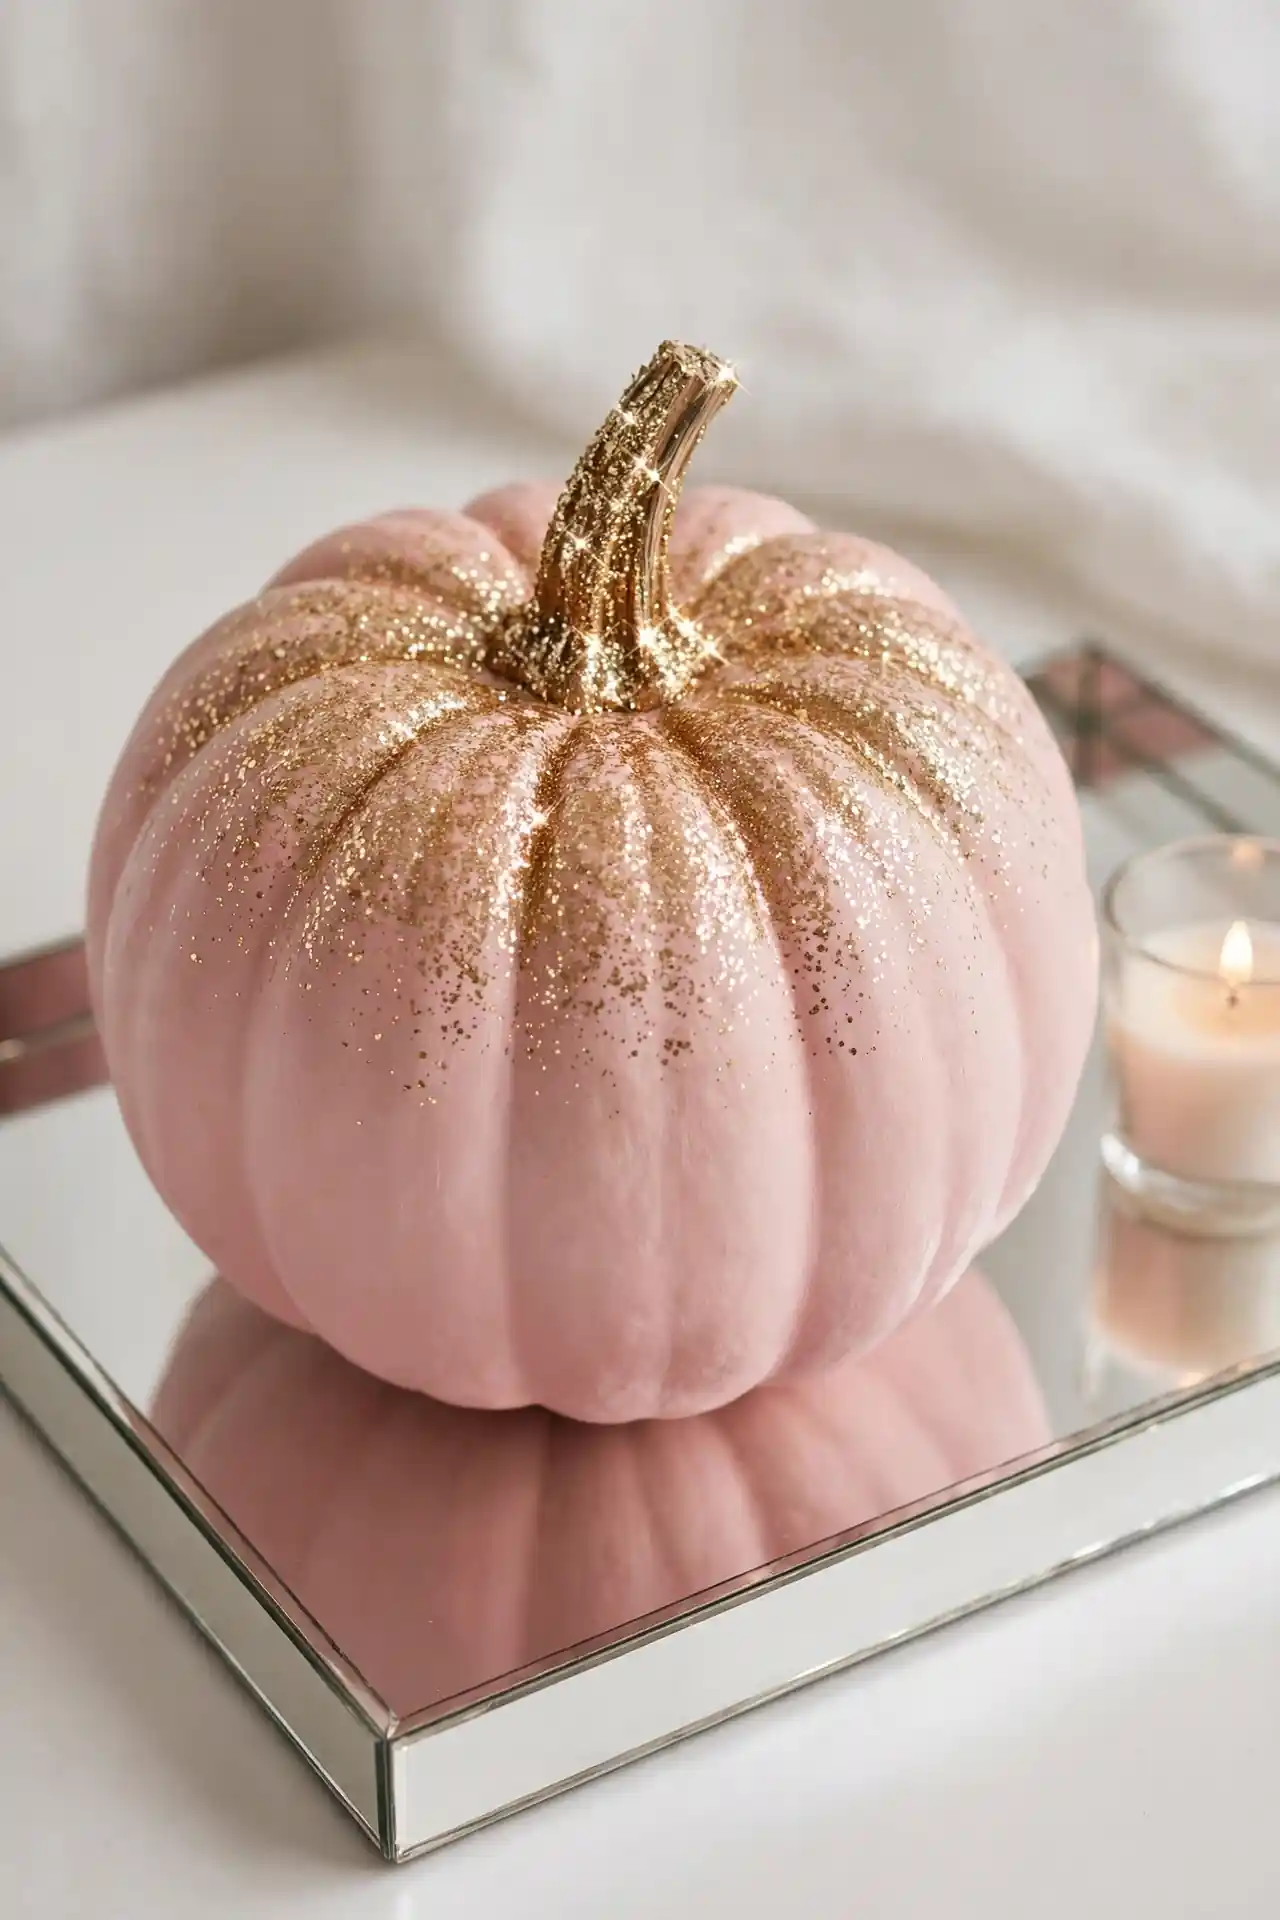
Glitter Gradient Tops
Glitter gradients add glamour without overwhelming your decor. Paint the pumpkin matte blush pink, then brush craft glue over the top third and sprinkle fine gold glitter, fading the density as you move downward.
- Use fine glitter rather than chunky for an elegant finish
- Apply glue in thin layers to control the fade
- Shake off excess glitter over paper to reuse it
- Seal with glitter-safe spray so sparkle stays put
The ombre sparkle catches light beautifully on mantels and entry tables. This is the design for anyone who believes fall decor should have a little magic, and it photographs like a dream for social sharing.
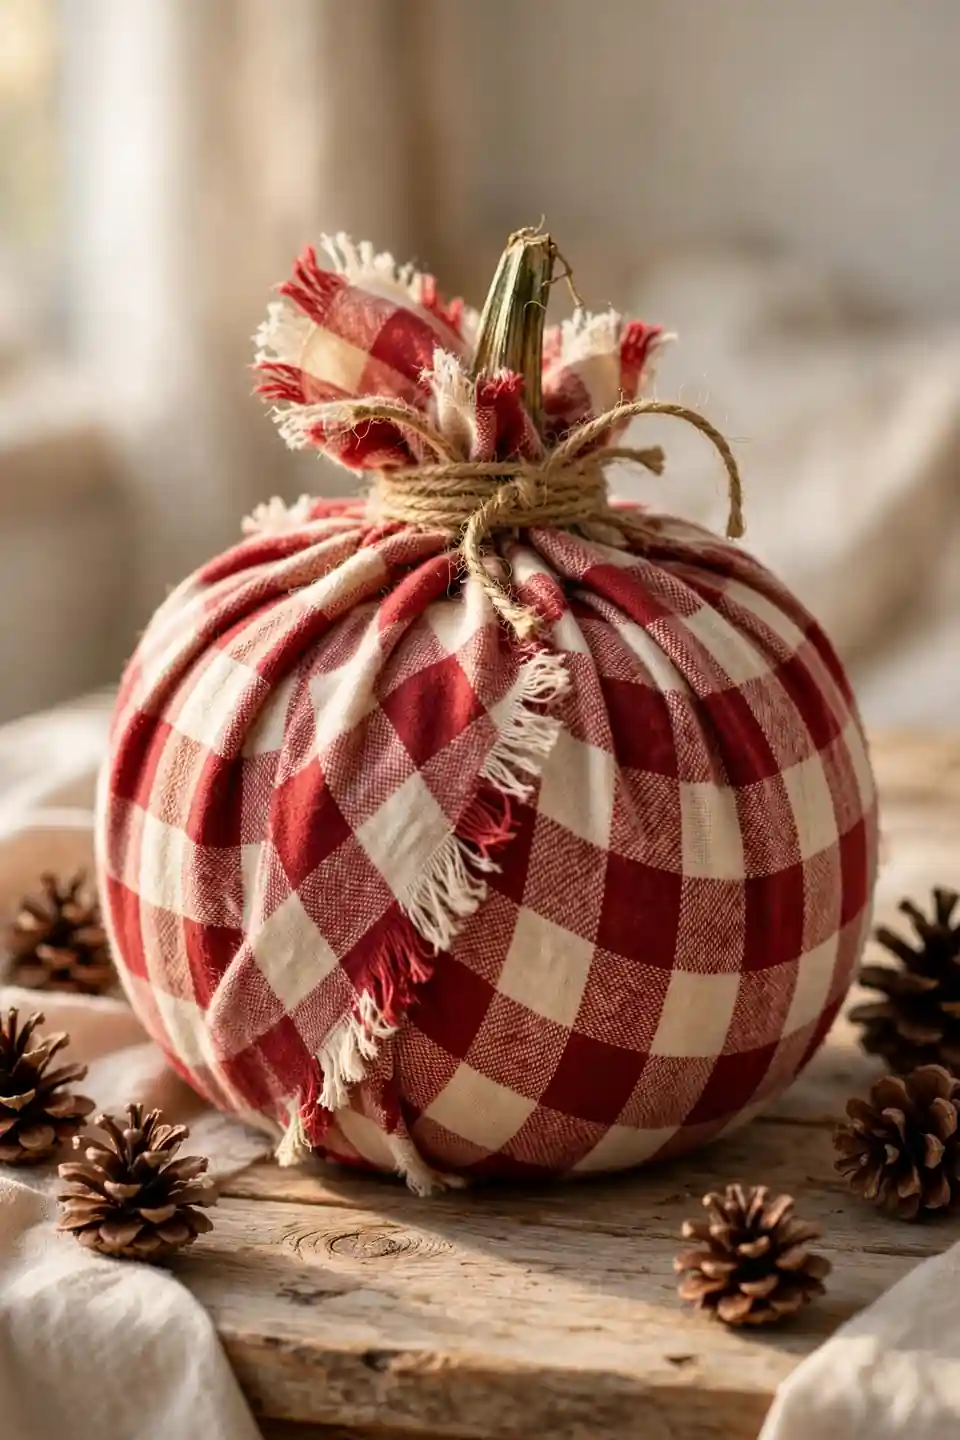
Plaid Flannel Wraps
Skip the paintbrush entirely and wrap pumpkins in plaid flannel for instant coziness. Cut fabric squares large enough to gather at the stem, then secure with jute twine for a charming gathered effect that looks like a fabric pumpkin patch.
Choose classic red and black buffalo plaid or soft cream tartan depending on your palette. This no-mess method is perfect for last-minute decorating, and the fabric pieces can be reused on different pumpkins next year.

Vintage Map Decoupage
Before: A plain pumpkin that feels out of place in your travel-inspired study full of globes, leather books, and wanderlust.
After: A storied globe-trotter pumpkin wrapped in sepia world maps, looking like a treasured artifact from a vintage explorer’s collection.
Tear old maps or print vintage map images at home, then apply them with decoupage medium in overlapping pieces. The aged paper tones blend into a cohesive vintage patina that flatters any room decorated with warm wood and leather. This design sparks lively conversation at gatherings, as curious guests lean in to spot familiar coastlines and dream about their next big adventure.
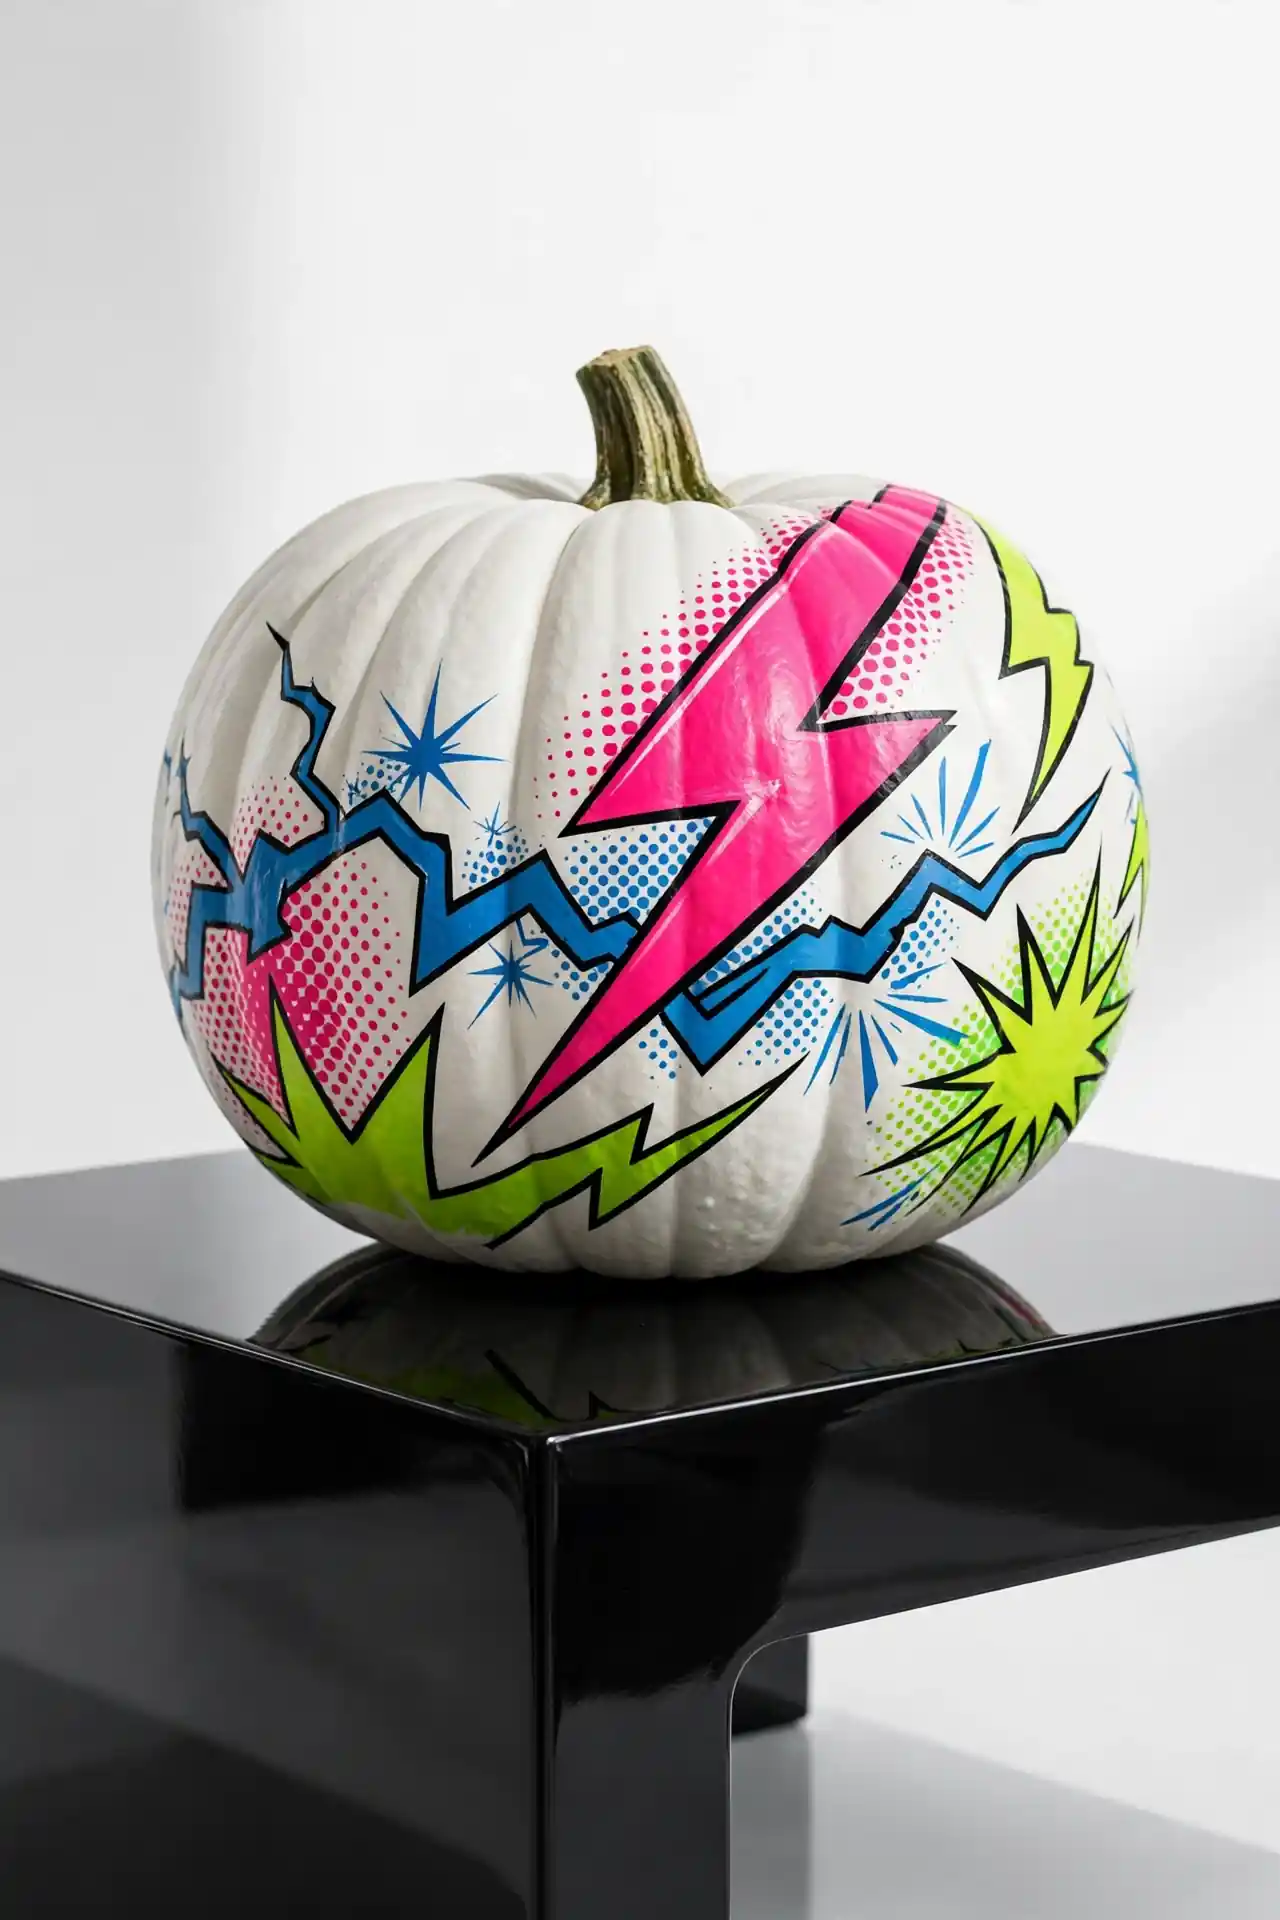
Neon Pop Art
Neon pop art pumpkins bring bold electric energy to Halloween for the fearless decorator. Paint lightning bolts, starbursts, and comic-style bursts in hot pink, electric blue, and vivid lime green over a crisp white base for maximum visual punch.
- Sketch bold graphic shapes lightly in pencil first
- Fill shapes with neon acrylic, using two coats for opacity
- Outline everything in black for that comic-book pop
- Add white highlight dots to make colors glow
These bold statement pieces truly shine at teen parties and modern Halloween gatherings. Under blacklight, the neon colors fluoresce quite spectacularly, turning your display into a truly unforgettable glow experience.
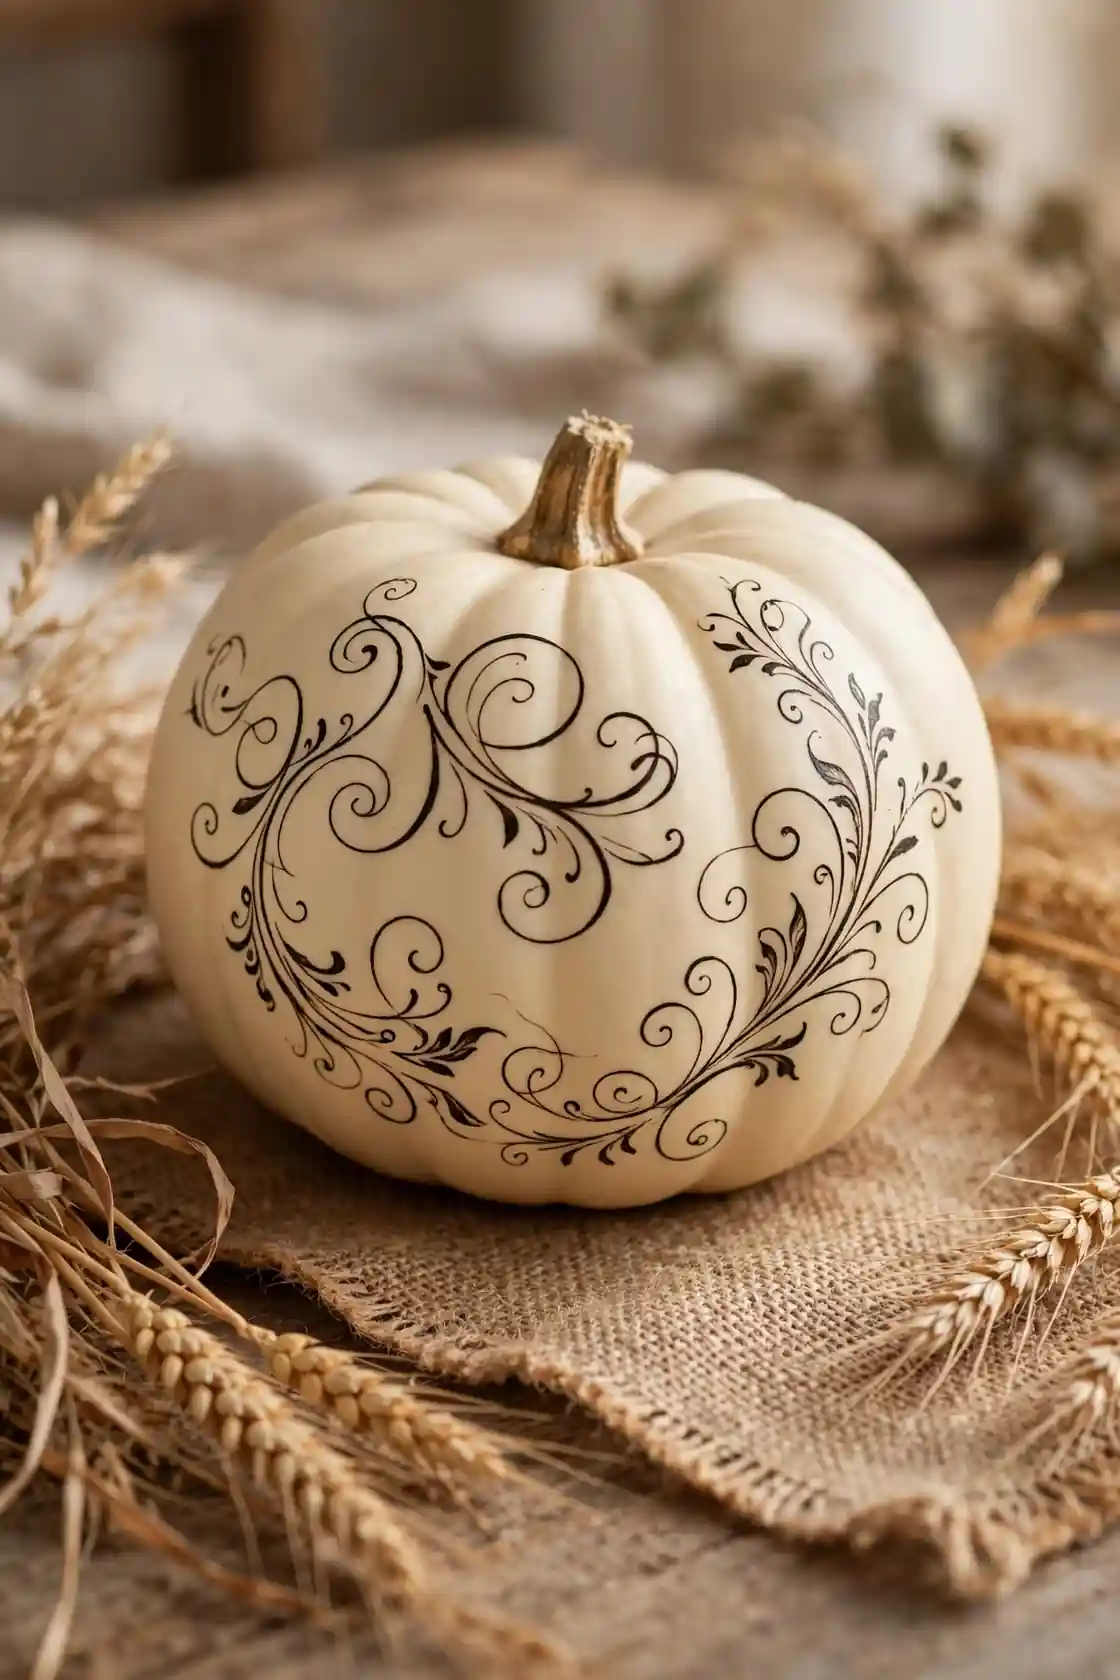
Farmhouse Script Words
Hand-lettered script brings farmhouse charm to any pumpkin. Use a fine liner brush and dark brown acrylic to paint flowing flourishes, scrollwork, and decorative swirls across a cream pumpkin for that beloved rustic sign aesthetic.
| Style | Brush | Look |
|---|---|---|
| Modern calligraphy | Fine liner | Delicate and airy |
| Rustic serif | Flat small | Bold and homey |
| Whimsical swirls | Round detail | Playful and free |
Practice your flourishes on paper until the strokes feel natural. Keep a damp cloth handy to wipe away mistakes quickly before paint sets. These elegant pumpkins anchor fall tablescapes beautifully, especially when paired with fall porch decor ideas for a cohesive seasonal home.
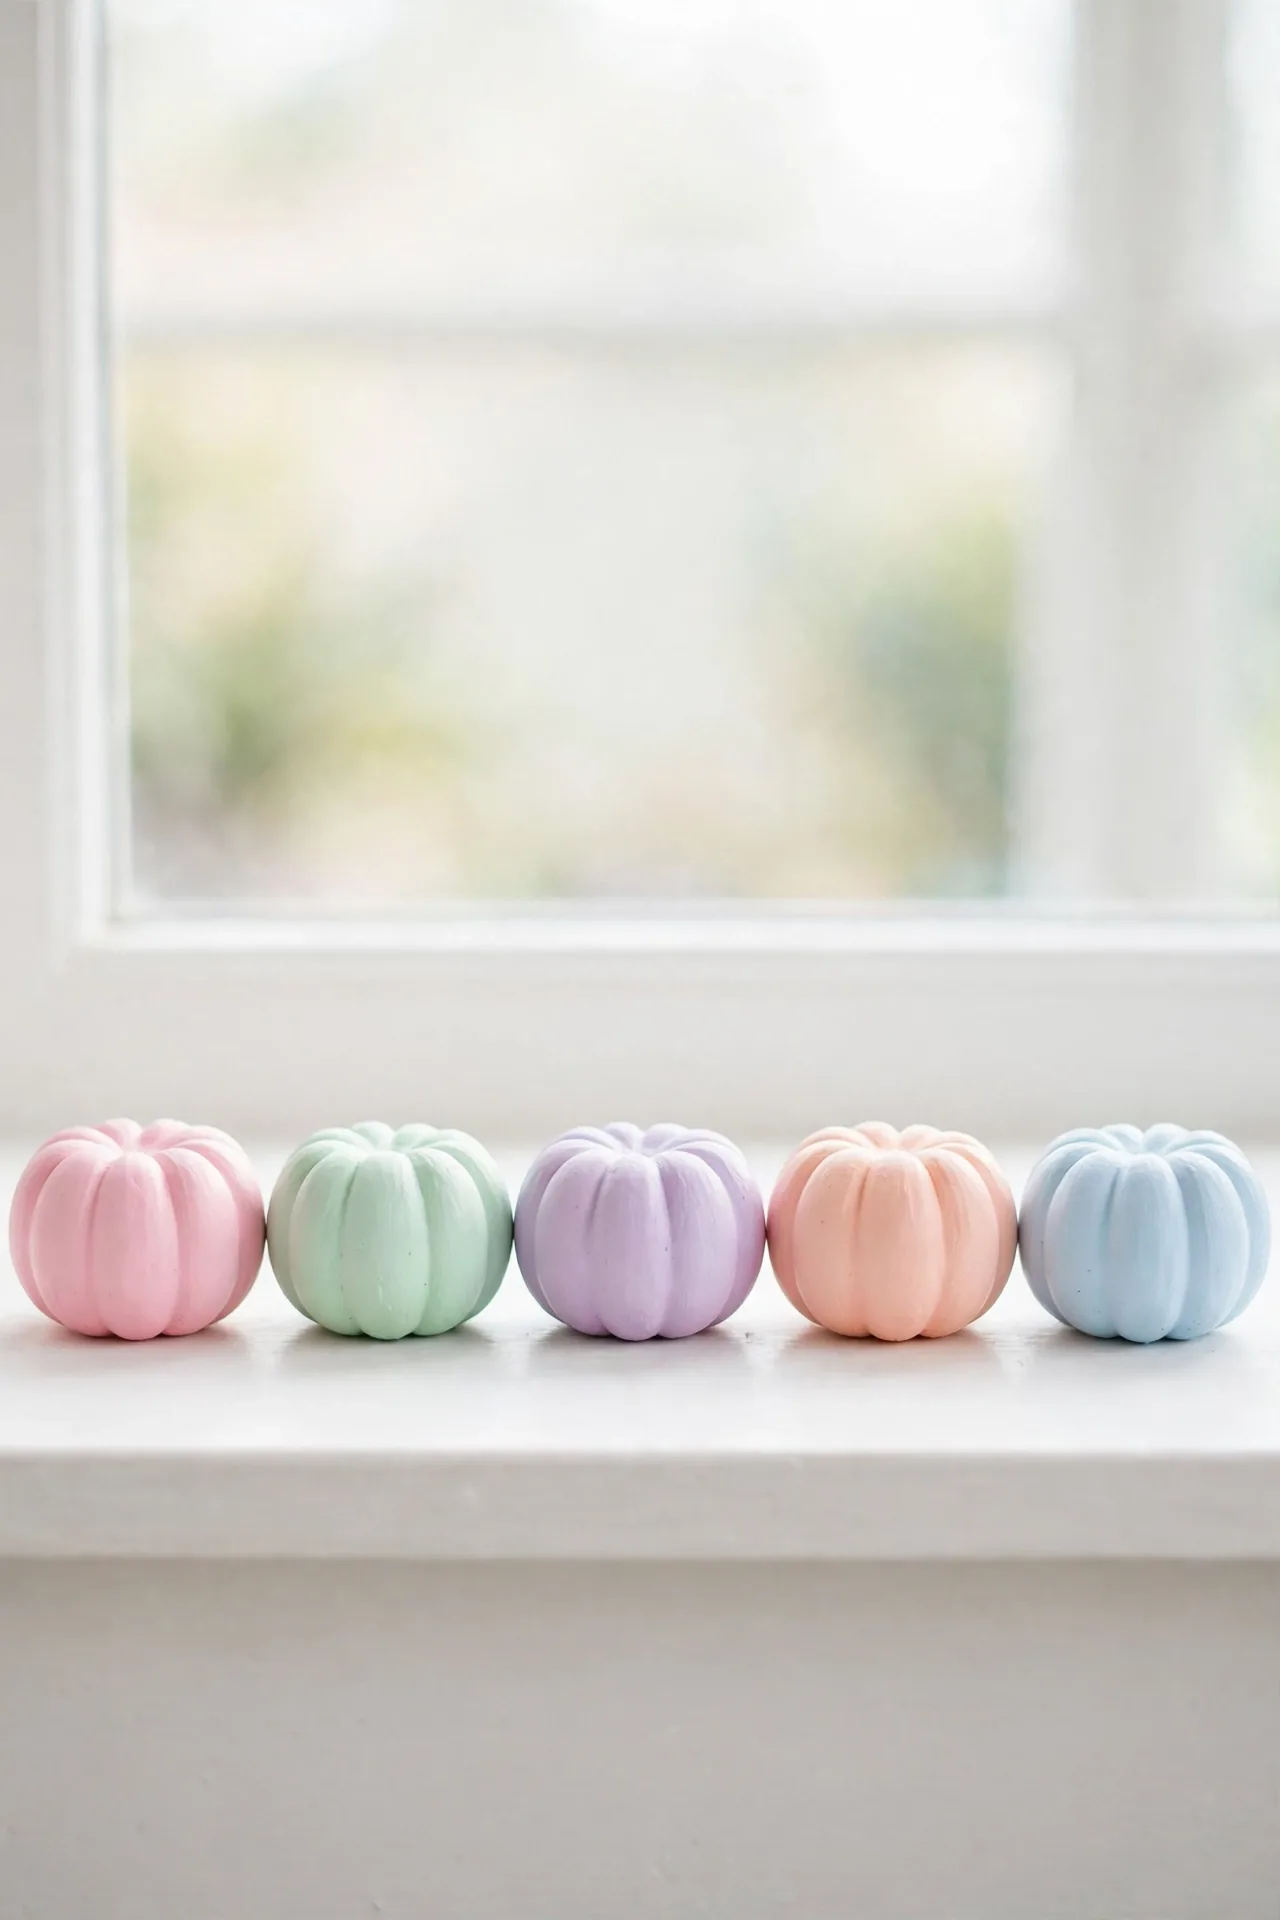
Pastel Rainbow Rows
Pastel rainbows prove fall color does not have to mean orange and brown. Paint small pumpkins in pink, mint, lavender, peach, and baby blue, then arrange them in gradient order along a windowsill or mantel for a delightful color story.
Do:
- Use the same finish, all matte or all satin, for cohesion
- Arrange in true rainbow order for the prettiest gradient
- Mix pumpkin sizes to add rhythm to the row
Don’t:
- Add extra patterns, since the colors are the stars here
- Place in direct sun, which can fade pastels over time
- Forget small risers to vary heights along the row
This cheerful display works beautifully for spring-like fall parties and nurseries, proving seasonal decor can be soft, sweet, and utterly charming.
Conclusion
From classic jack faces to dreamy watercolor washes, these 23 creative ways to paint pumpkins prove that a little paint opens up endless fall decorating possibilities. Each design fits a different style, skill level, and celebration, so you can mix spooky favorites with elegant showpieces across your home. Gather your brushes, invite friends or family to join the fun, and enjoy watching plain pumpkins become personal works of art. Share your finished creations with neighbors and guests, and let this cozy craft become a treasured autumn tradition you look forward to every single year.


One Comment