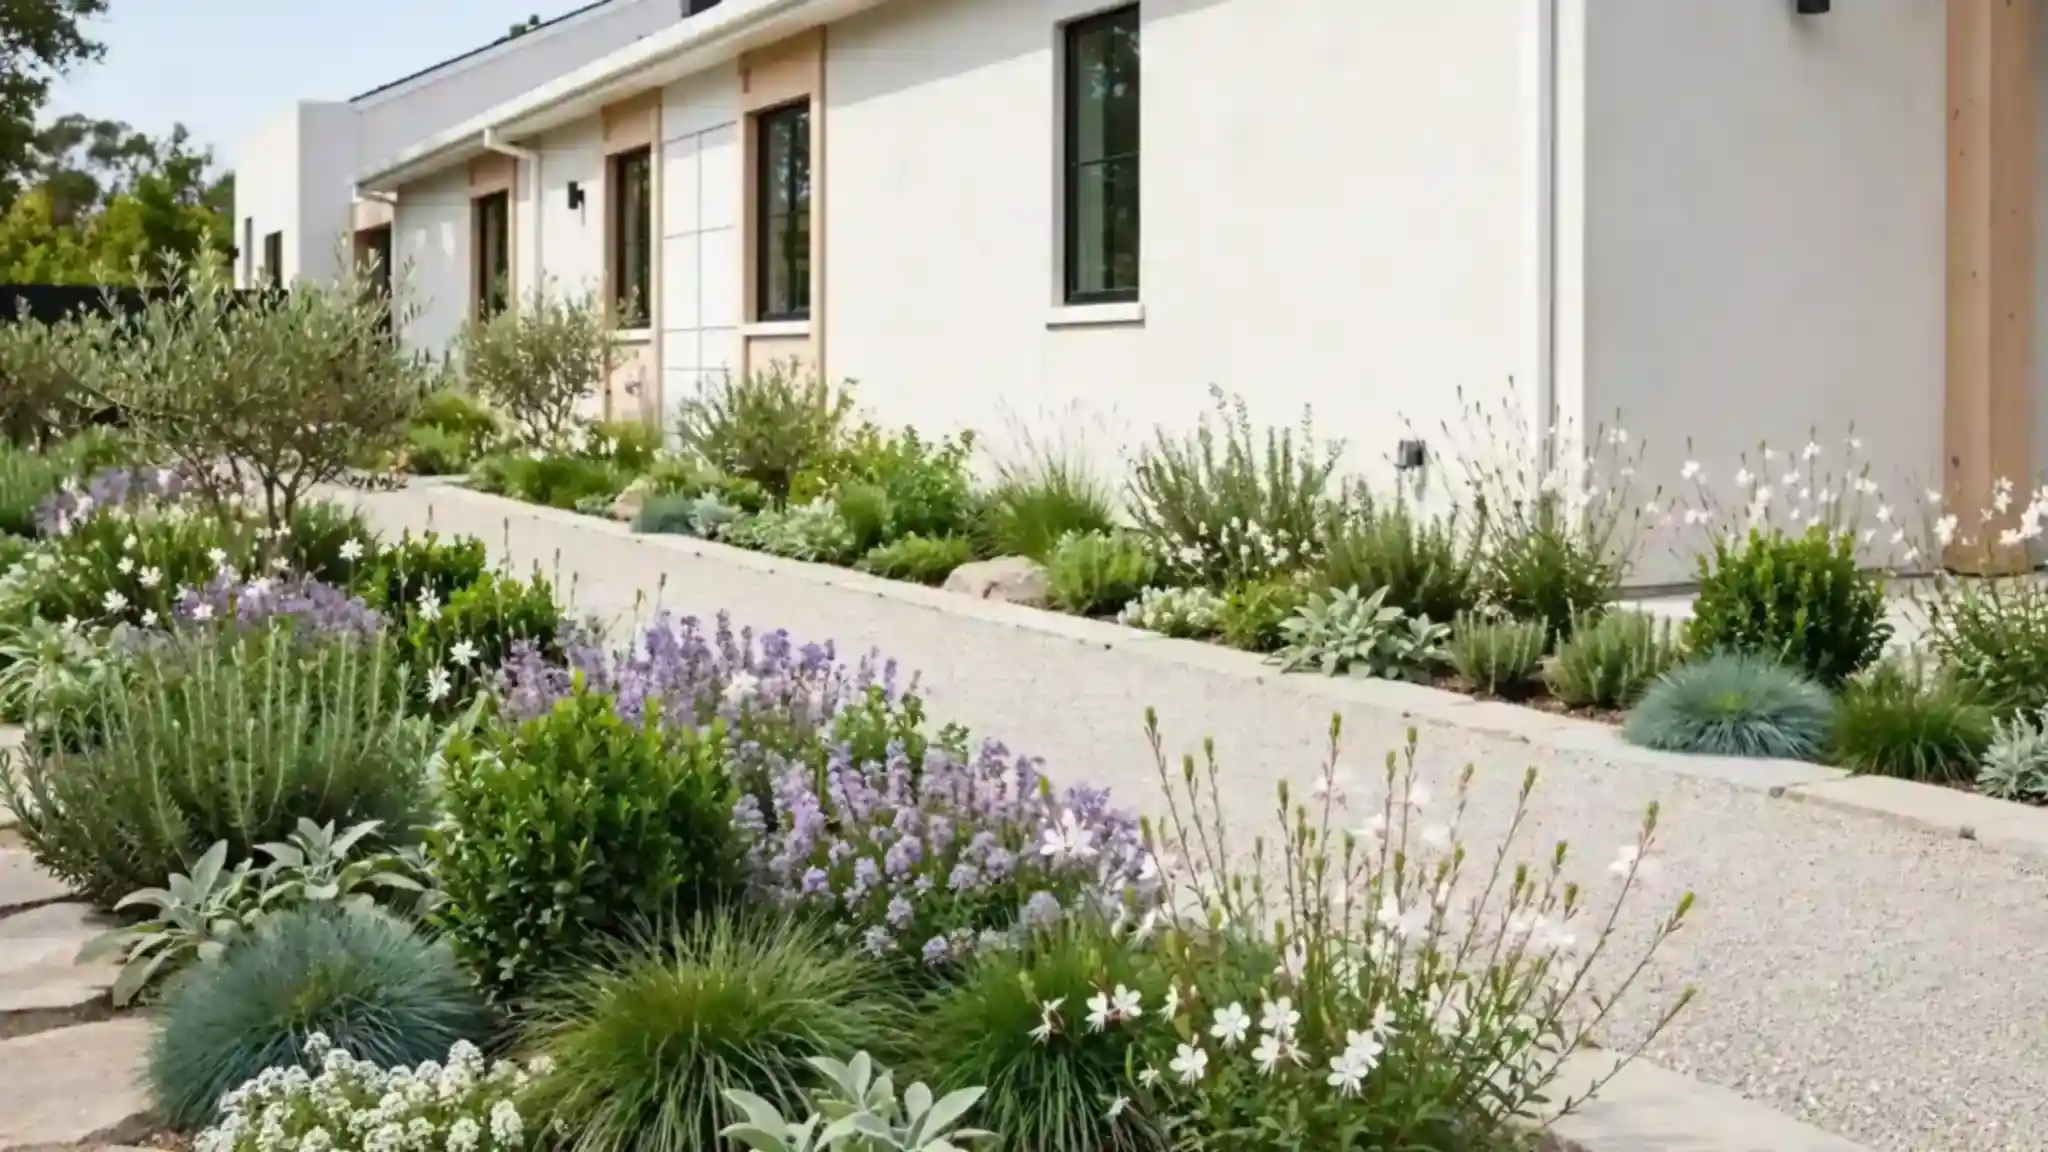
21 Side of House Landscaping Ideas to Transform Bare Spaces
That narrow strip along your house sits empty while the rest of your yard gets all the attention. Sound familiar? Most homeowners walk past this forgotten space every day without seeing its potential. These side of house landscaping ideas turn that overlooked corridor into one of the prettiest parts of your property. With a few smart plant choices and simple design tricks, even a three-foot-wide strip becomes a garden worth showing off. If you are already planning your front yard, these pair beautifully with front yard landscaping ideas for a cohesive look from every angle. In my experience, side yards respond faster to small changes than any other part of the landscape.
Below are twenty-one practical ideas, each designed for the unique challenges of narrow side spaces. You will find options for sun, shade, tiny budgets, and weekend timelines.
Narrow Flower Border
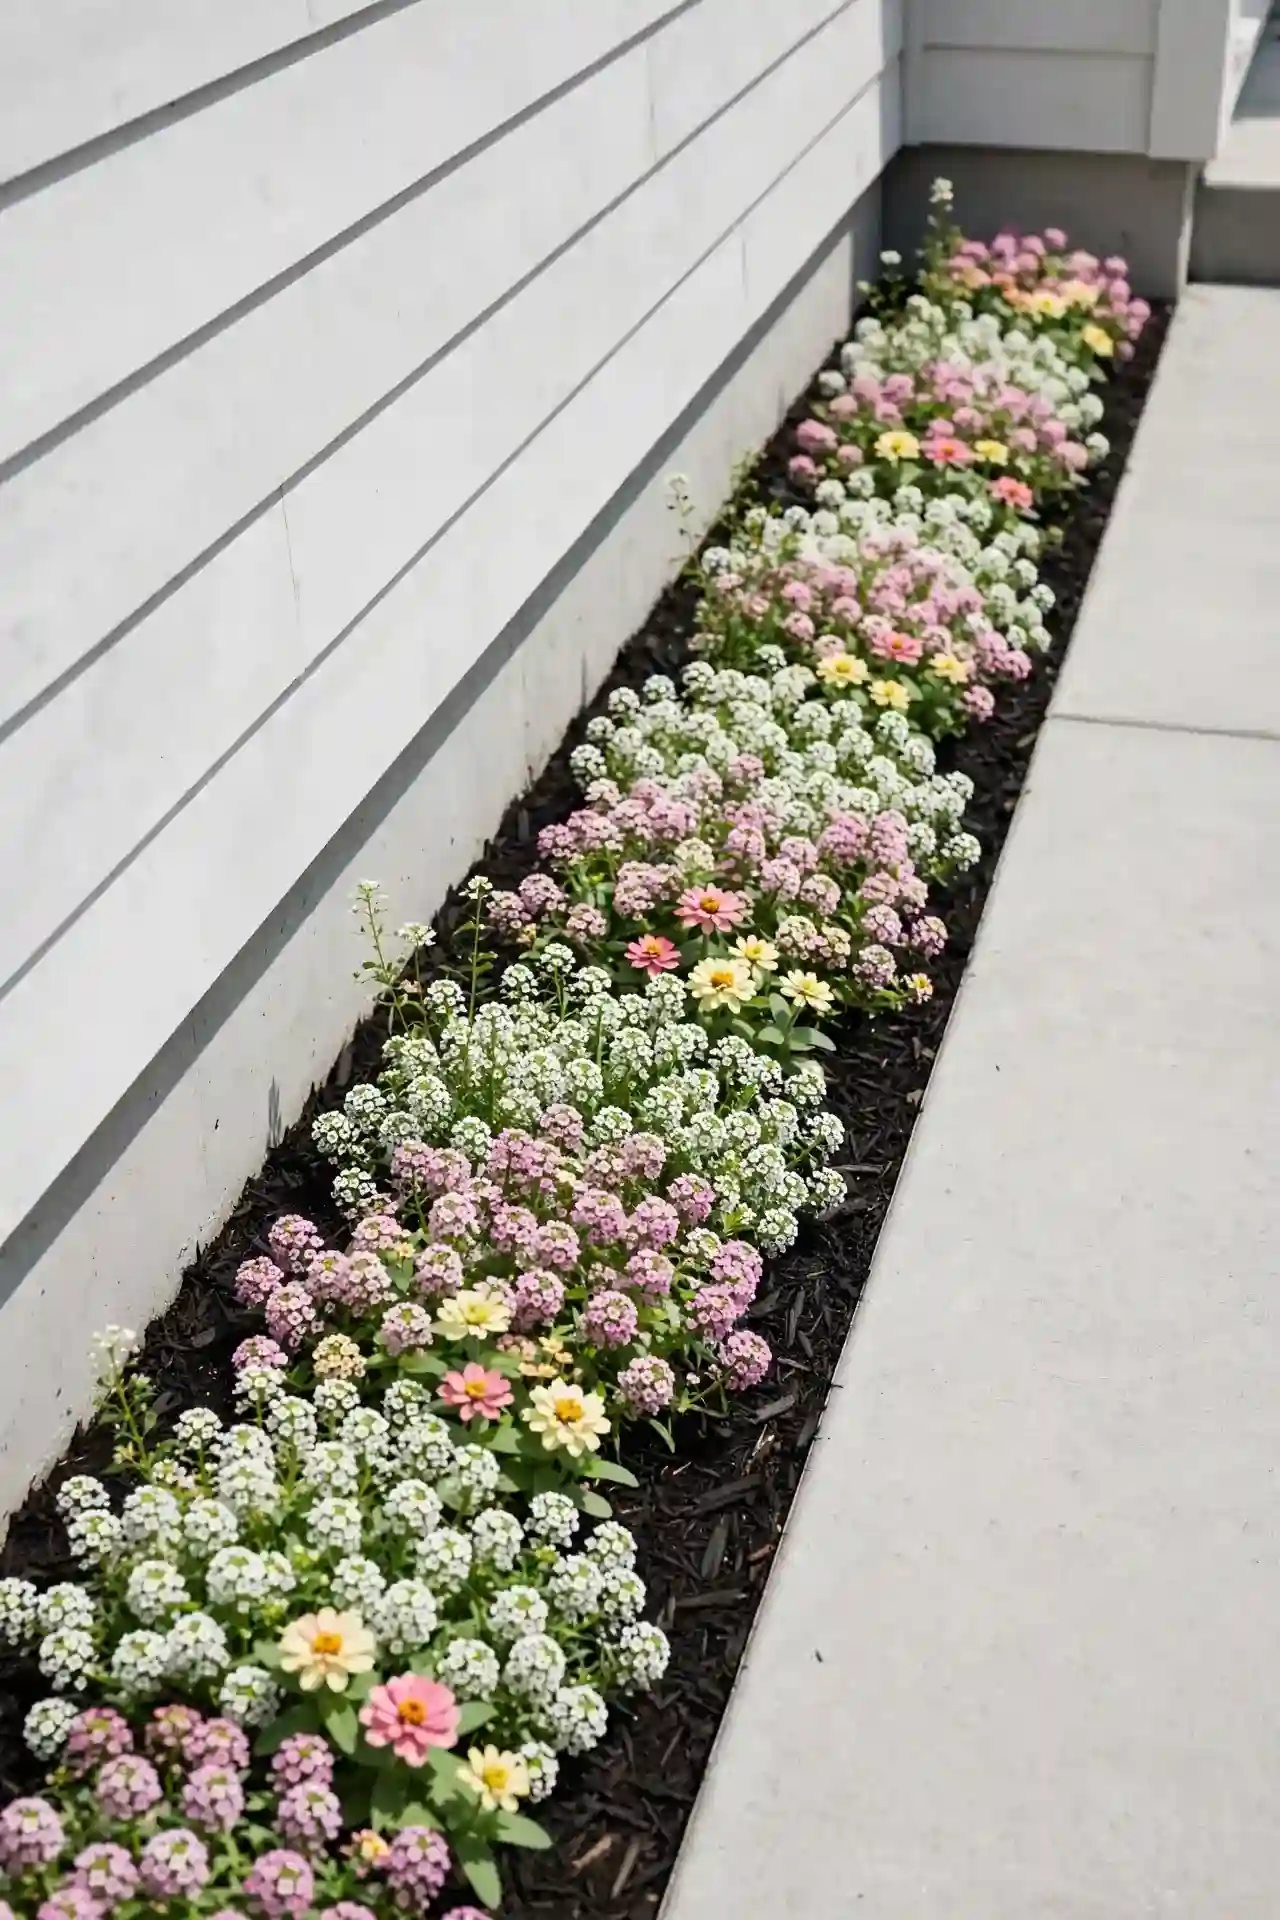
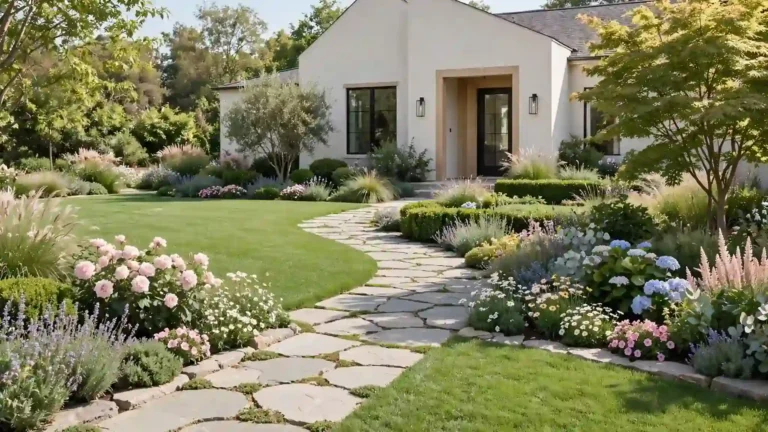
A slim strip of soil hugs most house foundations, waiting for color. Low-growing blooms like alyssum, lobelia, and dwarf zinnias fill this space without crowding walkways. Plant them in odd-numbered clusters for a natural look, keeping taller varieties at the back near the foundation wall.
Water deeply twice a week during the first month so roots establish before summer heat arrives. I’ve noticed that a two-inch layer of mulch keeps weeds down and moisture in, which means less work for you all season. This simple border delivers months of color for very little effort.
Gravel Path Walkway
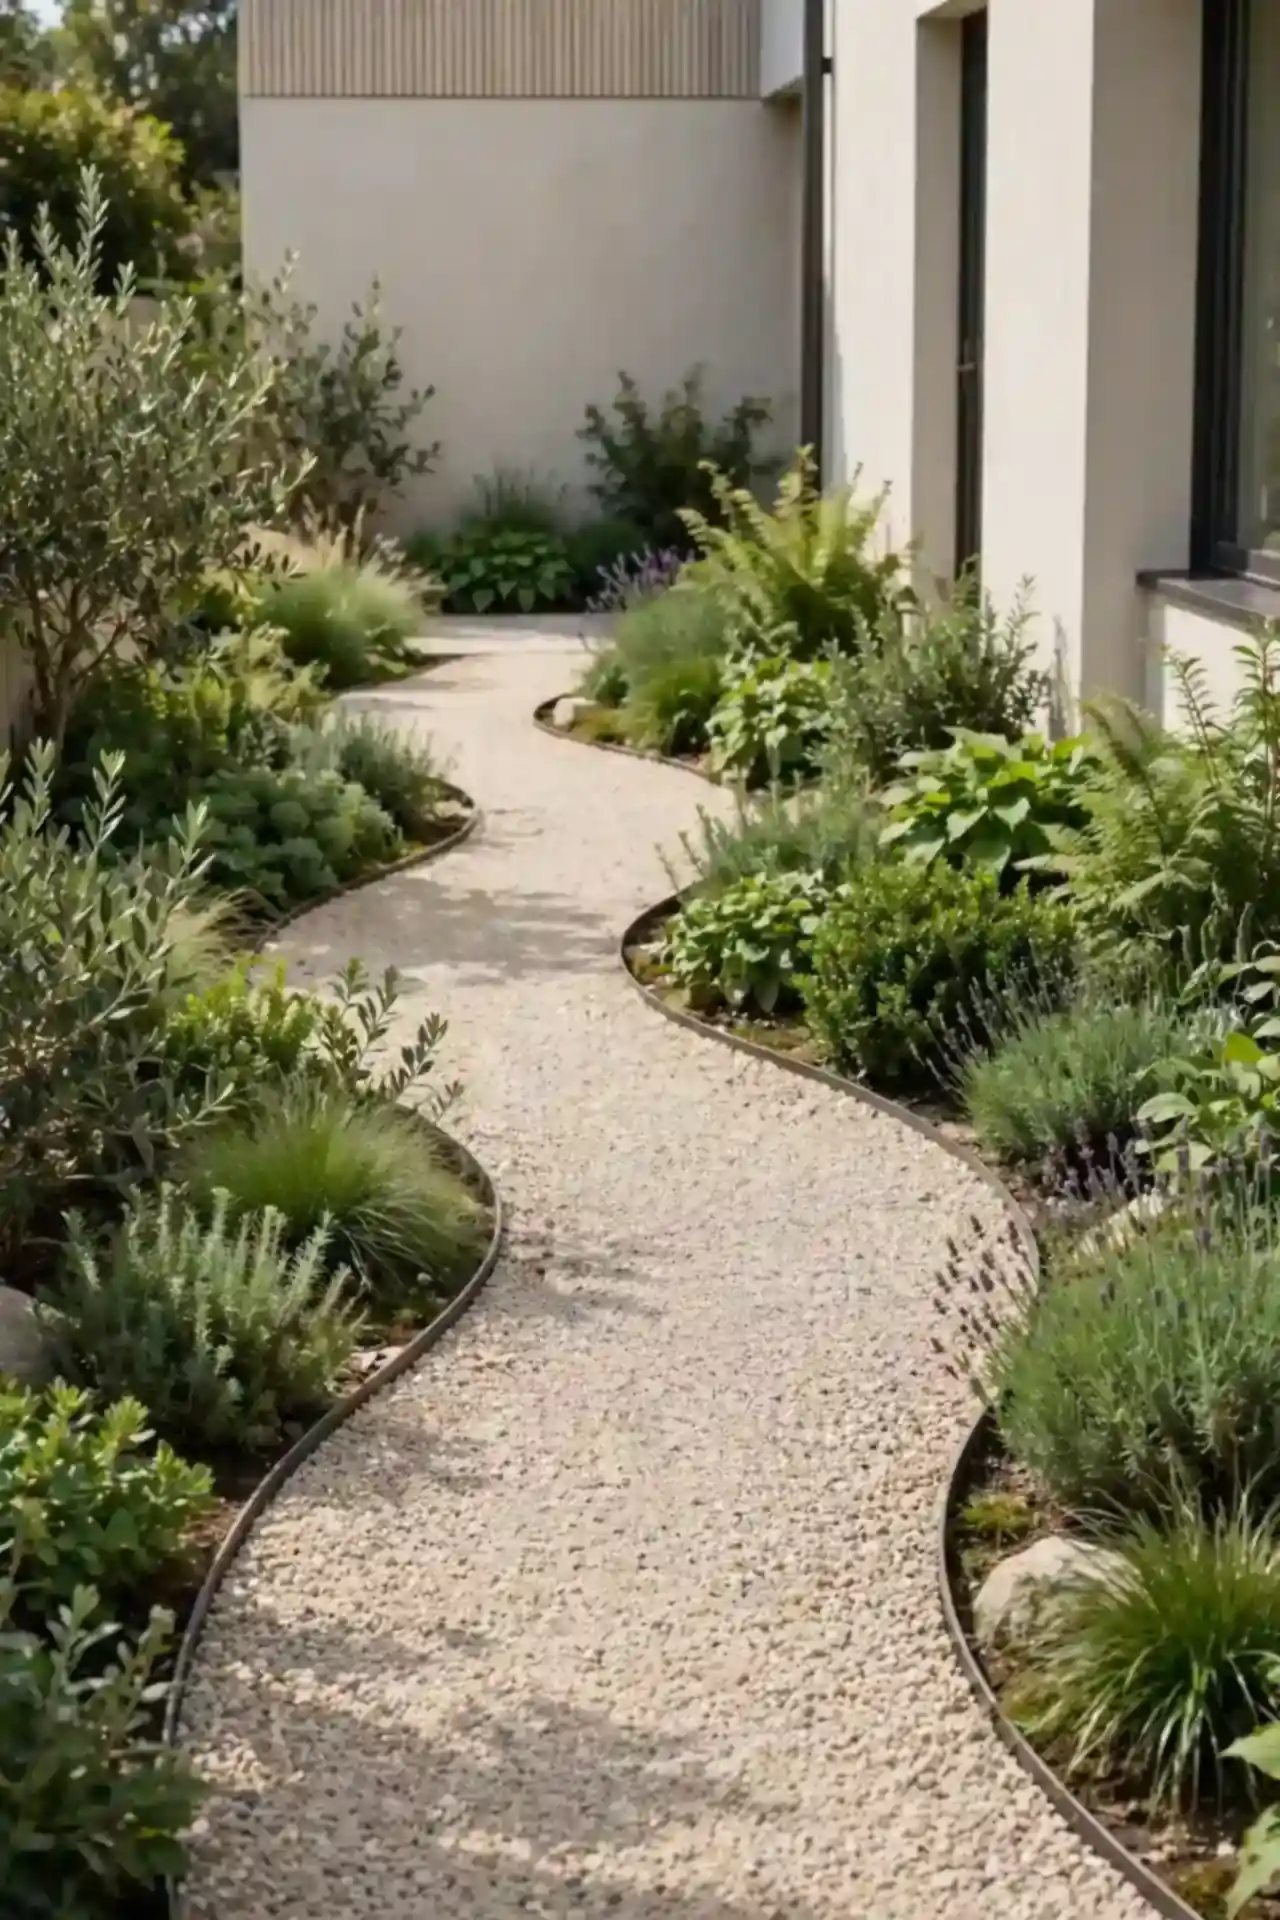
- Spread landscape fabric first to block weeds from pushing through the stones.
- Choose pea gravel or crushed granite, both stay comfortable under bare feet.
- Edge the path with steel or stone strips so gravel stays neatly in place.
- Rake the surface smooth each spring, then top up thin spots with fresh gravel.
- Curve the path gently; straight lines make narrow sides feel even tighter.
Gravel paths cost a fraction of poured concrete and install in a single weekend. In my experience, they also drain better during heavy rain, which protects your foundation from pooling water. Pick a gravel tone that echoes your house trim for a pulled-together look that feels intentional, not improvised.
Vertical Herb Garden
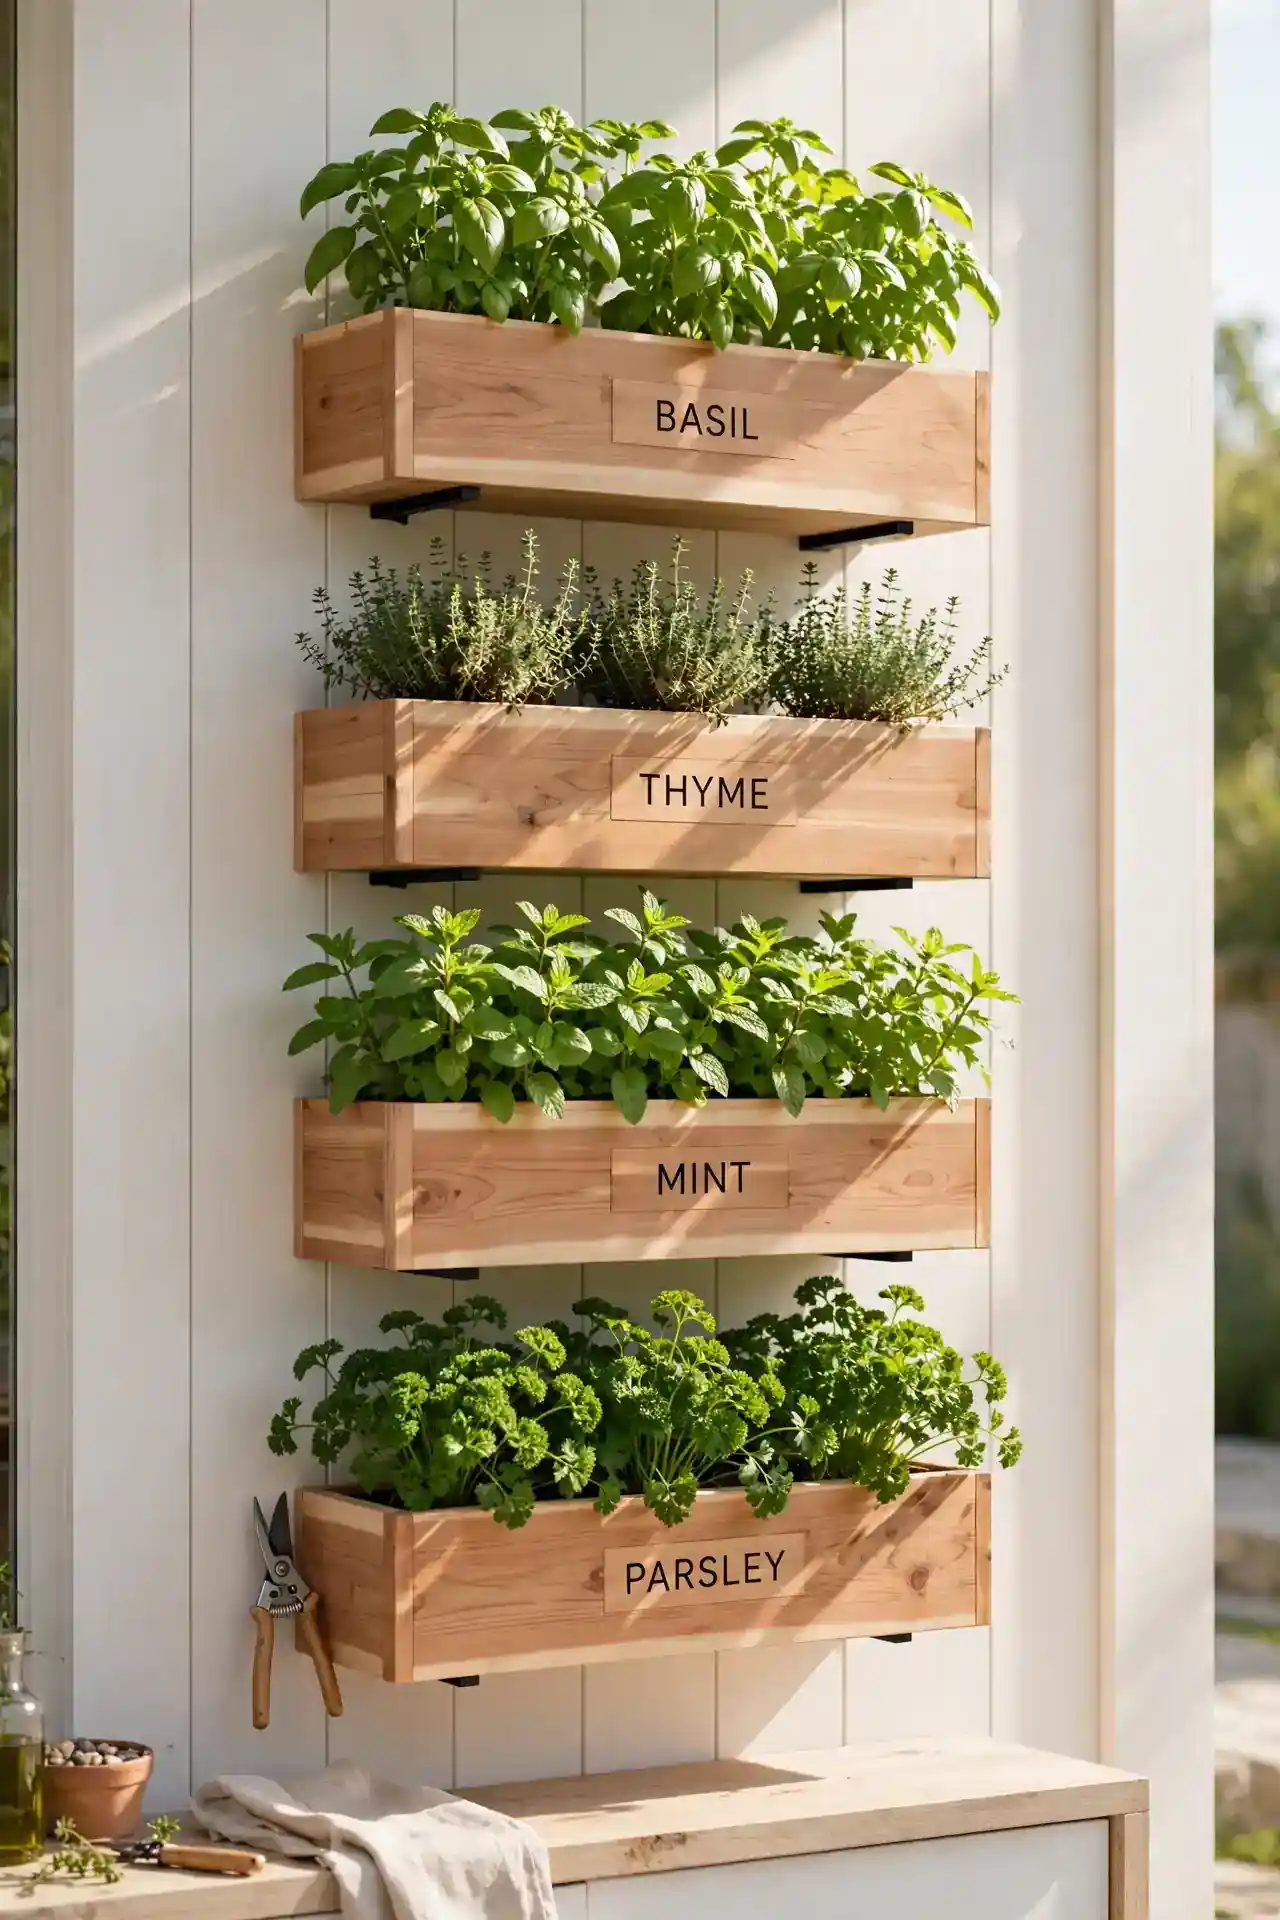
Quick Tip: Mount cedar planter boxes or a slatted trellis panel directly on the side wall. Fill them with basil, thyme, mint, and parsley, all of which thrive in partial sun. Water container herbs daily in summer since wall-mounted soil dries out faster than ground beds.
Side walls often get four to six hours of morning sun, which suits most culinary herbs perfectly. I’ve seen this work well in many cases where ground space was too narrow for a traditional bed. Snip fresh herbs for dinner just steps from your kitchen door, and enjoy the scent every time you pass by.
White Picket Accents
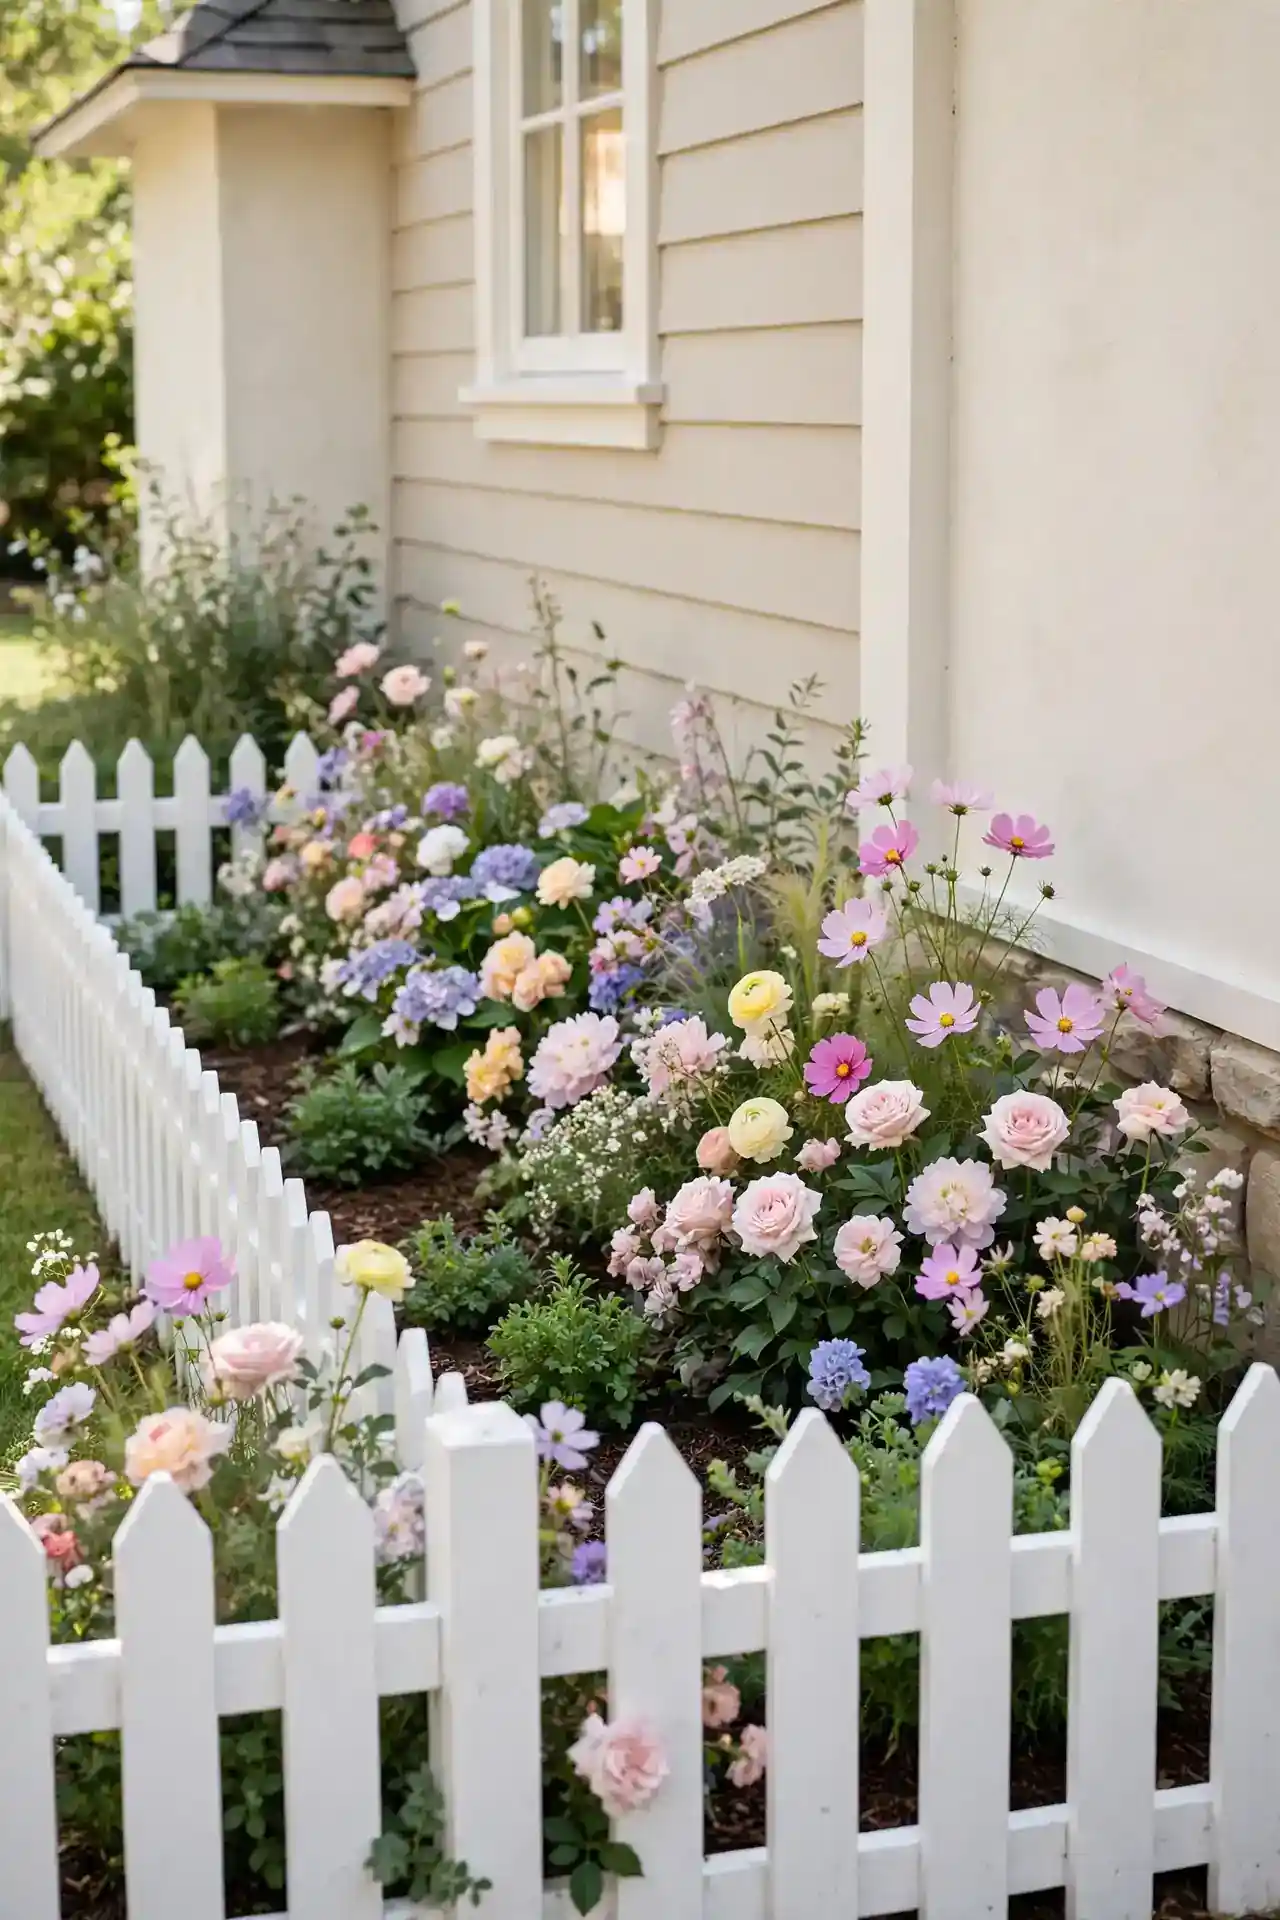
BEFORE: The side yard was a plain grass strip that collected stray toys and looked unfinished. Nothing marked it as part of the garden, so it felt like leftover space.
AFTER: Short sections of white picket fencing now frame a cottage-style flower bed along the wall. The crisp white lines draw the eye and give the whole side a finished, welcoming feel.
You only need two or three fence panels to create this effect, no full perimeter required. I’ve noticed that painting them bright white makes even small plants behind them pop visually. Anchor each panel with a metal post stake so they stay upright through wind and winter.
Shaded Fern Corner
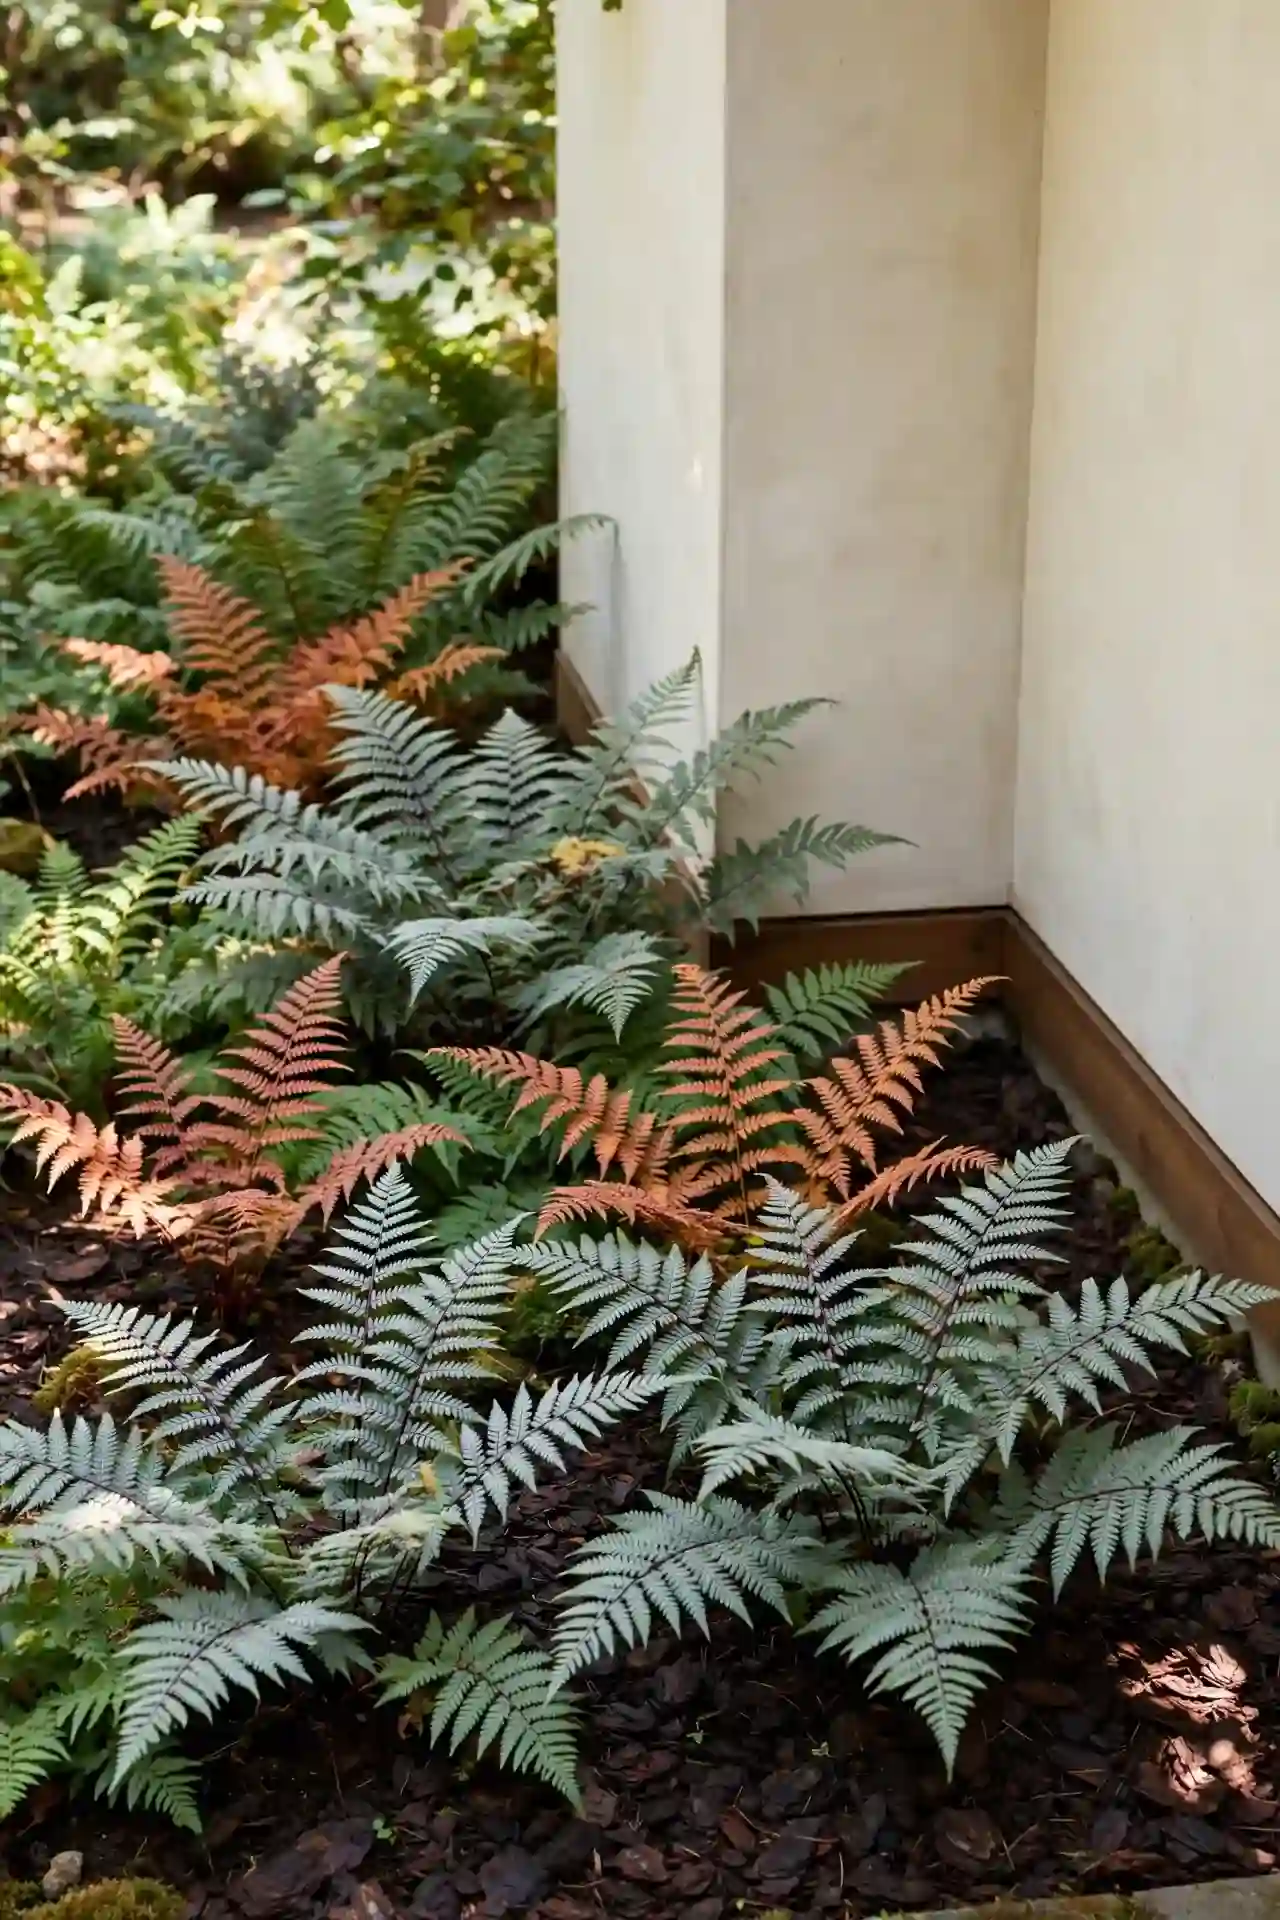
- Clear weeds and debris from the shady corner, then loosen the top six inches of soil.
- Mix in compost to help the soil hold moisture, which ferns love.
- Plant Japanese painted ferns and autumn ferns 18 inches apart in staggered rows.
- Spread pine bark mulch three inches deep, keeping it away from the stems.
North-facing side yards stay cool and damp, which is exactly what ferns want. That’s why many experts recommend ferns for spots where nothing else seems to grow. Once established, they need almost no care beyond an annual cleanup of old fronds each spring, and they return lusher every single year.
Stone Edging Lines
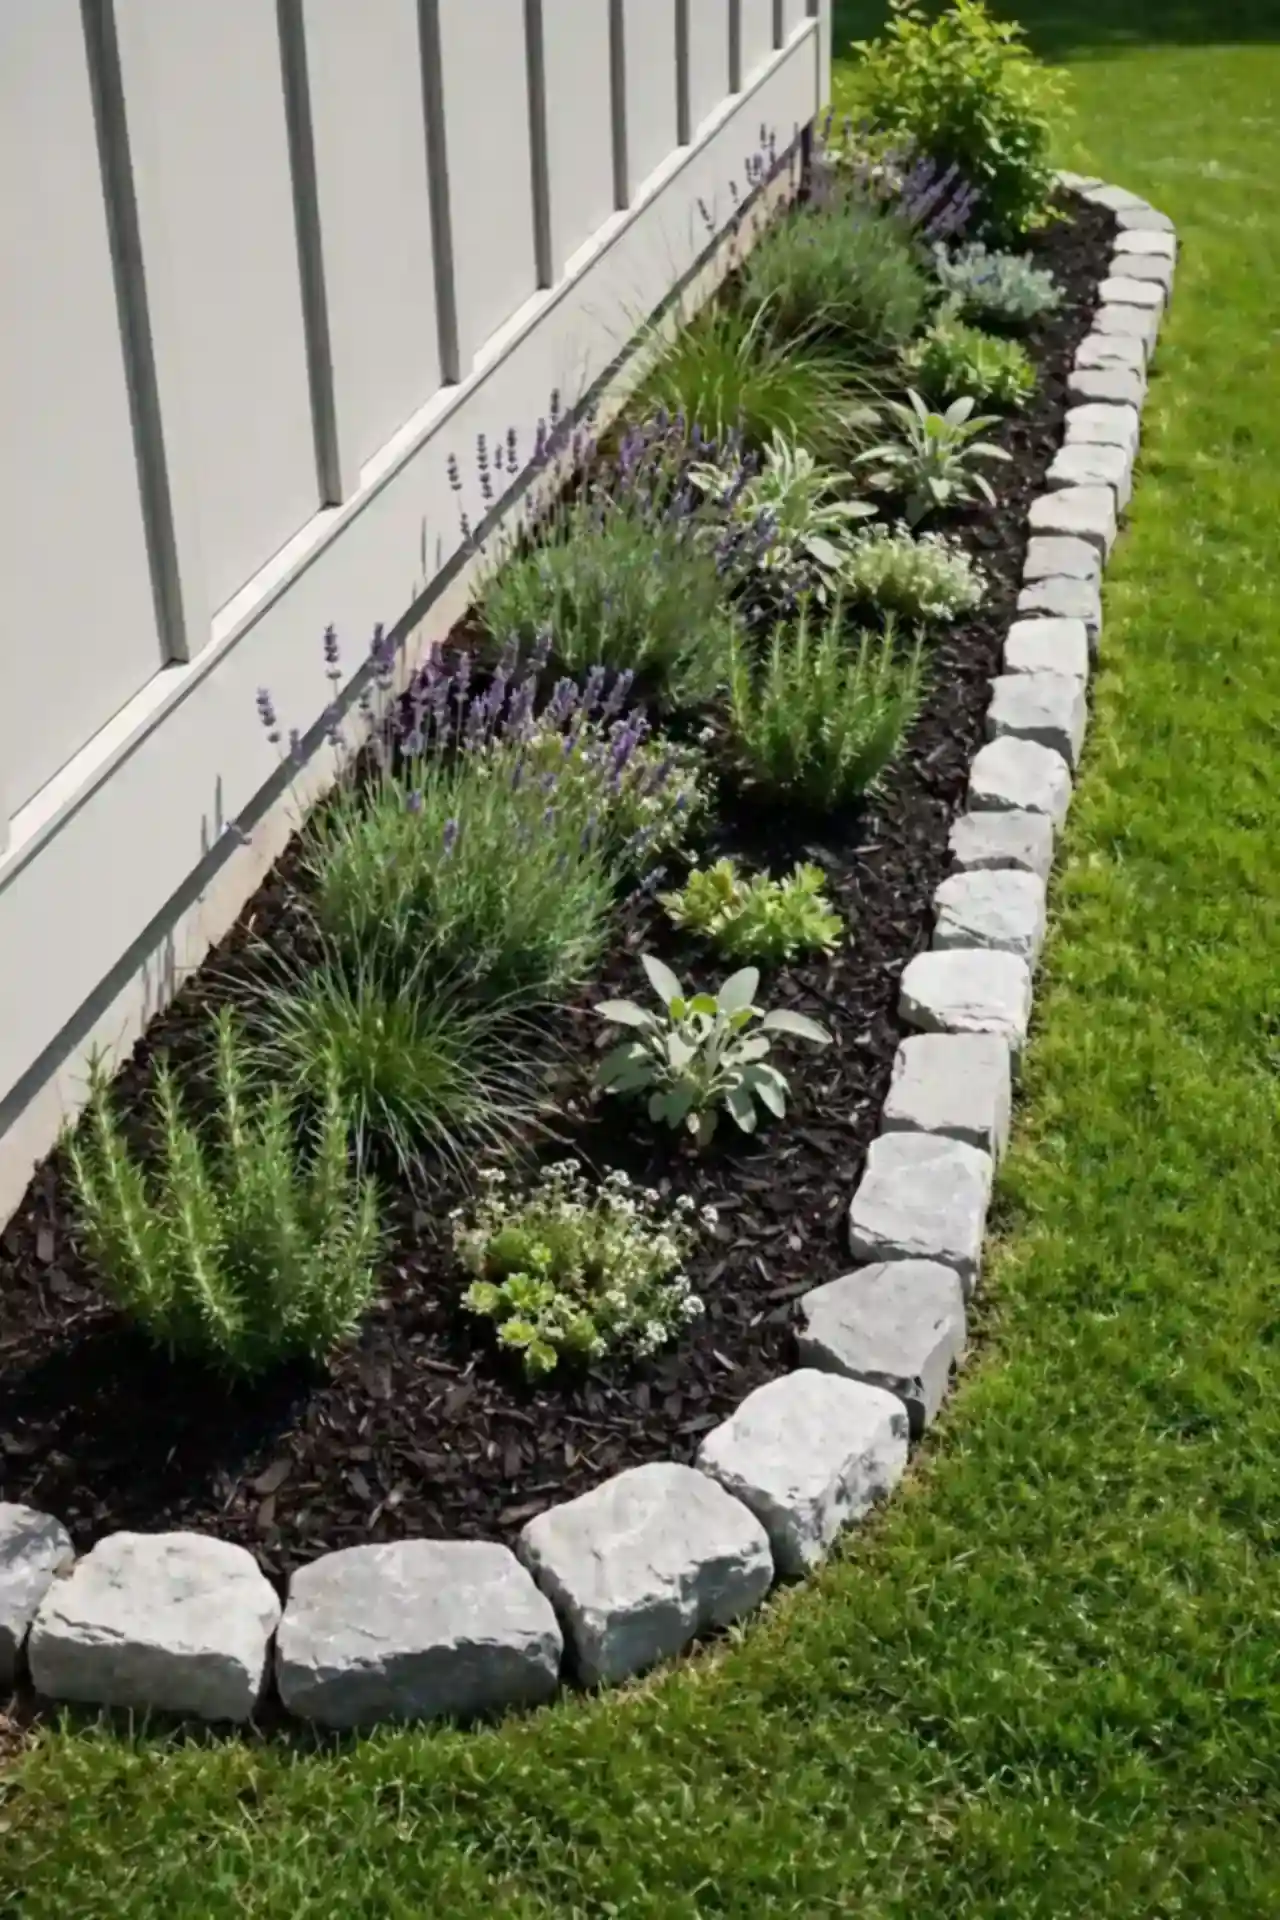
| Natural Stone | Concrete Edgers | |
|---|---|---|
| Cost | Higher upfront, lasts for decades | Budget-friendly and widely available |
| Look | Rustic charm with varied shapes | Clean lines with a uniform finish |
| Install | Heavier pieces need a deeper trench | Lightweight blocks set in quickly |
| Upkeep | Check yearly and re-level as needed | Rarely shifts once properly installed |
| Best for | Cottage gardens and rustic styles | Modern yards wanting tidy borders |
Crisp edging stops grass from creeping into beds and gives every side yard instant polish. I’ve tried both materials over the years, and natural stone wins for character while concrete wins for speed. Either choice beats a ragged, undefined edge that makes the whole area look neglected and forgotten by design.
Climbing Rose Trellis
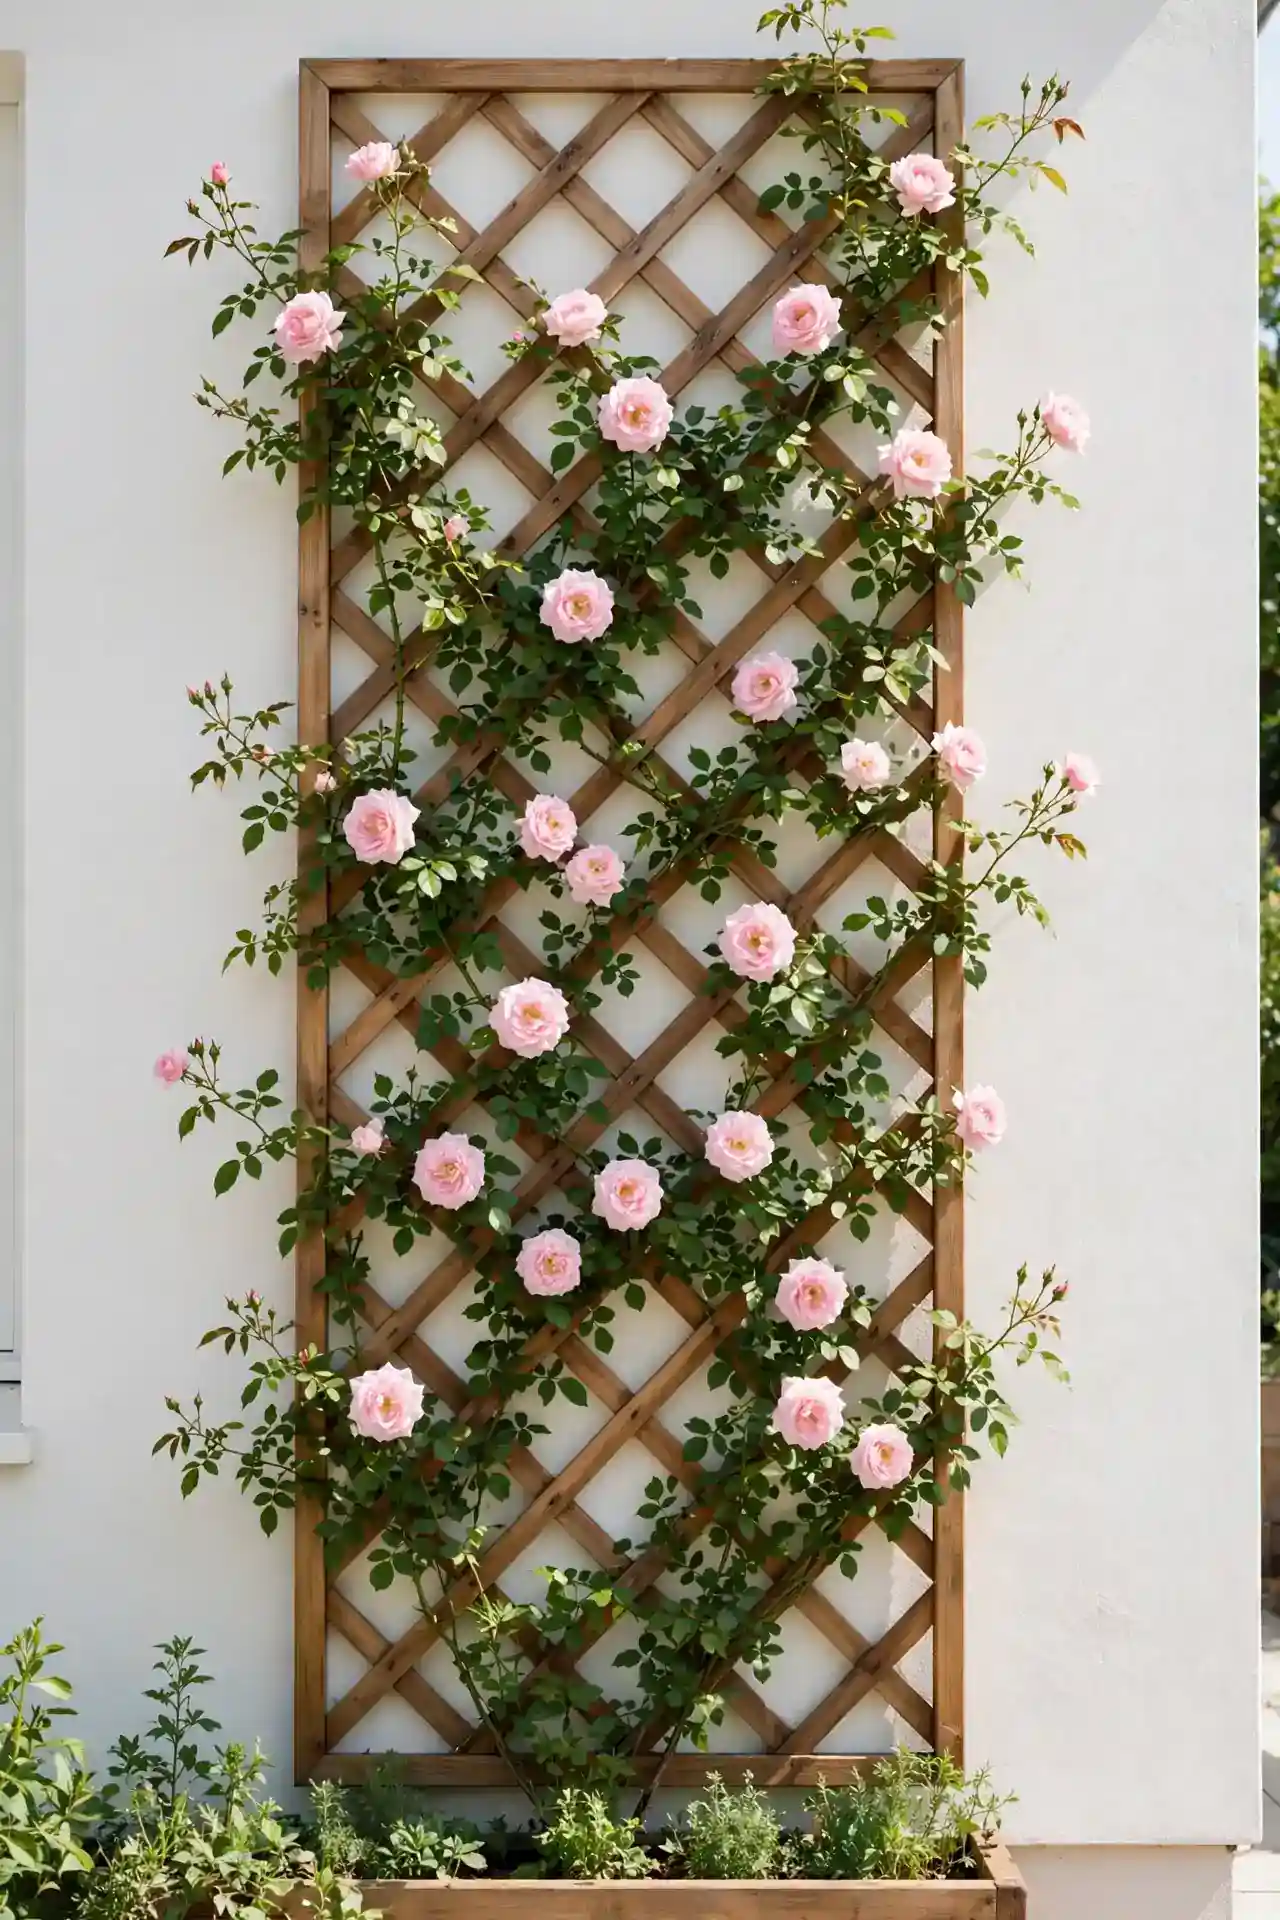
DO:
- Do choose a disease-resistant rose variety suited to your climate zone.
- Do secure the trellis firmly to wall anchors rated for the mature weight.
- Do prune lightly each spring to encourage fresh flowering canes.
DON’T:
- Don’t plant roses where roof runoff dumps directly onto their roots.
- Don’t let canes rub against siding, which damages both plant and wall.
- Don’t skip the mulch ring, since bare soil splashes disease onto leaves.
A rose-covered trellis turns a blank wall into the prettiest view on the property. I’ve seen this work well in many cases where homeowners wanted maximum impact from minimal ground space. Train new canes horizontally along the trellis wires for the heaviest bloom display each June.
Rustic Wooden Bench
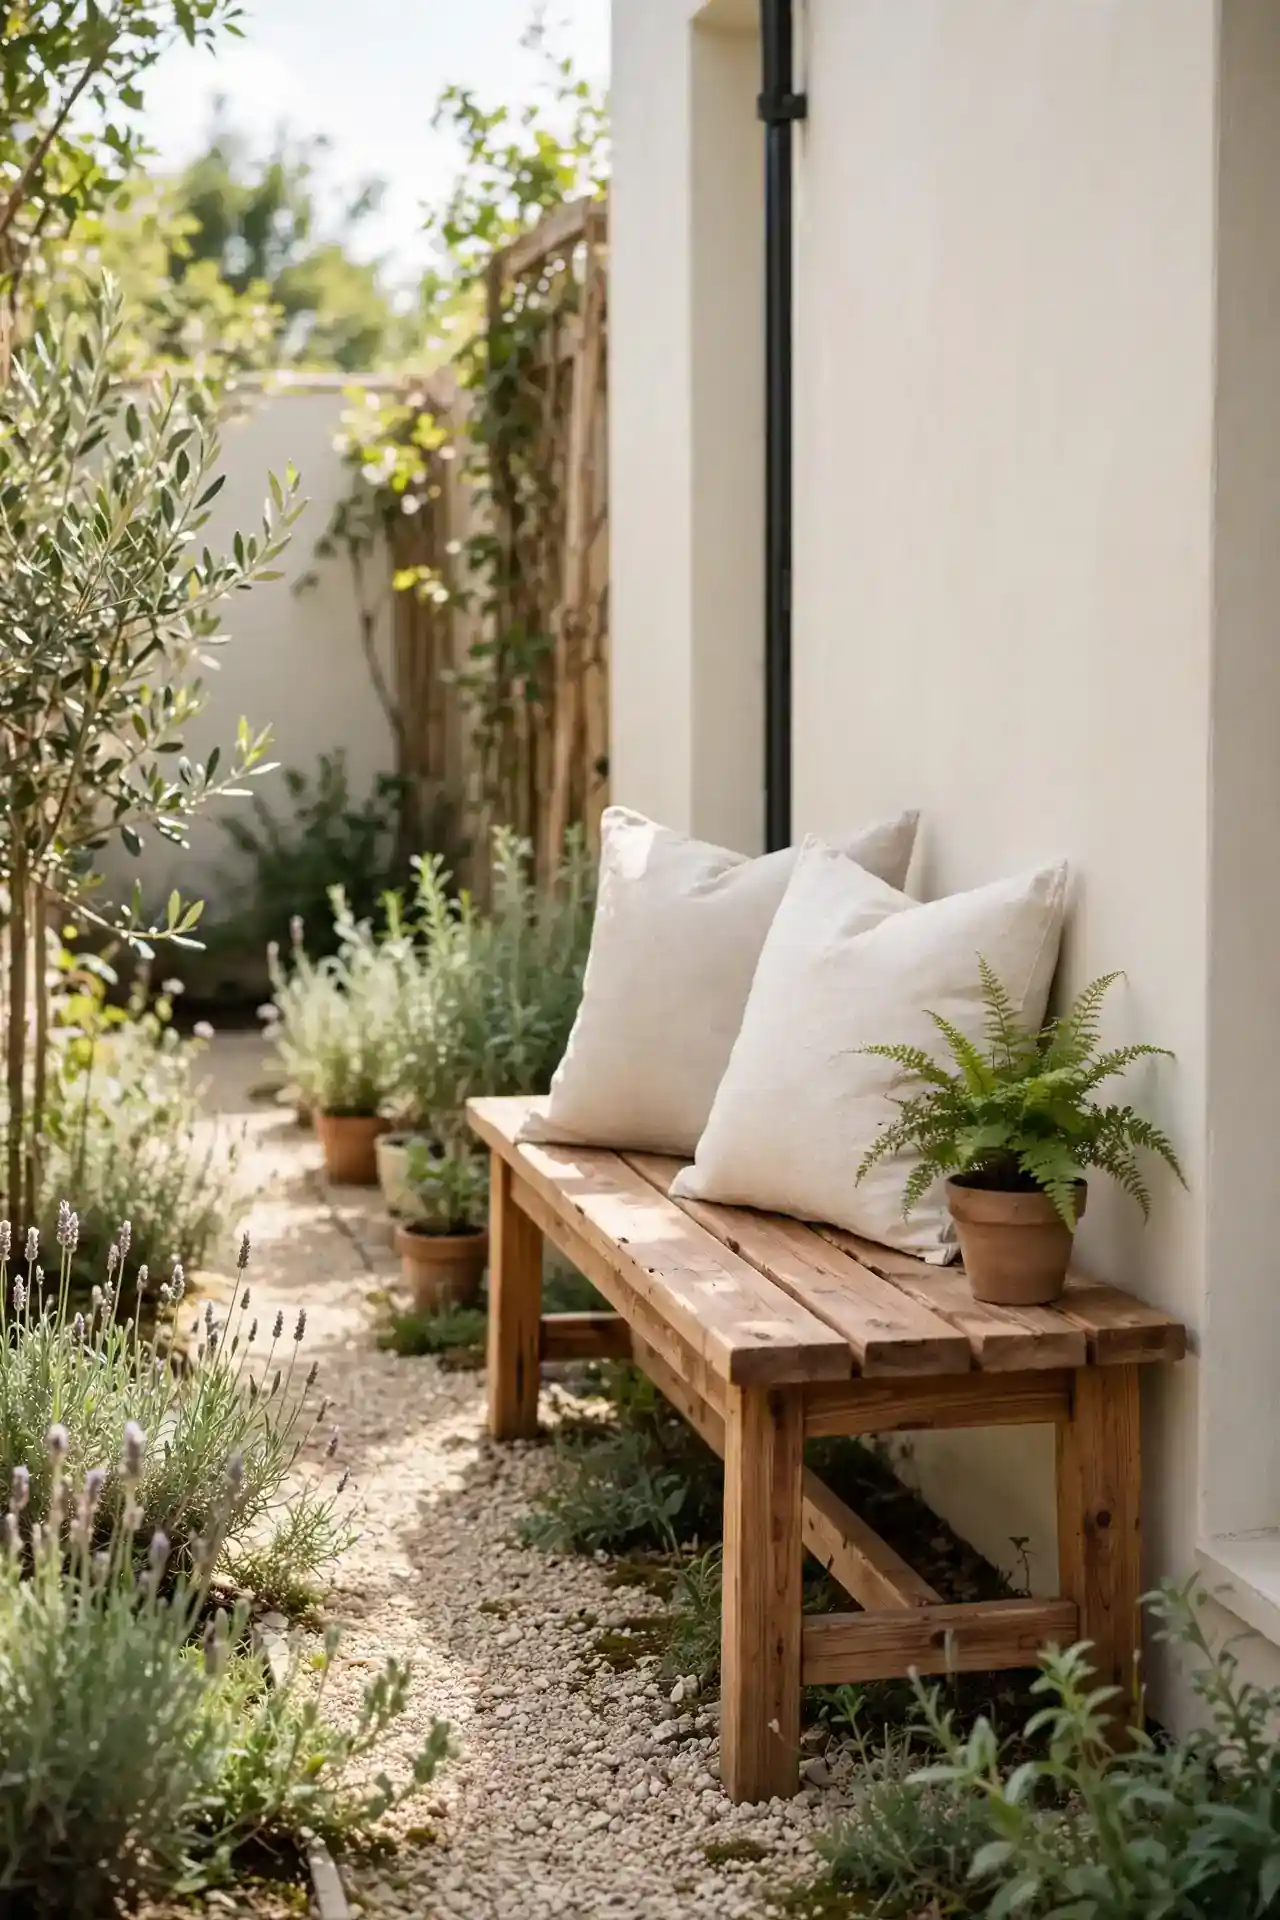
Cost: Low to medium depending on your wood choice
Time: One weekend to build, or one afternoon to style a ready-made bench
Skill Level: Beginner friendly, no advanced tools needed
Best For: Narrow side yards that need a destination and a quiet resting spot
Result: A cozy pause point that makes the side yard feel like a real garden room
A simple cedar bench invites you to actually use the side yard instead of just passing through it. Style it with two weatherproof pillows and a small potted fern at one end for instant charm. In my experience, adding seating is the fastest way to make any overlooked space feel like a genuine garden room.
Potted Plant Row
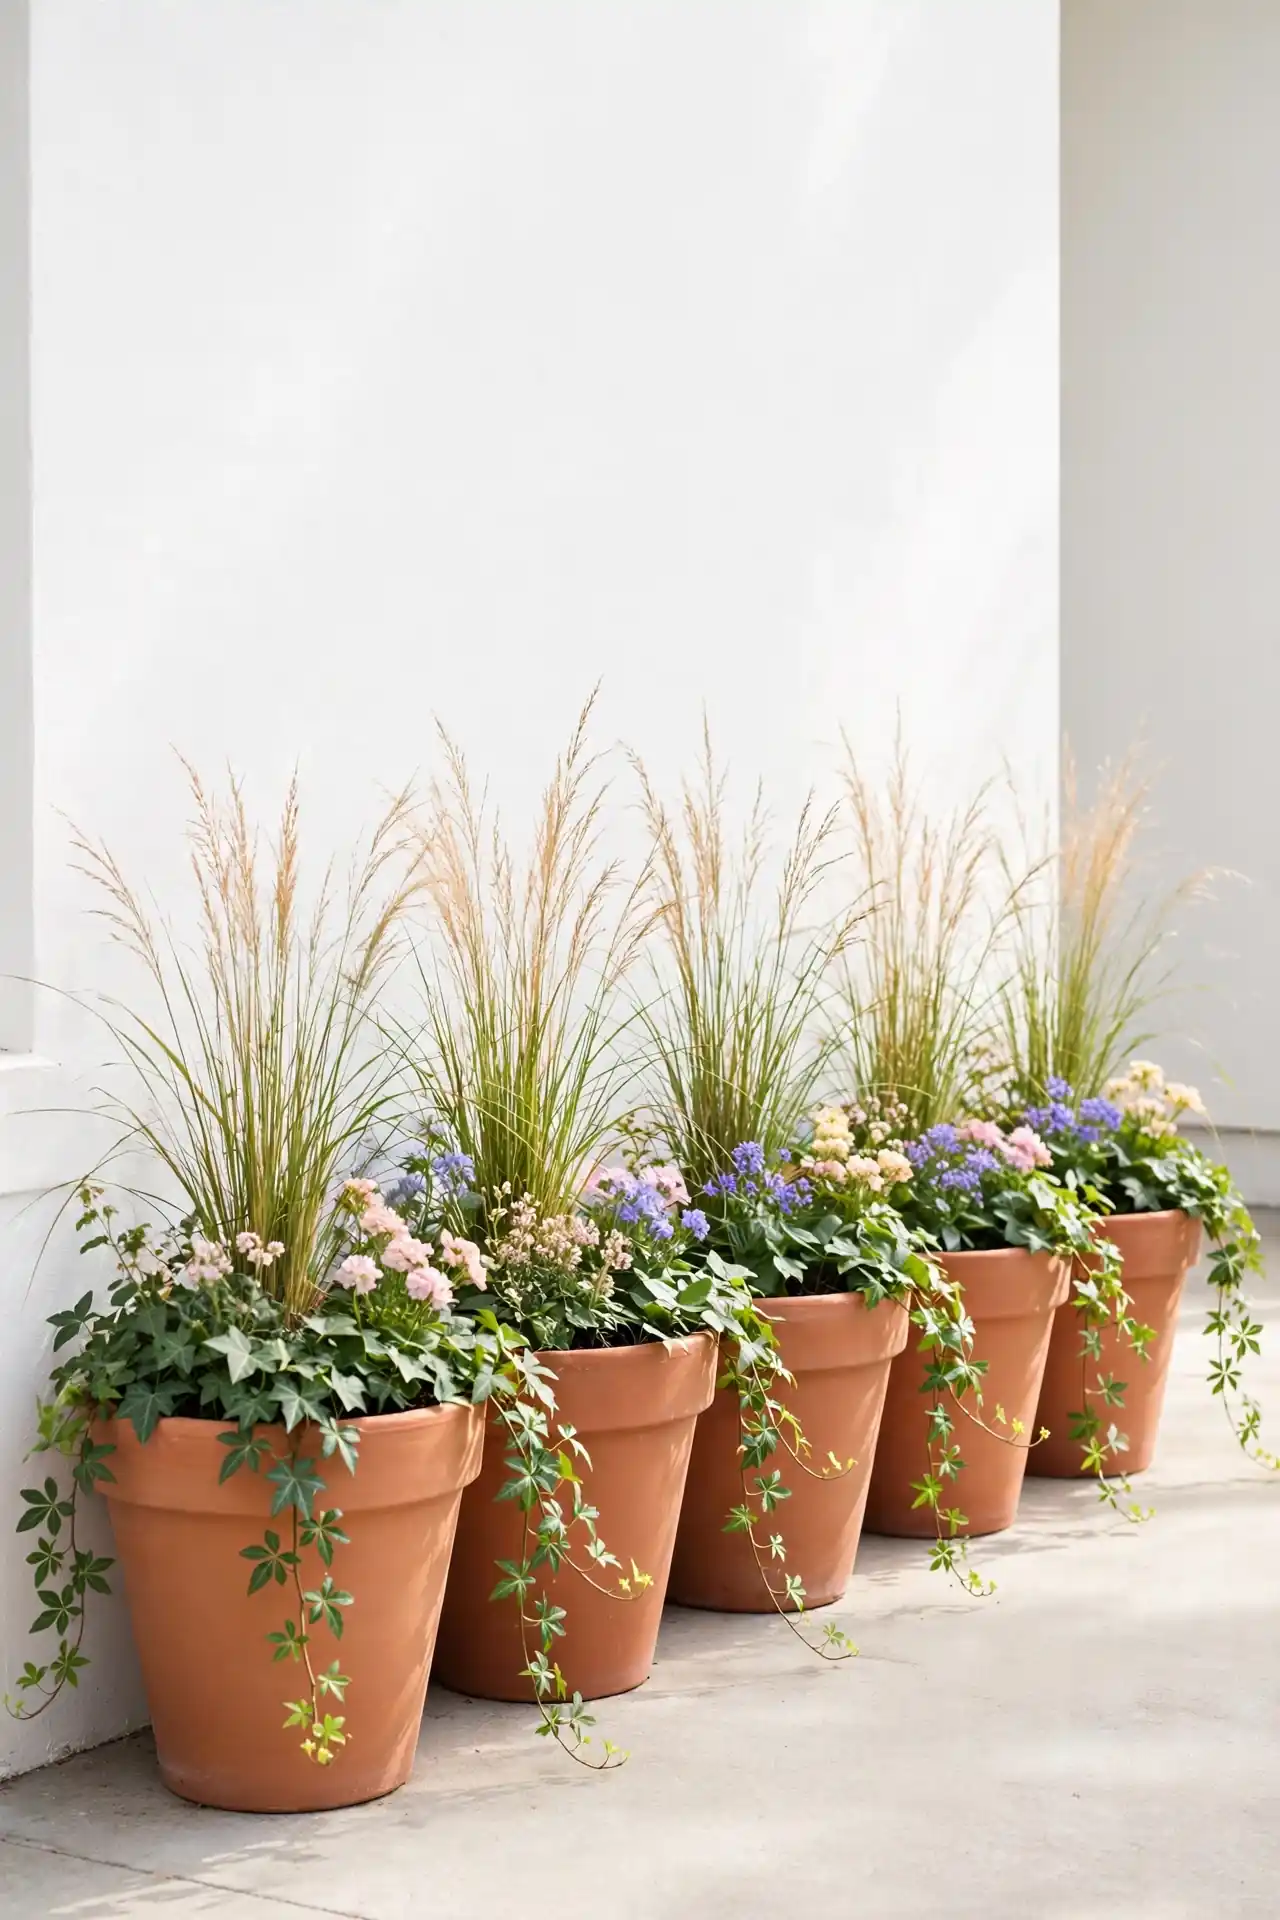
Matching pots in a neat row bring instant order to a chaotic side strip. Terracotta, glazed ceramic, or galvanized metal all work, just keep the containers consistent for maximum impact. Fill them with a mix of trailing ivy, upright grasses, and one flowering plant per pot.
Group pots in threes at intervals rather than spacing them evenly like soldiers on parade. I’ve noticed that odd groupings look more natural and draw the eye down the path. Refresh the plantings with each new season, and this simple display never feels tired or dated.
Ornamental Grass Strip
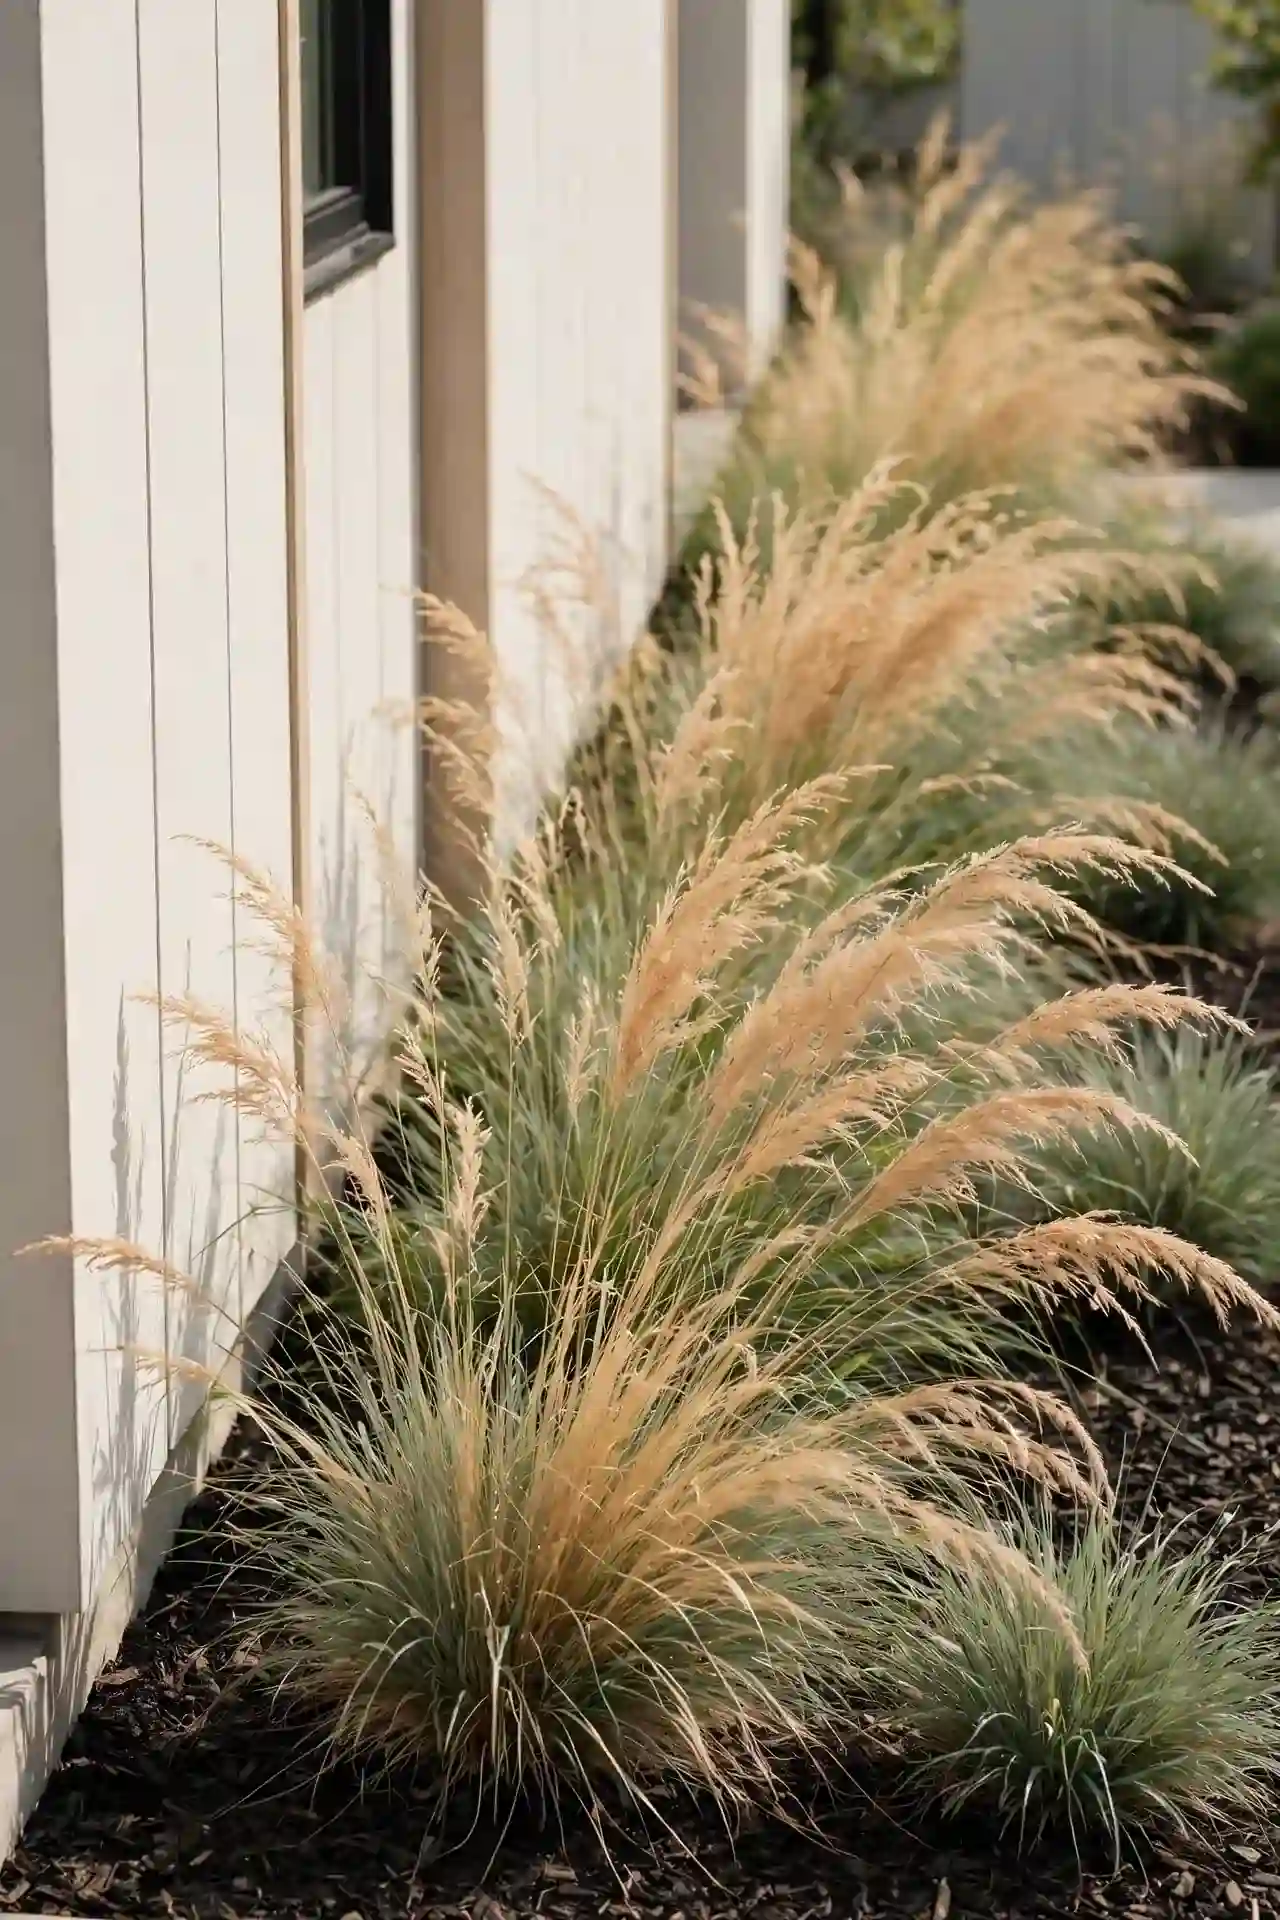
- Pick compact varieties like dwarf fountain grass that won’t flop onto paths.
- Plant in drifts of five or seven for a flowing, meadow-like effect.
- Cut all grasses back to six inches in late winter before spring growth.
- Pair with dark mulch to make the golden seed heads stand out dramatically.
- Divide overgrown clumps every three years in early spring to keep them vigorous.
Ornamental grasses sway beautifully in side-yard breezes and need almost no water once their roots establish. That’s why many experts recommend them for low-maintenance landscapes everywhere. Their upright form also screens ugly utility boxes and meters without blocking airflow the way solid fences do in tight spaces.
Stepping Stone Trail
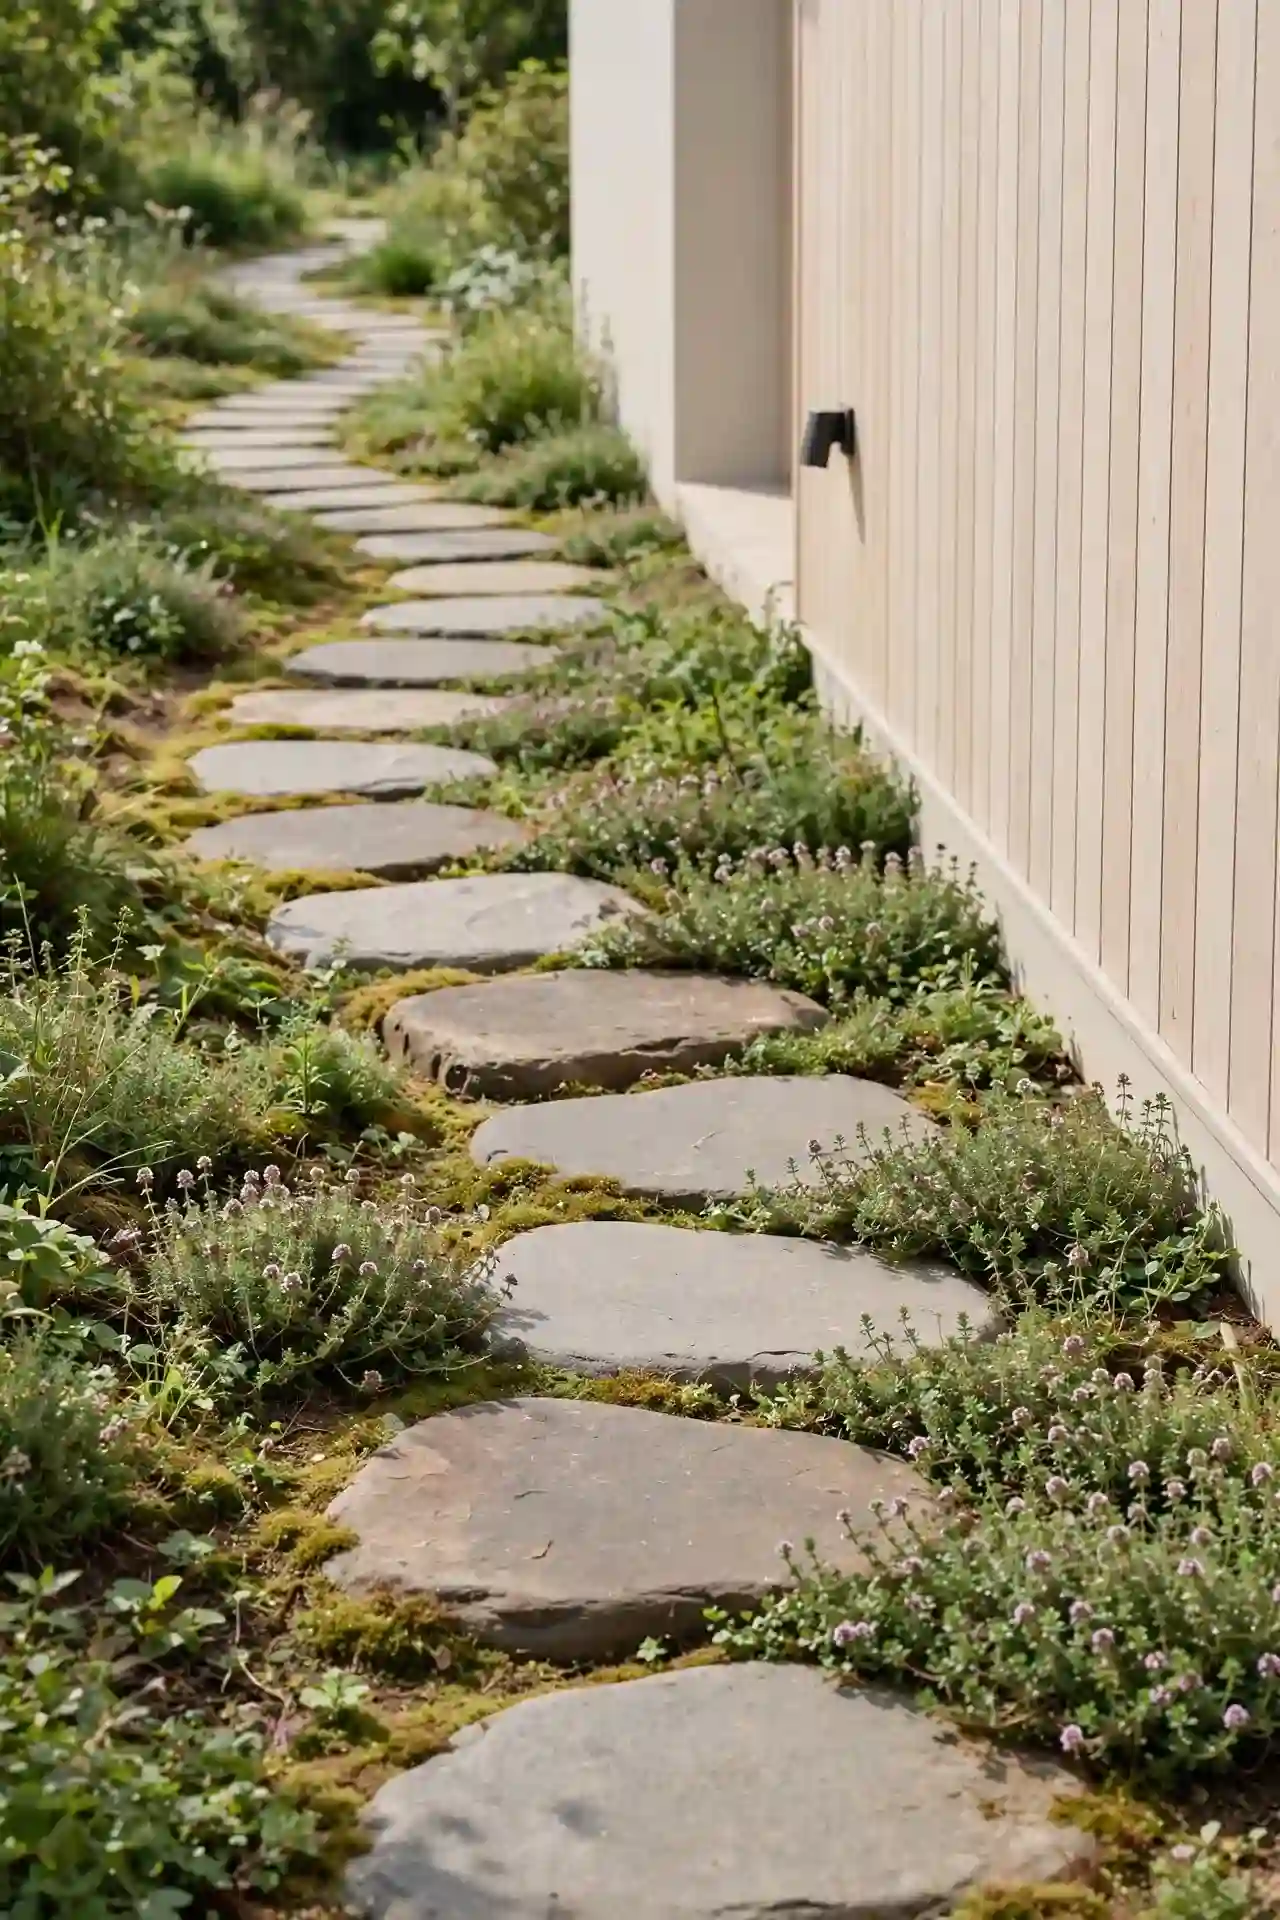
Quick Tip: Lay large flat stones with two-inch gaps between them, then fill those gaps with creeping thyme or Irish moss for living grout. The tiny plants soften every hard edge and release a lovely scent when stepped on. Set each stone perfectly level with its neighbors so the whole path feels stable and safe underfoot.
A stepping stone trail invites exploration and slows the pace through a narrow side yard. I’ve seen this work well in many cases where a plain concrete walk felt too harsh. Choose stones with natural, irregular edges for a path that looks like it has always belonged there.
Hanging Basket Posts
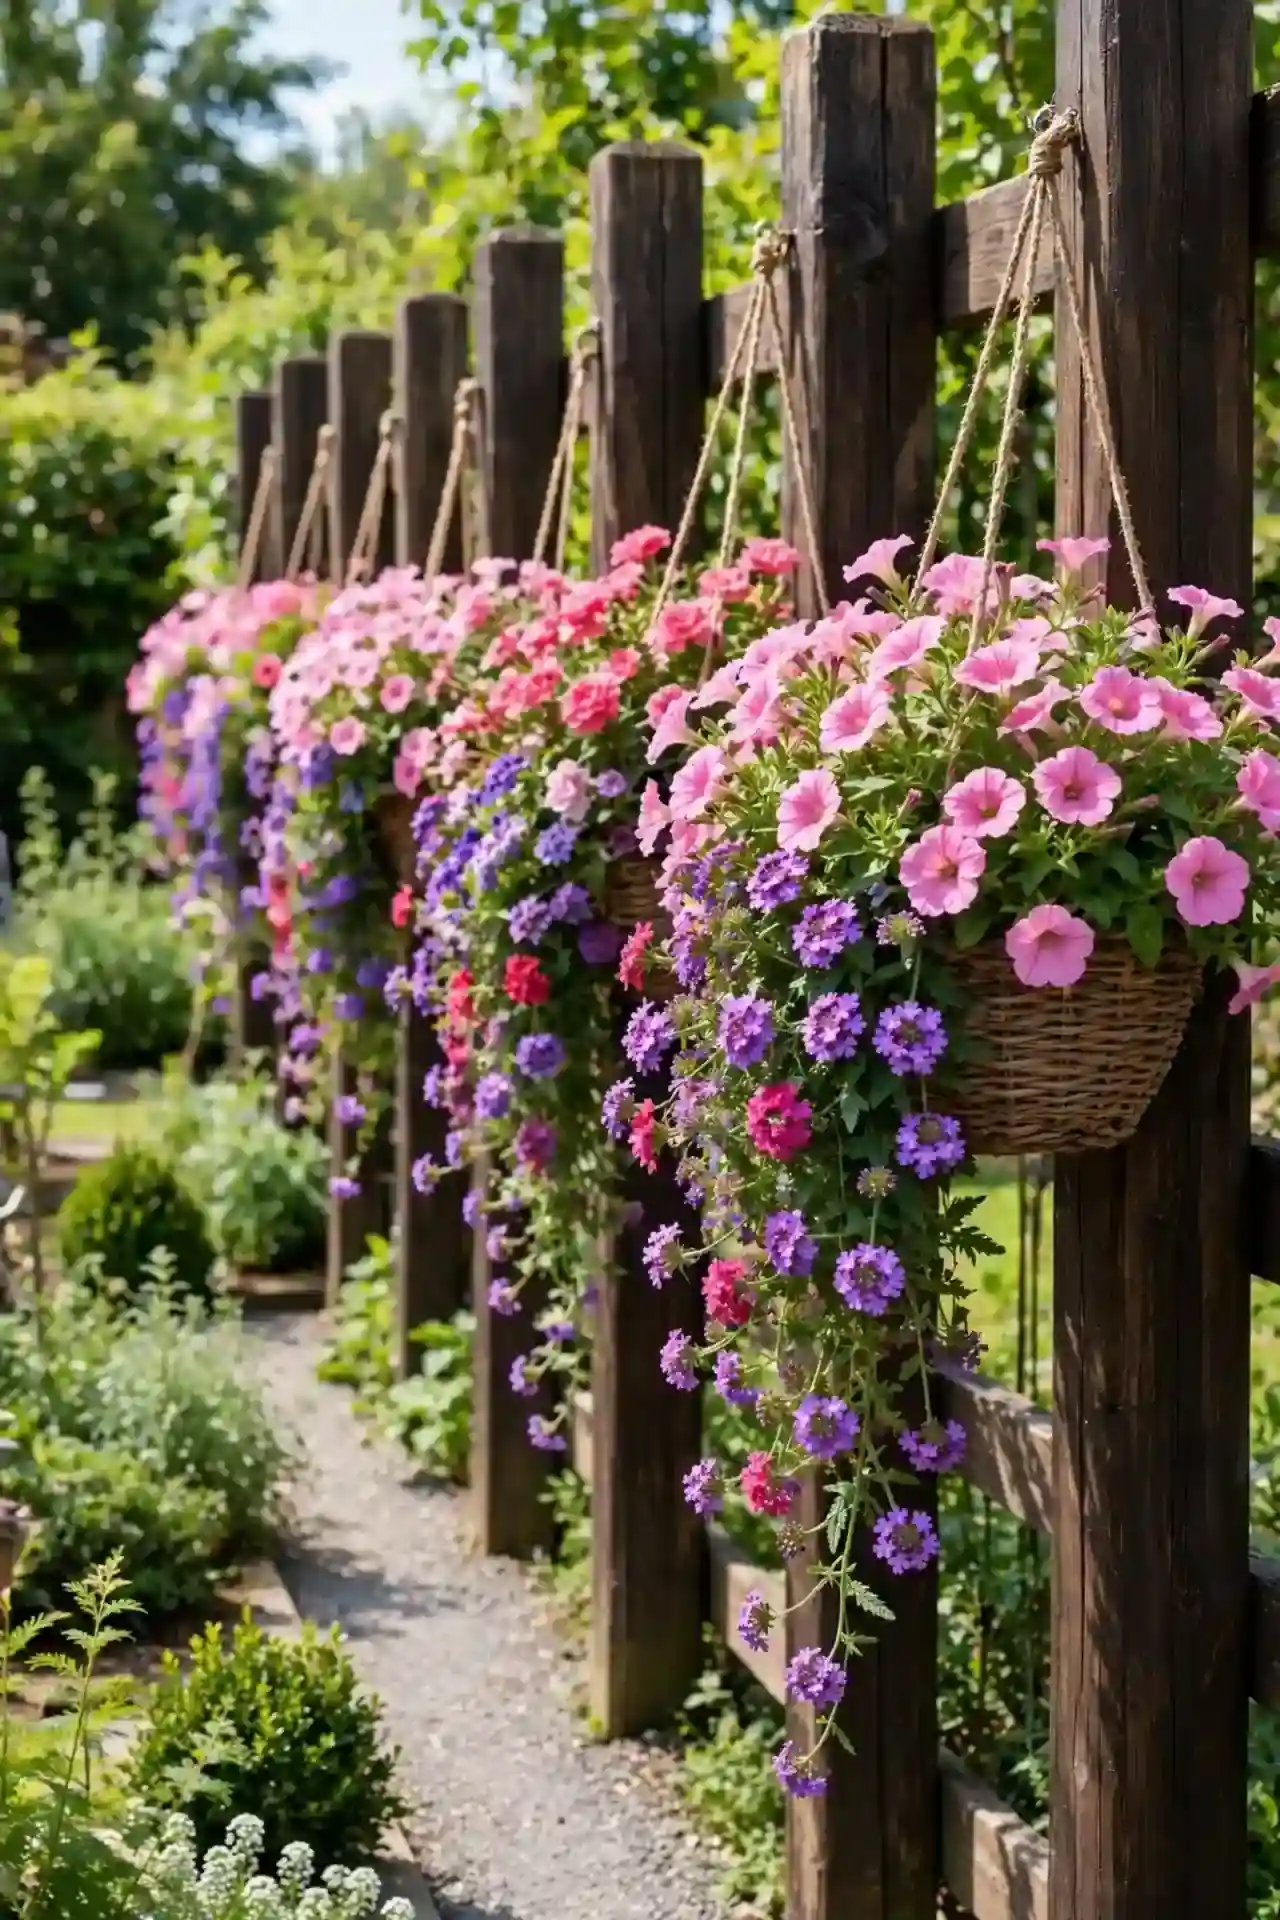
BEFORE: The long side fence stood bare and boring, offering nothing to look at from the kitchen window. It marked the boundary but added zero beauty to the daily view.
AFTER: Sturdy posts with hanging baskets now line the fence, dripping with petunias and trailing verbena. The color draws your eye along the whole side, and the view from inside the house completely changed.
Mount the posts just inside the fence line so baskets hang where you can see them from indoors. They pair nicely with summer front porch decor for a coordinated warm-weather look. Water baskets daily in July and August, since hanging soil dries faster than anything in the ground.
Mulched Tree Beds
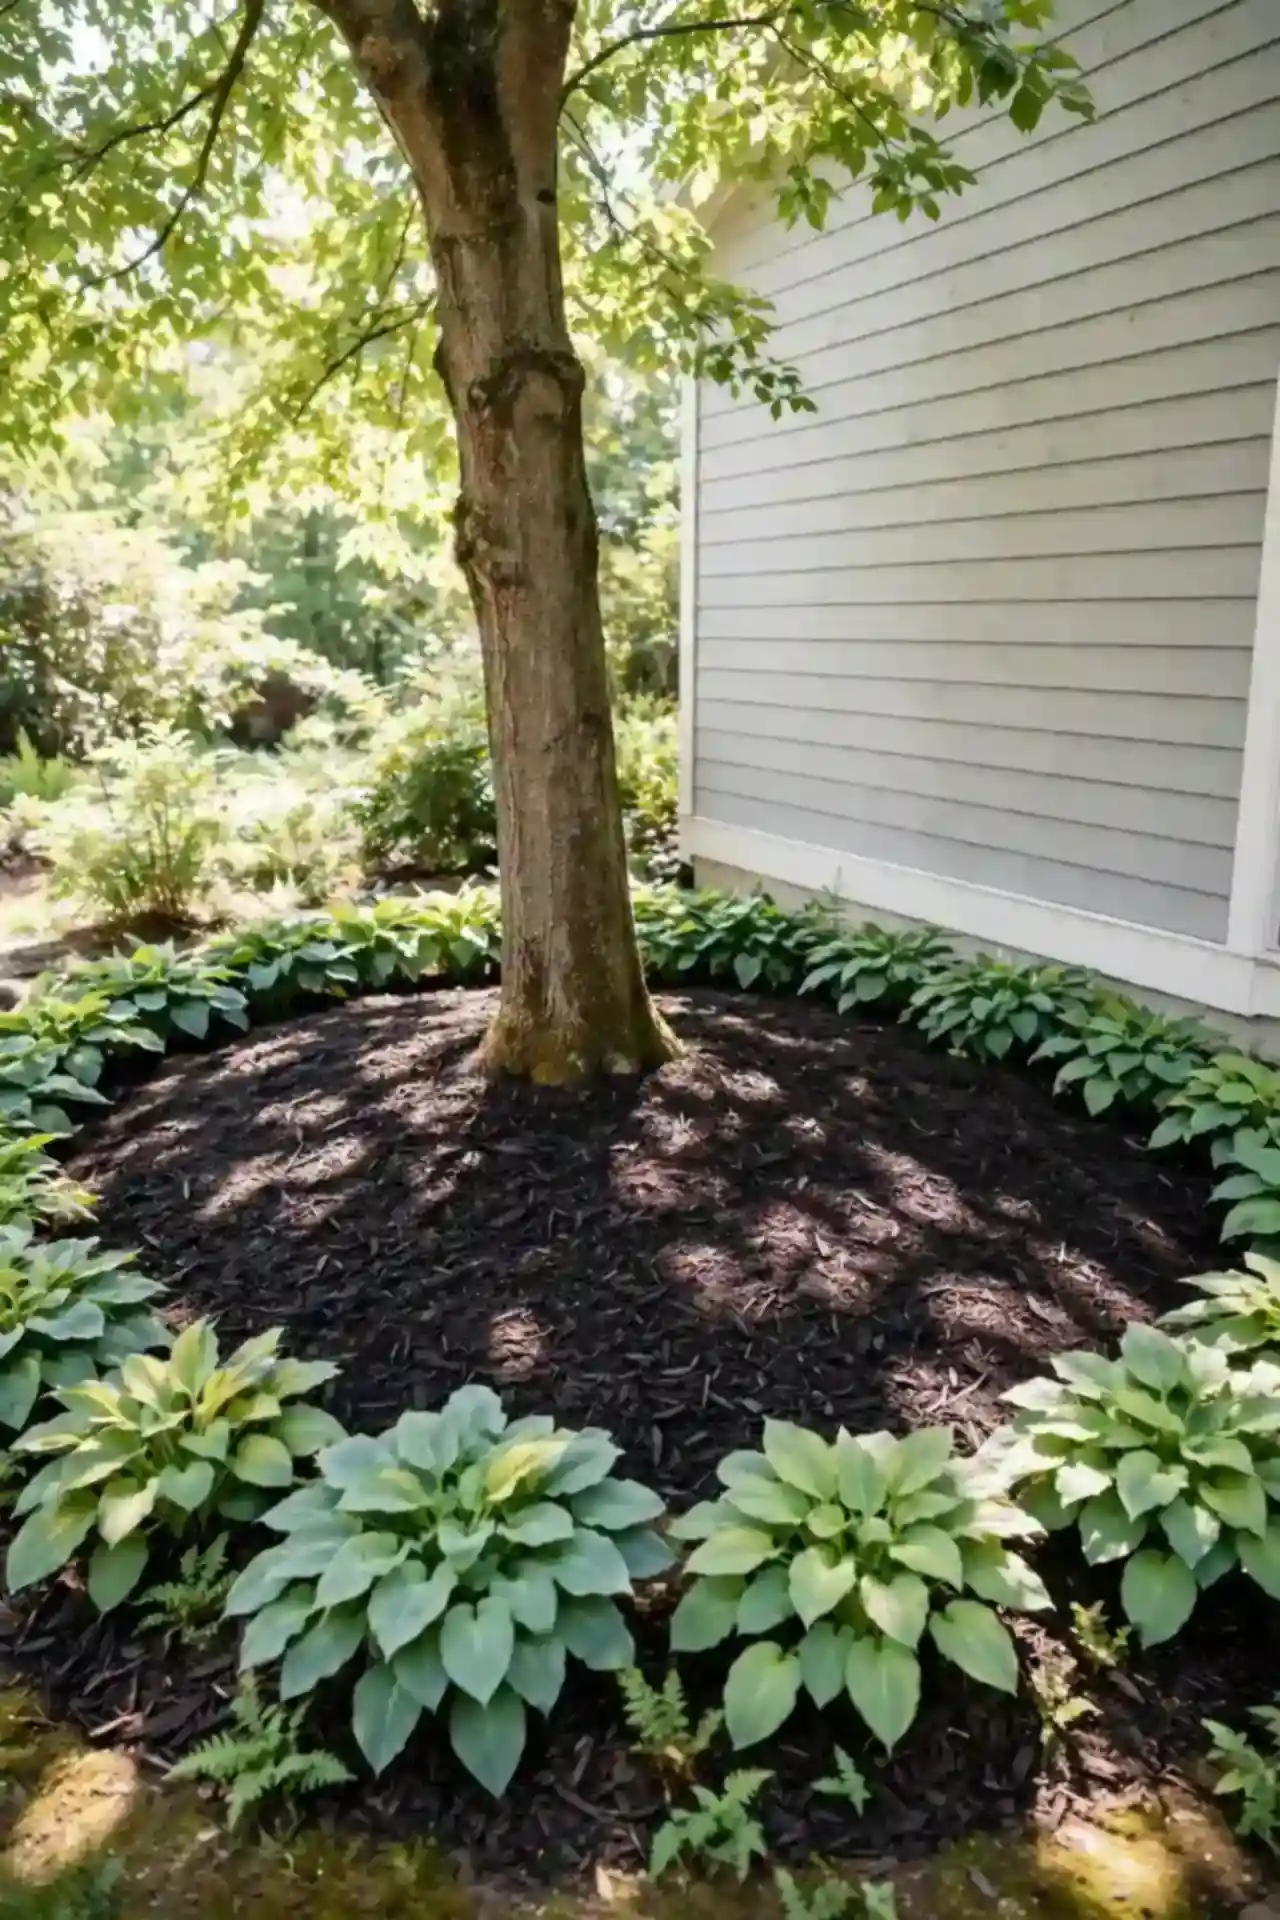
- Mark a wide circle around the tree trunk, at least three feet in every direction.
- Strip out grass inside the circle, digging just deep enough to remove roots.
- Spread shredded bark mulch three inches deep, keeping it six inches from the trunk.
- Water the bed thoroughly, then add shade-loving plants like hostas around the edges.
Trees in side yards often sit in sad rings of struggling grass that nobody wants to mow. A generous mulch bed solves the mowing problem and feeds the tree at the same time. In my experience, trees with proper mulch rings grow noticeably faster than those fighting grass for water.
Decorative Lattice Screens
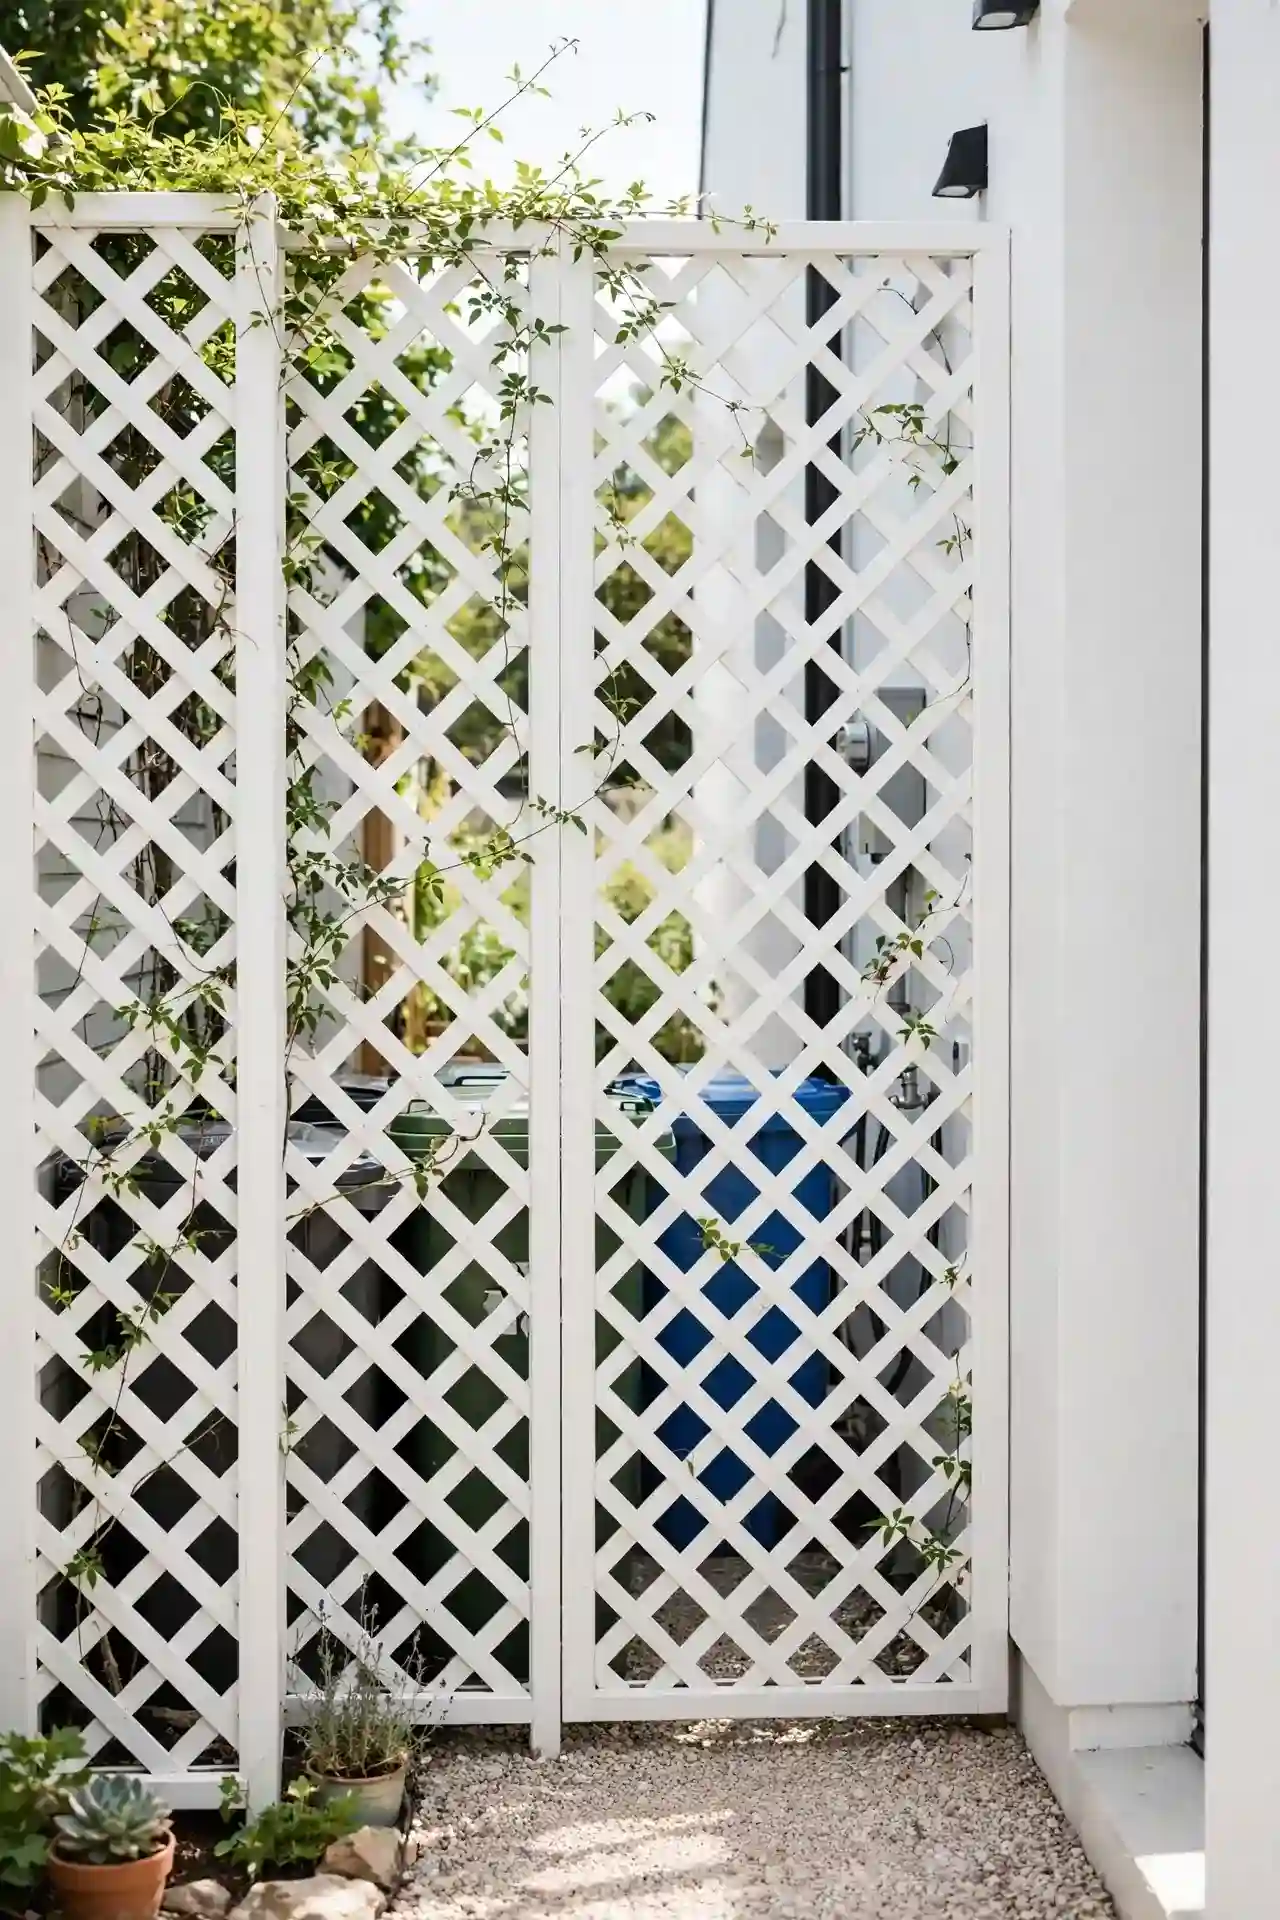
| Wood Lattice | Vinyl Lattice | |
|---|---|---|
| Cost | Affordable, paint any color | Pricier, color lasts for years |
| Look | Warm, traditional charm | Crisp, clean, modern feel |
| Upkeep | Repaint every few years | Rinse with hose as needed |
| Strength | Sturdy for light vines | Flexible, best for decoration |
| Install | Cut easily with basic tools | Snaps into simple frame kits |
| Best for | Cottage gardens on a budget | Low-maintenance modern yards |
Lattice screens hide trash bins, air conditioners, and other eyesores in minutes flat. I’ve noticed they also give climbing plants something to grip, which doubles their value in any garden. Position each screen with a slight gap from the wall so air circulates freely behind them.
Wildflower Patch
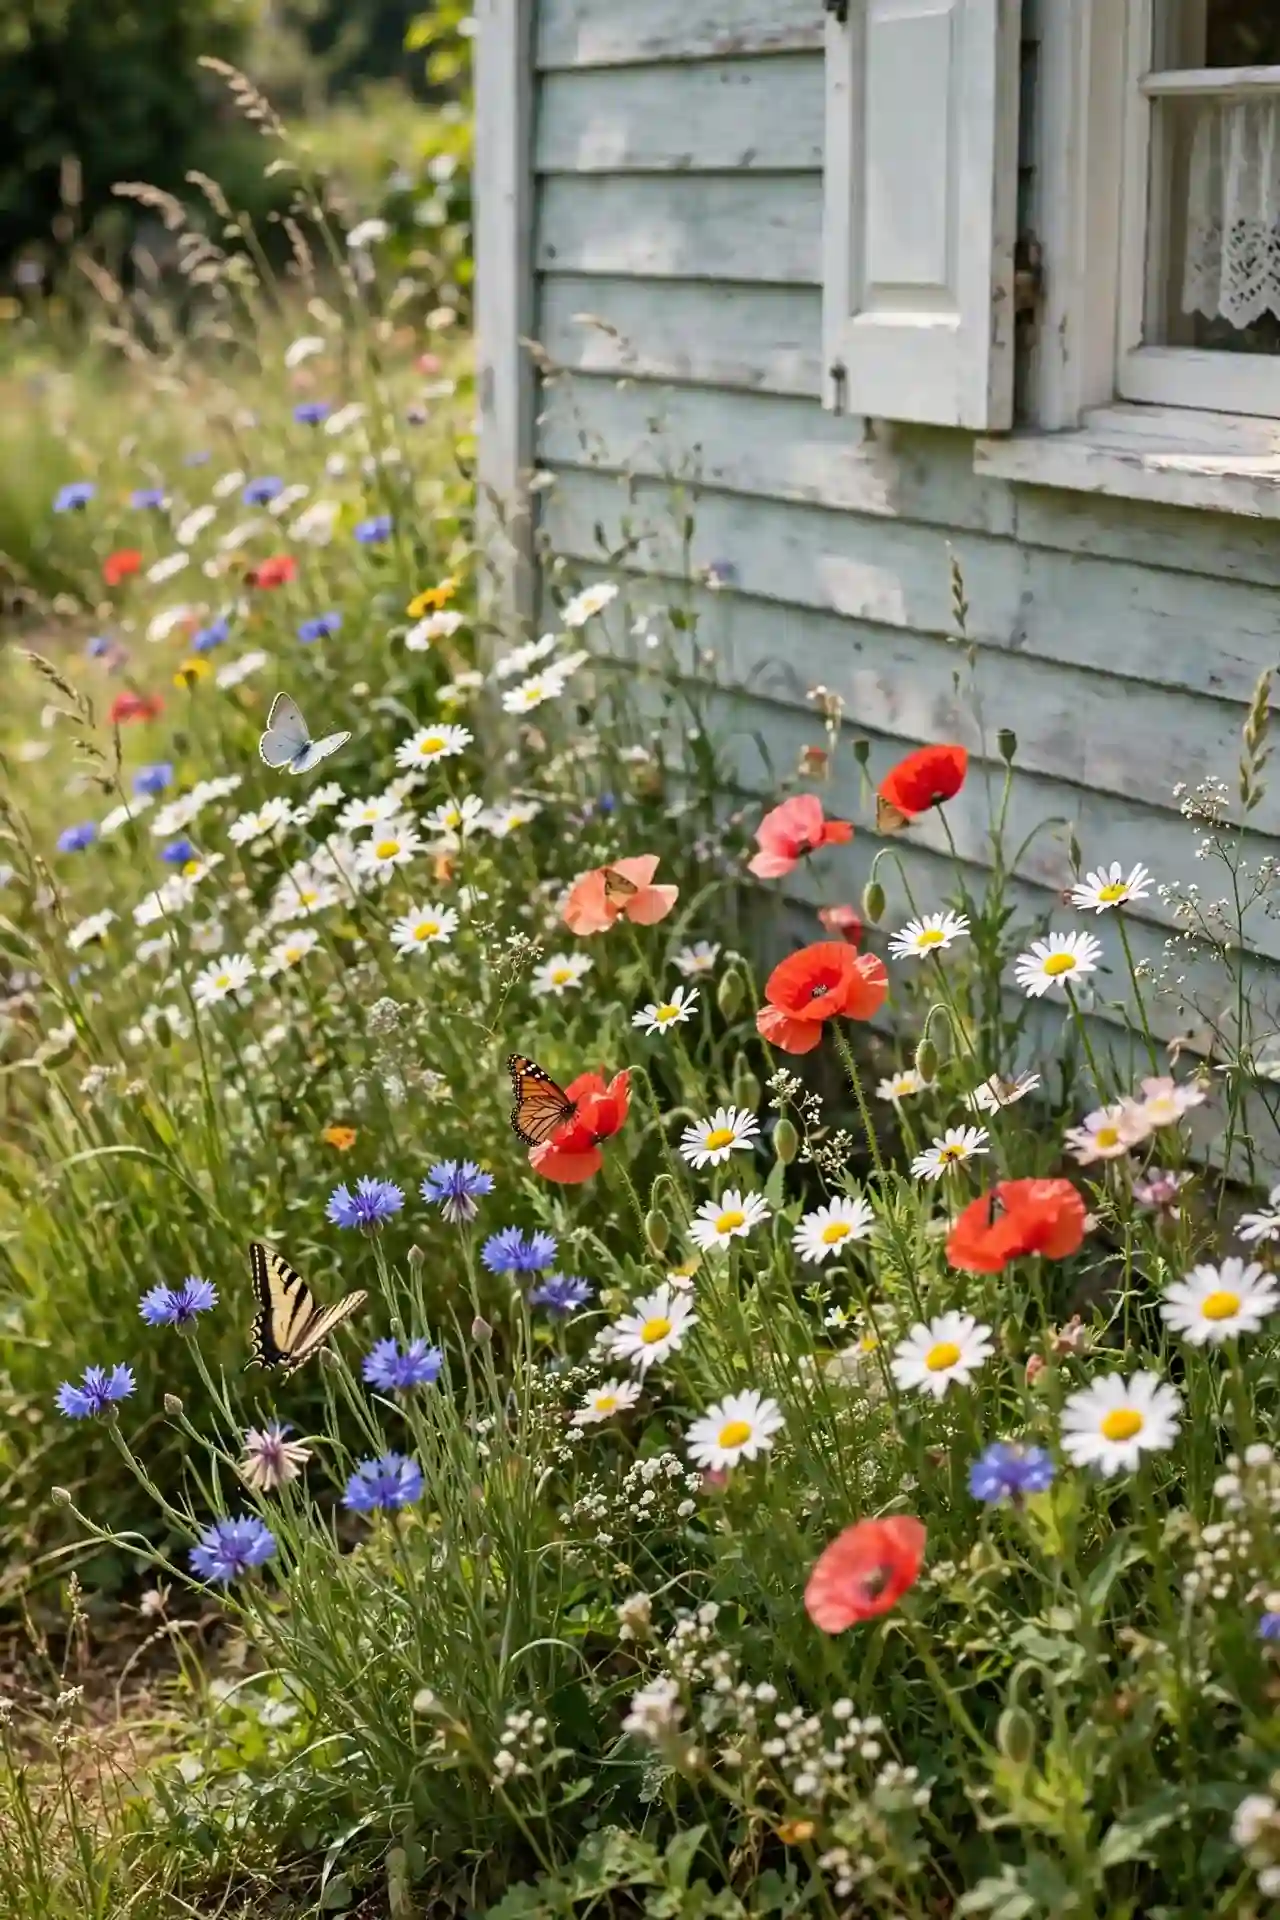
DO:
- Do choose a regional wildflower mix suited to your soil and sunlight.
- Do sow seeds in fall or early spring for the strongest germination.
- Do water gently until seedlings reach three inches tall.
DON’T:
- Don’t use landscape fabric under wildflowers, since many reseed themselves.
- Don’t mow the patch until seed heads have fully dried and dropped.
- Don’t expect a perfect meadow in year one; wildflowers build over seasons.
A wildflower patch brings butterflies and bees to the quietest corner of your entire yard. That’s why many experts recommend them for supporting local pollinators with truly minimal effort. Let the patch go a little wild each summer; the casual, carefree meadow look is exactly the point here.
Lantern Light Row
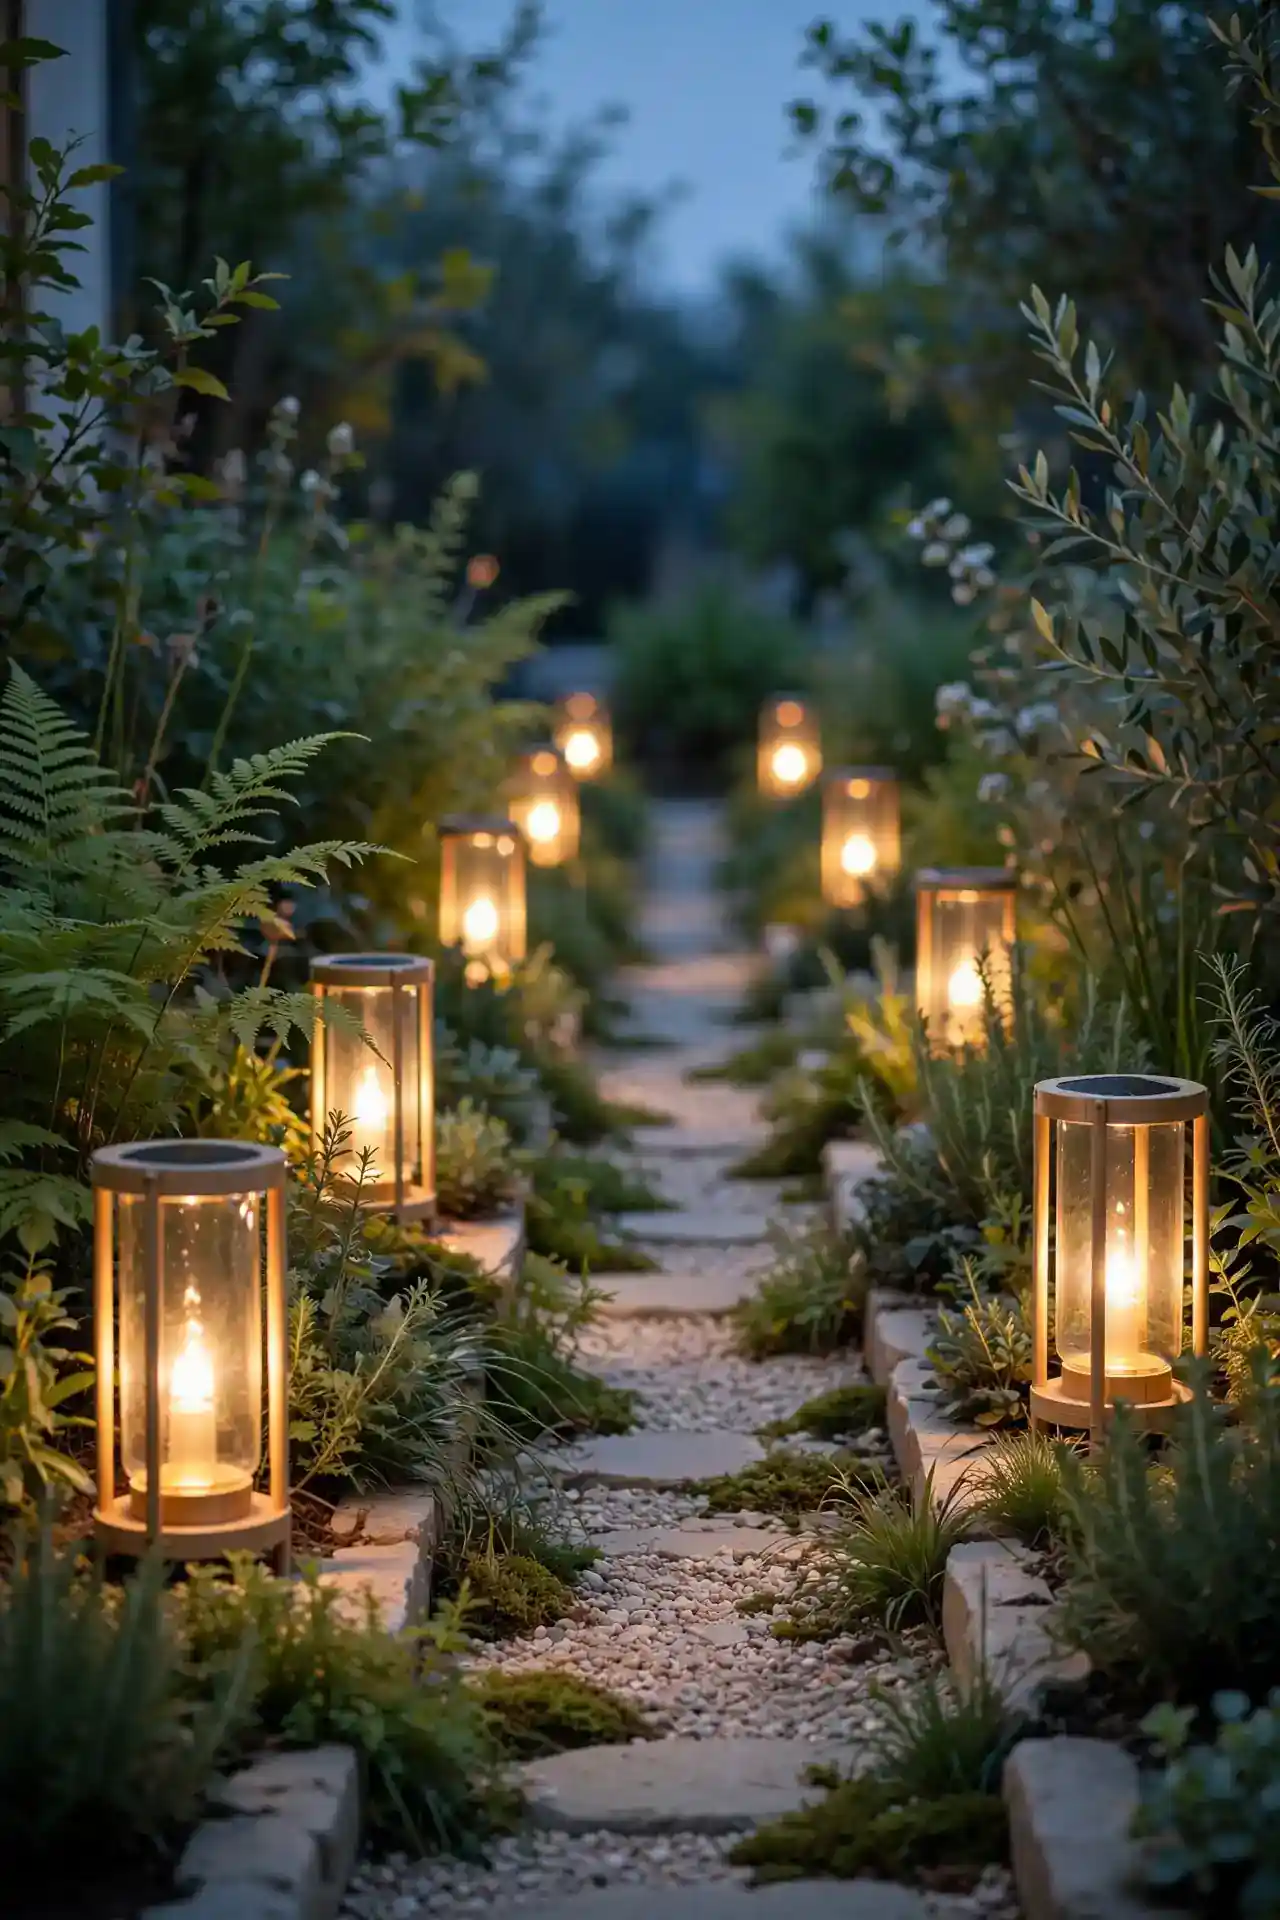
Cost: Low for solar, medium for wired
Time: One afternoon to place and adjust
Skill Level: Beginner, no wiring needed for solar
Best For: Sides that feel dark and unsafe at night
Works In: Any climate with decent sun exposure
Result: A welcoming glow that extends evenings outdoors
Solar lanterns along the side path make evening trips to the garage feel safe and genuinely pleasant. I’ve seen this work well in many cases where homeowners avoided their side yard completely after dark. Choose warm-white lights rather than harsh blue-toned ones for a cozy glow that flatters both your plants and your people.
Boxwood Hedge Line
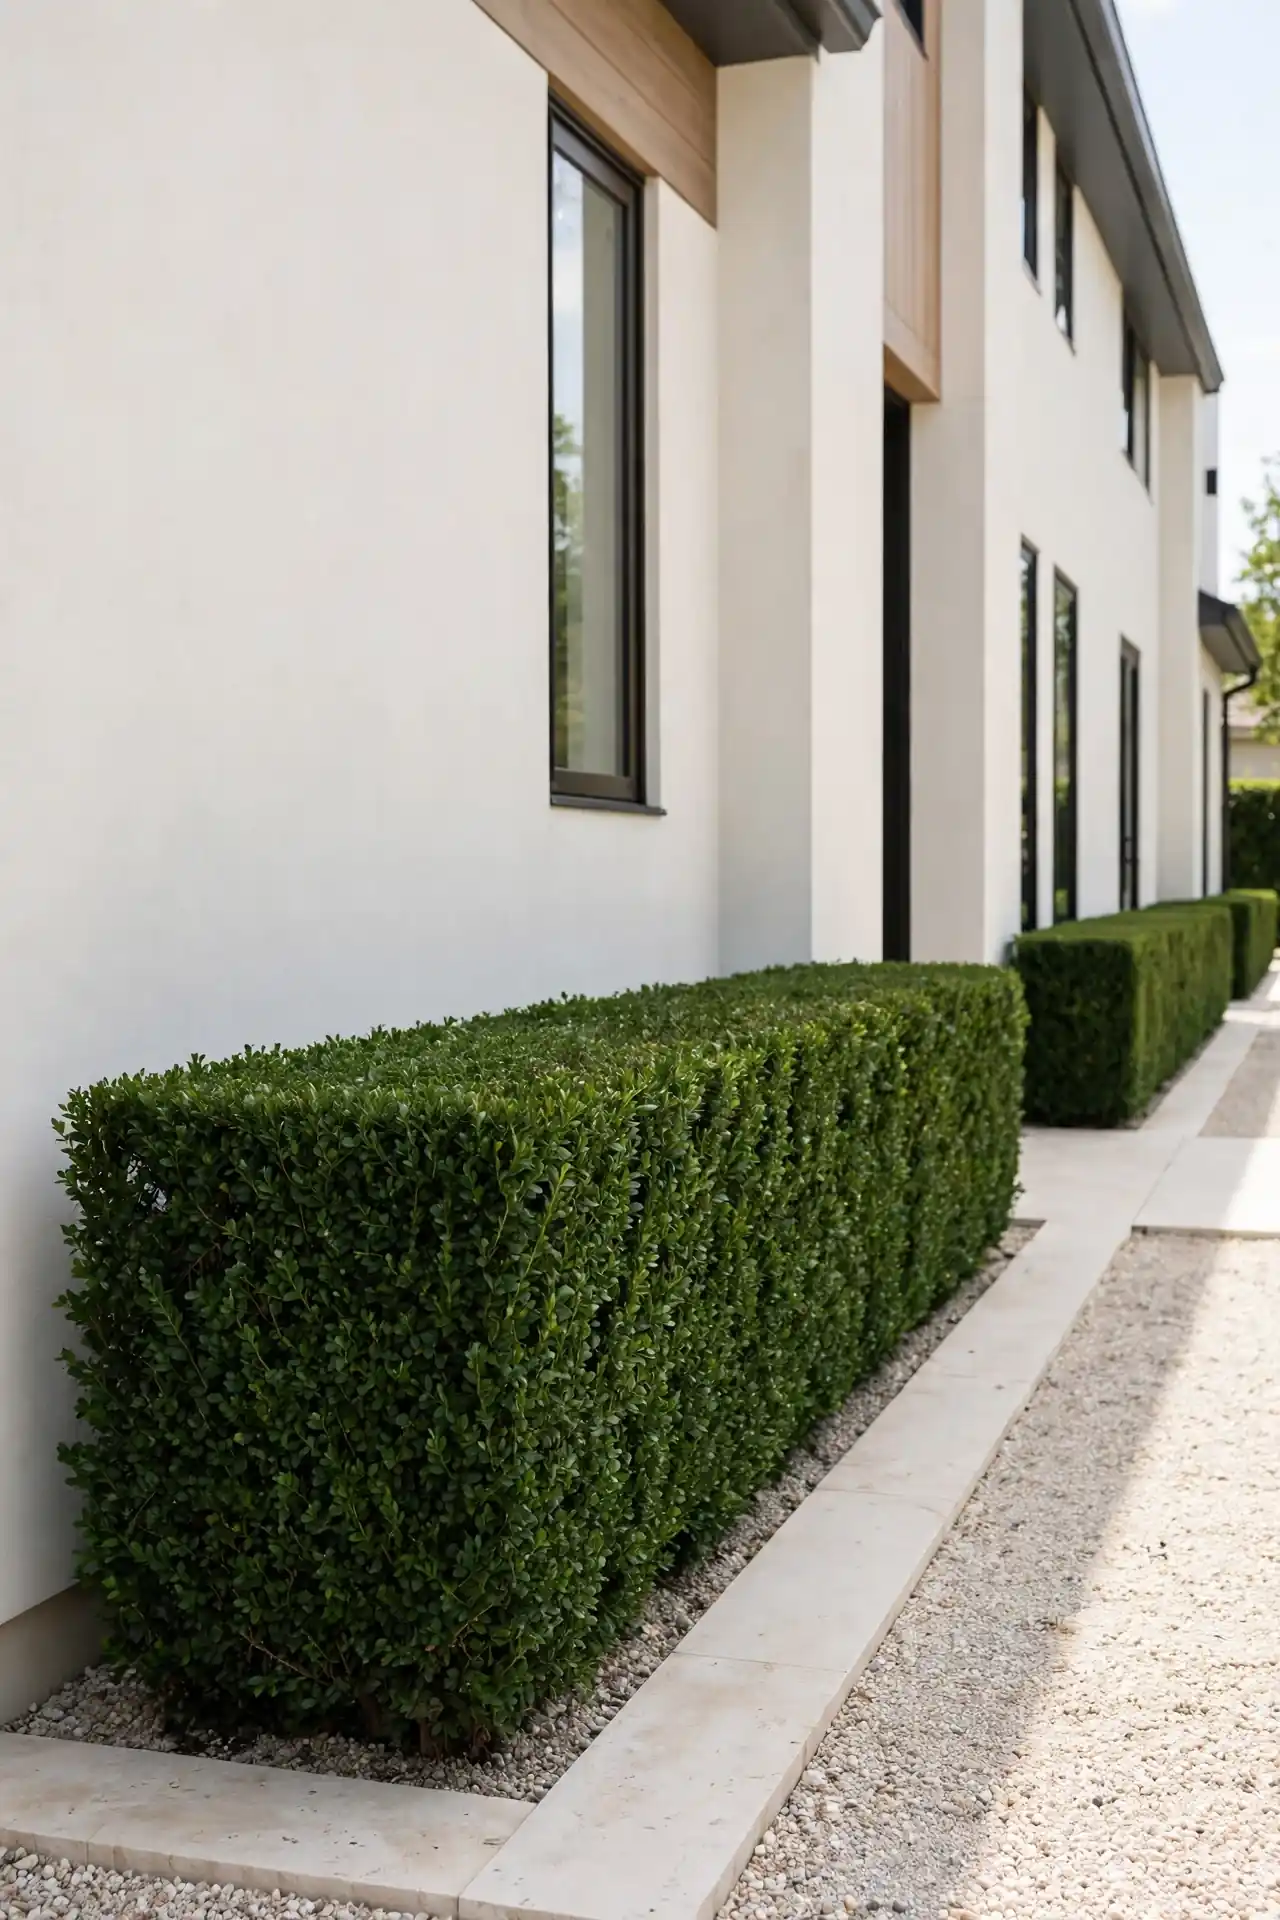
A low boxwood hedge creates a green backbone that looks good in every season. Plant small starter shrubs 18 inches apart, and they will knit together into a solid line within two years. Boxwoods tolerate the partial shade common along house walls without any complaint at all.
Shear lightly twice a year to keep the line crisp, once in late spring and again in midsummer. I’ve noticed that boxwoods bounce back quickly from trims when they get enough water. This classic hedge gives structure to plantings that might otherwise look random and scattered.
Rain Chain Feature

- Hang the chain from the gutter downspout where roof water already collects.
- Place a large ceramic basin or buried barrel beneath to catch the flow.
- Choose copper chains for a patina that improves with age and weather.
- Add river rocks around the basin to complete the water garden look.
- Check the basin after storms and empty it before mosquitoes can breed.
Rain chains turn a boring downspout into a garden feature you will actually enjoy watching. In my experience, the gentle sound of water trickling down the chain beats any store-bought fountain. This project takes under an hour and works with the gutter system you already have.
Succulent Rock Garden
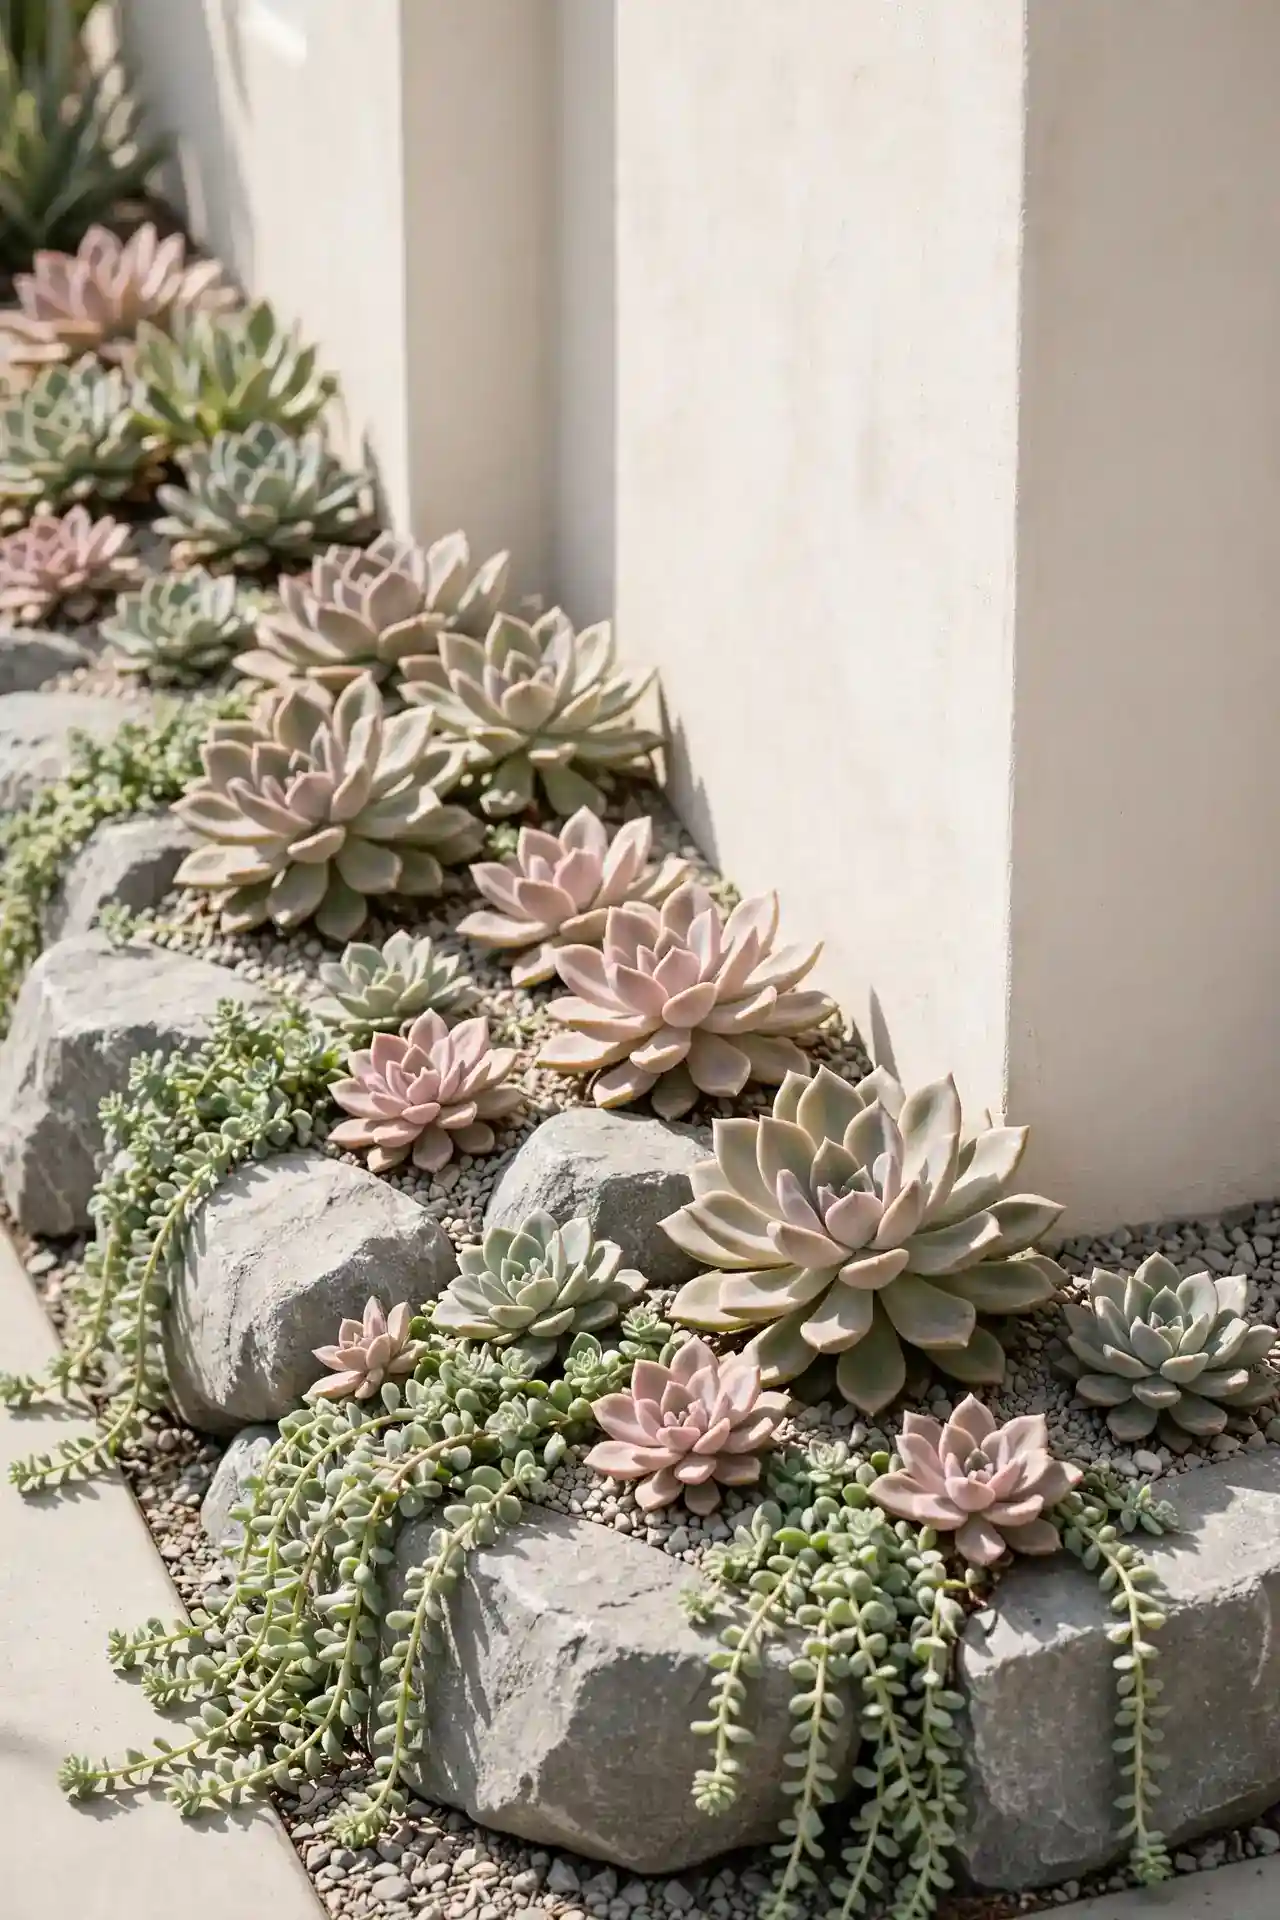
Quick Tip: Build a slight mound with sandy, fast-draining soil before placing a single rock, since succulents rot in soggy ground. Nestle echeveria, sedum, and hens-and-chicks between the stones at natural-looking angles. Top-dress everything with small gravel to keep the leaves dry and prevent rot during rainy spells.
Succulents thrive on the neglect that kills fussier plants, making them ideal for hot, dry side yards with poor soil. I’ve tried this in a narrow strip that baked every single afternoon, and the plants only looked better with time. Their bold sculptural shapes also contrast beautifully with soft ornamental grasses planted in nearby beds.
Bicycle Planter Display
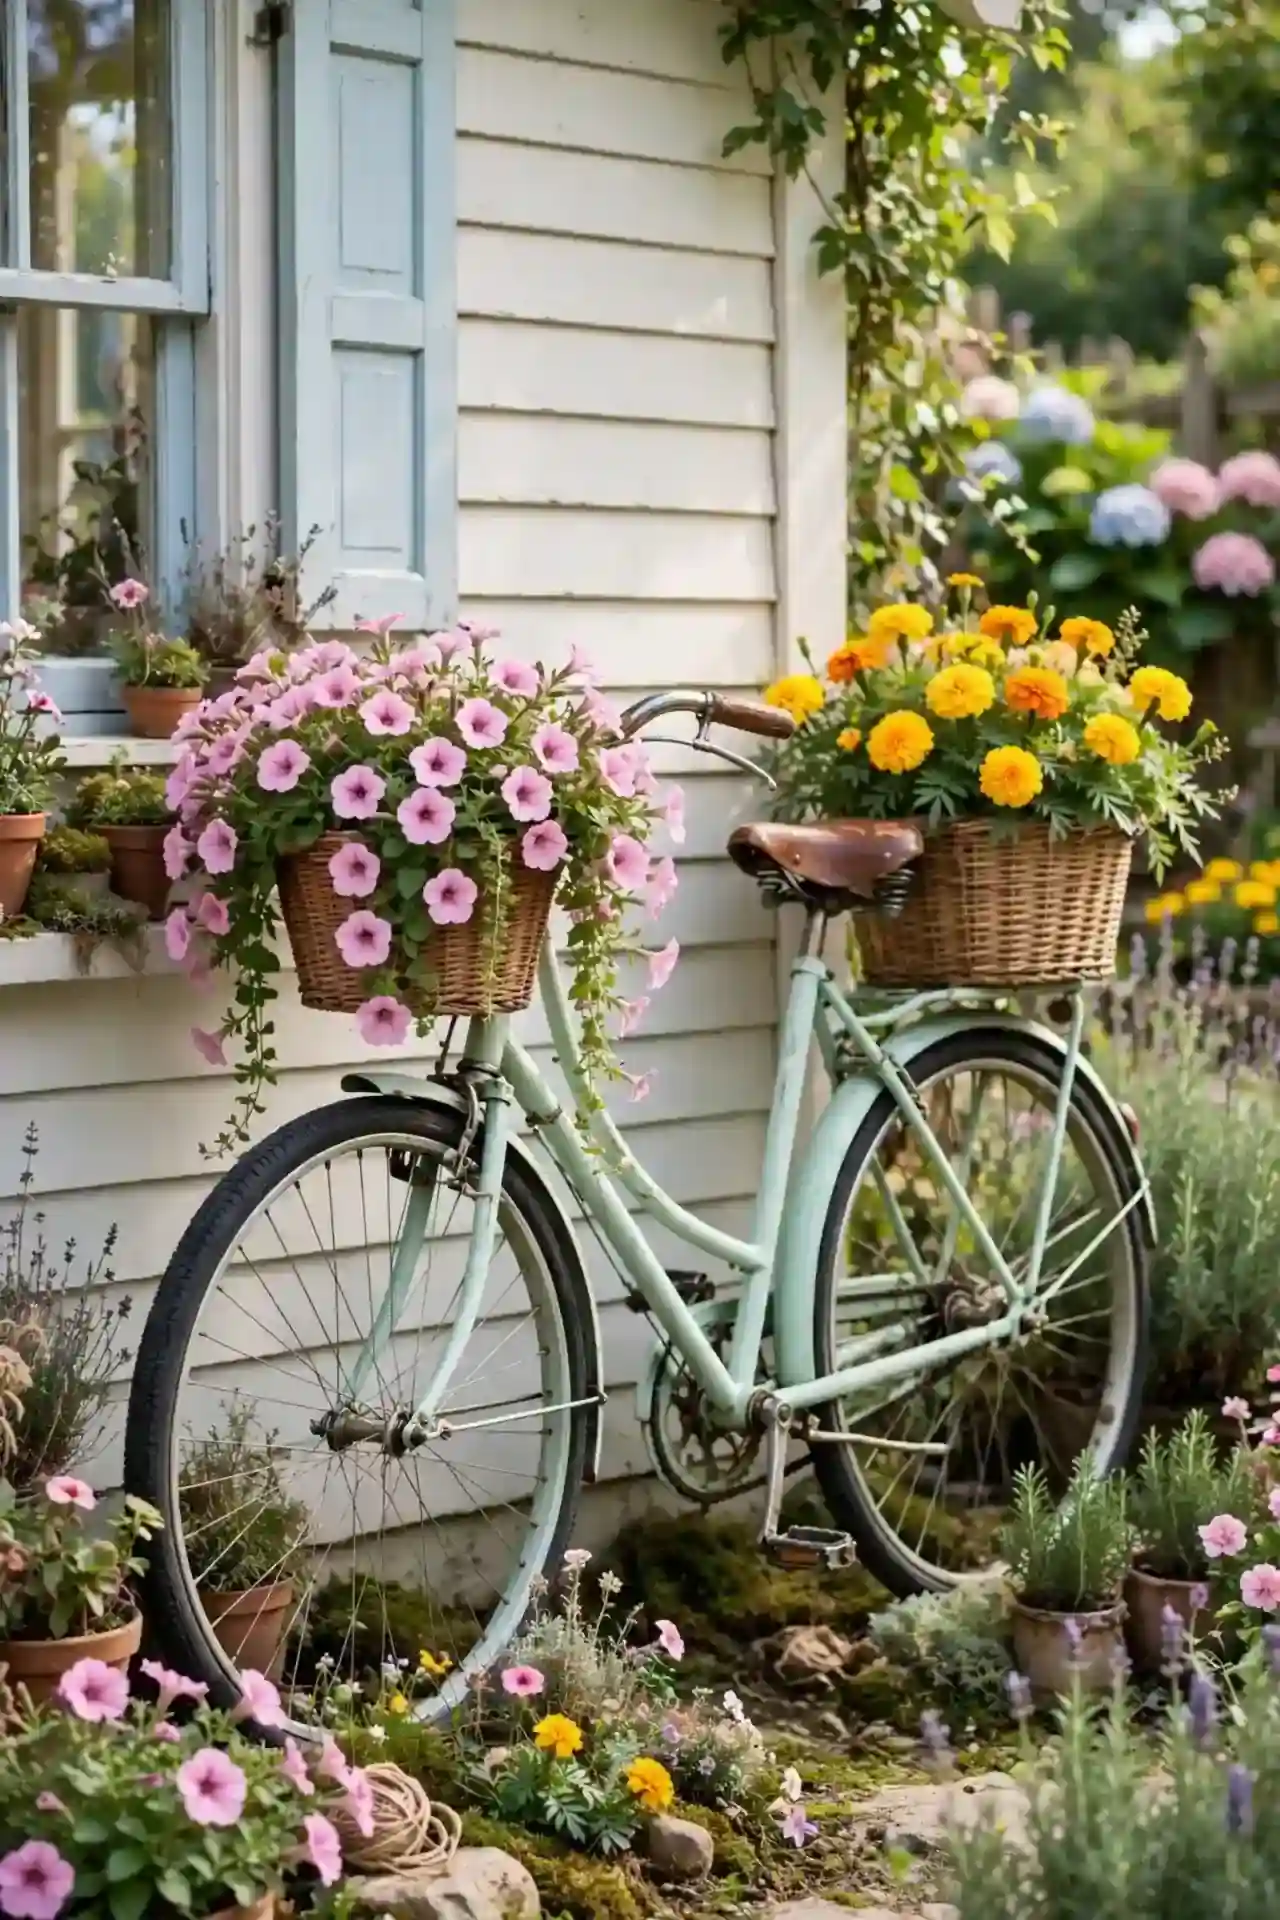
BEFORE: An old bicycle rusted quietly against the garage wall, too worn to ride but too charming to throw away. It sat there for two years, slowly becoming an eyesore.
AFTER: The same bicycle now holds baskets of trailing petunias and bright marigolds on its handlebars and rear rack. A fresh coat of pastel paint turned it into the most photographed corner of the yard.
Vintage finds like this add personality that new store-bought decor simply cannot match. I’ve seen this work well in many cases where a side yard needed one bold statement piece. Lean the bicycle securely against the wall so wind cannot topple it onto your plants.
Bird Bath Focal Point
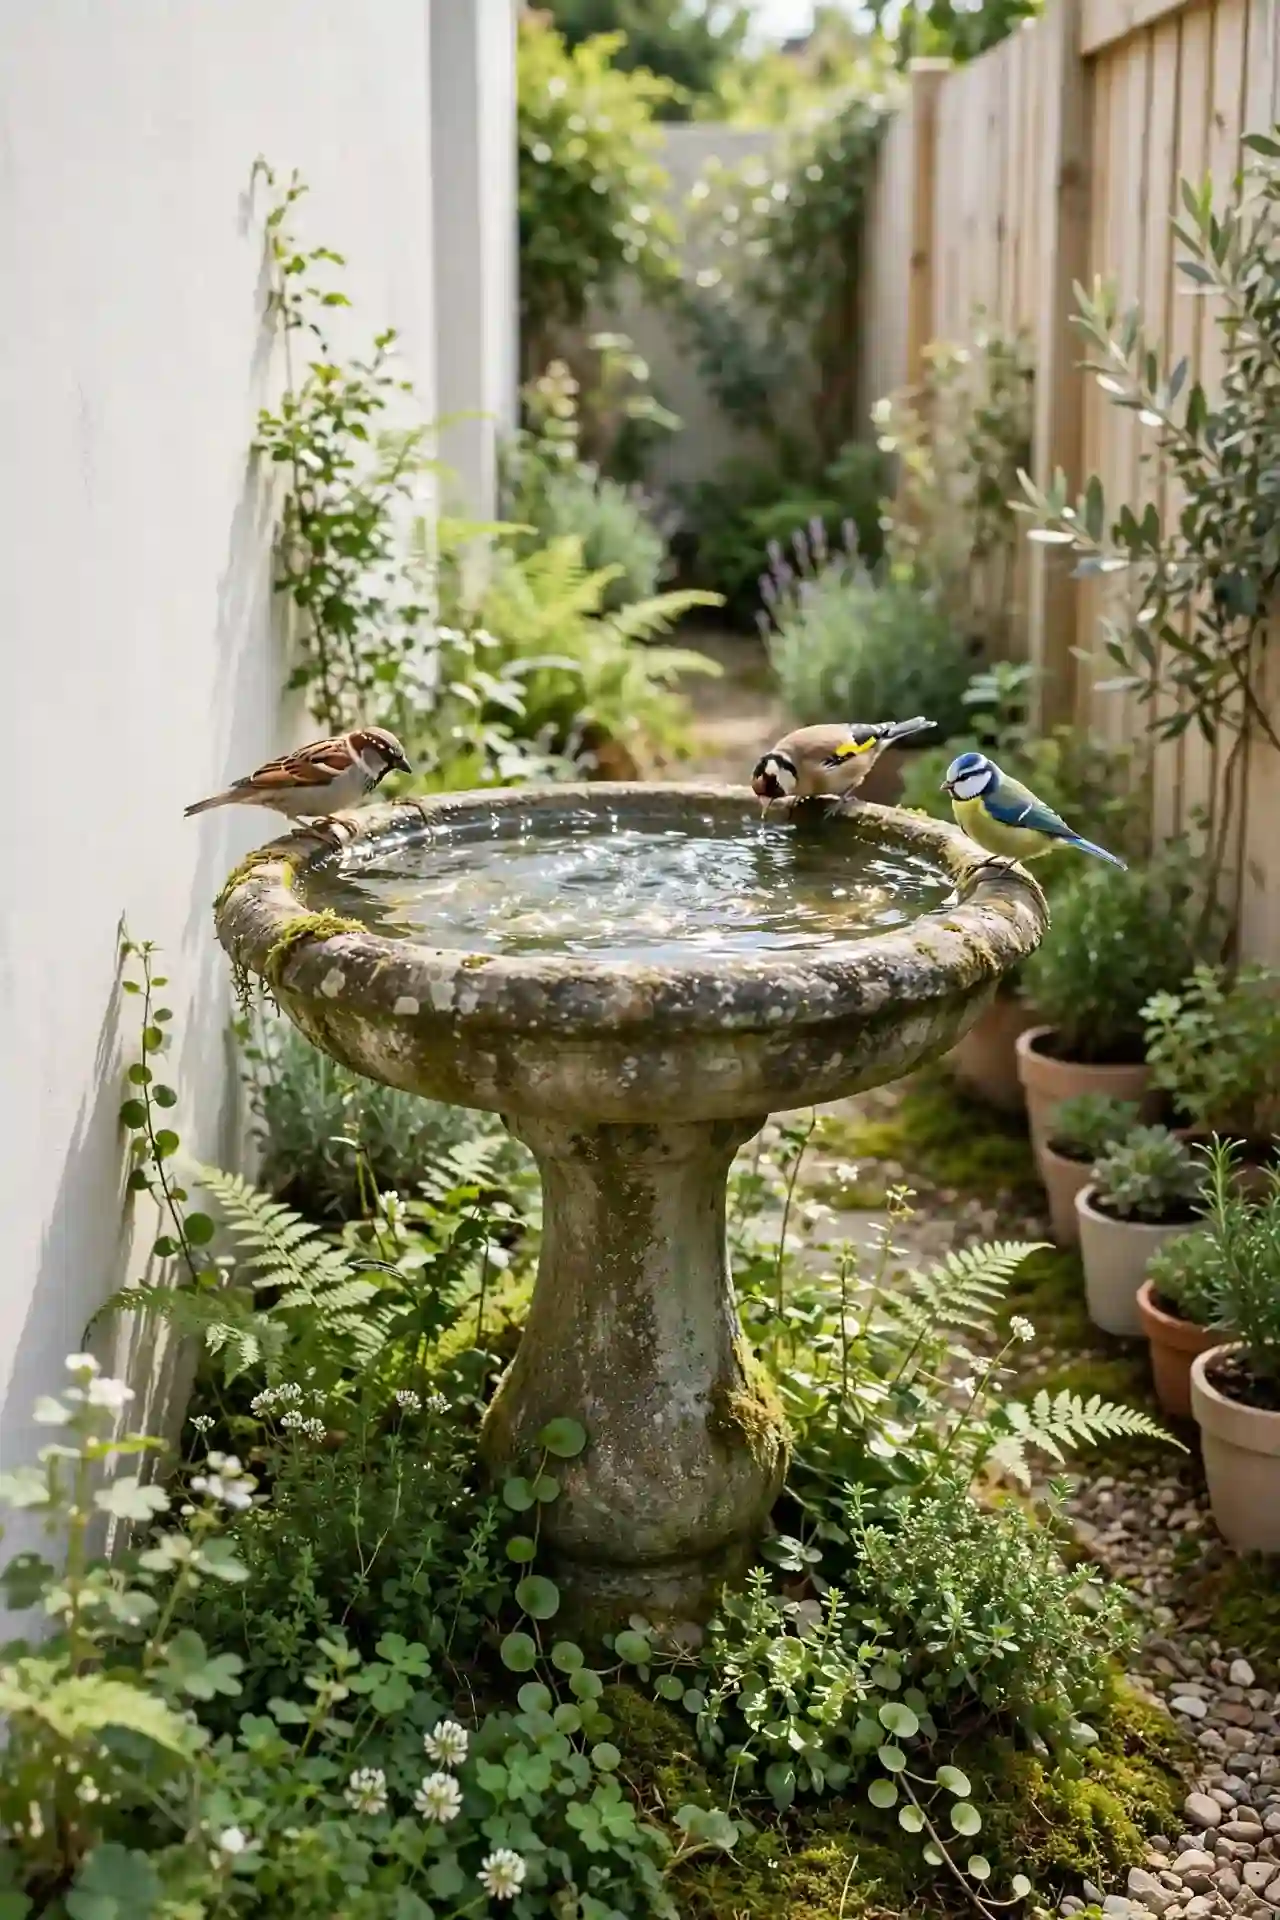
- Pick a spot visible from your kitchen or patio window for maximum enjoyment.
- Level the ground with a shovel, then set the bird bath base firmly in place.
- Fill the basin with two inches of fresh water, no deeper for small birds.
- Add a flat stone in the center so bees and butterflies can drink safely.
- Refresh the water every two days to keep it clean and inviting.
A bird bath gives the side yard a living, moving focal point that changes every hour. In my experience, birds discover new water within days, and soon the whole area feels alive. Place it where cats cannot hide nearby, keeping your feathered visitors safe while they splash.
Conclusion
Your side yard does not have to stay the forgotten strip between houses. Pick two or three of these side of house landscaping ideas that fit your space and budget, then start this weekend. I’ve seen how small changes like these can completely shift the way a space feels. Save your favorites on Pinterest, grab a friend to help with the heavy lifting, and enjoy watching a bare corridor become a garden you love. The best side yards are not the biggest ones, they are the ones someone finally decided to care about.

2 Comments